All posts by Chelle

What I Bought This Month – November 2014 Haul

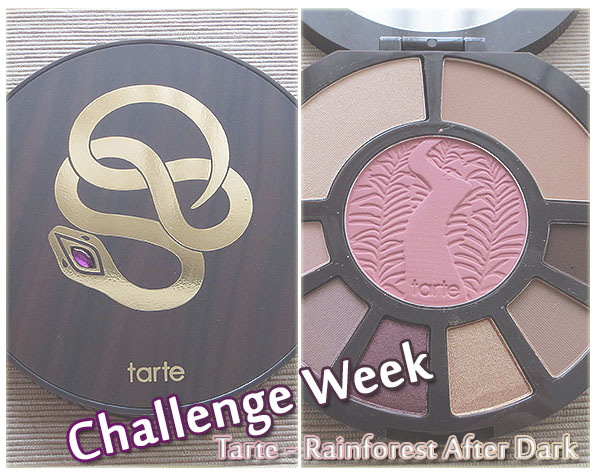
Oh boy. This was the month of Sephora’s VIB sale and IMATS. I didn’t do too badly really,  as I do feel like I reigned myself in a bit, but I’ve definitely got an excessive amount of new goodies play with. (Not that this is a bad thing!)

Too Faced – Everything Nice palette (regularly $68 CAD, purchased for $54.40 CAD)

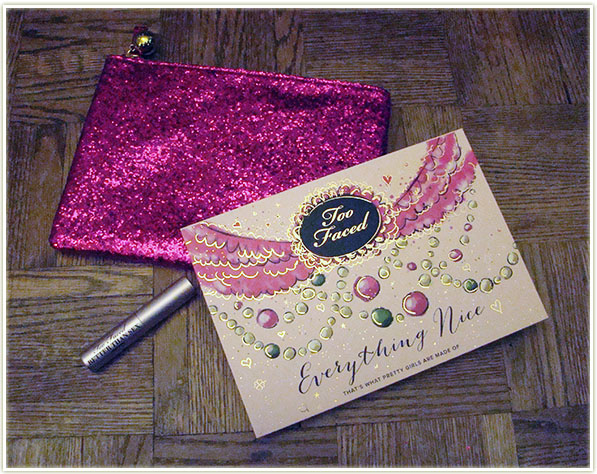
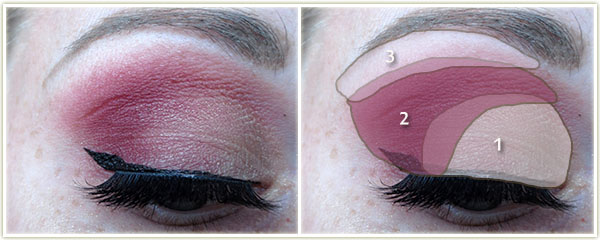
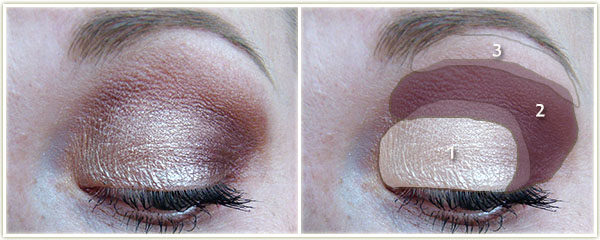
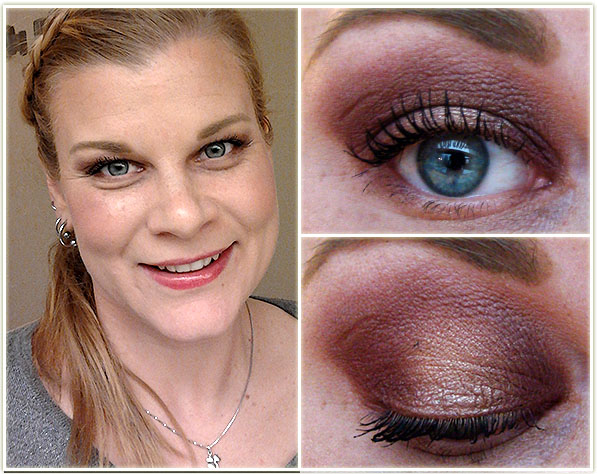
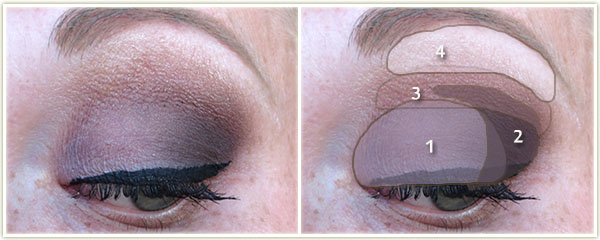
Unfortunately I have no clear full shot of this palette since the lighting has been atrocious lately (I rely on natural lighting and winter-time is so not my best friend for photos). Too Faced‘sEverything Nice palette was a last minute impulse buy during the VIB event. I had last year’s Too Faced holiday palette and figured I didn’t need this. Then I saw a few too many YouTube tutorials on it and I snapped it up during the sale. There are some repeat shades in this palette when I compare it closely to the previous one, however there is a surprising number of shades that are not.

I’m not a huge fan of the slightly bulkier packaging, but it’s a beautiful all-in-one face palette that includes 20 eyeshadows, 2 blushes and a bronzer and highlighter. There’s also a mini Better Than Sex mascara as well. Excellent quality and a great deal all around. The only completely STUPID thing about this palette is that it WILL NOT FIT into the glittery pink makeup bag it came in. No amount of shoving worked here. And considering this palette has no real closure (no latch or super strong magnet) this is a completely idiotic move in my eyes. If you have last year’s bag though, it will fit in that one.

Too Faced Melted Candy (regularly $25 CAD, purchased for $20 CAD)

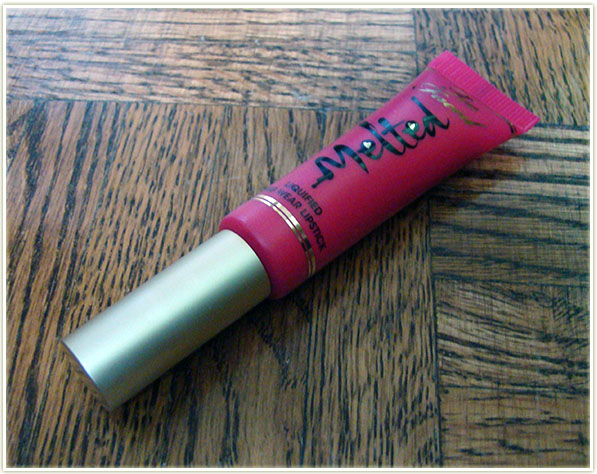
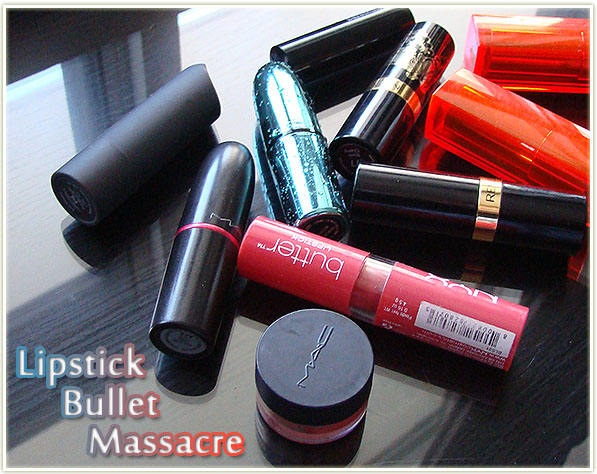
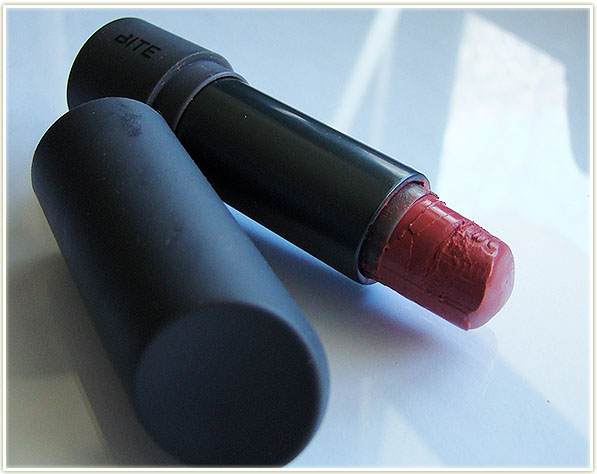
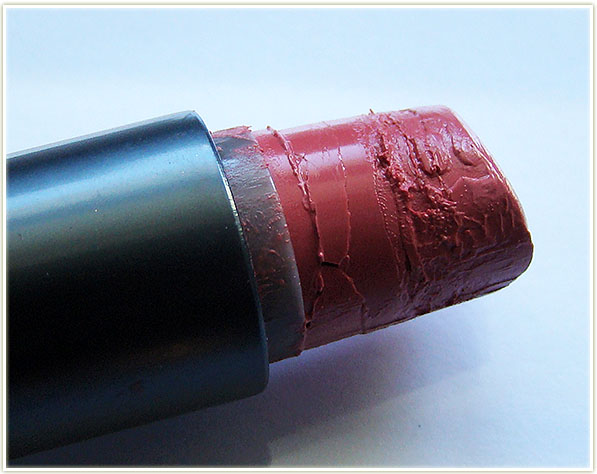
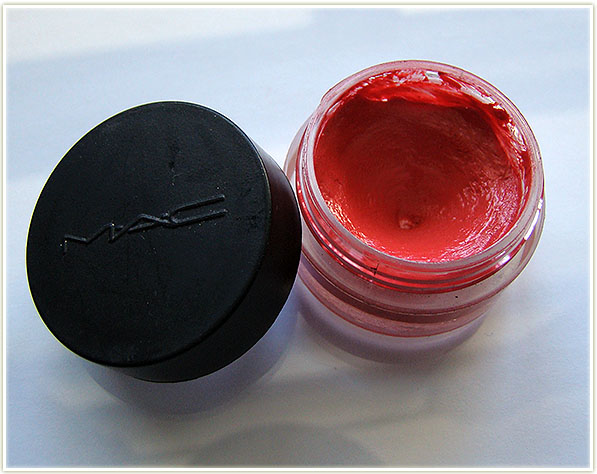
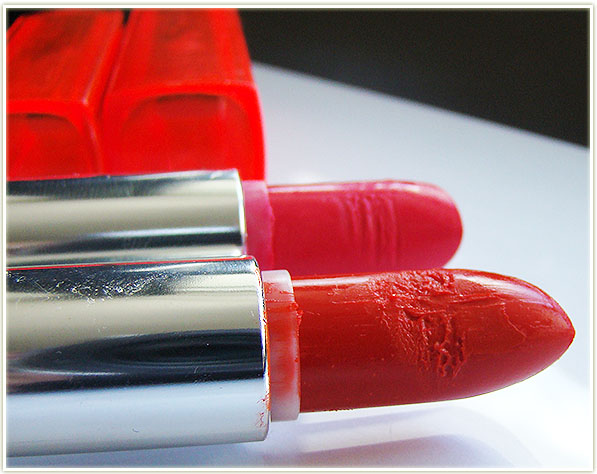
This was just tragic. I already owned Too Faced‘s Melted Candy but then I fell out of my pocket on my way to work one day. Since this is one of my top five holy grail lip colours, I had to pick it up again during the VIB sale. Stunningly vibrant shade, this one is a definite keeper. Unless… you drop it and lose it.

Laura Mercier Artist’s Palette for Eyes & Cheeks (regularly $70 CAD, purchased for $56 CAD)

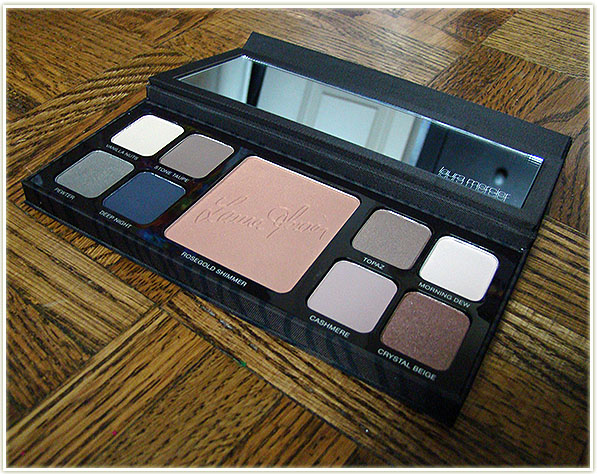
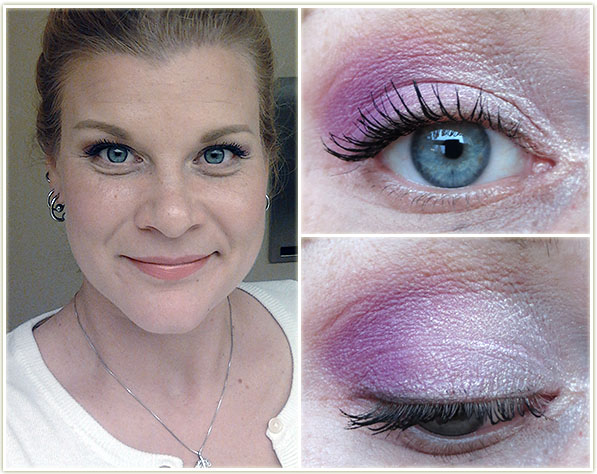
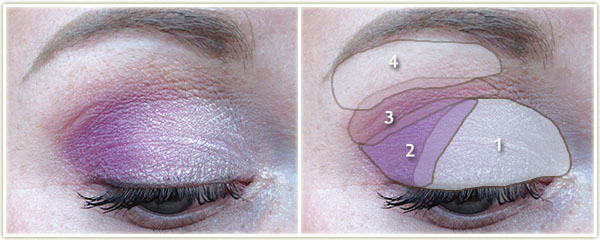
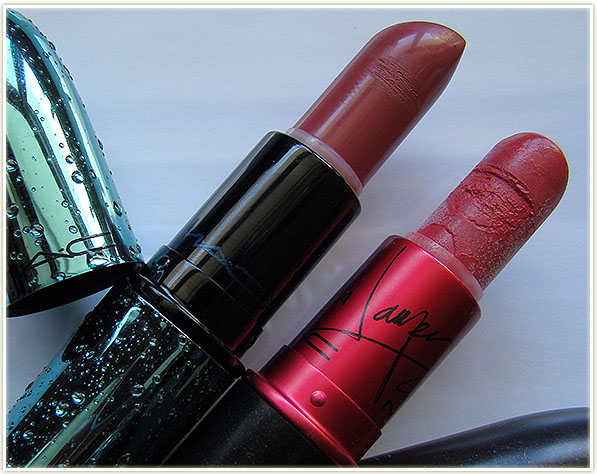
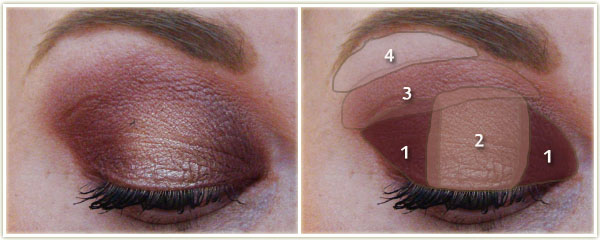
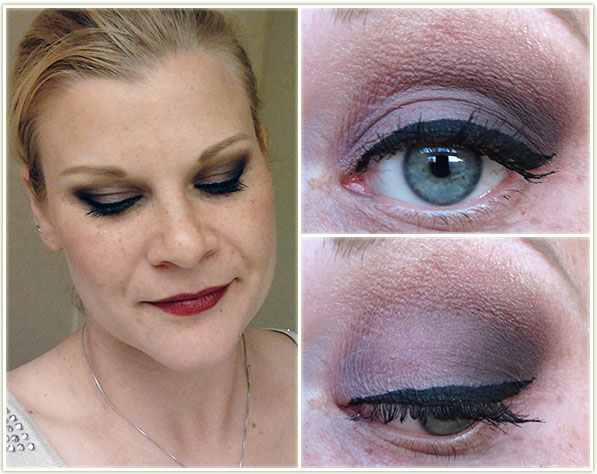
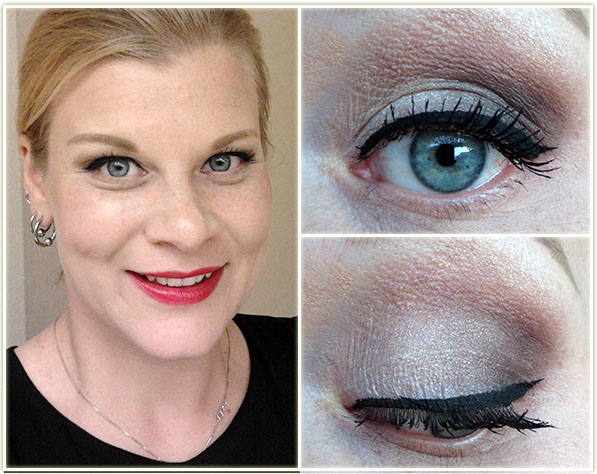
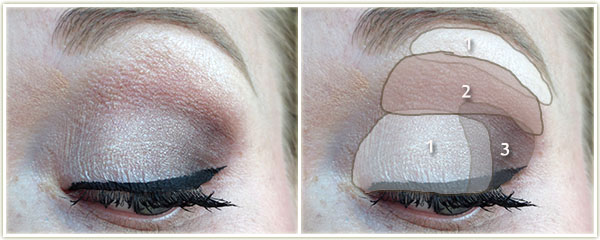
I was so enchanted with Laura Mercier‘s 2013 holiday palette that despite not being overly enamoured with the colours this year, I still wanted to snap it up. The shadows are just as I expected – buttery soft and blend like no other shadows I own. (As a note, when I bought this, it was 70 bucks on Sephora’s site. I did get the VIB discount, which knocked it down to $56, but it’s CURRENTLY on sale on Sephora’s site for $59 CAD.)

NYX Studio Liquid Liner in Extreme Silver ($7.49 CAD)

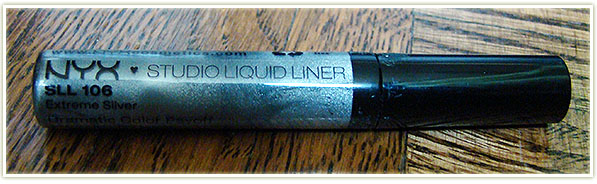
I actually picked up NYX‘s Studio Liner in Extreme Silver on Halloween night for use for my Halloween costume. I haven’t used it since… and I’m kind of wondering just how often I’m going to use a silver liquid liner…

Neutrogena Make-up Remover Wipes – Hydrating ($9.99 CAD)

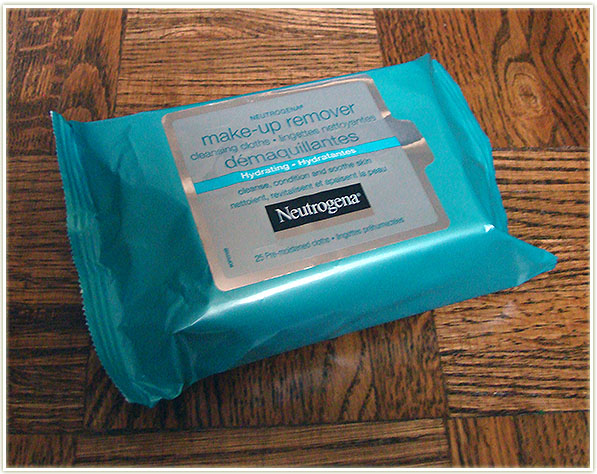
My staple wipes. ‘Nuff said.

Labello Lip Butter in Coconut (~2€)


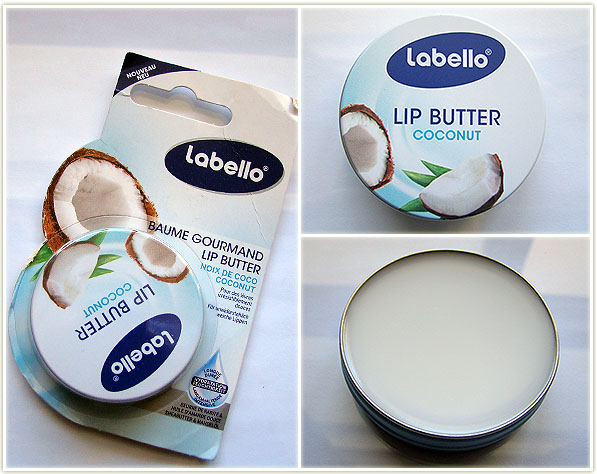
Finally! My extra products that I bought on vacation in Vienna were shipped to me (I had stupidly left them in a car) so I have a few overseas goodies to add in the mix. First up is Labello‘s lip butter in Coconut. I’d not seen this flavour in the Nivea lip care line (they’re the same company) so I snagged it up to try out. It’s lovely, but it has the same “makes your lips white” problem that I have with all the other potted Nivea products.

Manhattan Natural Bronzing Powder (~6€)

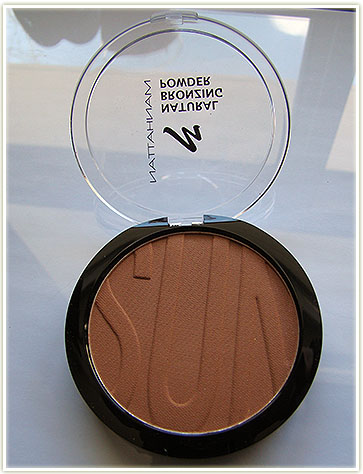
I’d heard a bit about the brand Manhattan, but wasn’t really sure what to buy from the line. I like bronzers a lot, so I picked up this one. It doesn’t seem to have a shade name other than “Natural Bronzing Powder”.

Manhattan Eyeshadow Base (~ 5€)

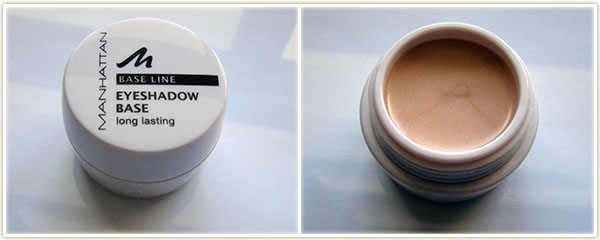
Also from Manhattan is their eyeshadow base. I’m curious to see if this will work on me at all.

Lavera quad in Cuprum Glam (8.99€)

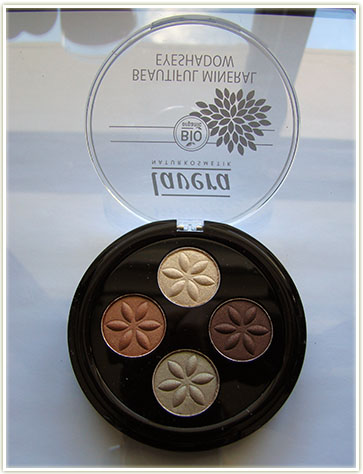
This one was stupidly expensive for what it is but hey, I was on vacation! Lavera‘s eyeshadow quad in Cuprum Glam interested me because that bottom green shade has some interesting duochrome to it.

Look by Bipa in Crystal Jam (2.79€)

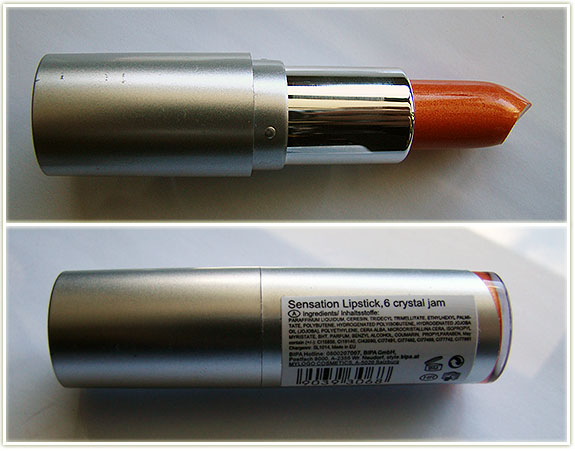
I bought this Look by Bipa lipstick (Crystal Jam) purely because it reminds me of my favourite eyeshadow from Inglot. How I’m going to wear a shiny, shimmery orange lip… I have no idea. But there you have it.

Real Techniques – Duo Fiber Set ($30 CAD), Powder Brush ($10 CAD) and Miracle Complexion Sponge ($10 CAD)

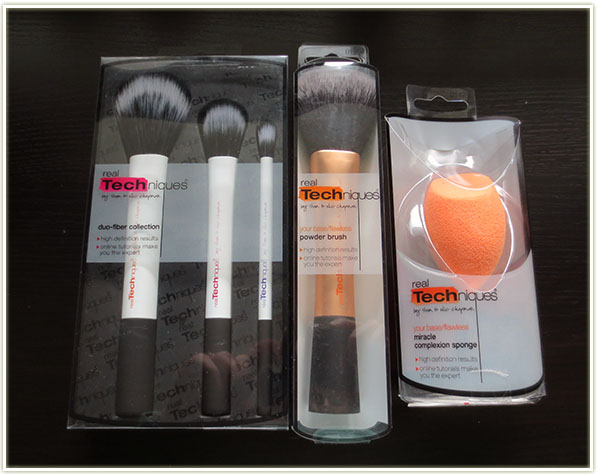
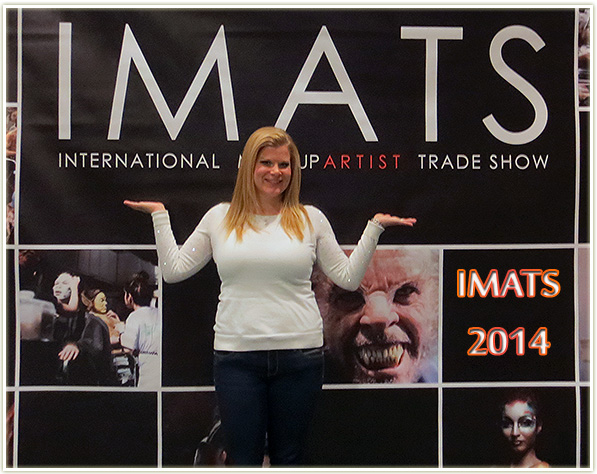
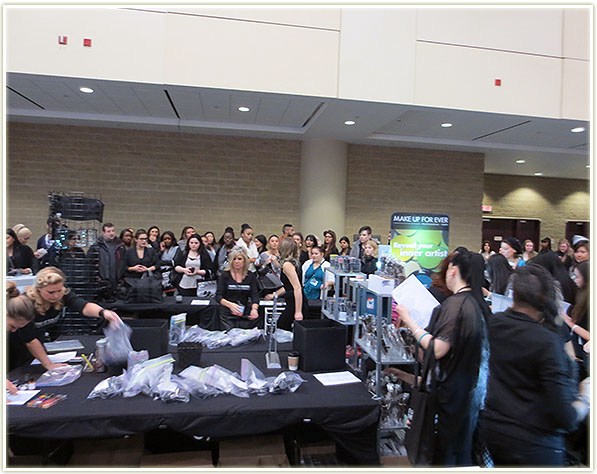
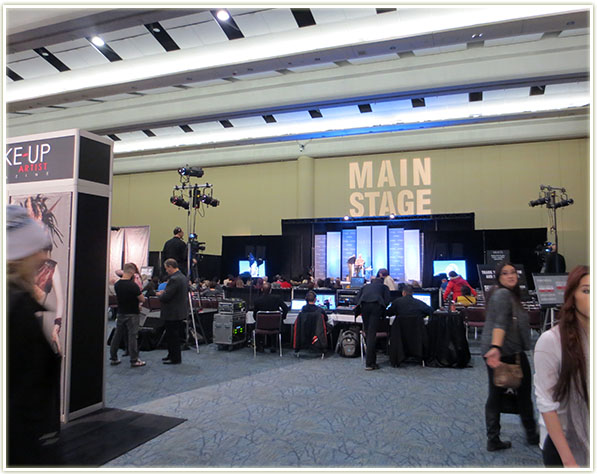
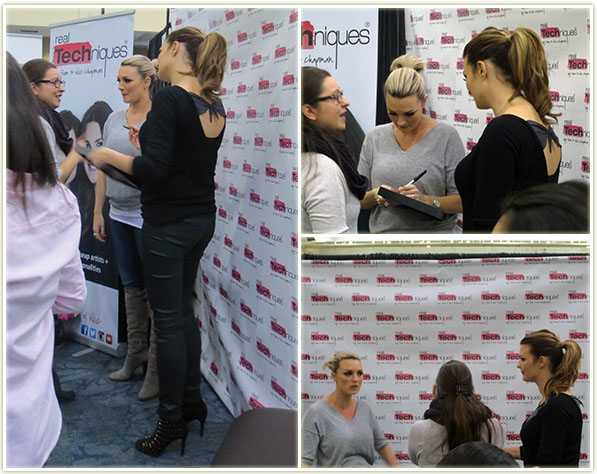
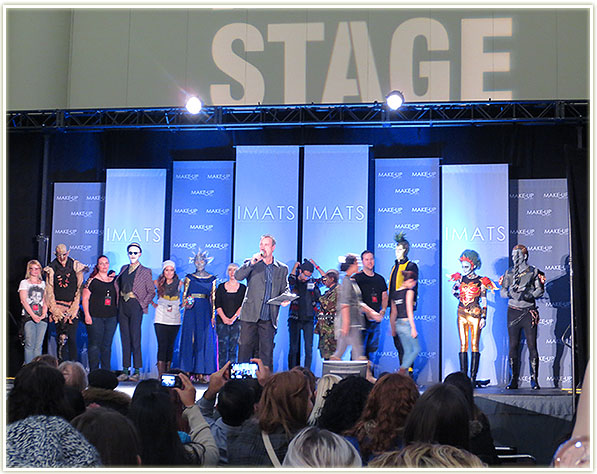
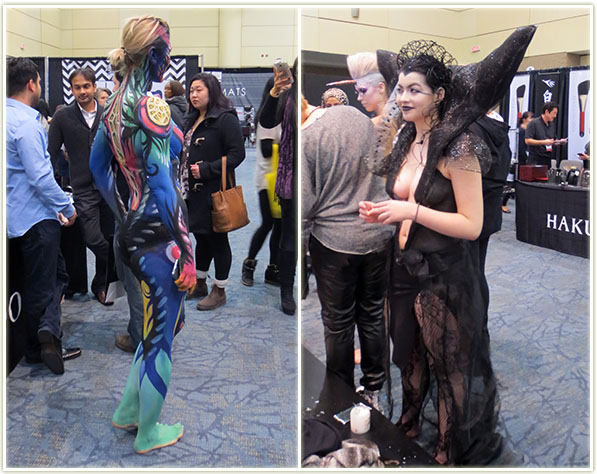
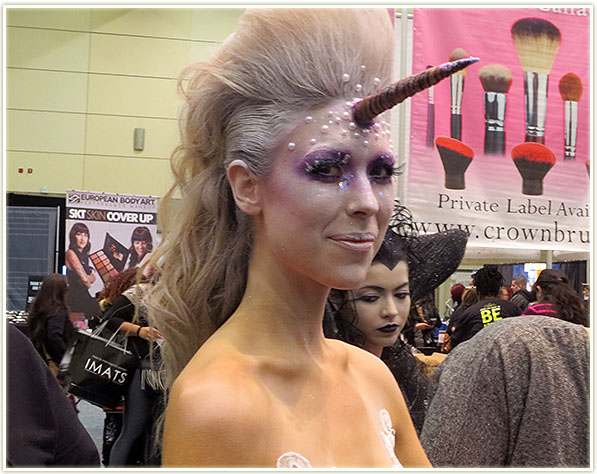
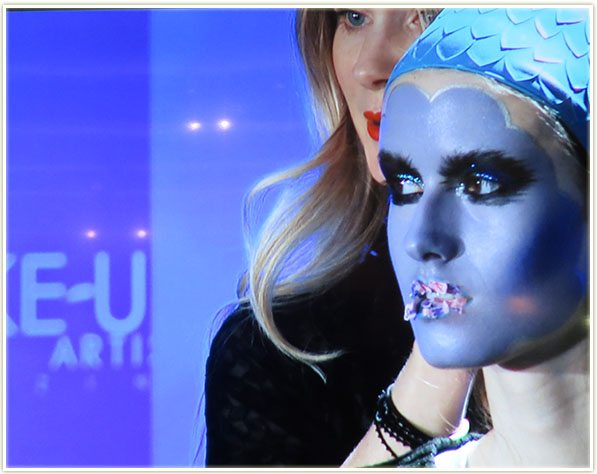
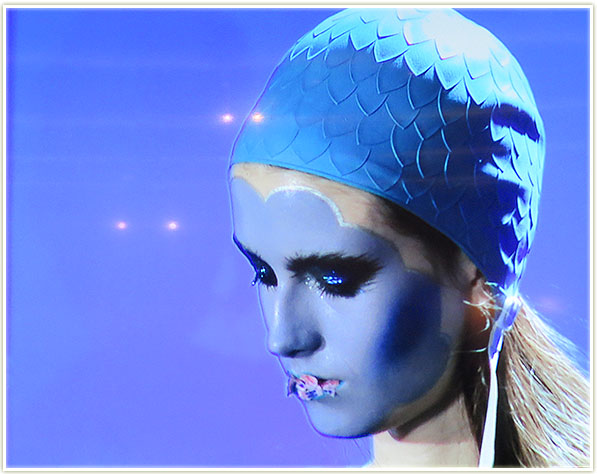
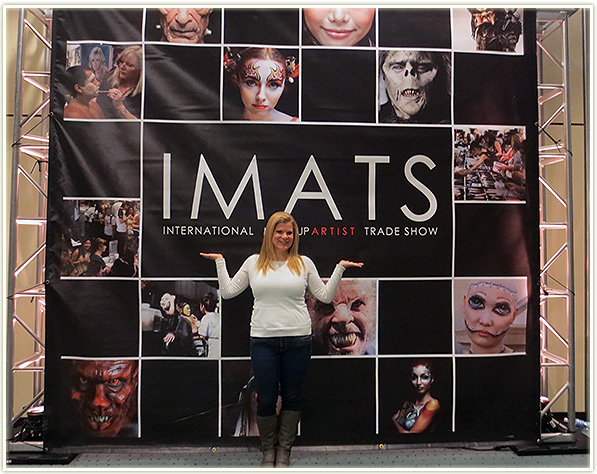
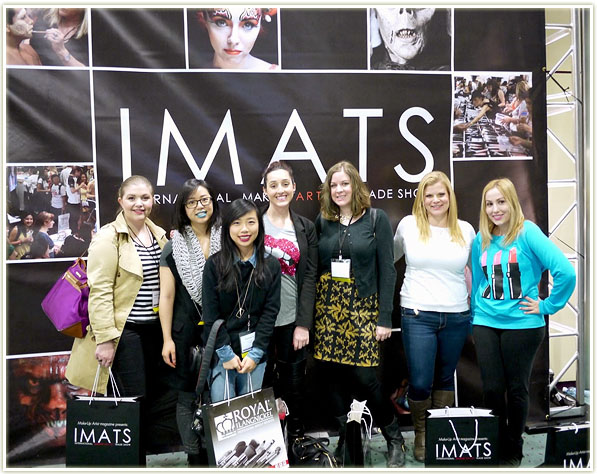
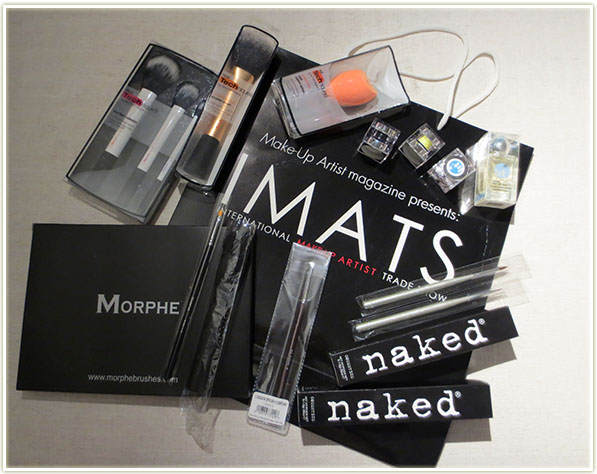
Next up is my IMATs stuff! I snagged up a bunch of Real Techniques brushes I didn’t have yet” The Duo Fiber set, the powder brush and another Miracle Complexion Sponge because mine is starting to get pretty ratty.

Naked Cosmetics pigment stacks in Ivory and Tropical Paradise ($55 CAD for both)

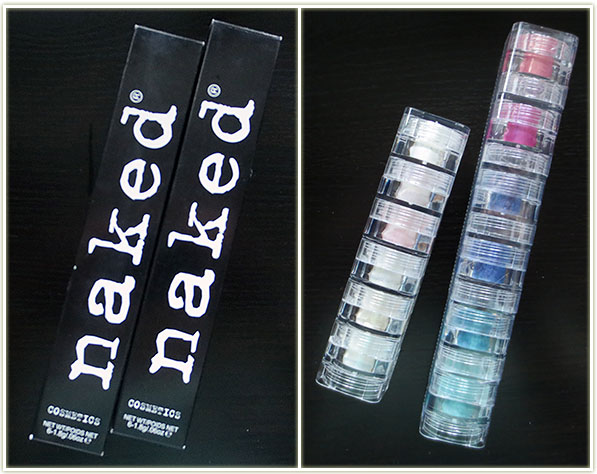
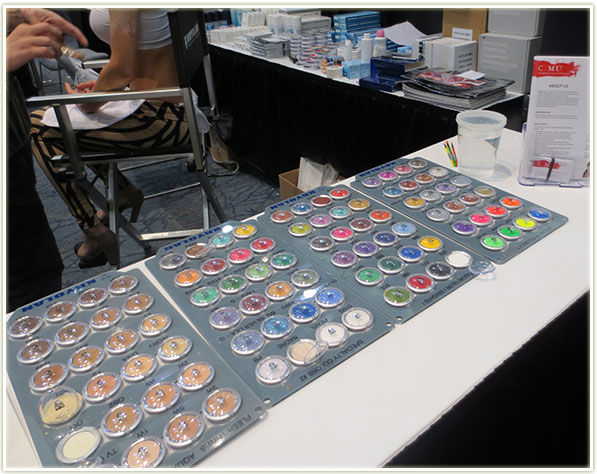
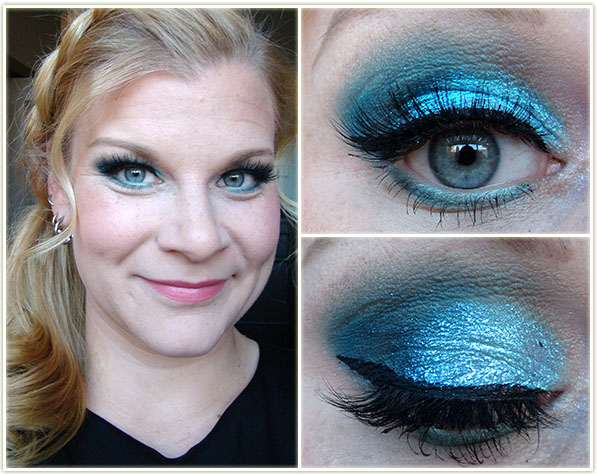
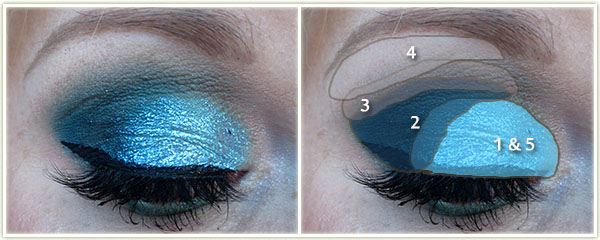
AT LONG LAST! I have been oogling Naked Cosmetics pigment stacks for a very long time. A few years ago they were heavily touted on YouTube and I’ve been itching to get my hands on them ever since. They had a deal on, so I picked up two stacks – one in Ivory (these are white pigments with a coloured duochrome – they are GORGEOUS) and Tropical Paradise(your standard bright colours, some with a duochrome). I’ve used them a bit and so far I’m over the moon about them. I’m not a huge lover of pigments, I find them messy, but these are so, soooo worth it.

Morphe 36 Glam Palette ($19 CAD)

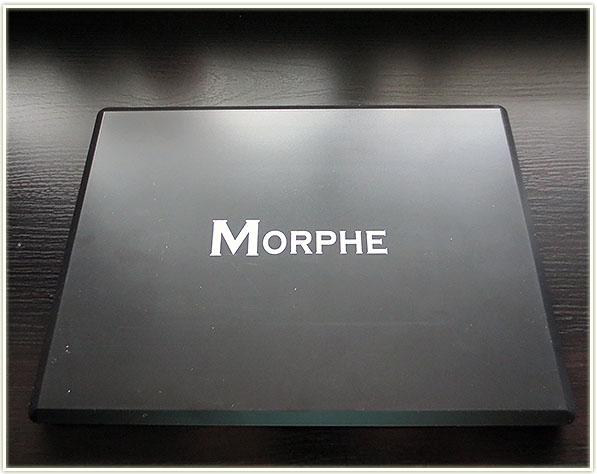
If Jaclyn Hill is to be believed, Morphe products are the second coming.

Morphe 36 Glam Palette ($19 CAD)

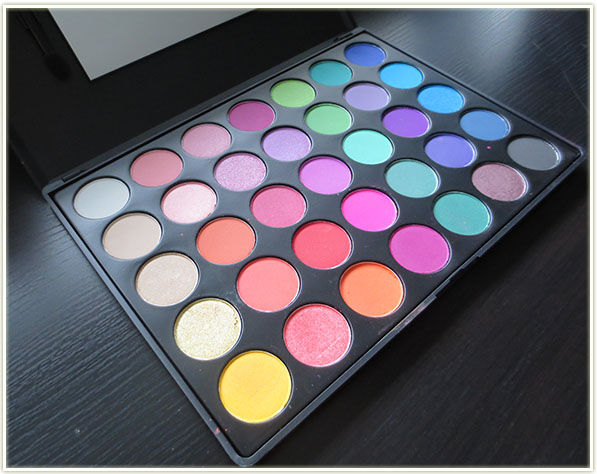
So I picked up a palette of brights (36 Glam) because it was nineteen bucks, the quality felt nice under my finger tips and it was a little too pretty to walk away from. I’m sure this looks like clown makeup to some people but I’m just sitting here like “YESSSSSSSSSSSSSSSS COME TO MAMA”.

Morphe Brushes – MB Angel Blush/Contour ($8 CAD) and M160 1/16 Angle Taklon Liner ($2 CAD)

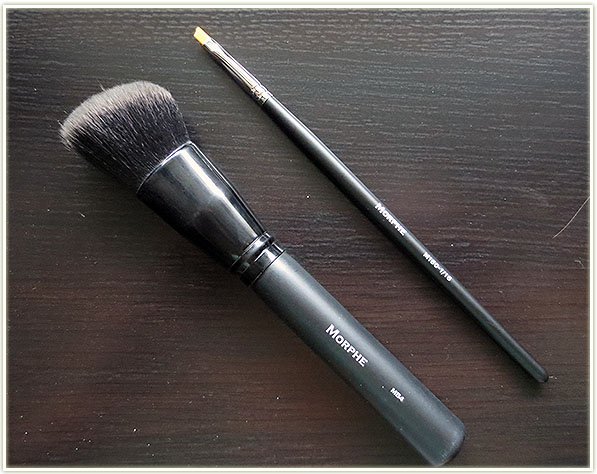
I’m hoping the quality on these Morphe brushes are good because they were incredibly cheap as well! The small angled one is working out really well for my eyebrows so far.

London Brush Company – #0 Fine Art Liner ($10 CAD)

Mmm such lovely photography (I’m kidding, really). I picked this up from the London Brush Company because I’ve been wanting another small liner brush for my gel liners. At the moment, I’m feeling like the brush hairs are too long. Makes it a bit floppy for applying gel liner.

Lit Glitter Kit ($40 CAD)

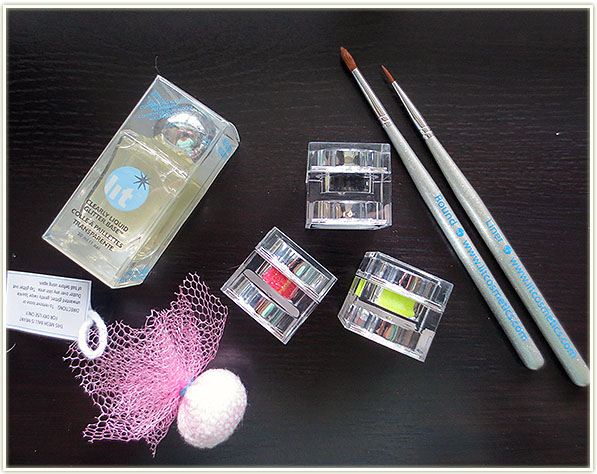
Another brand I’ve been dying to try out! Lit Cosmetics was having their usual kit sale – $40 for their glitter base, three glitters, two brushes and a puff that helps remove glitter from your face.

Lit Glitters in California Soul, Lemon Tart and Back in Black

Reasoning behind the colours I chose:

  • I had nothing like them
  • I’ve been dying to have a black glitter
  • xsparkage did a video in 2011 that used that yellow glitter and I’ve been dying to get my hands on it ever since
  • That orangey-red was screaming my name

And there you have it! A hefty makeup month and I’m loving every second of it!

IMATS 2014 Recap

201411_imats1

Having never been to IMATS before, despite my makeup obsession long withstanding, I have to say this was a pretty phenomenal first experience. I got to meet a ton of Toronto-area bloggers that I read on the daily, pick up a bunch of makeup brands I don’t normally have access to, meet some YouTubers I’ve been watching for years and… surround myself with people who are just as into makeup (if not moreso) as me!

Blurry hurried selfie while heading to the subway

I was a bit in a rush that morning since I was heading to meet Jenn from Scarlet Beauty prior to the doors opening at the Metro Toronto Convention Centre. We got there early enough, but the lines were still insane. A line to pick up your pass (aka a stamp on your wrist) and then another long line to actually get into the IMATS hall.

Make Up For Ever craziness

I’d been warned that everyone would go bat-shit insane for the MUFE and MAC counters. I wasn’t really interested in either of them, so I swatched a few items while Jenn compiled her list at MUFE. And then, while she waited in line for an HOUR to get her order fulfilled there, I ran off to check out the other booths.

Kryolan singles
Kryolan singles

I managed to pick up all the things on my “To Buy” list during that hour. They mostly included glitters from Lit Cosmetics, pigments from Naked Cosmetics, and a bunch of brushes from theReal Techniques/Farleyco booth. Lit and Naked both seem to be online only to Canada and I’ve always wanted to check them out in person first.

Main Stage area
Main Stage area

Then, while Jenn was still waiting at MUFE for her order, I got into the Real Techniques line where the Pixiwoo sisters would be meeting and greeting for the next two hours. I have to admit, I felt silly. I mean, I’m a 31 year old woman and I was predominantly surrounded by late teens/early 20-something-or-others, waiting in line to meet some YouTubers. I always feel incredibly awkward meeting “famous” people because I’m overly conscious of the fact that I am “just another blogger in a long list of people they will see and promptly forget”. HOWEVER, I’ve been watching their videos for five or six years now and I have gotten more information and techniques from them than I ever thought possible and I really wanted to get a picture with them.

Real Techniques/Farleyco booth

So I lined up, snagged a few pictures while they were with other people, and then my turn came up. They were warm and friendly – asking my name and what makeup I was wearing (which I promptly blanked on because I was dealing with mild-starstruck-itis). In the end, they were lovely and they took a beautiful picture. On my way out of the photo area (I really didn’t say much to them, I didn’t want to take up too much of their time), Sam turned to me and said she didn’t catch my name. I repeated it, and I thought that was such a sweet gesture.

Pixiwoo sammich
Pixiwoo sammich

Thankfully the picture came out pretty good!

Student competition on the main stage

Afterwards, it was a matter of meeting up with some more bloggers, having some lunch with a few of them, and then checking out some of the panels and some more of the booths. I picked up way more brushes than I intended (MorpheLondon Brush Company) and grabbed a palette of brights from Morphe.

Various life art by different brands

There were also a lot of pieces of art walking around as well. While I love the bright colours by MUFE (on the left), I was *super* excited to see the Mia Sara get-up on the model on the right from the movie Legend. At least that’s what I think they were going for! (Man, I LOVE that movie! Good reminder to go re-watch it…)

A unicorn. With glitter. And sparkles. SO MUCH YES.

The last panel of the day was something to do with MAC Cosmetics and fantasy. It started off interestingly, with the inspiration being teacups and 80s punk….

201411_imats_macfantasy1

….and then everything went disastrously downhill once the Sweet n Lo packets were brought in to be applied to the lips.

It was all fun and games until someone brought in the Sweet n Lo packets…

Like… what?

It’s okay nameless model, we feel your pain too.

The poor model…

201411_imats2

So all in all IMATS was a ton of fun. It was crowded as hell during the morning, but a lot of people left by mid-afternoon so there was a lot more space to move around and check out booths. That being said, there was also a lot less product left at the booths by the end of the day, so if you wanted something in particular that was a highly coveted item, I hoped you picked it up in the morning!

Canadian Beauty Bloggers (CBB) – photo from Jen of A Beautiful Zen

Aside from the products, getting to meet some of the CBB crowd was fantastic! Be sure to check them out:

My bag of goodies
My bag of goodies

And despite my concerns, I actually managed to stick to my budget ($200). I wasn’t expecting it to actually happen (we all know we start to cave when we’re around shiny new products!) but I was super pleased that I actually held to it.

Monthly haul coming up on Friday which will include all my IMATs stuff as well!

What’s On My Face – Volume 28

This week’s set of looks has a bunch of glitter, some “tis the season” lips and plenty of lashes!

20141124_look2-1

An excuse to wear glitter? I’ll take it! I did this look for a sports banquet one of my soccer leagues was putting on. Love how it turned out!

20141124_look2-2

Eyes

  1. Inglot AMC Shine 33 all over the lid.
  2. Inglot Matte 338 on the outer corner.
  3. Too Faced Milk Chocolate through the crease.
  4. Too Faced Cream Colored Ponies on the brow bone.
  5. MAC Reflects Transparent Teal glitter tapped onto the lid.

Catrice liquid liner in Dating Joe Black to create the wing with Pur Minerals Big Look Waterproof mascara on my lashes. I’ve also applied some Femme Fatale lashes in She-Devil.

Rest of the Face

  • Foundation:  CoverGirl CC Cream in 110 Classic Ivory
  • Bronzer: Revlon Bronzed & Chic
  • Blush: Hourglass Diffused Heat
  • Highlighter: MAC Silver Dusk
  • Lips: Bite Beauty Fig

20141124_look3-1

I’ve been loving the pinky-red berry lips lately and this eye look just worked out perfectly with this lip colour.

20141124_look3-2

Eyes

  1. Makeup Geek Bleached Blonde all over the lid.
  2. Makeup Geek Bitten on the outer corner and through the crease.
  3. Makeup Geek Vanilla Bean on the brow bone.

Kat Von D Tattoo Liner in Trooper to create the wing and applied Estee Lauder Sumptuous Infinite mascara to my lashes. I also have Femme Fatale Catwalk lashes on.

Rest of the Face

  • Bronzed: NYC Fire Island Tan
  • Blush: Hourglass Mood Exposure
  • Lips: Too Faced Melted Berry

20141124_look4-1

I love the lid colour on this one because it’s not just pale and shimmery, it’s also got hints of pinky, purple and some gold. Makes it easy to match it with different colours.

20141124_look4-2

Eyes

  1. Too Faced Coquet all over the lid.
  2. Too Faced Ooh La Orchid on the outer corner.
  3. Too Faced Chocolate Milk through the crease.
  4. Too Faced Cream Colored Ponies on my brow bone.

Too Faced Dark Chocolate was used to line the lid and Estee Lauder Sumptuous Infinite mascara is on my lashes.

Rest of the Face

  • Foundation:  CoverGirl CC Cream in 110 Classic Ivory
  • Bronze: Too Faced Chocolate Soleil
  • Blush: Too Faced Raindrops on Roses
  • Highlighter: Benefit Watts Up
  • Lips: Cailyn Basic Instinct gloss

20141124_look1-1

I did this look for a guest posting over on Julie’s Swatch and Review blog for a MAC Monday. I’m reposting it for my own posterity!

201410_sr_chellemac5

Eyes
(all MAC)

  1. Vanilla pigment on the inner corner.
  2. Expensive Pink all over the lid.
  3. Sketch in the outer corner and blended through the crease.
  4. Shroom on the brow bone.

I used Blacktrack fluidline to create the wing, then tightlined both my upper and lower lash lines with Feline Kohl Power Pencil. On my lashes is Urban Decay‘s Perversion mascara.

Rest of the Face

  • Foundation: Boots No7 Stay Perfect in Deeply Ivory
  • Bronzer: NYC Fire Island Tan
  • Blush: MAC Warm Soul
  • Highlighter: MAC Vanilla pigment
  • Lips: MAC Viva Glam Cyndi

20141124_look5-1

Inspiration? My shirt. Yep, I’m “one of those” that matches their eyeshadow to their clothing!

20141124_look5-2

Eyes

  1. Too Faced Creme Brulee all over the lid.
  2. Too Faced Gilded Ganache on the outer corner.
  3. Too Faced White Chocolate on the brow bone.

Rest of the Face

  • Bronzer: Tarte Park Avenue Princess
  • Blush: Tarte Dazzled

Lipstick Bullet Massacre

201411_lipstickbulletmassacre

What do all of those lipsticks have in common? The fact that somehow I have managed to mangle them all!

I don’t know what the hell is wrong with me! Does anyone else have this issue? Over the years I’ve noticed that a lot of my lipsticks have indentations on the back sides where I’m obviously pressing too hard on the bullet when I apply the lipstick to my lips. However, more recently, I’m having lipsticks full on break on me!

Bite Beauty – Fig
Bite Beauty – Fig

I actually returned this lipstick from Bite Beauty because I thought I’d received an incredibly soft one since it broke the very first time I used it. However, the exact same thing happened to my replacement.

The mangled remains of Fig

Since I like the lipstick so much I’ve tried to make do by flattening down the bullet so it applies more like a chapstick. It hasn’t actually broken off from the base, although I figure it’s not long off doing so.  I would de-pot it… but a lipstick in a pot is so much less convenient. Good god this thing looks like hell when I pull it out to apply it.

MAC Hibiscus
MAC Hibiscus

This one I actually did de-pot. MAC‘s Hibiscus is from a limited edition collection years ago and it snapped pretty quickly after I bought it. I tried using all the tricks to re-assemble it – melting, re-attaching, freezing, but none of it works for me! After realizing how little I use this because it’s in a pot, I stopped de-potting any of my other broken bullets.

Revlon Black Cherry & Snow Peach

This is usually how it starts – just a few indentations on the back side, and then eventually I end up using the lipstick too often (and clearly too roughly!) and eventually they snap off the bottom completely!

Maybelline Vivids – Vivid Rose and Neon Red

Some seriously rough looking Vivids. I think Neon Red is pretty close to snapping.

MAC Mystical and Cyndi

Mystical isn’t too bad, but Cyndi has already partially cracked off the base. I don’t even understand why either – this is my second tube of this lipstick and I didn’t have any problems at all with the first tube!

bareMinerals – Get Ready

I even managed to snap this baby-sized bareMinerals lipstick. This is one of my attempts to melt and re-connect the two ends. You can see it didn’t turn out that well…

NYX – Fizzies
NYX – Fizzies

This one I actually know why it happened: I’d had a little bit too much to drink at the bar one night and wound the bullet all the way up to the top before I tried to apply it directly to my lips. Then… *snap*. ARGH!

So does anyone else have this problem? I can’t believe I’m the only one being rough with my lipsticks! I often feel like I don’t get enough pigmentation onto my lips unless I press hard enough on the bullet, but obviously that’s causing me problem! Unfortunately, I have no real solution for fixing these lipsticks since none of the DIYs on the net have worked for me. De-potting seems to be the way to go, but ugh… the hassle of a lip brush is just not worth it to me!

Challenge Week: Tarte Rainforest After Dark

201411_tarte_rainforestafterdark

A lovely friend picked up the Tarte Rainforest After Dark palette in the US when it was on a super deal at… Ulta I want to say? (*edit* Nope wrong! It was on Tarte’s own web site for such an amazing price.) She got it at a rocking deal of $26 USD and I couldn’t say yes fast enough! I had missed out on the previous Tarte disks (I’ve been mourning never getting my hands on Aqualilies for a while now) and since this was Tarte‘s latest release, I was excited to try it out.

There’s no denying the benefits of this palette. There’s a lot to be said for a palette that can give you so much product in one compact shape: It comes with six eyeshadows, a full-sized blush, a highlighter and a bronzer! I barely own any full face palettes like this, and if I do, they’re in absolutely enormous packaging which makes travelling cumbersome.

While I do love Tarte‘s blushes quite a bit, I’ve never had the opportunity to test out the rest of their products. I’ll admit that I found the eyeshadows in this palette to feel quite dry. They don’t lack for pigmentation, but they do feel a bit stiff. There is also no matte brow bone shade in this palette, so I found myself mixing the palest eyeshadow shade with the highlighter to use as on my brow.

For each look I used the blush (Unleashed), bronzer (Park Avenue Princess) and highlighter (Champagne) so I won’t re-iterate those for each look breakdown.201411_tarte_rainforestafterdark_look4-1

A look I always go to because it’s super easy – monochromatic shades going from light to dark.

201411_tarte_rainforestafterdark_look4-2

 Eyes

  1. Make a mauve all over the lid.
  2. Plum away with me on the outer corner and through the crease.
  3. Champagne and Bare to explore mixed together and blended onto the brow bone.

I used Tarte‘s black gel liner to create the wing and applied Estee Lauder Sumptuous Infinite mascara to my lashes.

Rest of the Face

  • Foundation: CoverGirl CC Cream in 110 Classic Ivory
  • Lips: MAC Mystical

201411_tarte_rainforestafterdark_look3-1

When I look at this palette, this is the look my eyes gravitate towards first – gold all over the lid with the purple/plum in the crease.

201411_tarte_rainforestafterdark_look3-2

 Eyes

  1. Up to no gold all over the lid.
  2. Plum away with me in the outer corner and through the crease.
  3. Champagne and Bare to explore mixed together and blended onto the brow bone.

Estee Lauder Sumptuous Infinite mascara is on my lashes.

Rest of the Face

  • Foundation: CoverGirl CC Cream in 110 Classic Ivory
  • Lips: MAC Brick lip liner with MAC Dark Side on top

201411_tarte_rainforestafterdark_look5-1

Unfortunately the lighting is not so good on the close up shots (I have no lighting source other than natural light and with the short days this become problematic!).

201411_tarte_rainforestafterdark_look5-2

Eyes

  1. Plum away with me on the inner and outer thirds of the lid.
  2. Up to no gold on the middle of the lid.
  3. Tan-gled up in you through the crease.
  4. Champagne and Bare to explore mixed together and blended onto the brow bone.

Estee Lauder Sumptuous Infinite mascara is on my lashes.

Rest of the Face

  • Foundation: CoverGirl CC Cream in 110 Classic Ivory
  • Lips: Laura Mercier Lip Glace in Rose


201411_tarte_rainforestafterdark_look1-1

I think this is my favourite look out of the bunch. It’s smokey and dramatic and I looove the outer corner shade (Don’t turn a-brown).

201411_tarte_rainforestafterdark_look1-2

 Eyes

  1. Make a mauve all over the lid.
  2. Don’t turn a-brown on the outer corner.
  3. Tan-gled up in you through the crease.
  4. Champagne on the brow bone.

I used Tarte‘s black gel liner to create the wing and applied Urban Decay Perversion mascara to my lashes.

Rest of the Face

  • Foundation: CoverGirl CC Cream in 110 Classic Ivory
  • Lips: Revlon Lipstain + Balm in Twilight

201411_tarte_rainforestafterdark_look2-1

The “typical” look. Light on the lid, brown through the crease. Oddly, the brown shades seemed to make the champagne shade seem rather grey. It didn’t bother me, but it’s worth noting.

201411_tarte_rainforestafterdark_look2-2

Eyes

  1. Champagne all over the lid and on the brow bone.
  2. Tan-gled up in you through the crease.
  3. Don’t turn a-brown in the outer corner.

Estee Lauder Sumptuous Infinite mascara is on my lashes.

Rest of the Face

  • Foundation: CoverGirl CC Cream in 110 Classic Ivory
  • Lips: Too Faced Jelly Bean