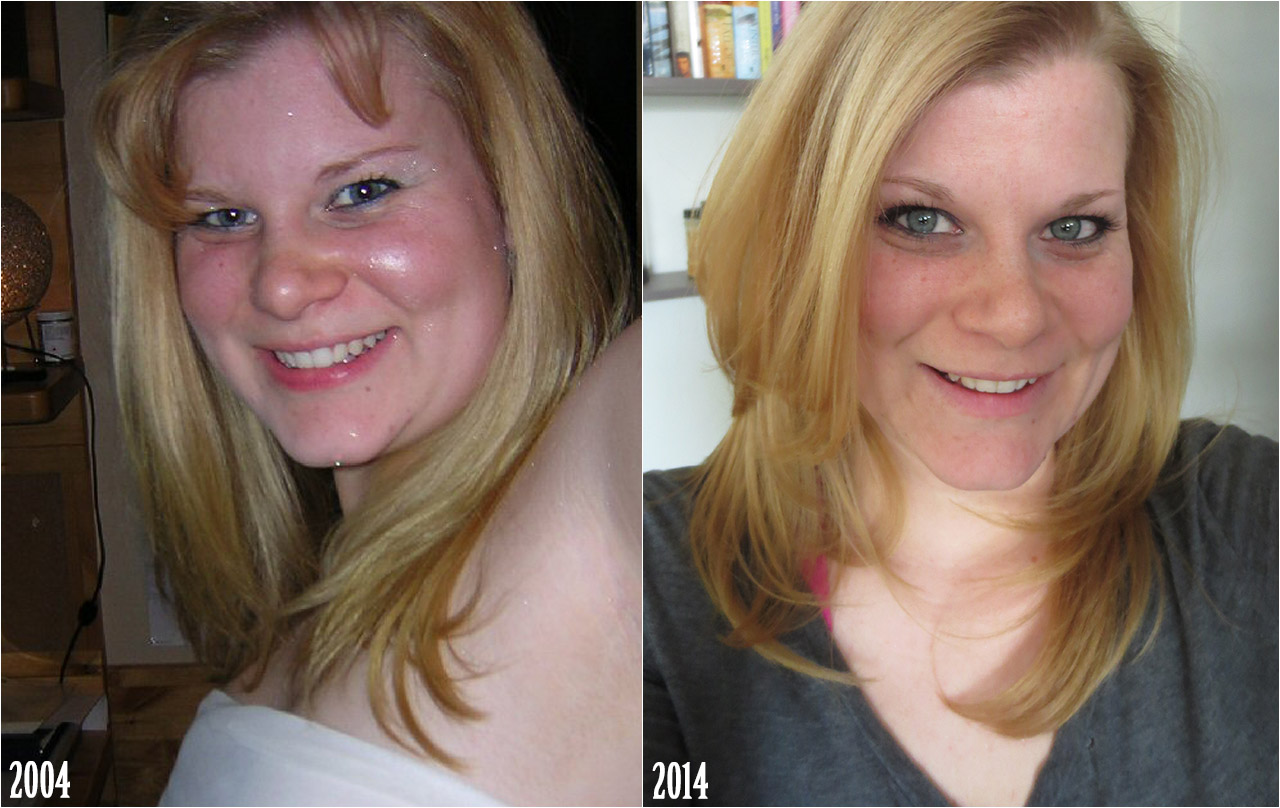
More makeup looks I’ve done over the past few weeks ranging from stuff I wore to work, out to a bar or was just headed over to a friend’s place! I was really happy with this set of looks and I hope you enjoy them.
As a note, I’ve switched to NARS‘ Pro Prime eyeshadow primer, so that’s what I use in all of my looks now unless otherwise stated.
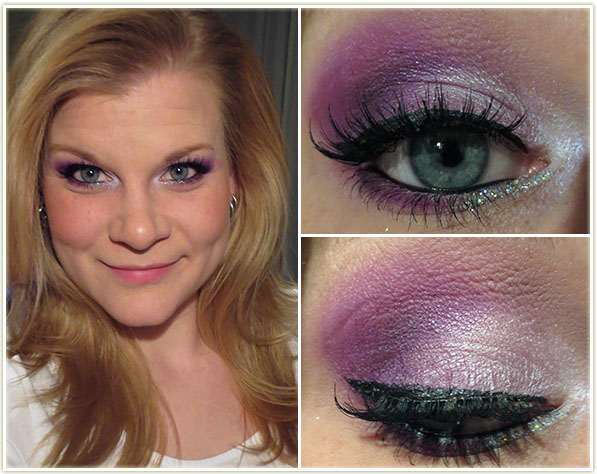
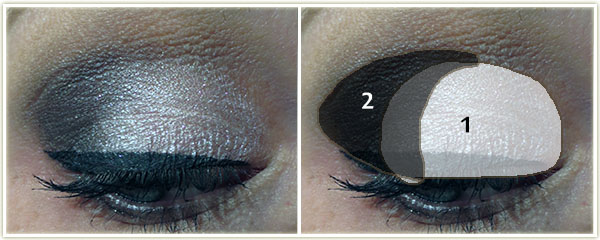
I loooove this one! It took me a lot more time to put this one together because I don’t normally get this creative and use so many shadows. (Seriously, if you haven’t noticed, I tend to stick to about two lid colours!) I don’t typically wear this much shadow/liner under my eyes on a regular basis because holy hell is that area ever sensitive on me and I usually end up with very watery eyes. This frustrates me because I realize just how much a makeup look comes together when you shade under your eyes!
Anyway, moving on.
With this, I had one goal: I wanted to use the MUFE rainbow glitter that I had picked up last month. I also hadn’t done purple look in quite a while so I figured this was as good a time as any.
Eyes: I first applied NYX‘s Jumbo Eye Shadow Pencil in Milk all over the lid as a base.
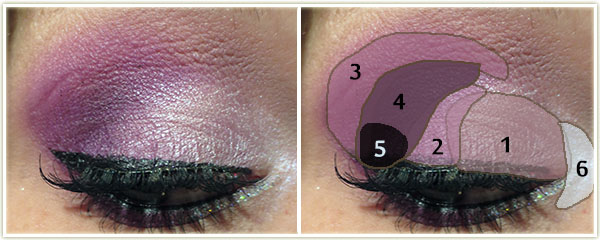
- The first colour from a ginormous Sephora eyeshadow palette I have that unfortunately does not have shade names, however, the colour is very similar to MAC‘s Crystal. Essentially, the colour is a very pale lilac shade with a bit of a sheen to it. This shade was placed on the inner half of the lid.
- I then used MAC Dame’s Desire right beside the previous shadow, but not all the way out to the corner.
- Sleek Sugarlite was blended heavily into the upper crease.
- Sleek Highness filled in the outer corner, with;
- Sleek Noir at the very edge of the outer lashline to darken up that area.
- I then used MAC Vellum to highlight the inner corner of the eye and blended it into the pale purple.
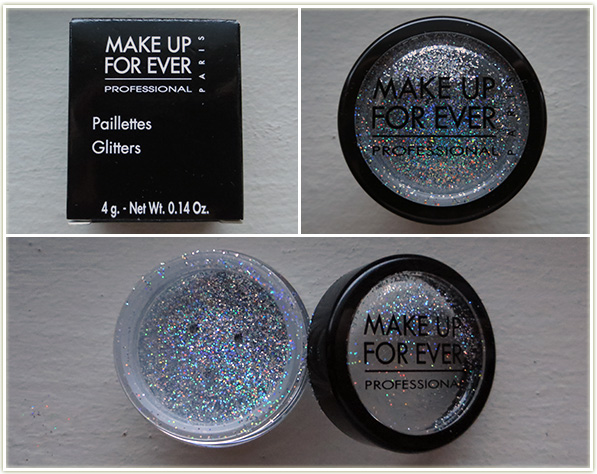
MAC Blanc Type to highlight the browbone with MAC Omega on my brows. On the lower lashline, I used Sugarlite to line the outer half of the lid, then applied some Too Faced Glitter Glue to the inner half of the lid and tapped on Make Up For Ever‘s Glitters 13 (silver rainbow glitter) on top of the glue. I lined the upper lashline with MUFE‘s Aqua Liner in 13 Blackand used MAC‘s Feline Kohl Power pencil on the lower waterline. And finally, I finished up the eyes with some Ardell‘s 102 Demis and applied L’Oreal Voluminous Carbon Black on my lashes.
Rest of the Face
- Foundation: Bourjois Healthy Mix Serum in 51 Light Vanilla
- Bronzer: Revlon Photoready Bronzer in Bronzed & Chic
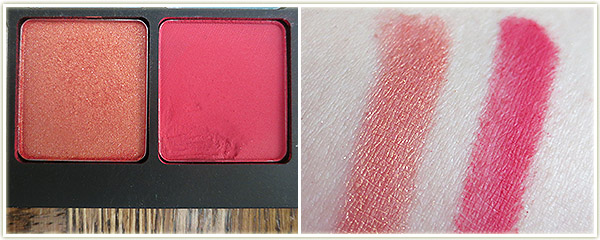
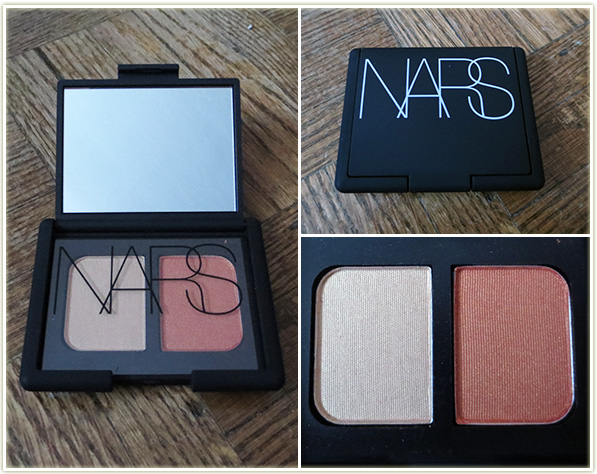
- Blush: Tarte Exposed with Illamasqua
Hussy layered on top - Highlighter: MAC Silver Dusk
- Lips: I’m not wearing it in the picture, but I wore Rimmel Apocalips in Celestial out that night.
- Extra: I used MAC‘s Select Coverup in NW20 under my eyes and set it with Laura Mercier
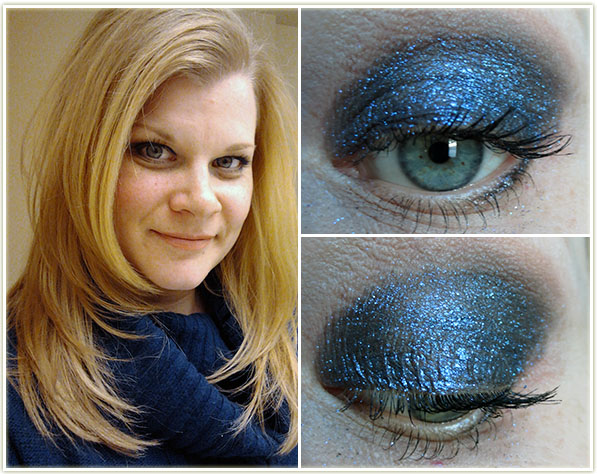
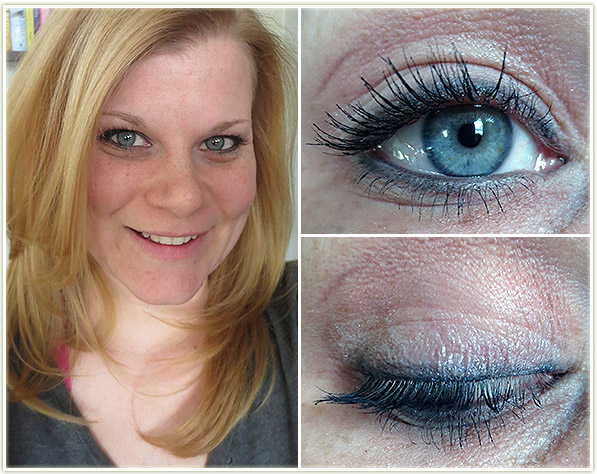
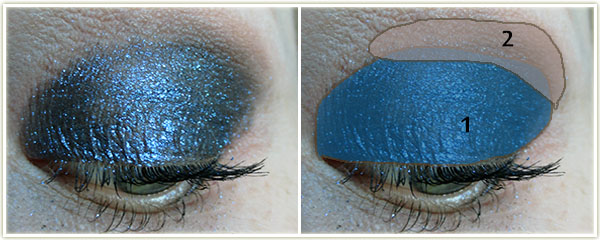
It was just one of those mornings when I had no idea what to wear and just happened to look into the tub that contains all of my mineralize eyeshadows. Although it’s beautiful, I rarely use this shadow. A word to the wise though, this can apply really patchy and can flake off at a moment’s notice. Beautiful end result, however.
Eyes:
- With a dampened, flat, stiff makeup brush, I packed (and I do mean packed) on MAC Blue Flame all over my entire lid. You may will likely need to layer this.
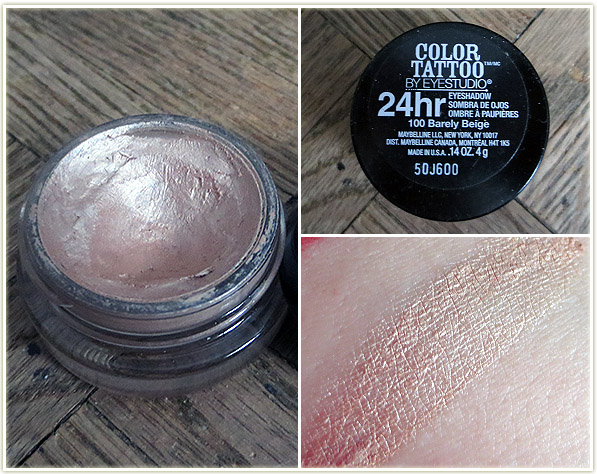
- I then blended Makeup Geek Creme Brulee into the crease.
I also lined the outer third of my bottom lashline with the Blue Flame as well. Too Faced‘s Cream Colored Ponies on my browbone and L’Oreal Voluminous Carbon Black on my lashes.
Rest of the Face
- No foundation, bronzer or highlighter.
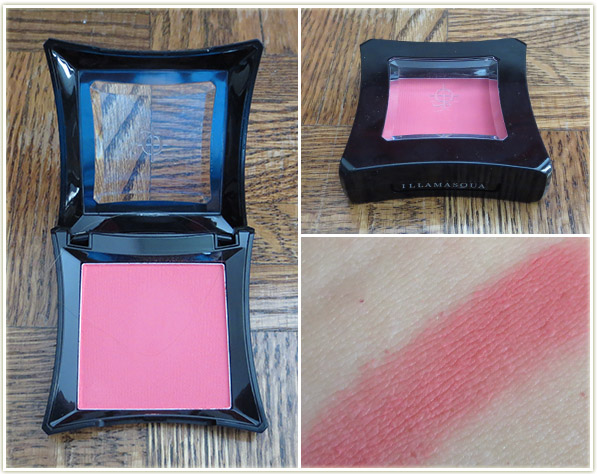
- Blush: Illamasqua – Hussy
- Lips: MAC – Shy Girl

Obligatory neutral eye look, using the Too Faced A Few of my Favorite Things palette.

Eyes: (Urban Decay Primer Potion as a primer for this one!)
- Too Faced Snowflakes all over the lid.
- Too Faced Buche de Noel slightly into the outer corner.
- Too Faced Woolen Mittens on the outer corner and blended into the crease.
I did the winged liner with MAC‘s Dipdown fluidline.
Rest of the Face
- Foundation: MUA Matte foundation in Shade 1 Soft Sand
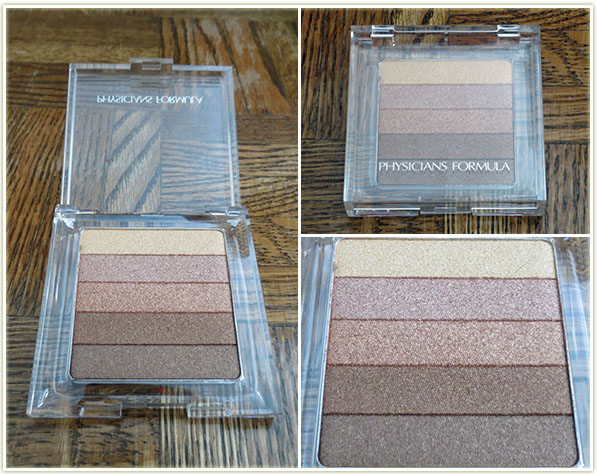
- Bronzer: Physicians Formula Bronze Booster in Light/Medium
- Blush: Errr no idea. Maybe nothing?
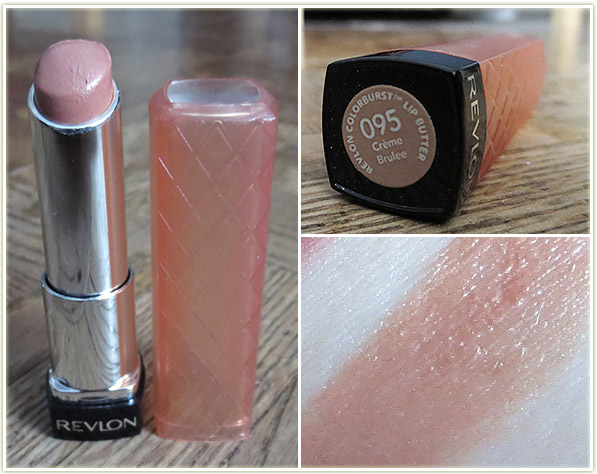
- Lips: MAC Boldly Bare lipliner with MAC Viva Glam Cyndi on top
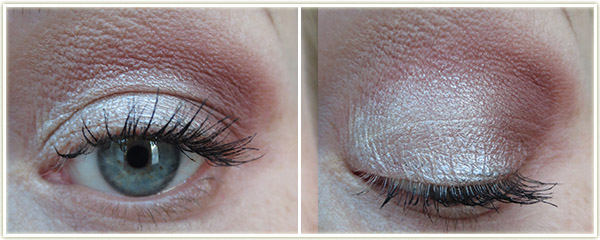
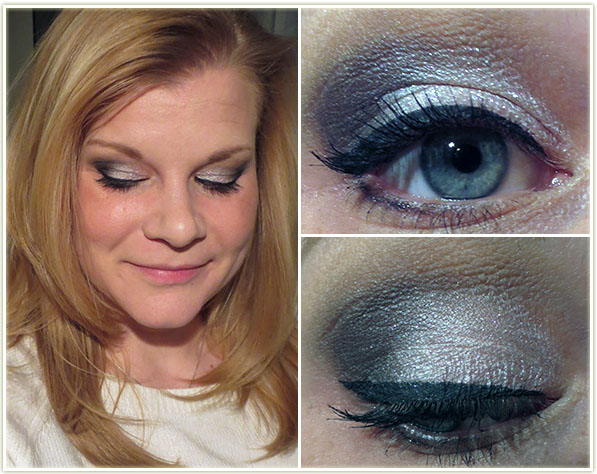
This look features Jealousy Wakes, the eyeshadow created by Christine (Temptalia) for MAC. Unfortunately it was limited edition (boy, was it EVER) and it sold out almost instantly back when it was released. It’s a beautiful shade and this is my default look when I want to wear that shadow.
Eyes: (Again with UDPP)
- MAC Vex, inner two thirds.
- MAC Jealousy Wakes, outer corner and into the crease.
- Makeup Geek Creme Brulee throughout the crease.
MAC Brule to highlight the brow and L’Oreal Voluminous Carbon Black on my lashes.
Rest of the Face
- Foundation: MUA Matte foundation in Shade 1 Soft Sand
- Bronzer: Physicians Formula Bronze Booster in Light/Medium
- Blush: Physicians Formula – Natural
- Highlighter: Dior Amber Diamond
- Lips: MAC Petting Pink Lip Conditioner
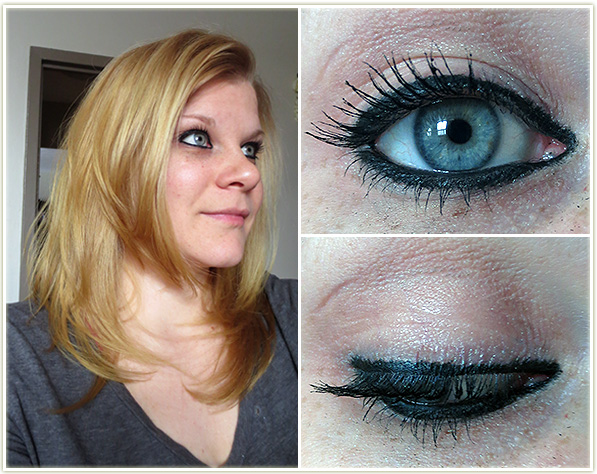
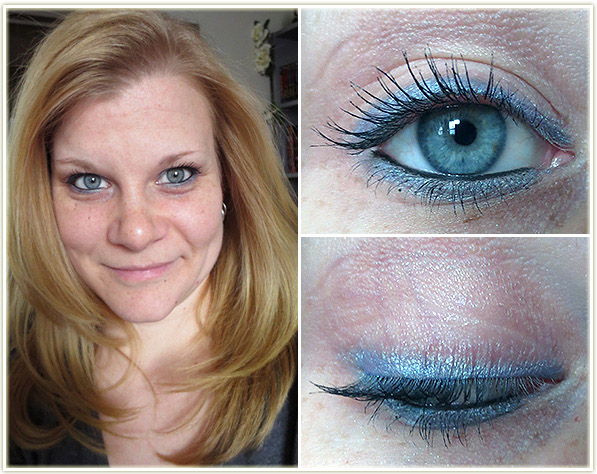
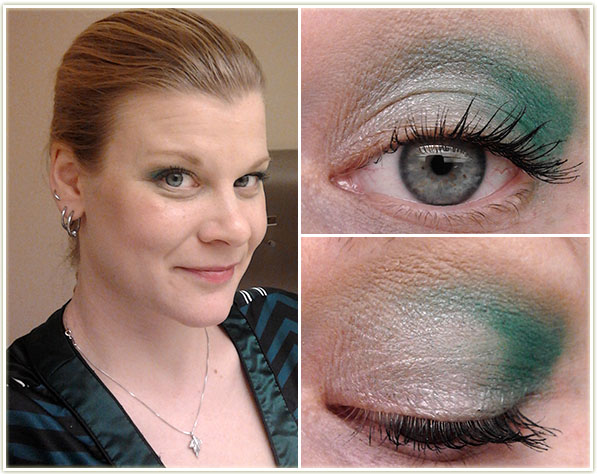
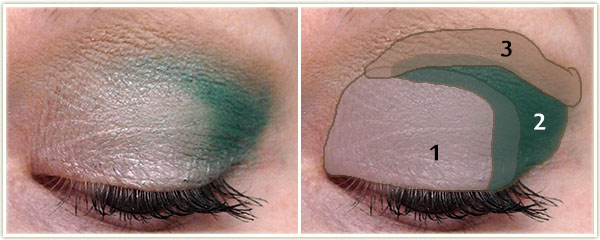
A shame the sparkles don’t show up more – I was going for a wintry snowfall at night look.
Eyes:
- MAC Crystal Avalanche on the inner two-thirds of the lid.
- MAC Print on the outer third.
Although it is incredibly difficult to see in the photograph (which is very frustrating to me), I did layer Illamasqua‘s Beguile
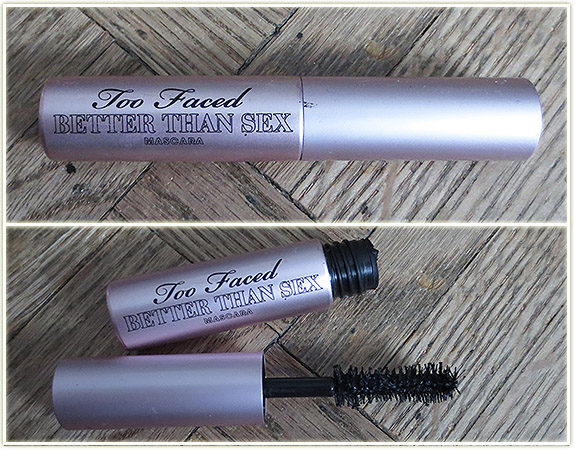
I used KIKO‘s Twinkle Eye Pencil in 06 (I really need to use this more, it’s fantastic) on the lower lashline. The upper winged lined was created with MAC Blacktrack fluidline. I appliedToo Faced Better Than Sex mascara to both sets of lashes and ran some MAC Omega through my brows. (The brows really never change, I’ll probably stop repeating this…)
Rest of the Face
- Foundation: MUA BB Cream in Light mixed with some moisturizer
- Bronzer: Physicians Formula Bronze Booster in Light/Medium
- Blush: MAC Warm Soul
- Highlighter: MAC Silver Dusk
- Lips: Nothing – was heading out to eat so I didn’t see the point!
I’m pretty pleased in the makeup department lately… most of my looks have been suitable enough to post on here and I had about 15 or so looks to choose from for this post! Pretty happy with that because sometimes I can get a nasty streak where I don’t like anything I applied at all for several days. (That’ll make for an interesting post some day.