Category Archives: Makeup

Swatch Sunday: Makeup Revolution Redemption Palette Matte Brights

Makeup Revolution - Redemption Palette Matte Brights

I don’t normally post reviews during Swatch Sunday posts because I usually just want you to appreciate the prettiness of the palette. However, I feel like I need to make a freaking public service announcement with this palette. DO NOT SPEND YOUR MONEY ON THIS. This Makeup RevolutionRedemption Palette Matte Brights (what a freaking awkward name) is a dirty, cheap knockoff of Sleek‘s Matte V1 Brights palette (and Sleek‘s palette is INCREDIBLE by the way). The pigmentation is just not there (you’ll see that shortly) and the quality is absolutely abysmal. At roughly $5 USD, this is just under half the price of the $11 USD Sleek palettes. Sleek deserves your money in regards to this palette, not Makeup Revolution.

Makeup Revolution - Redemption Palette Matte Brights
Makeup Revolution – Redemption Palette Matte Brights
Makeup Revolution - Redemption Palette Matte Brights
Makeup Revolution – Redemption Palette Matte Brights

Swatches

Makeup Revolution - Shade 1
Makeup Revolution – Shade 1
Makeup Revolution - Shade 2
Makeup Revolution – Shade 2
Makeup Revolution - Shade 3
Makeup Revolution – Shade 3

(And for reference, I dipped back into the product FIVE TIMES just to get that amount of pigment in the swatch!)

Makeup Revolution - Shade 4
Makeup Revolution – Shade 4

(This orange shade was the only decent one.)

Makeup Revolution - Shade 5
Makeup Revolution – Shade 5
Makeup Revolution - Shade 6
Makeup Revolution – Shade 6

….really?

Makeup Revolution - Shade 7
Makeup Revolution – Shade 7
Makeup Revolution - Shade 8
Makeup Revolution – Shade 8

Okay, this one isn’t that bad either. Which is kind of incredible for a yellow.

Makeup Revolution - Shade 9
Makeup Revolution – Shade 9
Makeup Revolution - Shade 10
Makeup Revolution – Shade 10
Makeup Revolution - Shade 11
Makeup Revolution – Shade 11
Makeup Revolution - Shade 12
Makeup Revolution – Shade 12

House of Lashes (Reviews of Bombshell, Noir Fairy & Iconic)

House of Lashes

My love for House of Lashes actually started as a result of my frustration with other lash brands. I was doing my makeup several months ago and I was eager to try out some lashes I had sitting in a drawer. I went through FOUR DIFFERENT BRANDS and not a single one of them would stay put (not ping off the edges), not look fake (some had seriously reflective plastic) or even curve to fit my eyelid no matter what I did with them. I ended up throwing out everything I had except for my lonely pair of Bombshell lashes by House of Lashes that I knew worked for me.

House of Lashes false lashes

From that moment on, I vowed to only buy House of Lashes. I don’t know about you, but I don’t wear lashes too frequently – maybe a handful of times a month. So when I wear them, I want to be able to just put them on and not worry about them. I don’t want the application to be difficult or tedious – I just want it to WORK. And for that very reason, I am happy to say that I’ve found my lash brand of choice, and I will not be swaying from House of Lashes any time soon. (Also worth mentioning – their house brand lash glue is the best I’ve ever used – highly recommended.)

Here are pairs I’ve used so far (two sets have been used, so they’re snipped to fit my eyelid):

House of Lashes - Iconic
House of Lashes – Iconic

Quite a few YouTubers wear the Iconic lashes ($12 USD) so I wanted to try them out as well. They are fat, fluffy caterpillars and they are incredibly flattering. They’re quite a heavy and thick, so the band is on the thicker side to support the weight of the lashes. That being said, the band will still bend nicely to conform to my eyelid.

Houses of Lashes - Iconic
Houses of Lashes – Iconic

I wear these when I want a lot of impact. They are noticeably fake on me though – although they’re gorgeous, many people were able to easily identify that I was wearing fake lashes just because they’re so fluffy.

House of Lashes - Noir Fairy
House of Lashes – Noir Fairy

When I first got the Noir Fairy lashes ($12 USD) I stayed away from them for several months because I thought they were just way too thick for my liking. I thought they’d take over my eye shape and swallow up any kind of lid space I had. I was wrong however:

Houses of Lashes - Noir Fairy
Houses of Lashes – Noir Fairy

These are absolute stunners. I don’t feel they’re as “in your face” as the Iconics are, but they add a lovely swoop and curve to the ends of my lashes. I love how they add a lot of thickness to the base of my lashes and yet taper out to softer points.

House of Lashes - Bombshell
House of Lashes – Bombshell

And finally, my beloved Bombshell ($7 USD) lashes. These are the ones that made me fall in love with the brand. These are very light and soft. They add a lot of depth to my lashes, but are they aren’t overly heavy or obvious. The band is invisible and quite thin, which makes them very flexible and easy to curve to your eyelid. These are also almost indestructible. I have worn my first set of Bombshells over TWENTY TIMES and they are still in excellent condition (the shot above is of a backup pair I have). I haven’t even been able to get mink lashes to last that long and they’re more than double the price of these!

House of Lashes - Bombshell
House of Lashes – Bombshell

And here’s me wearing the Bombshell lashes – you can see that they add depth and length to my own lashes, but they don’t overtake my eyelid space.

Final Thoughts

I’m really happy I took the leap and bought House of Lashes. Because they seem to be an online only type of brand, you never know what kind of quality you’re going to get… but the internet did not lie to me! These are excellent lashes and, for me, they are well worth the slight price increase from a drugstore brand. By comparison though, these are quite cheap compared to some higher end lash brands (including mink lashes) and yet the durability of them is unparalleled. They also have bundle deals where if you buy a few pairs of each, you save a couple bucks. Do yourself a favour and try these out!

Too Faced Melted Chocolate (Review + Swatches)

Too Faced Melted Chocolate Lipsticks

Oh Too Faced. You get me every. single. time.

Too Faced Melted Chocolate Lipsticks

This past December, Too Faced released some additional shades to their Liquified Long Wear Lipstick range (the Melteds), except this time they did it with a chocolatey twist!

Too Faced Melted Chocolate Lipsticks in Chocolate Cherries, Chocolate Milkshake & Chocolate Honey

Staying true to the ever-raging 90s trend, these chocolate Melteds are quite brown on the lips, but they each have a twist of colour. I picked up all of the “regular” ones: Chocolate Cherries, Chocolate Milkshake and Chocolate Honey. They also released three shades in the metallic version of the Melted formula, but I’m not a fan of their reflective consistency, so I opted not to get those. (Edit: I got them a few months later! Check out that review here.)

For those unfamiliar with the Melted formula, it’s considered a liquid lipstick since it is quite fluid. However, they do not dry down to the “dry as a bone” matte formula that most liquid lipstick possess. They are richly pigmented and are quite glossy on application, but will dry down to a soft and comfortable matte formula within roughly an hour. You can either re-apply the product to bring back the glossiness, or just keep wearing it as is (which is my preferred method). I do not find them drying on the lips.

Too Faced Melted Chocolate Lipsticks in Chocolate Cherries, Chocolate Milkshake & Chocolate Honey

Aside from the obvious colour selection, these are called Melted Chocolate because they do in fact smell like chocolate! The scent is not quite the same as the Chocolate Bar palettes – to me, the Melted Chocolates do smell a lot more artificial. It’s like it’s flavoured with chocolate on top of the usual smell of the Melted formula (which is kind of a non-scent to me to begin with). That being said, it’s not offensive to my nose and the scent/taste does completely fade on the lips. The wear time is equal to all the other Melteds I own (six hours or more, easily), although Chocolate Honey did feel a bit more liquid than the other two. Amazingly, Chocolate Cherries did NOT stain my lips, even after wearing it for five hours straight.

Too Faced Melted Chocolate Lipsticks in Chocolate Cherries, Chocolate Milkshake & Chocolate Honey Swatches
  • Chocolate Cherries is the darkest of the lot, and while it does look quite red-brown in the swatch, in practice I feel like it looks a lot more black-brown on my lips. (In the same way that Melted Villain looks black on me.)
  • Chocolate Milkshake has a hint of pink added into the pale brown. I do get far less pink payoff on my lips though.
  • Chocolate Honey is what I’d call the true medium brown of the lot. I was anticipating this giving me poo lips, but I’m actually quite pleased how much it does look like melted milk chocolate!

Too Faced Melted Chocolate – Lip Swatches

Too Faced Melted Chocolate Milkshake
Too Faced Melted Chocolate Honey
Too Faced Melted Chocolate Cherries

Final Thoughts

It’s no secret that I’ve been in love with the Melted formula by Too Faced for quite some time. (You can see me swatch the entire Too Faced Melted collection here!) And these Chocolate additions have not shaken my love for the formula. If you like the colours and are looking for a comfortable lipstick to wear, you cannot go wrong with these. Absolutely two thumbs up from me!

Too Faced Melted Chocolate lipsticks can be purchased for $25 CAD each on Sephora.ca, or for $20 USD each on TooFaced.com.

What’s On My Face – Volume 44

Alright, it’s been a while since I’ve done a roundup of looks. Unfortunately, there wasn’t a lot of pizzazz in my looks throughout December as I felt like I was eternally rushing around, so this roundup is going to include my actual New Year’s look, some guest posts and a suuuuper old look from June I still hadn’t posted yet. Enjoy!


201601_womf44_look1.1

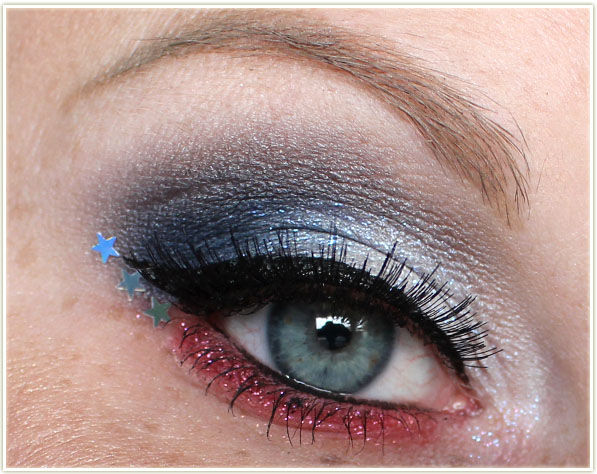
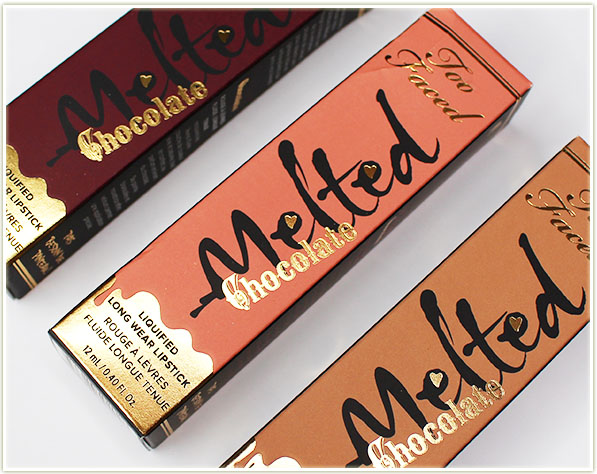
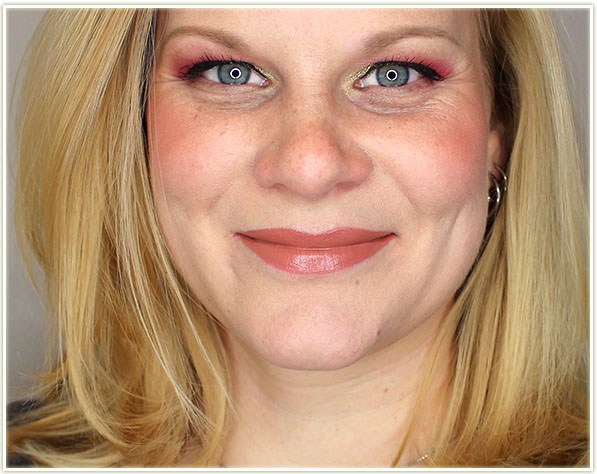
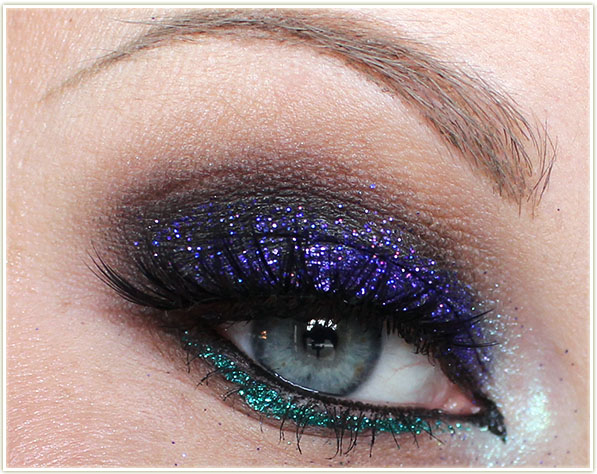
So here’s what I actually wore on New Year’s Eve. We didn’t have extravagant plans (we ended up going to an arcade), but I wanted to at least have a splash of glitter on! I ended up applying false lashes later on, but didn’t get around to reshooting the pictures, so what you’re looking at is sans falsies. This look does use the Too Faced Chocolate Bon Bons palette, but I promise there’s a full Challenge Week coming up focusing on that palette soon!

201601_womf44_look1.2

Eyes
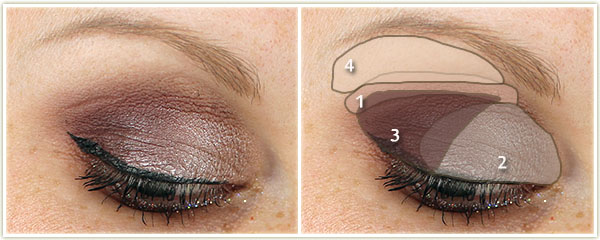
(Too Faced Chocolate Bon Bons palette)

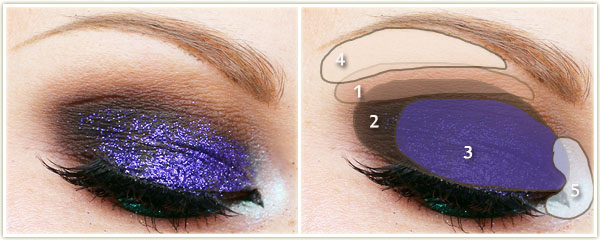
  1. Pecan Praline through the crease.
  2. Cafe Au Lait on the lid.
  3. Bordeaux on the outer half of the lid.
  4. Divinity on the brow bone.

I applied Make Up For Ever Glitters in 13 to my lower lash line using some Too Faced Glitter Glue. I created the wing with Kat Von D‘s Tattoo Liner in Trooper and applied Make Up For Ever Smoky Stretch mascara to my lashes.

Face

  • Bronzer: Charlotte Tilbury Filmstar Bronze & Glow
  • Blush: Clinique Cola Pop
  • Highlighter: Charlotte Tilbury Filmstar Bronze & Glow
  • Lips: Sephora lipgloss in Queen Bee

201601_womf44_look2.1

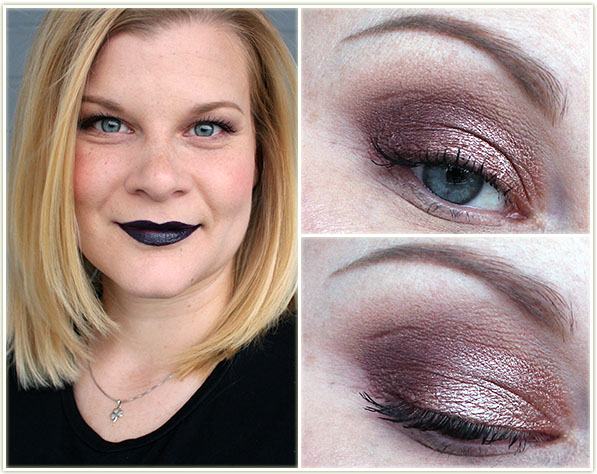
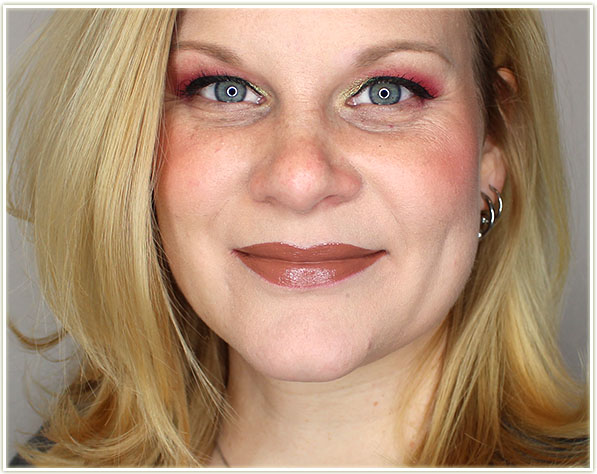
This look was completely focused on featuring Too Faced’s Melted Villain lipstick. Although it’s a dark purple, I have to admit that it mostly comes out looking black on me. that’s okay though! I love the colour and it’s NOT patchy! (And yes, I did wear this exact look to work that day!)

201601_womf44_look2.2

Eyes
(all Makeup Geek)

  1. Peach Smoothie through the top of the crease.
  2. Grandstand on the lid.
  3. Hipster through my crease.
  4. Burlesque on the outer half ofthe lid.
  5. Vanilla Bean on the brow bone.

I applied Make Up For Ever‘s Smoky Stretch mascara to my lashes.

Face

  • Foundation: Bourjois Healthy Mix Serum 51 Vanilla
  • Concealer: Collection Lasting Perfection concealer in 2
  • Bronzer: The Body Shop Honey Bronzing Powder in 01 Light Matte
  • Blush: Hourglass Luminous Flush
  • Highlighter: MAC Soft & Gentle
  • Lips: Too Faced Melted Villain

201511_chelleforjodi3

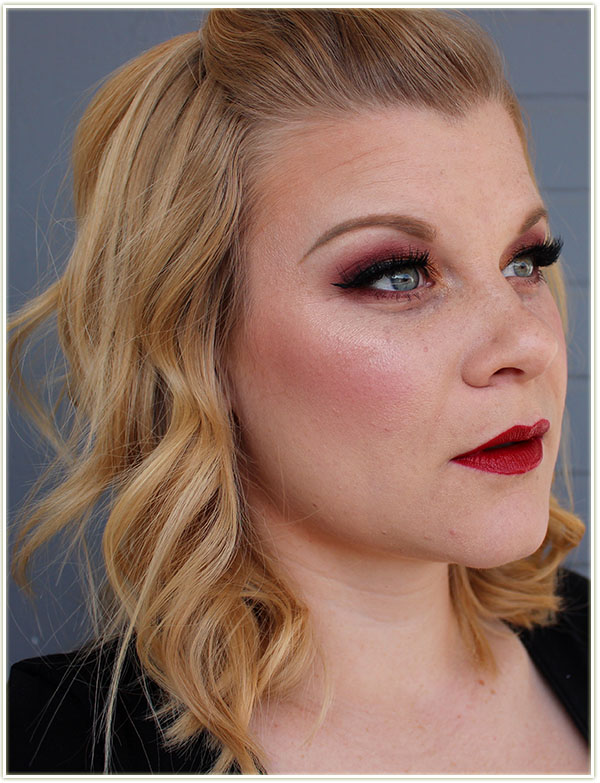
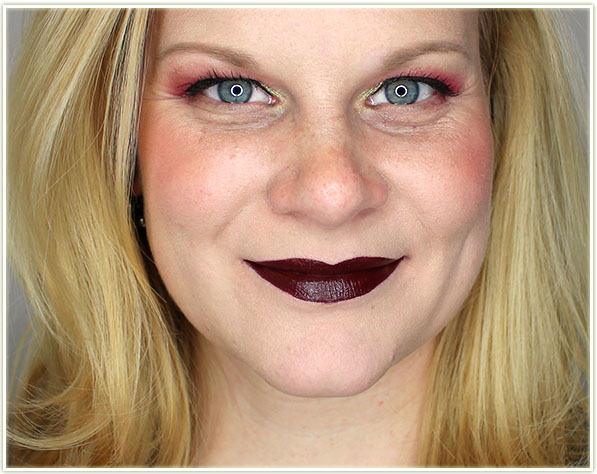
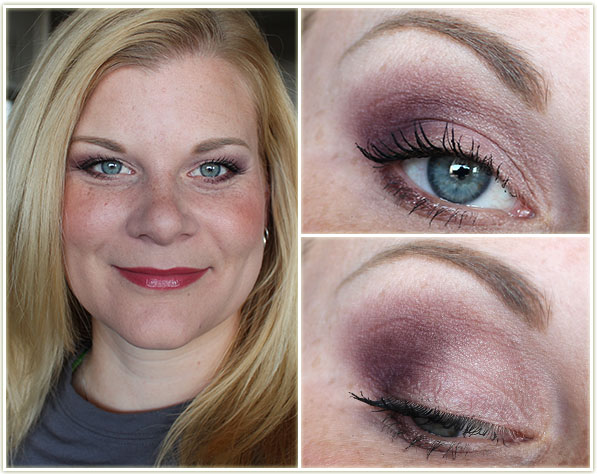
I looooved this look! I did this as a guest post for Up The Rollercoaster last month and just adored how the shots came out. I wasn’t sure how the cranberry tones in the shadows would work with a red lip and if I’m honest, I think it’s a LITTLE bit off, but the overall effect is WA-BAM!

201511_chelleforjodi1

201511_chelleforjodi_eyeopen

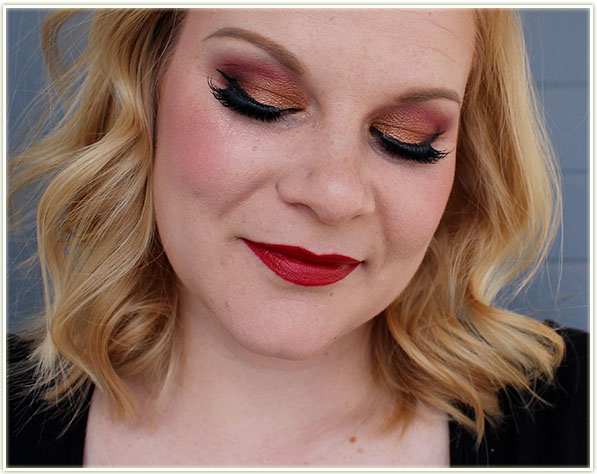
^^ That right there’s a money shot. I’m so pleased with it! 😀
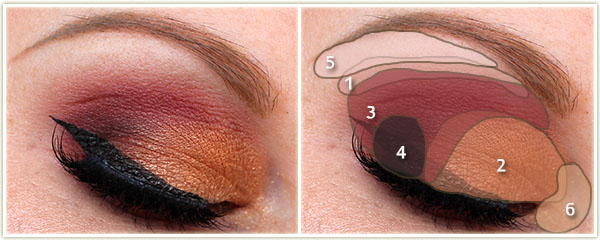
201511_chelleforjodi_eyemap

Eyes

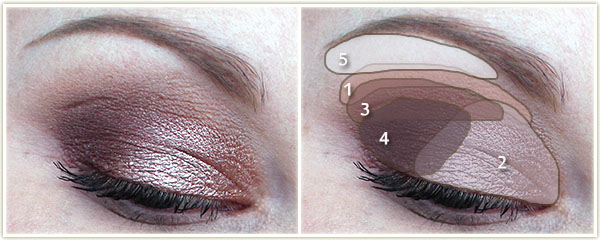
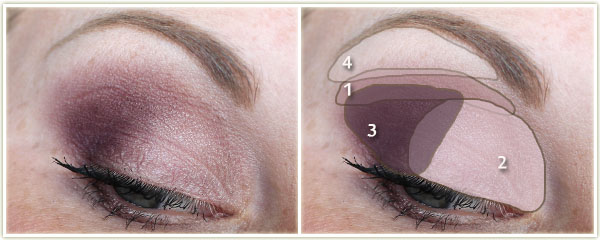
  1. Makeup Geek Peach Smoothie through the top of the crease.
  2. Makeup Geek Glamorous all over the lid.
  3. Makeup Geek Bitten on the outer half of the lid and through the crease. I also used Bitten to liner my lower lash line.
  4. Makeup Geek Corrupt to deepen up the outer corner.
  5. Makeup Geek Vanilla Bean to highlight the brow bone.
  6. I used some old MAC gold glitter flecks to add some sparkle to the inner corner. Any gold glitter will do!

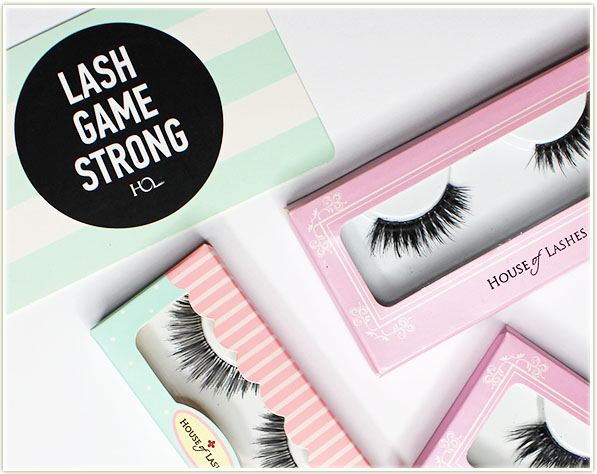
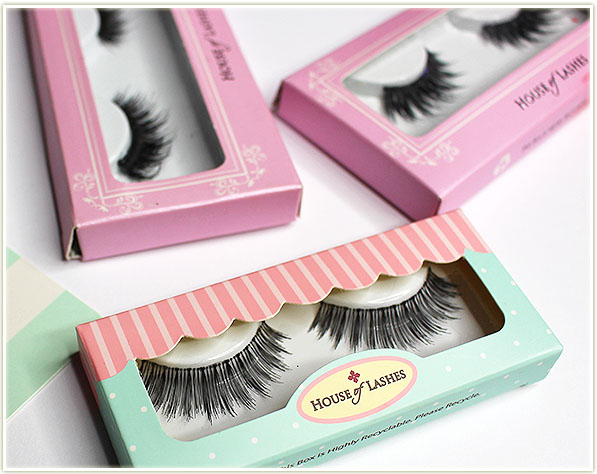
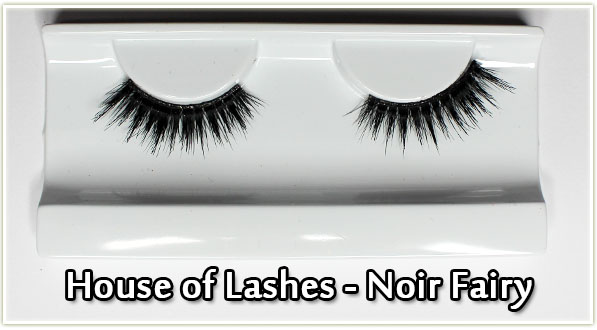
I created the wing with Kat Von D‘s Tattoo Liner in Trooper and tightlined my upper water line with Marc Jacobs‘ Highliner Gel Crayon in Blacquer. I coated my lashes with essence‘s get BIG! lashes volume boost waterproof mascara and applied a pair of Noir Fairy false lashes by House of Lashes. My brows are filled in with Anastasia’s Dipbrow Pomade in Blonde.

Face

  • Foundation: Bourjois Healthy Mix Serum in 51 Light Vanilla
  • Bronzer: Make Up For Ever Pro Bronze Fusion in 30M
  • Blush: Clinique Cola Pop
  • Highlighter: Becca Champagne Pop
  • Lips: MAC Russian Red with Brick lipliner to even out the lip lines

201512_chelle_forzoe3

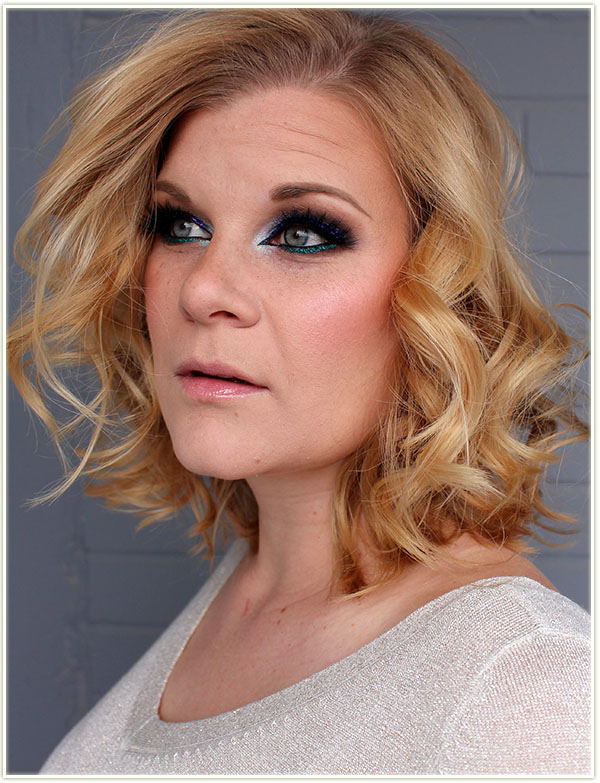
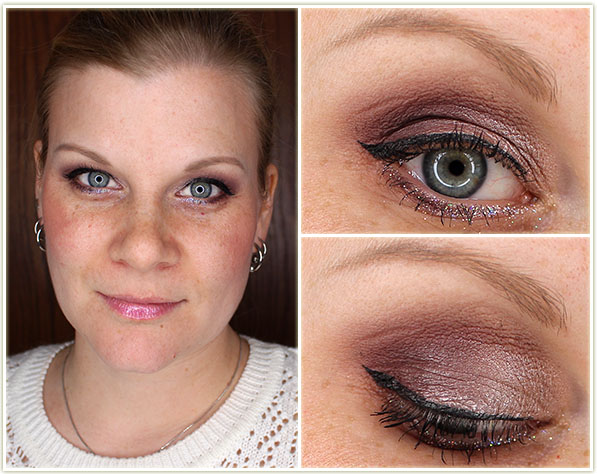
Another guest post! (This time for Writing Whimsy.) I really love doing guest posts because it gives me an opportunity to be totally creative. Usually I’ll take a Saturday afternoon and spend a couple hours working on one. This is very different from my usual makeup roundups which are done almost exclusively as my daily work makeup (which doesn’t always afford me the luxury of playing around with glitter since I’m usually in a rush!).
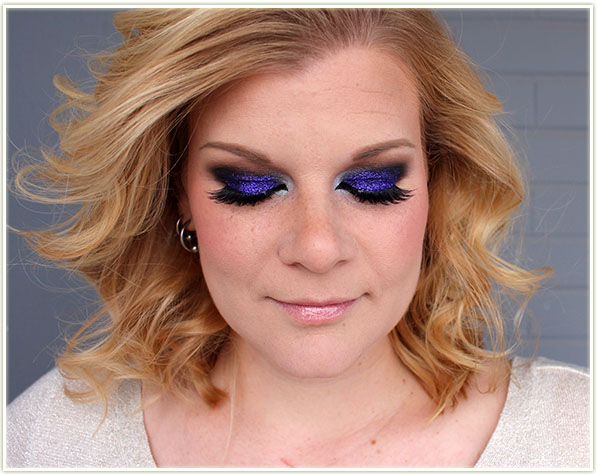
201512_chelle_forzoe1

201512_chelle_forzoe_openeye

201512_chelle_forzoe_eyemap

Eyes

After priming my eyelids, I applied NYX‘s Jumbo Eyeshadow Pencil in Black Bean all over the lid and blended out the edges. Then:

  1. I deepened my almost non-existent crease (thanks hooded lids) with MAC‘s Cork.
  2. I covered the entire lid with Urban Decay‘s Blackout, making sure to blend it into Cork.
  3. I then patted on Lit Cosmetics’ glitter in Disco Diva using their glitter adhesive.
  4. MAC‘s Blanc Type is on the brow bone to even everything out.
  5. On the inner corner, I blended together Naked Cosmetics IV-05 and IV-03 and patted it on.

I created the inner corner point with Kat Von D‘s Tattoo Liner in Trooper,  thinly lining my upper lash line with it as well. I tightlined my water lines with Marc Jacobs Highliner Gel Crayon in Blacquer and applied essence get big! lashes waterproof mascara to my lashes. I lined my lower lash line Lit Cosmetics Peacock glitter.

Face

  • Foundation: Revlon Colorstay in 200 Nude
  • Bronzer: Too Faced Milk Chocolate Soleil
  • Blush: Hourglass Diffused Heat
  • Highlighter: Make Up For Ever Pro Sculpting Duo #1 (highlighting shade)
  • Lips: Sephora Good Fairy lipgloss

201601_womf44_look3.1

Alright this one’s just super old. I had toyed with doing a Challenge Week for Laura Mercier‘s Artist palette, but I never got around to finishing it (likely something new and exciting caught my eye!). I did this look sometime in June of 2015.

201601_womf44_look3.2

Eyes
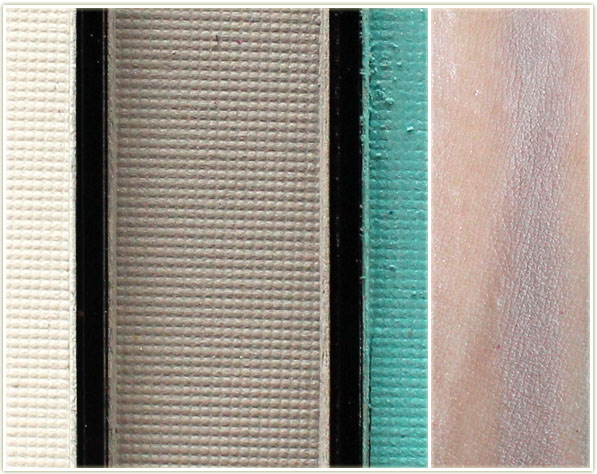
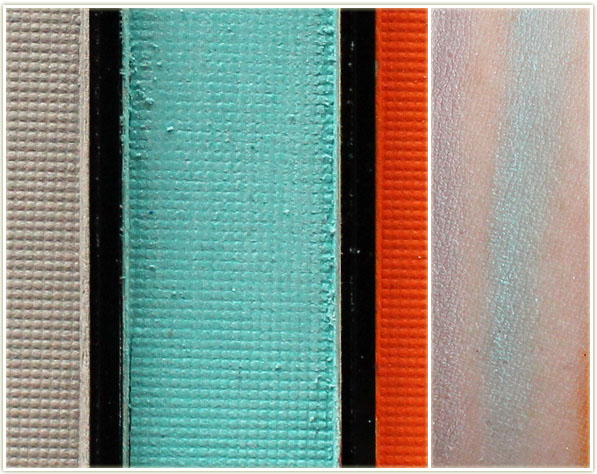
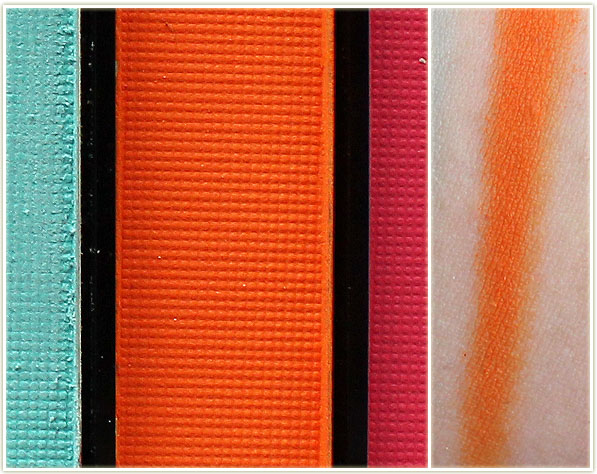
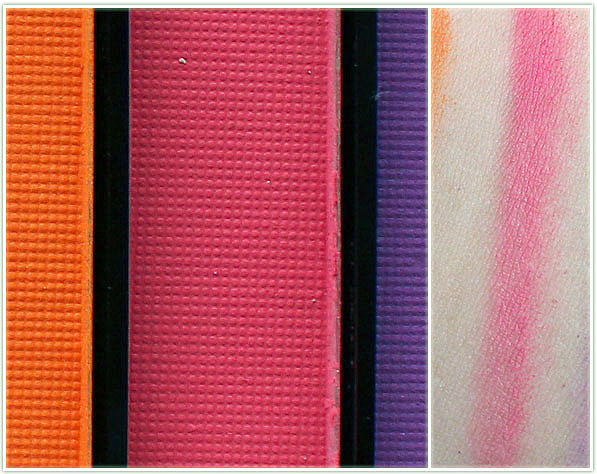
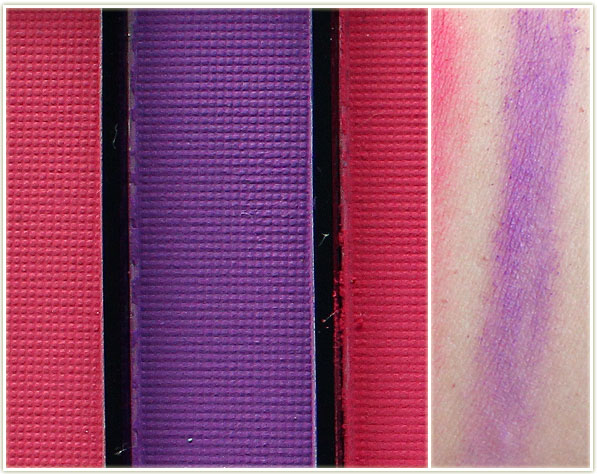
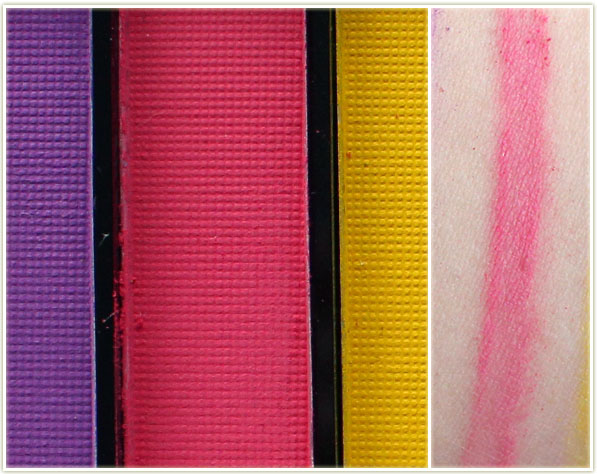
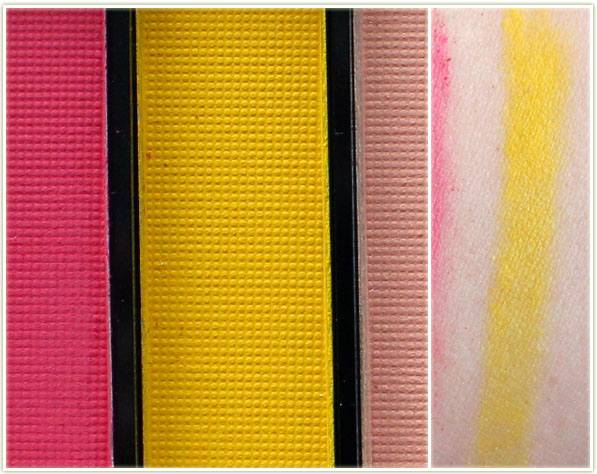
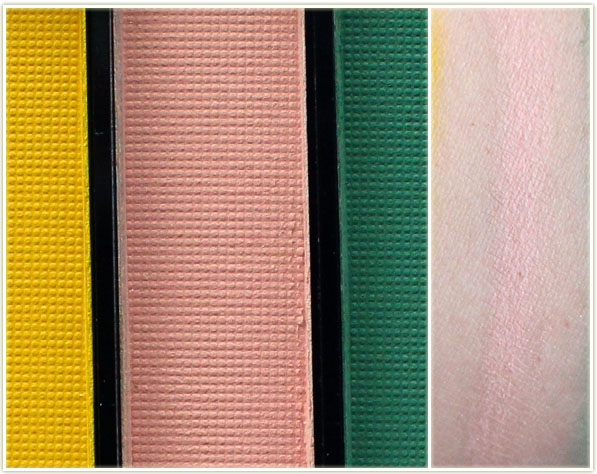
(all Laura Mercier Artist palette)

  1. Plum Smoke through the crease.
  2. Guava on the lid.
  3. Kir Royale on the outer half of the lid.
  4. Sparkling Dew on the brow bone.

I coated my lashes with essence‘s Lash Princess mascara.

Face

  • Foundation: Boots No7 Instant Radiance in Cool Vanilla
  • Bronzer: NYC Fire Island Tan
  • Blush: MAC Sea Me, Hear Me
  • Highlighter: Make Up For Ever Pro Sculpting Duo #1 – Highlighter
  • Lips: MAC Mystical