Category Archives: Makeup
NARS Sarah Moon Holiday Collection (Review & Swatches)
The imagery for the NARS Sarah Moon Holiday Collection made me gasp. It was ethereal, beautiful, futuristic and yet sensual and commanding all at once. It’s been quite a while since a makeup collection has grabbed my interest so intensely and I felt I just had to know more.
I’ll link you to the Wikipedia article, but, in short, Sarah Moon (born Marielle Warin) was a French model turned photographer throughout the 1970s. In 1985 she decided to focus on gallery and film work. This NARS holiday collection was created in collaboration with Sarah and the packaging focuses on inspired imagery from the movie Metropolis (1927) and the idea of transparency. This article from Independent explains a lot more about the collaboration and I encourage you to read it if you have the time/interest. It’s rare for me to look deeper into a collection, but there was something about THIS ONE that made me do so. Perhaps you’ll feel the same.
But anyway, let’s get into the makeup!
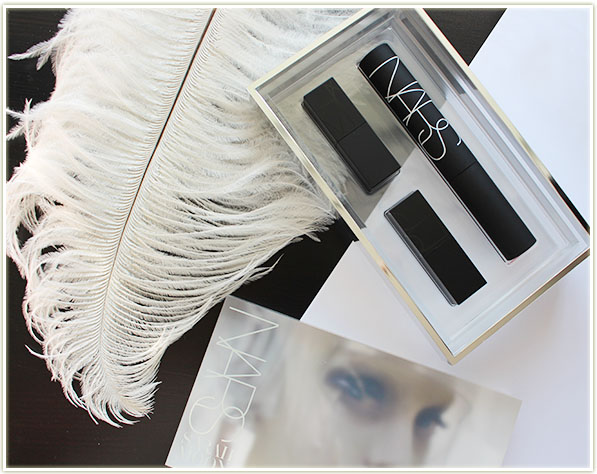
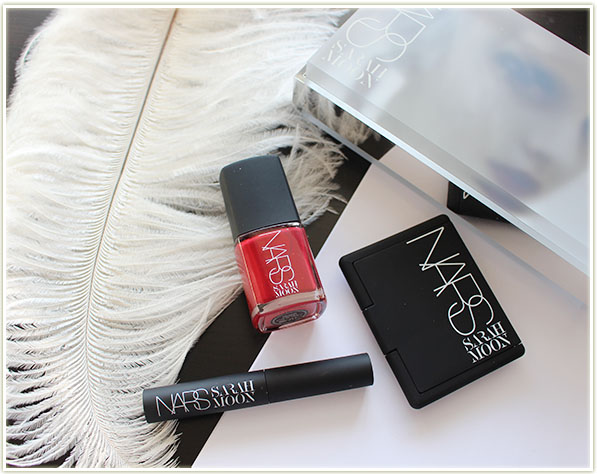
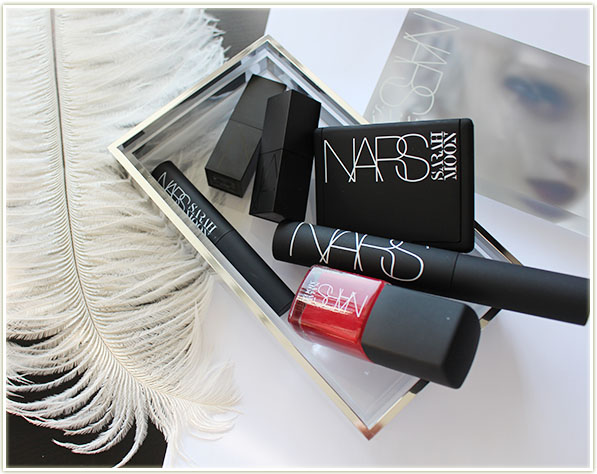
The Get Real Lip & Eye Set is jaw-droppingly gorgeous. The whole set comes packaged in a heavy-duty acrylic box with frosted imaging on the top lid. The lid lifts off to reveal a set that contains two mini Audacious Lipsticks and a full size Audacious Mascara. The products lift out of their separate plastic packaging and the whole box can be recycled as a beautiful keepsake box for you vanity.
The products in the Get Real Lip & Eye Set are healthy size products too – the NARS mascara is full size and the mini lipsticks are larger than any deluxe size sample I’ve ever seen in my life.
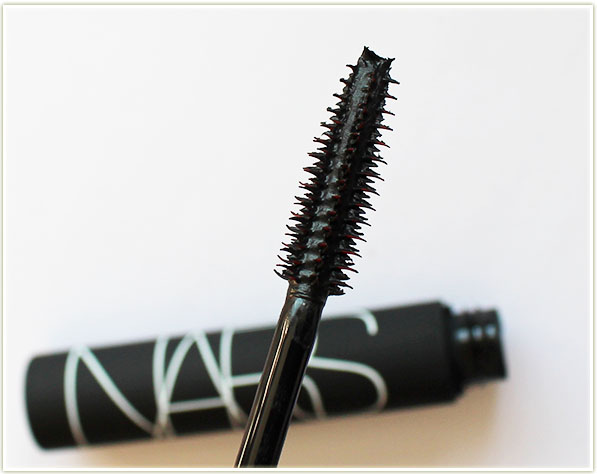
The NARS Audacious Mascara has 200 (!!) molded bristles and lengthening hooks. It’s a plastic bristle brush and it’s on the large side of things for a mascara wand. The bristles and hooks are also far larger than your average size brush, which means they’re also spaced out a lot more.
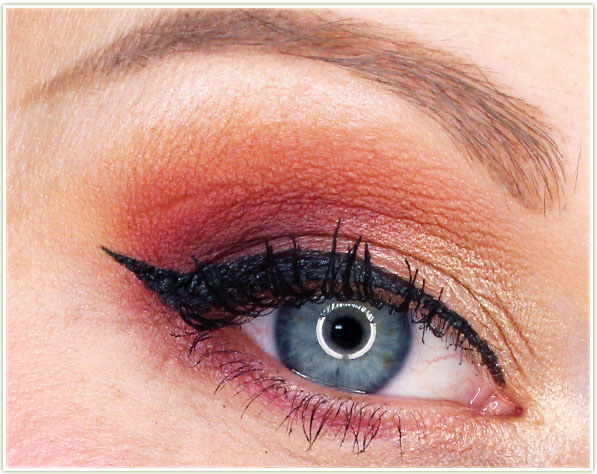
I was neither in love, nor hating on this mascara. It thickened my lashes more than it lengthened them and I found it could clump a little bit (not a bad thing for a volumizing mascara). I personally prefer a bit more of a taper to the ends of my lashes, but, as we’re all aware at this point, everyone has far different views on mascara so it’s really, REALLY hard to review one for someone else. This was neither a wet nor dry formula – it was kind of in between. (Please note, in all following face shots, I have falsies on.) I noticed a slight bit of flaking, but nothing like I’ve experienced in some other mascaras, and it really only happened after the six hour mark.
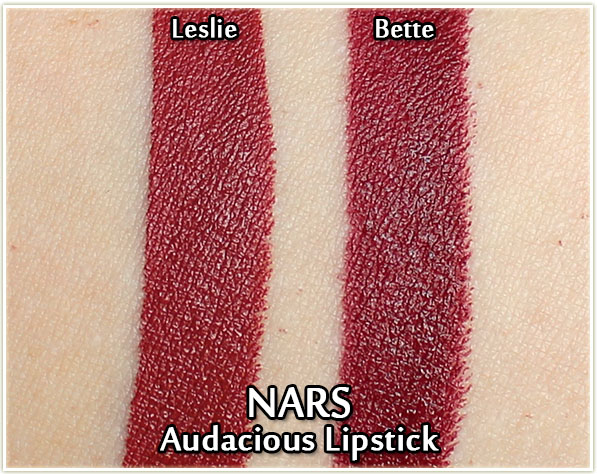
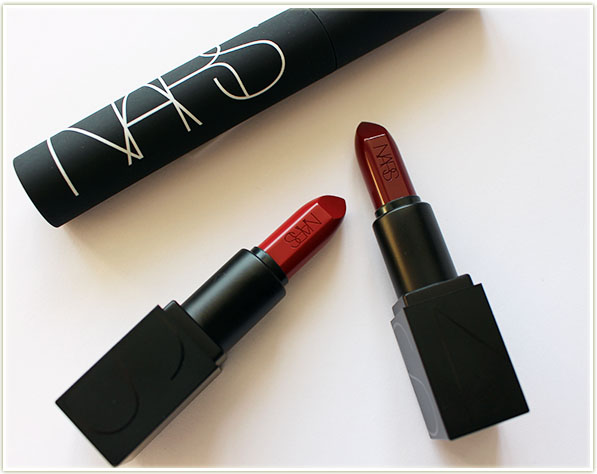
Also included in the Get Real Lip & Eye Set, are two Audacious Lipsticks. And these lipsticks take a back seat to no one! I fell in love with them during the Fall 2016 launch, and these shades are just as impressive as those. My swatch shot shows basically no difference between the two shades, but the face shots definitely tell another story.
NARS Leslie was a slightly thicker and creamier formula for the Audacious line. I found I got a lot of pigment deposit, so I would suggest applying this lightly so that you just don’t end up overapplying. This colour shows up very terracotta with a hint of berry on me.
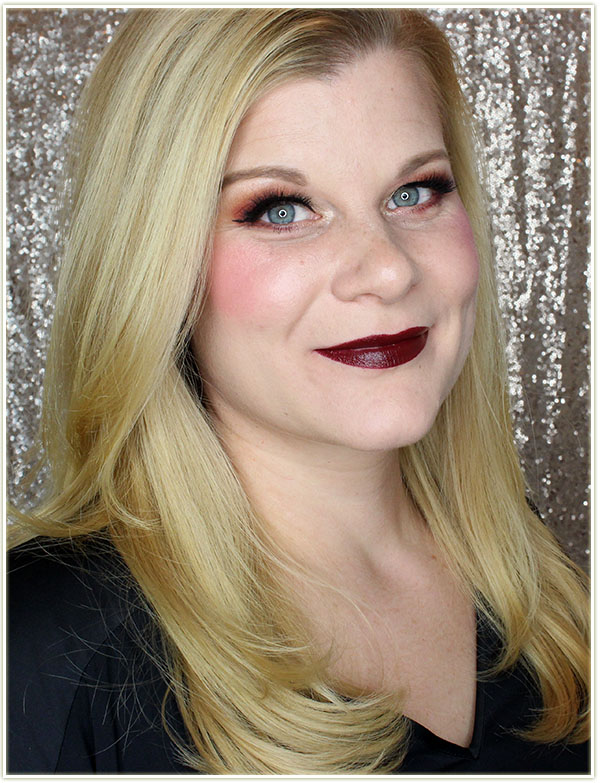
Despite my swatches, Bette comes out very dark in tone and completely dissimilar to Leslie. This was a thinner formula than Leslie and had a tendency to fade right on the center of my lips. I love the colour so much, that I’d just encourage you to wear a lip liner underneath.
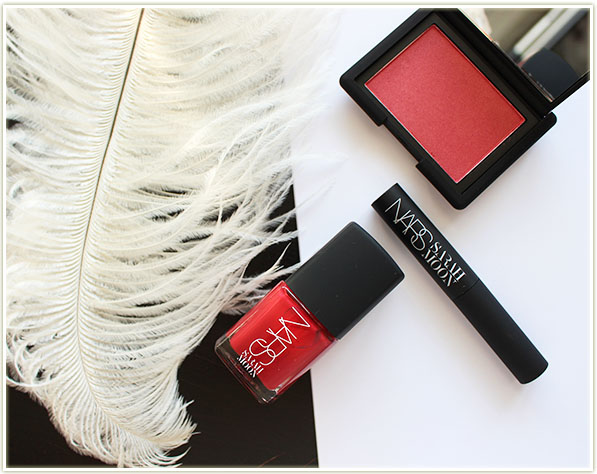
There are a few other sets in the collection (which I don’t have), as well as a slew of individual products. Most of the products, of course, focus on tones of red which is entirely appropriate for a holiday collection.
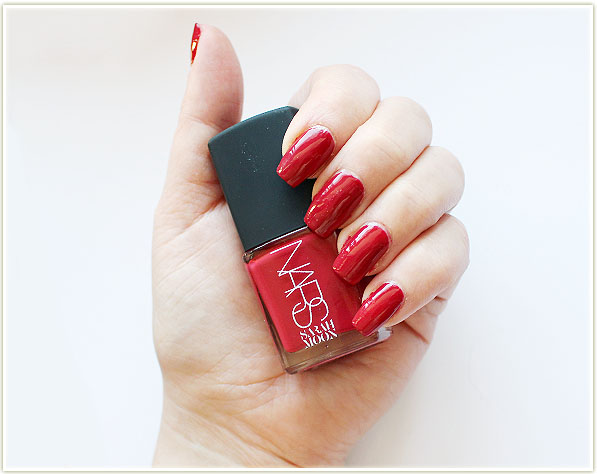
I’m done saying I’m not a nail polish person, and NARS‘ Never Tamed nail polish may be the shade that pushed me over the edge. Having never owned a true red nail polish, this shade has had me staring at my fingernails in awe. It’s almost a week later since I took these pictures and am now writing this post, and I’m still looking at my fingernails and sighing in happiness. This shade is everyyyything to me right now. The formula was very easy to apply, although I did find the brush was identical in width to my pinky finger (never done a nailpolish application in one swipe before!). For full transparency: Because I always apply a glossy taco on top of my nails now (quick drying top coats are something I should’ve gotten into sooner), please be aware I’m also wearing Seche Vive on top. I’m also wearing two coats of Never Tamed.
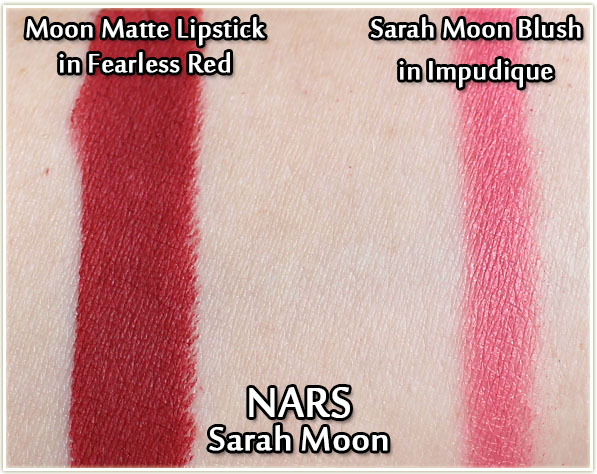
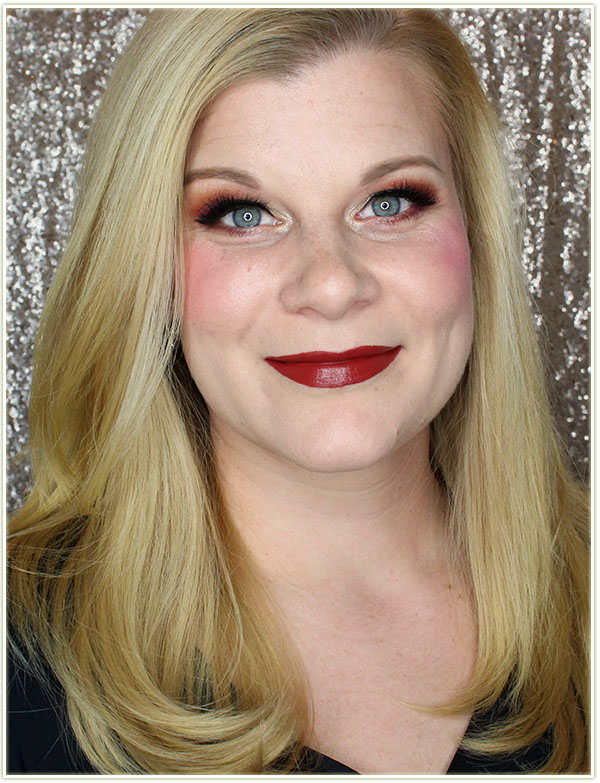
New to me is the Matte Lipstick formula – I have the shade Fearless Red, and I think this is my also first ever NARS blush: Impudique. (“Impudique” is French for “immodest”.)
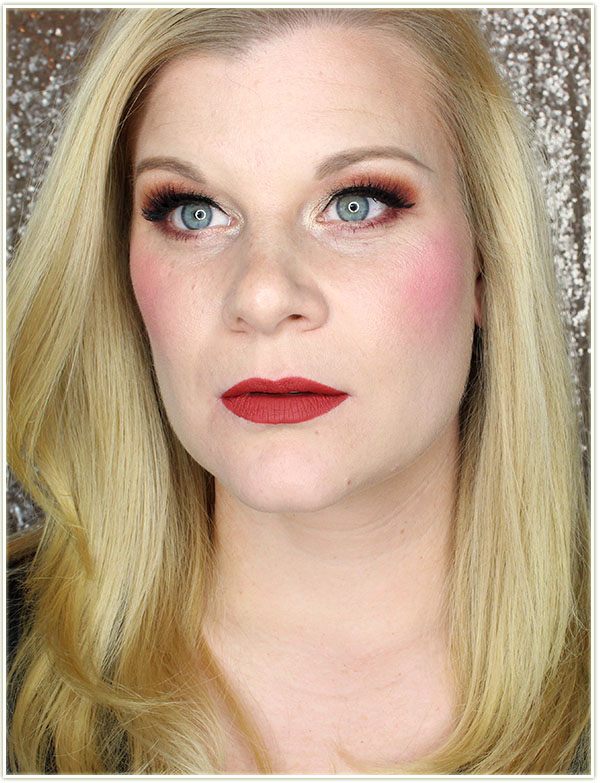
I’ve been wearing Impudique blush in all of the face shots in this post, but I’m also pairing it with Fearless Red matte lipstick in this shot. Impudique blush is beautiful – it is everything I want in a red-toned blush, and more. It’s super pigmented (so go lightly with your brush) and adds an unbelievable colour to my cheeks. It also has a sheen built into the product that I was not expecting – the first time I applied it I was so confused – although I had not, I looked like I had applied highlighter on top! (I’m not wearing highlighter in any of the face shots in this face.) This is also the perfect shade to make it look like you just came in from the cold winter air.
I have mixed feelings about the Fearless Red lipstick. The colour is fantastic, there’s no doubt about that, and I really like how I look wearing this shade (you can see me wearing it in my Drugstore Favourites video). It also feels “comfortably” dry. That being said, I also had varying results: with no primer applied, this lipstick wore well through a lot of talking (my video), but, I wore it the next day to work and coupled it with H&M’s lip primer, it did not do so well. My suggestion would be to wear it without lip primer, even if you feel you usually need one.
So there are the pieces from the NARS Sarah Moon Holiday collection that I’ve been playing around with! My recommendations are towards that stunning nail polish, the Impudique blush (*swoon*) and anything involving the Audacious lipsticks (there’s even a set with eight of the lipsticks!). Let me know if you were intrigued by this collection and whether or not you plan to pick anything up.
Several sites have sold out of various items from the collection, but you can take a gander at them on sephora.com, nordstrom.com and narscosmetics.com.
The products featured in this post were sent to me for consideration.
VIDEO: Drugstore Favourites
BECCA Shimmering Skin Perfector Slimlights (Reviews & Swatches)
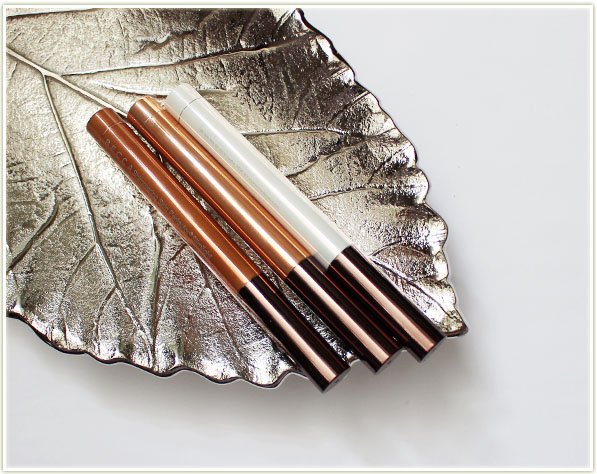
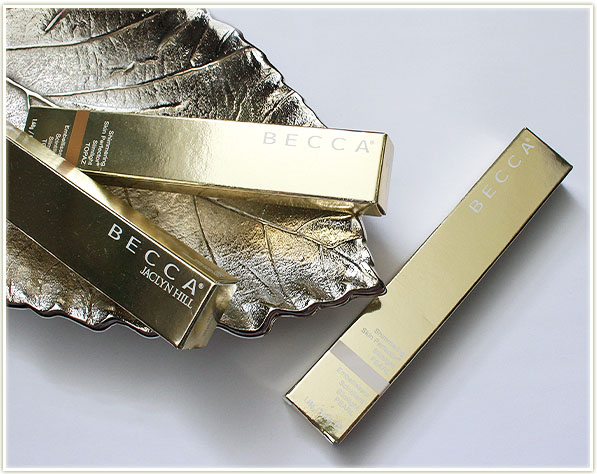
Alongside the BECCA x Jaclyn Hill Champagne Collection release, BECCA released a new addition to their highlighting range: the Shimmering Skin Perfector Slimlights.
With the highlighter craze having no end in sight, the beauty world’s insatiable demand for more highlighters means we’re getting a lot more options to make us shine up to the heavens. And I, for one, hope this craze never ends!
So far the Slimlights have been release in three shades that match their predecessors that are also available: Pearl, Champagne Pop and Topaz.
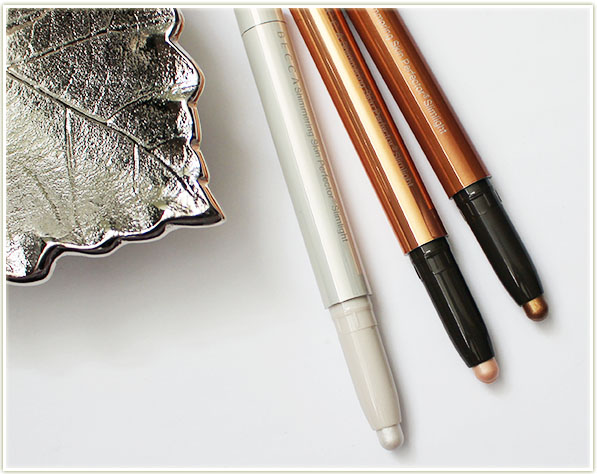
The Slimlights are a twist up tube highlighter that makes for quick and easy application. I’ll be honest, the first time I tried this, I applied it straight from the tube onto my cheekbone and tried to blend it out with my finger. The shine and finish I was accustomed to with BECCA‘s highlighters was just not there and I was more than a little confused. How could my favourite highlighter brand let me down like this??
….and then I read the packaging and Sephora’s site. The Slimlights are intended to create added dimension in targeted areas – down the bridge of your nose, on your brow bone, the top of your lip and the inner corners of your eye. Suddenly this product made a heck of a lot more sense to me!
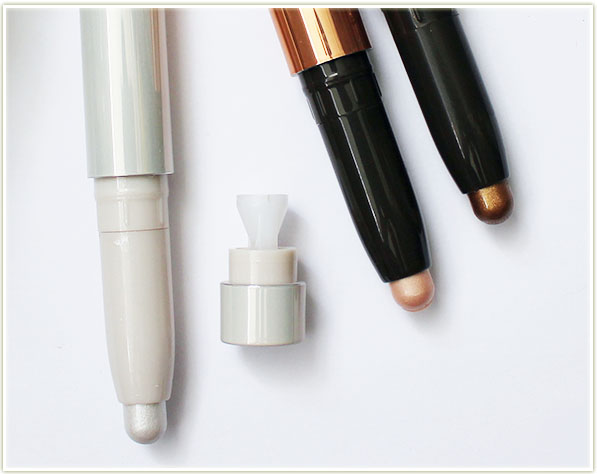
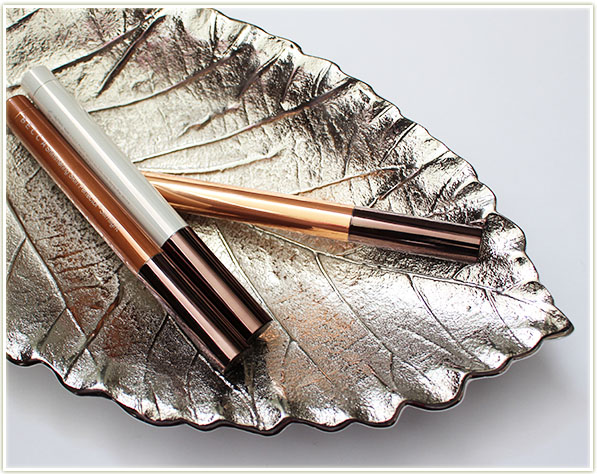
The Slimlights come with a sharpener in the base of the tube which you can pull out and use to sharpen the crease product if you so desire. Personally, I don’t see the point in that since I’m not likely to use this as a liner.
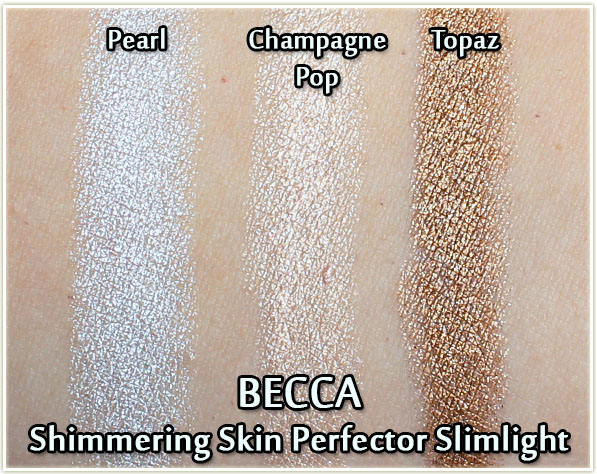
Swatched out, you can see the Slimlights deliver a punch of pigment as well as a lovely sheen. I was especially impressed with Topaz because the bronze-gold coming off on that shade is beautiful! It’s not quite for my skintone, but it is a STUNNING shade.
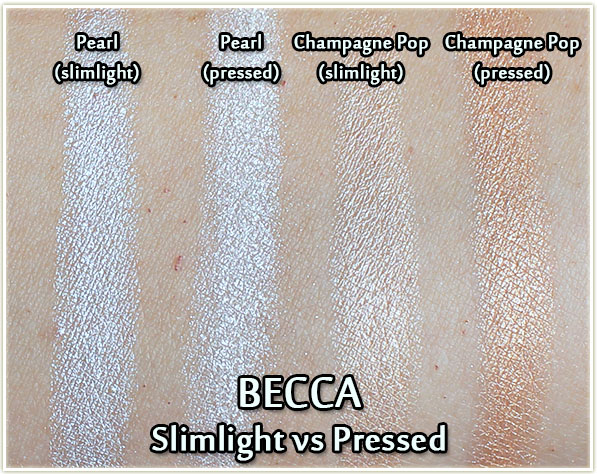
Since I had pressed versions of both Pearl and Champagne Pop, I wanted to compare them for my own sake. Pearl is a dead ringer in both the Slimlight and Pressed formulas, but you can clearly see that Champagne Pop is a much different shade. The Champagne Pop Slimlight is more of a pale yellow-gold (it looks a lot like Moonstone I think, although I don’t own that shade), whereas the Pressed version has far more peach in it.
With my knowledge of how to wear these now intact, I found I preferred to wear the Slimlights on my eyes. Champagne Pop makes the most beautiful inner corner highlight. I like that the shade is slightly paler than the pressed version because I think it works well on me. I also liked adding a bit of Pearl to underside of my brow to add a hint of shine. I did find Pearl was a bit more difficult to blend out than Champagne Pop, but nothing that would deter me from using the products.
Final Thoughts
If there’s one thing I can highlight about this product is the fact that it’s meant as a targeted highlight for smaller areas of your face. I remember reading the tear sheet I had after I’d used the product the first time (on my cheek) and I was like “well aren’t you dumb, Chelle!”.
After figuring out how to properly use the Slimlights, I am pleased to report that I love what they do. I have often struggled with inner corner highlights for my eyes because I feel like when I use a pencil brush to apply powder it goes freaking everywhere, including getting directly in my eye. With the Slimlight, I was able to target the inner corner directly and blend it out with my finger. It’s a small thing to be relieved about, but it definitely made me feel better about applying product there. Not to mention that it definitely felt quick, easy and foolproof! (Sidenote, I have tried Topaz on my eye as a lid colour on a whim, and I found it creased pretty quickly. So while the product says nothing about using it on your eyes, I thought I’d just give you the heads up that I tried it and it didn’t work out for me.)
Do I recommend these cheekbone highlighting? Absolutely not – but they’re also not meant for it! Do I recommend these for specific highlighting needs on smaller areas of your face? 100% percent. My personal shade preference? Champagne Pop – but get the one that you feel would suit you best!
The BECCA Shimmering Skin Perfector Slimlights can be purchased on sephora.ca for $34 CAD each or on sephora.com for $28 USD each.
The products featured in this review were sent to me for consideration.
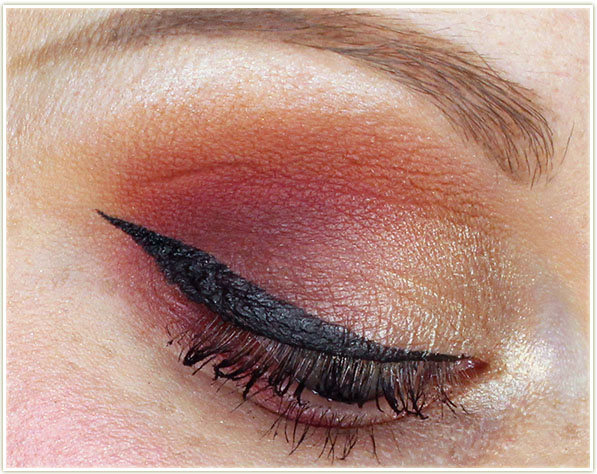
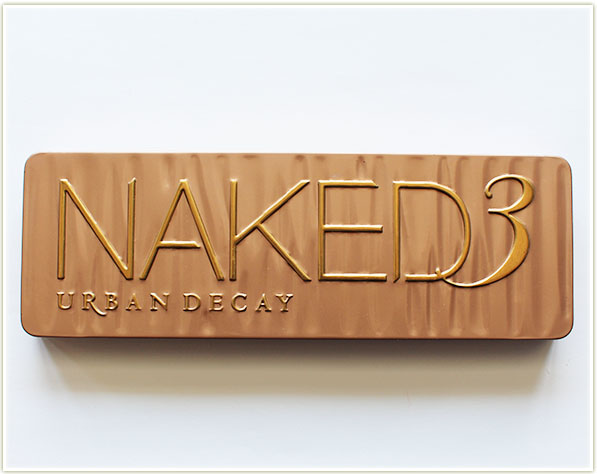
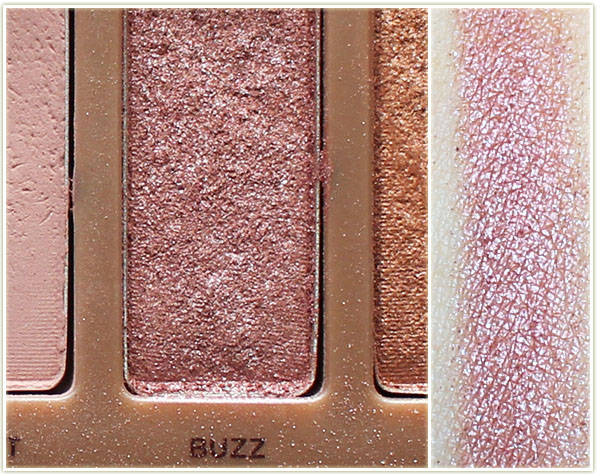
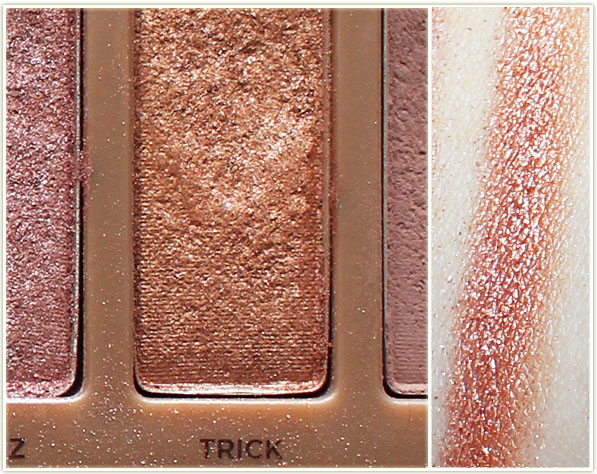
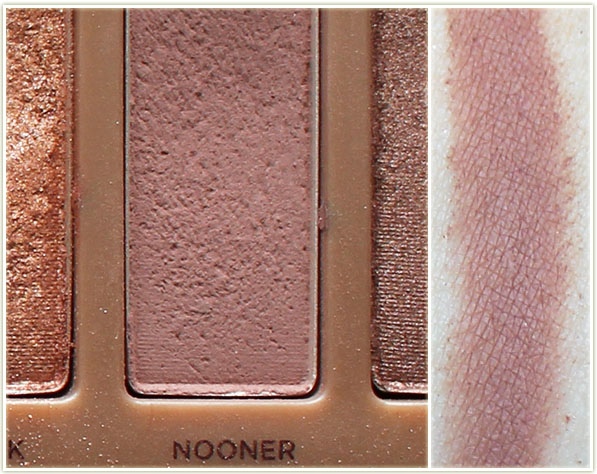
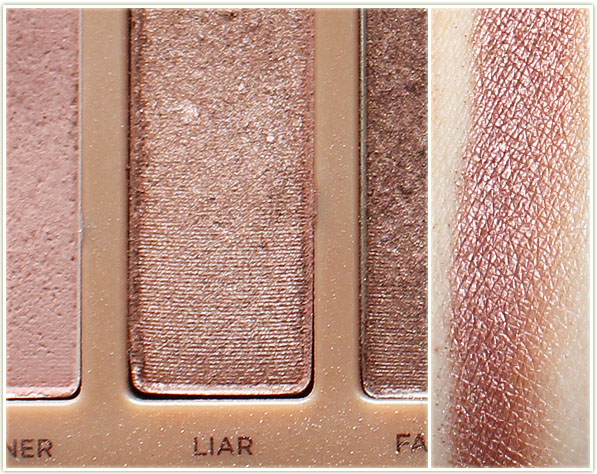
Swatch Sunday: Urban Decay Naked 3
We’re digging into the very ends of my palette collection guys! According to my Google Spreadsheet, this is the 87th Swatch Sunday that I’ve done. I’m actually a little bit taken aback by that because it doesn’t feel like that many! (You can look back at all of them here!)
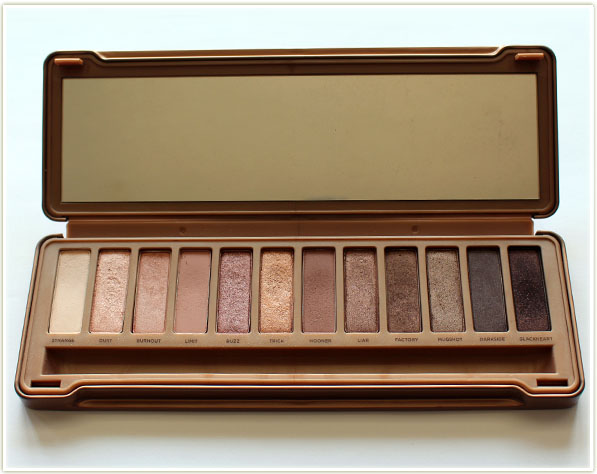
So this is my Urban Decay Naked 3 palette. I remember staying up till midnight on launch day to get this palette (in December 2013!)! It’s right around this time that I realized I was a eyeshadow palette junkie.
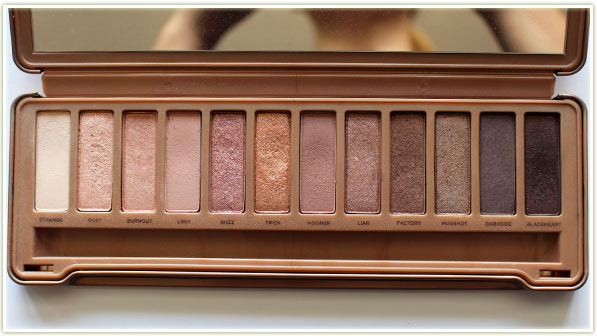
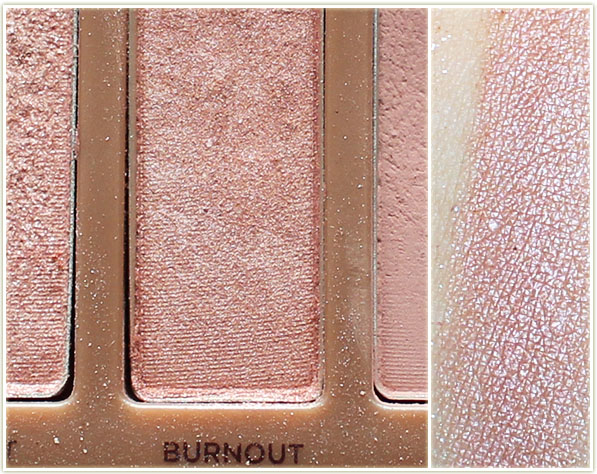
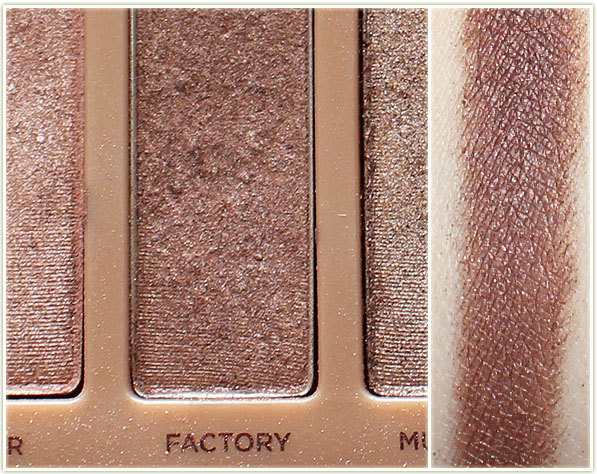
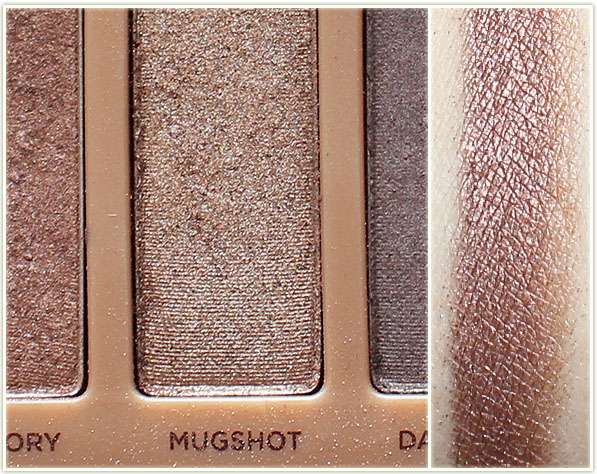
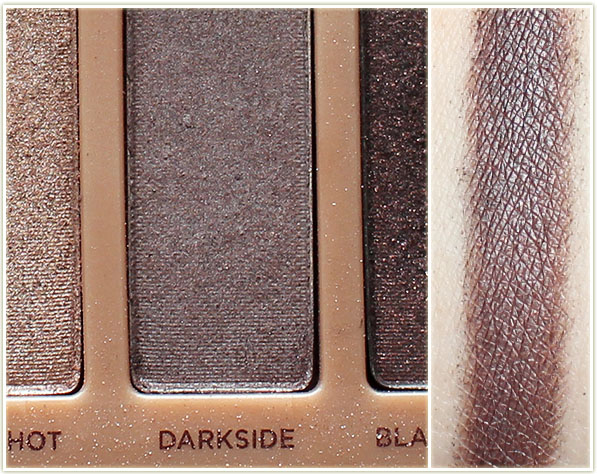
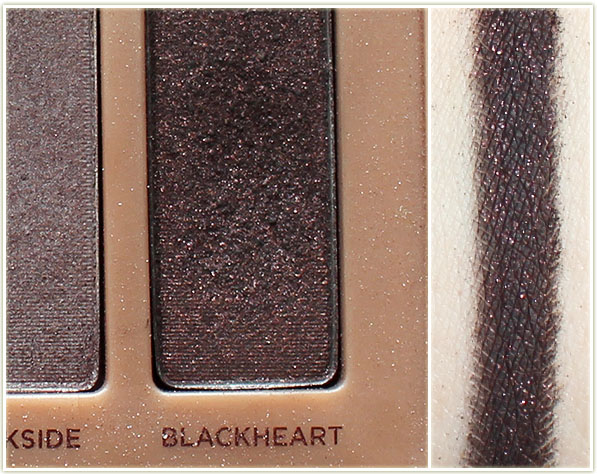
Although I don’t reach for this palette as much as I used to, it’s quite a lovely palette. I like that even though it was a pink-themed palette, the entire right side of the palette is mostly taupes/neutrals. And that Blackheart shade? Perfection!
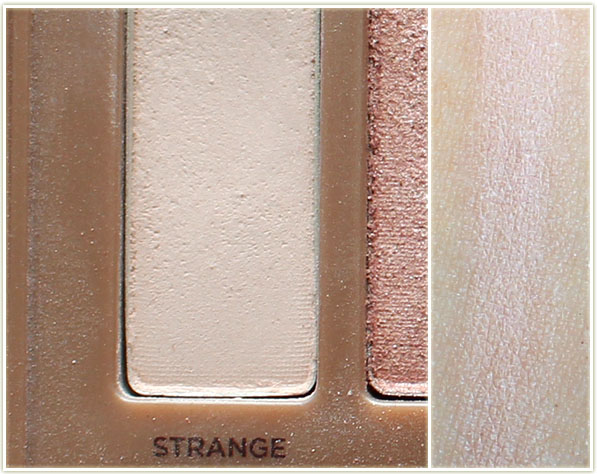
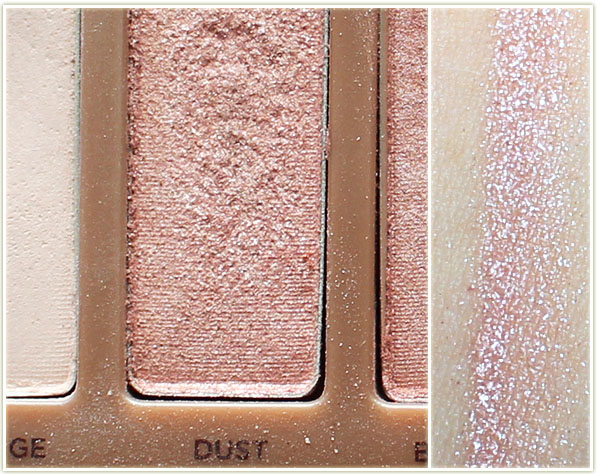
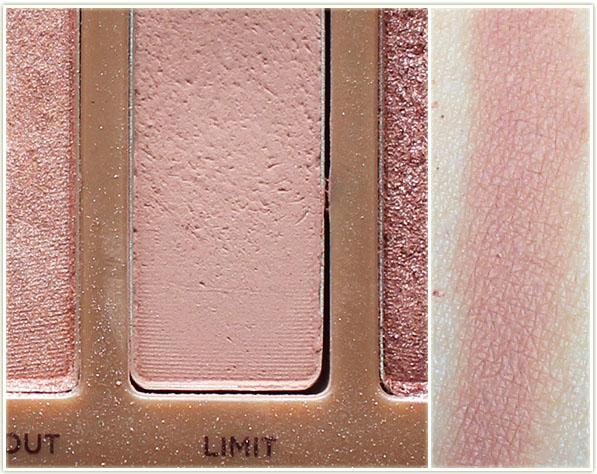
Urban Decay Naked 3 Swatches
The Urban Decay Naked 3 palette is a permanent product and can be purchased on sephora.ca for $66 CAD or on sephora.com for $52 USD. (Total side note, I pulled up my original online order for this palette on Sephora to double check when I bought it and the price tag was $52 CAD back in December 2013. It’s had a FOURTEEN DOLLAR PRICE HIKE in three years! What the HELL.)