Category Archives: Reviews

Hard Candy Wet Ever Bold Hold Lip Lacquer (Review & Swatches)

Hard Candy Wet Ever in Temptress

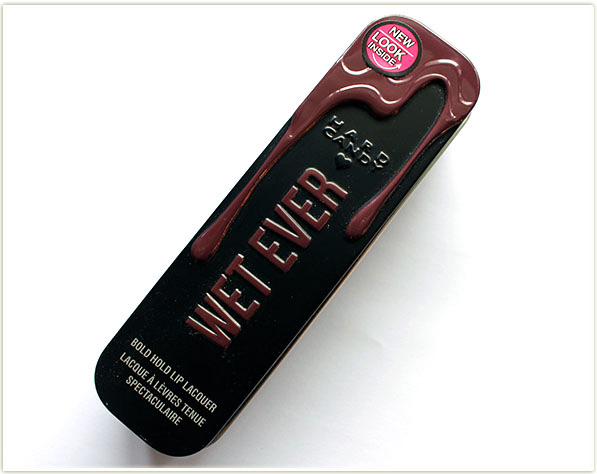
Has anyone else spotted these adorable tin packages of lip gloss by Hard Candy at Walmart yet?? These are Hard Candy‘s Wet Ever – a bold hold lip lacquer, although I do believe they have a matte one as well.
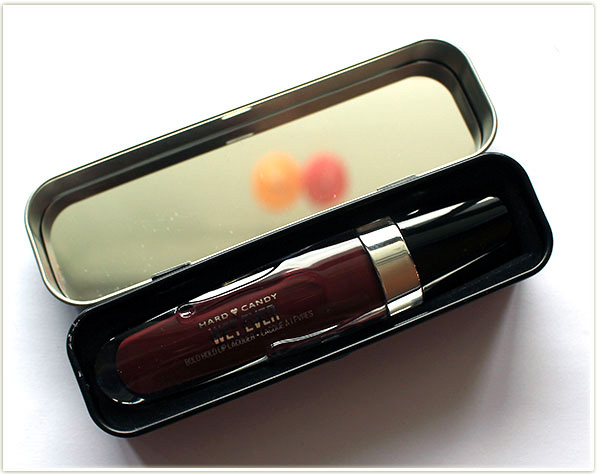
Hard Candy Wet Ever Bold Hold Lip Lacquer

Every time I see these tins I’m so impressed by the quality. I mean, it’s fairly unique to have a tin with a relatively large mirror inside (in the lid) to house your lip gloss! Even more so for a drugstore brand to do this! Each tin is colour-coded on the outside to match the lipstick inside with a dripping, melty lipstick that’s embossed on the tin. It’s such a nice touch!
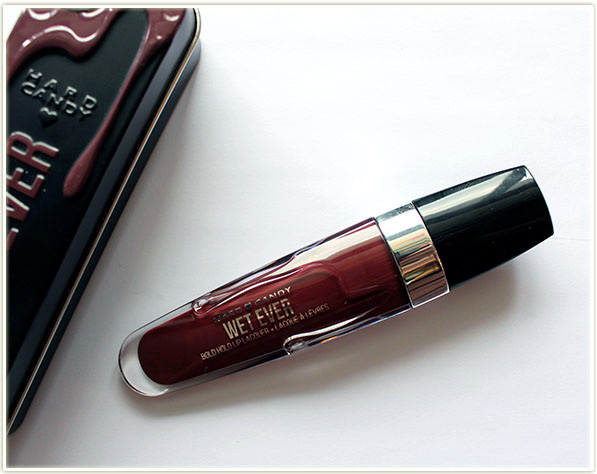
Hard Candy Wet Ever Bold Hold Lip Lacquer in Temptress

The tube of product is actually entrancing – the component is specially crafted with upraised drips of “melting lipstick” and it comes to a flattened out point at the end. I know I’m talking a lot about the packaging, but I’m really quite enamoured by it. It’s so unique for a drugstore brand!
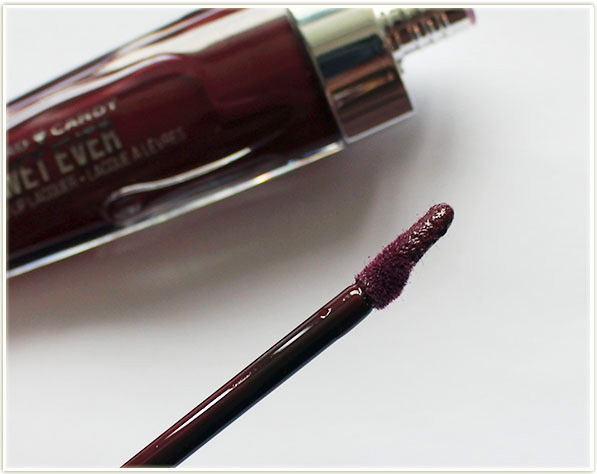
Hard Candy Wet Ever has a flattened out doefoot applicator.

Twist off the top and you’ll pull out your doefoot applicator. This one doesn’t have the “bucket” that some doefoots now have, but this one has more of a scooped shape that comes to a flattened out tip. This does wonders to help cover your entire lip, and the tip is also great for getting more precise lines around the edge of your lip line.
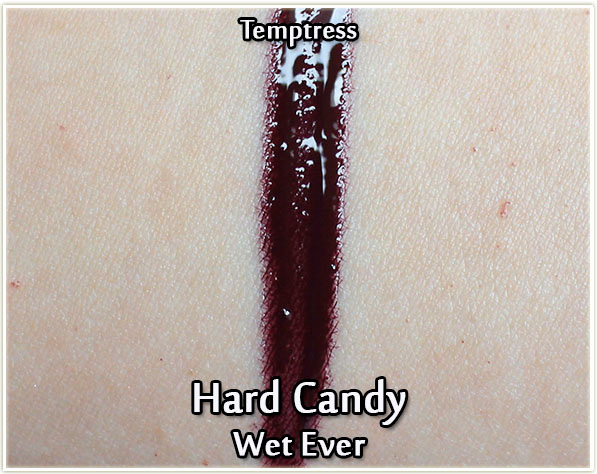
Hard Candy Wet Ever Bold Hold Lip Lacquer in Temptress - swatch
Hard Candy Wet Ever Bold Hold Lip Lacquer in Temptress – swatch

The colour I have is Temptress – a deep burdgundy-red with a hint of brown. Pigmentation is solid in one swipe (as shown above) and it definitely has that lacquer-like look because it looks very, very wet on the lips.
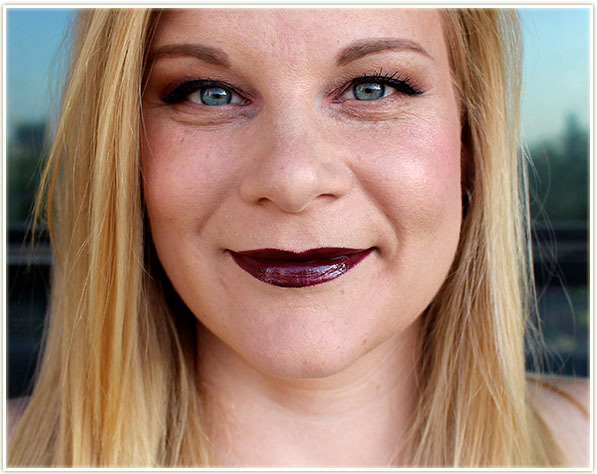
Wearing Temptress
Wearing Temptress

In these shots, I’ve applied the Wet Ever in Temptress without anything underneath so I could show you just how pigmented the product is. Hard Candy says these have the longwearing properties of a liquid lipstick with the shine and hydration of a lip gloss. I agree completely with the lip gloss statements (shine and hydration) but I feel like it misses the mark with the liquid lipstick claims (you definitely need to re-apply if you want it to stay glossy).
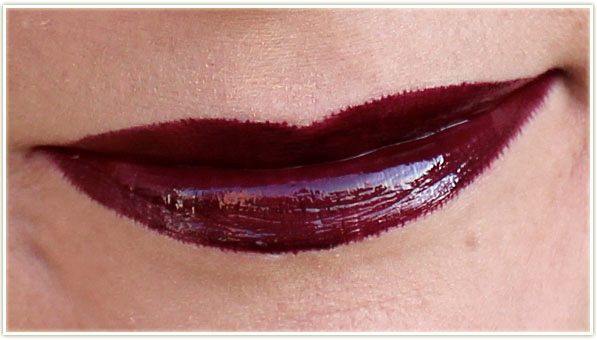
Close up of Temptress

In practice, I know that a lip gloss is never ever going to work on me because I am prone to lip line bleed out IMMEDIATELY upon application. You can see what I mean in the shot above- I had *just* applied the Wet Ever and you can see that I’m getting “the fuzzies” around the edge of my lips. So while the colour and pigmentation is gorgeous, for me this is a product that I have to use a lip primer and lip liner underneath in order to get it to stay put. I am an exception though, as most of the people I have talked to over the course of the years don’t experience such intense lip line bleed out as I am prone to, so please keep that in mind.

Longevity is what I would expect from a lip gloss – around 1.5 to 2 hours before I felt the need to reapply. I was extremely impressed that my lips continued to feel hydrated while wearing this even though I had tested it with a primer and a lip liner (which are generally prone to drying my lips out a tad). The colour is INTENSE on these too – solid, opaque and super glossy. I loved the consistency of the product and there was no scent, which is a huge bonus for me.

In short, although the Hard Candy Wet Ever needs a little bit of TLC from me in order to keep it in line, I think it’s a really decent product that packs one hell of a punch.

You can buy the Hard Candy Wet Ever Bold Hold Lip Lacquers on walmart.com for $5 USD each.

The product featured in this post was sent to me for consideration. Post may contain affiliate links.
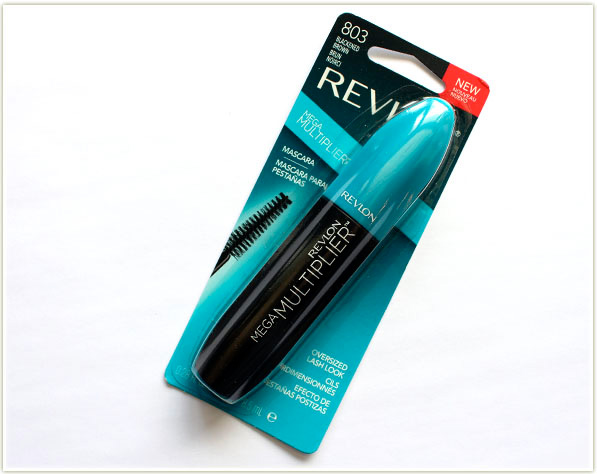
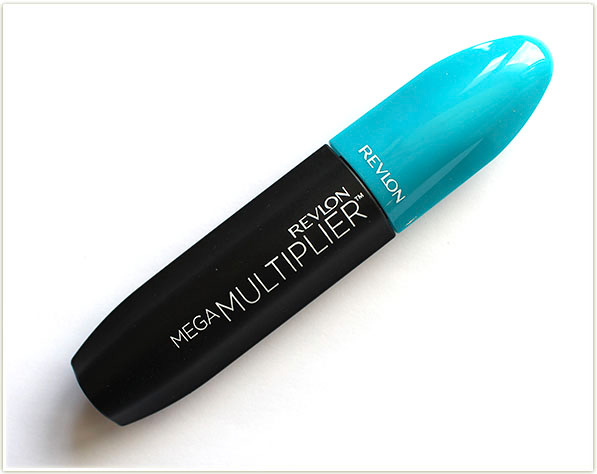
Revlon Mega Multiplier Mascara (Review & Photos)

Revlon Mega Multiplier Mascara

In all of my years using makeup, I don’t think I’ve EVER used a Revlon mascara. How can that be??

Revlon Mega Multiplier Mascara

I was recently sent this Revlon Mega Multiplier Mascara by Influenster to try out, so now I’m finally getting a chance to try out this mainstay drugstore brand’s lash offerings!

Influenster, for those unaware, is a web site where anyone can sign up to receive free product to try out. You can sign up here if you’re interested.

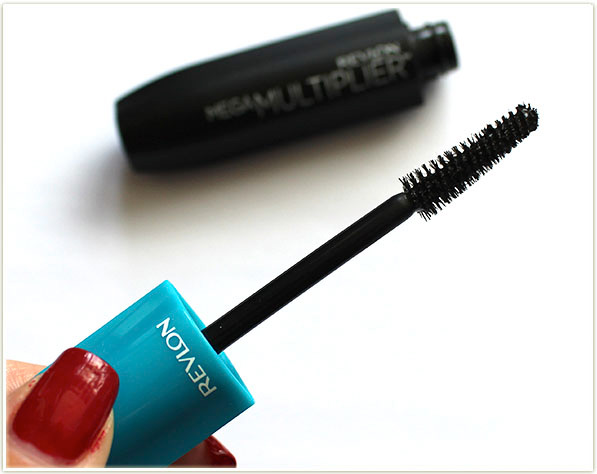
Revlon Mega Multiplier Mascara

The Revlon mascaras all come in a flattened out tube package which actually makes it really easy to twist the lid off because your fingers catch on the edges. I was sent the Mega Multiplier Mascara in the shade Blackened Brown… which… kind of disappointed me at first as I’m not especially into brown mascaras. However, I swear you would never think this mascara shade was anything other than black!

The Mega Multiplier Mascara features a conical wand (my favourite kind!) and promises to give you an oversized lash look. The product itself contains tiny fibers to help amp up your lashes. It’s also a tubing formula which will help decrease flaking.

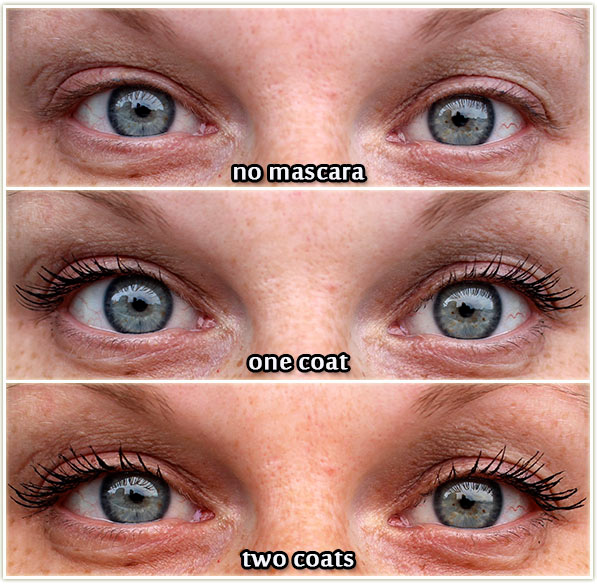
Revlon Mega Multiplier Mascara - comparison
Revlon Mega Multiplier Mascara – comparison


On my lashes, I found it did a really nice job of separating them, but I would’t say the volume was extreme. The fibers do actually lengthen my lashes, which was a nice surprise since I don’t usually find fibers do much other than bulk up my roots. That being said, the fibers are quite small, which makes it easy to manage/apply to your lashes so you won’t be getting an overly intense clumped up look.

The formula is neither super wet, nor super dry. It’s that happy medium that I think a lot of people will enjoy. I found the formula was nice overall, but with a name like Mega Multiplier I just automatically assumed I’d get more bang out of my lashes. I’m normally a one coat mascara kind of person (usually because I feel like mascaras get too clumpy if I add more than one layer), but I found the Mega Multiplier layered really, REALLY nicely. Possibly the best I’ve ever tried before! Even if I let one coat FULLY dry and then added another, my lashes still looked gorgeous and not spidery or clumpy.

Since this is a tubing mascara, I found it came off extremely easily with warm water. In fact, it actually struggled to come off with an oil based remover! So don’t fret with an oily remover – just stick to warm water and you’ll see how easily this mascara swipes away! That may concern you (as it did me), since you’d figure that would mean any kind of water would make the mascara melt. Not so! I experienced very minute flaking (like… maybe one flake a day) and no smudging whatsoever.

Let me know if you’ve tried out any Revlon mascaras before and what your favourites are!

The product featured in this post was sent to me by Influenster for review. Post may contain affiliate links.#RevlonXLashes

Cover FX Custom Enhancer Drops in Halo (Review & Swatches)

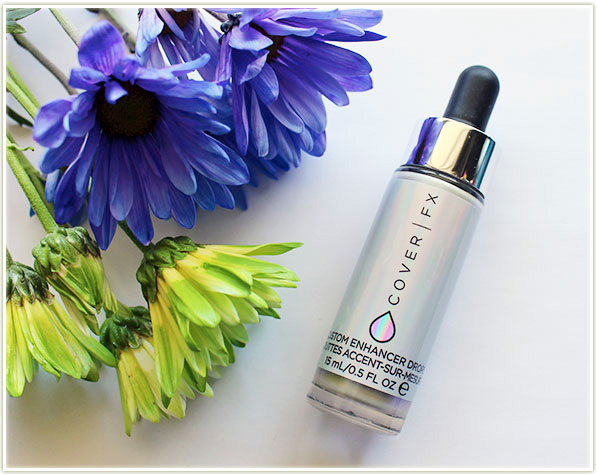
Cover FX Custom Enhancer Drops in Halo

There are some products that are just so mindblowingly beautiful that I just HAVE to have them, no matter what the price tag (for example, Guerlain’s Flocon Enchantees)! I first saw these Cover FX Custom Enhancer Drops in Halo on my beauty blogging buddy Shawna (see her post on these here) at an event many months back and was immediately enchanted. The insane reflection on her cheekbones was killer!

Cover FX Custom Enhancer Drops in Halo

So what is it? It’s a liquid highlighter that comes in a dropper style tube. Cover FX makes a few shades (I reviewed the shade Moonlight earlier this year) but the shade Halo is by far their most unique shade in the range. They’re billing this as a “holographic, multi-dimensional” product, but we all know by now that unless you can see rainbows, it’s most certainly NOT holographic.

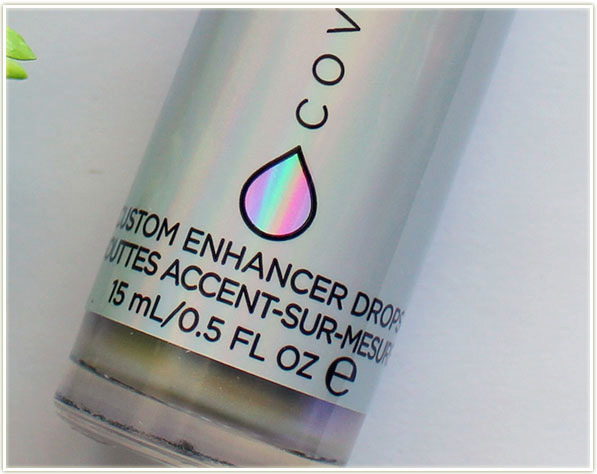
Cover FX Custom Enhancer Drops in Halo

(Although the package certainly tries to lead you to think that it actually is holo!)

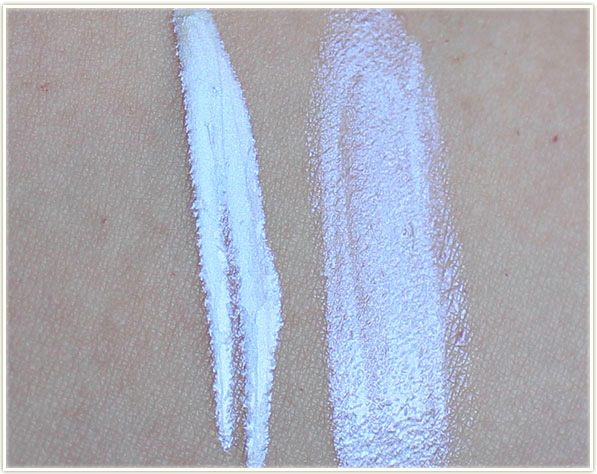
Cover FX Custom Enhancer Drops in Halo - swatched
Cover FX Custom Enhancer Drops in Halo – swatched

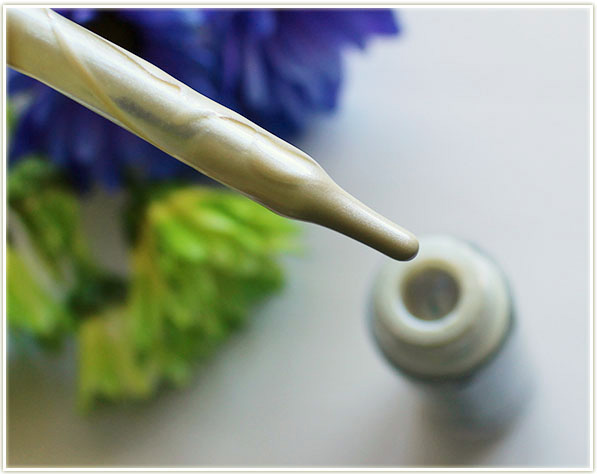
The product initially appears quite white, but it shifts to a lavender, blue, silver – it’s absolutely gorgeous and extremely ethereal looking (which is a quality I’m always looking for in makeup products as I love that kind of fairy aesthetic).

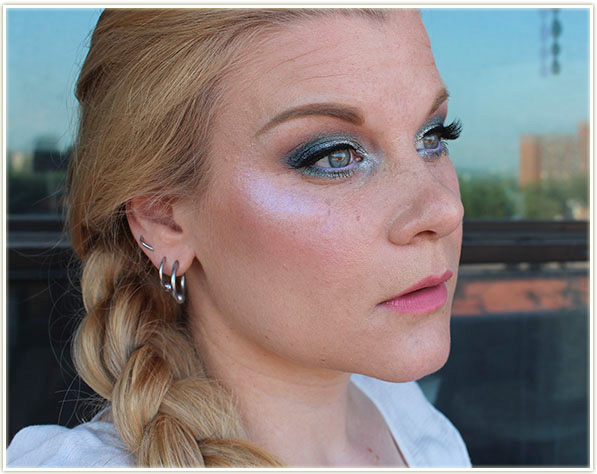
Wearing Cover FX Custom Enhancer Drops in Halo
Wearing Cover FX Custom Enhancer Drops in Halo (natural light)

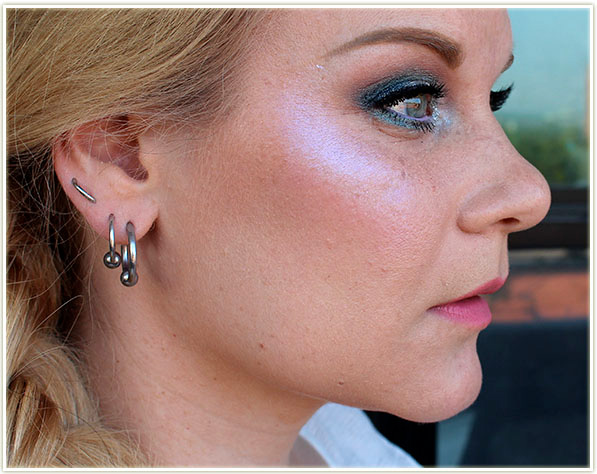
On the cheekbones it’s truly something else. These shots were taken in natural lighting so that I could attempt to capture just how beautiful it is.

Wearing Cover FX Custom Enhancer Drops in Halo
Wearing Cover FX Custom Enhancer Drops in Halo (natural light)

Shawna remarked in her post that said she couldn’t believe how many people came up to her and commented on her highlighter when she wore it. And she was bang on. I wore this to an event last night and EVERYONE I talked to asked me about what was on my cheekbones. Considering that I often wear “irregular” coloured highlighters (I’m a big fan of Anastasia’s Moonchild and Kat Von D’s Alchemist), I was surprised that people chose to comment on this highlighter instead of the greens, purples and blues I’ve worn in the past. But I guess that’s a testament to just how much this one stands out!

My favourite way to apply this is with my fingers. I’m not a huge fan of using fingers for my makeup in general, but it does work best for this highlighter in particular. I’d drop a blob on the back of my hand, dip a fingertip into it, and then pat a few drops onto my cheekbone. Then I’d take a clean finger and pat along my cheekbone to blend it out. I found two layers of this is what looked best for me. I did try it with a brush because I liked the shade Moonlight with a duofiber brush, but I found it just didn’t have the right amount of oomph when I did it that way (plus it blended out kinda funny with a brush).

In terms of whether or not this is worth your money… I’d say yes. This is a VERY expensive product in my opinion ($52 CAD/$42 USD), but I feel like it’s truly unique. There’s a TON of product in the bottle, so you needn’t worry about running out. If you’re balking at that price tag though… do what I did, and buy it during a Sephora sale. I picked mine up during the April sale, but there’s another one coming in November!

The Cover FX Custom Enhancer Drops can be purchased on sephora.ca for $52 CAD and on sephora.com for $42 USD.

Hard Candy Sheer Envy Prismatic Highlighter (Review & Swatches)

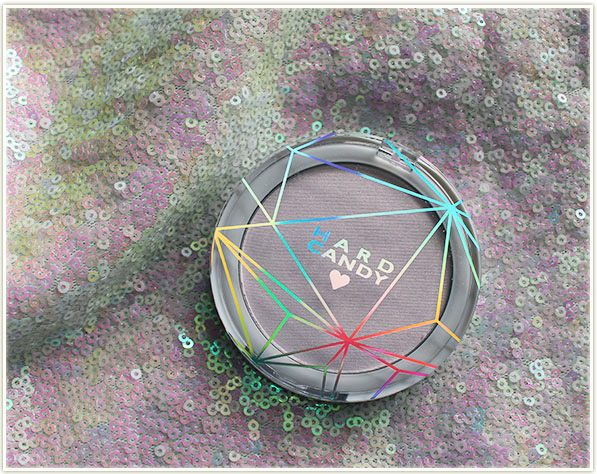
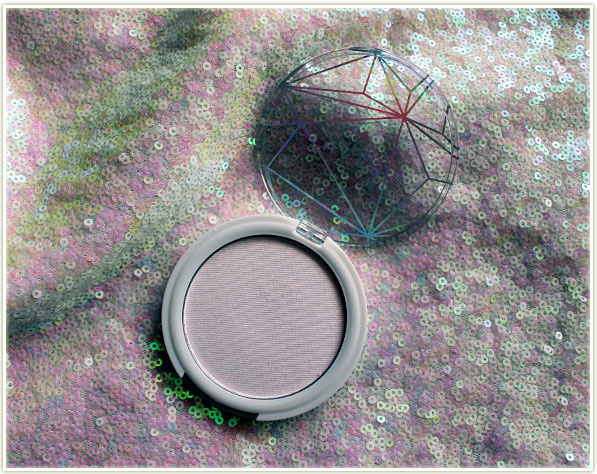
Hard Candy Sheer Envy Prismatic Highlighter

I had high, high hopes for the Hard Candy Sheer Envy Prismatic Highlighter! It’s billed as an iridescent pearl powder that is intended to catch the light and give you good lighting no matter where you go.

Hard Candy Sheer Envy Prismatic Highlighter

The product itself retails for $6 USD at Walmart and contains 12 grams of product, which is not only a great price point, but also a ton of product. However… the goodness stops there. (And this pains me, because I do really enjoy Hard Candy.)

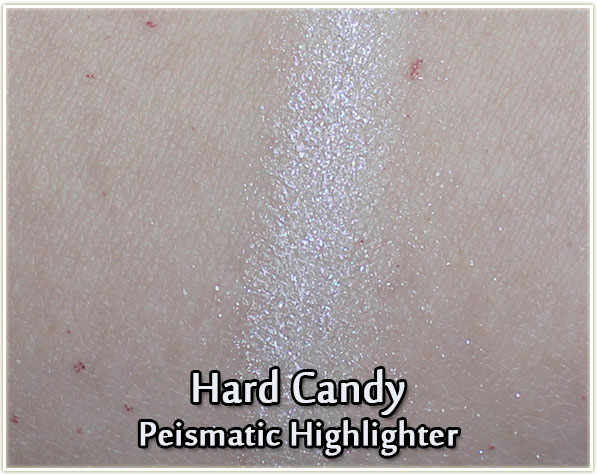
Hard Candy Sheer Envy Prismatic Highlighter - swatched
Hard Candy Sheer Envy Prismatic Highlighter – swatched

Swatched on the skin, you get a white, chunky, speckled-glitter mess. As someone who is IN LOVE with glitter, I was even astonished with just how much I did not like this. The powder has a bit of a purple/pink cast, but none of that is displayed on the skin. All you get is a white chalky mess with glitter thrown in.

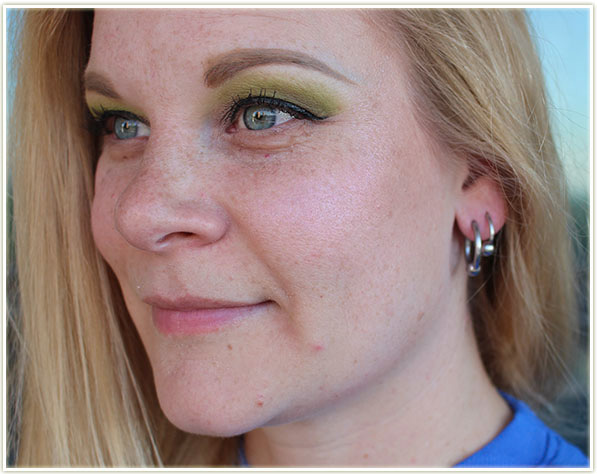
Wearing Hard Candy Sheer Envy Prismatic Highlighteron my cheekbones

Like, can you even see it on my cheekbones? Because I applied it very heavily. Let’s zoom in.

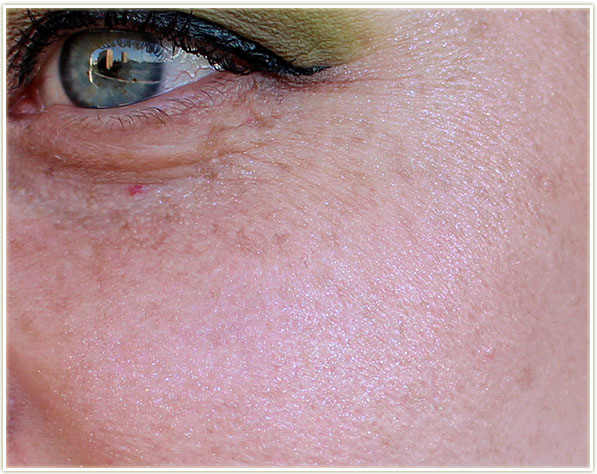
Zoomed in shot of my cheekbone

Oh there we go. Now you can see it. You can see the stuck-in-my-pores type glitter mess it’s created too.

Final Thoughts

Hard, HARD pass on the Hard Candy Prismatic Highlighter. I was so eager to try out a drugstore highlighter that would potentially compare to the higher end highlighters that are on the market right now, but this doesn’t even do anything but create a mess on your face. After writing my review I went to the internet to find other reviews and I had to laugh/cry at all the one star ratings I was seeing. I am definitely not the only person who felt this product was a total dud! Yikes.

My recommendation? Pass on the Prismatic Highlighter and get Hard Candy‘s Tiki highlighter instead. It’s insanely beautiful and actually worth your money.

The product featured in this post was sent to me for consideration. Post may contain affiliate links.
Clinique Blend It Yourself (BIY) Pigment Drops Foundation (Review & Swatches)

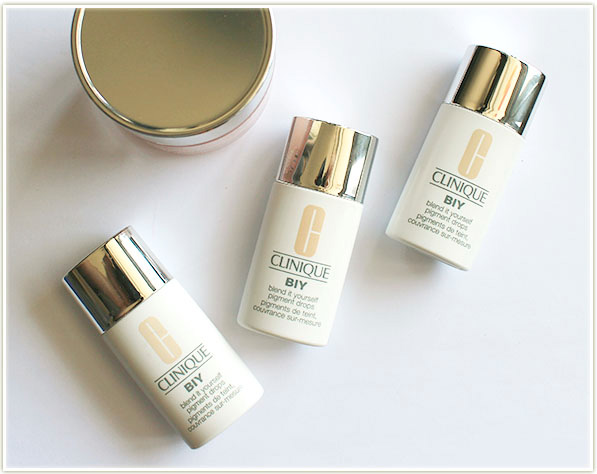
Clinique Blend It Yourself (BIY) Pigment Drops

Earlier this year, Clinique launched their Blend It Yourself (BIY) Pigment Drops – a pure pigment product that is intended to be mixed with your moisturizer to create varying levels of coverage.

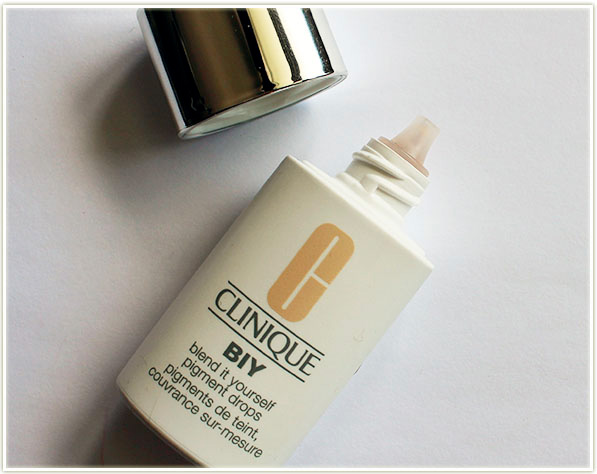
Clinique Blend It Yourself (BIY) Pigment Drops

Clinique indicates that “one drop of creates sheer cover[age]. Two or three, a flawless finish”. The more drops you use, the thicker your coverage will be! The BIY pigment will take on the finish of the moisturizer you use it with, so you can expect a more radiant coverage with a radiant moisturizer and/or one with a sunscreen base, or a more matte look with a mattifying moisturizer.

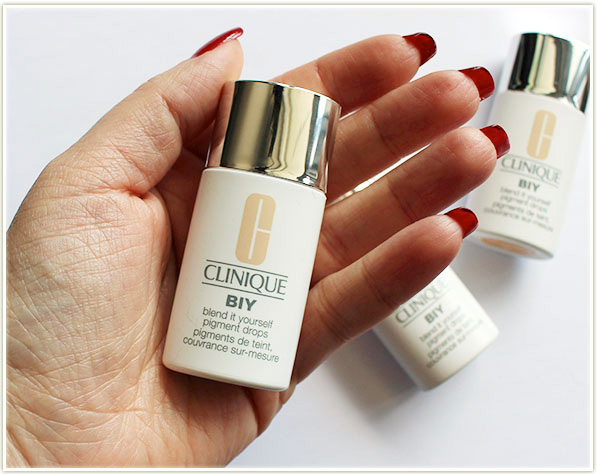
Clinique Blend It Yourself (BIY) Pigment Drops

One thing most people don’t realize is just how small the bottle is! Because this product is strictly a pigment, it’s lacking in all of the other “stuff” that would usually fill out a foundation bottle to the normal one ounce/30 ml size. These bottles do contain 0.34 ounces of product, which is the third of a size of a regular size of foundation. So it’s not THAT tiny – it just LOOKS really tiny.

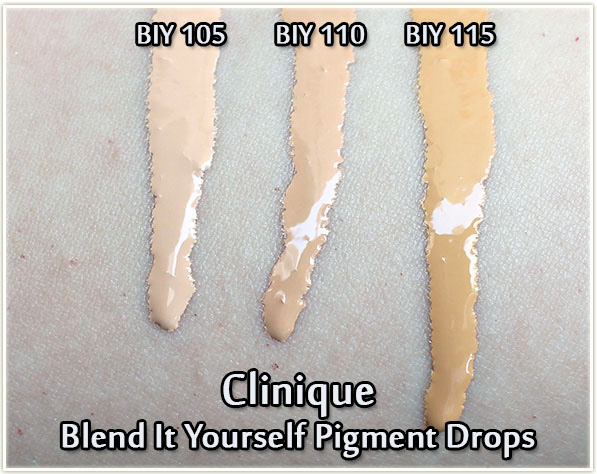
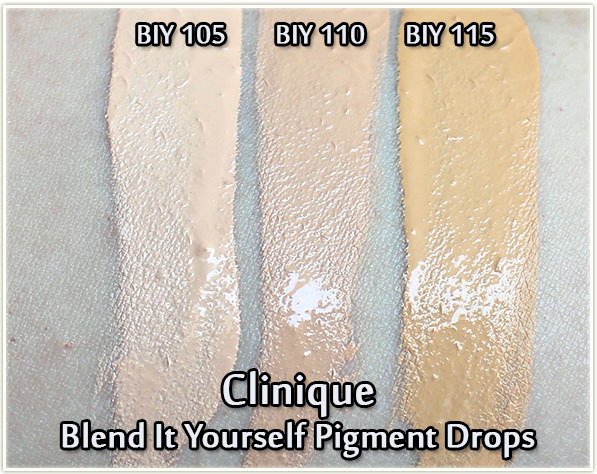
Clinique Blend It Yourself (BIY) Pigment Drops - swatches of BIY 105, BIY 110 and BIY 115
Clinique Blend It Yourself (BIY) Pigment Drops – swatches of BIY 105, BIY 110 and BIY 115

I have three of the shades starting from the lightest BIY 105 through BIY 115. The shot above is the product just after I’d tipped it out onto my arm (after shaking it vigorously to mix the pigment). You can see just how liquid the pigments are because they were dripping down the underside of my arm very quickly!

Clinique Blend It Yourself (BIY) Pigment Drops - swatches of BIY 105, BIY 110 and BIY 115
Clinique Blend It Yourself (BIY) Pigment Drops – swatches of BIY 105, BIY 110 and BIY 115

Smoothed out, you can see the colouring a lot better in the pigment.

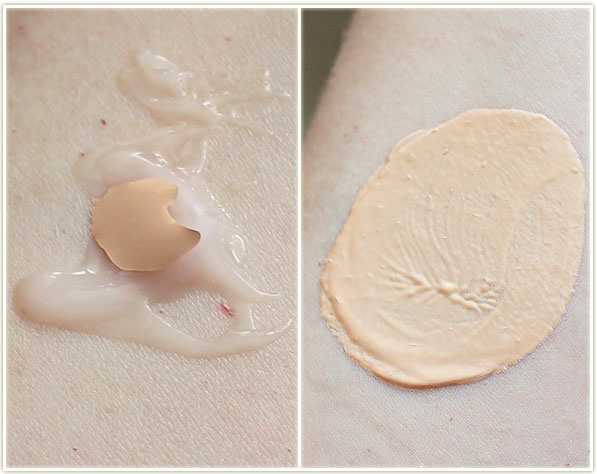
Clinique Blend It Yourself (BIY) Pigment Drops combined with moisturizer

I ended up mixing the pigment with Clinique‘s Moisture Surge moisturizer. More often than not, you need far less pigment from the bottle than you think you do. Every time I used it I was taken aback by just how much the pigment spreads throughout the moisturizer.

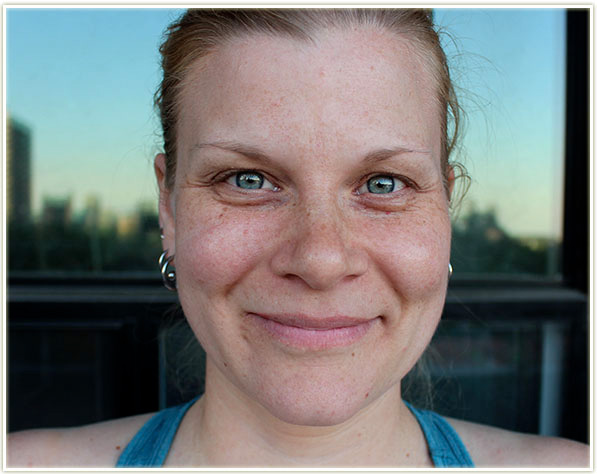
Clean face
Clean face

Shot above is with no makeup on for comparison.

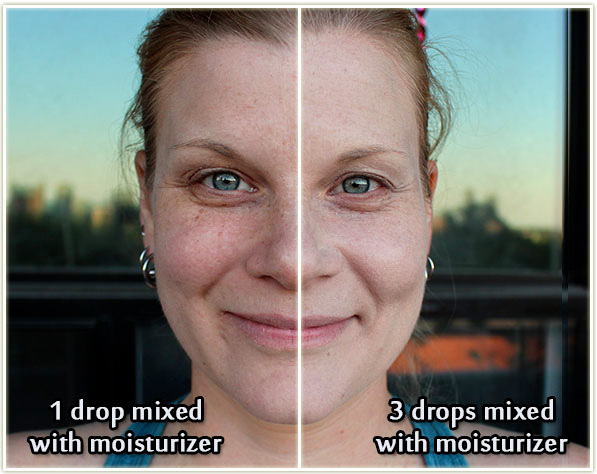
Side by side drop comparison

And this shot is a split view using BIY 105 (which is slightly pale for me, I’ve since started using BIY 110) and the Moisture Surge Moisturizer.

  • On the left side (as you’re viewing this) is a single drop mixed with moisturizer. You can see how it keeps the coverage of the BIY product very, very sheer.
  • On the right is three drops mixed in with moisturizer. The coverage becomes a lot denser, and I’d argue to say almost too much since I’m looking a little ghostly.

Final Thoughts

I really like the blend it yourself aspect of this product as I think it’s a fun way to customize how much coverage you have. For me, however, I feel this is best used when you create a lightly tinted moisturizer instead of trying to build up the coverage to get a full coverage foundation. I found one drop mixed with the amount of moisturizer I would need to cover my whole face was the way I preferred to wear it. When I tried for full coverage I felt like it looked like the product sat on my face instead of sinking into it. (And really, if you’re going to be buying a product like this, I truly doubt you’re going for full coverage – you’re more likely to go buy a full coverage foundation!)

Best way to apply it? Use your hands! I plop a dollop of whatever moisturizer I’m using that day on the back of my hand, add a drop of BIY and then mix it together with my fingertips. I’d then smear it on my face as I would any regular morning moisturizer. When done this way, my makeup blends nicely on top and you get a really nice natural finish. It’s not a ton of coverage, granted, but that’s how I prefer to wear product on my face during the summer!

The Clinique Blend It Yourself Pigment Drops can be purchased on ulta.com for $33 USD (us Promo Code: MAGICLINKS350 for $3.50 off $15+ spend!) or on beautyboutique.ca for $44 CAD.

The products featured in this post were sent to me for consideration. Post may contain affiliate links.