Category Archives: Reviews

Urban Decay Nocturnal Collection (Review & Swatches)

Urban Decay Nocturnal Collection

The Urban Decay Nocturnal collection slipped into stores in January and went straight under my radar! It’s like I was barely even aware of the launch at all. So when a few items showed up in my mailbox via Beauty Boutique I was a bit like “hmmmmm” since I’d heard practically nothing about it!
Urban Decay Nocturnal Collection

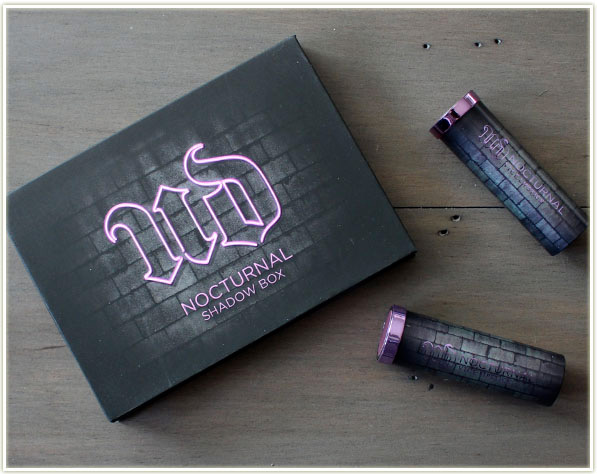
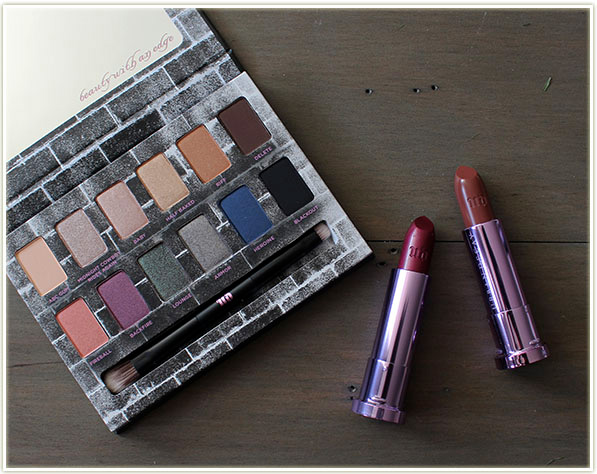
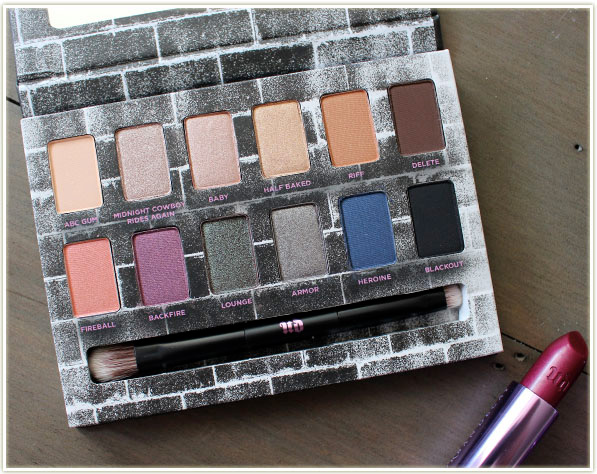
The Nocturnal collection focuses on a bunch of wearable dark shades while also balancing it out with some neutrals and sheer colours (via the lipsticks). The packaging on the eyeshadow palette really hearkens back to the old days of UD packaging – solid cardboard with a printed theme. It’s a nice throwback to their roots, and it definitely made me smile.
Urban Decay Nocturnal Shadow Box

The Nocturnal Shadow Box is in the same vein as their regular line of Shadow Boxes (like the Ammo one). This one just has an updated shade range with some mattes, some satins and a few shimmers thrown in the mix. It also contains three shades from previous Vice palettes – Delete, Armor and Heroine.
Urban Decay Nocturnal Shadow Box Swatches - top row
Urban Decay Nocturnal Shadow Box Swatches – top row

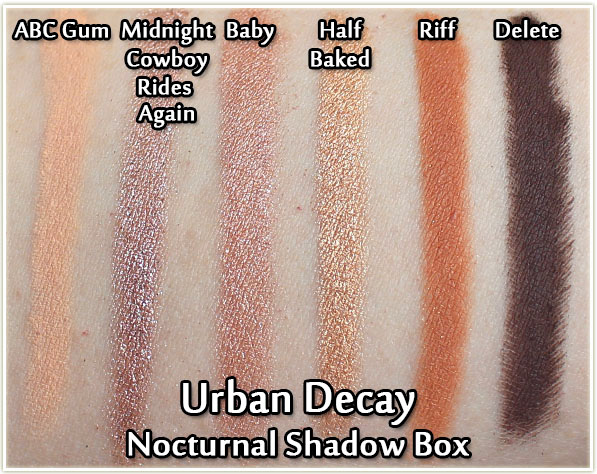
The top row is really your basic set of neutrals and they definitely lean more warm toned.
Urban Decay Nocturnal Shadow Box Swatches - top row
Urban Decay Nocturnal Shadow Box Swatches – top row

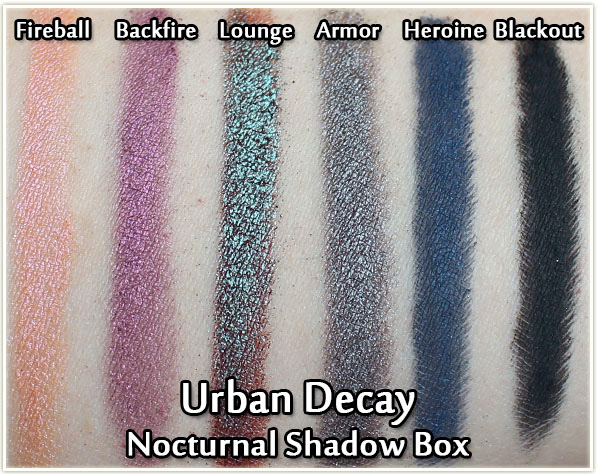
The second row is where the magic happens. Shades like Heroine, Lounge, Backfire and Fireball are where I found the bulk of my makeup inspiration came from.

I was also hugely impressed with the pigmentation and blendability on these shades. A few recent palettes from UD have left me wanting (and therefore a bit unexcited about further releases), but this one re-invigorated my interest in the brand. And it’s funny too, because this is a palette that I would never have given a second glance based on the colour palette – it just felt too neutral/too dark. I was very wrong, and you’ll see what looks I managed to create near the end of this post.
Urban Decay Nocturnal lipsticks in Backstab and Lawbreaker

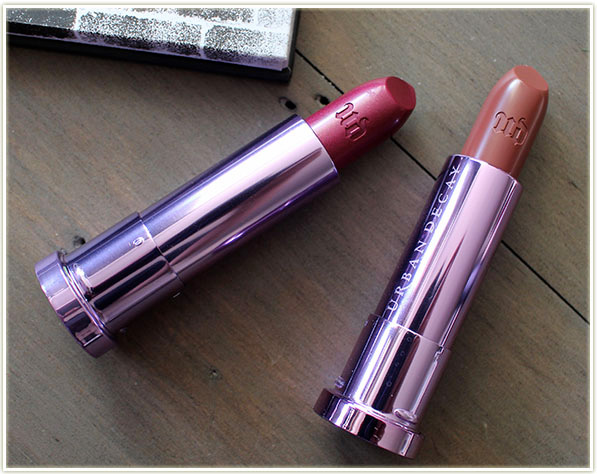
The latest versions UD‘s lipsticks have been an absolute winner for me this year so I was more than happy to try out some new shades. There are a few more lipsticks in the Nocturnal launch, but I have Lawbreaker (Sheer Shine) and Backstab (cream).
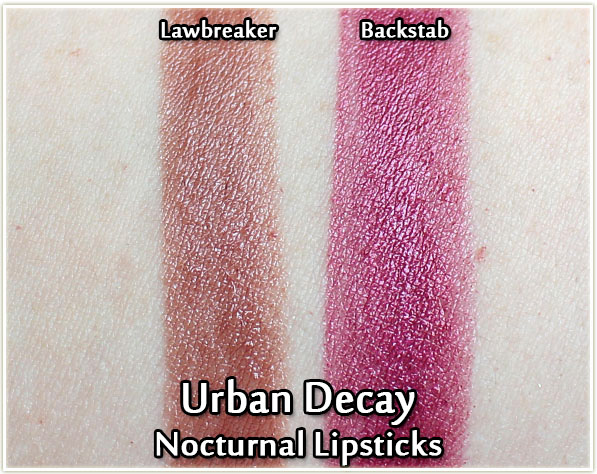
Urban Decay Nocturnal lipsticks in Lawbreaker and Backstab - swatches
Urban Decay Nocturnal lipsticks in Lawbreaker and Backstab – swatches

At first glance I was sooo not into Lawbreaker. I mean it’s a brown, how boring is that? But I should really know better than to judge makeup products  just on first glance alone. Because Lawbreaker is a sheer shine formula, it glides on the lips easily and provides a boost of shine alongside the colour. I was pleasantly surprised!

Backstab has a cream finish with a hint of pearl to it. Like Lawbreaker, it’s exceptionally comfortable to wear, although this one isn’t a sheer so you’ll definitely experience more pigment on your lips overall.

Urban Decay Nocturnal – Look 1

You may notice I look a bit darker in these photos than I normally do – I’ve got fake tan on and as such I used a much deeper foundation.
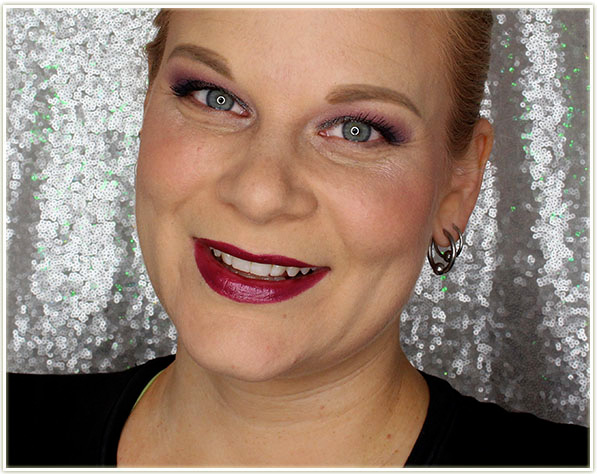
Urban Decay Nocturnal - Look 1
Urban Decay Nocturnal – Look 1

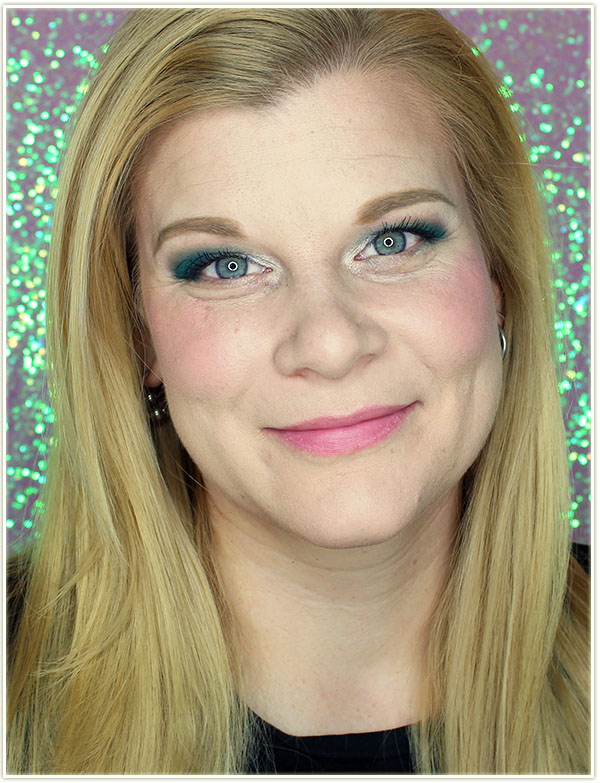
Look one involved using the gem tones fro the palette and Backstab lipstick.
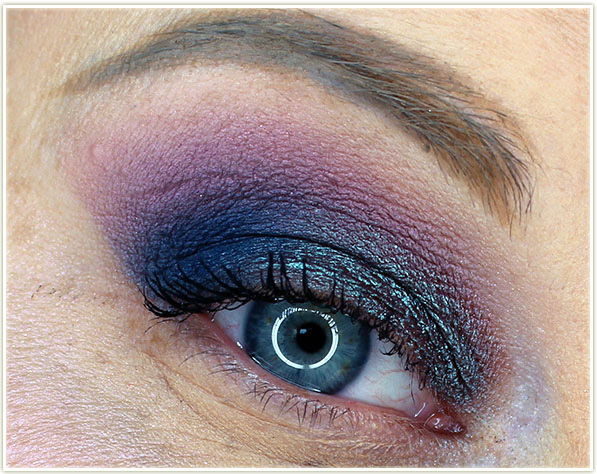
Urban Decay Nocturnal - Look 1
Urban Decay Nocturnal – Look 1

I have Backfire through the crease, Lounge on the lid and Heroine through the crease. I feel like this photo turned out a little bit messy (which is disappointing to me), but this look floored me. It was so, so freaking flattering and I had a lot of compliments on it when I wore it on Snapchat (my snap is muyourmind).
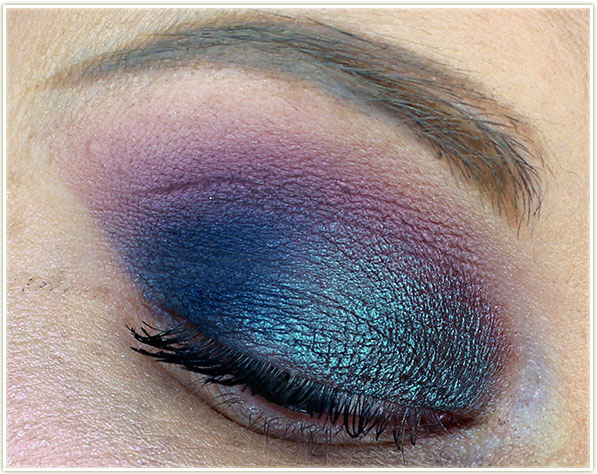
Urban Decay Nocturnal - Look 1
Urban Decay Nocturnal – Look 1

The look came together so well and so easily that I didn’t even feel like I needed winged liner to amp it up which is a shocking rarity for me!

Urban Decay Nocturnal – Look 2
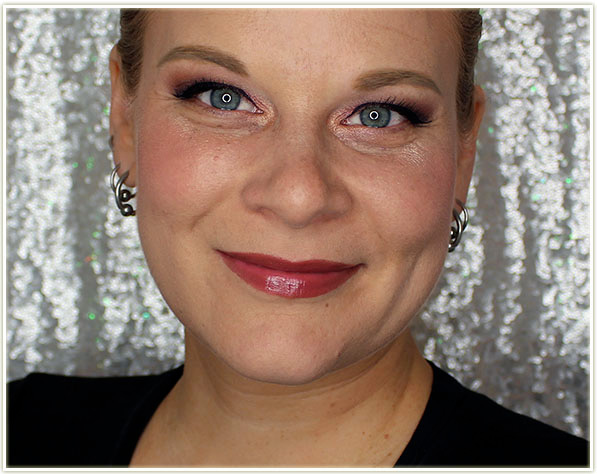
Urban Decay Nocturnal - Look 2
Urban Decay Nocturnal – Look 2

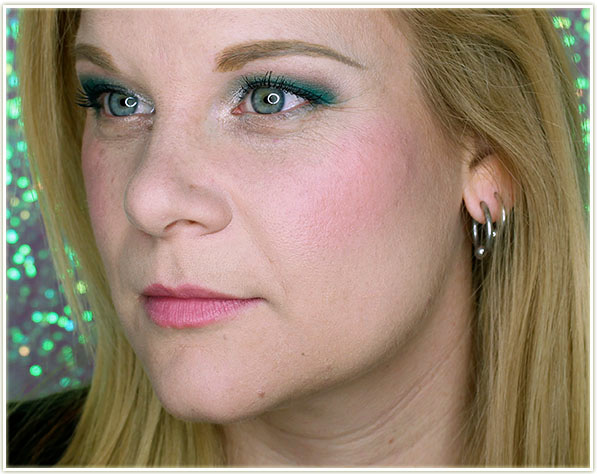
I tried to use more neutral colours on the lids (and kinda failed) and I’m also wearing Lawbreaker lipstick. See how it doesn’t come off nearly as brown a the tube would lead you to believe?
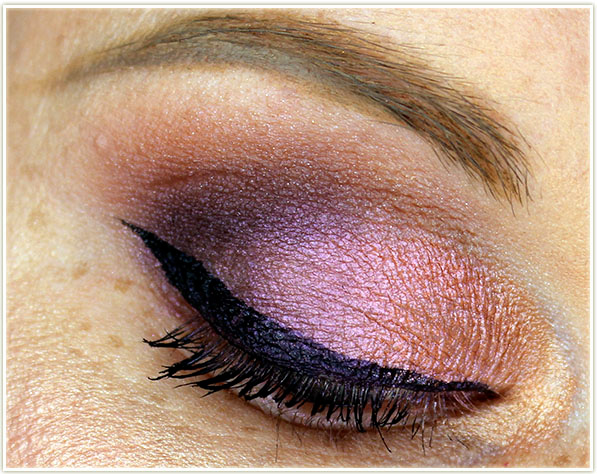
Urban Decay Nocturnal - Look 2
Urban Decay Nocturnal – Look 2

I’m wearing Riff through the crease, Fireball on the lid, Backfire in the outer corner, with a bit of Delete to deepen it up. I’ve also got Half Baked on the inner corner.
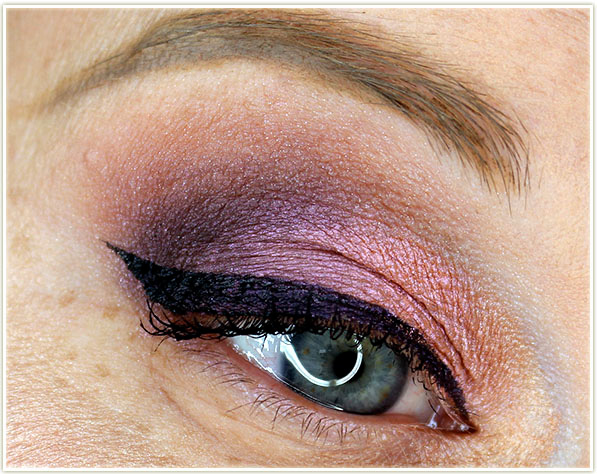
Urban Decay Nocturnal - Look 2
Urban Decay Nocturnal – Look 2

Final Thoughts

Considering I was very “meh” at first glance about the Urban Decay Nocturnal collection, I can barely believe that I’m now telling you just how excited I am about it! The eyeshadow palette is so much fun! I think the colour balance looks a bit odd in the pans, but they work together so, SO nicely on the lids! Also with the  the lipsticks – although not what I usually find myself attracted to, were such a nice complement to the eyeshadow palette.

Is this worth your money? 100 times yes!

Products were provided by BeautyBoutique.ca, but I’m not currently seeing this collection online on their site, so definitely check in stores. I do, however, see them up on UrbanDecay.ca!

The products featured in this post were sent to me for consideration. Post may contain affiliate links.
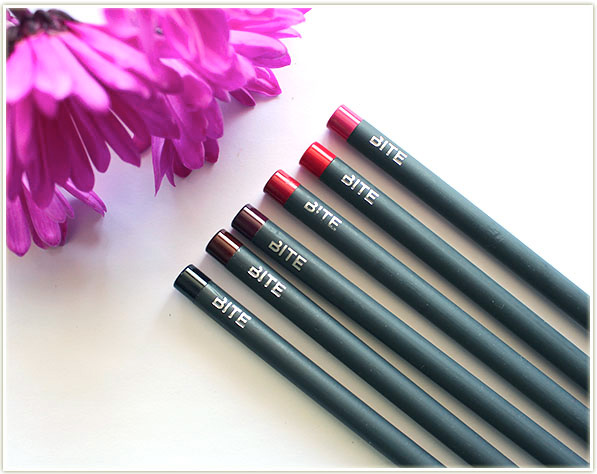
Bite Beauty Lip Pencils (Review & Swatches)

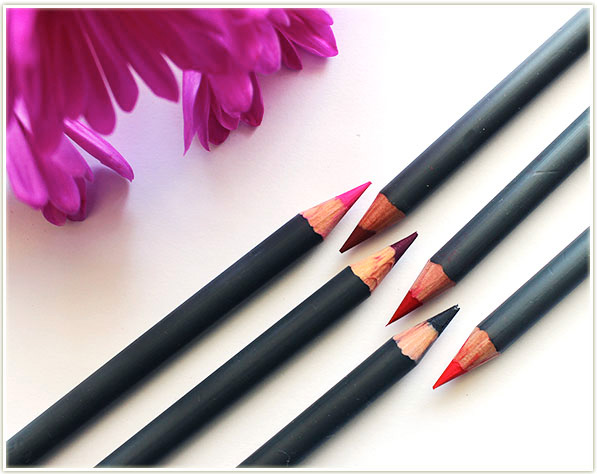
Bite Beauty Lip Pencils

I’m always sooo curious when Bite Beauty decides to venture outside of doing just lipsticks. Granted, their brand new Lip Pencils (and subsequent lip pencil shade extension launch) is still very much FOR YOUR LIPS, but I’m still always like “oooo”. And frankly, I suppose a lip pencil is long overdue for them since they ARE so known for their lipsticks, but hey, I’m intrigued, okay?

Bite Beauty Lip Pencils

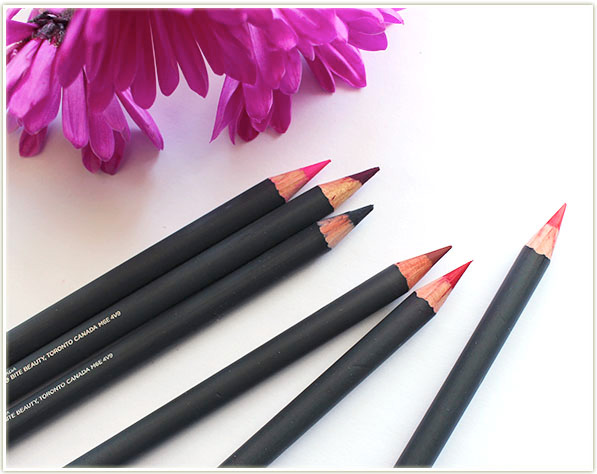
When Bite launched their lip pencils, they basically boomed into Sephora. And onto Influenster (seriously, who DIDN’T see those on blogs, Instagram and Twitter??). The shade selection was impressive at the time, and even more so now since they’ve launched additional colours. Looks for a navy lip liner? You got it! Black? YES! And white too!

Bite Beauty Lip Pencils

The Bite Beauty version of the lip pencil is what I would call fairly standard: it’s a wooden pencil that you sharpen with any old standard sized eye/lip pencil sharpener. The lip pencils contain whipped shea butter and glide on the lips smoothly. These are not a stiff, overly drying lip pencils – I was impressed with how easily it was to pencil in my lips without causing ANY dragging. As a result, you may find the formula is on the softer side, which will require a little bit more sharpening than some of the dryer, harder formulas out there.

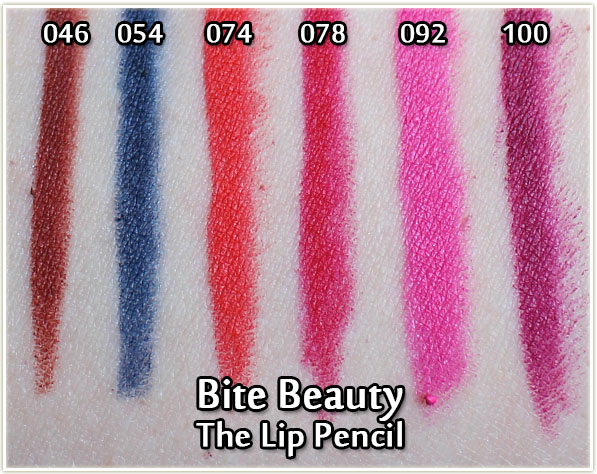
Bite Beauty Lip Pencils - swatches
Bite Beauty Lip Pencils – swatches

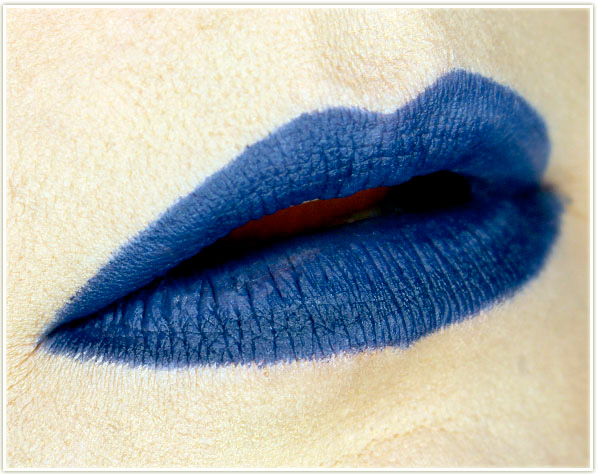
I was sent a wide variety of shades, which was really, really nice since it gave me the opportunity to play around with the differences between shades. I was really, REALLY happy to see that 054 shade. A colour to match my Bite Squid Ink lipstick?? Heck YES!

Bite Beauty Lip Pencils – Lip Swatches

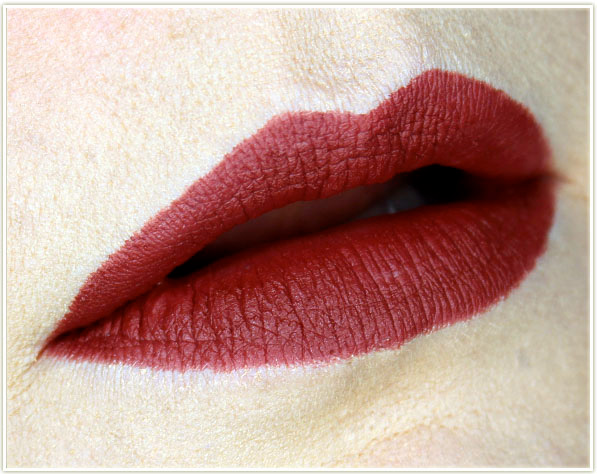
Bite Beauty Lip Pencil - 046
Bite Beauty Lip Pencil – 046
Bite Beauty Lip Pencil - 054
Bite Beauty Lip Pencil – 054
Bite Beauty Lip Pencil - 074
Bite Beauty Lip Pencil – 074
Bite Beauty Lip Pencil - 078
Bite Beauty Lip Pencil – 078
Bite Beauty Lip Pencil - 092
Bite Beauty Lip Pencil – 092
Bite Beauty Lip Pencil - 100
Bite Beauty Lip Pencil – 100

Final Thoughts

I did the daring thing (for me) and wore these under lipstick without any primer. For those new here, I am incredibly prone to lip line bleed out unless I use a lip primer so I was basically taking my life in my hands while testing these out. (A bit dramatic, I know.) What I experienced was very interesting – even with a super creamy lipstick, this lip pencil gave me the most amount of protection towards lip line bleed out that I have ever experienced outside of primer. Sure, there was a tiny bit of bleedout, but considering I am usually required to wear a lip primer with any lipstick, this was extremely impressive. So two big thumbs up for that.

Lip line bleed out covered – I can assure you that these are a very comfortable lip liner to wear because they are inherently creamy. That being said, they’re not so creamy that you’ll find your lipstick moving around (huge plus). It’s like it’s creamy, but dry enough to stay put, but definitely not uncomfortable.

The only downside though? I’m not a huge fan of the cap – I think it’s designed really weirdly and could be done a lot better.

Overall, if you like lip pencils, you can’t go wrong with these. I like them not only because they’re lovely, but also because they’ve got some oddball shades covered in there. Hooray for not just your standard nudes, pinks and reds!

The Bite Beauty Lip Pencils can be purchased at sephora.ca for $20 CAD each or on sephora.com for $18 USD.

The products featured in this post were sent to me for consideration.

Anastasia Beverly Hills Glow Kit in Aurora (Review & Swatches)

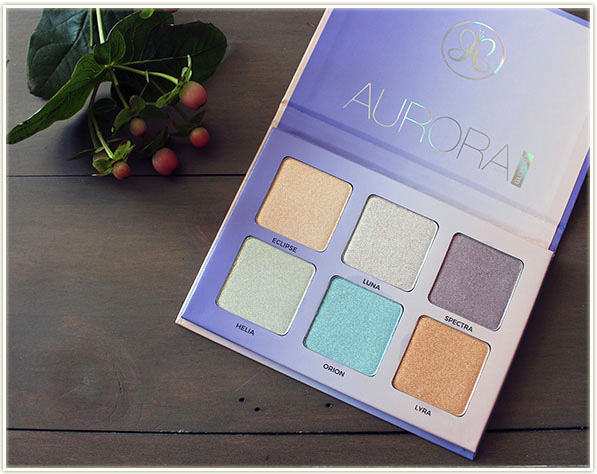
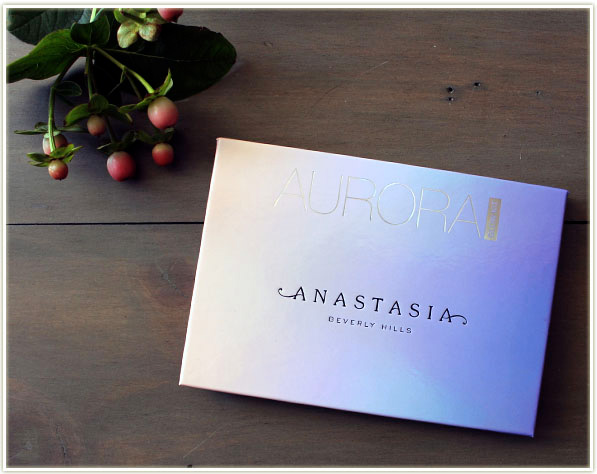
Anastasia Beverly Hills Glow Kit in Aurora

At this point it should be no surprise that I go bananas over every new Anastasia Beverly Hills Glow Kit launch. It first started with Gleam, then I fell madly in love with Moonchild and Sweets, and then finally I tried out the Nicole Guerriero palette. So I was ecstatic when we discovered that the new Aurora palette was going to be available at IMATS New York when we were there last month!

Anastasia Beverly Hills Glow Kit in Aurora

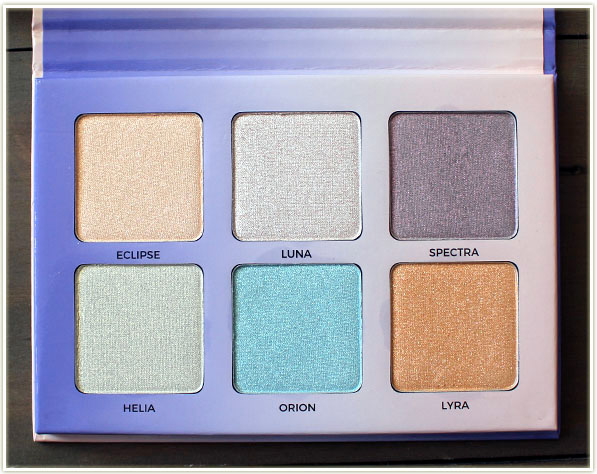
I had a few up and down moments with this palette. The shots online looked absolutely glorious: the shades were very different than the previous Glow Kit launches and they seemed really, really beautiful. However, when I got my hands on it IRL, I felt a bit deflated. The colours seemed less saturated (possibly a good thing), but it also seemed like the WEIRDEST mix of colours for a Glow Kit. (That being said, there’s so many highlighters on the market that it can be hard to top every previous launch, so I do understand why the colours are a bit kooky.)

Anastasia Beverly Hills Glow Kit in Aurora

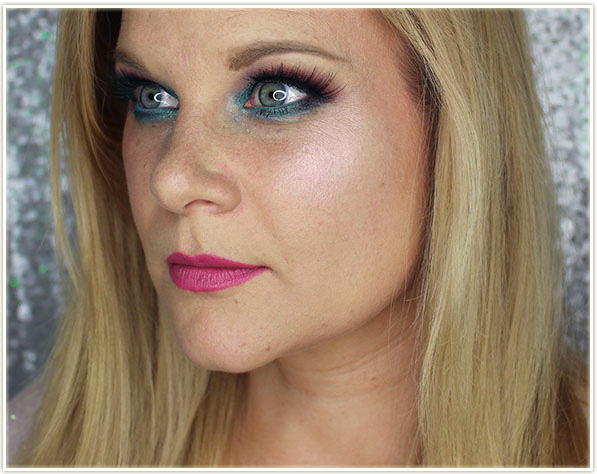
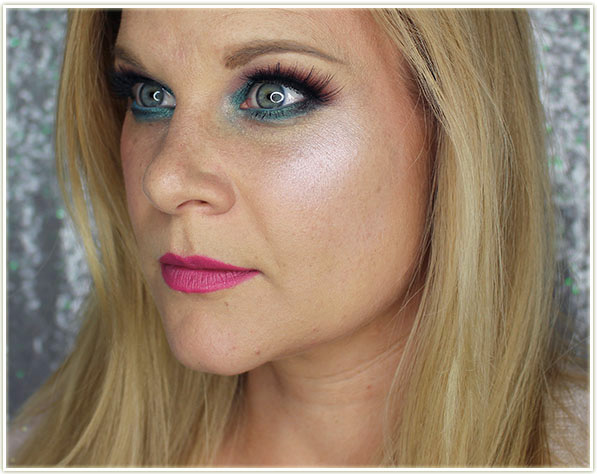
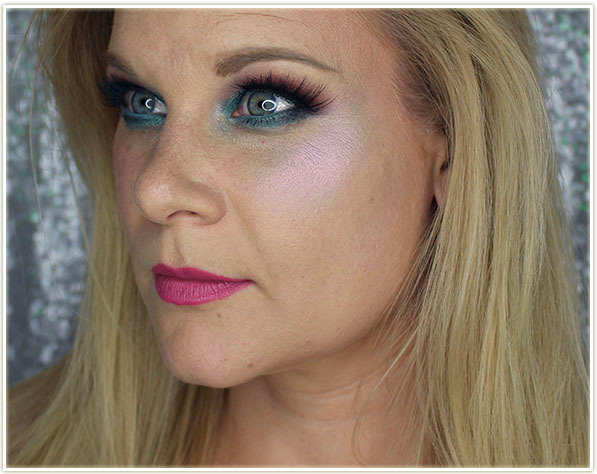
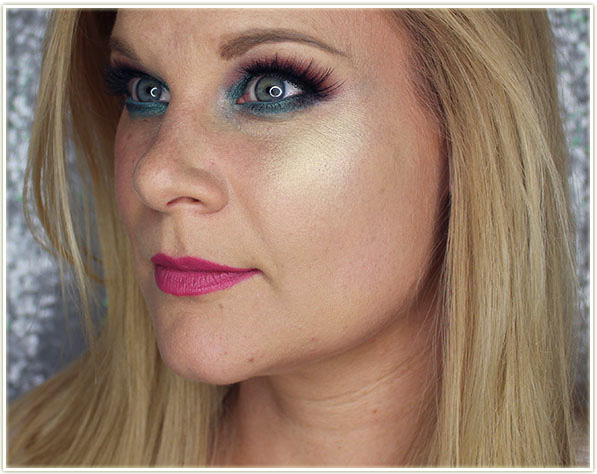
As a result, I spent a bit of time looking at this palette being like “what the heck?”. And I think I finally figured out why I felt that way: on my skin tone, the shades I was most excited about (Spectra and Orion) verge on being unwearable. I’ve seen a few people commenting that this is much better for deeper skin tones than myself, so that may be a potential factor.

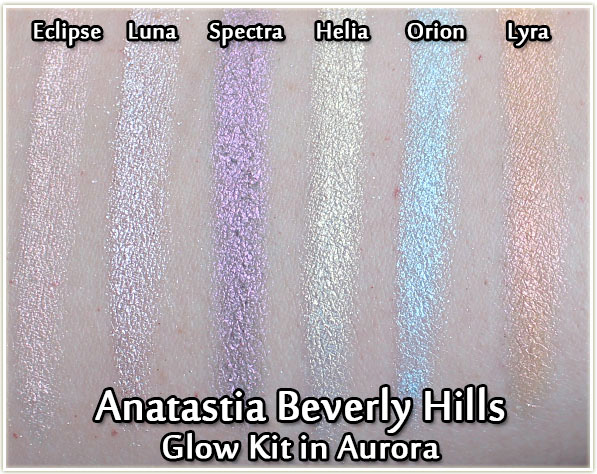
Anastasia Beverly Hills Glow Kit in Aurora - swatches
Anastasia Beverly Hills Glow Kit in Aurora – swatches

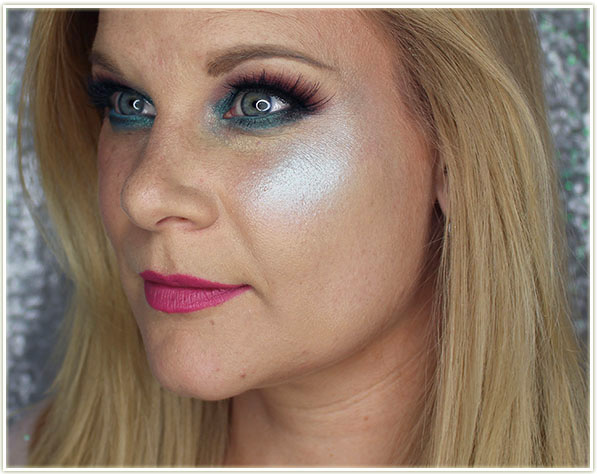
Taking a look at the shades, four of them are “easy enough” to wear: Eclipse, Luna, Helia and Lyra. Spectra and Orion are extremely colour heavy and when I wear them on my face I feel like I am overtly aware of my highlighter. I know that’s a weird thing to say for someone who does love off-colour highlighter (blues and greens are my favourite), but there’s something about those shades that just doesn’t work for me right out of the gate.

Anastasia Beverly Hills Glow Kit in Aurora – Face Swatches

Let’s take a look at the individual face shots:

Wearing Eclipse
Wearing Eclipse

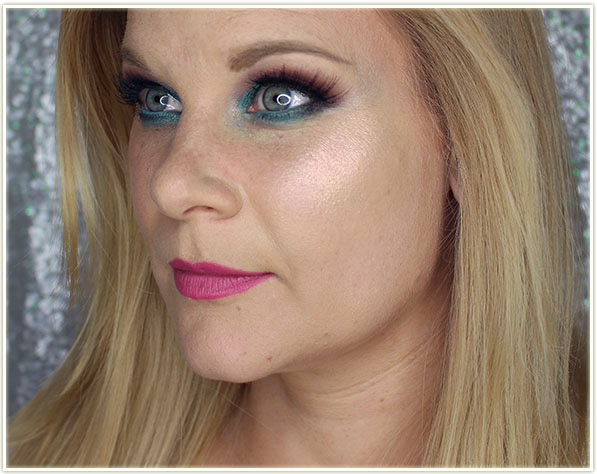
In the pan, Eclipse looks very peach but I feel it comes out more pink-toned on my skin.

Wearing Luna
Wearing Luna

Luna is a silver-white that would fall under your basic “silver-white” highlighter category.

Wearing Spectra
Wearing Spectra

Spectra is very, very interesting. It a pigmented purple with a pink reflect. The face shot is not showing nearly the amount of pigment that comes off on this colour – it can be very difficult for me to wear. I can’t go in full blast and I do have to have a bit of a tan (my body is tanned and I’m wearing a darker foundation in these shots) to make this colour work.

Wearing Helia
Wearing Helia

Helia is the most incredible looking colour in the pan – it’s a weird green-yellow hybrid that comes off a lot more golden on the cheekbones. This is a LOT more wearable than the pan makes it look.

Wearing Orion
Wearing Orion

Orion is a total failure on me and I have no clue how to make this one work. While the shot above looks okay-ish, in person it’s a disaster. This is a straight up blue streak on my face with a highly reflective sheen.

Wearing Lyra
Wearing Lyra

My favourite of the whole lot is Lyra. In the pan it’s very orange (which I’ve been looking for in a highlighter), but it comes out beautifully peachy on my cheeks. This shade does have some specks of glitter in the pan – which doesn’t bother me, but I know some people do not want glitter in their highlighters.

Final Thoughts

I don’t know how I feel about this palette. Maybe just neutral? The Aurora Glow Kit has a nice array of shades that haven’t been available in any of the previous Anastasia Beverly Hills highlighter palettes. I appreciate this, but I’m also starting to feel totally tapped out on highlighters now because I feel like we’ve explored every single shade that’s out there that could be workable. It’s entirely possible that this Kit would look better on a deeper skin tone and just missed the mark for me in that respect (which is fine! Not everything is or should be tailored to paler skin tones!). Alternatively, you could also use these as eyeshadows but that’s not something I find myself doing with highlighting palettes.

In the end, for me, I do feel that this is a barely wearable palette and I much prefer the Moonchild and Sweets palettes (which are still available on their web site). So if you want to pick up a Glow Kit, I’d steer you more towards those.

If you’ve tried this palette out, I would love to hear your thoughts!

NARS x Charlotte Gainsbourg (Review & Swatches)

NARS x Charlotte Gainsbourg

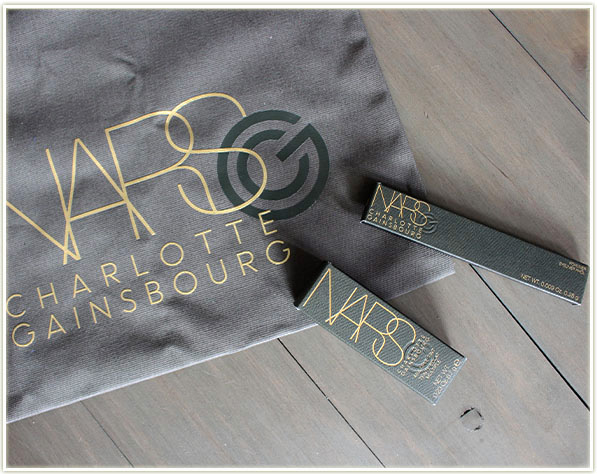
NARS has just recently launched their Charlotte Gainsbourg collection- a 15-piece collection of which I have two items. For those uncultured fools (I’d be one of them), Charlotte Gainsbourg is a French woman born from two icons: British movie star and Hermès muse Jane Birkin (Birkin bag anyone?) and French music legend Serge Gainsbourg. Interestingly enough, Gainsbourg has been quoted as saying she doesn’t wear much makeup and the best piece of advice she ever received (in regards to makeup) was “to not put too much on”.

NARS x Charlotte Gainsbourg

So perhaps it’s for that reason that the collection focuses a lot on glowing tints of colour (although the eyeshadow duos say otherwise) via the Multiple Tints, the Hydrating Glow Tint, as well as the Lip Tints. The bulk of the collection is geared towards natural beauty and sheerness – an effortless aesthetic that is often associated with the French.

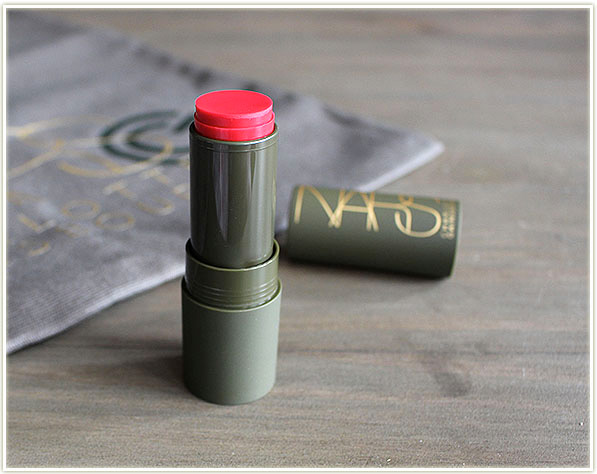
NARS x Charlotte Gainsbourg - Multiple Tint in Jeanette
NARS x Charlotte Gainsbourg – Multiple Tint in Jeanette

Most interesting to me was the Multiple Tint. I have a few Multiples (which is NARS‘ version of a combo lip and cheek product, although I almost always wear it on my cheeks) that are a chockful of colour which means you need to tread lightly with the product. While it can be nice to have full pigmentation, for the summer, and on my cheeks, that’s generally not what I’m going for. I want something more luminous, sheer, but with a solid wash of colour.

And the Multiple Tint delivers! This particular shade is Jeanette – a sheer berry by their standards (and a poppy pink by mine!).

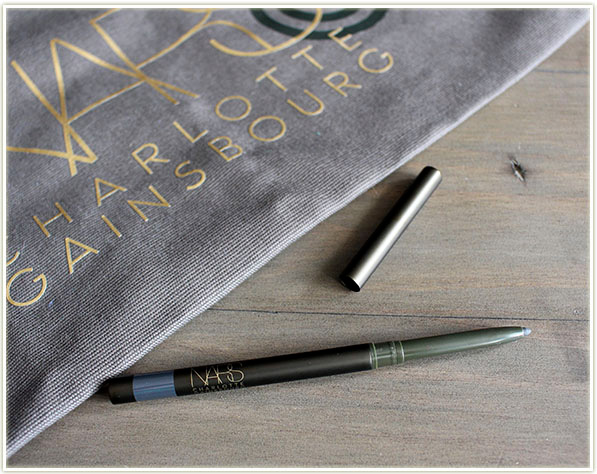
NARS Kohliner in Zinc

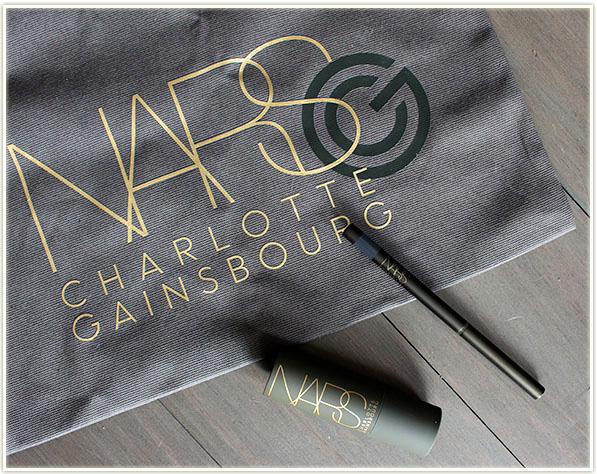
The other item I tried out is the Kohliner in Zinc – a slate grey pencil that you’s swear was actually blue by that colour tag at the bottom of the pencil. This is a twist up product (but be careful – it doesn’t wist back down!) that smudges out easily. You’ve got plenty of time to layer it on your eye and then go in with a brush before it sets. Once it does set though – it’s definitely not going anywhere!

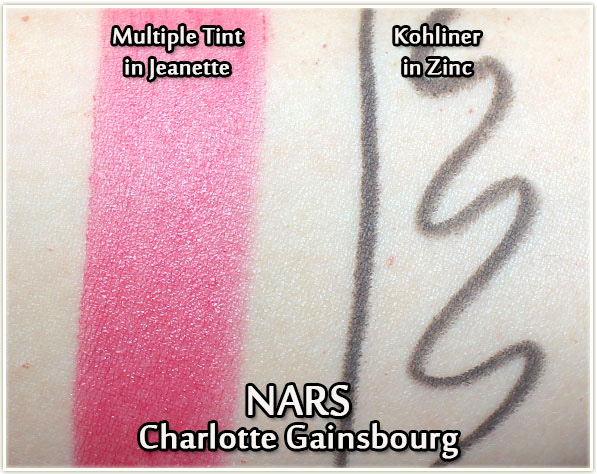
NARS x Charlotte Gainsbourg swatches - Multiple Tint in Jeanette and Kohliner in Zinc
NARS x Charlotte Gainsbourg swatches – Multiple Tint in Jeanette and Kohliner in Zinc

The Multiple Tint in Jeanette is absolute perfection in my books – that’s the EXACT colour I want on my cheeks when I’m going for that flushed look. And I love how it’s got a hint of sheerness to it – makes for much easier blending on the cheeks. Although it appears creamy in my swatch, rest assured that it dries down completely on the cheeks.

I’m not much of a eye pencil person (liquid’s my jam) but the Kohliner in Zinc is very easy to use. I appreciate how it glides on smoothly with minimal fussing. I also seriously appreciate the fact that it doesn’t dry down immediately and there’s some wiggle room – I was able to go in with a pencil brush after layering it down to smoke it out a little bit.

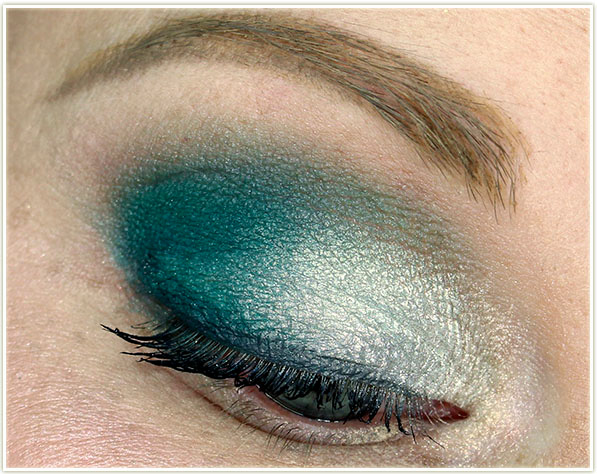
Wearing the Kohliner in Zinc smudged along my upper lash line

Wearing Zinc along my upper lash line. I was able to layer it down, smudge it with a pencil, and then add a bit more to roots of my lashes to add depth.

Wearing the Multiple Tint in Jeanette on my lips and cheeks

For reference, I have some bronzer on towards the back of my cheekbones, but I’m not wearing any highlighter. What you see on my cheeks and lips is only the Multiple Tint in Jeanette.

Full face wearing the Multiple Tint in Jeanette on my lips and cheeks, and the Kohliner in Zinc on upper lash line

Final Thoughts

Although I only tried two products from the NARS x Charlotte Gainsbourg collection, I was quite enchanted by them. The Kohliner is really quite nice, even though it’s not a product that’s in my usual wheelhouse of looks. The Multiple Tint though… that thing has stolen my heart. Any kind of cheek tint in that kind of luscious red colour is an absolute win for me.

Did anything from this collection pique your interest? Let me know!

To check out the whole NARS x Charlotte Gainsbourg collection, take a peek at it on sephora.ca or on sephora.com.

 The products featured in this post were sent to me for consideration.