Category Archives: Reviews

Review: Burberry Lip & Cheek Bloom

201506_burberry_lipcheekbloom_poppy1

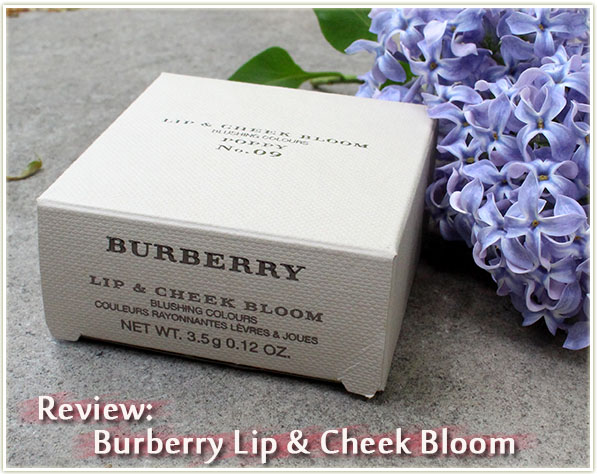
If there’s a company out there that knows how to lure me in purely by their packaging, it’s Burberry. I’ve been lusting over Burberry products for far too long, only recently taking the plunge by picking up their Lip & Cheek Bloom in Poppy.

Burberry Lip & Cheek Bloom in Poppy

The Lip & Cheek Blooms are new to Burberry‘s lineup of products I believe. Encased in a solid square jar, these pots comes with 3.5 grams of product that can be used on your lips or cheeks. I bought this with the express purposes of using it as a cream blush, but I’ve discovered it works out well on the lips as well.

Burberry Lip & Cheek Bloom in Poppy

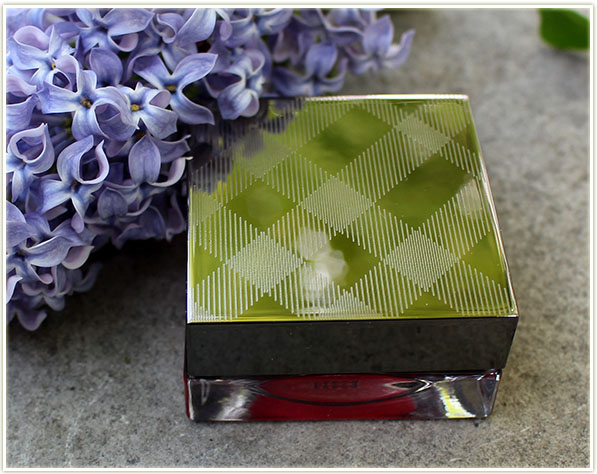
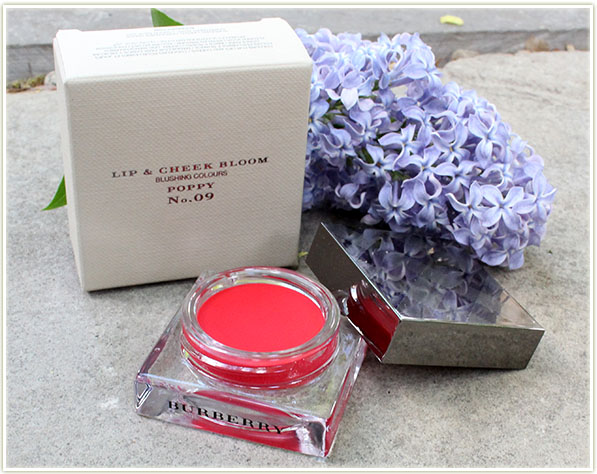
First off, I need to mention the packaging, because that’s ultimately what drew me into Burberry‘s beauty line. It has that solid, chunky feel to it while still appearing elegant. The weight of the product lets you know that it means business (and that it wasn’t cheap either) and it definitely won’t break if you happen to drop it (which I actually did – oops!). The simple Burberry pattern, a typical gun-metal grey speaks to elegance and beauty.

Burberry Lip & Cheek Bloom in Poppy

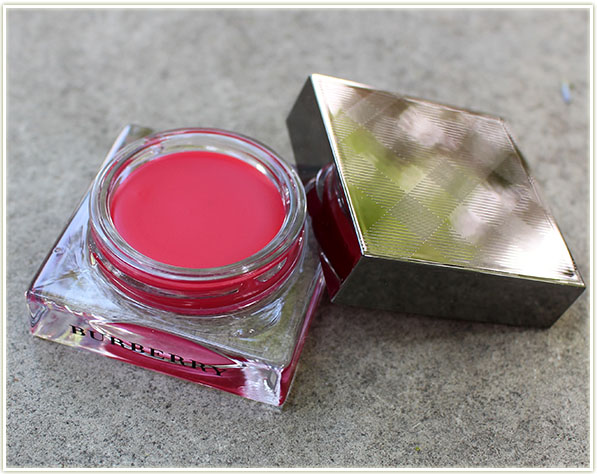
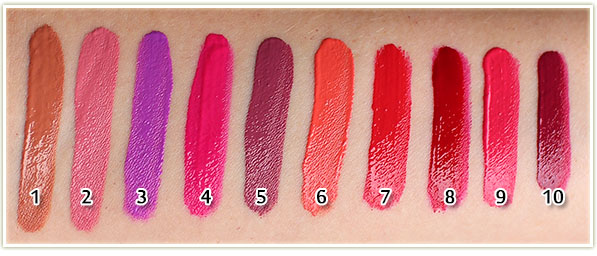
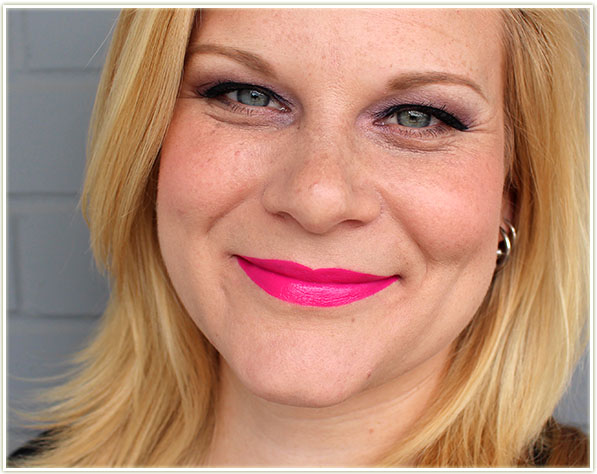
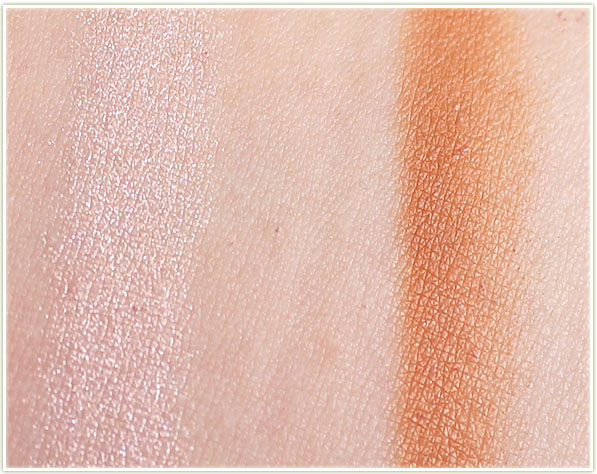
So in the name of elegance and all things beauty, I went out and bought… the brightest shade they had available at the counter. Burberry‘s Lip & Cheek Bloom in Poppy (No. 09)drew me in by the sheer power of its colour. I mean look at it! That is one hell of a stunner.

Burberry Lip & Cheek Bloom in Poppy – Swatch

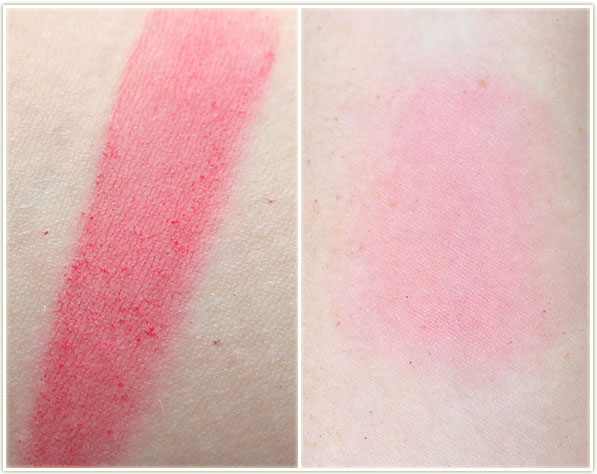
I know most people shy away from vivid colours because they’re worried it’ll be overpowering on their face, but I’m here to urge you to not be scared! The soft, velvet-like texture of the cream lends itself to being blended out without causing any harsh lines. On my cheeks, this will last an entire workday and still keep on ticking. You also don’t need a lot of product so I have little doubt that this product will last me an eternity before I even make a dent in it.

Burberry Lip & Cheek Bloom in Poopy – on my lips and cheeks

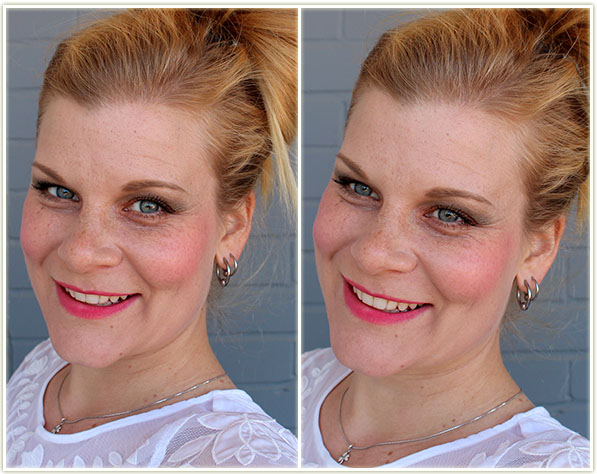
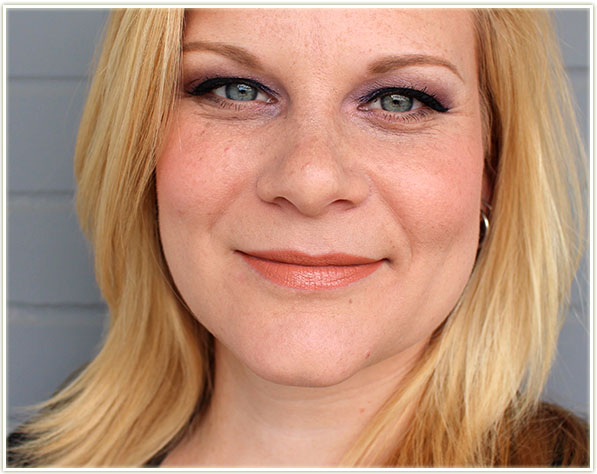
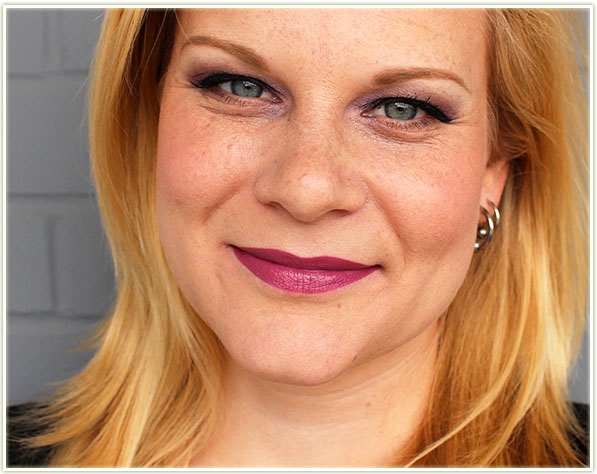
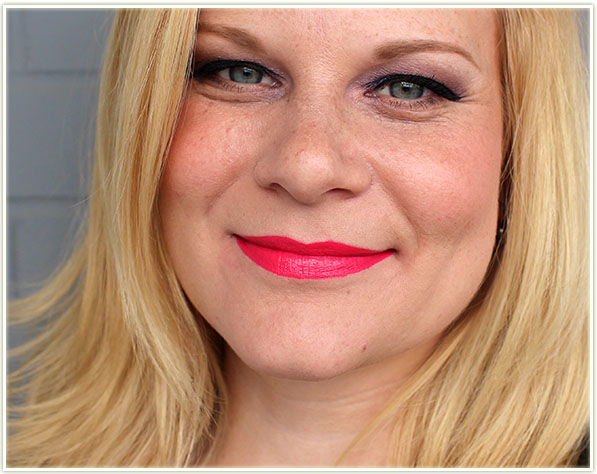
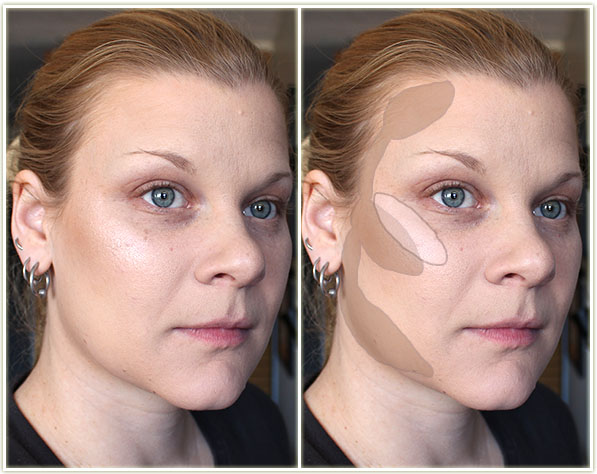
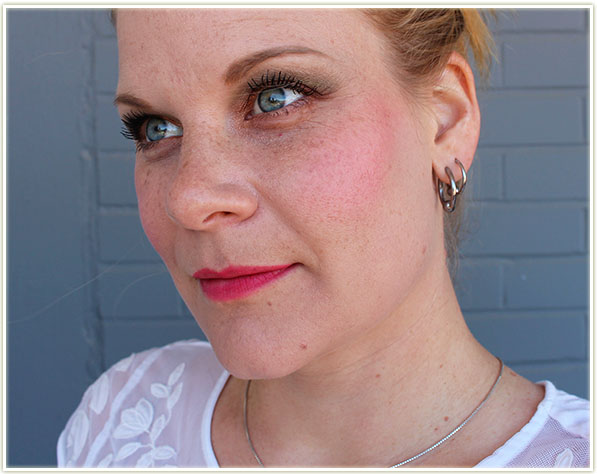
Here’s how it looks on me. I’m not wearing any bronzer or highlighter, so you can really see how the product comes across on the skin. On the cheeks, this is two thin layers of product applied with a small stippling brush. You can really get an impact of colour that way (which is how I like it), or you could opt for one layer and make it more of a lighter flush.

Burberry Lip & Cheek Bloom in Poopy – on my lips and cheeks

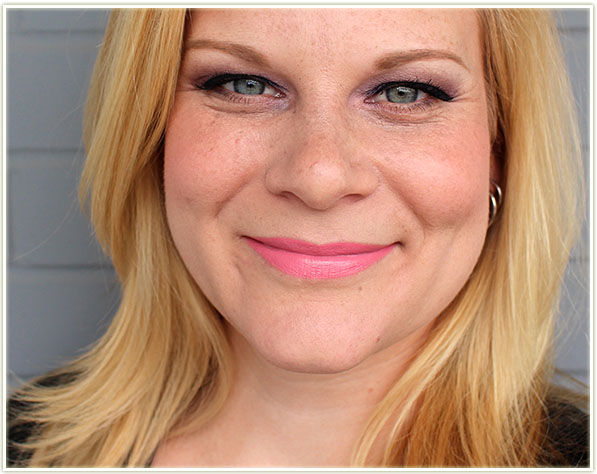
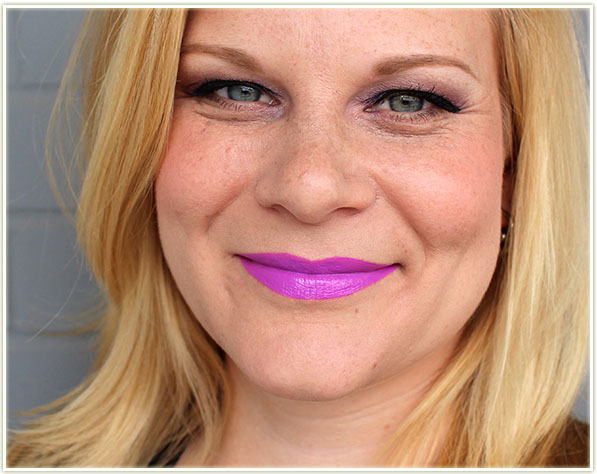
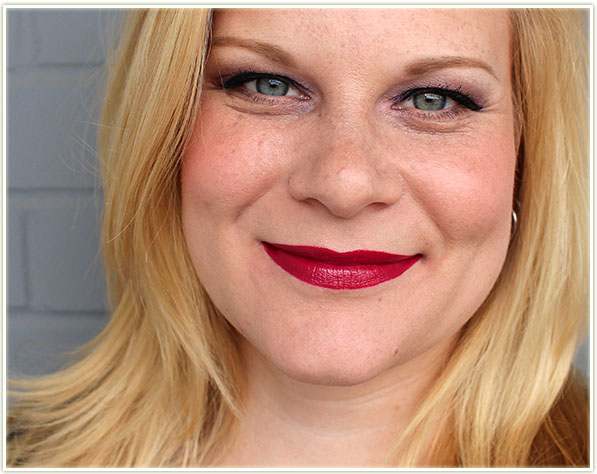
While I prefer it on the cheeks, it does also work on the lips. It reacts more like a matte stain when applied to my lips. It’s not something I would wear frequently on my lips, but it’ll do if I want to pat on some colour quickly. As a bonus, this product has zero scent that I can detect!

Final Verdict

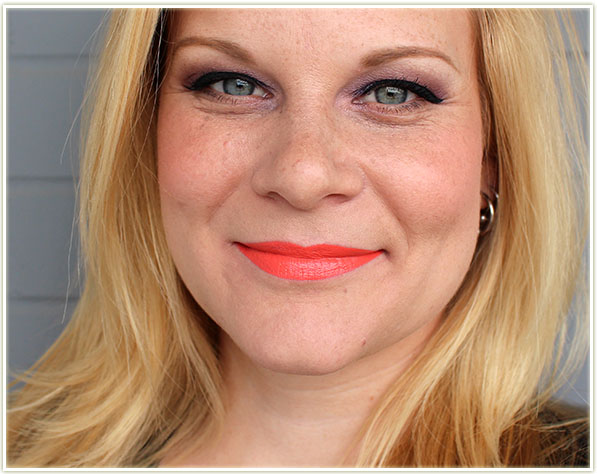
At $36, Burberry‘s Lip & Cheek Bloom is undoubtedly a pricey product. It doubles as a lip and cheek product, so for those who are interested in more bang for your buck, this is a viable option. However, I was most interested in trying out what Burberry Beauty had to offer – regardless of the price tag – and this product definitely delivered. I’ve applied this many times before work and come home to find it still solidly intact on my cheeks. The lasting power is on parr with what I would expect from a price point like this which is very encouraging. I’m not sure if I’ll go out and purchase another one of these shades (although I also noticed a *stunning* tangerine colour…), but it has definitely piqued my interest in Burberry makeup as a whole and I’m eager to try out more from the line. I think I’ll give the eyeshadows a try next…

Review: Make Up For Ever Step 1 Skin Equalizers

201505_makeupforever_step1skinequalizer_primers1

I’m a wee bit late to the party with my review on the MAKE UP FOR EVER Step 1 Skin Equalizers, but bear with me, it’s because I wasn’t sure what I was searching for in a primer and MUFE really helped me figure myself out.

MAKE UP FOR EVER Step 1 Skin Equalizers in (l-r) Smoothing, Hydrating and Pink

At the beginning of March, I went to the launch event for MAKE UP FOR EVER‘s Spring 2015 lineup. The most noteable product launch was the revamping of their primer line (now called Step 1 Skin Equalizer). It’s not so much a small tweaking as it was an enormous overhaul (heck, they even said outright that they felt, for example, that their previous green primer – meant to target redness – was just flat out too pigmented and they wanted to fix that).

And fix it, they did. MUFE let loose on the world 10 newly formulated primers that are designed to target various skin concerns. Of the 10, five target your skin’s texture (Mattifying, Smoothing, Hydrating, Nourishing and Redness Correcting) while the other five target your skin’s tone by boosting radiance (Pink, Blue, Yellow, Peach and Caramel). They can be used alone, or layered together to get your desired result.

MAKE UP FOR EVER Step 1 Skin Equalizer in Radiant Base Pink

At the event, I was kindly gifted two primers of my choice. Since it was nearing the end of winter, my skin was suffering the ill affects of a rather dry season, so I opted for theHydrating primer. Additionally, I chose the Pink radiance boosting primer since the consultant and I felt that with my skin’s natural undertones and my penchant for getting a running/soccer tan during the summer that it would work out for the best.

These primers have a very thin nozzle tip.

While these two primers certainly did their job (Hydrating and Pink), they didn’t give me that excited feeling I get when I use products on my face. They smelled lovely (it’s a very clean, refreshing scent), worked well (my foundation definitely locked into place a lot better than it normally does), but I just didn’t get that “je ne sais quoi” that made them feel special.

Until I tried the Smoothing primer out.

During a CBB swap, I picked up the Smoothing primer, vowing to give these primers another chance to wow me. And boy, did it work. On my (*cough*aging*cough*) skin, this primer went on like butter. It had that slippery-siliconey feel that I really love and it made my skin feel comfortable even while wearing foundation. I’ve even opted to wear it while not wearing foundation – using it mostly as a line filler and skin smoother.

(l-r) Smoothing, Hydrating, Pink

I now switch between the three primers that I have depending on my skin’s needs that day:

  • Smoothing Primer for when I want to feel extremely put-together and need my foundation to last through the work day and then some. This one has a silicone-type feel, and goes on the skin with a very, very faint hint of colour.
  • Hydrating Primer for when my skin feels like it needs to more moisture. This one goes on the skin clear and feels akin to a water-based substance.
  • Pink Primer when I want to boost my skin’s radiance, AND it’s great for colour-correcting some of my more yellow-toned foundations. This goes on the skin with a pale pink hue and has a milky-type texture.

Final Verdict

If you’re someone that loves primer, you’ll love that MUFE now has ten different types to choose from that fit a wide variety of skin types, textures and colours. Like me, you may need a little bit of time to discover what works best for you, but when you find it, you’ll love that you have a primer that’s tailored towards your needs. And if your needs change over time? There’s a whole lineup of primers ready and waiting for you!

As some of you may know, I don’t really like foundation – it makes my skin itch and gives me an all around uncomfortable feeling. These primers though? They totally obliterate that annoying feeling I have on my skin while wearing foundation. I don’t know what’s in it to prevent that kind of sensation, but it’s been really, REALLY nice to forget that I’m wearing foundation for once and instead just enjoy having an even skin texture.

Bonus: Since this is a squeeze tube, you get exact amount of product out that you want. No worrying that a pump is going to dispense too much product, or that you have to tip the whole bottle upsidedown to get anything out!

MAKE UP FOR EVER Step 1 Skin Equalizers can be purchased from makeupforever.ca or at Sephora for $43 CAD each.

My Too Faced Melted Collection (Review + Swatches)

201505_toofaced_meltedcollection1

It’s no secret that I’m desperately in love with Too Faced‘s Melted Liquified Lipstick formula. (In fact, I did this as a guest post on Lipstick & Lullabies last year when I only had four shades!) I picked up my first ones last September and never looked back. From their adorable brightly coloured squeeze tube packaging, to their fantastic range of shades where it seems like every single shade appeals to me, to their phenomenal wear time… well… my current ultimate goal is now to own every single shade. The scary part is that Too Faced keeps coming out with more and it’s starting to make my wallet hurt!

My Too Faced Melted Collection

So what’s to love about these? Well, they fit quite nicely into the liquid lipstick fad that seems to have taken the beauty world by storm. They also come in a massive range of shades, although they do lean more towards vibrant shades than safe ones (although there are various nude/neutral shades as well).

Too Faced Melted tip

They come in a squeeze tube with an applicator that looks is a fat doe-foot-like device. The product is squeezed out of the doe-foot which can then be directly applied to your lips. The applicator has enough precision to create straight lines, which is fantastic for me cuz I hate hauling around a lip brush. If you want super crisp lines, you could always use a lip brush, but I’ve never felt the need to use one myself. I also love the applicator because I have a nasty habit of breaking my lipstick bullets, and this saves me completely from that ritual massacre.

Too Faced Melted applicator

The wear holds up remarkably well. I don’t eat with lipstick on, so I can’t tell you if these last through meals, but on me they will survive an easy five hours (and by then, I’m eating something again so I’ll usually wipe my product off then). These go on the lips slightly glossy but dry down to a matte finish within two hours or so. Once you hit the matte stage these pretty solidly lock onto your lips. They’re not transfer-proof, but you could blot them down to get them to that stage – there’s so much pigment in them that they won’t suffer much from a good blot.

They are slightly drying over time on the lips, but that isn’t a pain point for me. I struggle with super slippy lipstick formulas (aka I end up smearing them all over my face) so I like having something that I know is going to stay put.

I don’t own all the shades (YET!) but I’m swatching out what I have so if you’re interested in any of the ones I own, you may be able to narrow down your choices. (Or do what I do and just try to amass them all!)

Click to enlarge
Click to enlarge
  1. Melted Nude
  2. Melted Peony
  3. Melted Violet
  4. Melted Fuchsia
  5. Melted Fig
  6. Melted Coral
  7. Melted Strawberry
  8. Melted Ruby
  9. Melted Candy
  10. Melted Berry

And on the face:

Too Faced Melted Nude

Melted Nude is a brown-peach shade that suits me better than I thought it would.

Too Faced Melted Peony

Melted Peony verges on a bubblegum pink on my skintone. This is the shade I wear the least because I just feel it’s so… girly (which I realize is a weird thing for a beauty blogger to say).

Too Faced Melted Violet

Melted Violet is what I would call a neon purple and it’s unlike anything I own. However, out of all the Melteds I own, this one has the weirdest consistency – it’s more melty than the others and seems to wear off my lips awkwardly. Maybe I got a bad one?

Too Faced Melted Fuchsia

Melted Fuchsia can only be described as a medium pink transcribed into a neon format. This shade is electric!

Too Faced Melted Fig

Melted Fig is a deeper burgundy purple that tends to look more mauve when it dries down. It’s a fairly unique shade in my collection and I reach for it more often than I ever thought I would.

Too Faced Melted Coral

Melted Coral is not my definition of a coral, but it’s still lovely. This shade is a vibrant orange on my skin and it just blazes with colour. I’ve really liked this paired with some kind of bluey-green eyeliner.

Too Faced Melted Strawberry

Melted Strawberry is a strawberry red shade with a pink fade. The pink isn’t strong, but you will notice it on the edges if you look closely. It’s an easy summer red, I think.

Too Faced Melted Ruby

Melted Ruby is the “Christmas” red (although I think perhaps Melted Velvet would better fit that description but, sadly, I don’t own it).

Too Faced Melted Candy

Melted Candy is my absolute favourite out of the bunch. I can pick this one out on someone else a mile away. It’s a pink fruit punch/cream soda type colour and I LOVE how it looks.

Too Faced Melted Berry

Melted Berry has become my more traditional fall/winter colour as I’ve moved slightly away from reds. I don’t think I own a piece of cold-weather clothing that this doesn’t match. Really, really gorgeous.

That’s my whole Too Faced Melted collection and I’m still keenly awaiting the opportunity to buy them all up.  I’ve now been able to swatch them all! See my updated post with video where I swatch the entire Too Faced Melted lineup! Do you ever feel that way about a product line? That you have to Pokemon the shit out of them and catch ’em all?

Too Faced Melted lipsticks can be purchased for $25 CAD each on Sephora.ca or for $21 USD on Sephora.com.

Review: Real Techniques Sculpting Brush

201505_realtechniques_sculptingbrush1

Oh boy. Okay so… I don’t contour my face. I never have, simply because I’ve seen a lot of bad contours in my day and I *don’t* want to be the woman on the street with terrible unblended streaks on her face. So when I was sent the Real Techniques Sculpting Brush to try out, needless to say… I was slightly intimidated.

HOWEVER! I spend sooo many hours of my day watching makeup video after makeup video on YouTube that I feel like I’m armed with enough information to give this contouring business a try.

Real Techniques Sculpting Brush

Where do we start? Well, a brush is as good as any. The relatively newly released Sculpting Brush from Real Techniques has the basic shape to get you off on the right foot.

Real Techniques Sculpting Brush

It’s a fat, dense brush, but it’s pinched neatly so it can get into the crevices of your cheekbones. It’s not so stiff that it’ll give you grief while blending, but it’s not so floppy that you can’t get any definition. In my eyes, this makes this brush perfect for newbies like myself.

Makeup Geek Barcelona Beach eyeshadow

Essentially, the idea behind contouring is to make your face look more gaunt. It helps to slim out our features, pop out our cheekbones and recede anything that we don’t want to draw attention to on our faces. The best way to do this is to use products (powders, creams, etc.) that have a natural grey-cast to them. Ideally, you should be contouring with a product that is darker than your own skin; one that can cause the effect of a natural shadow. Shadows aren’t orange or brown in colour, nor do they sparkle, which is why bronzers are not recommended for contouring. That’s not to say they can’t be used, but orange and glitter definitely don’t scream “shadow”, do they?

Contouring guidelines

So here’s what I did: I took Makeup Geek‘s Barcelona Beach eyeshadow on my Real Techniques Sculpting Brush and drew a line along the areas I wanted to recede. This included my jaw line, the hollow (not that I have much of one) UNDER my cheekbone and, because I forgot what I was doing, the sides of my forehead (an area I normally bronze. Oops!).

Using the lines as a guide, I then blended upwards and downwards to soften the streak I had created. This is highly necessary, otherwise you end up looking like a badly done up drag queen.

Contouring completed!

And here’s how it came out. Seeing myself with contouring for the first time is very weird. My first reaction is that I feel like I overdid it, or that it wasn’t blended in enough. As I look at the pictures more over time, I get used to looking at my face like that and it seems less stark than I had originally thought it was.

With and without contouring

On a side-by-side comparison, I can see how much it chiseled out my jaw bone and created a definite recession underneath my cheekbone. I’m not a huge fan of the forehead business, but I can live with it. Amazingly, I don’t think it makes me look dirty either, which is something I half expected to see.

I don’t see myself contouring my face on a regular basis as I just don’t feel it’s a step that I need (or want to do!) on a daily basis. I can see how much of an impact it can make though! I’m really happy that the Real Techniques Sculpting Brush made this a relatively simple job to do. And I mean that, I don’t think contouring my face took more than 3-5 minutes, which is pretty good for a total rookie.

So how do you guys contour? Or do you not bother with it?

Review: Make Up For Ever Pro Sculpting Duo

201504_makeupforever_prosculptionduo_1

During the Make Up For Ever Spring 2015 product launch event I went to, we were kindly gifted one shade of the Pro Sculpting Duo. I chose Duo #1 which is described as a Pink Beige. The other option is Duo #2 which is more golden.

Make Up For Ever Pro Sculpting Duo

Encased in a solid compact with a handy mirror, the Pro Sculpting Duo is split roughly down the middle; one side has an orangey-brown sculpting shade and the other a pearlescent white-pink highlighter. The compact contains 8 grams of product, which is a little bit shy of the typical 10 grams average for a compact of this size. However, that may have something to do with the fact that this product comes from a gel-to-powder formula (I believe it goes on the terracotta plate as a gel and then is baked into a powder formula).  It’s also talc-free.

Make Up For Ever Pro Sculpting Duo #1

Of course, one can’t get over how gorgeous the product is. Give us beauty consumers a two-colour product with a print, and you’ve pretty much got us cornered!

Make Up For Ever Pro Sculpting Duo #1 – close up

Ugh I can’t. So gorgeous.

Make Up For Ever Pro Sculpting Duo #1 – swatches

So how does it play out on the skin?

Sculpting Shade

Well, the sculpting shade is just… too orange. I wouldn’t encourage anyone to sculpt their faces with an orange shade – it’s just not how contouring works. Even worse is that it has a sheen to it which does nothing to help sink your cheekbones in, or recede areas of your face. If you want to contour, you need to be using shades tinted grey as that’s what a natural shade creates on your face.

It does, however, work as a bronzer. While it is still rather orange for my tastes, you can blend this in, or use a light hand to get the shading you want. I focus on the high points of my face, the areas that get the most sun, such as the back of my cheekbones, my temples and forehead, and along my jawline and nose.

Highlighting Shade

This is where the duo really shines! The pink-beige shade is hard to describe, and the swatch really doesn’t do it justice because it is GORGEOUS. If you have any experience with MAC’s Vanilla pigment, this is rather similar, just without the yellow flecks. It’s creamy to the touch, smooth blending with a pinky-white sheen. It’s unlike anything I have in my collection, which surprised me, because highlighters don’t tend to be particularly unique on the whole. (I’ve heard Duo #2 is a dupe for MAC’s Whisper of Gilt, if you’re interested!) The pigmentation on this is very strong, so go easy if you’re not looking to be super highlighted, but if you love a solid glow to your skin, this one’s for you!

Make Up For Ever Pro Sculpting Duo #1 – applied to the face

Here’s what it looks like on my face. As I said, I won’t use that sculpting shade to contour my face, but I will use it as a bronzer. I stuck to the areas of my face that get the most sun, choosing to blend it down slightly on my upper cheekbones (it’s not directly UNDER my cheekbone though). The highlighting shade was applied directly to the tops of my cheekbones. It really stands out and adds a beautiful amount of luminosity to my cheekbones.

Final Thoughts

I’m confused by the sculpting shade, especially from a brand that definitely knows how to do makeup right. If you ignore the fact that you’re encouraged to contour your face with it, you can definitely use this as a glowing bronzer for the skin. I love how it looks on my face to make it seem like I’ve gotten way more sun that I actually have.

The highlighter is what really makes this compact for me though, it’s beyond gorgeous and looks stunning on my face. In fact, I keep swatching it on my finger just to keep looking at the different facets to it. I honestly think the whole compact is worth it just for the highlighter alone, but if you can use the bronzing shade, all the better!

Kolme’s having fun playing around with the brush