Category Archives: Reviews

Review: Bourjois Healthy Mix Serum Foundation

201504_bourjois_healthymixserum1

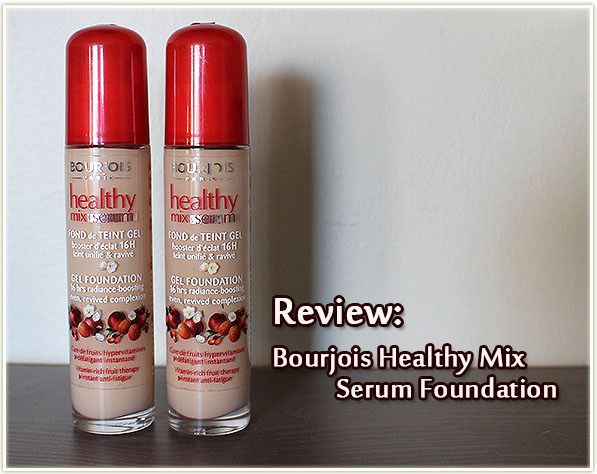
I was first introduced to Bourjois Healthy Mix Serum by the wonderful people on YouTube. Beauty guru after beauty guru would rave on and on about the wonders of this gel foundation. When I was in Ireland a few years back (yeah, I’m that late reviewing it) I saw the foundation in Boots and decided to pick it up in two different shades since I wasn’t sure what shad would suit me.

Bourjois Healthy Mix Serum in shades 51 Light Vanilla and 52 Vanilla

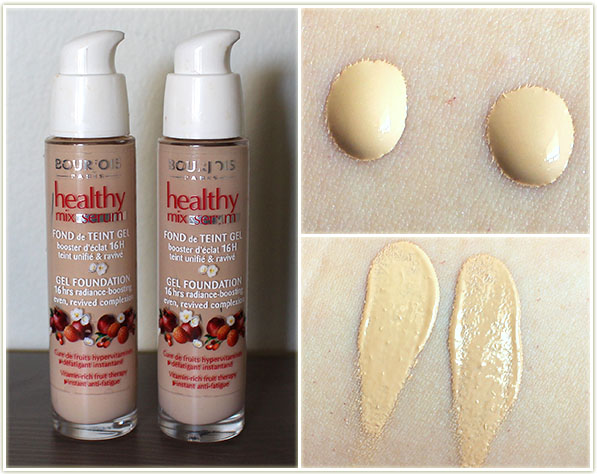
The shades I picked up are on the bottom of the range (of which there are really not a lot of shades); 51 Light Vanilla and 52 Vanilla. The shades lean decidedly yellow; none of them seemed even remotely pink.

The first thing I noticed with this foundation is the scent – it’s incredible! I can’t pinpoint the smell exactly, but it’s a pleasant fruity scent. For those concerned about the longevity of the scent on their skin; don’t be. It dries down quickly and the scent goes away immediately.

No makeup on my face

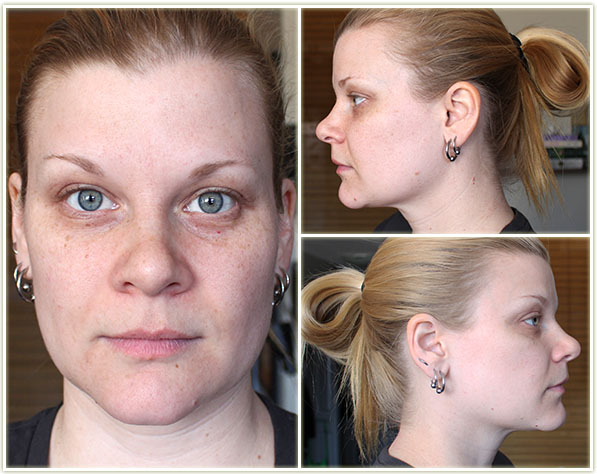
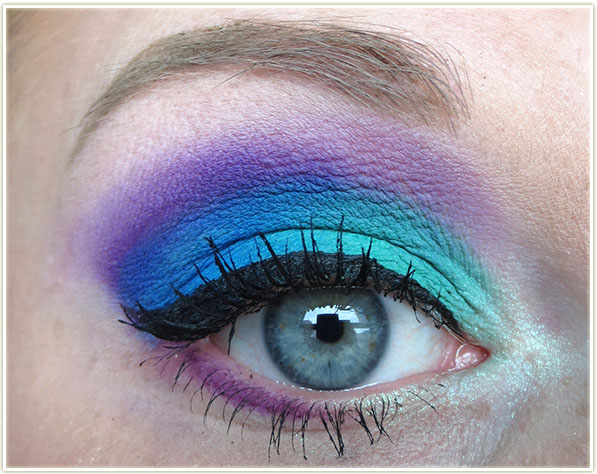
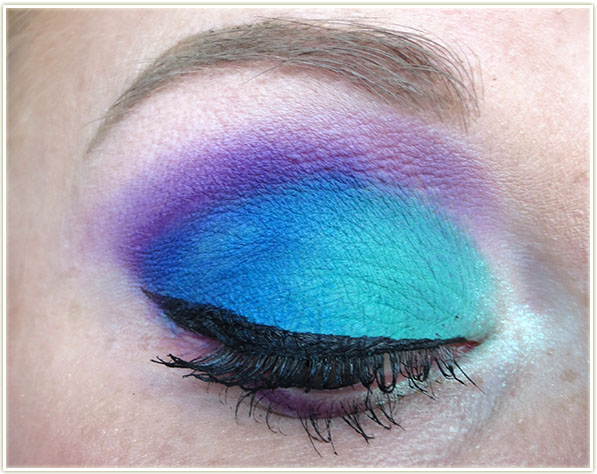
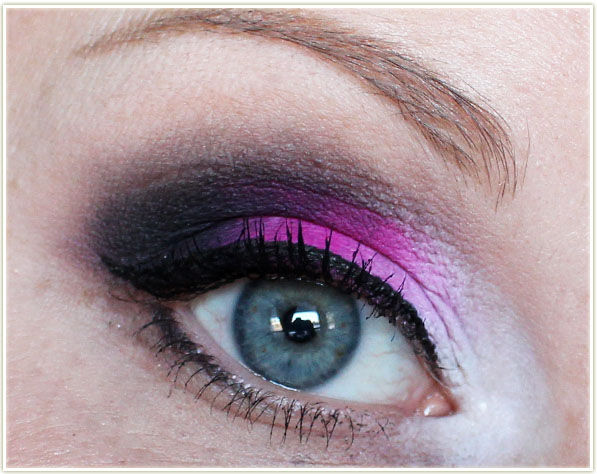
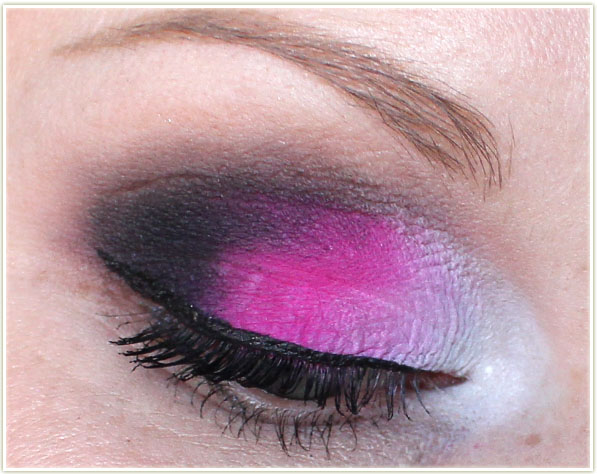
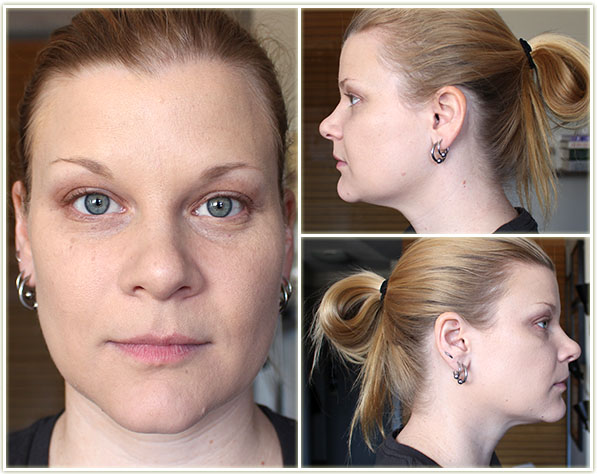
So here’s the deal with my foundation-free face (above): My skin is slightly darker than my neck, and definitely more pink. I have some redness, but nothing symptomatic of larger problems. I have moles I was born with that don’t bother me and freckles I love. My skin has been rather dry this past winter, but can get a bit on the oily side in the summer, but nothing excessive. When I look for a foundation, I’m essentially looking for something to give me a blank canvas to work from because it makes pictures look so much better. All this to say, I do not have any large problems I’m trying to cover up so I don’t need a full coverage foundation.

Dab it everywhere, then get to patting it in!

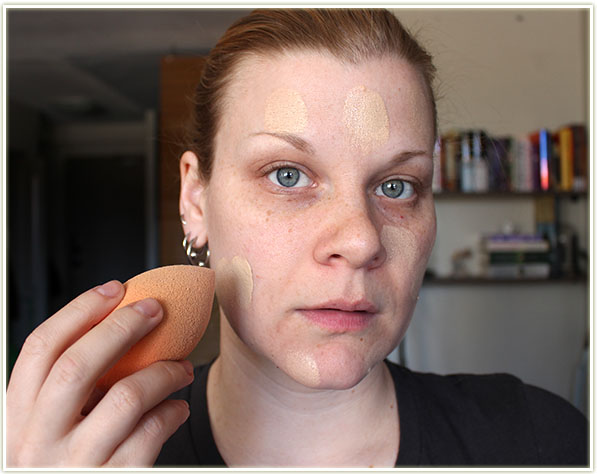
My favourite way to apply any and all foundations is with my Real Techniques Miracle Complexion Sponge. Lately I’ve been doing two pumps of 52 Vanilla, with one pump of51 Light Vanilla. (Although on further reflection, judging by the shots below, I should’ve been doing it 50/50.)

Bourjois Healthy Mix Serum fully applied

And here’s the product completely blended in to my skin. You can still see some of my darker freckles, and certainly some of my moles but if you’re that desperate to cover those you could always use a concealer. On me, Healthy Mix Serum is a light to medium coverage foundation that has enough coverage to even out my skin, but still lets me feel like my skin is still my own skin. Unlike with other foundations where I routinely experience itchiness from daily wear, this foundation doesn’t do that. More often than not, I forget I’m wearing anything, and for me that’s a huge relief because I really struggle with the feeling of heavyweight foundations on my skin.

Close up to show texture

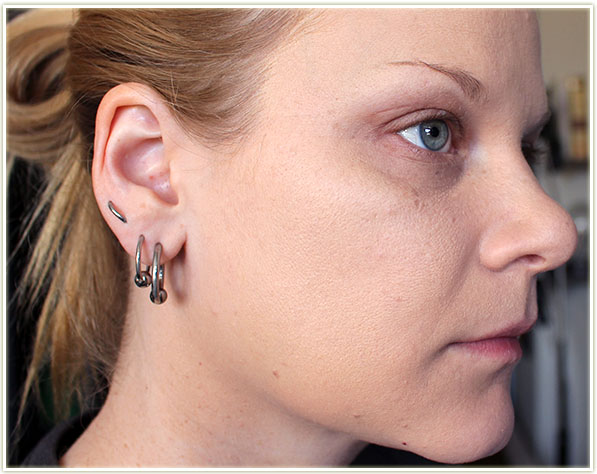
And here’s a close up shot that will hopefully show you the texture of my skin and the degree of coverage I achieve with one layer of foundation applied. I do experience some product rubbing off throughout the workday as I am prone to touching my skin a lot, or holding a phone to my ear where the receiver will eventually hit my face. I don’t use powder however, so you could probably set it with one to increase the longevity. That being said, this does last an entire work day if you’re not prone to touching your skin. At the end of the day when I take this off, I end up taking a LOT of pigment off on my makeup wipe which tells me that it clung to my skin very well throughout the day.

In short, I love the way this smells, feels and wears. I’m sad that I’m close to finishing these two bottles and will definitely repurchase it once I’ve cleared a few other foundations out of my collection. I do wish they had more shades though, since the range is very, very limited.

Do you have any recommendations for Bourjois products? I’m definitely wanting to explore this brand a bit more!


Review: Make Up For Ever Ink Liner

201504_makeupforever_inkliner1

Make Up For Ever‘s Ink Liner ($27 CAD) is a relatively new release for the brand. I was anxious to try this one out due to the claims, the primary one which claimed this was a truly matte formula.

Ink liner with the brush wiped off so you can see the shape of the liner

Released just this past January, the Ink Liner promises  to be a truly matte black liquid eyeliner, and quick drying while providing flawless wear and hold. I have been after a liquid liner that actually delivers a matte black formula without the hint of a sheen so I was super excited to try this out.

Make Up For Ever Ink Liner swatches

And the Ink Liner definitely delivers on the matte black formula! This stuff is as dark as an abyss. It is completely, without a shadow of a doubt, matte. It has no sheen, no hint of a gleam – it is UTTERLY matte. It also remains matte throughout the entire day – I had zero transfer from my eyeshadows to the liner, which is a problem I still have with my matte gel liners.

One thing worth noting, is that this liner is not waterproof. A lot of people assume that liquid liners are always waterproof, and that is not necessarily the case. This one is not waterproof (nor did they ever claim it was), so if you have watery eyes you may want to stay away from this one.

Freshly applied
Freshly applied

The shot above is the Ink Liner freshly applied. I put it on before work that morning (roughly 7:30 a.m.). My first attempt with the liner produced quite a thick line. As with any new applicator, you need a little bit of time to get used to the shape. The applicator is a small rubberized cone with a fairly rounded end. It has some flex to it, but not as much as a brush tip.

Freshly applied
Freshly applied

But what a line it produces! With my eye closed, you can see just how solid this product is. I got a sharp point on the end of my wing while freehanding the line.

Ink Liner at the end of the day

And this is what the Ink Liner looked like at the end of my work day (roughly 5 p.m.). It’s just as matte black as when I started the day out! It didn’t transfer to my upper lid once it had dried down and it didn’t pick up any of the shimmery shadows from my lid (and I purposely did a look that’s given me problems in the past with eyeshadow transfer). These are enormous pluses in my book since I’m all about that ultra matte life with zero transfer.

I really love that the Ink Liner managed to deliver what other liners have not for me (the true matte-ness), but I can’t help but wish it was waterproof. Maybe it’s just impossible to make a completely matte formula while having waterproof properties? Hmmm.

Do you have a favourite matte liquid liner? I’d love to hear about your experiences with liners!

The product featured in this review was provided by PR.

Review: Make Up For Ever Smoky Stretch Mascara

201503_makeupforever_smokystretchmascara1

After attending the Make Up For Ever Spring 2015 Preview event, we were gifted a generous bag of products that were launching soon. The first product in the bag I reached to try was the Smoky Stretch mascara. Having been a fan of their Smoky Extravagantmascara, I was interested to see what this one would have to offer.

Make Up For Ever Smoky Stretch – Lengthening & Defining Mascara

Make Up For Ever says: “Thanks to its exclusive Flex Control Complex, Smoky Stretch’s smooth formula glides on lashes for incredibly length and perfect definition. Its molded multi-bristle brush grips lashes starting from the root, covering every single lash for optimal separation without clumping. Shorter bristles on the tip work magic on tiny lashes.”

Make Up For Ever Smoky Stretch brush

The wand on the Smoky Stretch mascara has rubberized bristles in a slight conical shape. It’s a small taper, but it’s also a small brush, which works a lot better on my own lashes. I struggle with enormous brushes because it feels like I can’t get to the root of my lashes so I was especially pleased with the size of this one!

And they’re not kidding about the small bristles gripping your tiny lashes. This wand grasps the lashes and tugs them through the wand in order to coat them with mascara. I suppose that sounds painful, but it’s not. If anything, it’s an incredibly satisfying feeling.

Let’s see how it did on my own lashes:

Left side: Mascara application at varying stages. Right side: No mascara at all.

As you can see, I have blonde lashes that are almost non-existent when there’s no mascara on them. I personally only tend to wear one coat of mascara, but I applied a second one after the first coat had dried to see if it would cause any major clumping (which I don’t feel it did).

Visually the application looks impressive – I like how separated it makes my lashes, but how much bulk it adds as well. The brush grips the lashes and applies an even application of mascara. The smaller bristles are excellent for working on the inner and outer corner to build up the product in areas that need it. It also has a wet consistency, which is a personal preference of mine.

Make Up For Ever Smoky Stretch Mascara

So how did it wear you ask?

UNBELIEVABLY WELL. I am prone to constant and consistent flaking with every single mascara I have ever worn. It drives me crazy, but I’ve tried dozens and none of them have ever not flaked. Until now! Smoky Stretch gripped onto my lashes and held on for dear life. On my longest day, I wore this for 16 hours straight and the only complaint I can make is that I had maybe one flake fall onto my upper cheek by the end of the day. It also doesn’t make my lashes feel brittle or crunchy either – huge plus!

I’ll be curious to see how the formula holds up as the months go on (I really hope it doesn’t dry up after a month like my Benefit They’re Real did), but after the two weeks I’ve been using this product, I can safely say I am totally on the bandwagon with this one.

Wearing Smoky Stretch Mascara

My press sheet says that the Make Up For Ever Smoky Stretch mascara is available at MUFE Boutiques, but I can also see it up on the Sephora web site which will make it readily accessible for everyone. It retails for $28 CAD which definitely makes this a higher end mascara, but based on my experiences, I will for sure be buying this one when I run out!

Have you tried any MUFE mascaras before? Do you think you’ll give this one a shot?

The product featured in this post was given to me for consideration.

Review: Morphe 35B Palette

201503_morphe35bpalette

This is an awkward post to create; primarily because I’m doing it for one very specific reason: I’ve never heard anyone ever say anything bad about Morphe‘s products. I feel like since I’ve had such a completely different experience to everyone else that I needed to get my viewpoint out there and share it.

Morphe
Morphe

So to get right to the point… I do not feel that Morphe makes quality eyeshadows. I know everyone is bonkers for the Jaclyn Hill palette, but I can only speak to my own experience using the 35B.

Morphe – 35B palette

I picked up the 35B Morphe palette at IMATS in 2014. It was $20 CAD,  how could I resist? Vibrant, beautiful colours that range from shimmery to matte. I was especially drawn to the bright matte shades because those are the kinds of colours I like to play with the most.

Morphe – 35B palette

Unfortunately, the quality just isn’t there. Mattes, by their general nature, can be quite difficult to work with. Tough to blend, sometimes hard as a rock, etc. But never in my life have I encountered an eyeshadow that applied as if was made using blackboard chalk.

I first ran into issues when I decided to create a look for Zoe when she was going on vacation and needed some guest posters. She had suggested I do something vibrant, and I knew just want to use, my new Morphe palette! I pulled it out and got to work. I applied my usual Urban Decay eyeshadow primer and then started applying the colours.  I immediately ran into issues. The colour would just not adhere to my lid despite the primer. I tried to pack it on to get more impact, but whenever I’d try to blend the edges, the shadow would just literally fall off my lid. I’ve never seen anything like it. There was just no adhesion to my lid whatsoever.

I tried a few different shades, to see if any of them would stick, but  had no luck. Irritated, I wiped everything off my face and started again. (A smarter person would’ve chosen a different palette, but I’m too damn stubborn.)

Makeup look created for Writing Whimsy

This time I used two primers and NYX‘s Jumbo Eyeshadow pencil in Milk to get a sticky base going. From there, I was able to pack on the colour enough to an intensity that was suitable, but blending became the perfect nightmare. I mean, how exactly do you blend chalk? Or a product that treats your eyelid as though it’s made out of teflon?

Makeup look created for Writing Whimsy

I know what you’re thinking (or maybe not)… you’ll likely think this looks quite blended and perhaps quite pretty. And I’ll admit, it does. But if you look closely, you can see the patchiness. Nothing is so much blended as it is layered. There are jagged edges that reflect where each colour starts and ends. Hell, there’s even a bald spot in the middle of the bright blue.

And maybe that’s good enough for some people. But I think it’s unbelievable that I had to use three bases to get this. There are brands out there that can do vibrant mattes far better than this and they DON’T require that you spend twenty to thirty minutes on each eye lid. (I’m looking at you Sleek – you and your brights – you’re awesome!)

Even though the price point ($20) of these palettes makes them a very cheap buy, this isn’t the sort of eyeshadows that a beginner should be using. Even if you have a ton of experience, you probably don’t want the hassle of these either. There’s nothing fun about using products that don’t want to be there in the first place.

Makeup look created for Up The Rollercoaster

Well, I had another guest post coming up (this time for Jodi) and I was like “okay, let’s give this another go. There has to be something worthwhile in this palette!” So I tried completely different shades, anxious to make this work.

Makeup look created for Up The Rollercoaster

Once again I had to pack on the bases to get the shadows to stick. While blending the shades together, more and more of the colours kept lifting off my lid. If you look at the shot above, this is a far better example of the pain I had with blending. This isn’t even blended  – this is mashed together in an attempt to make it look like I was able to blend anything.

I want to love this palette so much. The colours are gorgeous in the pan, but they are just not worth the effort. It’s an arduous task to blend out the shades and that’s only if you can even get them to stick to your lids in the first place. I don’t consider myself a total rookie when it comes to makeup, I mean, I was able to get something decent out of these colours after all, but I can’t really recommend this particular palette to anyone. It’s not even helpful if you want to dabble in colour because you’d probably get so irritated with the application you’d be totally turned off of vibrant shades.

If you’ve tried out this palette, or others from Morphe, let me know what your thoughts are. Maybe the shimmers are better?

Must Have Makeup Geek Shadows

201503_musthavemakeupgeek1

So apparently I yammer on a lot about Makeup Geek (MUG) shadows. I realize it’s true, but it’s because I can’t get enough of Marlena’s eyeshadows. They’re cheap as chips, are more pigmented than MAC and by buying them you’re supporting a woman that’s growing her company from scratch (I’m not against large corporations, but there’s something really special about knowing that I’m supporting a YouTuber I’ve been watching for half a decade now).

Zoë from Writing Whimsy suggested that I write a post about my favourites from the brand and I am more than happy to oblige! These are my personal favourites, but I need to point out that I own more than half of the Makeup Geek shadows out there and there are very, VERY few duds in the entire collection. If there’s a shade you like that I haven’t listed, I’d suggest you pick it up – you’ll far prefer anything that suits your colouring and your preferences than choosing what I’ve chosen. That being said, maybe my favourites will give you some ideas.

By the way, I thought I’d mention that I’ve placed five total orders with Makeup Geek and I’ve not had to pay any customs or duties as a Canadian. Shipping seems to cap out around $8 USD, although I’ve not placed an order higher than $220 USD.

Makeup Geek – Flamethrower

Let’s start this off with a bang (and with the foiled shadows). This is Flamethrower and it is FIRE. Between the pigmentation, the utter shimmeryness  and the fact that it’s molten copper… I couldn’t love this shadow more. Out of all the foiled shadows, I felt this one had the best payoff and was definitely one of the more unique ones. It doesn’t matter if I apply this on the lid or in the crease, it looks gorgeous anywhere on I apply it.

Makeup Geek – Jester

Jester (another foiled shadow) is green with a gold flash. It’s similar to MAC‘s Golden Olive but less fussy since it’s not a loose pigment. This is the kind of green that makes my heart swoon. I’ll typically apply this to the lid and then add a darker matte green in the crease to give it some depth. Would also pair nicely with a yellow-toned inner corner highlight.

Makeup Geek – Mesmerized

Mesmerized is not a shade I even want to like because it’s so… traditional.  This is the kind of shade that everyone loves which probably has a lot to do with the fact that it’s incredibly flattering. It’s similar to MAC‘s Satin Taupe (a shade I shunned for ages because I felt it was too boring) and for that very reason it’ll do well on everyone’s skin tone. This looks gorgeous no matter what you do with it. It’s one of those simple colours that can be a “One and Done” type look on the lid.

Makeup Geek – Bitten

Moving on to MUG‘s regular line of shadows. Bitten seems to swatch incredibly poorly, but this one is holy grail status (and please ignore the picture on MUG’s own site, it does not do this shadow justice). I’ve never seen anything quite like it in any other makeup line which makes this one super special. I use this in the crease and outer corner and on me it has that reddish tinge while still remaining flattering.

Makeup Geek – Creme Brulee

Creme Brulee was the kind of shade that I didn’t know what to do with. Like what the hell is this shade? Slightly orange? Slightly brown? What on earth do I use it for? And then I tried out the “transition colour” technique that everyone seems to refer to on blogs and YouTube. And wow, I had no idea. I had nooooo idea that I could actually make my eyeshadows blend seamlessly with my skin tone until I tried this shade out. If you have a solid defined crease, pop it in there to help transition lid shades to your brow bone. If you have hooded lids like me, blend it slightly above your crease to do the same thing. I prefer this most with super smokey eyes, but it works well with any look in general.

Makeup Geek – Roulette

A cheater favourite really. This is Roulette, and it’s only available in the Vegas Lightspalette (which is limited edition and the whole thing is worth the cash, so you should really just go buy the whole thing). (EDIT: It’s now permanent!) Roulette is not dissimilar to Flamethrower, but perhaps a subtler shade as it doesn’t have the foiled punch. Are you sensing a theme yet? Orange and red shades are definitely my favourites.

Makeup Geek – Razzleberry

This one. My god this one. Helllloooo sailor. Bright neon raspberry with gold flecks. This shade is insane. There isn’t anything I don’t love about it. And can we talk about the name? Razzleberry. RAZZLEBERRY. Another completely unique shade (seriously, go ahead. Name me a brand that has a shade like this in their regular line.) that I’ve completely fallen in love with. I use this predominantly in the crease because I’m really not sure how to wear it on the lid (I’m open to suggestions!).

Makeup Geek – Vanilla Bean

This is for us pasty folk out there. Vanilla Bean is the highlight shade I use for my brow bone. One of the downsides of the MUG line is that there aren’t a whole lot of brow bone highlight shades, so this seems to be our default colour. It is, despite being the only shade available, quite nice. It’s not pale enough to be super brightening so skintones lighter than NW20 may find this is far too dark on their skin.

Makeup Geek – Poolside

Poolside is one of my more recent acquisitions. It requires some build up to get its full potency on the lid, but that doesn’t make me love it any less. This is a gorgeous turquoise shade with a satin finish. Not quite dark enough to deepen up the crease, but I still use it there anyway and then bump up the darkness with a touch of black shadow.

Makeup Geek – Utopia

This one isn’t a pressed shadow, but it’s far beyond worth mentioning. Utopia pigment is a shade that I’m not sure how it exists. It looks like blackened-gold minerals in the pot, but it doesn’t seem to retain its black properties on the lid (a good thing, because usually when that happens you get too much black and not enough actual colour). It does, however, seem to remain both equally shiny gold and dark at the same time. I usually apply a black base (NYX‘s Jumbo Eyeshadow Pencil in Black Bean) and then pat this on top. It’s especially stunning all over the lid with Bitten in the crease.

Because I’ve already done a lot of looks involving Makeup Geek shadows, I thought I’d round up a few that include the shades I’ve mentioned in this post. Enjoy!

Flamethrower in the crease
Flamethrower in the creaseFlamethrower in the crease
Flamethrower on the lid, Bitten in the crease

So while I’ve named ten shades, I really do love this whole line of eyeshadows so thoroughly that I’m currently in the process of trying to acquire them all. Tell me what your favourite shades are!

Utopia on the lid
Utopia on the lid
Razzleberry on the outer corner/crease
Roulette on the outer half of the lid
Bitten in the crease, Vanilla Bean on the brow bone
Utopia on the lid, Bitten in outer corner/crease

So while I’ve named ten shades, I really do love this whole line of eyeshadows so thoroughly that I’m currently in the process of trying to acquire them all. Tell me what your favourite shades are!