Category Archives: Reviews

NYX A Bit Jelly Gel Illuminator in Luminous (Review & Swatches)

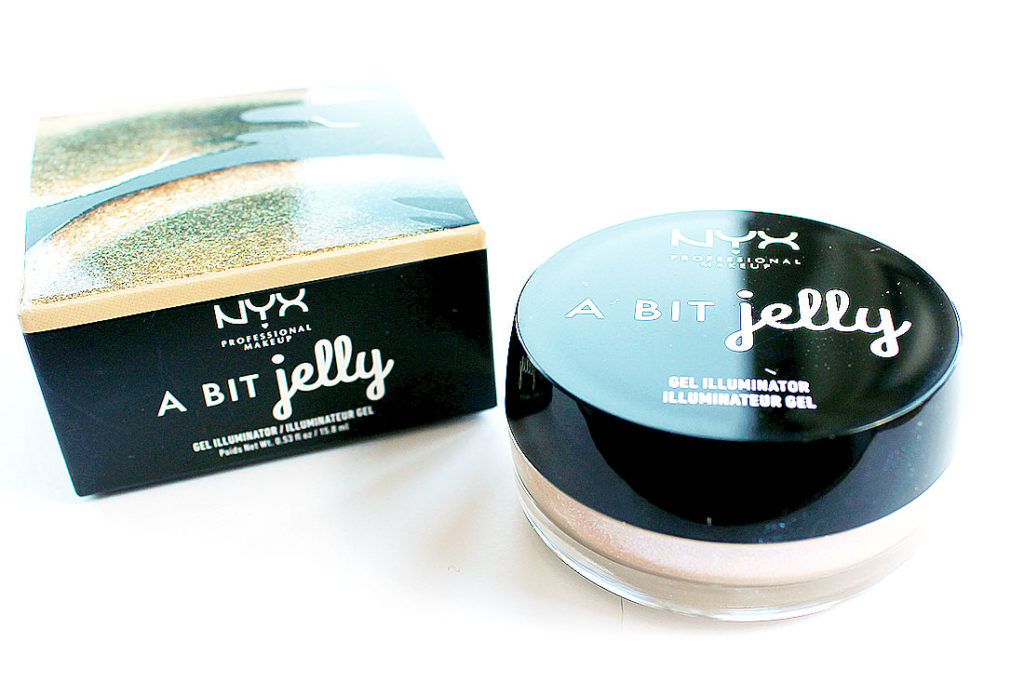
NYX A Bit Jelly Gel Illuminator in Luminescence

I feel like we’re pretty used to seeing typical highlighters now – either they’re powder or they’re cream, and they look slightly different, but for the most part they’re fairly similar. Even a truly liquid highlighter has similar properties. So a highlighter that’s rather gelatinous in nature? I was intrigued!
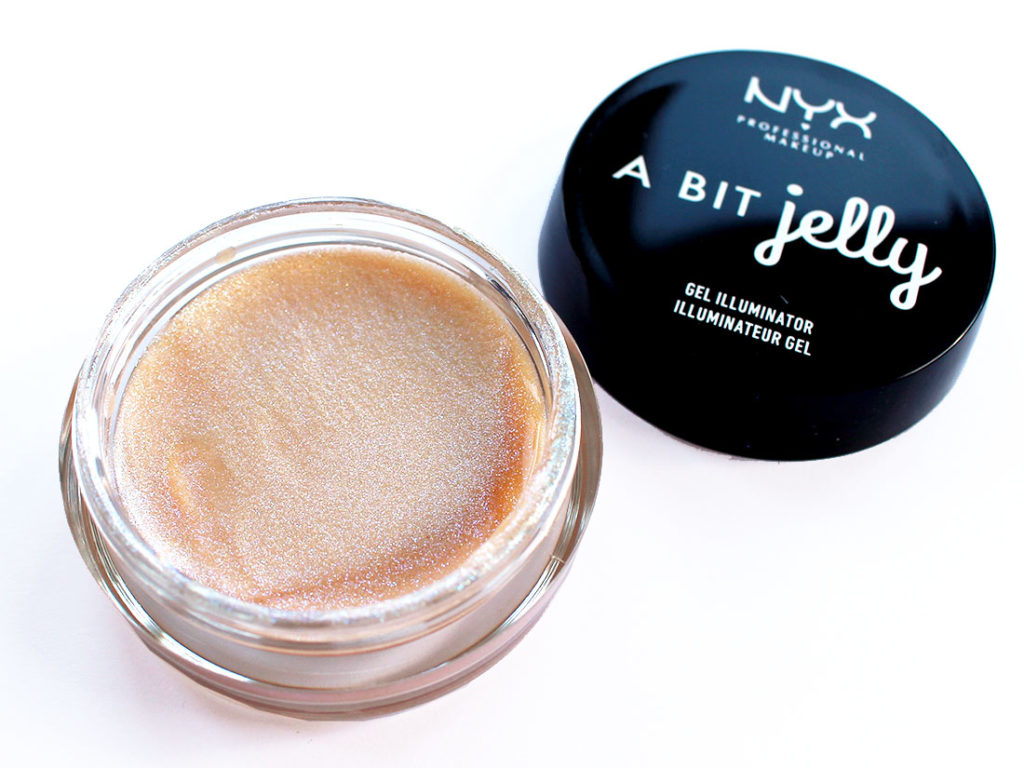
NYX A Bit Jelly Gel Illuminator in Luminescence

NYX has recently launched their “A Bit Jelly” highlighters – a gel illuminator that is water-based, lightweight, and filled with sparkle. And it truly is filled with sparkle – the little specks you see floating in the gel are fine glitter particles!
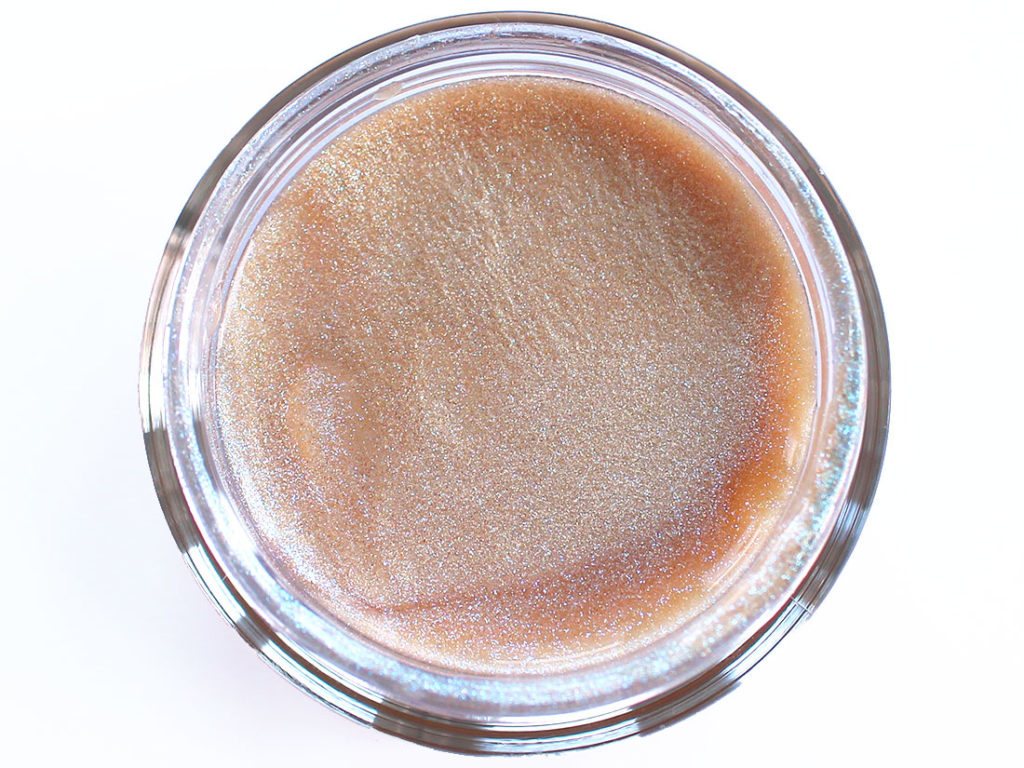
NYX A Bit Jelly Gel Illuminator in Luminescence

There are three shades in the collection, but the one I have to showcase is Luminous. It’s a WEIRD shade in the tub to be honest – it looks like a caramel bronze base with teal shimmer.
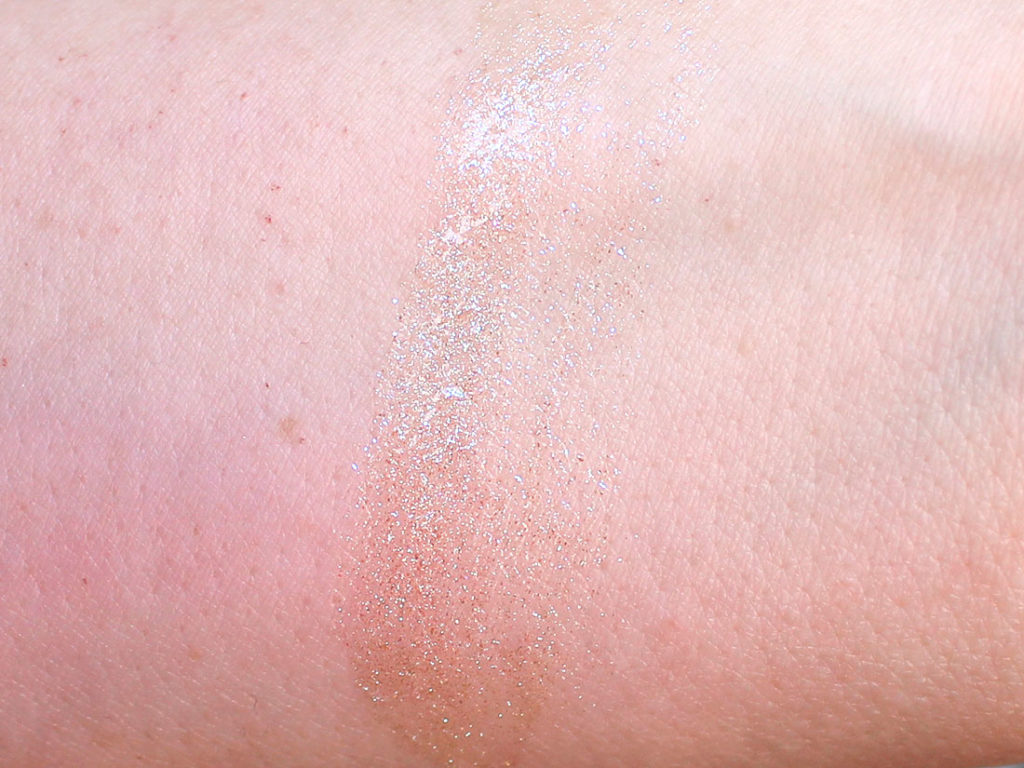
NYX A Bit Jelly Gel Illuminator in Luminescence - swatch
NYX A Bit Jelly Gel Illuminator in Luminescence – swatch

When you swatch it you can see that the hints of caramel in the base disappear a bit, although it’s still obvious around the edges of my arm where it curves. The glitter particles stand out quite a bit, but they’re not quite as “glitter in your face” as I was expecting!
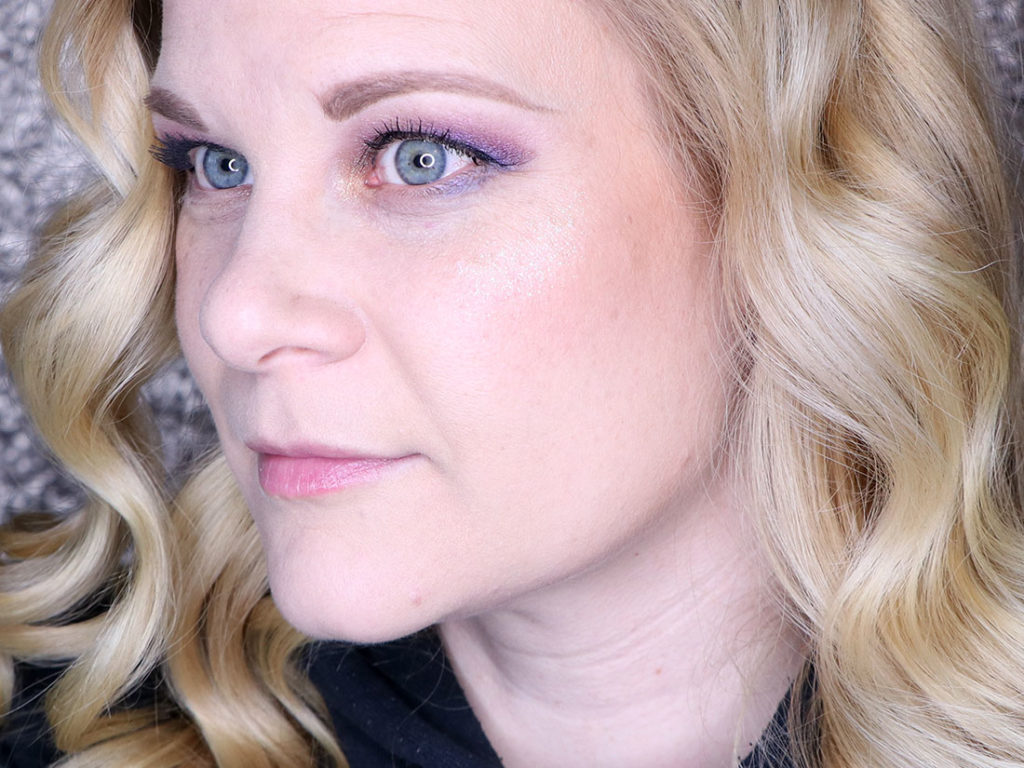
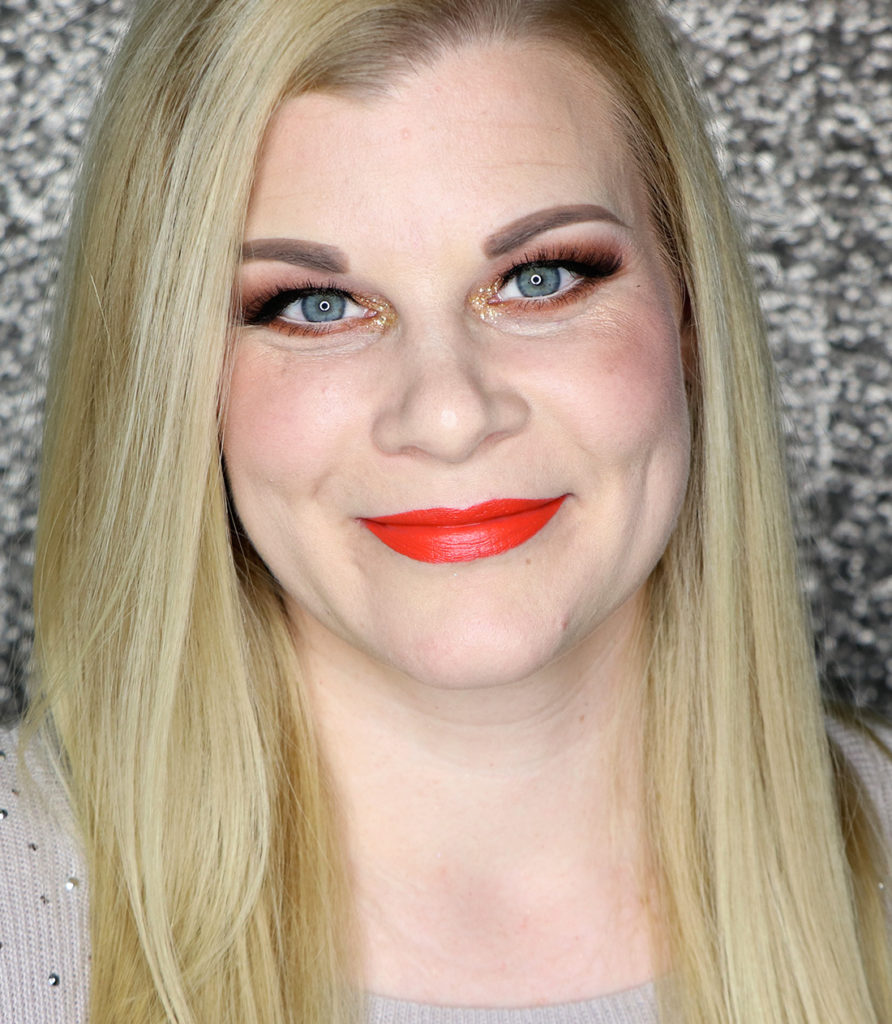
Wearing Luminescence

As NYX recommends, I used a finger to apply Luminous to the tops of my cheekbones. It’s very, very wet, and feels very bizarre to be applying to be honest. It blends out just fine, but since I’ve never used a gel highlighter before I have to say it felt so very strange at first!

Luminous doesn’t look like a glittery highlighter from afar – more like a soft shimmer (I asked a coworker just to confirm and she agreed.)
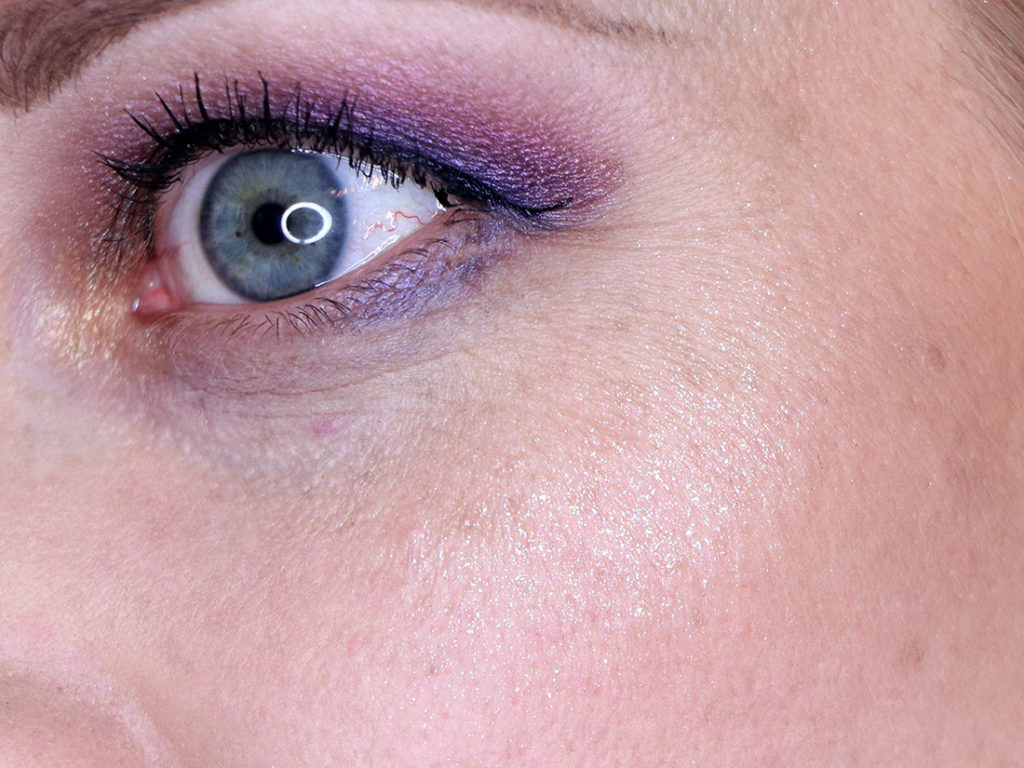
Luminescence up close

But up close is another story. Up close you can see the particle shimmer actually becomes  little bit more flattened down and takes on a clumpy, flaky texture. I love the effect, but if you’re in to a more even sheen, then this is potentially not the highlighter for you. It’s definitely luminescent – I love how the shimmer looks more and more like glitter the closer you get to my face.

Final Thoughts

What a bizarre texture! But once you get over that, the NYX A Bit Jelly Gel Illuminator is a lot of fun to use. I don’t think this is for everyone though – the texture is bizarre, the application isn’t traditional (if you’re someone who prefers to use a brush), and the overall effect is quite glittery up close (less so from afar). BUT… it’s a lot of fun to play with! I think this would look gorgeous if you applied some all over your body during the summer for a bit of extra shimmer and glow. Or, if you don’t want to be a disco ball, apply it in select locations like your collarbones and the tops of you shoulders. In short, it’s fun and it’s beautiful… but it’s a bit more fussy to play with that your traditional powder highlighter.

The NYX A Bit Jelly Gel Illuminators can be purchased on shoppersdrugmart.com for $13.99 CAD (currently on sale for $10.99!) or on ulta.com for $15 USD. Annnnnd I’ve just realized this is cheaper in Canada! This happens so infrequently! WOOOHOOO!!!!

The product featured in this post was sent to me for consideration. Post contains affiliate links.
INGLOT Body Sparkles Crystals (Review & Swatches)

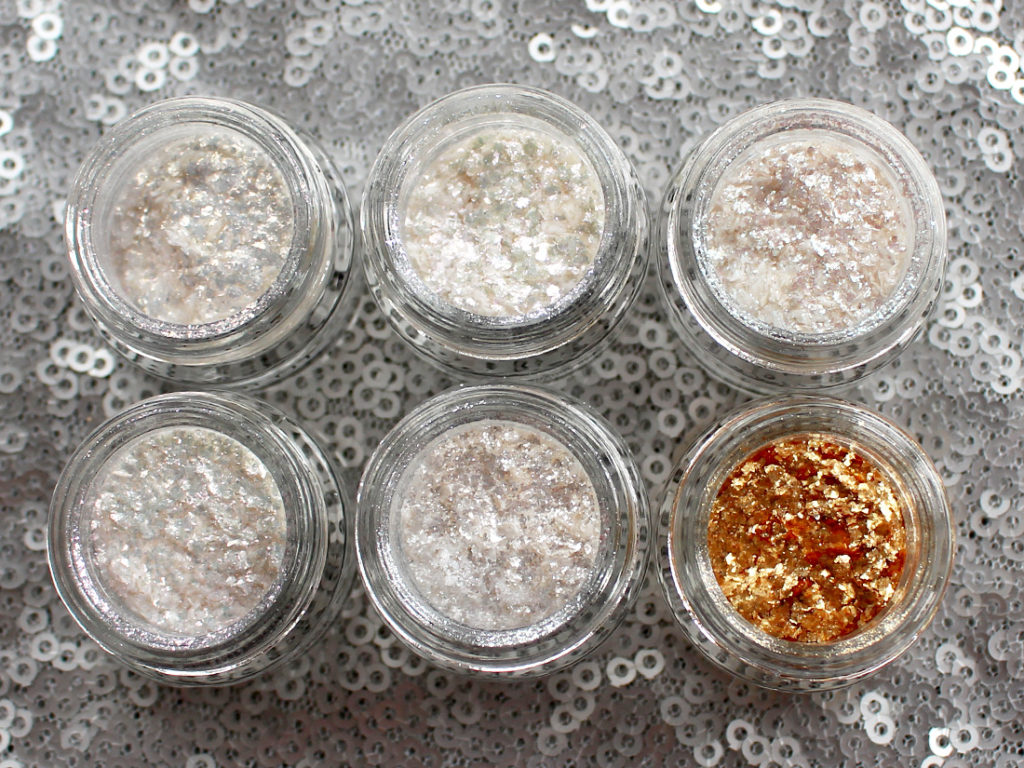
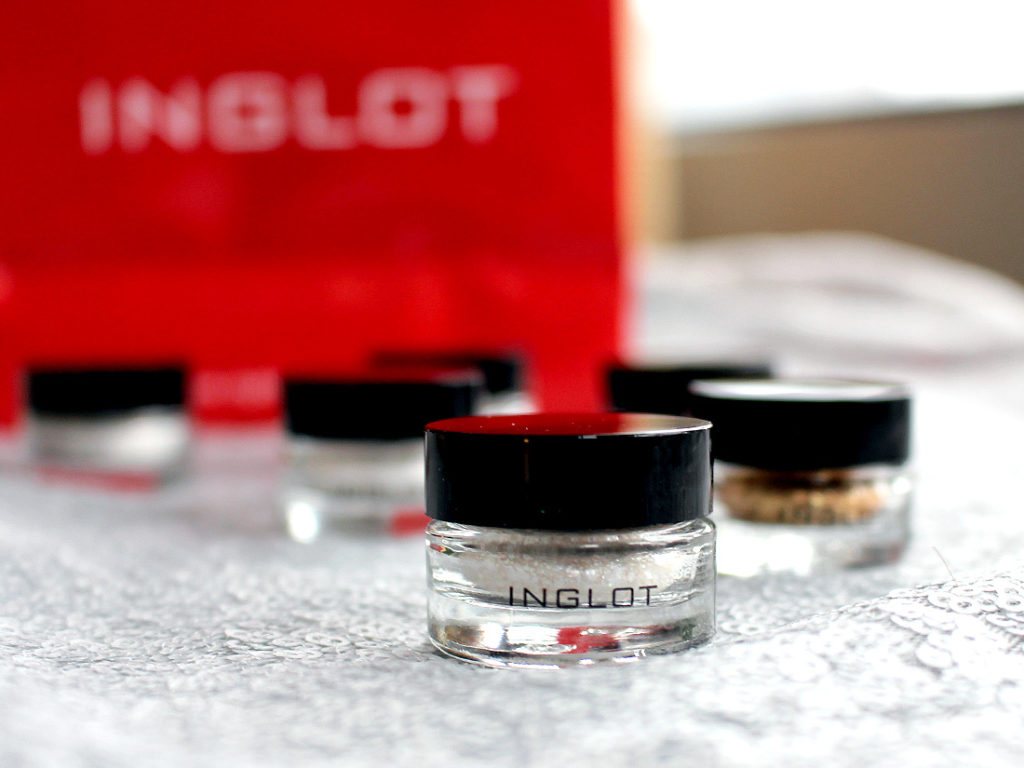
INGLOT Body Sparkles Crystals

A new INGLOT product always gets me excited, and even moreso when it’s a glitter(esque) launch!

INGLOT Body Sparkles Crystals

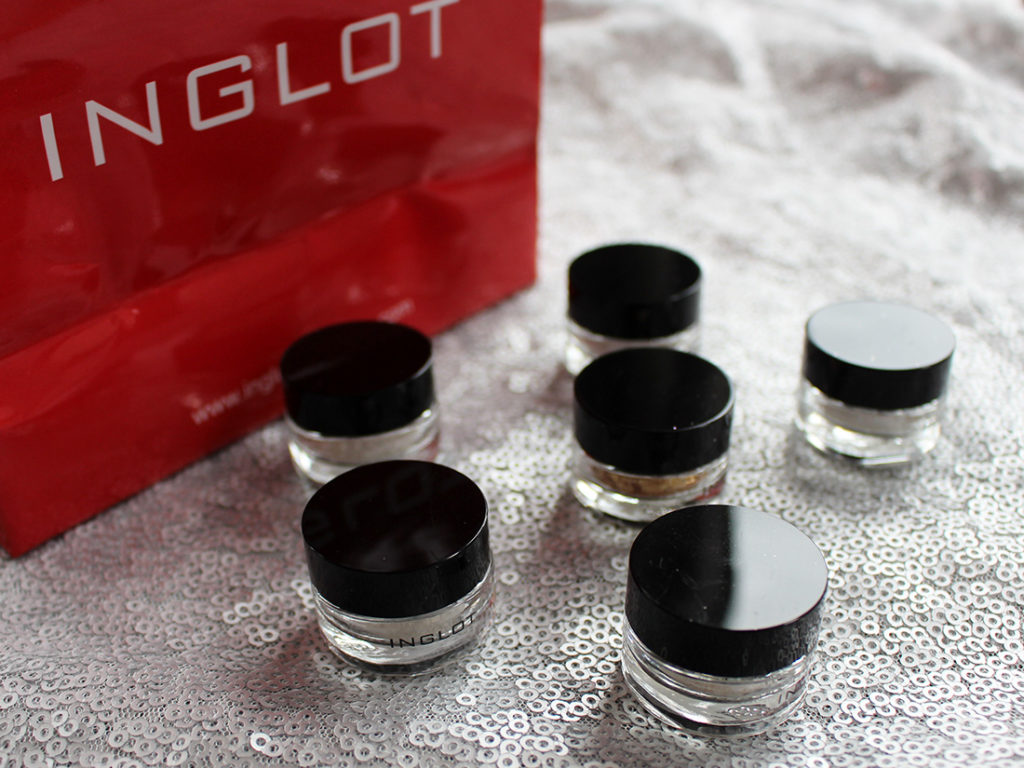
A month or so ago, INGLOT launched their Body Sparkles Crystals. They’re a play off their initial Body Sparkles launch – while the original Body Sparkles are incredibly finely ground glitter, the Body Sparkles Crystals have a much larger, flakier texture.

INGLOT Body Sparkles Crystals

In the pot, you’d assume they were all white/translucent except for the bright gold. However, they’re all actually duochrome in nature and have a colourful reflect depending on the angle in which you look at the product.

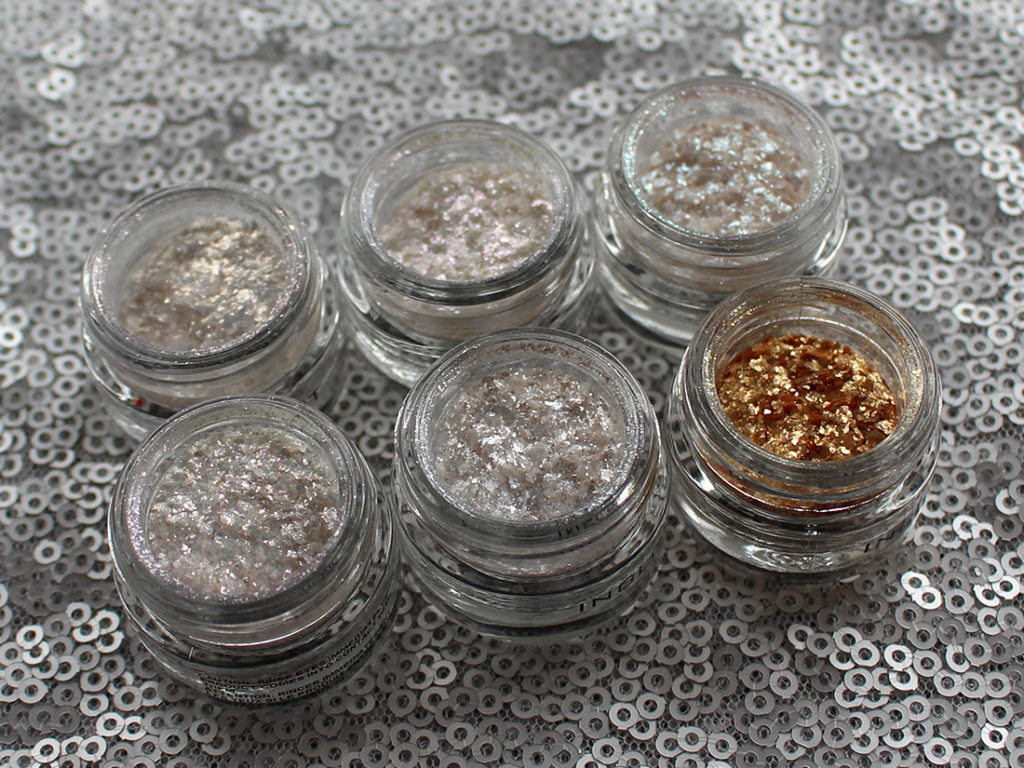
INGLOT Body Sparkles Crystals

When photographed at an angle, you can see a bit more of the colours peeking out. There’s a bit of purple, or teal, or pink hue to some of the shades. And while they’re fun looking in the pot, they’re truly spectacular on the eyes.

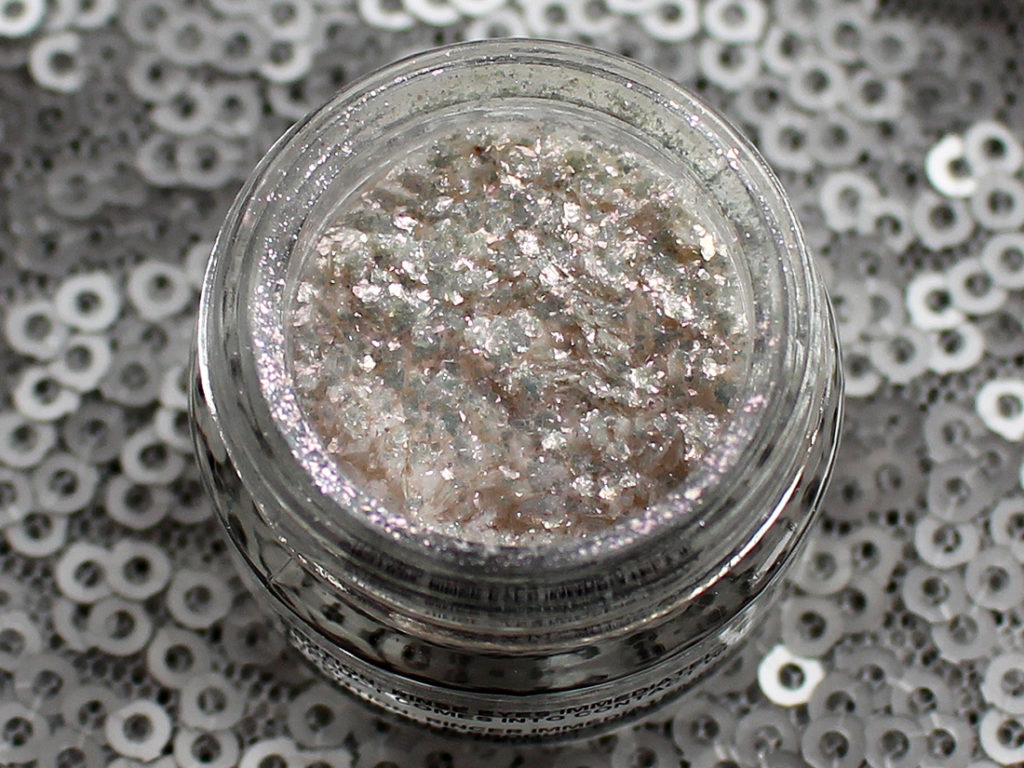
INGLOT Body Sparkles Crystals - up close
INGLOT Body Sparkles Crystals – up close

Here’s a closer up shot so you can see a bit of the texture of the Body Sparkles Crystals. They’re really flaky – it’s a texture you’d expect to see in a nail polish!

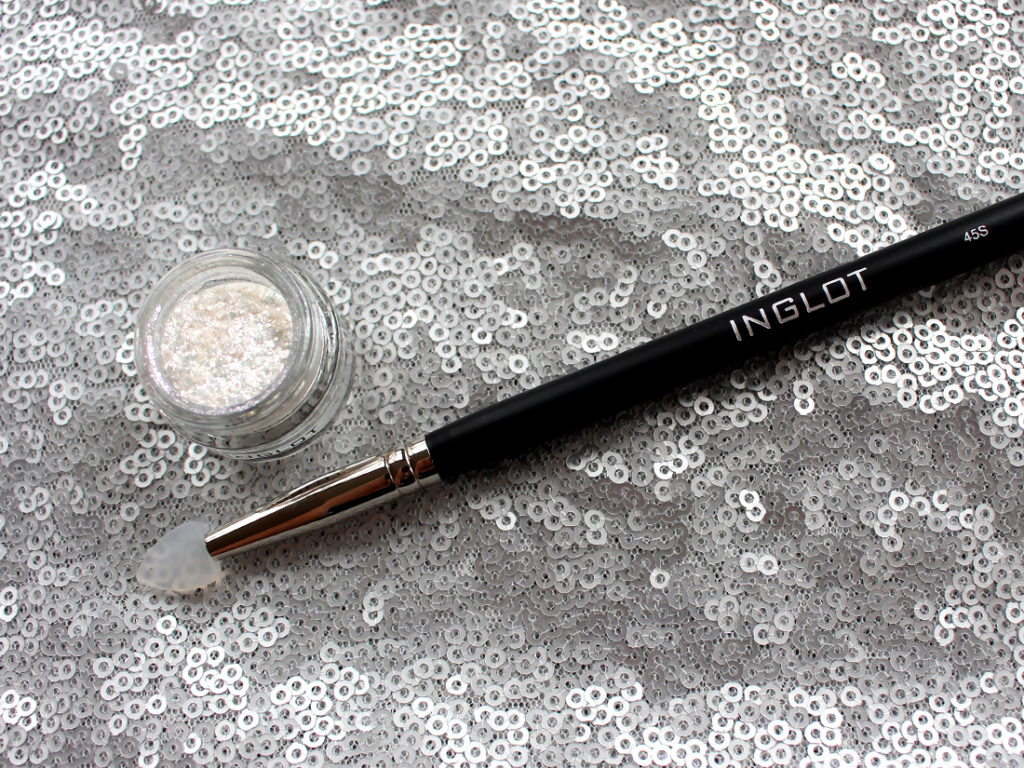
Best used with the INGLOT 45S silicone paddle brush

INGLOT recommends using them on top of their Eye Shadow Keeper (an eye primer) and using their silicone paddle brush (the INGLOT 45S). I found that the silicone brush was really, really helpful for application. When I tried to apply these with a regular brush, it ended up being such a mess. Your finger may work, but I’d definitely recommend picking up the 45S brush if you plan on snagging any of these Body Sparkles Crystals. They do also apply nicely on top of a primer or a glitter glue to help really lock the flecks in place.

INGLOT Body Sparkles Crystals - swatched
INGLOT Body Sparkles Crystals – swatched

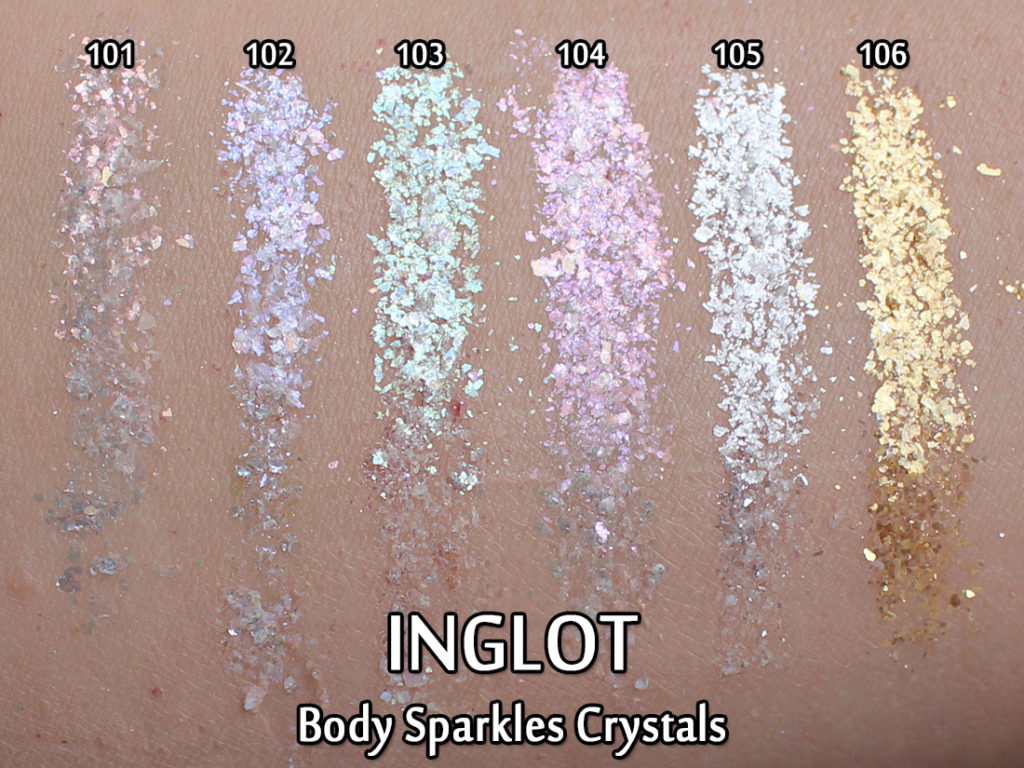
I’ve got several swatches in this post because I really wanted you to see the different tones and textures the Body Sparkles Crystals have on the skin. Above is my “regular” swatch shot – taken with my DSLR and straight on. Amazingly, you can really see the colour shift on bare skin.

INGLOT Body Sparkles Crystals - swatched layered over a black base
INGLOT Body Sparkles Crystals – swatched layered over a black base

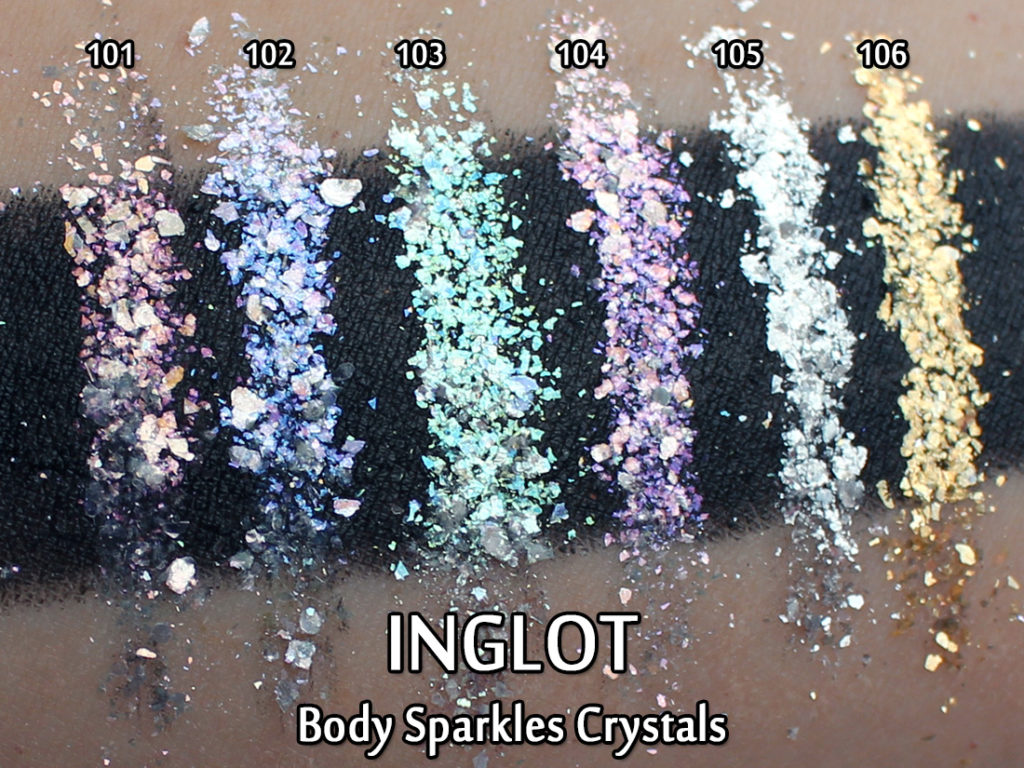
Swatched on top of a black base, you can see the colour comes out a lot more strongly and the flakes are more evident. Some are chunky, and others are smaller specks.

INGLOT Body Sparkles Crystals - swatched (photo taken with a phone to show particles)
INGLOT Body Sparkles Crystals – swatched (photo taken with a phone to show particles)

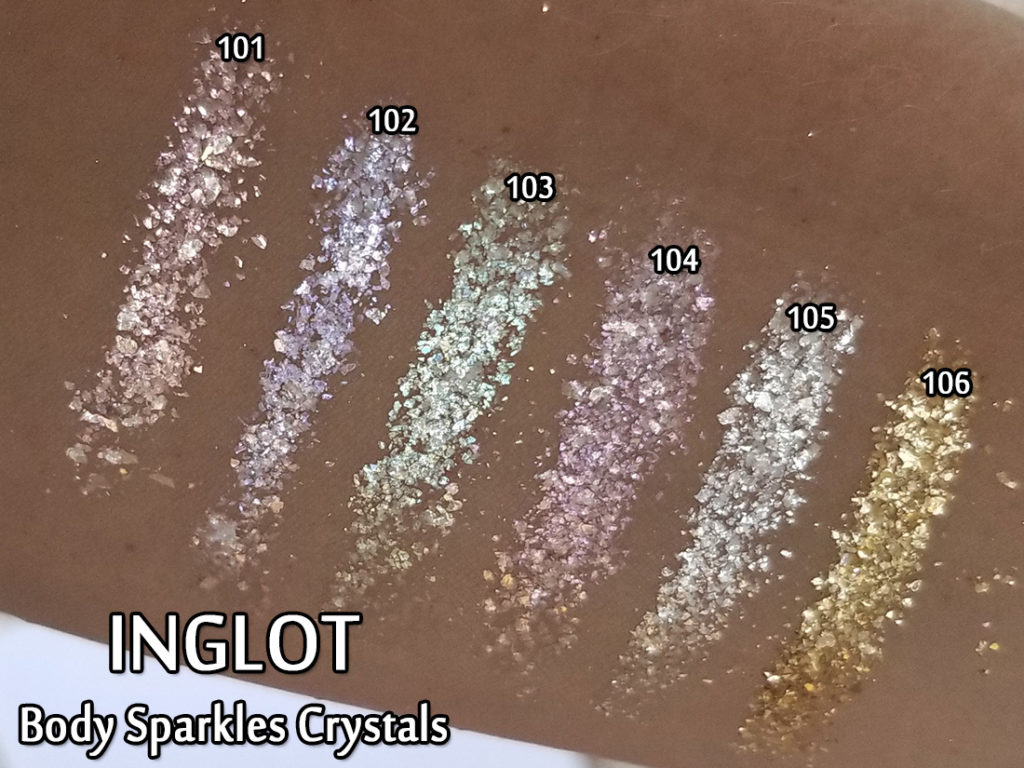
And finally, the shot above is with my phone (which automatically equals garbage photos) but I thought it was neat to see the texture this way as well.

Here’s how they worked out on my eyes:

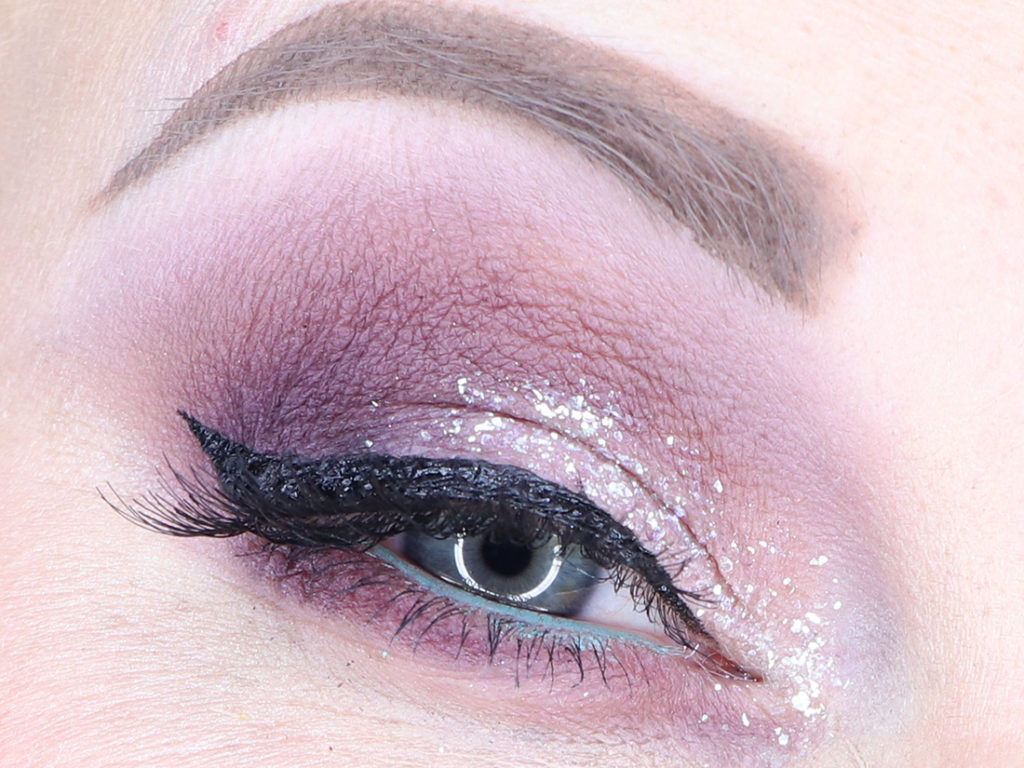
Wearing 101
Wearing 101

101 has the opalescent shift and I opted to put it on top of a light pink base. You can see the crystals peeking out and it looks like pieces of fragmented glass.

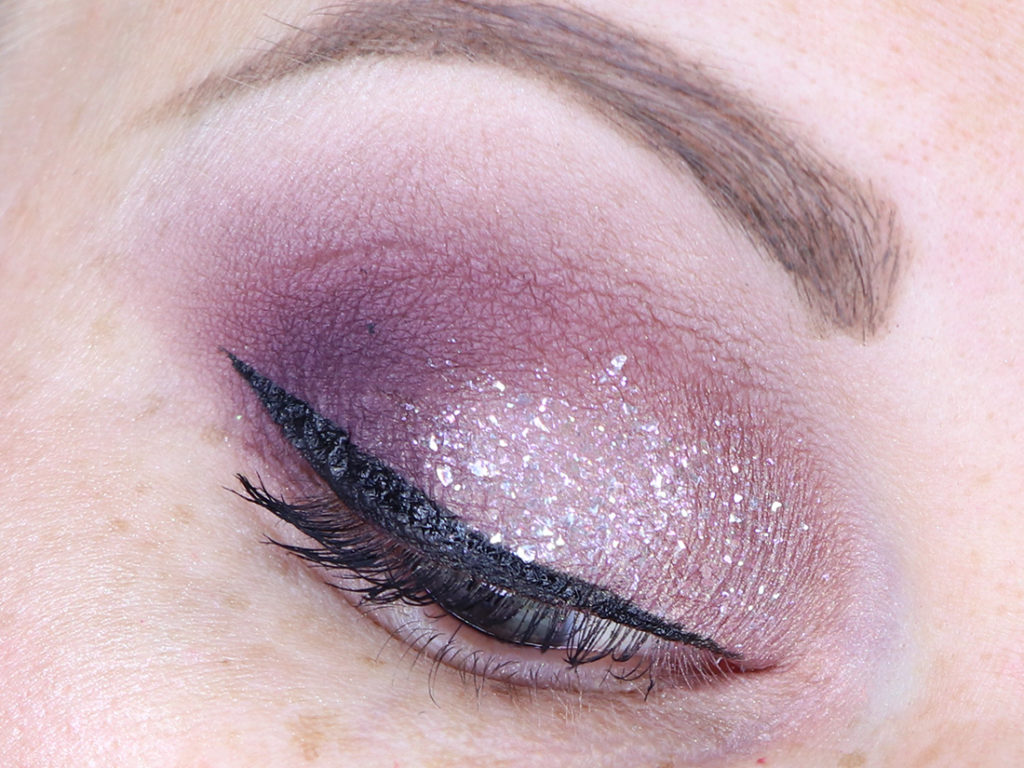
Wearing 103
Wearing 103

103 didn’t come out as I would’ve liked, so I think it would’ve worked a lot better on top of a light green base (I have it over an ivory/cream shade). 103 was one of my favourite colours in this launch, but I sadly didn’t do it justice.

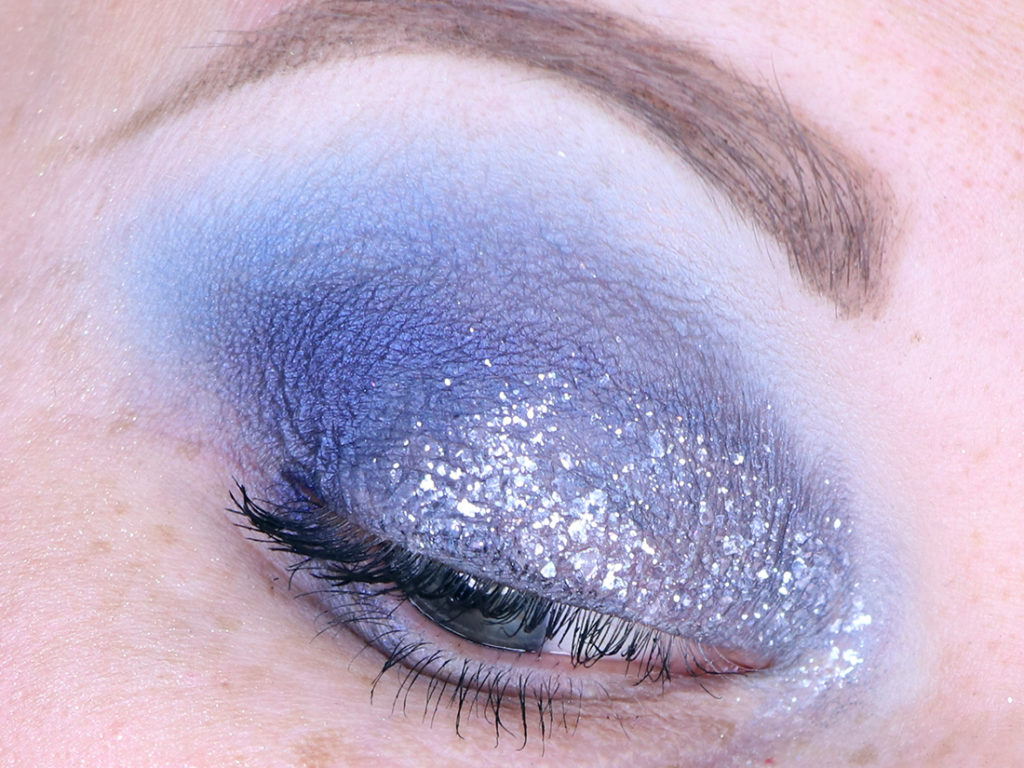
Wearing 104
Wearing 104

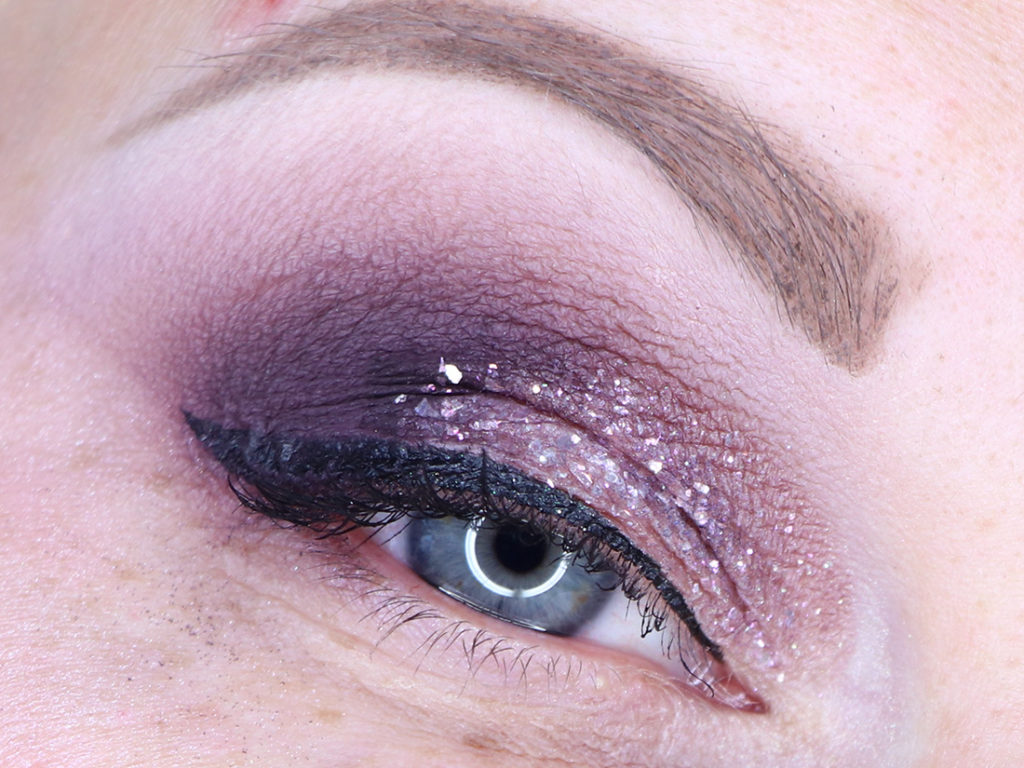
Funny how the first three photos were all purple looks! 104 is more of a pinky-purple toned glitter and worked a lot better on top of the purple base I put underneath it.

Wearing 105
Wearing 105

105 was so freaking cool. I know it looks like there’s a gap in the crystals at the top-center of my lid, but that’s just how it looks at certain angles – like there’s pieces missing. Once you move a little bit, that fragmented piece shows up – it’s really a neat effect.

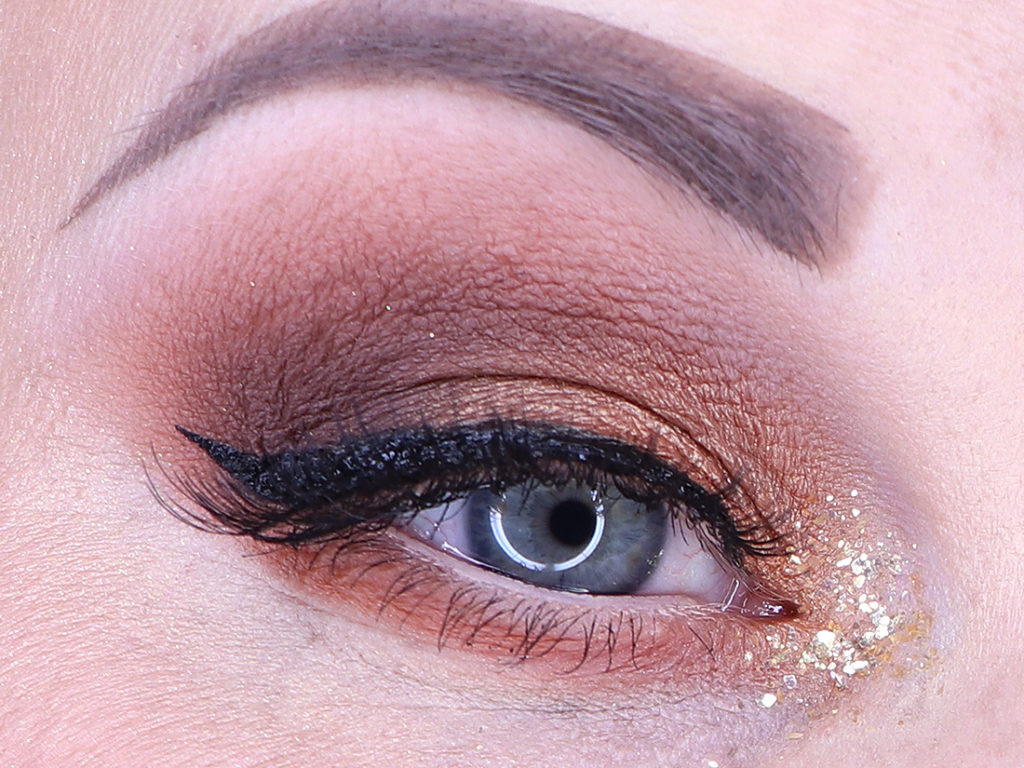
Wearing 106
Wearing 106

And lastly, I put 106 on the inner corner of my eye for a fractured glitter look. This is one of the more subtle ways to wear glitter because if I zoom you out…

Wearing 106
Wearing 106

…it’s not as obvious that I’ve got a ton of glitter on my face. Of course, you could apply this to your temples or along your cheekbones for a super glittery, flaky look… and I may just do that during the summer months!

Final Thoughts

I *love* these! The INGLOT Body Sparkles Crystals are something new and exciting, and I loved playing with them. I’m already a huge fan of glitter, so it was nice to try out this flaky/fragmented glass texture on my eyes instead. I have an old MAC shadow from one of their holiday collection years ago that has this kind of flaky glitter on it, and it’s been years since I’ve seen another brand release something similar. I love that these are all ivory-to-colour duochromes because those are my favourite kinds of duochromes.

I did feel that this took a little bit of playing around to figure out what works best for them. Fundamentally, I think either a straight black base, or a base that is similar in colour to the Crystal you’re going to be applying is necessary to make the colour stand out. Application with the silicone paddle (the 45S) was massively helpful for getting the flecks in just the right places on my eye.

In short – I love these. I think they’re a fun new take on glitter and I’ve been having a lot of fun playing with them!

If you’re interested in picking these up (or any INGLOT products), use code using “MAKEUPYOURMIND” for 10% off your orders on these web sites:

The products featured in this post were sent to me for consideration. Post contains affiliate links.