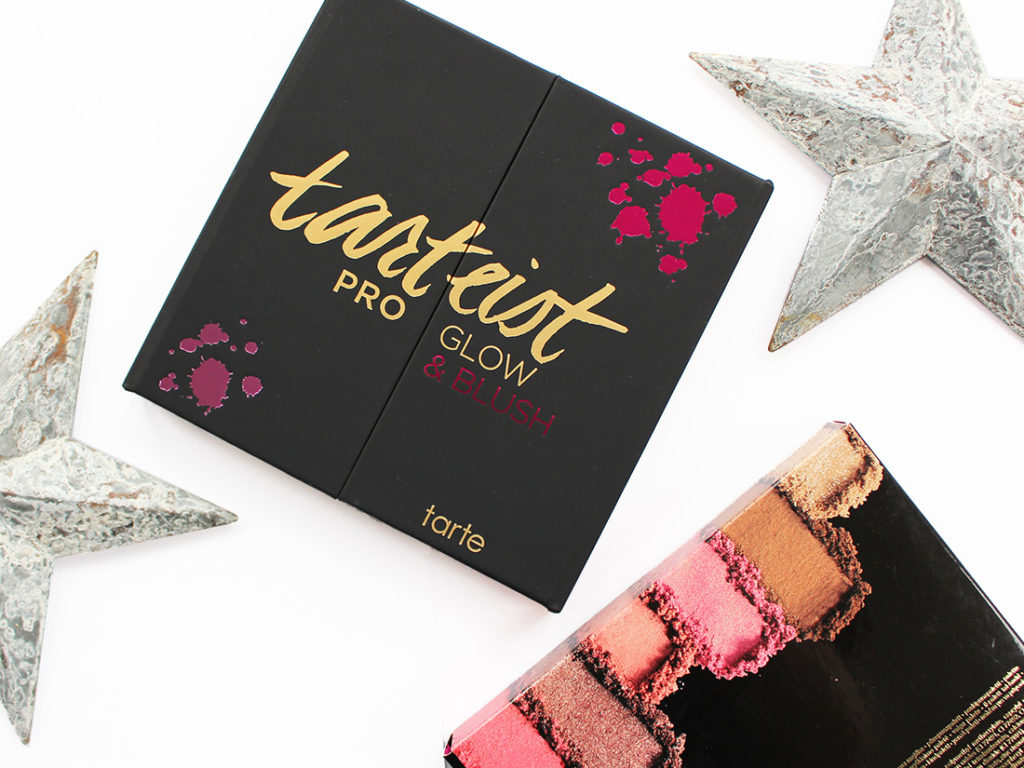
I’ve always been super keen to try out Tarte‘s face palettes – their 2013 Off The Cuff holiday launch is still one of my favourites to date, so I’m always eager to see what else they’ll put out in the face department.
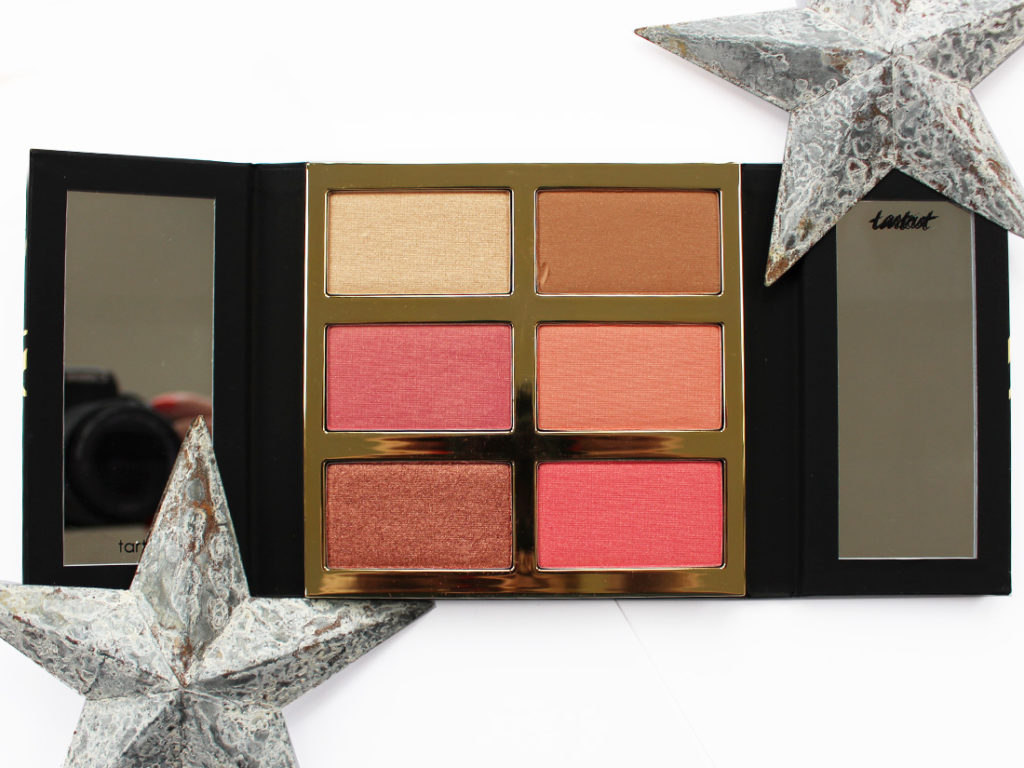
Tarte Tarteist Pro Glow & Blush
New out in the face palette department for the brand is their Tarteist Pro Glow + Blush palette. It features four shades of blush, a highlighter and a bronzer. There is a definite emphasis on glow in this palette – all the blushes have a shimmery edge, and the bronzer does have specs of glitter throughout the formula that are readily apparent on the skin.
Tarte Tarteist Pro Glow & Blush
The palette retails for $59 CAD/$45 USD and each pan contains 5.6 grams of product. They say the product is their traditional Amazonian Clay formula, although I found the formula on these to be not as stiff as their regular Amazonian Clay blush singles. I usually use a duo fiber stippling brush for those singles, but with these I found a normal powder blush brush worked the best.
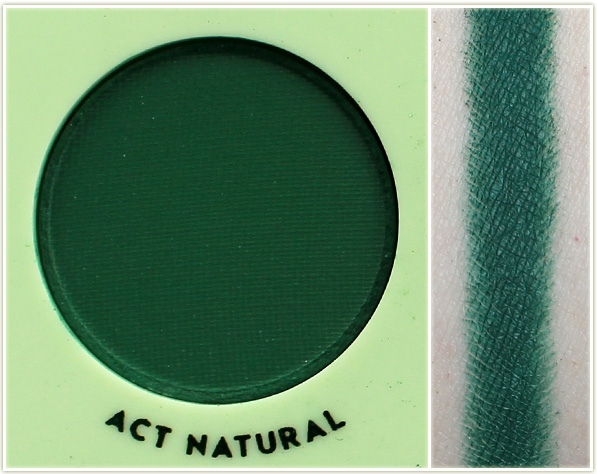
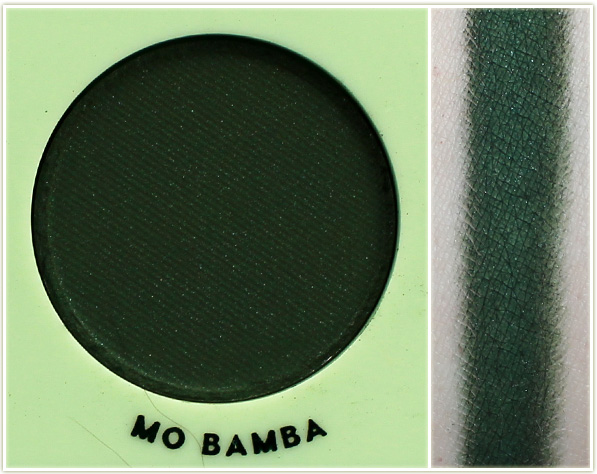
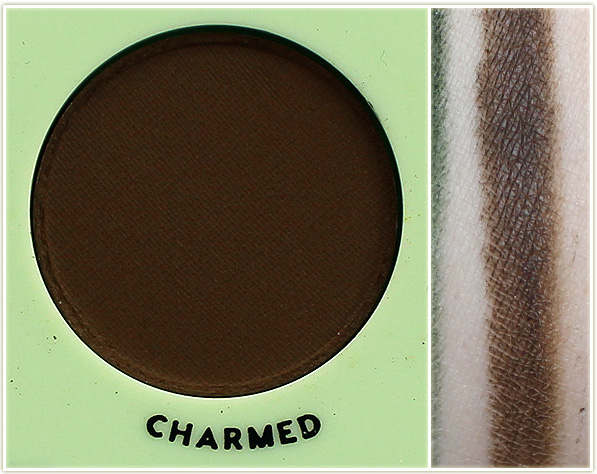
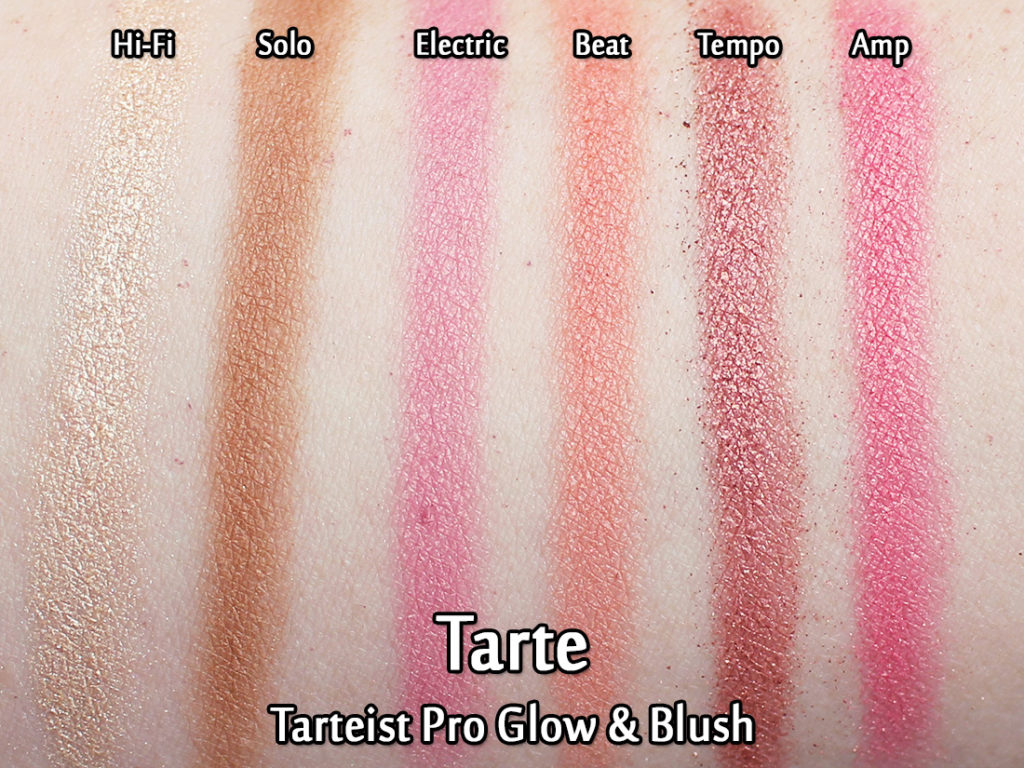
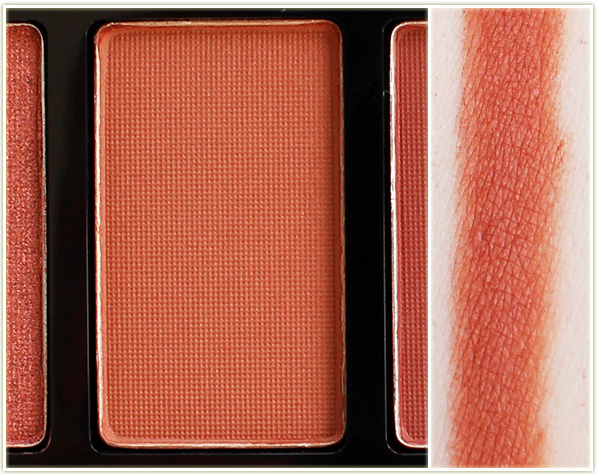
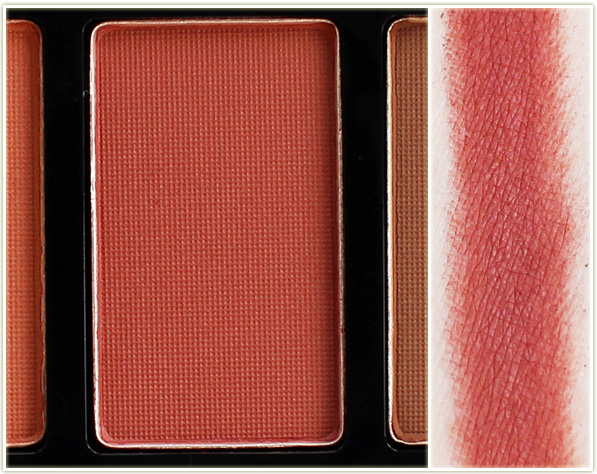
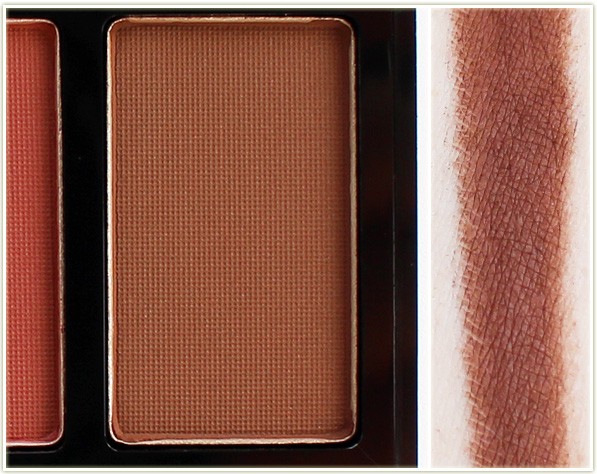
Tarte Tarteist Pro Glow & Blush – swatches
Swatched out, you can see the varying levels of shimmer inherent in each powder. The highlighter is very reflective, whereas I’d say only two of the blushes have a LOT of shimmer – the others are more on the subtle/softer side.
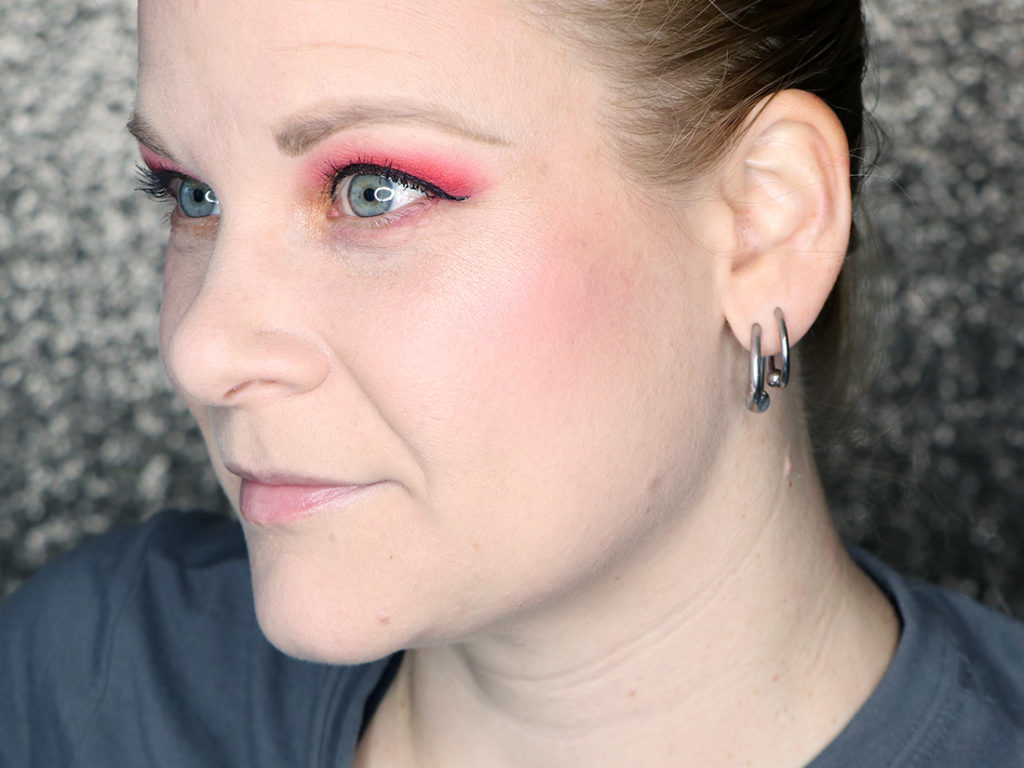
In all of the shots below I’m wearing the bronzer in Solo and highlighter in Hi-Fi. Only the blush colour changes.
Wearing Electric
Electric is an easy-to-wear pink with gold shimmer.
Wearing Beat
Beat is a peach with gold shimmer.
Wearing Tempo
Tempo is a golden mauve with high shimmer. I was surprised by this one! Given the shade in the pan I thought this might be a touch dark, but it actually worked out well when I used a light hand.
Wearing Amp
Amp was my favourite of the bunch because it’s a coral with gold shimmer.
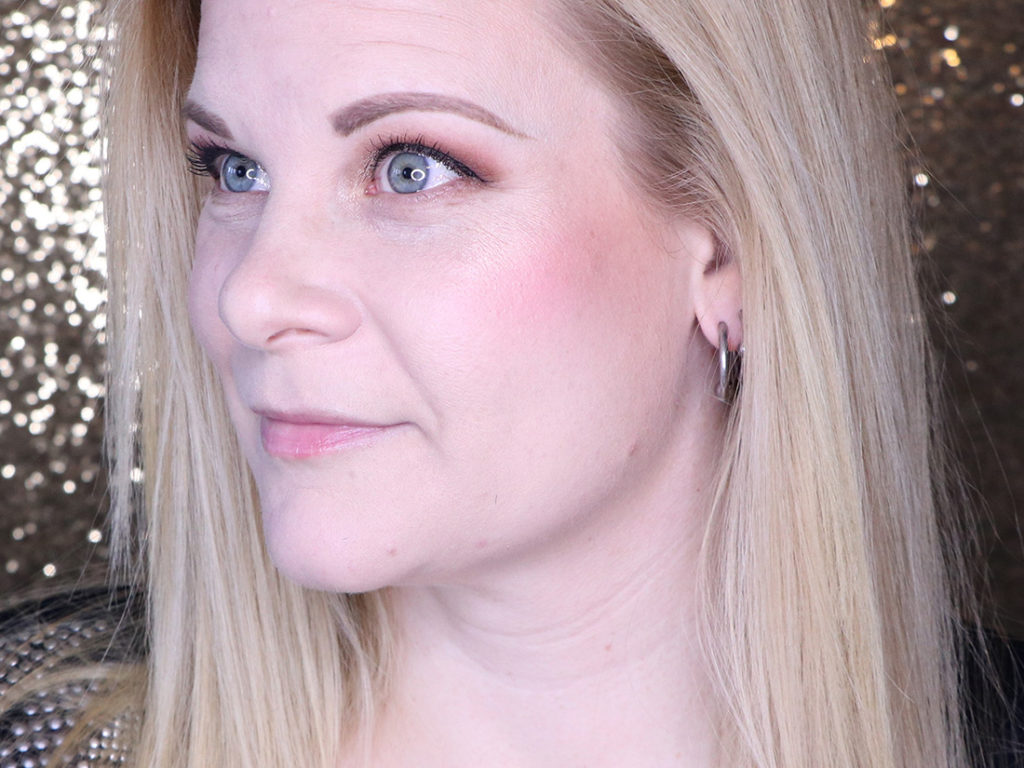
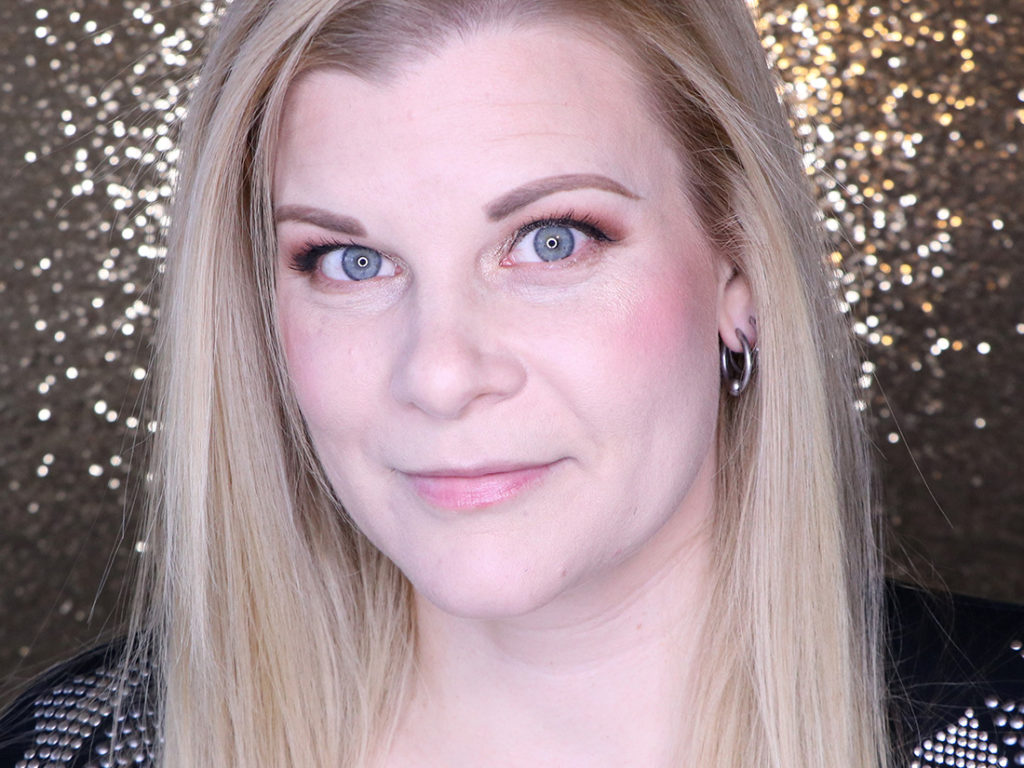
Full face with Beat
Here’s a more direct face shot so you can see how it plays out on a full face. I feel like the bronzer is quite seamless on my skintone, but I have to point out that the shimmer specs in it are actually tiny particles of glitter and I was surprised as heck when I noticed the random glitter on my face at one point while I was doing my makeup. I thought I’d accidentally used glitter without realizing it. That being said, it took me a long time to actually notice it (third time I was using the palette), so I wouldn’t say it’s something overtly obvious.
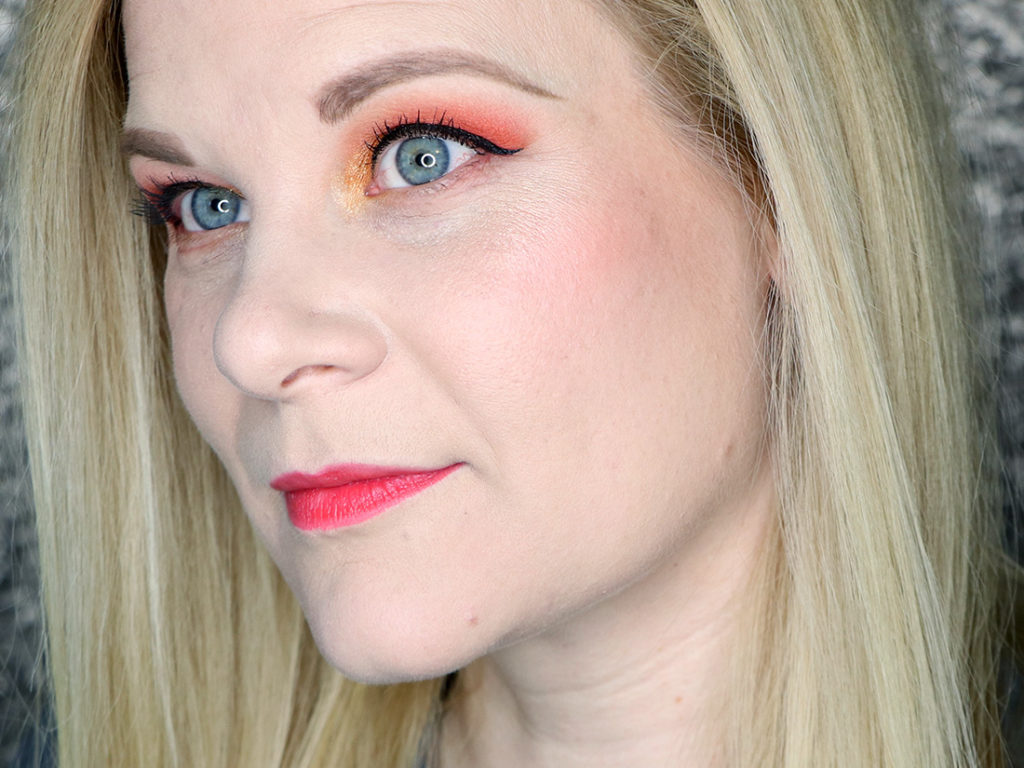
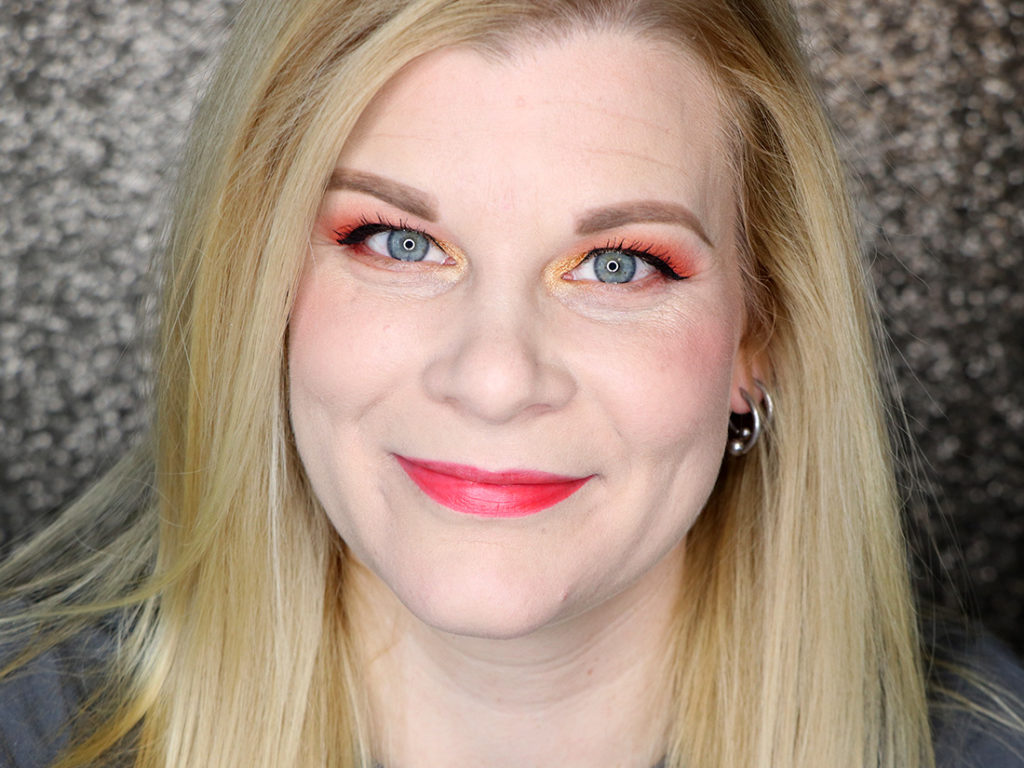
Full face with Electric
The previous face shot was in warm-toned lighting, whereas this one is more cool-toned, and I feel like the bronzer still looks good despite the tone change.
Final Thoughts
Although I was surprised that the TarteTarteist Pro Glow & Blush palette was all shimmery, I can see how it works considering that “glow” is in the name of the actual product! If you’re someone who prefers a matte blush and bronzer, then this is most definitely not the palette for you. If you’re up for all the glow, then this is definitely worth looking into. If you’re a deeper skintone than me I feel like the blush and highlight shades will work for you since they’re quite pigmented and veer on the golden side of things. The bronzer may work for skintones a bit deeper than mine, but if you’re deeper than a medium I don’t think it’ll look like much.
I found myself pleasantly surprised that I liked the shimmery blushes so much. There are varying depths of shimmer (the deeper tones definitely have more of it) which I think make it more interesting since I don’t necessarily want all shimmer all the time. The highlighter works really well with all of the blush shades since all the shades do have quite a golden edge to them. The bronzer blended in seamlessly despite the tiny glitter specks too, which made me really happy.
For those unfamiliar, Influenster is a site and app where you can apply to get makeup for free. You don’t have to be a blogger or YouTuber – you just have to have some kind of social media account and be able to provide reviews on the products you try out on Influenster’s own web site.
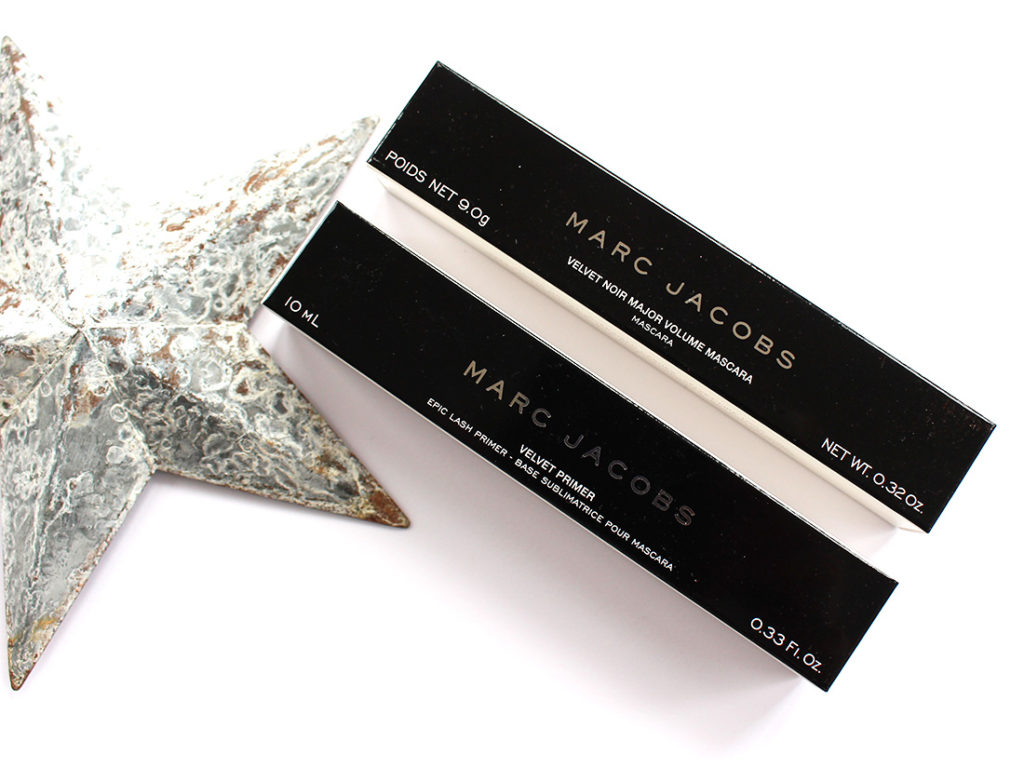
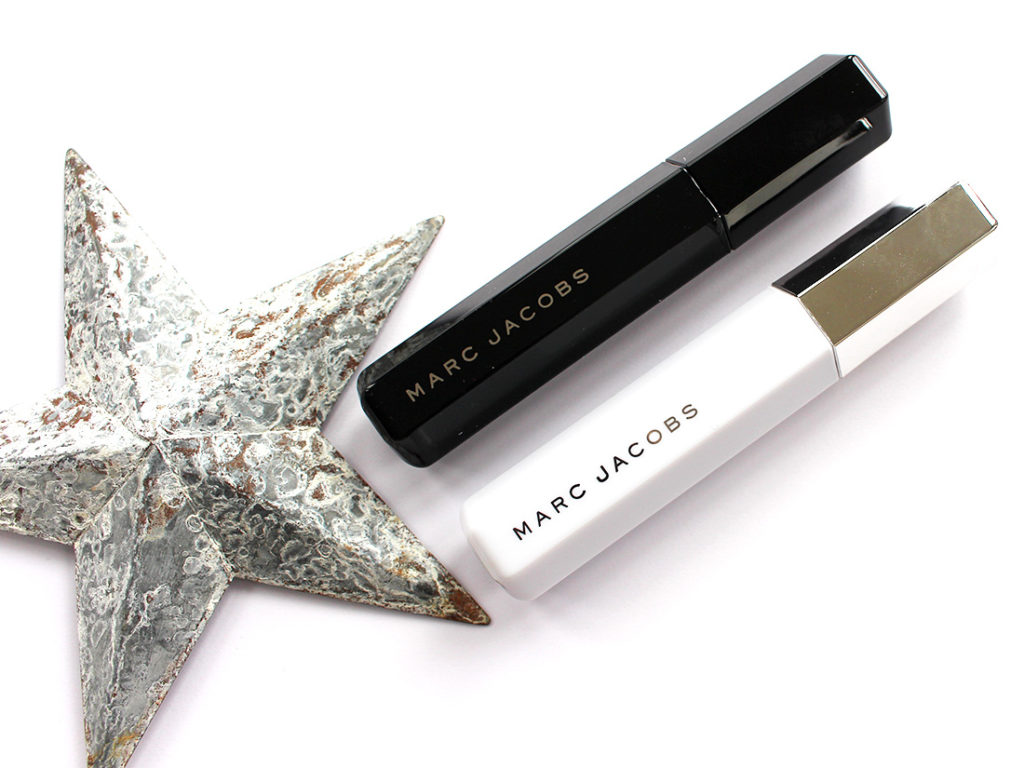
Marc Jacobs Velvet Noir Mascara and Velvet Primer
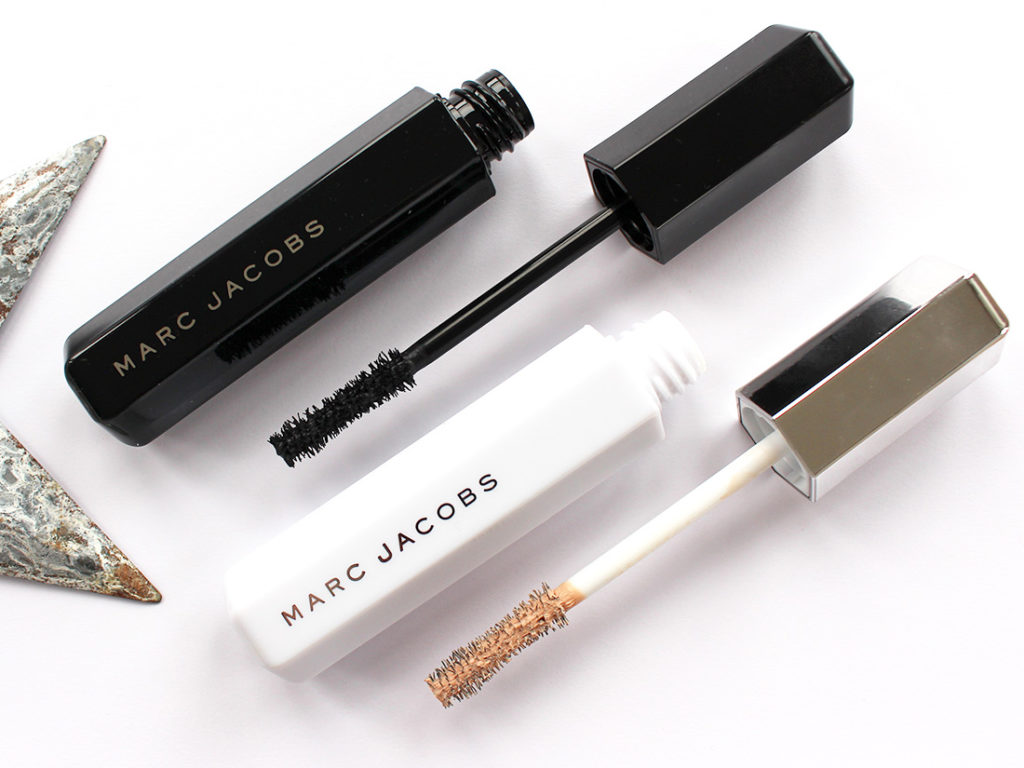
While the Velvet Primer is the primary purpose of the promotion, Influenster also sent along Marc Jacobs‘ Velvet Noir mascara. I hadn’t tried either product before so I was happy to give them both a shot. But I have to say… I was super skeptical. Lash primers tend to be white products which only end up making your mascara look black.
Marc Jacobs Velvet Noir Mascara and Velvet Primer
Thankfully, I was happy to discover that the Velvet Primer is actually a peach tone!
Marc Jacobs promises that the Velvet Primer is “an ultra-plush lash primer with a conditioning base that maximizes the benefits of your favorite mascara for a false-lash look” and that the Velvet Noir mascara “an ultra-volumizing mascara that delivers instant dimension for epic lashes”. Both wands are shaped the same: they have natural fiber bristles and a slight hourglass-shaped wand. The curve on the hourglass isn’t extreme though (like the Too Faced Better Than Sex mascara) which made it a bit easier for me to apply since I’m not a huge fan of hourglass shapes.
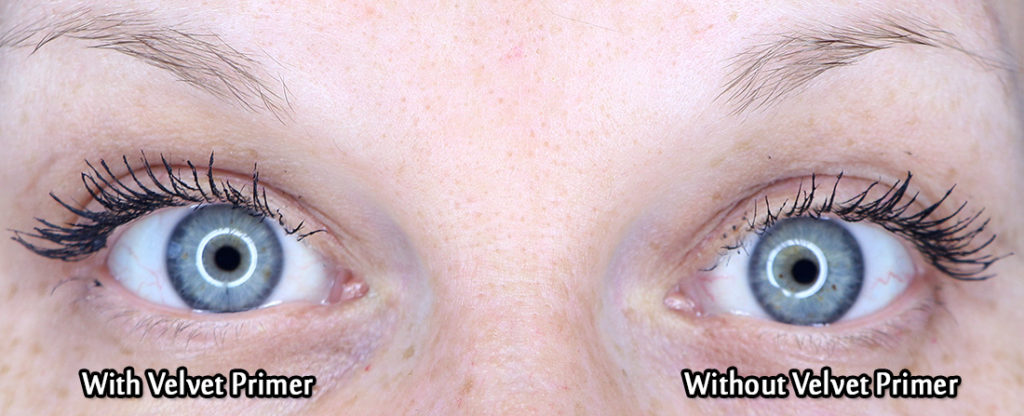
On the left hand side: Velvet Primer applied before Velvet Noir mascara. On the right hand side: just Velvet Noir mascara.
For application, I would coat on a thick coat of the primer and let it sit for about a minute before applying mascara. I found the Velvet Primer was easy to apply and the peach tone does a great job of showing you which lashes you’ve covered (in case you missed any). I then went in with the Velvet Noir mascara and coated directly on top of the primer. I was pleasantly surprised at how well the mascara covered the primer without any issue. There weren’t any gaps I had a hard time filling, and the primer didn’t leave my lashes looking grey after I’d applied mascara (which was my biggest concern).
Final Thoughts
But did it… do anything? I mean… a bit? But nothing massive. The shot above has primer applied before mascara on the left side, and only the mascara on the right side. I think you can see a little bit of extra girth to my lashes at the root, but it’s not super obvious.
I found that is I layered a lot of primer on my lashes I could get my lashes to look quite chunky… but a lot of the extra primer ended up at the tips of my lashes which didn’t look great so I would just pinch them off. I also don’t like the look of super clumpy lashes so I feel like I stopped applying primer before I got to that stage (which is maybe why my results are not that impressive).
What I did like was that the primer can add a little extra oomph without going totally overboard. I like that it was covered by the mascara easily. And above all else, I like that the two products worked very well together AND they were flexible together – my lashes never felt crunchy. They also never flaked on me (which is impressive since I tend to have a decent amount of issues with mascara flaking on me).
Do these replace false lashes for me though? Absolutely not. Would it help you out if you have particularly thin lashes? Yes, but not in a massively voluminous way. For me, I’ll continue to use the mascara since I think it’s quite good, but I don’t think I need the hassle of the extra step of the primer (even if it is goof proof) in the morning.
The products featured in this post were sent courtesy of Influenster. Post contains affiliate links.
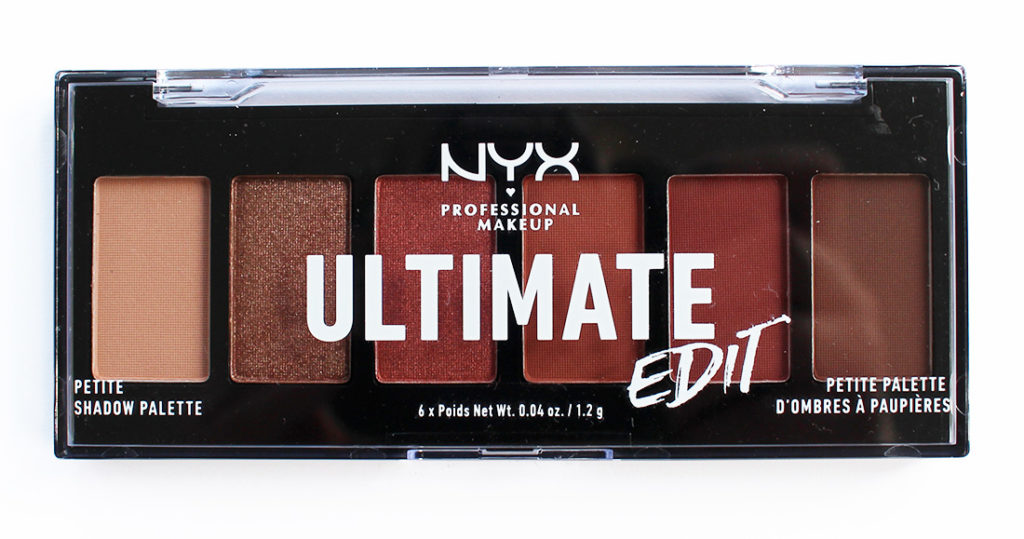
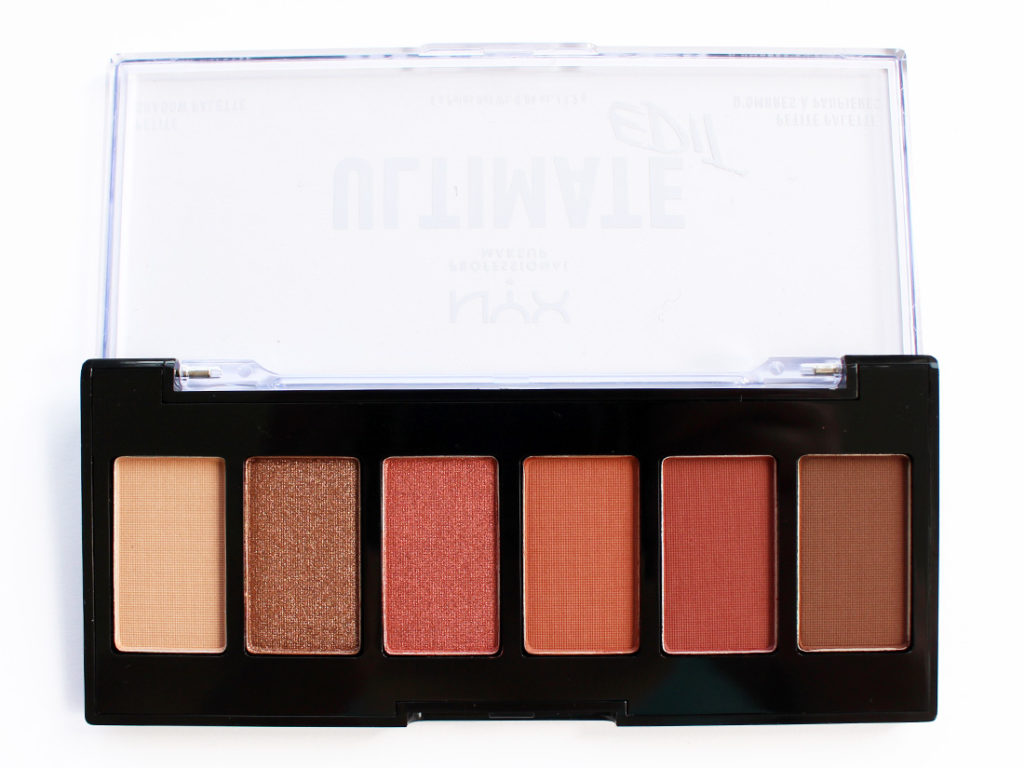
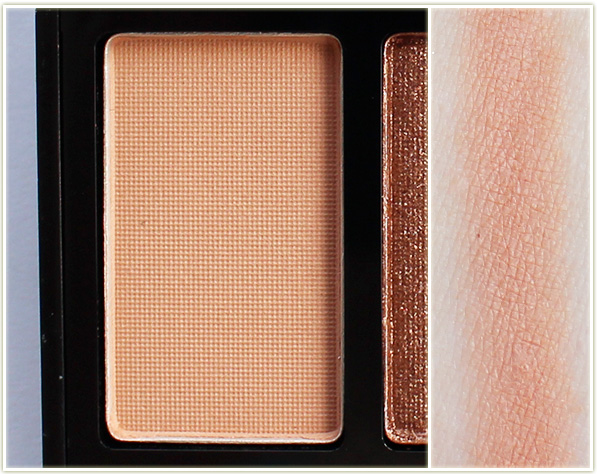
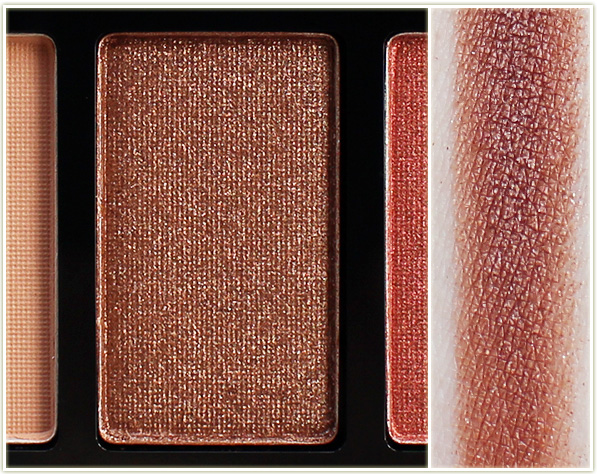
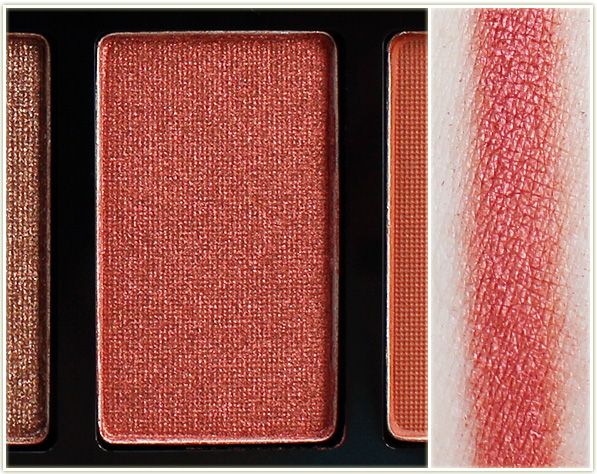
Another mini version as an extension of their Ultimate 16 pan palettes – this is the NYXUltimate Edit Warm Neutrals!
NYX Ultimate Edit Warm Neutrals
While the Ultimate Edit Brights has all mattes, the Ultimate Edit Warm Neutrals has four mattes and two shimmers which makes it a little bit more interesting than just a straight neutrall matte palette.
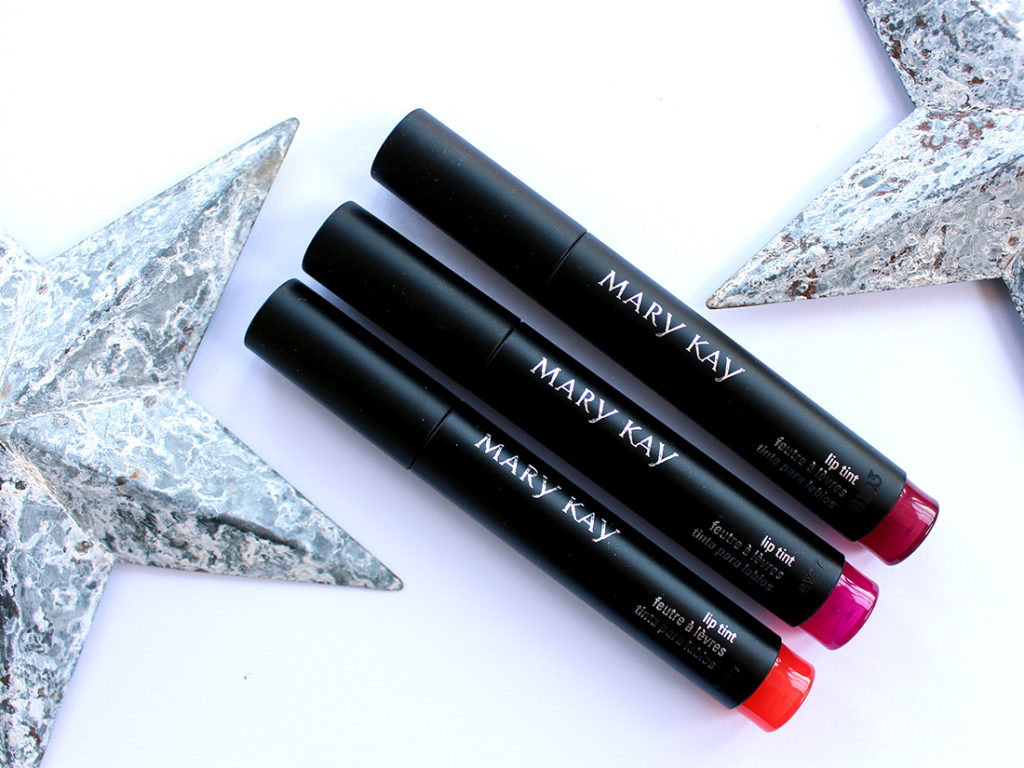
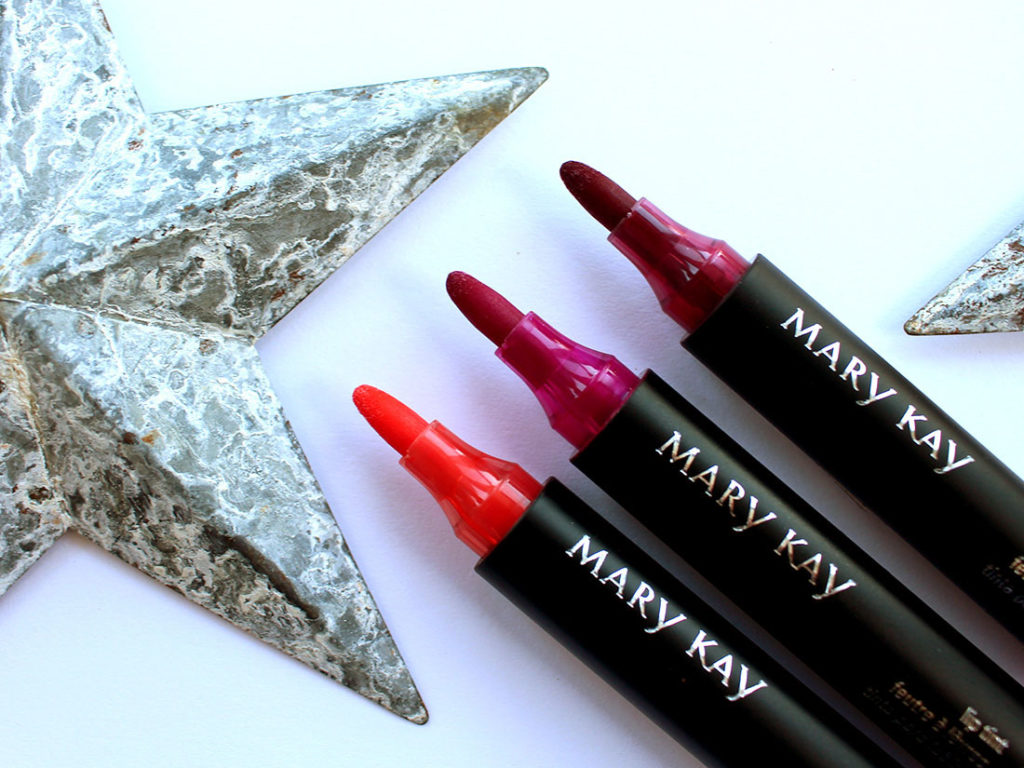
Are lip stains making a comeback?? I sure hope so! Mary Kay has launched their Lip Tints for Spring 2019, and I was so excited to try them out.
Mary Kay Lip Tints
I used to love the ease of a lip stain (back when they were more readily accessible) – it feels weightless on your lips and yet adds a bunch of colour that seems to last forever. Mary Kay has released three limited edition shades that contain 0.08 oz/2.5g of product for $18 USD or $21 CAD.
The water-based lip tints are inspired by desert hues and smell of vanilla (honestly, I get more of a butterscotch smell which is really delicious). They claim to have buildable colour and a lightweight feel.
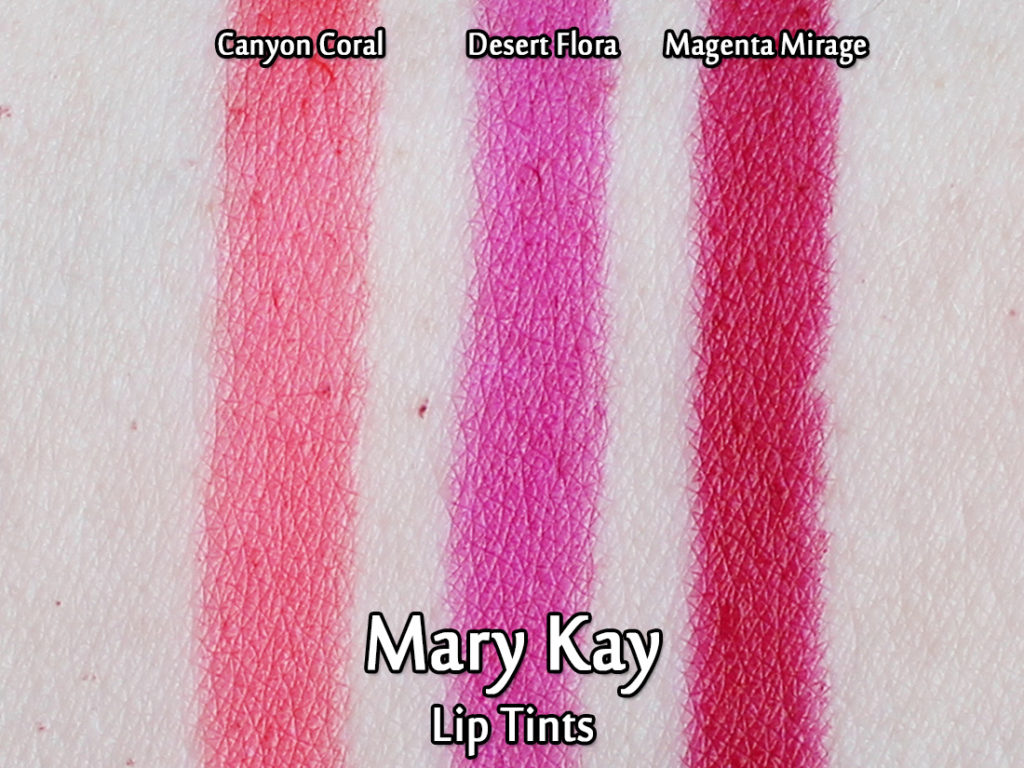
Mary Kay Lip Tints – swatches
They might be buildable, but right out of the gate you can see that there is intense colour pigmentation in a swatch! The shades are really beautiful and I experienced very little feathering even in a swatch (which is impressive given that most lip stains in a pen format tend to bleed out intensely into the crevices of my skin).
Unfortunately, the story changes a little when you get these shades on the lips.
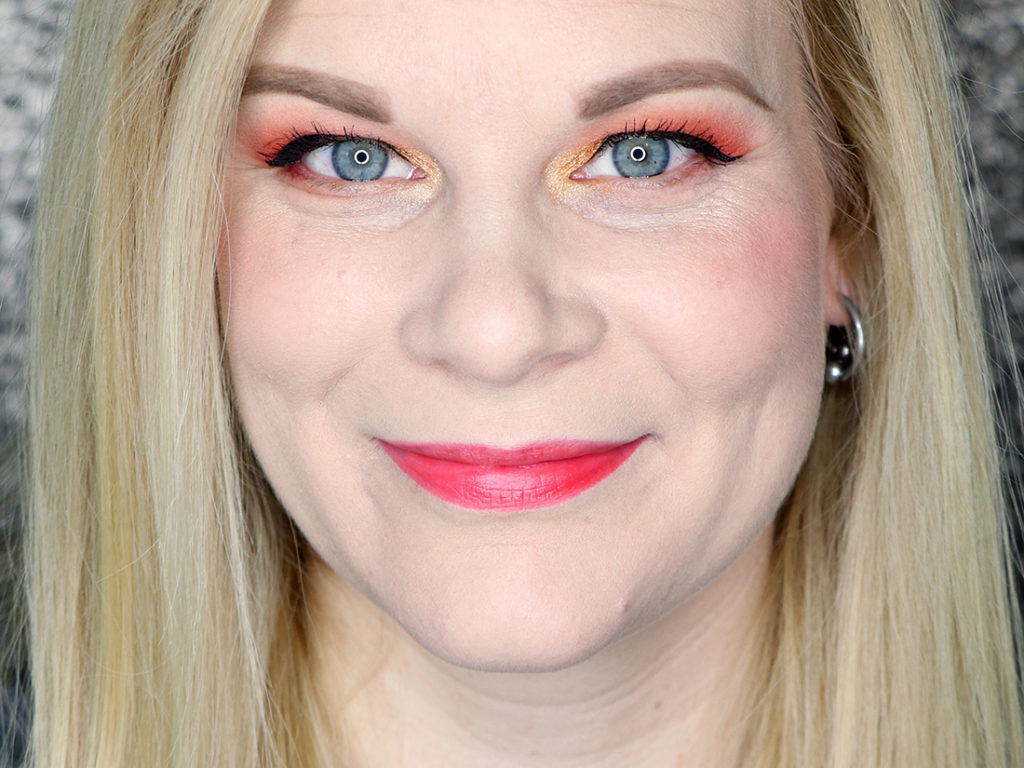
Wearing Canyon Coral
Canyon Coral is the palest of all three shades, and yet still vividly bright. I found that I did have to swipe on two layers to try to get an even coat, but even then I was left with some patches on my lip where the colour wouldn’t adhere very well. Lip stains have a tendency to cling to dry sections of your lips (so for me that’s usually the perimeter) and that became pretty obvious with this one. Even after I had let the product dry for 3-5 minutes, I pressed my lips together and the colour lifted from a large chunk of the inner rim of my mouth. I tried re-applying it, but it just wouldn’t stick on that area. Plus you can also see that it looks kinda patchy on my upper lip. The colour itself is gorgeous, but I found the application and staying power too finicky on this shade.
Wearing Desert Flora
Desert Flora was slightly better, but again you can see the weird translucency in parts of my lip, but not everywhere. Sadly, the darker the shade, the more you’ll see lighter patches of your skin coming through. Unfortunately, I found that as soon as I licked my lips, most of the colour disappeared, even after I’d let it dry for quite a while.
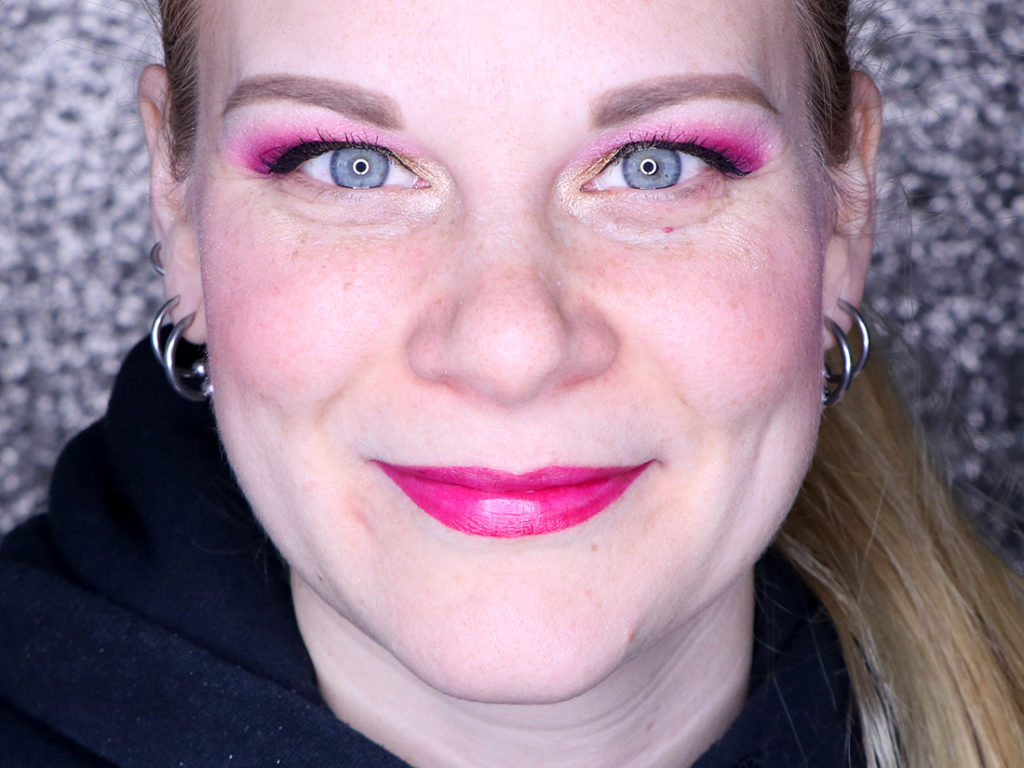
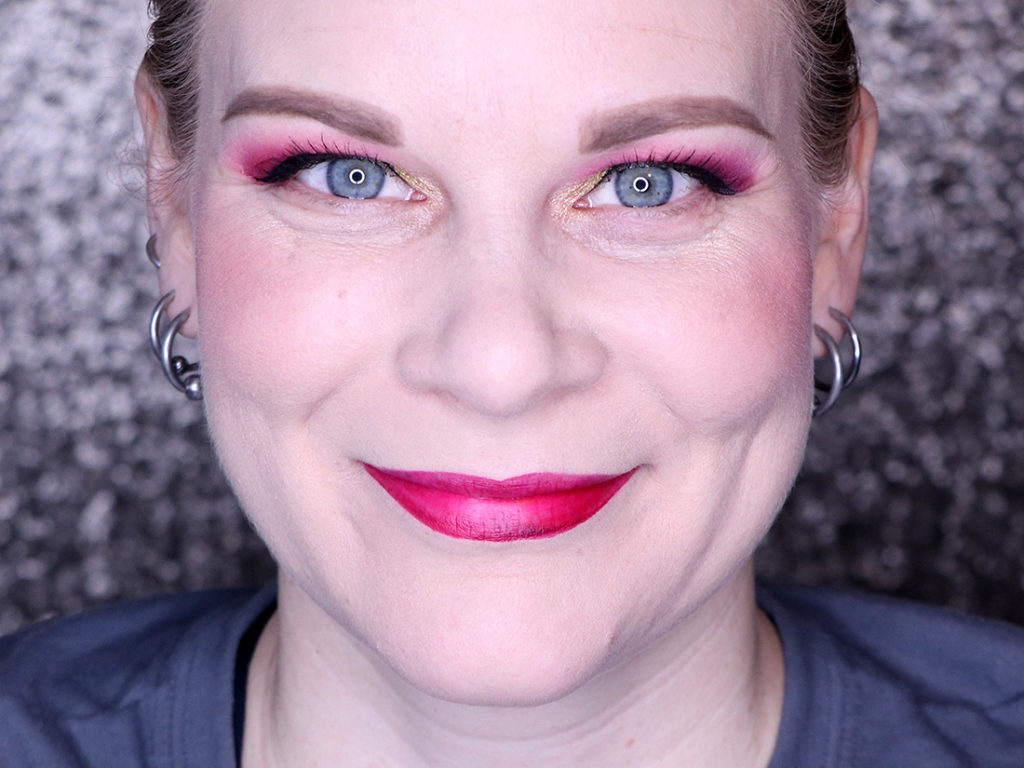
Wearing Magenta Mirage
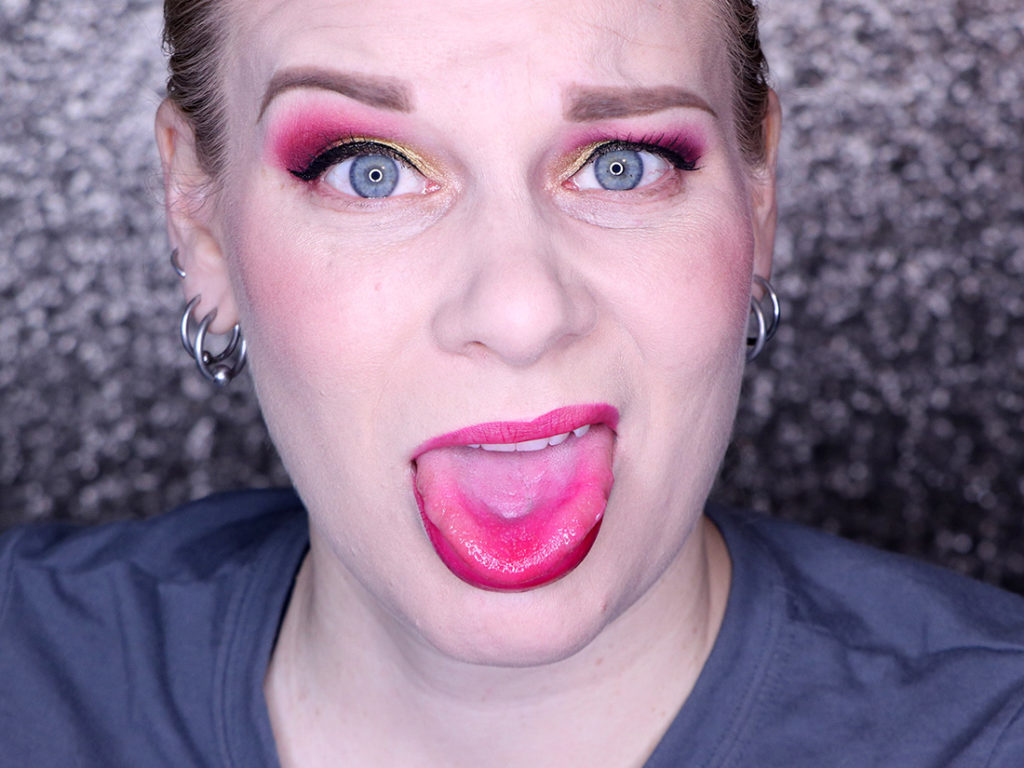
Oh boy… I’ll be honest, after the last two shades I didn’t even want to try Magenta Mirage out as my previous experiences had been seriously unfortunate. But I figured maybe this would be the BEST one. Yeah… nope. The colour itself is beautiful.. but you can see it clinging for dear life to a patch of skin on my bottom lip (that doesn’t even FEEL dry to me by the way). Sadly, the worst part was that I put this lip colour on after I’d done my makeup, let it dry while I did my hair, took the picture you see above… licked my lips slightly… AND:
What the heck?
The colour got all over my dang tongue. I was so annoyed. Not only had I lifted most of the colour off of my lips, but now I also had a stained tongue. (And it stained for HOURS by the way… through a coffee and a bottle of water, even after I’d blotted my tongue with a paper towel.)
Final Thoughts
I can’t recommend these at all. I was so excited to use them because I used to love the Revlon Lipstains + Balm (and only just realized they’ve long since been discontinued), but these Mary KayLip Tints annoyed the crap out of me. The colour payoff was inconsistent on my lips, the colour mostly came off at the faintest sign of wetness (the inner rim of my lips, my tongue, even a straw), and they stained my freaking tongue. Even when they left behind a mediocre stain (like… 30% of what you see in the lip swatch photos above), it was mostly as a rim around my lips! So it looked like I had applied lip liner and nothing else.
I’m actually really sad about this… I wanted to wear Canyon Coral all summer long and now I want nothing to do with these. 🙁
The products featured in this post were sent to me for consideration.