Category Archives: Swatches

Hard Candy Glitteratzi Press + Play (Review & Swatches)

Hard Candy Glitteratzi Press + Play Glitter Transforming Lip Color

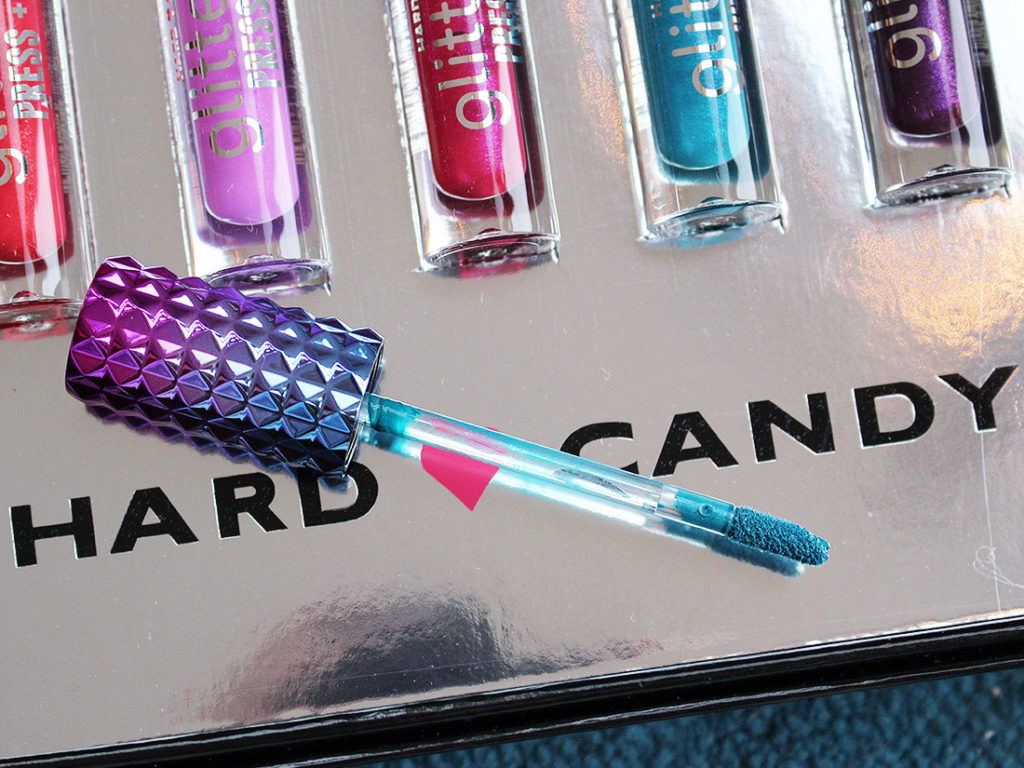
When this Hard Candy Glitteratzi Press + Play Glitter Transforming Lip Color package showed up in my mailbox one day last month I was absolutely freaking floored. Number one… I had never heard of these, and they’re GLITTERY. Number two? Could these be the drugstore answer to the Ciate Glitter Flips that made the beauty world explode in 2017??

Hard Candy Glitteratzi Press + Play Glitter Transforming Lip Color

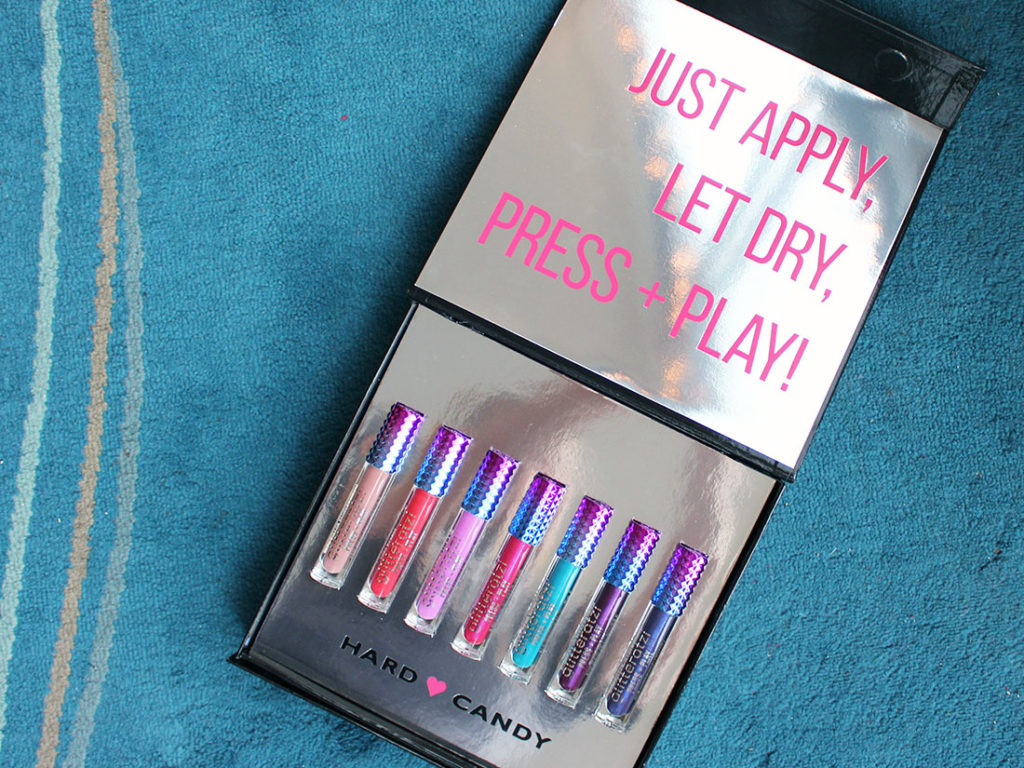
For those unfamiliar with the Ciate Glitter Flips, they’re essentially a liquid lipstick that when you press your lips together it reveals a wash of straight up glitter on your lips. It’s actually kind of a miraculous reveal, so I was eager to see that Hard Candy was billing their Glitteratzi Press + Play lipsticks as a very similar product. They say these are a matte lip colour that transforms into a sparkling finish once you press your lips together. They are… SORT of matte, when you first apply them, but you can still see a hint of sparkle through the base of the product (the hidden glitter!), so for me these are more on the metallic side of things rather than a flat out matte. It’s a *soft* metallic look, but it’s there.

Hard Candy Glitteratzi Press + Play

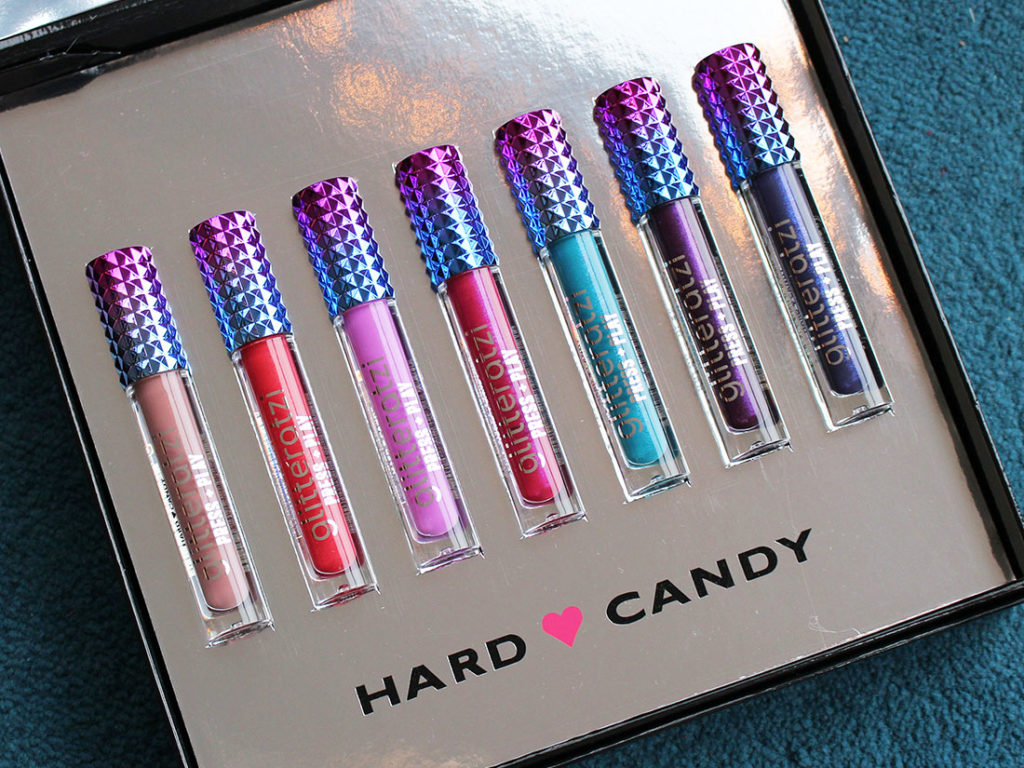
There are seven shades in the range with some impressively bold colours in the mix. I guess Hard Candy figured that if you’re in the market for a glitter lipstick, you’re probably not one to shy away from unique and off the wall colours. And I really feel like they hit the mark on the colour selection to be honest – these are different, they’re fun, and it’s nice to see a drugstore brand do something that isn’t safe, conventional or expected.

Hard Candy Glitteratzi Press + Play - Swatches
Hard Candy Glitteratzi Press + Play – Swatches

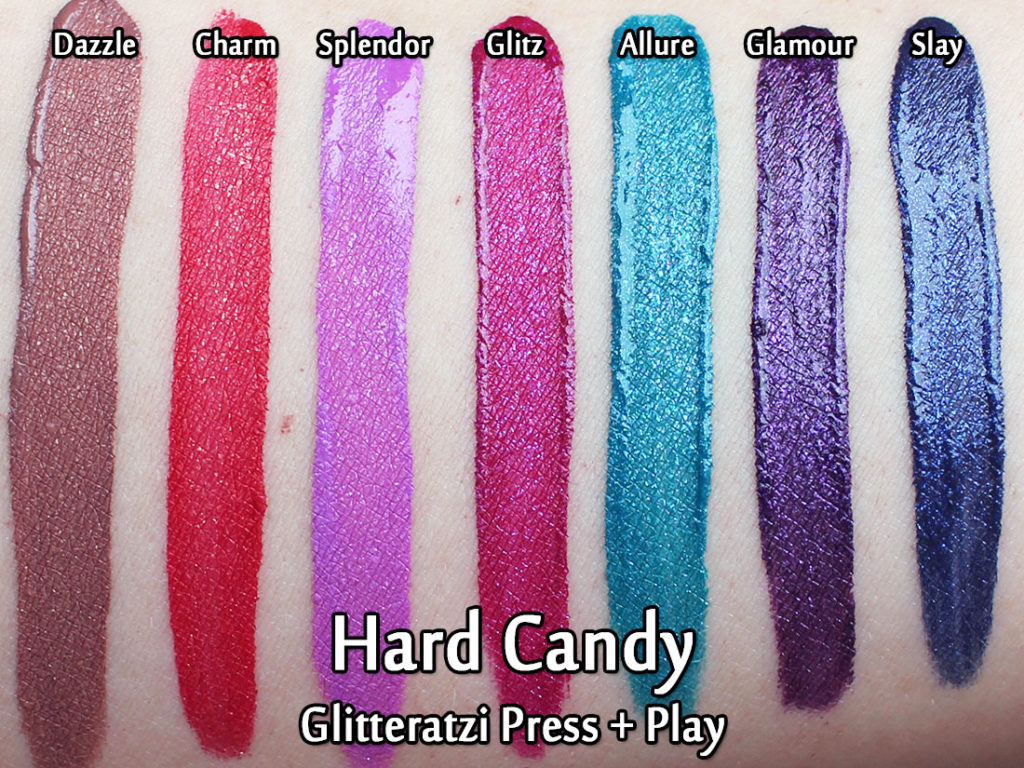
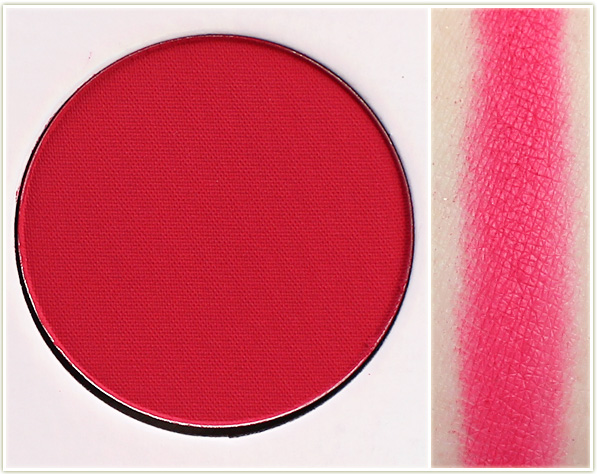
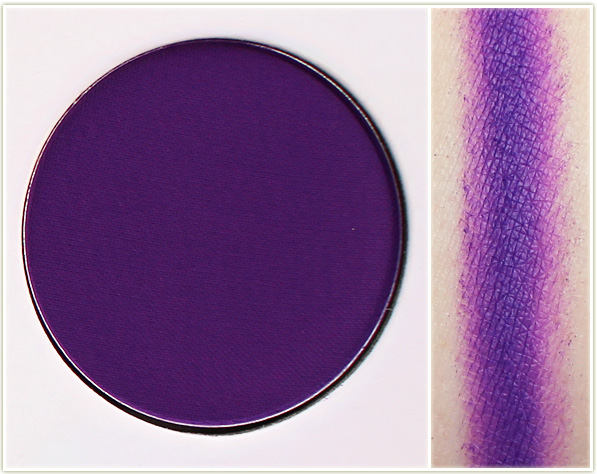
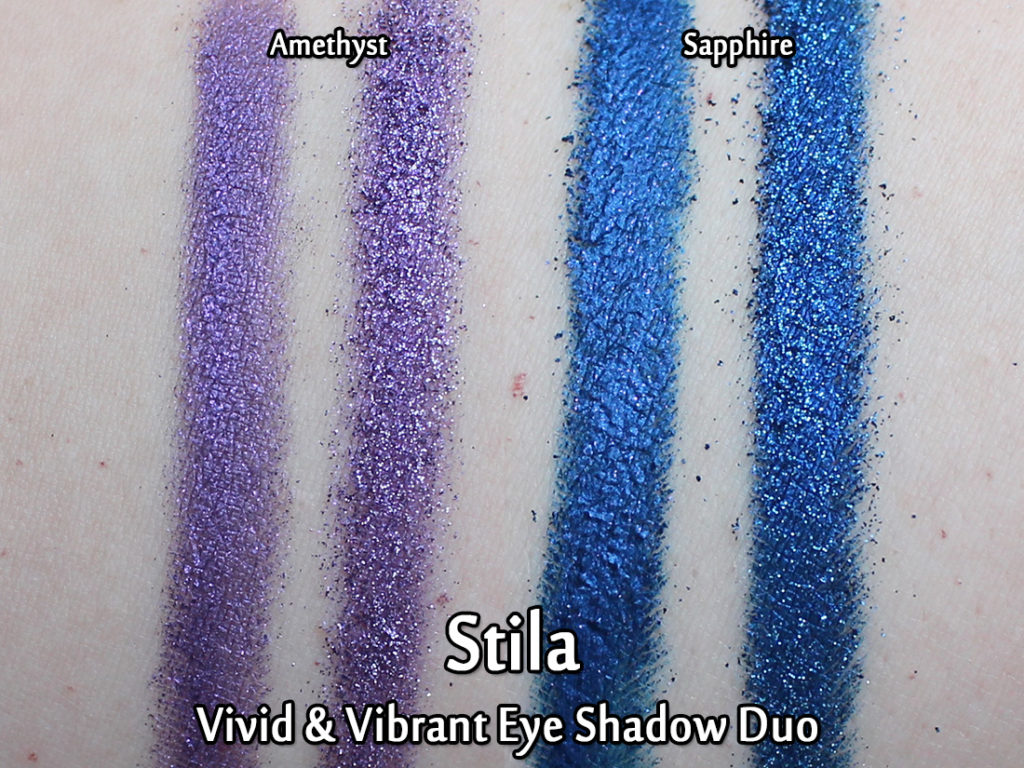
In the swatches above you can see some of the sparkle shining through the product in a direct swatch. I swatched the shade Dazzle first, so you can see how that dries down after about a minute or so, whereas Slay was the last one I swatched and I took this photo within seconds of swatching. So they start off like any other liquid lipstick, and dry down fairly quickly.

Hard Candy Glitteratzi Press + Play - Lip Swatches
Hard Candy Glitteratzi Press + Play – Lip Swatches – left side is on application, right side is after I pressed my lips together

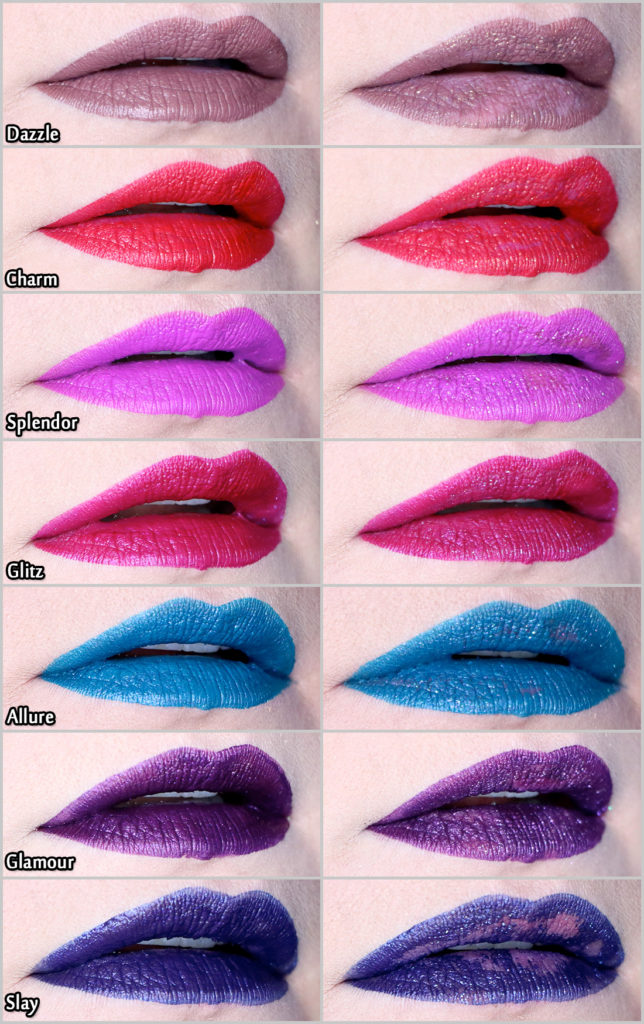
On application each shade is incredible, and nearly completely opaque in colour (only the two last shades had the very faintest whisper of some translucency). However, once you put your lips together to reveal the glitter, you can end up with a slightly different story depending on the shade you’re using.

First of all, the glitter is gorgeous – and it’s really cool to “reveal” the glitter when you push your lips together, I love that aspect so much. BUT, while most shades are fine and have a small amount of lifting (just like the Ciate Glitter Flips, I might add – those shades do have some lifting when you press your lips together), there are two that are completely unwearable due to the lifting. I found Slay and Dazzle to be unwearable not because of the colour, but because of the way they tore chunks out of the lip colour when I pressed my lips together. Interestingly, while I can see there is a decent amount of missing patches on Charm (the red), I would say that one looks completely flawless in real life. I think the studio lights are highlighting some problems that the naked eye wouldn’t normally observe. Melanie of I’m Not A Beauty Guru had a similar experience with some of the lifting, but still found these products to be really lovely to wear too!

Final Thoughts

For an $8 CAD glitter liquid lipstick, these are pretty freaking cool! The Hard Candy Glitteratzi Press + Play lip colours aren’t flawless, but if you skip the shades that I had difficulty with then I think you’ll find the remaining shades are beautiful and fun to wear. Out of all seven shades my favourites are definitely Charm, Glitz, and Allure.

I’m really happy to see a drug store brand putting out fun and exciting products. I know these are essentially a knockoff of the Glitter Flips and some people don’t like copycat products, but meh – as far as I’m concerned the drugstore needs an injection of fun sometimes and I’m glad to see Hard Candy delivering on that!

The Hard Candy Glitteratzi Press + Play Glitter Transforming Lip Color can be purchased on walmart.ca for $7.98 CAD or on walmart.com for $6 USD.

The products featured in this post were sent to me for consideration. Post contains affiliate links.

Swatch Sunday: Tarte Tartelette

Tarte Tartelette

The original Tartelette palette! I feel like this one by Tarte doesn’t anywhere near the same amount of attention as the Tartelette in Bloom palette, but it was definitely the original that started the “Tartelette” theme for Tarte!

Tarte Tartelette
Tarte Tartelette

The Tarte Tartelette palette has twelve matte shades that are both cool and warm, but I do find it leans slightly more on the warm side of things overall.

Tarte Tartelette
Tarte Tartelette

Tarte Tartelette Swatches

Tarte - Free Spirit
Tarte – Free Spirit
Tarte - Force of Nature
Tarte – Force of Nature
Tarte - Dreamer
Tarte – Dreamer
Tarte - Multi-tasker
Tarte – Multi-tasker
Tarte - Caregiver
Tarte – Caregiver
Tarte - Natural Beauty
Tarte – Natural Beauty
Tarte - Best Friend
Tarte – Best Friend
Tarte - Bombshell
Tarte – Bombshell
Tarte - Super Mom
Tarte – Super Mom
Tarte - Wanderer
Tarte – Wanderer
Tarte - Power Player
Tarte – Power Player
Tarte - Fashionista
Tarte – Fashionista

The Tarte Tartelette palette can be purchased at sephora.ca for $49 CAD or on sephora.com for $39 USD.

The product featured in this post was sent to me for consideration. Post contains affiliate links.

Covergirl Exhibitionist Influenster Campaign (Review & Swatches)

Revlon Exhibitionist Campaign

It’s been a long time since I’ve tried anything new by Covergirl, so I was pretty pleased when I was selected for the Influenster Exhibitionist campaign!

For those unfamiliar, Influenster is a site and app where you can apply to get makeup for free. You don’t have to be a blogger or YouTuber – you just have to have some kind of social media account and be able to provide reviews on the products you try out on Influenster’s own web site

Revlon Exhibitionist Mascara, Lipstick and Get In Line Liquid Liner

The Covergirl Exhibitionist box contained their Exhibitionist mascara, the Exhibitionist cream lipstick in Hot, and the Gel In Line Liquid Liner in Major Matte Black.

And my initial reaction? Well, it wasn’t a good one.

  1. I hate curvy, fat mascara wands because I find them difficult to use. So I wasn’t pumped about the mascara.
  2. I *massively* dislike the smell of Covergirl lipsticks (ugh, horrible old lady scent anyone??). So I wasn’t pumped about the lipstick.
  3. I haaaaaaate dip-pot style liquid liners with a felt tip applicator. So yeah… I wasn’t pumped up the liquid liner either.

Why am I telling you all this? Because this freaking box changed my dang mind on every single one of my preconceived opinions on these products, and it was kind of eye opening!

The end result of all three items was not only gorgeous, but it made me fall in love with new products!

Let’s dive right in. The shade I got to try in the Covergirl Exhibitionist Lipstick range is the shade Hot – a colour I was deeply, deeply interested in since I’d read years ago that Taylor Swift used to wear this colour and I was always madly in love with the reds she used to wear. I remember looking at the shade Hot in stores years ago and thinking it was pretty, but I just could NOT get over the horrific scent that Covergirl lipsticks used to have so I always put the shade back without purchasing it. When I realized that this shade was in my box I was excited to see what the colour would look like on me, but I figured I’d end up junking the lipstick because if there’s one thing I can’t handle in makeup, it’s a nasty/funky tasting lipstick.

So imagine my surprise when I sniffed the bullet and realized Covergirl had put a touch of vanilla in the lipstick. Okay… I can get down with this. There’s still a hint of old lady makeup scent, but it wasn’t as disgustingly overpowering as it used to be. So I put the lipstick on, was immediately wowed by the colour… and then I quickly realized that the scent completely dissipated! It didn’t taste or smell like ANYTHING at all! I was elated! With that terrible scent out of the way, I was now free to enjoy the lipstick!

And enjoy it I did – I wore this sucker for 6 hours straight without really thinking about it. The shade Hot has amazing longevity, and it’s likely because the lipstick is quite staining (you’ll need an oil based remover to get most of it off). The formula claims to be a cream, and it does apply like one, but it goes matte within thirty minutes. It’s not uncomfortable matte though – this is really, really lovely to wear. And the shade? WOW. I’m in love!

Wearing Covergirl Revlon Exhibitionist Mascara and Get In Line Liquid Liner

On to the eyes!

I scowled at the dip-pot liner as I pulled the applicator out of the tube to apply it to my face the very first morning. Dip-pots, by and large, are messy to me – I find the product ends up  getting on my lashes because the applicator style is clumsy (or maybe I’m clumsy, who knows) and I’ve always preferred pen or a real brush as an applicator. Fortunately, the Get In Line Liquid Liner ended up being less messy than I had anticipated, and I was suddenly struck with how much I missed using a truly matte black liquid liner. While I love my pen-style brush tip liquid liners because they’re so incredibly fast to use, it has to be pointed out that there is no truly matte formula on the market – they all have a hint of a sheen and I’d kind of forgotten that over the years. I was blown away at just how matte this black was on my eyes. The longevity is also on point – I had no flaking or transferring, and it looked just as good at the end of an eight hour work day as it did when I first put it on in the morning.

The only real downside to this product is that the felt tip applicator is very, very flimsy – it has too much give to it in my opinion. This can make it a little bit hard to really follow the edges of your eye. That’s the only thing stopping it from being truly perfect in my eyes. That being said – I’m 100% going to use every last drop of this product and I would absolutely consider repurchasing it.

And lastly – the Exhibitionist Mascara. I have never really fallen in love with hourglass-shaped mascaras as I just find them to be cumbersome and quite messy. I’m prone to getting mascara on my upper lid during application, and large wands have a tendency to exacerbate this problem (which is why I prefer small, conical wands). But I’d been sent the mascara in the box, so of course I was going to give it a good go.

And it was good. So good. I’m a one coat mascara wearer, so what you’re seeing in these photos is only of a single coat, but you could easily build this up if you had to as the formula isn’t super crusty which to me has always meant that it can layer well. The volume isn’t unreal, or out of this world, but it’s a solid mascara that gives me that bit of extra boost I’m going for on a day to day basis. It’s more on the wet side of things too – not super soaking wet, but it’s not as dry as I was expecting which made me really happy. And, rather impressively, I had no lower lash transfer to the hollows under my eyes. This has always been a problem spot on me – even waterproof mascaras tend to transfer from my lower lashes onto the skin underneath and I’ll end up with black spots which just look really terrible (this is why I generally avoid wearing lower lash mascara to work). Covergirl Exhibitionist Mascara though? No transfer! And it’s not even a waterproof formula either!

So… Covergirl… you did GOOD! This Influenster box knocked it out of the freaking park as far as I’m concerned. I went into this box/product review with a seriously negative attitude just based on my past experiences with certain aspects of each product, and yet each one managed to completely turn my head around. As a blogger I try to go into reviewing each product with an open mind, but after years and years of trying products, you start to learn what your preferences are, and for me… an hourglass shaped mascara, a dip-pot eyeliner and (what I thought was) a nasty smelling mascara were 100% at the bottom of my list of products I ever wanted to try again. So I’m happy to say I’ve got a fresh new perspective on these products and would absolutely recommend them!

And, in case you hadn’t heard, Covergirl is now 100% cruelty-free!

So with my change of heart in mind – maybe YOU can tell me about a product that you tried out that you thought was going to be bad based on your past experiences but turned out to be amazing!

The products featured in this post were sent to me by Influenster. Post contains affiliate links.

Swatch Sunday: Juvia’s Place The Zulu

Juvia's Place - The Zulu

While shopping at Ulta in New York City in October, I spotted the Juvia’s Place display… and you can bet I snapped up this gorgeous The Zulu palette!

Juvia's Place - The Zulu
Juvia’s Place – The Zulu

Not only are the colours gorgeous, but the Juvia’s Place palettes are traditionally very inexpensive – this one was only $20 USD I believe!

Juvia's Place - The Zulu
Juvia’s Place – The Zulu

Juvia’s Place – The Zulu Swatches

Juvia's Place - The Zulu - shade 1
Juvia’s Place – The Zulu – shade 1
Juvia's Place - The Zulu - shade 2
Juvia’s Place – The Zulu – shade 2
Juvia's Place - The Zulu - shade 3
Juvia’s Place – The Zulu – shade 3
Juvia's Place - The Zulu - shade 4
Juvia’s Place – The Zulu – shade 4
Juvia's Place - The Zulu - shade 5
Juvia’s Place – The Zulu – shade 5
Juvia's Place - The Zulu - shade 6
Juvia’s Place – The Zulu – shade 6
Juvia's Place - The Zulu - shade 7
Juvia’s Place – The Zulu – shade 7
Juvia's Place - The Zulu - shade 8
Juvia’s Place – The Zulu – shade 8
Juvia's Place - The Zulu - shade 9
Juvia’s Place – The Zulu – shade 9
Post contains affiliate links.

Stila Vivid & Vibrant Collection (Review & Swatches)

Stila Vivid & Vibrant Collection

When I saw the promo shots of the Stila Vivid & Vibrant collection I was so excited! Vivid, vibrant jewel tones in a formula I adore? AND matched with eyeshadow duos?? I was so enticed! There’s a whole range of colours, but I’ve got the blue and purple shades and I’ll be covering those two in this post (and I’m eyeing the green and the red for the future!).

Stila Vivid & Vibrant Eye Shadow Duos in Amethyst and Sapphire

With the Vivid & Vibrant collection, Stila launched eyeshadows duos as a near perfect reflection of the shades to the Shimmer & Glows (we’ll get to those shortly!). The left side of the pan is a very shimmery somewhat metallic version of the colour, and the right side is a glittery version of the same colour. Each side is basically the same colour with a different finish to give you a bit of variety when applying your shadow.

Stila Vivid & Vibrant Eye Shadow Duos in Amethyst and Sapphire - swatches
Stila Vivid & Vibrant Eye Shadow Duos in Amethyst and Sapphire – swatches

The swatches show just how deeply pigmented the colours are, ESPECIALLY the blue. Holy smokes, I was not prepared for that kind of colour payoff. I had initially thought that the finishes couldn’t be THAT different from each other, but you really see how the right side has more sparkle and glitter than the left (shimmery) side does.

Wearing Sapphire all over my eyes

For the look above I used the glitter shade in Sapphire all over the lid and used the shimmery one in the outer corners and crease. While I tend to prefer a matte formula in that area, I was surprised with how nicely it ended up looking. When you’re going for a full on glittery eye, sometimes it just works to go full on shimmer too!

Zoomed out
Zoomed out

Zoomed out a bit for the full effect – look at that eyeshadow colour! One thing you need to note though that is that while these are incredibly pigmented and are easy to blend… they also have insane fallout. There’s so much pigment to the shadow that even after you’ve applied your shadow and cleaned it up, you will still notice that, throughout the day, some pigment will still fall onto your cheeks and need cleanup. I was a bit surprised because I’m not used to dealing with fallout after application, but I also wasn’t surprised because while the powders are easy to blend, they are slightly clumpy which means that these might work best with a glitter adhesive. That being said, the fallout wasn’t so intense that I’d stop wearing these – they’re so freaking lovely!

Stila Vivid & Vibrant Collection Shimmer & Glow Liquid Eye Shadows in Vivid Sapphire and Vivid Amethyst

While I’m a massive fan of the Stila Glitter & Glows (see my collection here!), I can still appreciate a good Shimmer & Glow every now and then. The formula is fundamentally the same as the Glitter & Glows – they apply smoothly with the paddlefoot applicator and pack one heck of a pigment punch.

Stila Vivid & Vibrant Collection Shimmer & Glow Liquid Eye Shadows in Vivid Sapphire and Vivid Amethyst - swatched
Stila Vivid & Vibrant Collection Shimmer & Glow Liquid Eye Shadows in Vivid Sapphire and Vivid Amethyst – swatched

Vivid Sapphire, much like the eyeshadow, is a frigging knockout shade. Solid, opaque pigmentation in a single swipe. Vivid Amethyst is a bit more subdued and you will notice a touch of translucency to the product – layer this twice to get full opacity.

Wearing Vivid Sapphire Shimmer & Glow on the lid with Amethyst Eye Shadow Duo on the outer corner

For the look above I applied Vivid Sapphire Liquid Shadow all over the lid and then used the Amethyst Eye Shadow Duo in the outer corner. Blues and purples pair so easily together so this was a super quick and easy look to do.

Final Thoughts

For those wanting intense pigmentation, shimmer, sparkle and COLOUR in their shadows (liquid or powder), you really needn’t look elsewhere. I will say some of the fallout on the powder versions was a bit annoying, but I’m willing to suffer a smidge when the colour is that vibrant! The Shimmer & Glows were especially gorgeous – I was impressed not only by the colour of the two shades, but also by the longevity. I have a beast of a time with any kind of cream or liquid shadows (no matter how much or little eye primer I put on, they almost all crease on me), and these? They didn’t crease on me. I wore them a full work day and saw no creasing! Now THAT’S impressive!

The Stila Vivid & Vibrant Collection can be purchased at sephora.ca or sephora.com.

The products featured in this post were sent to me for consideration. Post contains affiliate links.