Category Archives: Swatches
Suva Beauty Hydra & FX Liners (Review & Swatches)
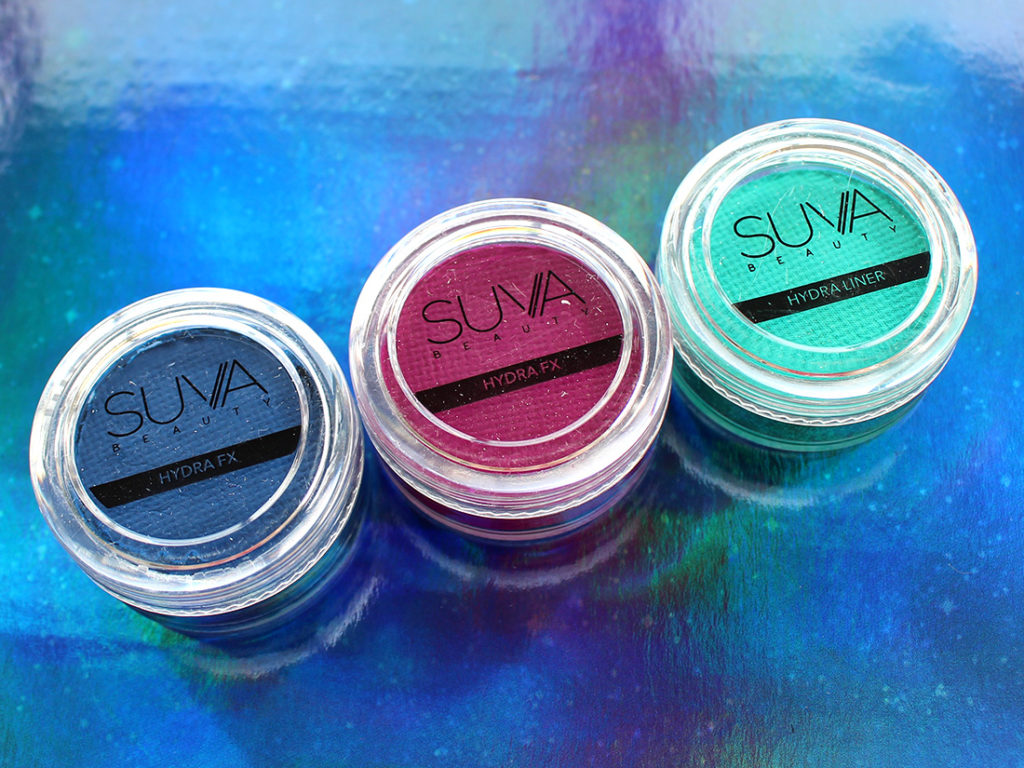
Suva Beauty‘s Hydra Liners – I feel like they’re one of those products in the indie beauty world that everyone talks about in hushed, reverent tones. I’d even venture a guess to say that they’re what Suva Beauty is most known for too. These little pots of beautiful, colourful glory are a water activated paint – they can be applied anywhere you like, but I use them predominantly as eyeliner.
I first played around with the shade Scrunchie last year when I picked it up at IMATS Toronto – I was so enamoured with that bright neon shade of it! So of course when it came to trying out more shades, I was more than excited since their colour range is really unique.
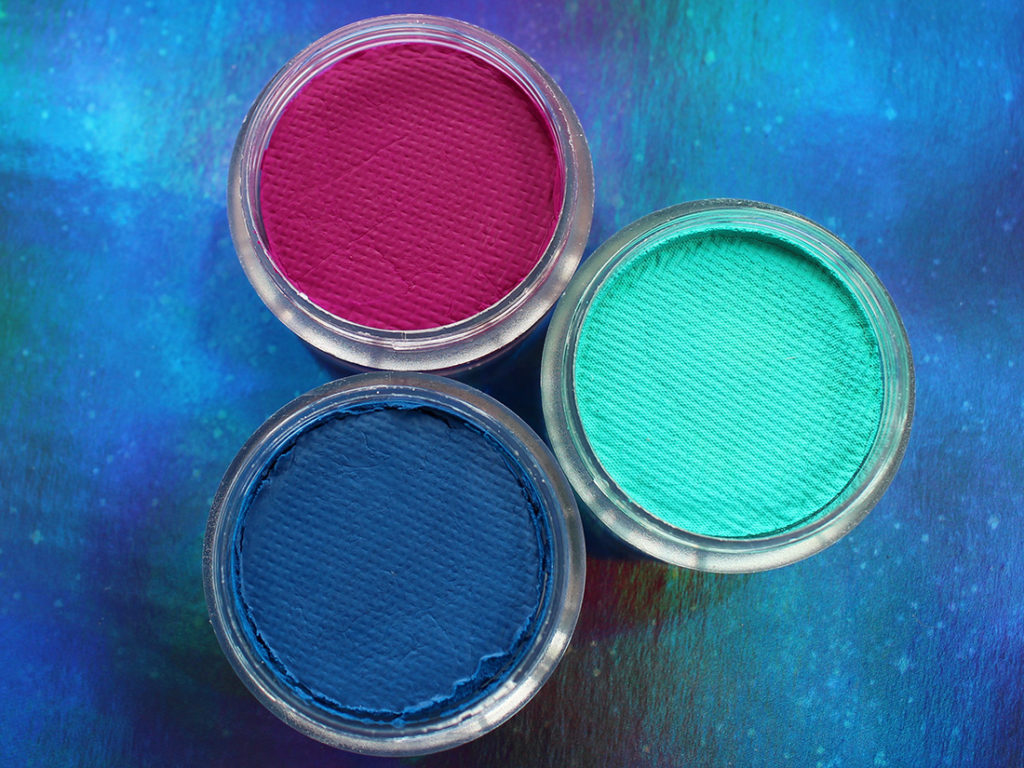
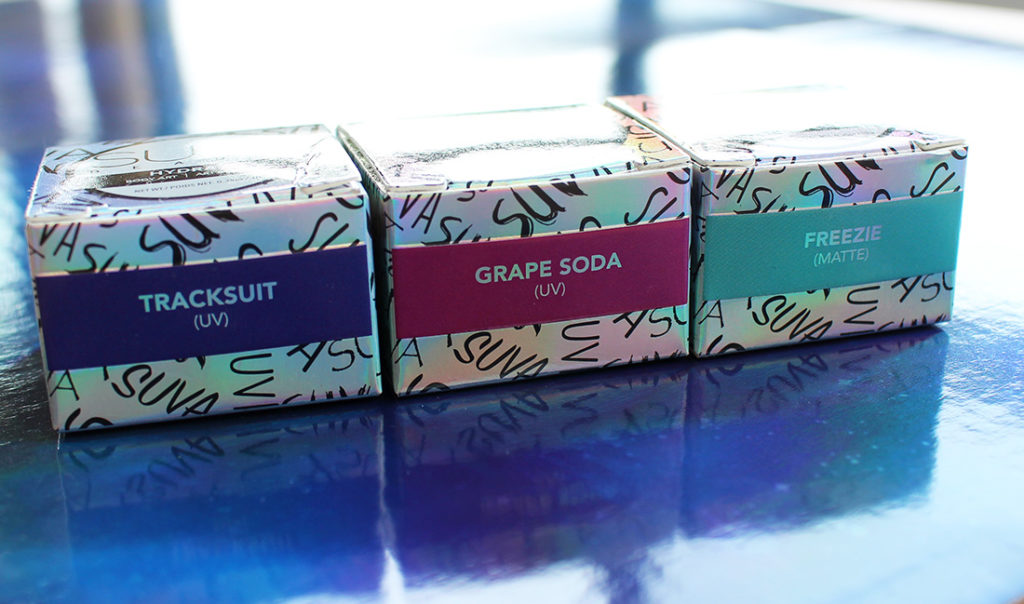
These three shades were recently released alongside their Block Party palette (full review video here) and I was immediately intrigued by the new colours as they seem made for each other. Interestingly, two of the shades are listed as Hydra FX and the other one is listed as Hydra Liner. I’m not sure what the difference is, as they both applied exactly the same.
The trick to using Suva Beauty‘s Hydra Liners is water. The pots themselves are a solid mass of dry paint and you can’t get any pigmentation off on your brush unless you add water to the paint cake. And it does have to be water – I’ve tried INGLOT’s Duraline in the past and it does absolutely nothing to the product! It doesn’t even liquefy it! I tend to drop a few water droplets into my pot and run my brush in there to loosen up the pigment. I like to get the pan fairly wet so that I get a nice amount of smooth liquid fluid on my brush in order to make application easier.
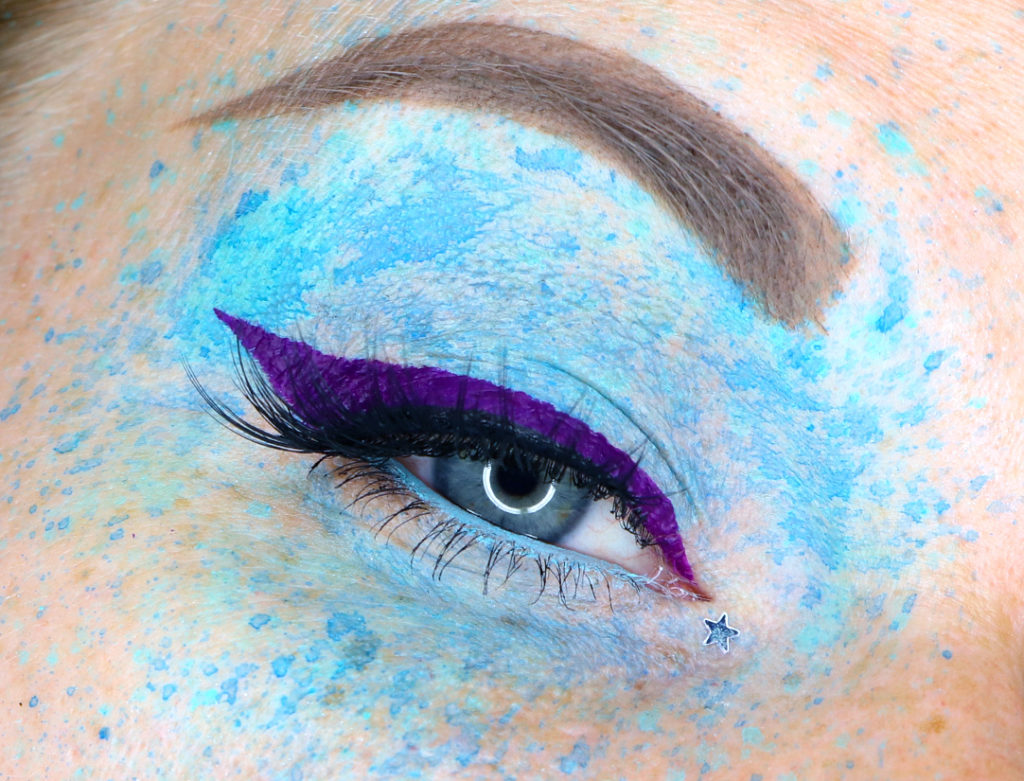
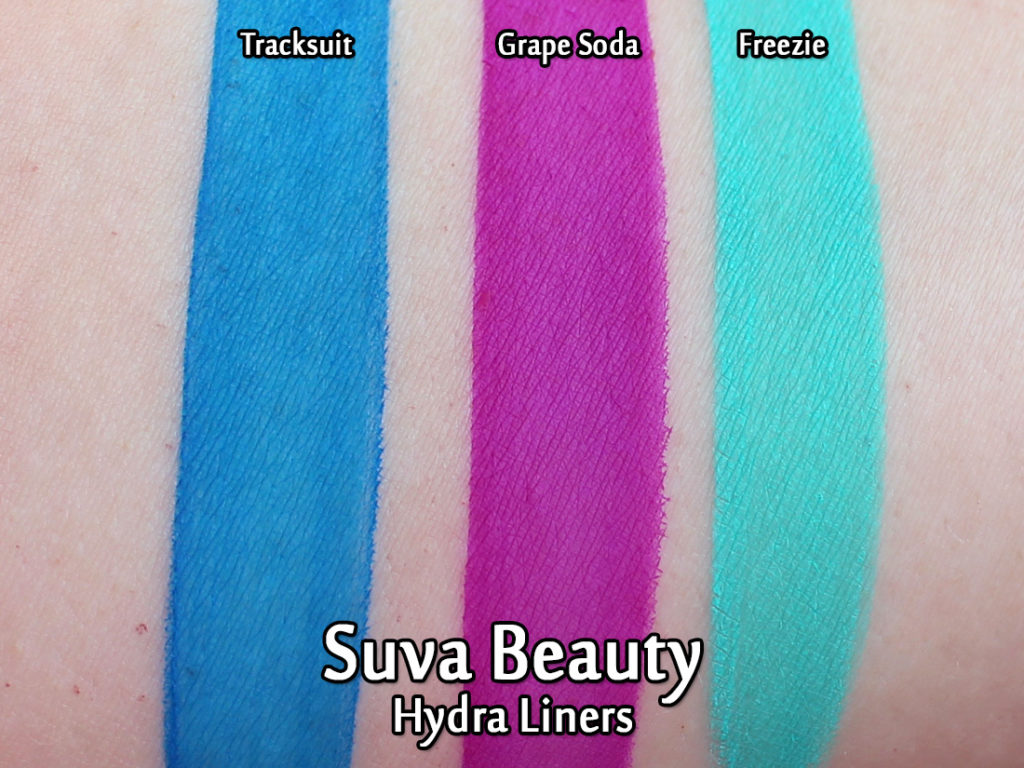
While I normally apply a Hydra Liner as a winged liner addition to my look (tutorial on that technique here!), this time I just wanted to just play around with them. I used the two blue shades (Tracksuit and Freezie) on a wet toothbrush and flicked them across my eye. I love the spackled paint look – it’s clearly more editorial than your normal every day makeup, but it’s a lot of fun to do. The two blues tones worked together to create a sort of water marbled effect on my eye. I then used Grape Soda to create my usual winged liner to add more interest to the look. Honestly, it was a lot of fun just playing around with these products – even if the end result isn’t “wearable”. (Sidenote: Grape Soda goes on the eyes a lot darker than the pan and swatch would suggest – I imagine it’s because I layered it a few times.)
One thing to be aware of in regards to the formula is that it feels a little bit differently than your usual liquid liner. It has a slightly thicker consistency so it might feel a bit tight/thick on your eye. It’s no detrimental to the product, but worth mentioning since not everyone might be aware of/expect that sensation. I’ve only worn these as shown in the photo above, so I have no idea how this wears over your entire lid (I really do need to give that a shot though!).
The colour selection is phenomenal, and a lot of their shades glow under UV lights! They’re one of the most and unique products I’ve tried in the last year and I love these additions to the shade range.
If you decide to pick any shades of Hydra Liner up, or anything by Suva Beauty, you can snag them on getdollied.com or getdollied.ca and get 10% off your order with the code “MAKEUPYOURMIND”.
The products featured in this post were sent to me for consideration. Post contains affiliate links.
MAC Cosmetics Iridescent Powder in Silver Dusk – 1996 vs 2018 (Review & Swatches)
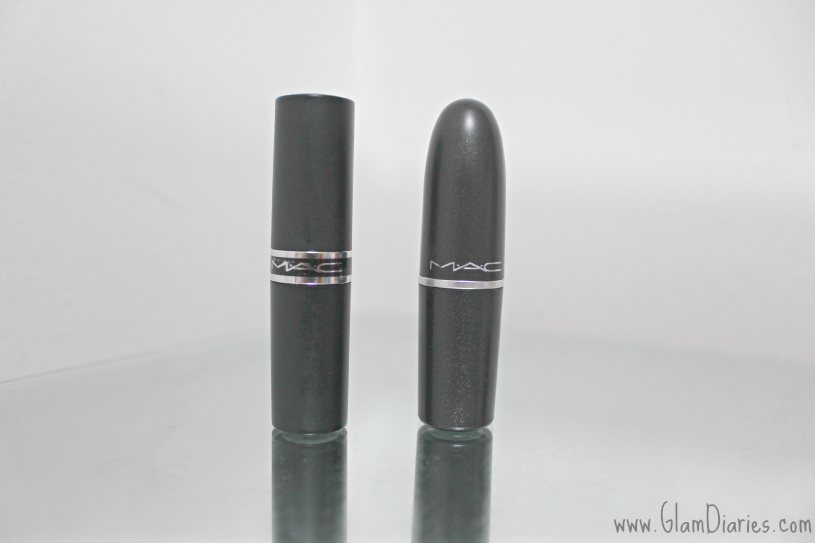
I have been wearing MAC products for a very, VERY long time. My aunt first introduced me to the brand because I needed to get some makeup for my figure skating competitions in order to bring out my features while I was performing on the ice. I was 12 years old at the time… and now I’m 35. So I’ve been stuck on this brand for a solid 23 years. Heck, I remember when MAC lipsticks used to look like this:
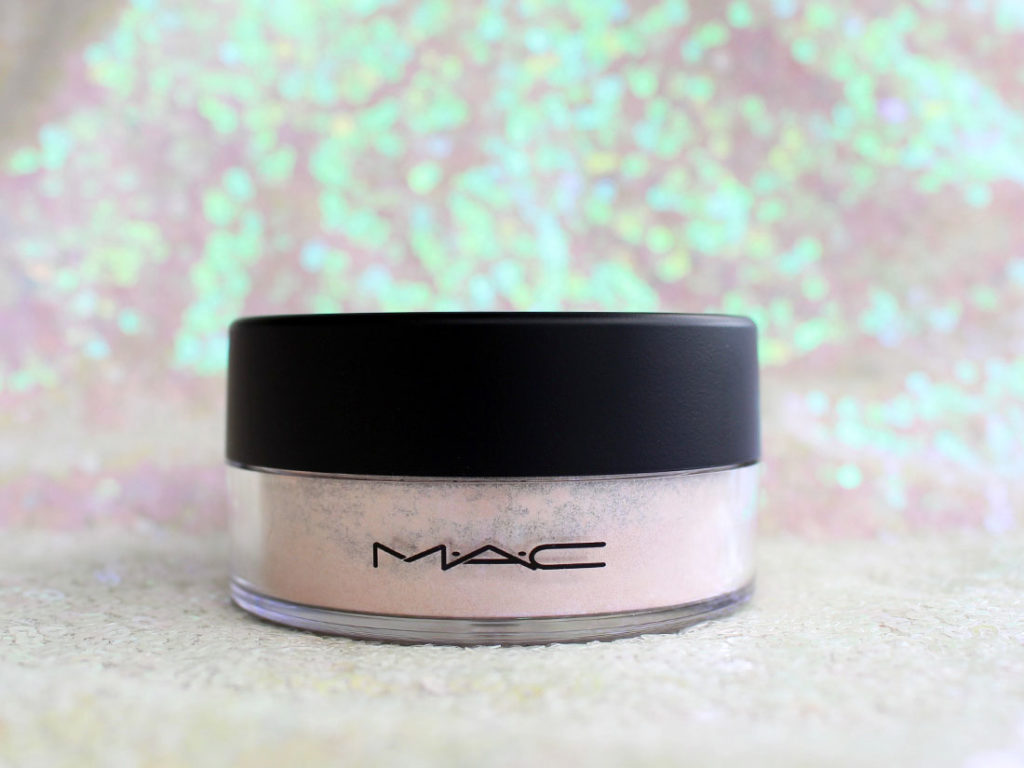
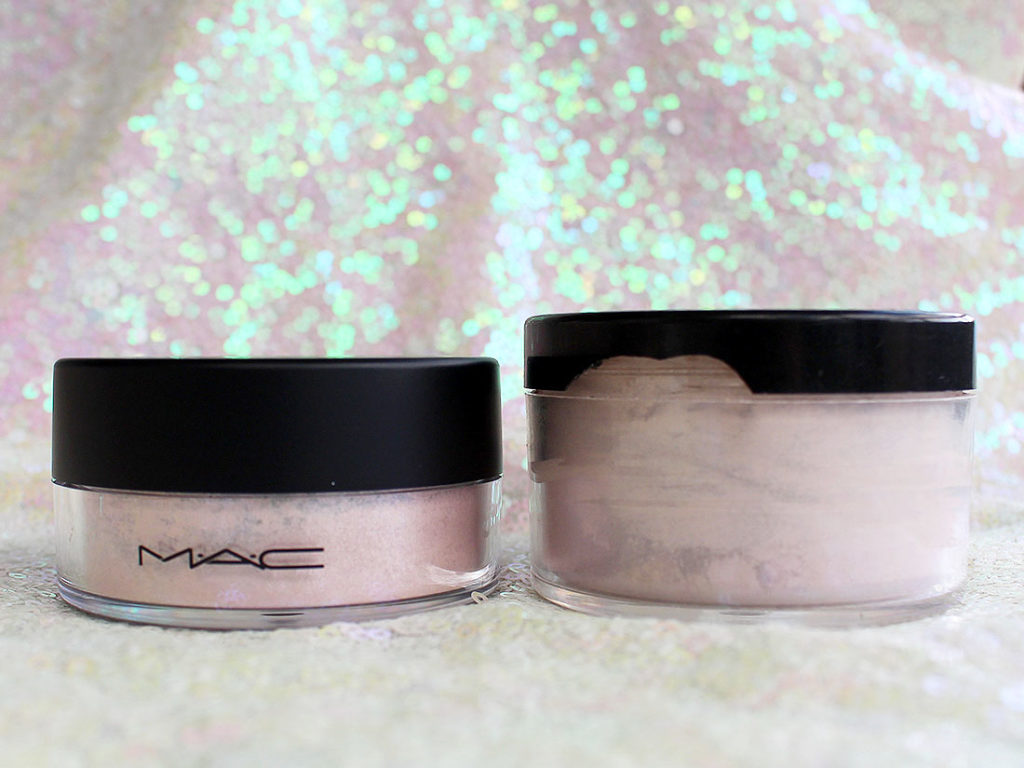
Anyway, I digress. My point is that I’ve been wearing MAC for a lot time and I do actually have products that are over the 20 year mark in my collection (powders only – I’ve long ditched any creams). One of my favourite products circa 1996 was MAC‘s Iridescent Powder in Silver Dusk, which is what this post is centered around. I had (have) a *HUGE* tub of it that I’ve been using for over two decades now and the thing is literally magical as I’m not anywhere near halfway done.
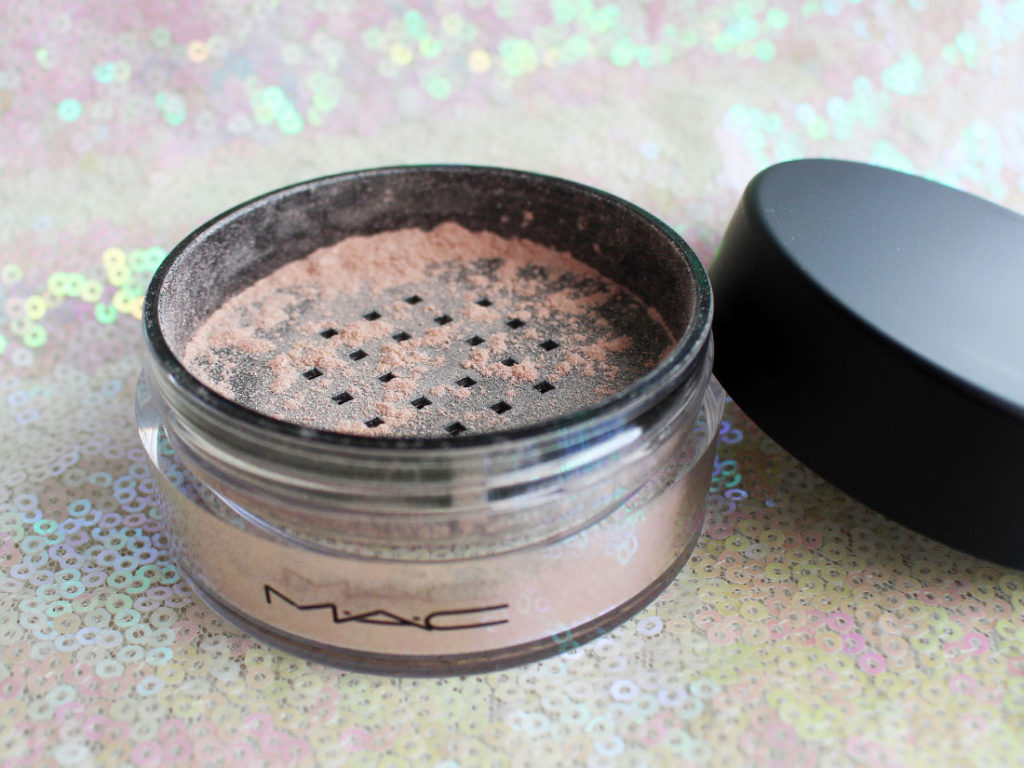
Silver Dusk is this beautiful pink-ish powder with unreal silver shimmer flecks suspended within the power. In 1996, 13 year old me was astonished by this product. It was likely fairy dust, unicorn tears and diamonds come to life.
I used to put it everywhere.
Literally.
All over my face, my arms, my neck – anywhere I had exposed skin, this stuff would go. I just wanted to SPARKLE. The reflection on it is fairly intense too – splash this all over your body and you do end up looking like a disco ball.
Of course, it’s come to my attention recently that having a 23 year old powder is kinda gross. And even worse is that my older packaging is looking really rough. And it’s because this tub of glory has been with me everywhere – I used to scoop out little spoonful and give to my friends in sample jars so they could experience the glory of it. I took the whole bloody thing with me on a family vacation to France in 1998 (I was also proudly hauling around my MAC Vellum, Orb and Haux eyeshadows, alongside a particularly hideous shade of pink lipstick by MAC called X-pose as well as the every lovely Cosmo). Suffice to say, I brought this sucker with me everywhere – it was beauty itself personified in my eyes.
MAC has discontinued and brought this powder back more times than I can remember in the last ten years. When I finally decide to bite the bullet and buy it again (which honestly felt stupid because I still had so much left *and* it doesn’t smell funny whatsoever), they upped and discontinued it before I took the plunge. I was pissed because it seems it was now gone forever.
However… two years later they brought it back around the time MAC launched at Sephora and I snagged it when they were having one of their sales. I was over the moon – I finally had a new version of my beloved powder!
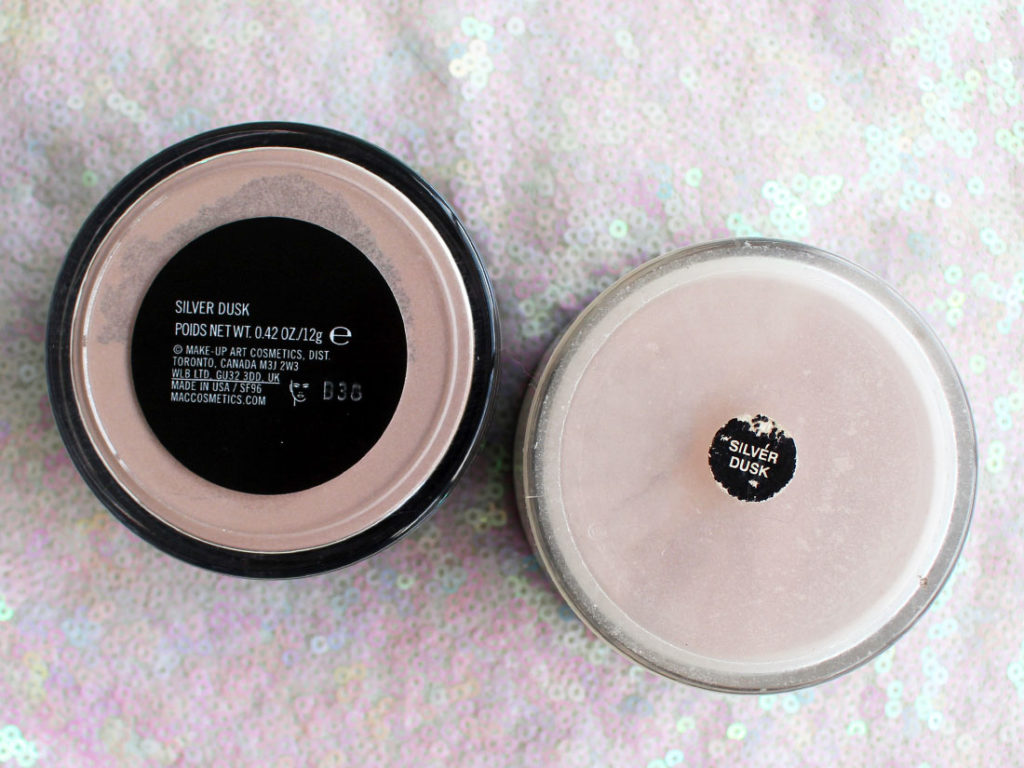
So… how does it stack up? Well, you can definitely see they’ve reduced the size of the packaging, although that happened many, MANY years ago when MAC started rebranding all of their packaging to the more matte black/charcoal you see today (back in the 90s the packaging was actually more of a glossy black). But honestly, my tub lasted me so bloody long that having that huge packaging was clearly not necessary.
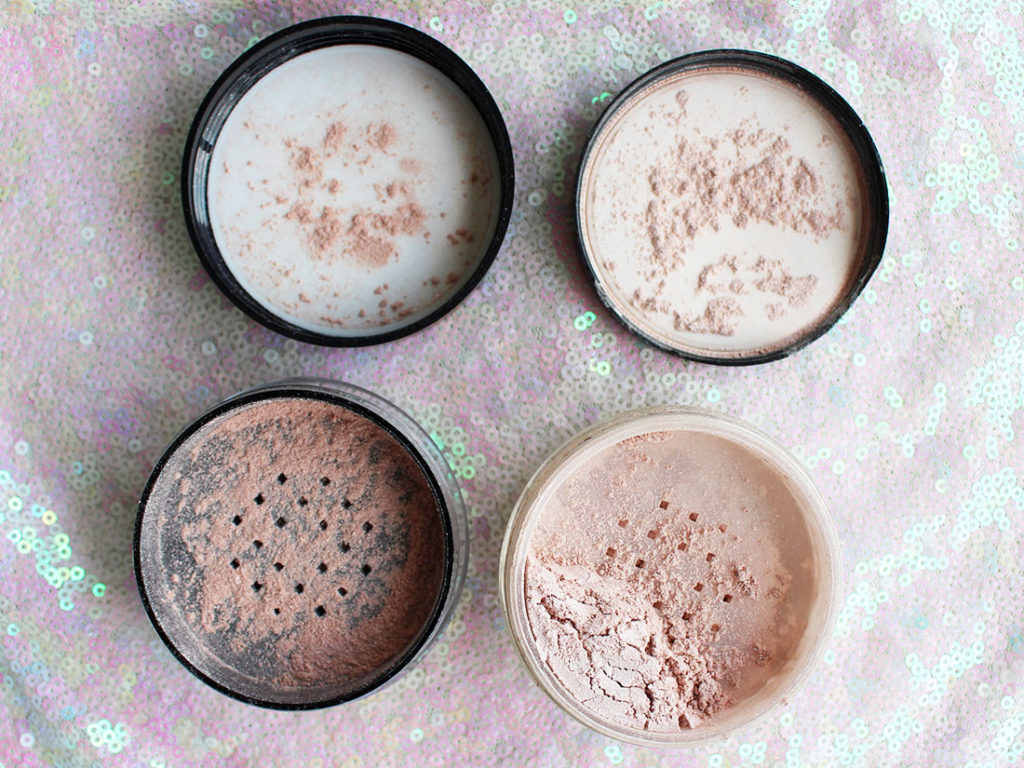
The most significant change though is definitely to the colour. The 2018 version of Silver Dusk is definitely more pink than the one I have from 1996. That being said… it’s entirely possible that my tub has been left out on a ledge exposed to a lot of sun over the years so it may have lost some of its colour over the years.
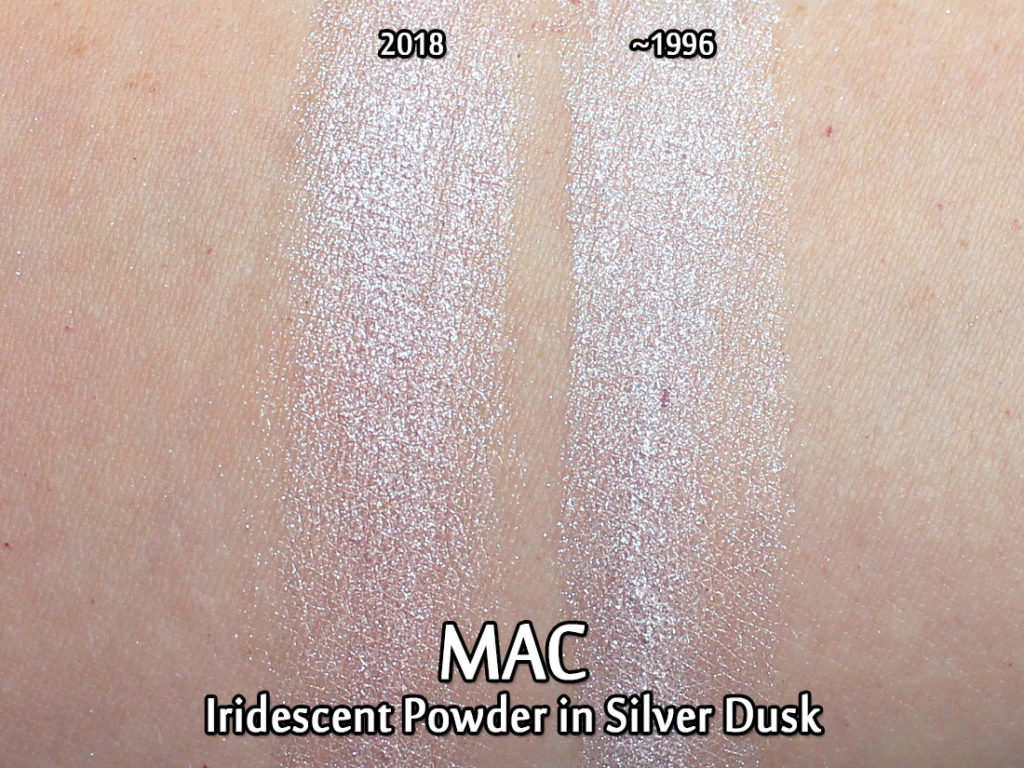
Swatched out you can definitely see more of the pink in the 2018 version. And it’s funny… I remember reading that Silver Dusk was a “pink/peach with silver shimmer” recently, but I had never mentally processed the powder as looking that way. To me, Silver Dusk always applied with a translucent base jampacked with silver-white glimmer. So I don’t really know if it actually has changed over the years, or if my memory of it has just warped over time (alongside the bleached out colour).
On the cheeks this powder is just as glorious as ever. It’s a little more subtle than today’s blinding highlighters, but there’s also more tiny flecks of shimmer in the product in comparison to what you’d expect a highlighter to look like nowadays. If you put this everywhere on your face (as I used to do), you will look like a glimmering diamond though!
I still feel like it’s ever so slightly different from my old pot and, because of that, it makes me not want to throw out my old relic. But let’s be real here… over the years I gradually stopped reaching for my old tub of Silver Dusk simply because it was SO old. I’m happy to have the new one, but it’s just not the *same*, you know? And maybe that’s because I have so many memories tied to it. Heck, I wonder if a MAC rep would even let me take the product back to them for Back2MAC… I doubt they’d even recognize the packaging!
Either way, I’m happy to have gotten a new Silver Dusk as it’s one of those makeup items I feel really attached to. If you want to snag MAC‘s Iridescent Powder in Silver Dusk, you can pick it up at sephora.ca for $33 CAD or on maccosmetics.com for $29 USD.
So tell me – do you feel this way about a particular product in your collection? Do you have fond memories of an old product that maybe you can’t get anymore? Tell me!
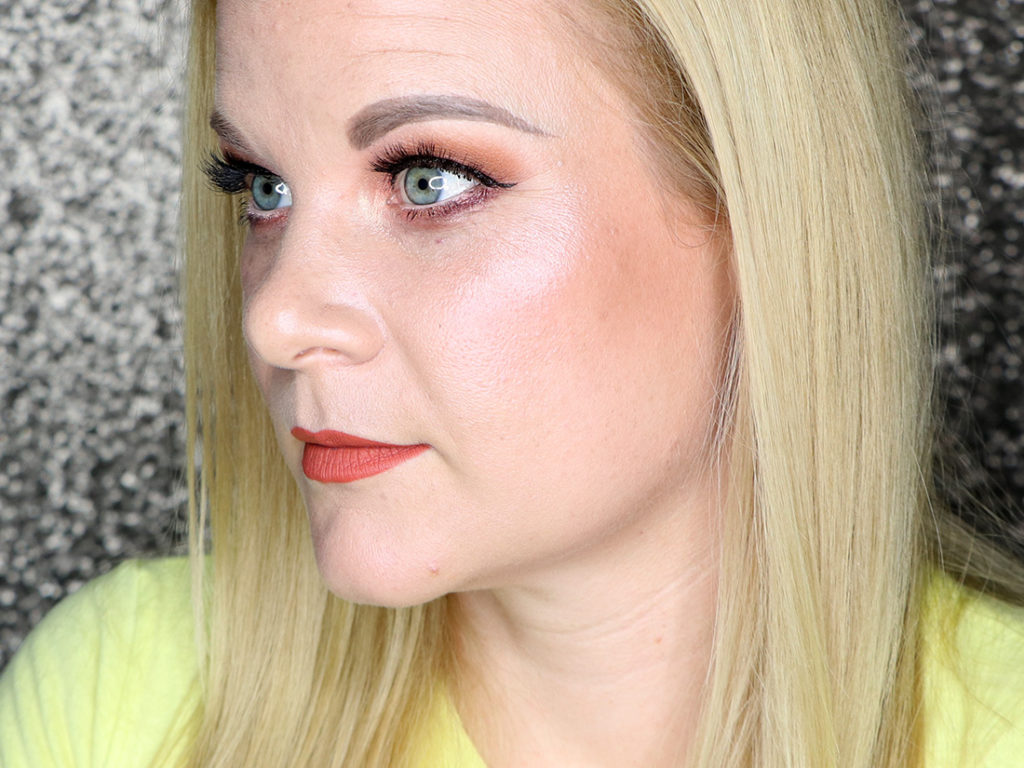
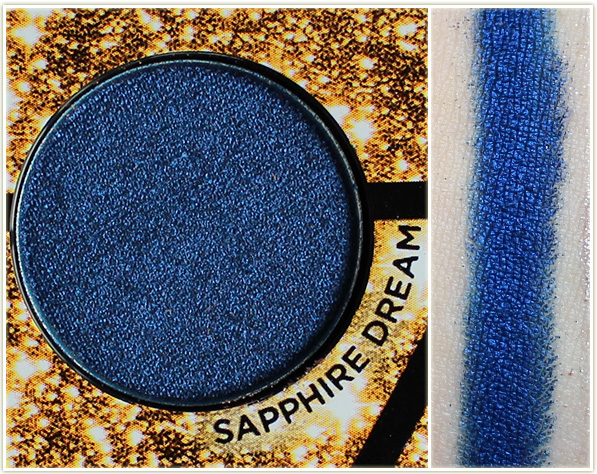
Swatch Sunday: Urban Decay Elements
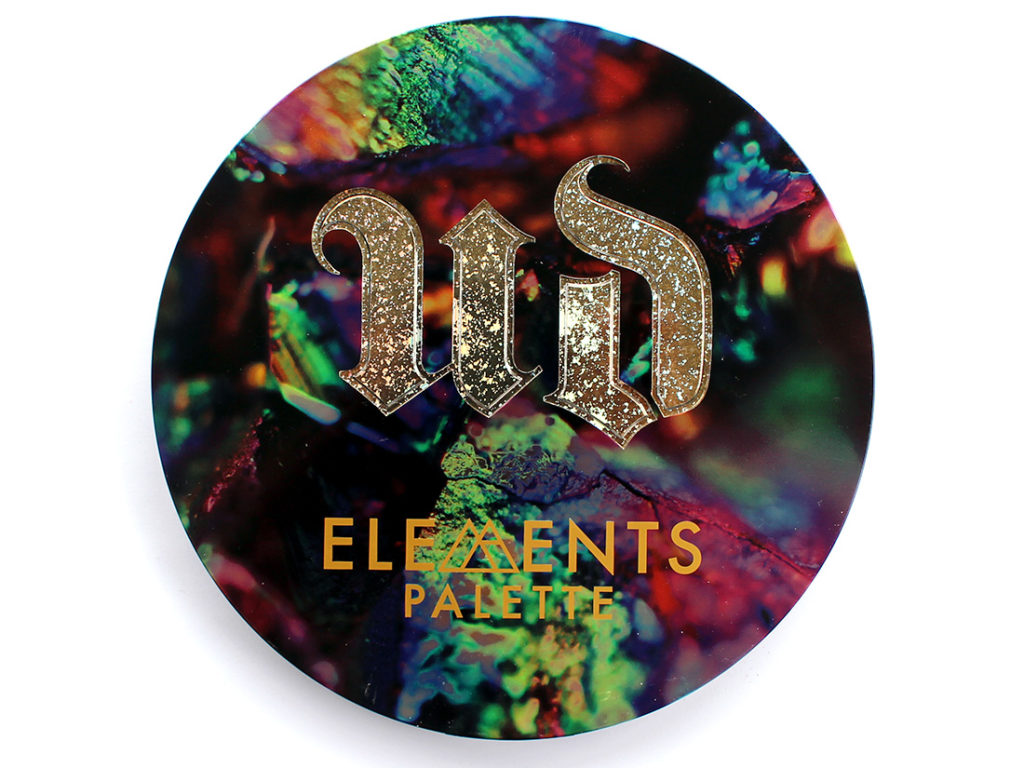
Urban Decay has launched their big holiday palette for 2018 – say hello to the Elements palette!
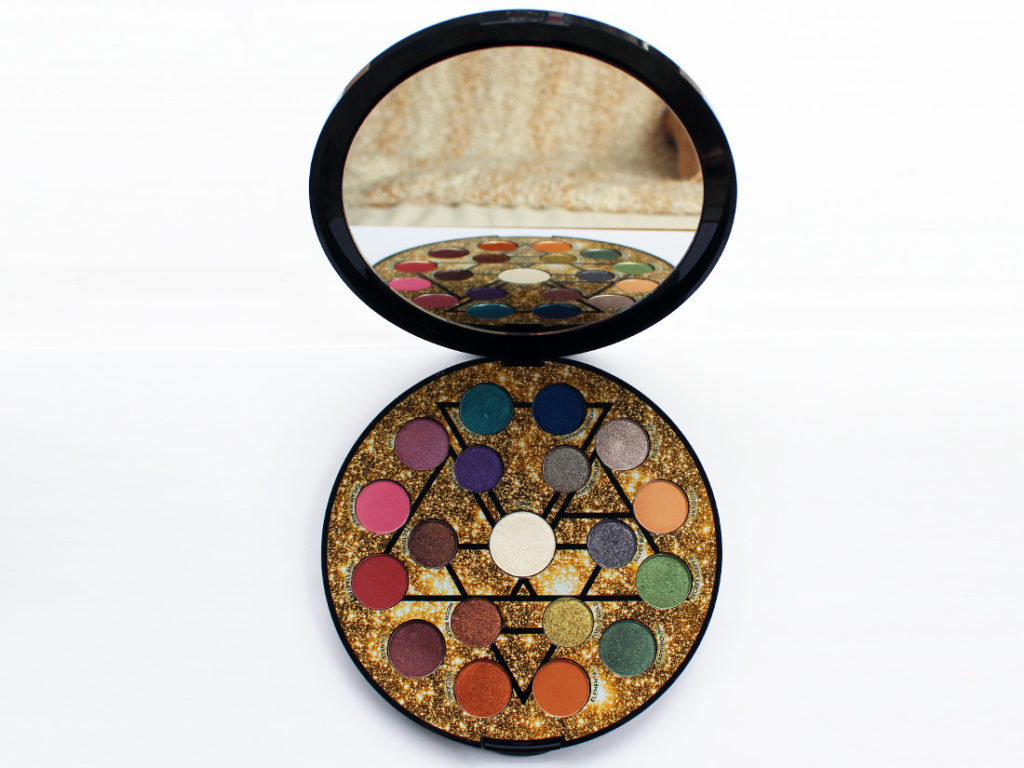
A departure from the structure of the Vice palettes Urban Decay used to launch every season, the Elements palette focuses on colour stories that pertain to earth, air, fire and water.

A full video review with five looks will be forthcoming, but in the meantime please enjoy the swatches!
Urban Decay – Elements Swatches
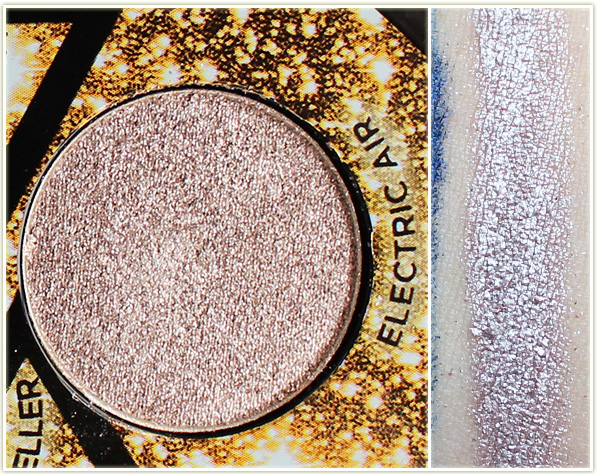
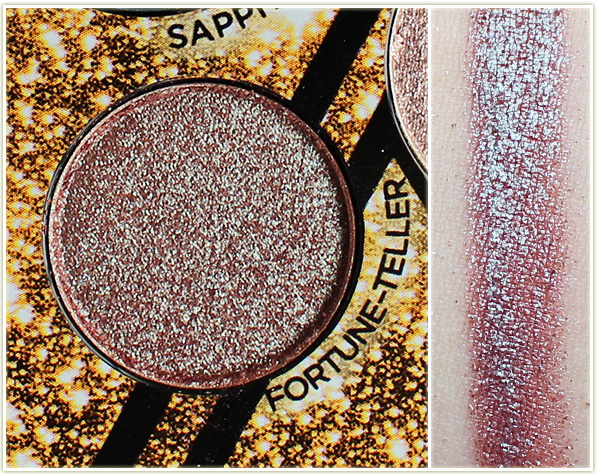

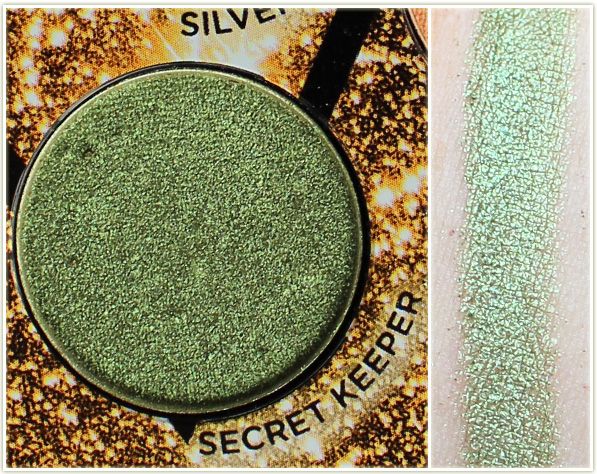
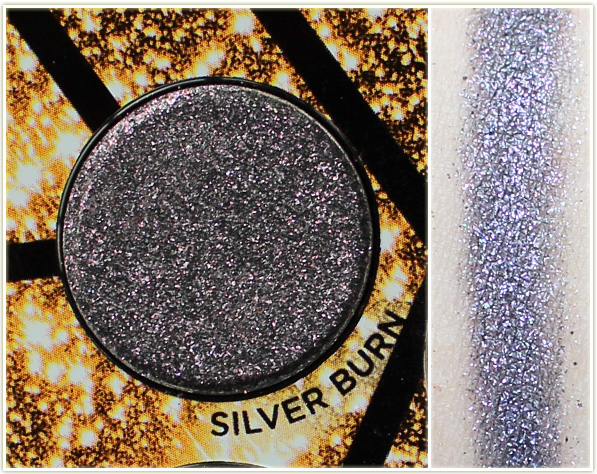
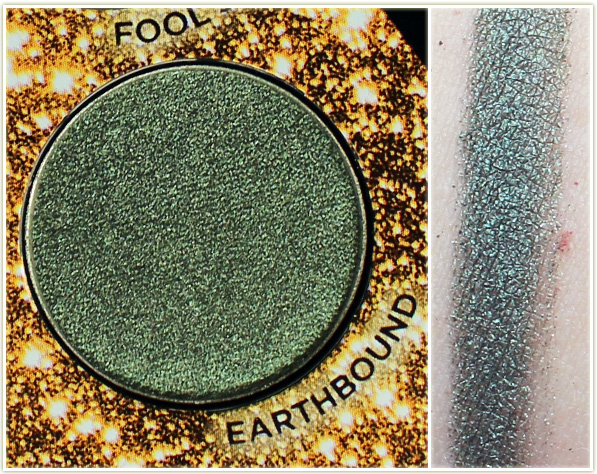
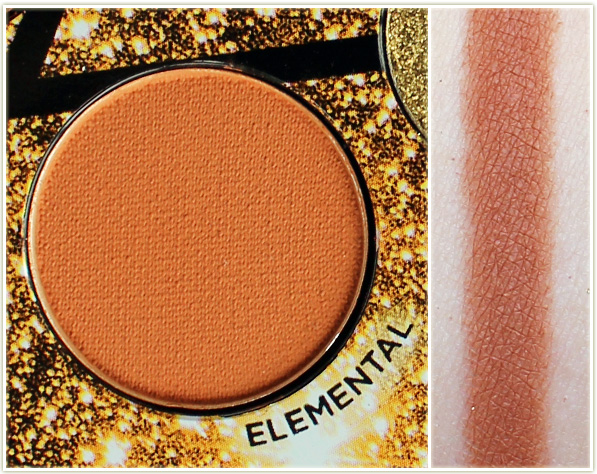
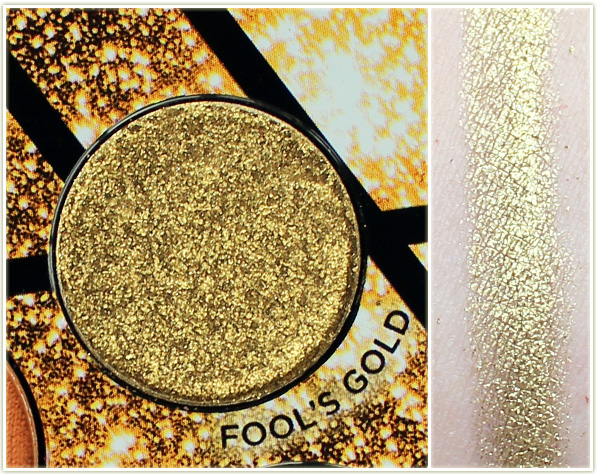
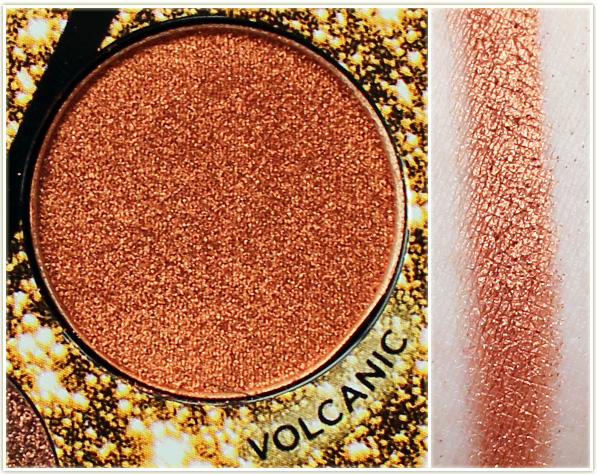

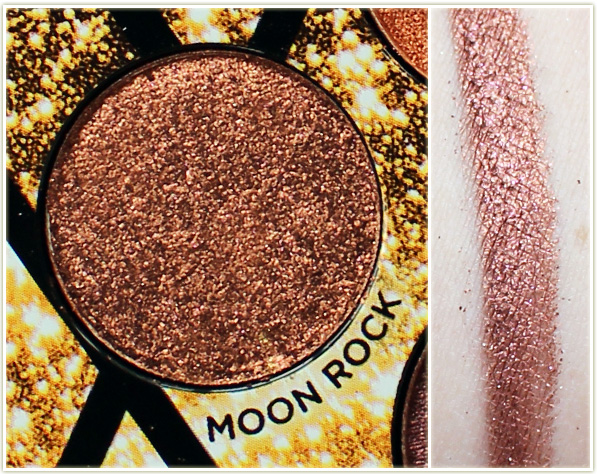
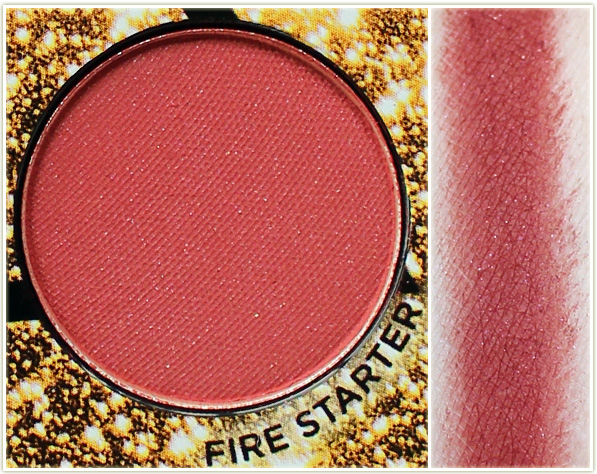
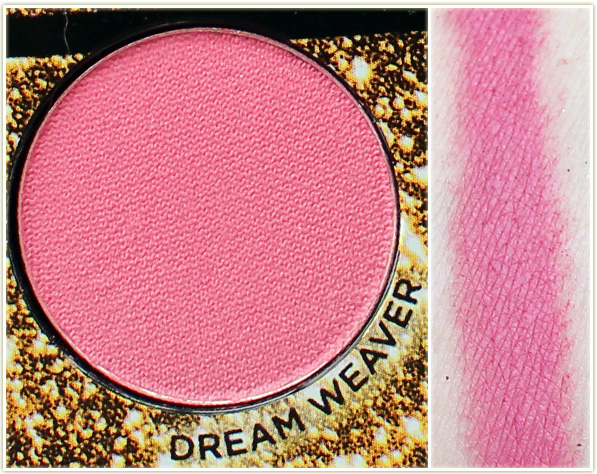
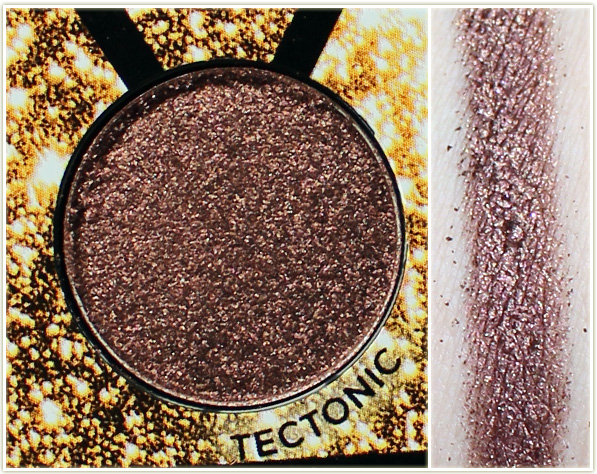
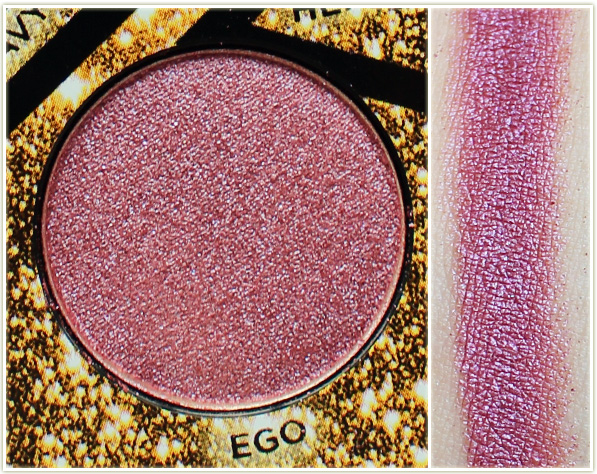
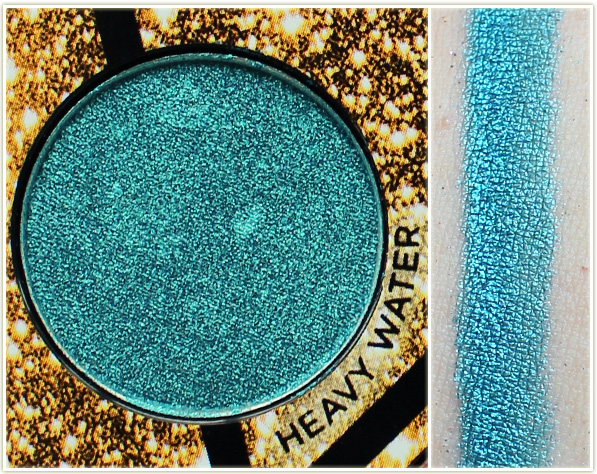
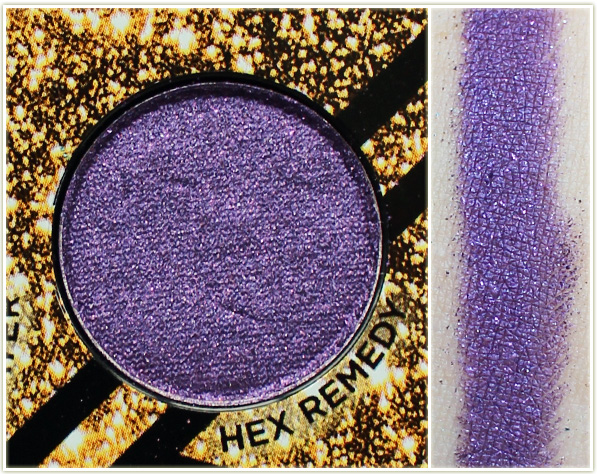
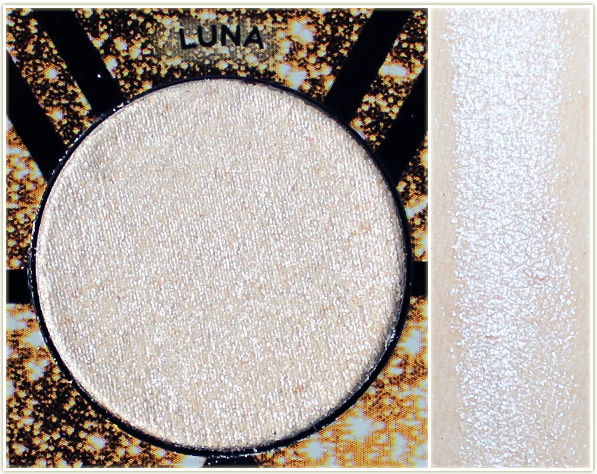
The Urban Decay Elements palette is available at sephora.ca for $65 CAD or on sephora.com for $52 USD.
The product featured in this post was sent to me for consideration. Post contains affiliate links.
Mary Kay – The “It’ Lipsticks (Review & Swatches)
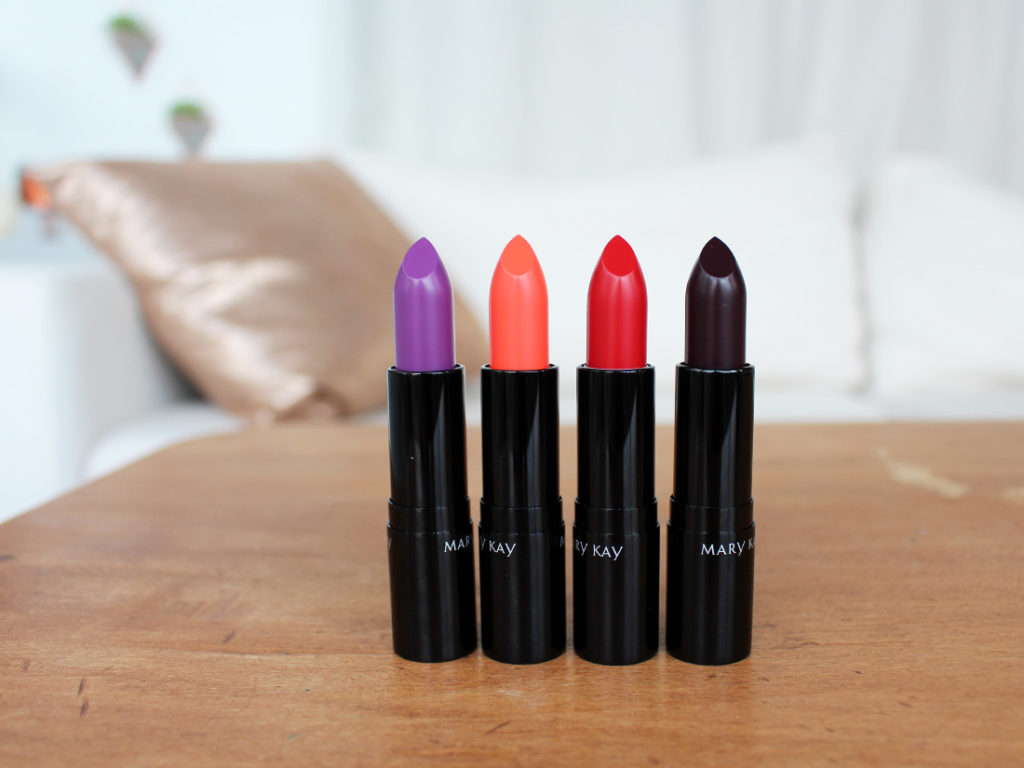
New out by Mary Kay are four lipsticks in colours that I am very, VERY excited to see by the brand – something bold, something unique, and something to spice up their brand name!

Say hello to their new “It” Lipstick which comes in four vibrant shades in a matte formula. Each shade retails for $20 CAD, and has a lightly sweet, soft vanilla scent. They’re out right now for a limited time only.

What makes me so excited to see these shades from this brand in particular is that Mary Kay has always been a “safe” brand. They stick to the neutral/normal shades, and don’t really go outside of that range very often. So when these shades showed up as a new launch, I was PUMPED! I want to see more excitement like this from a brand that has (for far too long I must say) been known as a grandma brand.
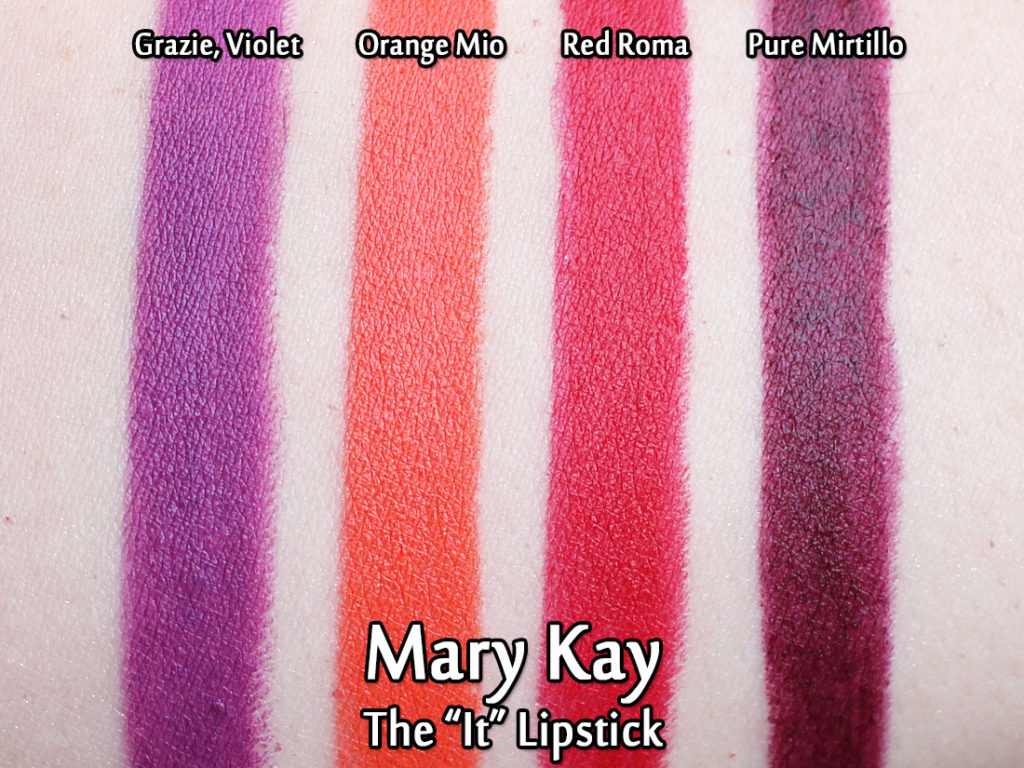
Pigmentation is completely opaque on the orange and the red, and somewhat patchy (but strong) on the two purples. This is fairly consistently a problem with purples in any brand, so I wasn’t that surprised to see it here as well.
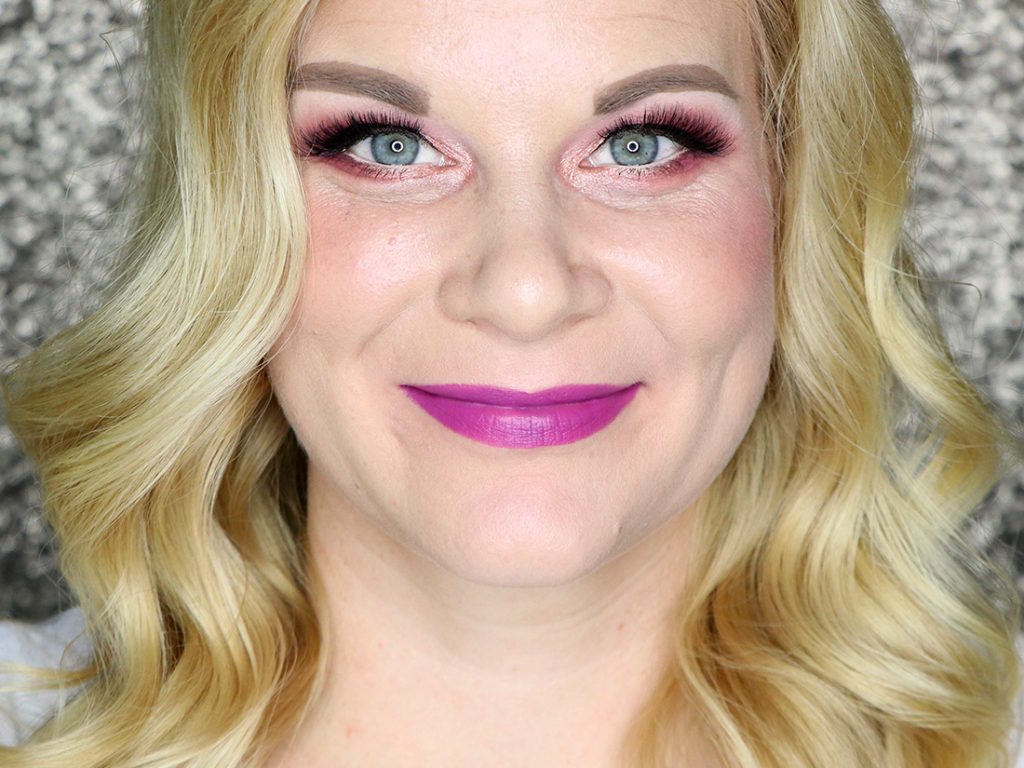
Grazie, Violet is the shade that surprised me the most in this launch – it’s so unlike Mary Kay to put out a shade like this, and that just made me smile to see it. It’s a beautiful luminous purple, but it does go a bit patchy on the lips.
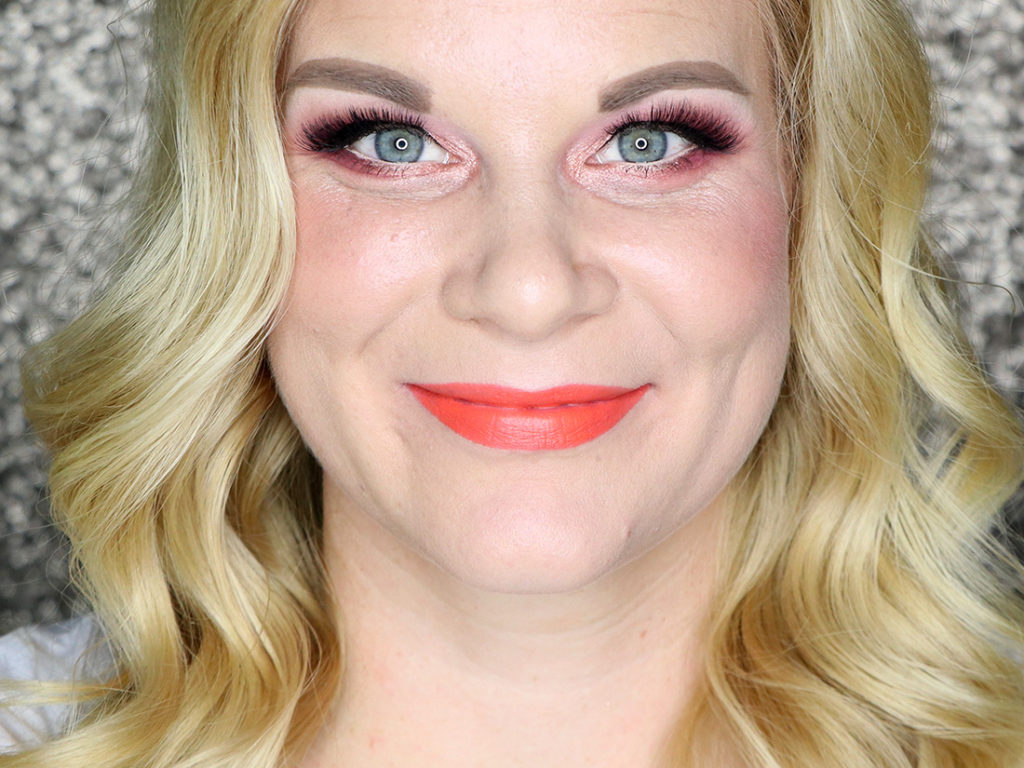
Holy smokes! Orange Mio is a loud orange with intense pigmentation. Love this one!
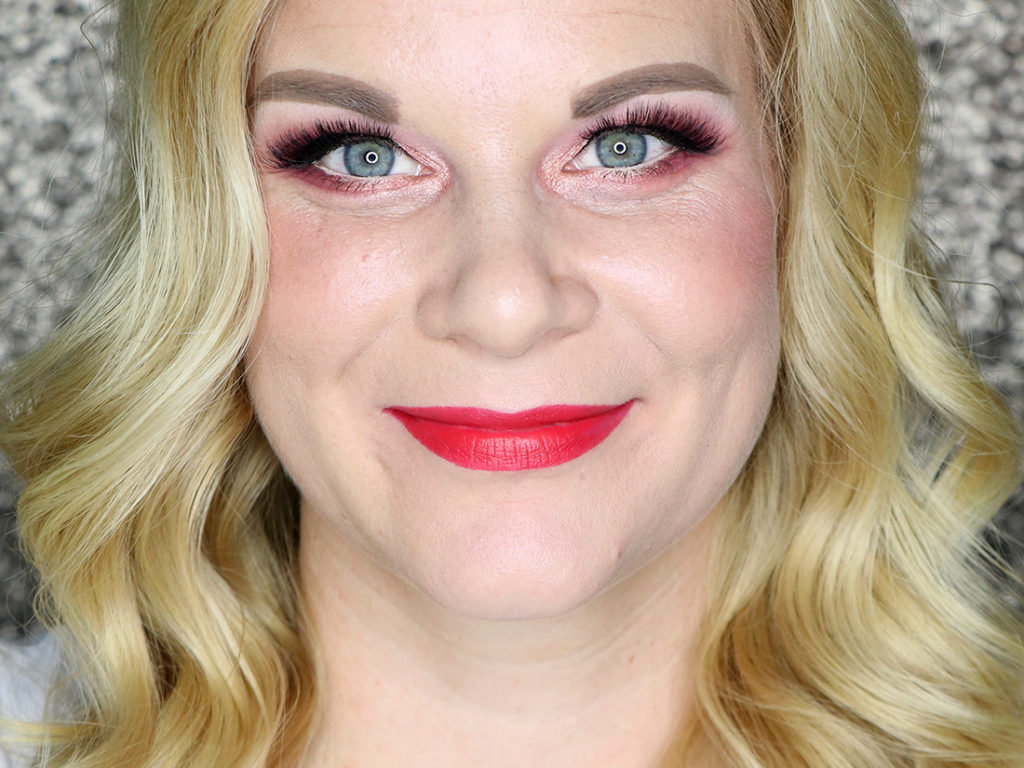
I absolutely thought Red Roma was going to be a boring, old red, but there is definitely something unique about it that I can’t quite put my finger on it. It’s almost verging on neon somehow? Neon red tends to have some pink in it, so I can see a hint of that here. Stunning!
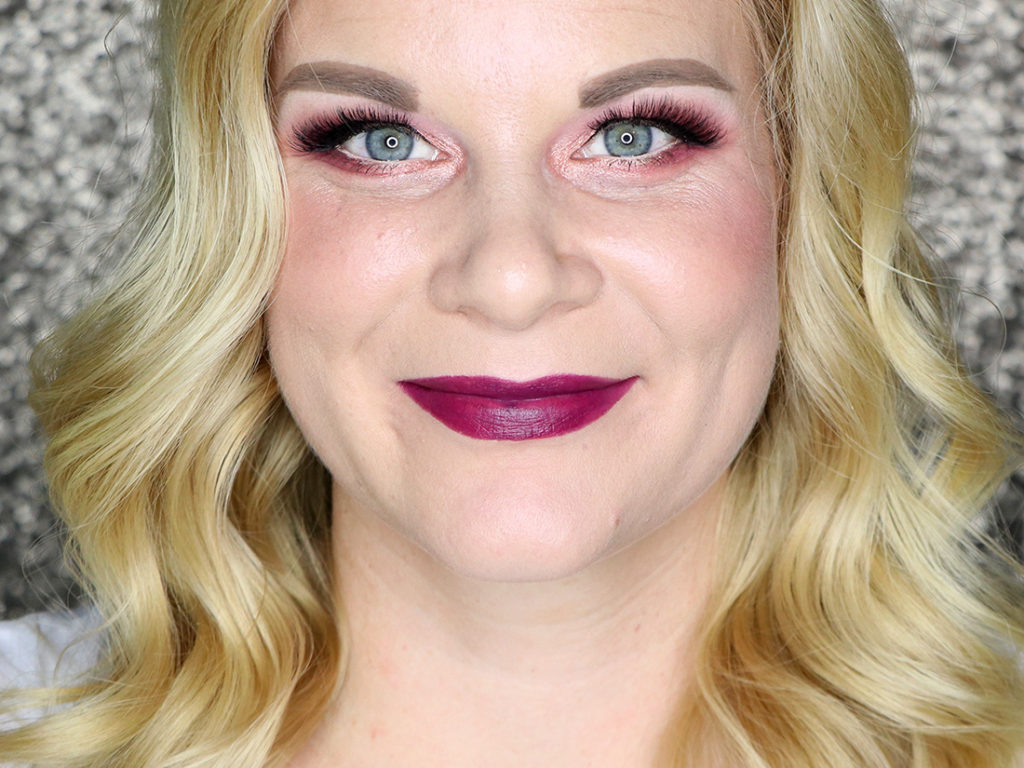
Despite the bullet looking dang near black, Puro Mirtillo is actually a deep purple. The colour is absolutely beautiful, but this one had the biggest problems in terms of patchiness.
Final Thoughts
Each shade applies smoothly and solidly, but I had varying degrees of success with each shade. Overall, I have to say that these lipsticks perform much better without lip primer. I found this surprising as lip primer is a lifesaver for me in terms of keeping my lipstick from bleeding out at the edges and for longevity. I found that lip primer ended up making this lipstick clump up, which is something I had never experienced before. Surprisingly without lip primer these lipsticks did NOT bleed outside of my lip line – I was so impressed!
That being said, I found that the purples and orange gathered a little bit at the edge between where my exterior lip ends and the interior of my mouth begins. The red shade didn’t do this though. As for colour pigmentation, much like that swatches, the orange and red were opaque, and the purples had some patchiness (use a lip pencil underneath your lipstick to prevent that issue from standing out). For me, the red, and then the orange were the clear winners, but I really love the deeper purple shade as it looks really, really good on!
So while there are a few discrepancies between the shades and how they wore on me, I have to say I am so impressed to see Mary Kay releasing these kinds of shades. Kudos to you guys – keep it up!
The products featured in this post were sent to me for consideration.