In the beauty world, we’re pretty oversaturated with products that are virtually the same, just in different packaging. So it’s like seeing a unicorn amidst the pack when you spot something new and totally unlike anything you’d ever experienced before.
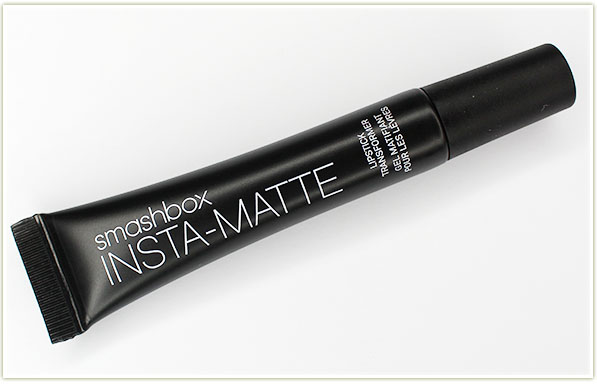
Smashbox Insta-Matte Lipstick Transformer
The brand new Smashbox Insta-Matte Lip Transformer is that rare mystical beast! As a matte lip obsessor, this has gotten me a little overexcited!
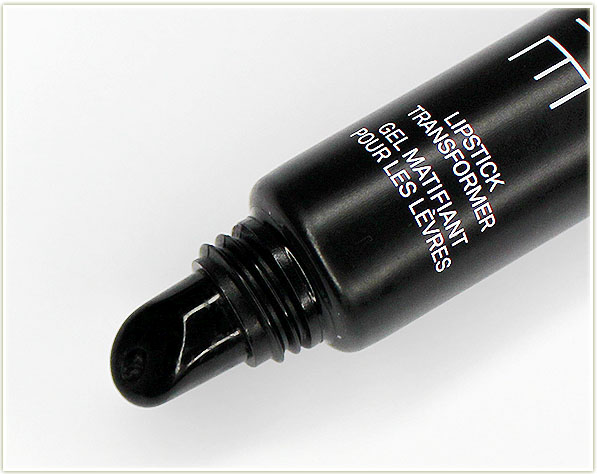
Smashbox Insta-Matte applicator
So what is this thing then? The Insta-Matte is a soft transparent gel that can be applied to your cream lipsticks (not for use with glosses, lacquers or balms) to transform them into a matte lipstick. It won’t change the colour of your lipstick either!
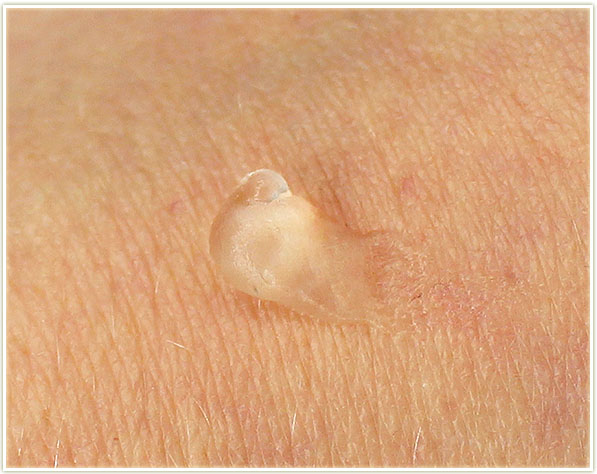
Smashbox Insta-Matte swatch
The Insta-Matte is also a really comfortable light-weight product that feels cushiony on the lips. It doesn’t add the dryness that most matte lipsticks have and it maintains the colour perfectly. I can liken it only to the new-ish matte formulas that have started to circulate in the beauty world… they have a bit of a gel texture, but they feel soft on the lips.
Application-wise, I apply my lipstick first, then pop a little bit of the Insta-Matte on to my finger tip and blend that in directly onto my lipstick. I discovered that less is better – one time I applied too much and it got a little bit gloppy on my lips. So stick with a small amount of product and add more as needed to mattify your lips. (A little goes a long way, so you won’t need much!)
Anyway, you’re here for the lip pictures. Let’s see the Insta-Matte in action!
Insta-Matte Comparisons
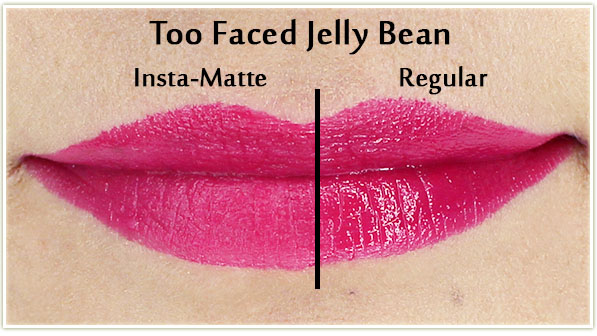
Smashbox Insta-Matte on Too Faced La Creme lipstick in Jelly Bean
The Insta-Matte is recommended for use with cream lipsticks, so I went straight for my Too Faced La Creme lipsticks. The difference between the two sides is astounding. I applied the lipstick to my whole mouth, then applied the Insta-Matte to the left side. You can see the instantaneous transformation AND that the colour of the lipstick stays true to itself!
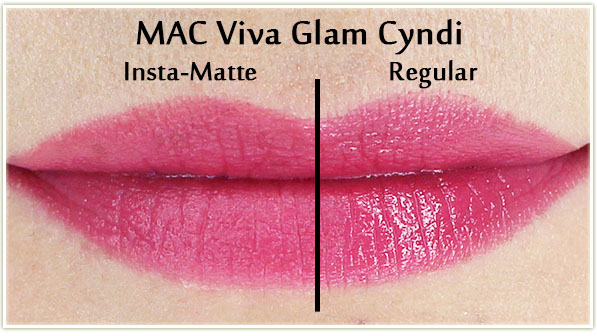
Smashbox Insta-Matte on MAC Viva Vlam Cyndi lustre lipstick
Now that I know this works like a charm on cream formulas, I decided to give some of my other lip products a try. This is MAC’s Viva Glam Cyndi lipstick (limited edition several years back, but it’s the only lustre formula I own) and it worked out just as well as the Too Faced one!
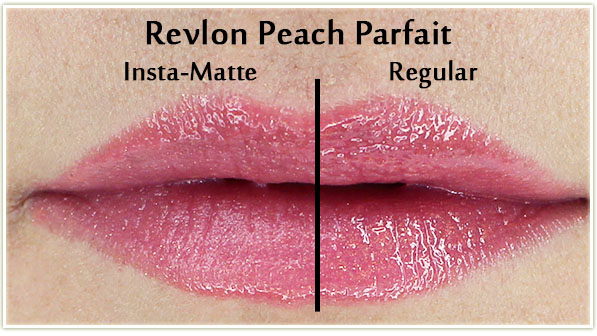
Smashbox Insta-Matte on Revlon Peach Parfait lip butter
And because I feel like instructions are meant to be tampered with, I decided to see how far I could push this product. The lip product above is my Revlon lip butter in Peach Parfait. This is where the Insta-Matte starts to struggle a little bit. It does work to tone down the sheen of Peach Parfait (which is one of the most reflective lip butters I’ve ever owned), but it’s not something I’d wear with regularity.
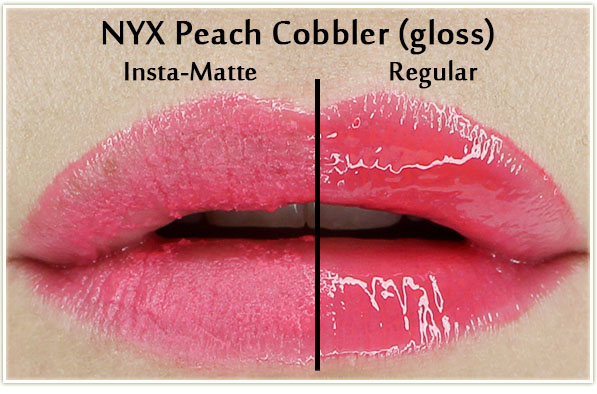
Smashbox Insta-Matte on NYX Peach Cobbler butter gloss
This last shot was just for fun. The Insta-Matte definitely says it’s not to be used with lip gloss, but I wanted to see what would happen. And as you can see… the results aren’t glamorous. NYX’s Peach Cobbler butter gloss actually maintains its colour but it starts to go crumbly and chunky.
Final Thoughts on the Smashbox Insta-Matte
My mind is totally blown by the Smashbox Insta-Matte – it’s a really incredible product and unlike anything else of its nature. I never liked the idea of applying powder to my lips to mattify a lipstick (like ew, hello, crunchy and powdery? Gross!) and this is a solution that will actually work for everyone. Although the instructions say to apply liberally, I would encourage you to start out with a small amount of product, and then build on that as needed. The best part is that this actually feels comfortable on the lips – it’s not drying which can be a chief problem with matte lipsticks (as a note, this does not make your lipstick transfer-proof!). So if you couldn’t tell by my post, I love this product – it works well, it’s comfortable to wear and it doubles your cream lipstick collection!
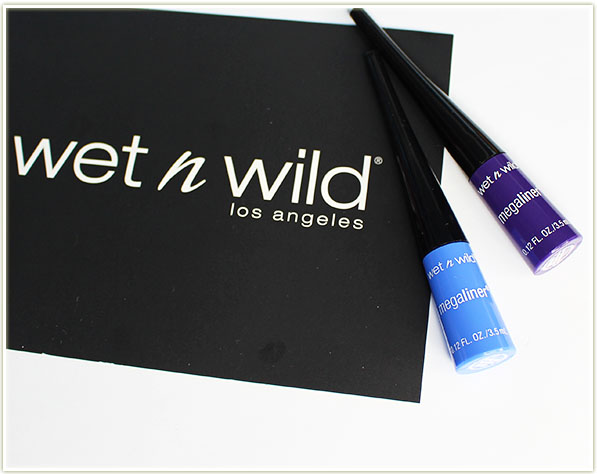
There’s some new colours in the Wet n WildMega Liner Liquid Eyeliner lineup and they’re freaking stunners!
Wet n Wild Mega Liner Liquid Eyeliner in Voltage Blue & Electric Purple
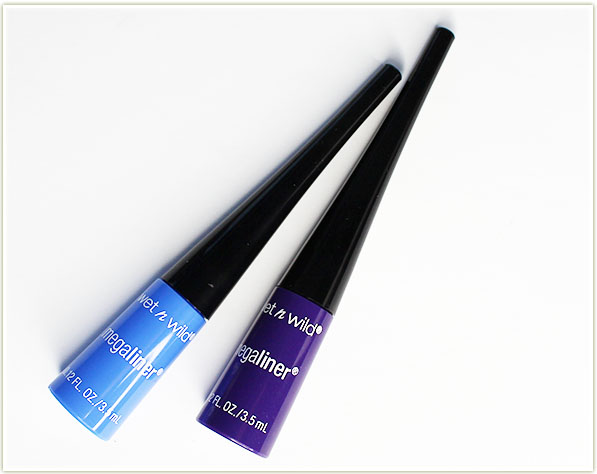
The Wet n WildMega Liners are designed like an ink well – you dip back in to get more product out. They’re said to be “formulated with high-definition pigment and a unique blend of polymers for a rich fluid formula that dries fast and stays put to subtly enhance or dramatically define”.
Wet n Wild Mega Liner Liquid Eyeliner in Voltage Blue & Electric Purple
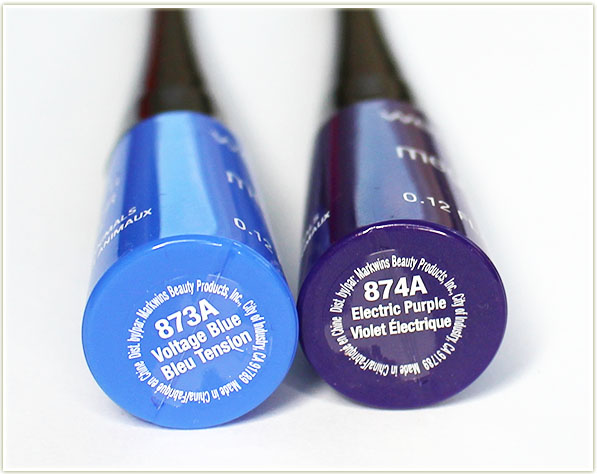
The best part about these liners? They’re MATTE! I was not expecting that at all, so when I first used them I was totally taken aback. I am so, so happy that these bright vibrant colours are in a matte formula as it creates a sharp impact on the eyes which I much prefer (instead of a shiny liner).
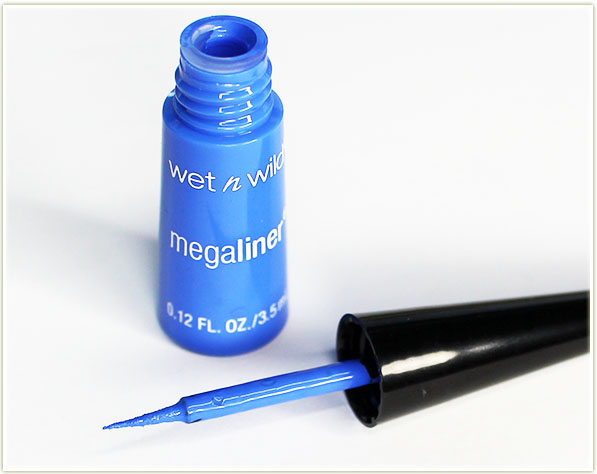
Wet n Wild Mega Liner Liquid Eyeliner – applicator
The Mega Liner comes with a flexible felt tip liner that is blissfully long and pointy. I have a huge complaint with liquid liners that are not long enough because I usually end up creating a stubby wing. Thankfully, that isn’t a problem with the Mega Liner – the tip is flexible and long enough to create a beautiful wing.
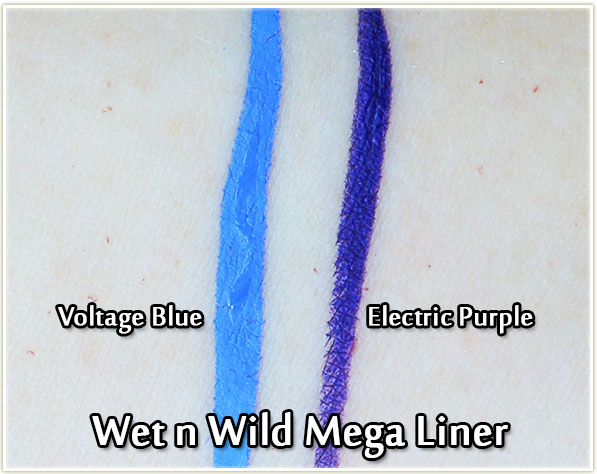
Wet n Wild Mega Liners in Voltage Blue & Electric Purple – swatches
Voltage Blue is opaque in one swipe and has beautiful pigmentation. Electric Purple is more liquid overall and may require two passes to reach full opacity (still a lovely shade nonetheless).
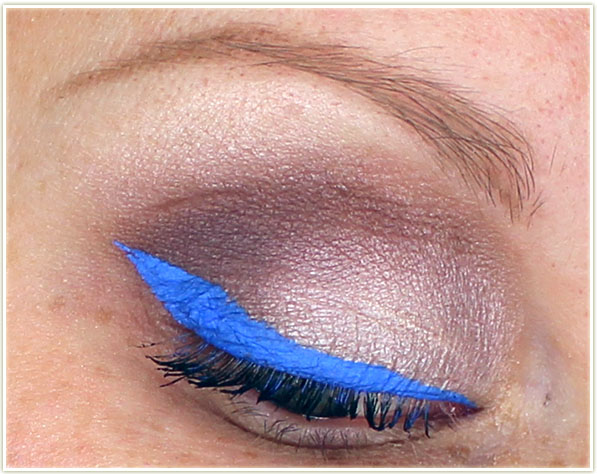
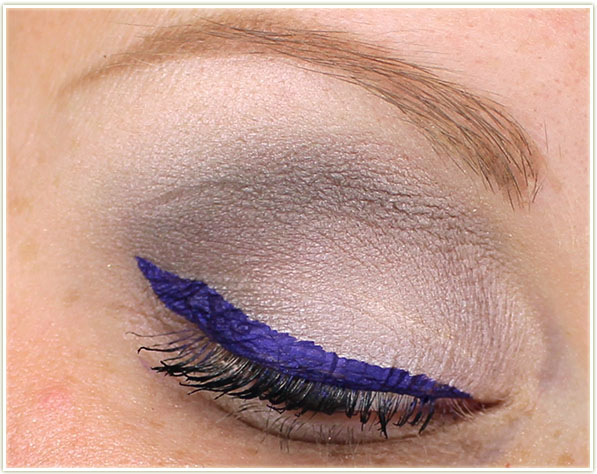
Wet n Wild Mega Liner Liquid Eyeliner in Voltage Blue
Wearing Voltage Blue. I die over this colour!
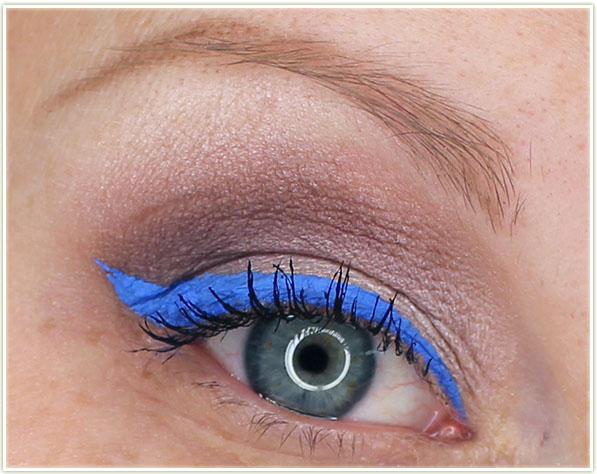
Wet n Wild Mega Liner Liquid Eyeliner in Voltage Blue
Wearing Voltage Blue – see how crisp and sharp that line is? Beauuuuutiful pigmentation.
Wet n Wild Mega Liner Liquid Eyeliner in Electric Purple
Wearing Electric Purple. Darker and more subtle than Voltage Blue.
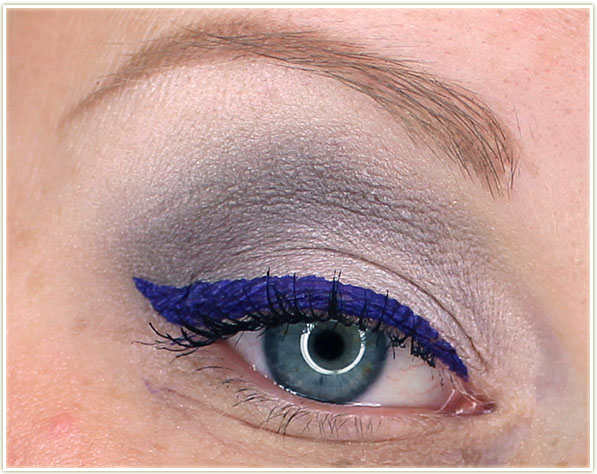
Wet n Wild Mega Liner Liquid Eyeliner in Electric Purple
Wearing Electric Purple – I had a slightly more difficult time with the application on this one. It might be because it was a bit more watery so I had to make several passes (creating a more jagged edge).
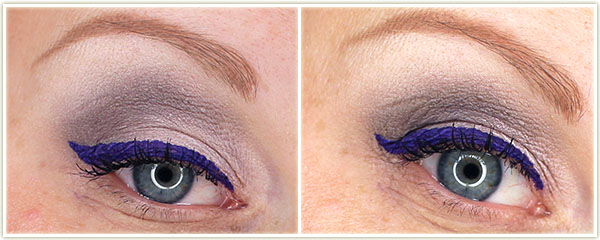
Wet n Wild Mega Liner – left shot taken at 7:30 am, right shot taken at 5 pm
Here’s a comparison shot: The shot on the left was taken at 7:30 in the morning before I went to work. The shot on the right was taken when I got home from work at 5 pm. Although my eye shape isn’t identical (sorry!), you can see there is no change in pigmentation and the liner held up the entire day (roughly 10 hours!).
Final Thoughts
It’s worth noting that the Mega Liners are not waterproof – so just keep that in mind. Overall, I’m impressed with the pigmentation and formula of these two liquid liners, *especially* when you consider their price point is somewhere around two to three bucks. Out of the two of them, I do prefer Voltage Blue as I felt it had superior pigmentation. That being said, both liners had a longevity over 10 hours long which is hugely impressive to me. Because really, if my liner can’t last an entire work day, why would I even bother applying it??
Let me know if you’ve tried these out or if these shades are something you would wear. 🙂
The products featured in this post were provided for consideration.
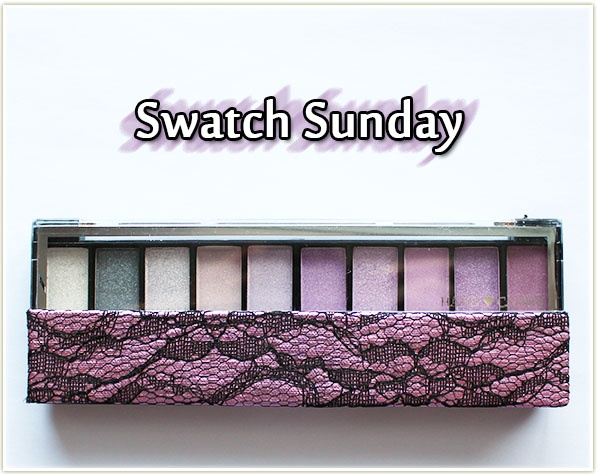
I did a tutorial featuring the Hard Candy Pinking of You palette on Friday (check out that Valentine’s Day look here) and I’m following it up with a Swatch Sunday post!
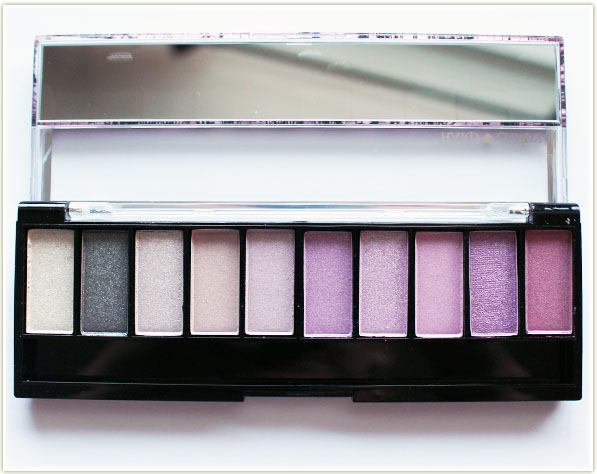
Hard Candy Pinking of You
I will say that you’re going to find a lot of the colours in the middle section of this palette are very, very similar. There isn’t a whole lot of pigment definition between them, but it does mean that it’s a really easy palette for people looking for a soft look. One thing to note is that there are no mattes in this palette, so you’ll need some additional colours to balance it out if you want something other than a totally shimmery eye.
Hard Candy Pinking of You Swatches
Hard Candy Pinking of You – Shade 1
Hard Candy Pinking of You – Shade 2
Hard Candy Pinking of You – Shade 3201601_Hard Candy Pinking of You – Shade 4201601_Hard Candy Pinking of You – Shade 5201601_Hard Candy Pinking of You – Shade 6201601_Hard Candy Pinking of You – Shade 7201601_Hard Candy Pinking of You – Shade 8201601_Hard Candy Pinking of You – Shade 9201601_Hard Candy Pinking of You – Shade 10
The product featured in this post was sent to me for consideration.
Oh man. I have been lusting and lusting over the Makeup Geek duochromes since they first launched back in September. At the time, I couldn’t justify the cost of the whole collection, but come December I was back in a position to purchase ALL OF THEM. I picked up the entire duochrome set in a packaged bundle for $150 USD. That set comes with all twelve duochrome shadows and all eight duochrome pigments. As I’m typing this, the set is currently out of stock, but it’s expected to be back in stock in early February.
Sidenote: If you’re ever wondering WHEN something will be back in stock at Makeup Geek, always be sure to check their spreadsheet here. They’ve had it for years and it’s continuously updated.
Makeup Geek Duochrome Eyeshadows
The duochrome eyeshadow singles are packaged in the usual single pan packaging (no case for these guys yet, so you’ll need a Z-palette).
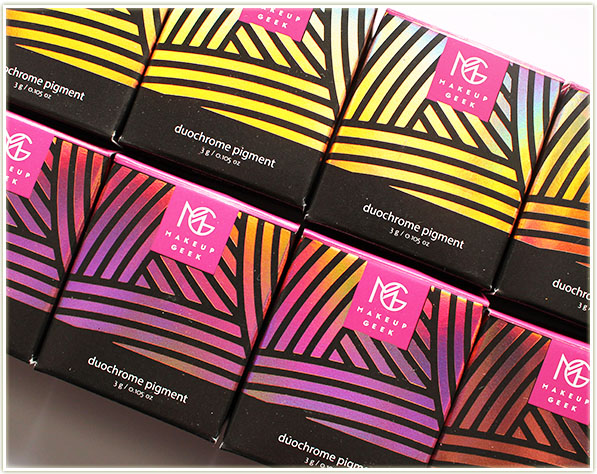
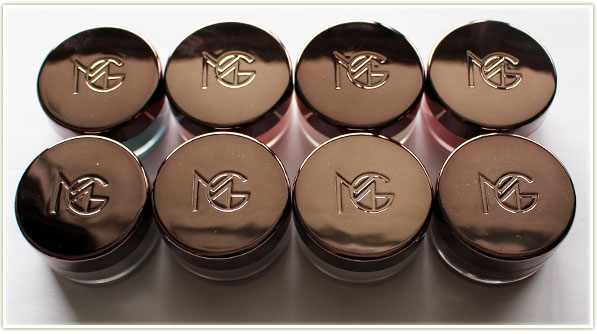
Makeup Geek Duochrome Pigments
The pigments come in the same original containers as the MUG pigments, but they’ve had an updated lid and logo design that is much more appealing than its earlier incarntion.
As we get into the shades, please keep in mind that since these shadows reflect multiple colours, sometimes a camera cannot capture each shade. At the bottom of all of the swatches are out of focus shots that I’ve taken in an attempt to show you the dimension of each shade.
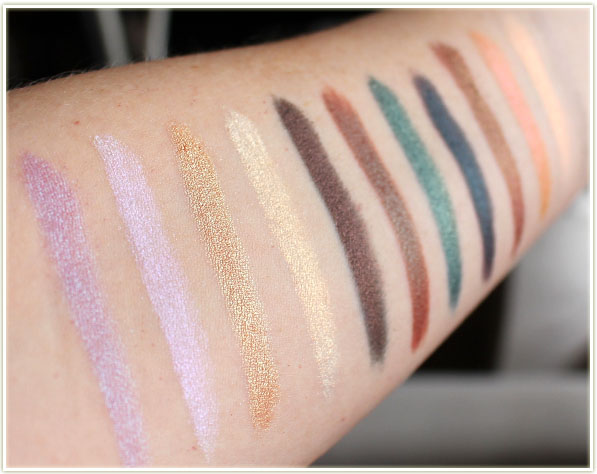
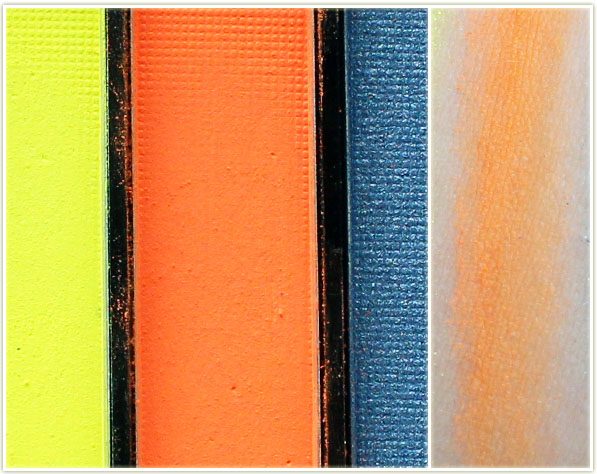
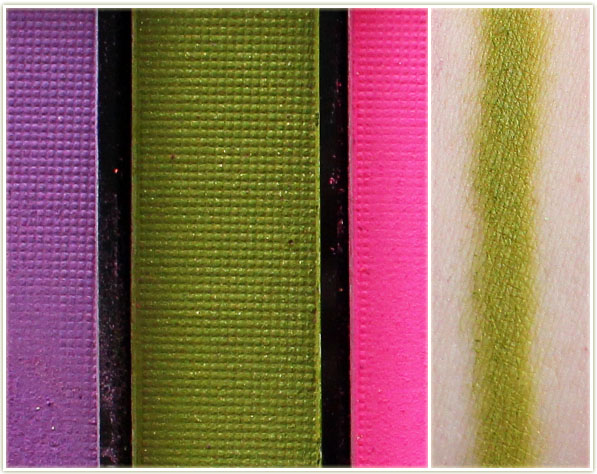
Makeup Geek Duochrome Eyeshadow Swatches
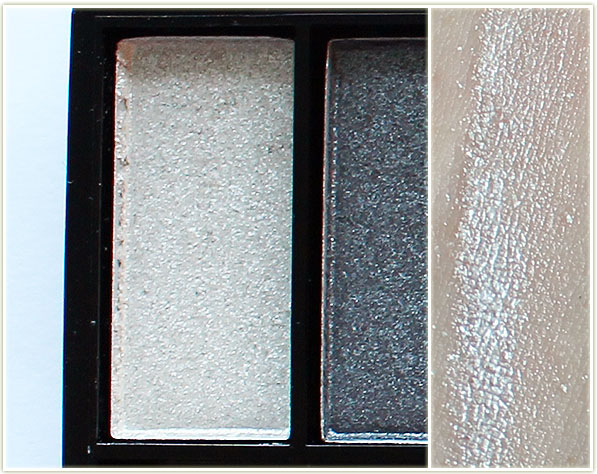
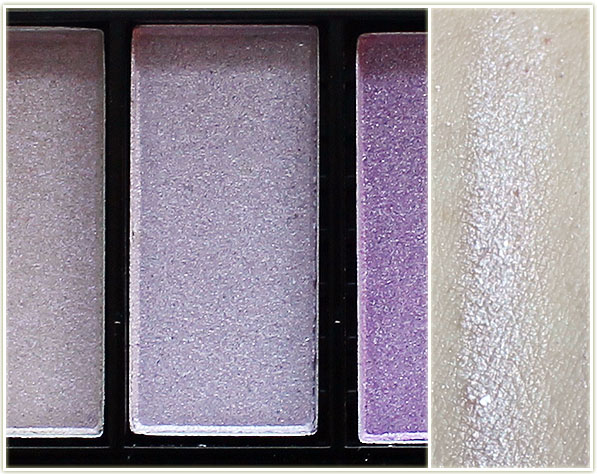
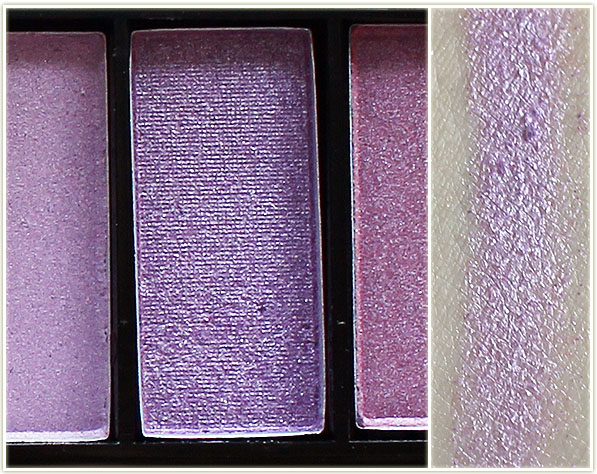
Makeup Geek – Blacklight
Blacklight is a purple with teal reflect. This is an incredible shade to use with a black base since it will do a lot to change the colour of the shadow.
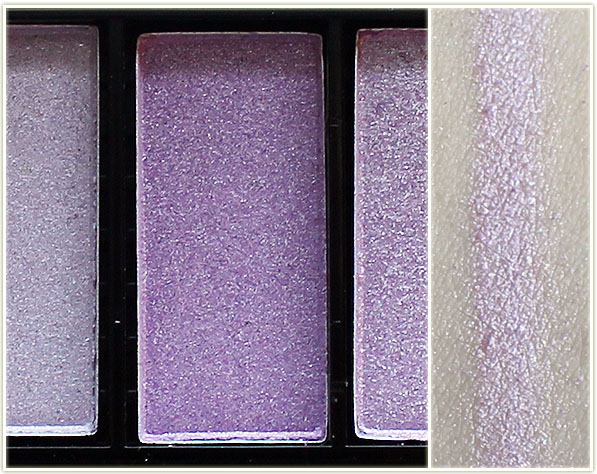
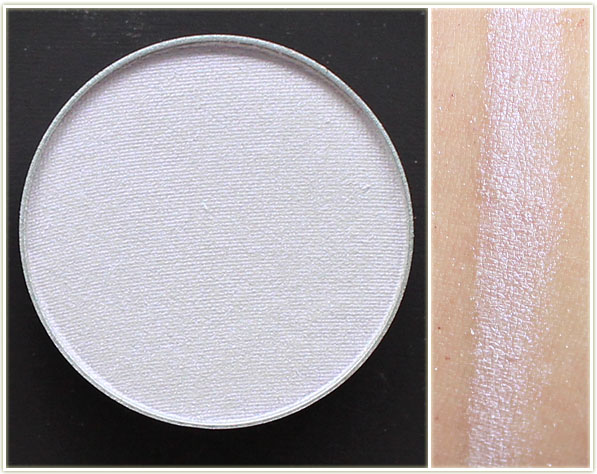
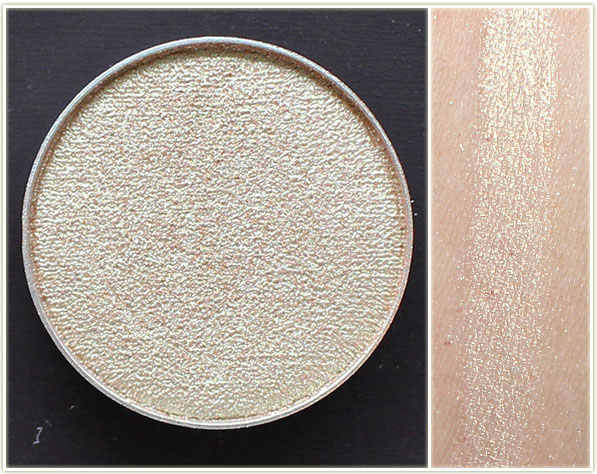
Makeup Geek – Phantom
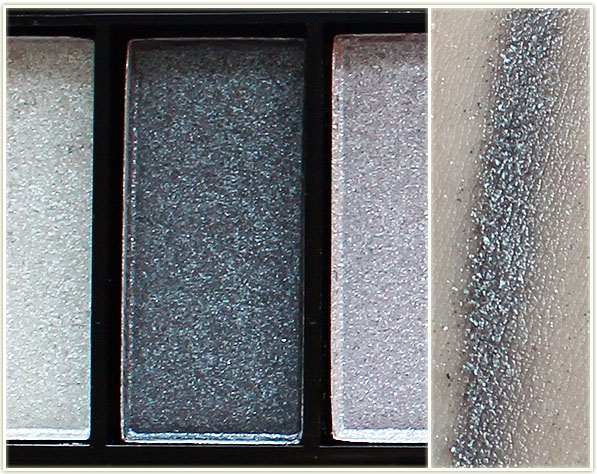
Phantom is a white shadow with a purple reflect. I find this very similar to MAC’s Vellum, although the texture on the Makeup Geek shadow is a million times better. I’ve had several pans of Vellum over the years and it ALWAYS develops crusty hardpan. (Very annoying!) I’m so pleased Phantom doesn’t do that!
Voltage is a colour I am so, SO FREAKING HAPPY TO HAVE. I had an old MAC duo that was very similar to this shade and I’ve never ever found a dupe for it (was the light white/gold shade from the Illusionary/Burning Ambition duo).
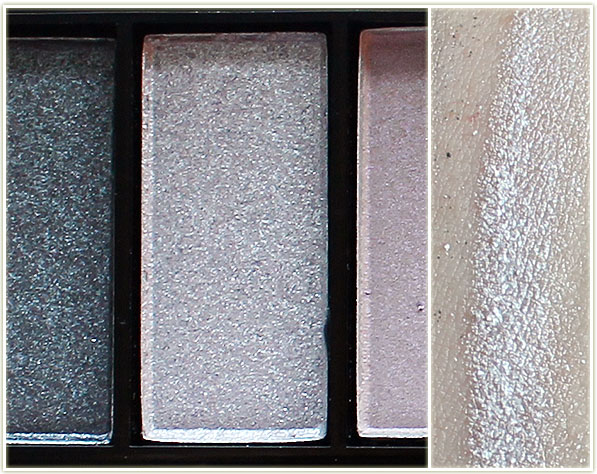
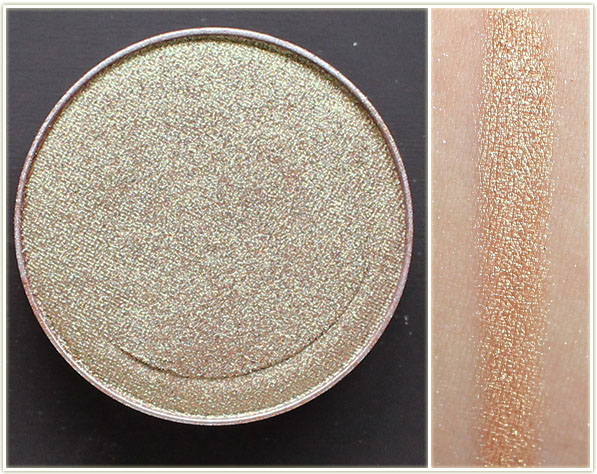
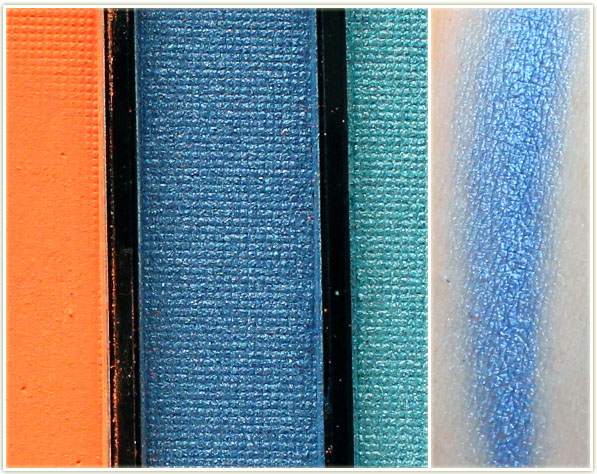
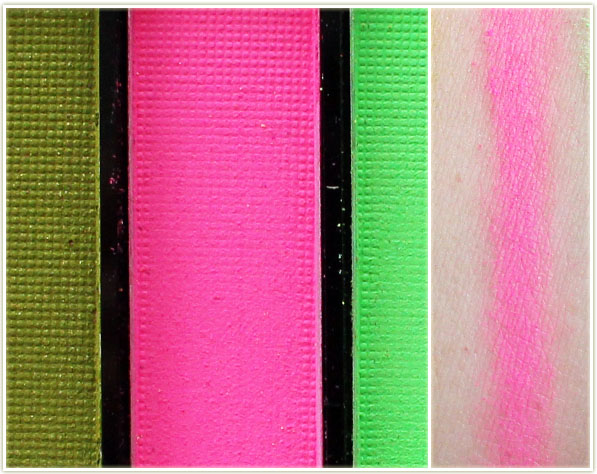
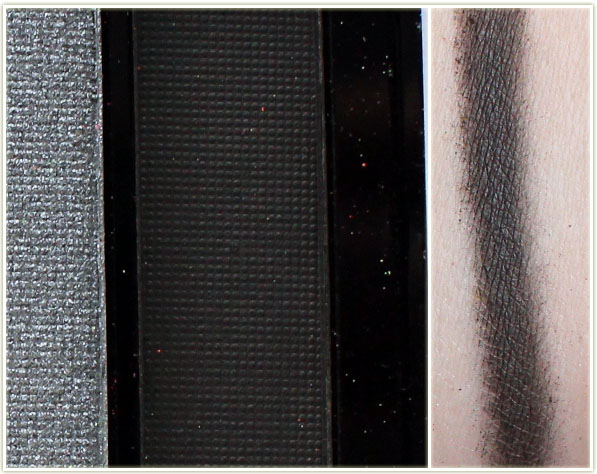
Makeup Geek – Steampunk
Steampunk is another unique shade I wasn’t expecting to see and it’s jawdropping. It’s a black base with a bronze reflect. And it’s EXACTLY what I would expect a shadow called “Steampunk” to look like.
Makeup Geek – Havoc
Havoc, to me, is your basic MAC Club. It’s an orangey-brown base with some teal reflect.
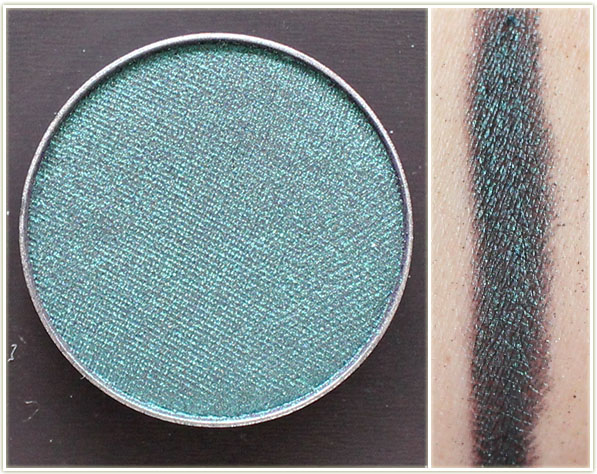
Makeup Geek – Typhoon
Typhoon is another one that took me by surprise. It looks pretty, you know.. green in the pan. Even perhaps a pale green. However, once you swatch it, the colour actually DEEPENS (sayyyyy what?) and it develops this gorgeous teal with gold and green reflect. Insanity.
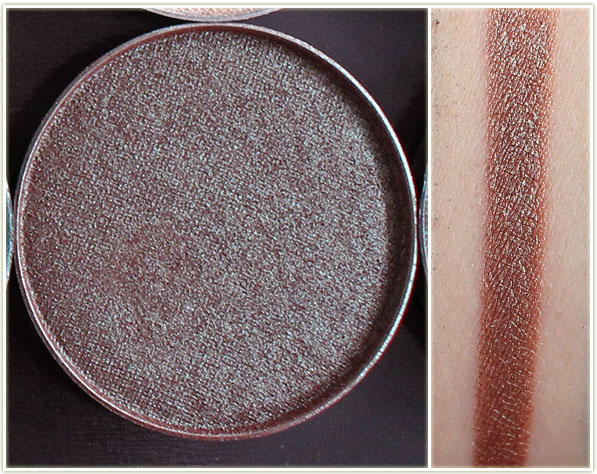
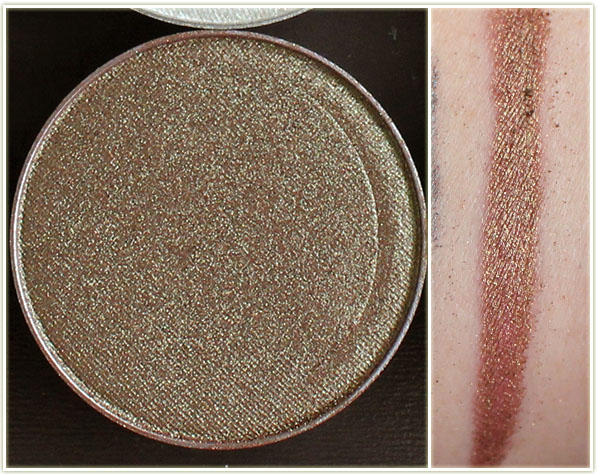
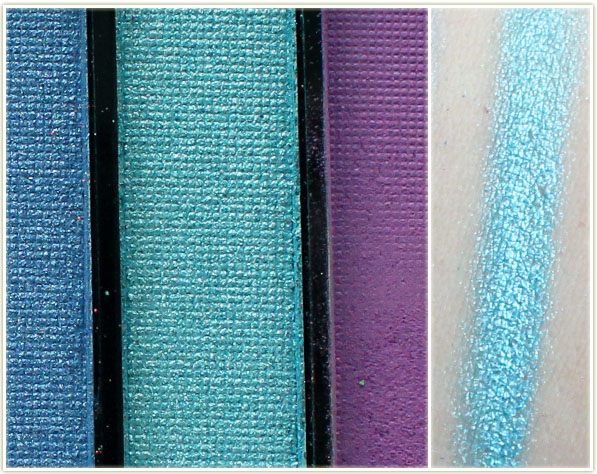
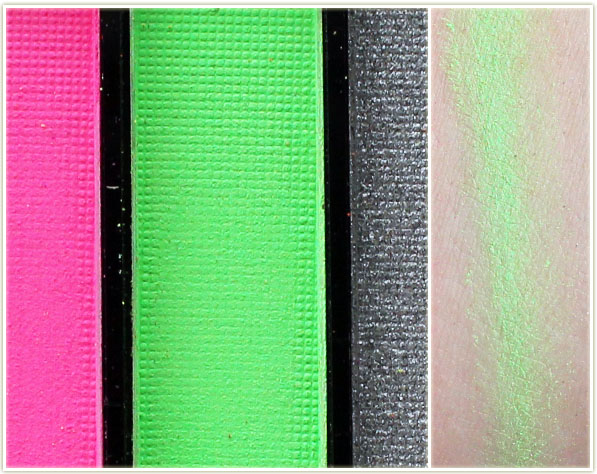
Makeup Geek – Secret Garden
Another stunner! Secret Garden also deepends up once you apply it. It’s a dark brown base with sharp green reflect. This is the perfect shade if you only want to wear one colour on your eye – it’ll be dark green on the lid and smudge out to a brown in the crease.
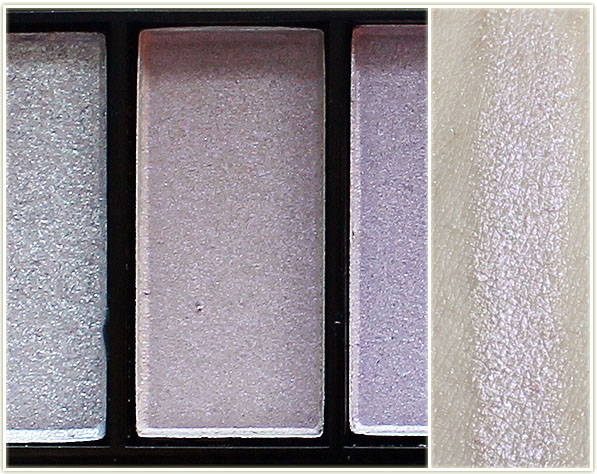
Mai Tai is a peach shade with a subtle lilac reflect.
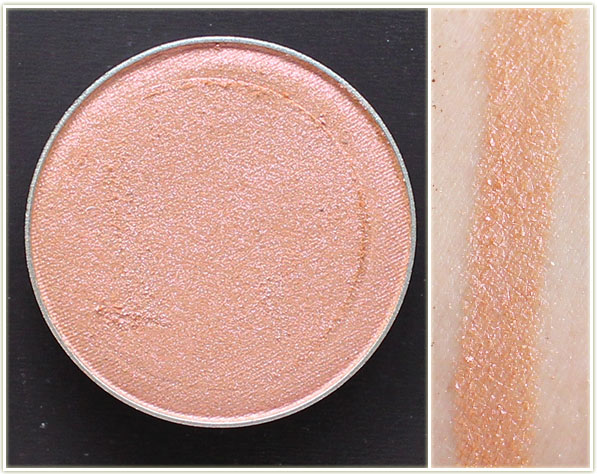
Makeup Geek – I’m Peachless
I’m Peachless is a champagne with peach-pink reflects. Stunning on the lid and on the inner corner.
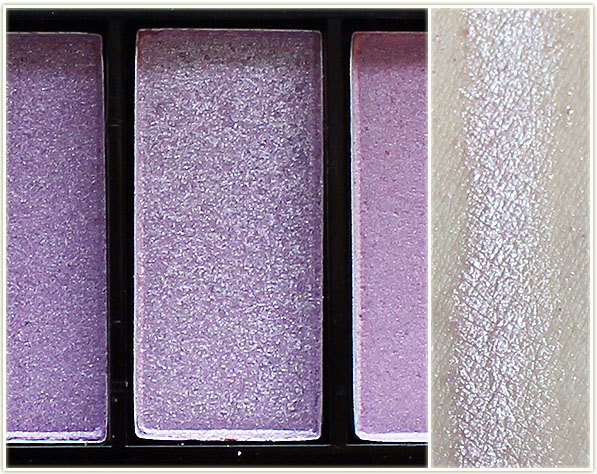
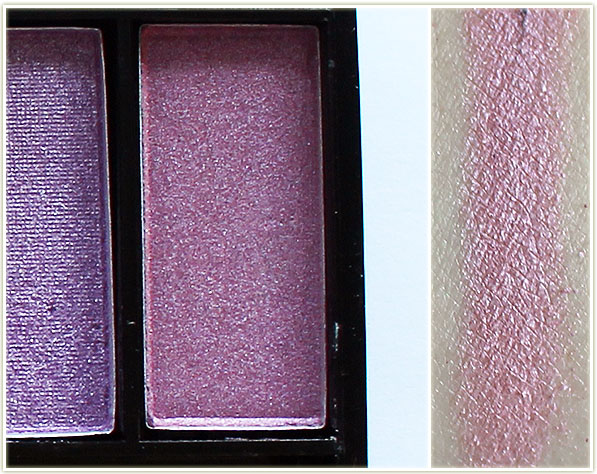
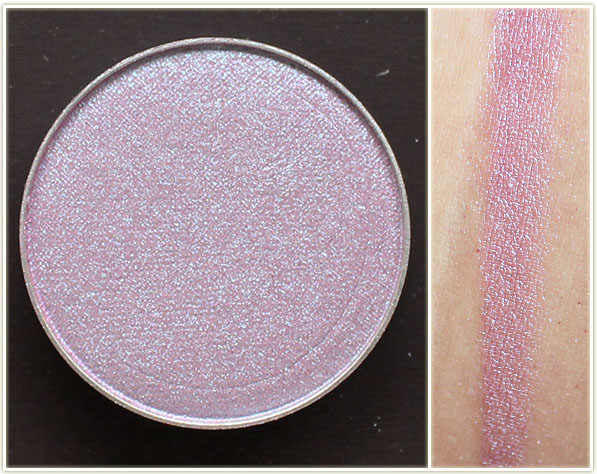
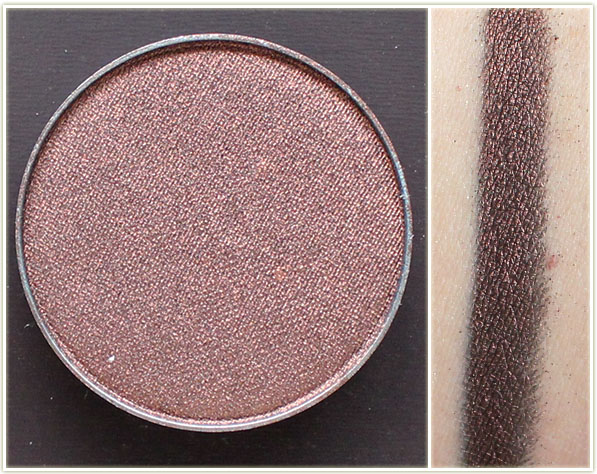
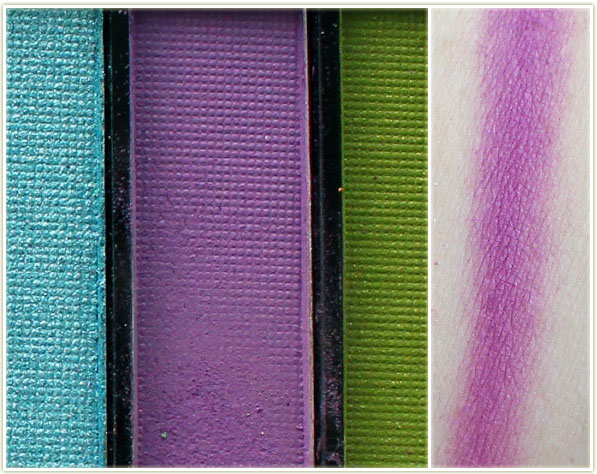
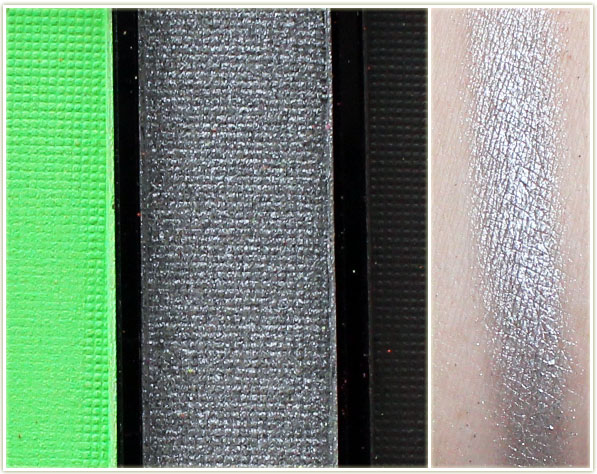
Makeup Geek – Rockstar
The already existing shade (although now added to the duochrome lineup) is Rockstar, a dull silver with purple and pink reflects. I find this very, very similar to MAC’s Vex.
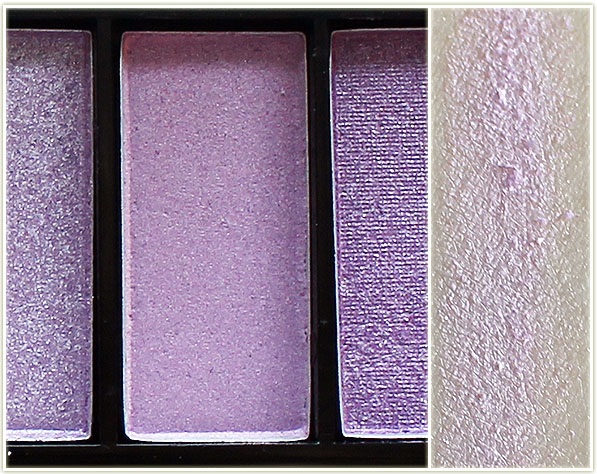
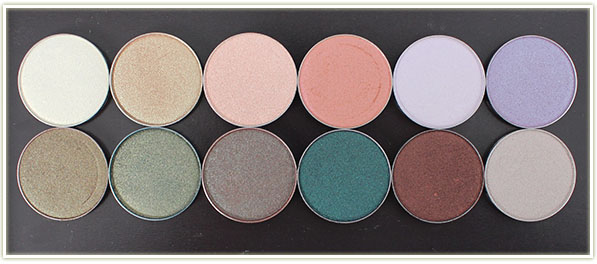
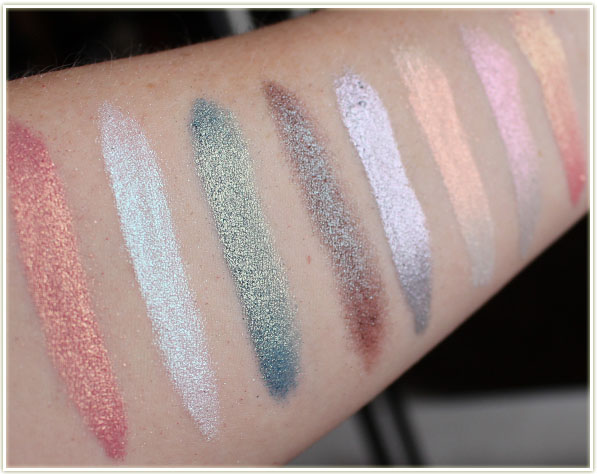
Makeup Geek Duochrome Eyeshadows – out of focus to show dimension
The shot above is every shade in the eyeshadow collection taken out of focus so you can see some of the reflect to the shades.
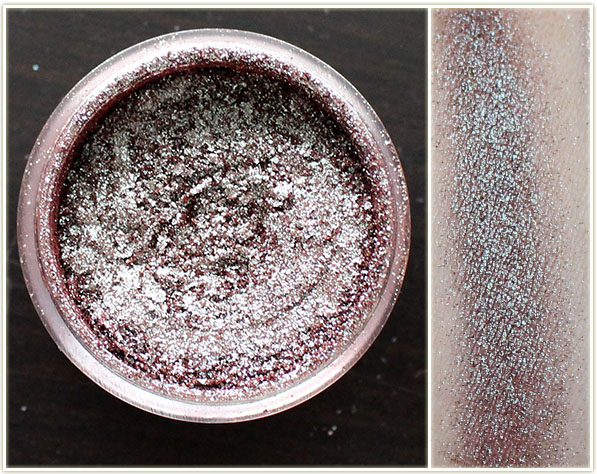
Makeup Geek Duochrome Pigment Swatches
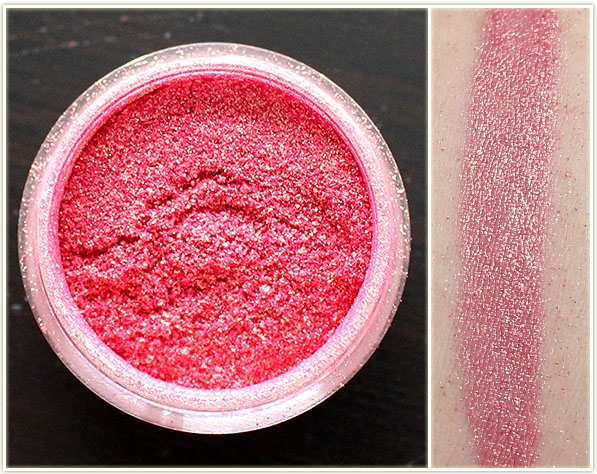
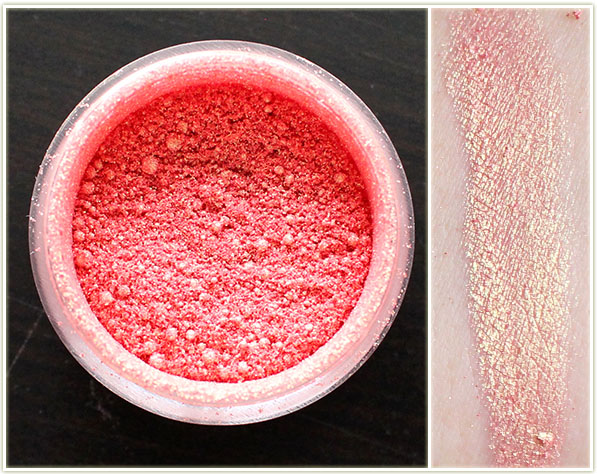
Makeup Geek – Wildfire
Wildfire is a red-coral with gold reflects. STUNNING.
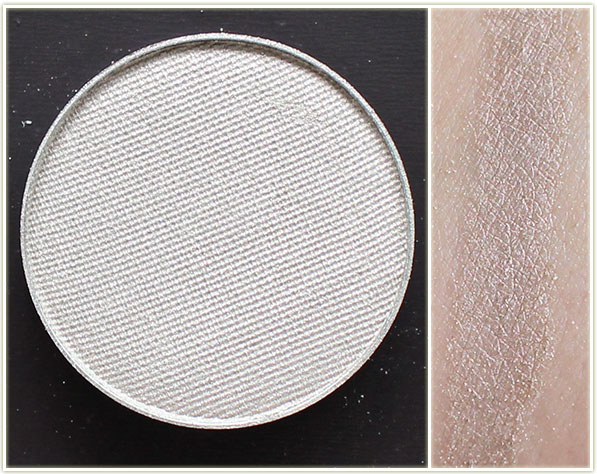
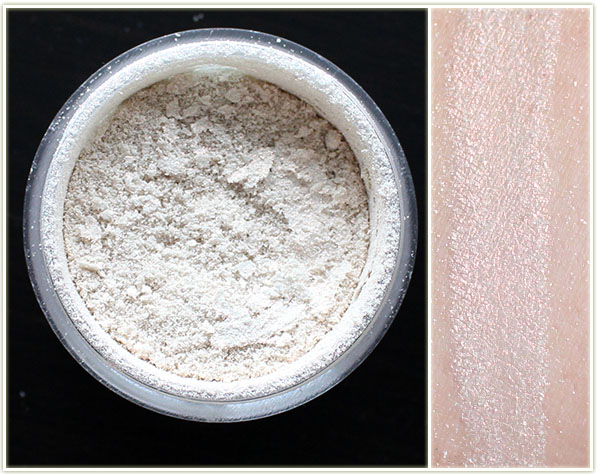
Makeup Geek – Sugar Rush
Sugar Rush is a white with a teal reflect. The shot above does nothing to do it justice. Scroll down to see the out of focus shot and you’ll see more of the teal coming out.
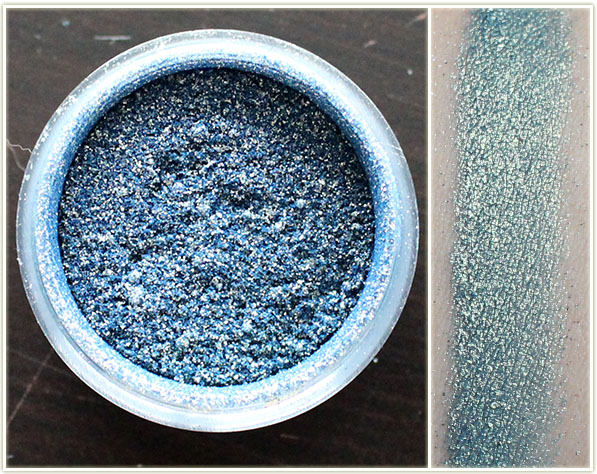
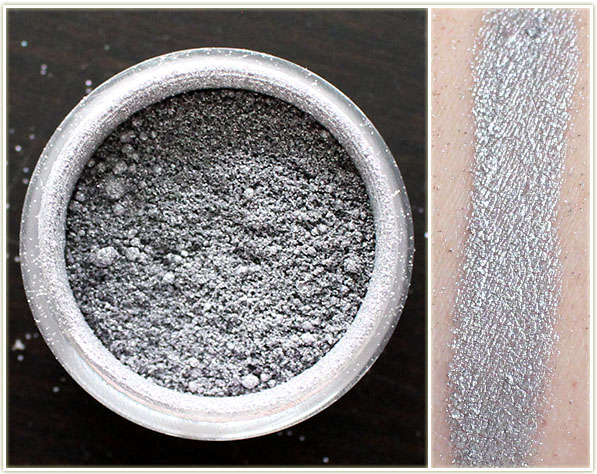
Makeup Geek – Chameleon
Chameleon is kind of cool in the pot – it looks blue and silver, but as soon as you swatch it it goes teal with gold reflects.
Makeup Geek – Insomnia
Insomnia is an existing shade for MUG, but I didn’t own it before (so I was happy to have it in this set). It’s a red-brown with blue reflects (also similar to MAC’s Club).
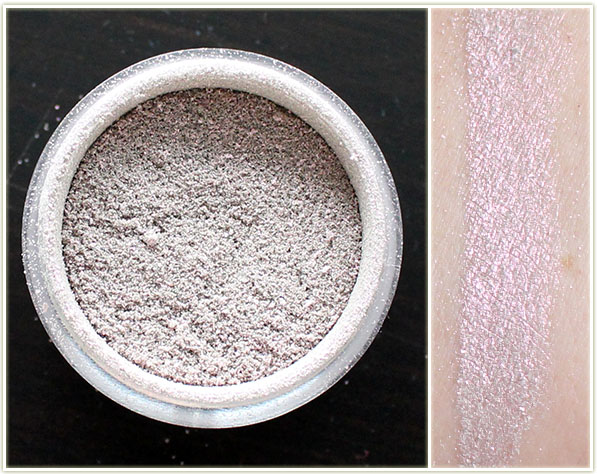
Makeup Geek – Kaleidoscope
I cannot photographKaleidoscope to save my life. It’s a medium silver with pink, purple and teal reflects that are very visible in person.
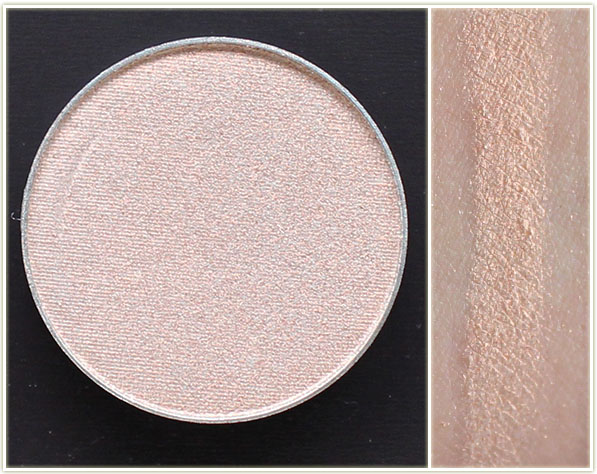
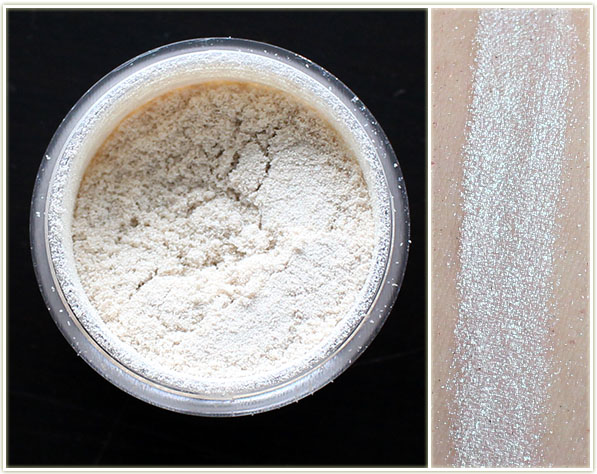
Makeup Geek – Prism
Prism is another one of those icy white shades with a peachy-pink reflect.
Hologram is a favourite of mine – while the base is quite orange, you get a LOT of gold punch to it on the lid.
Makeup Geek Duochome Pigments – out of focus
See how the colours on the right side of the swatch stand out more when they’re out of focus? So, SO pretty.
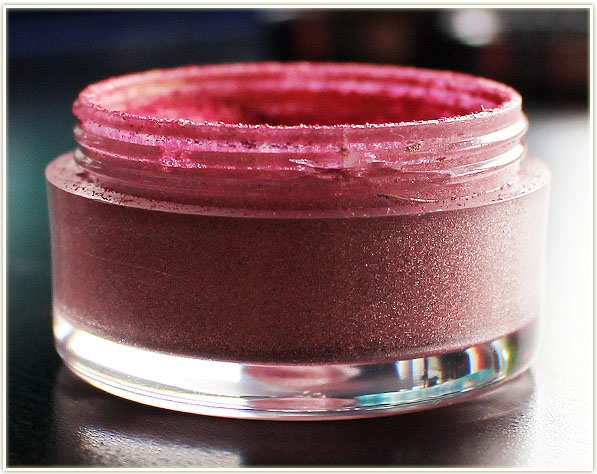
Packaging broken from inserted sifter
A note on the packaging: My pigments did not come with the sifters inside the jar and instead were in a separate baggie inside my order. Since I knew about the problem of the sifters breaking the jars, I decided to only try it on one of my pigments. As soon as I applied the sifter, it cracked the side of the lid around the screwtop. My husband pulled the top off for me, and I just decided to leave all the pigments as is without slotting in the sifters. Sure, they’re a bit messy, but pigments usually are. Applying the sifter isn’t worth it to me if it’ll crack the jars. Additionally, having the sifter on actually made it difficult to screw the tops closed (without the sifter on, it it glides through the grooves seamlessly.).
Lid of pigments
As you can see from the shot above, the lid of the pigments are suited to having the sifters on (the circle sticks out and slots into the hole in the sifter). I’m hoping they fix the packaging in the future so that that sifters don’t crack the jars, but until then it’s definitely not a deal breaker for me: I love the pigments and will continue to use them without the sifters.
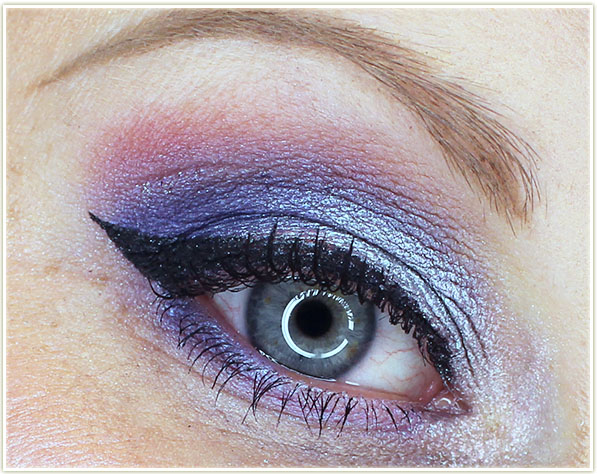
Makeup Geek Duochrome Looks
Here’s a few looks I cooked up using some of the pigments:
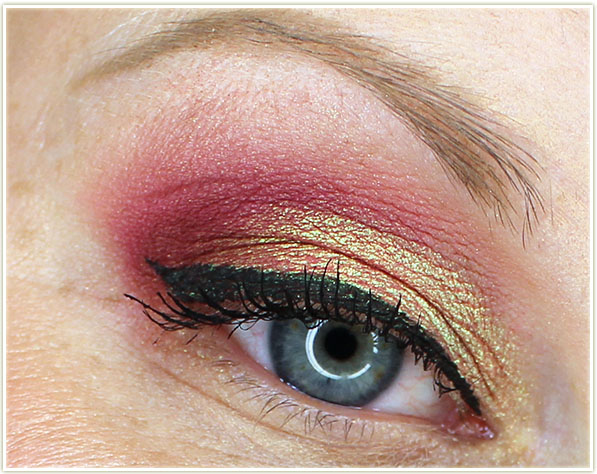
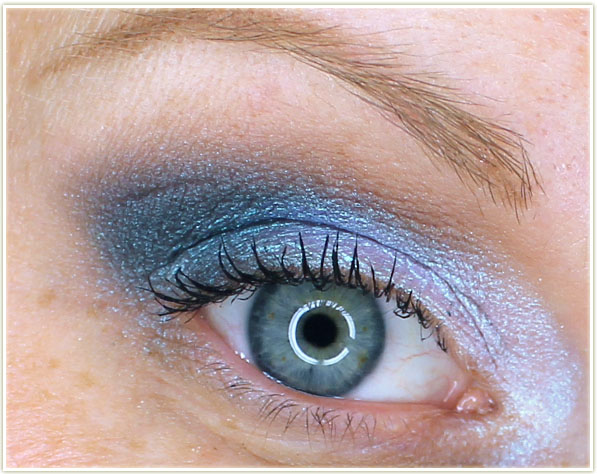
Wearing Kaleidoscope on the lid, Prism on the inner corner and Blacklight on the lower lash lineWearing Hologram on the lidWearing Sugar Rush on the lid
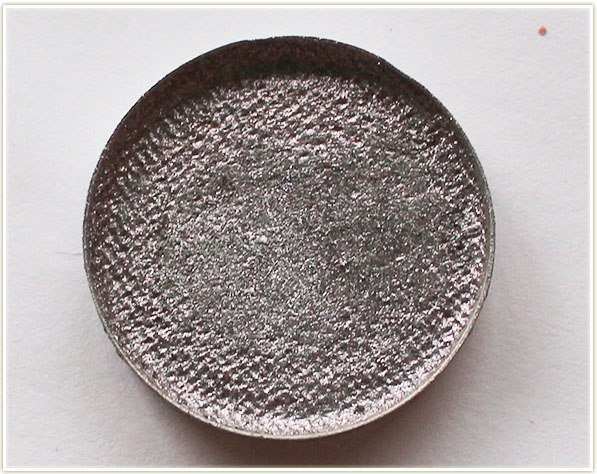
Pressing The Pigments
I know some people don’t like the mess of pigments, so I decided to press Kaleidoscope to see how it would turn out (plus I wanted to send it to a friend). For a tutorial on how to press pigments, check out this post.
Kaleidoscope as a pressed eyeshadow
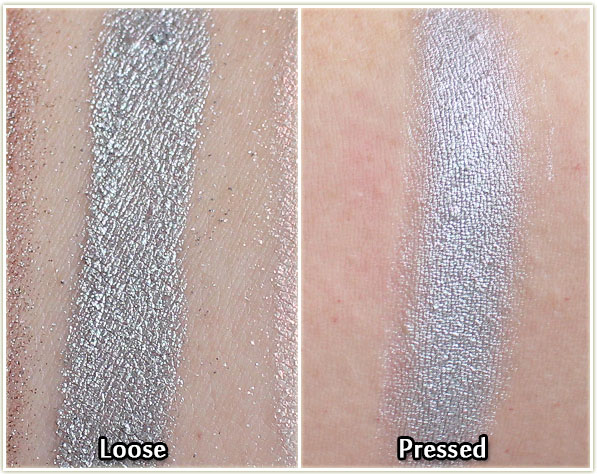
It definitely works, and the swatch ends up looking rather similar:
Kaleidoscope swatches: loose and pressed
If anything, it’s a bit softer of a colour when it’s been pressed and then swatched, but the different colours are present when you tilt the shadow towards the light. (I know you can’t see it in the swatch, which is a shame, because Kaleidoscope is so utterly unique!)
Final Thoughts
These are PHENOMENAL. They are so much fun to use and play with. Since the duochromes have multi-coloured shifts, you can mix and match with other eyeshadows you have to pull out more colour as you wish. For example, to pull out the red tones in Hologram in my eye shot above, I used some darker red/orange shades. You can also use different bases to augment different shades in the pigment (try playing around with it!).
My personal favourites eyeshadow shades are Blacklight, I’m Peachless, Phantom and Secret Garden. For the pigments, I love Hologram, Wildfire, Sugar Rush and Prism. They’re all good though, and the pigmentation as amazing as every other Makeup Geek shadow I’ve tried! If you REALLY want to see the multi-faceted shades in one of these, next time you place a MUG order, pick up the Kaleidoscope pigment. I actually gasped when I swatched that one!
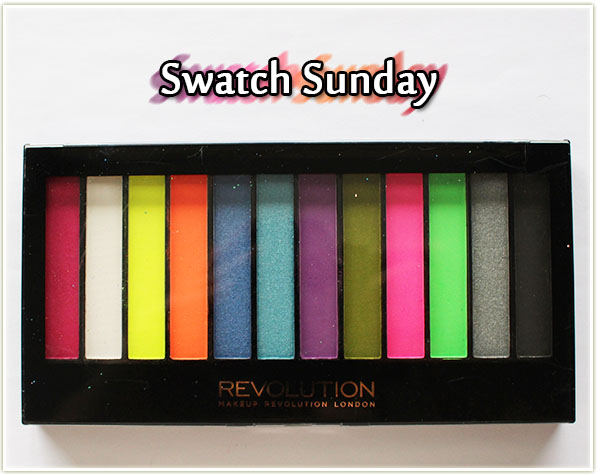
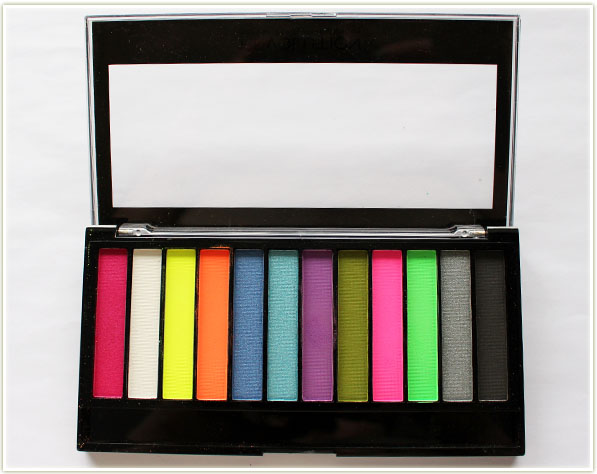
Despite my scathing comments on the Makeup Revolution palette I swatched last week (see that here), this palette is actually a lot better on the pigmentation side of things. Once again, this is a direct shade rip off of the SleekAcid palette, however, the Redemption Palette Acid Brights actually does have enough pigmentation to make this palette worthwhile. (Personally though, I’d just buy the Sleek palette instead.)