Joe Fresh Illuminating Primers in Pure Glow & Champagne (Review + Swatches)

Joe Fresh Illuminating Primers

With the news that Joe Fresh cosmetics are now being carried at Shoppers Drug Mart locations, I’m seeing a lot of new products popping up! I don’t know if I’ve just been out of the loop regarding Joe Fresh Beauty, but I’m seeing some fairly new and interesting things from them!

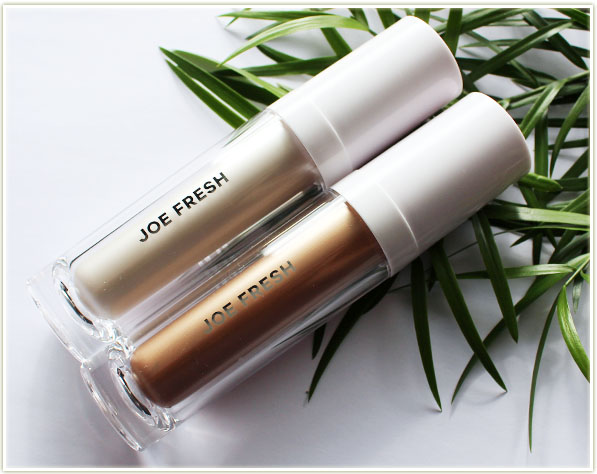
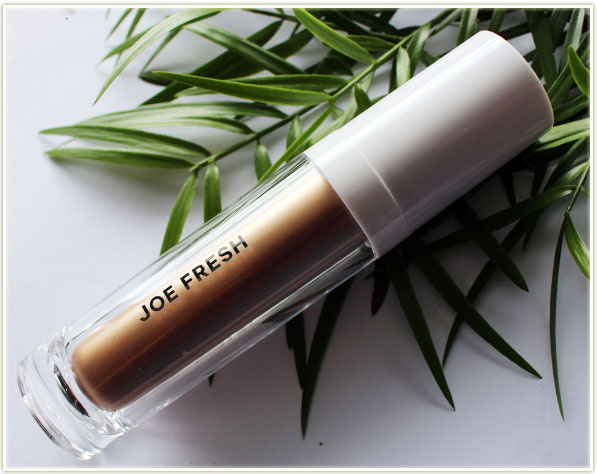
Like these Illuminating Primers that retail for $16 apiece. They come encased in beautiful translucent containers with a white top and…

With pump!
With pump!

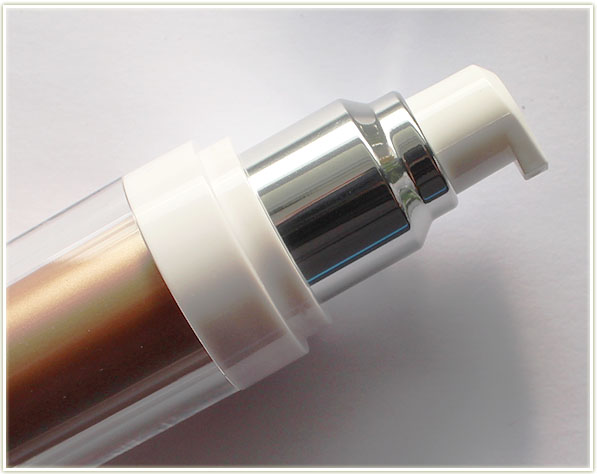
A FREAKING PUMP! Cream/liquid products without a pump are the absolute bane of my makeup existence, so it’s really, REALLY nice to see a brand release one with a pump without a second thought. The packaging is solid, well built and feels more expensive than the $16 price point would indicate.

The Illuminating Primer is a light, reflecting primer that can be used all over your body (mix it into body lotion for extra glow!). Joe Fresh claims that these illuminating primers create a radiant canvas, hide imperfections and provide longer-lasting makeup.

Joe Fresh Illuminating Primer in Pure Glow

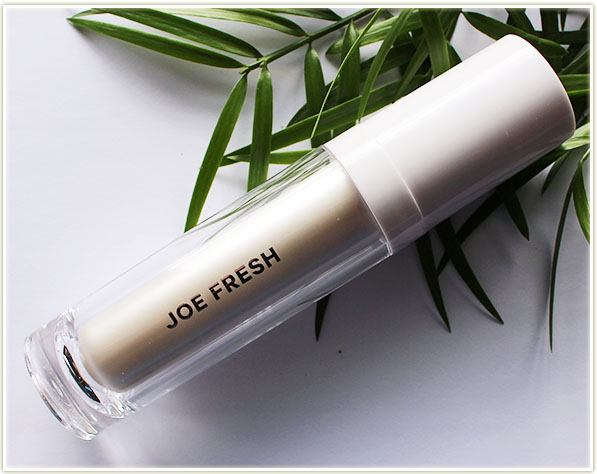
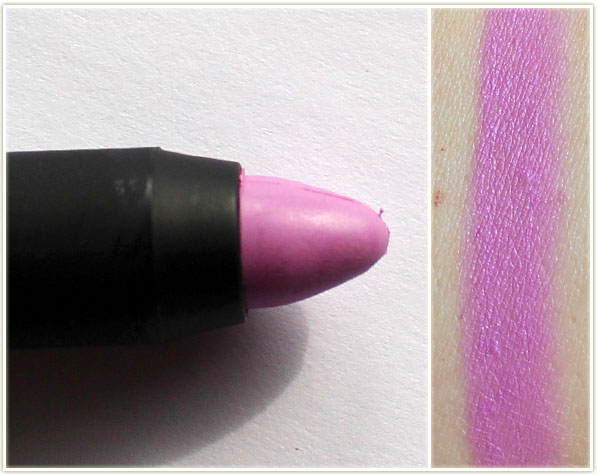
The white shade is called Pure Glow and it has a small hint of pinky-blue duochrome to it. Don’t be frightened though, it’s very, very subtle and you won’t look like a disco ball.

Joe Fresh Illuminating Primer in Champagne

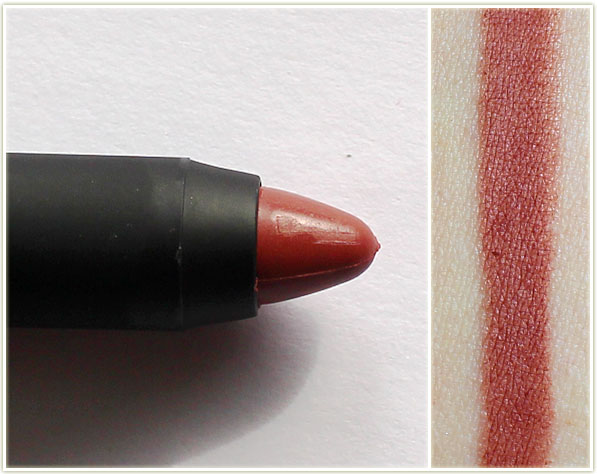
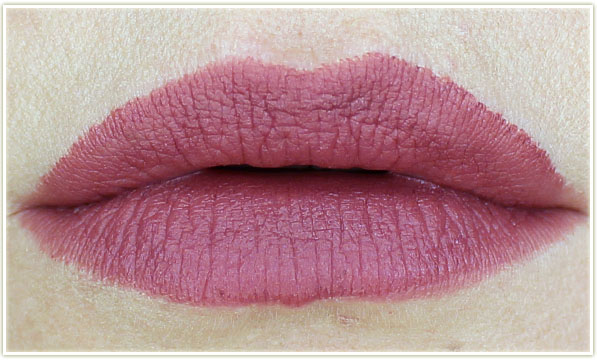
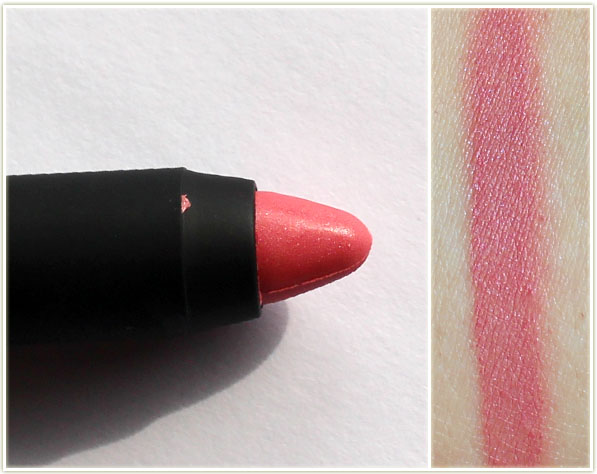
The more golden toned shade is Champagne. It’s a gold-caramel shade that seems to reflect a tiny bit of silver (odd to say, but I do see that in there). I was a little apprehensive that this shade would make me look like C-3PO, but thankfully that was not the case!

Joe Fresh Illuminating Primer swatches - Pure Glow & Champagne
Joe Fresh Illuminating Primer swatches – Pure Glow & Champagne

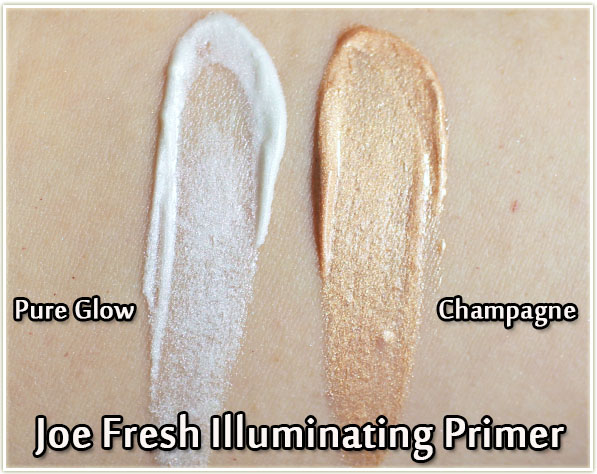
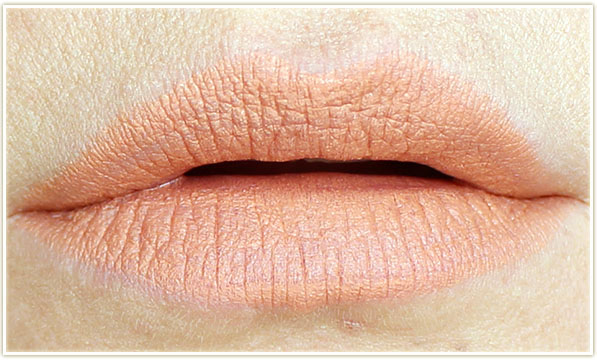
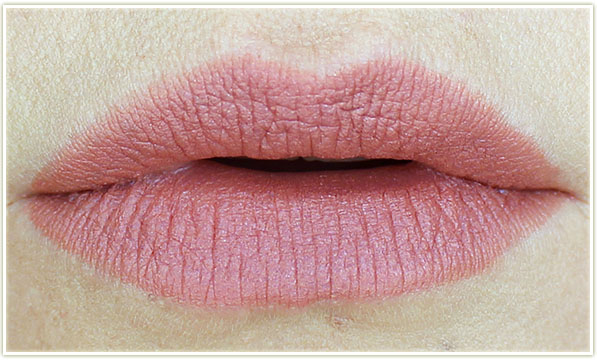
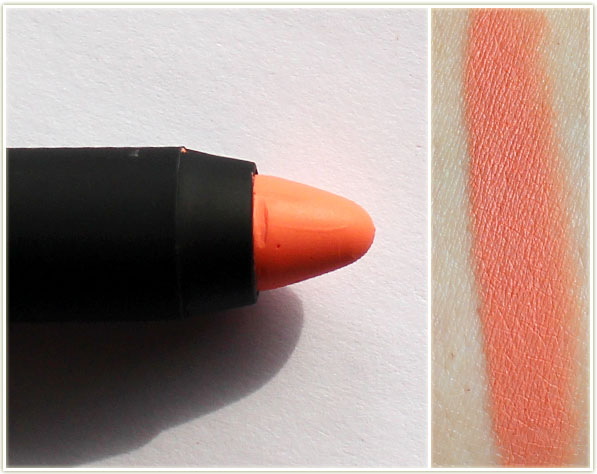
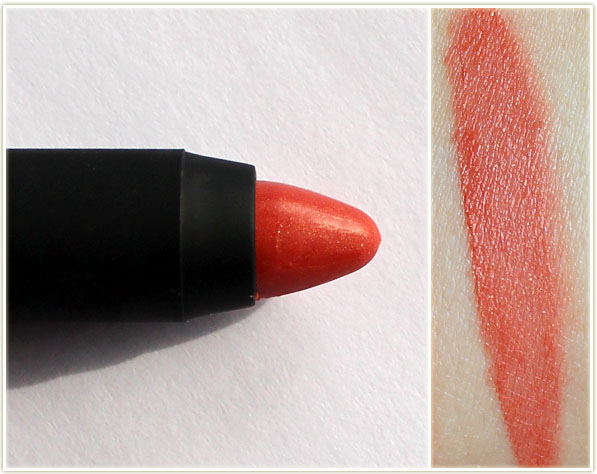
Both primers pack a colour punch when you apply them as a heavy swatch, but when you blend them in they create a dewy cast to the skin. It can look a bit TOO dewy, so I would not recommend wearing them alone – instead, stick to wearing it under your foundation or with a moisturizer as it was intended. For reference, since it’s the winter right now, I’m on the dry side of things skin-wise.

Wearing Joe Fresh Illuminating Primer in Champagne

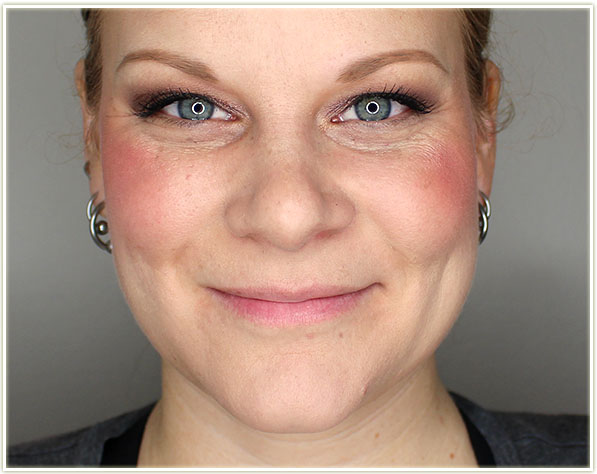
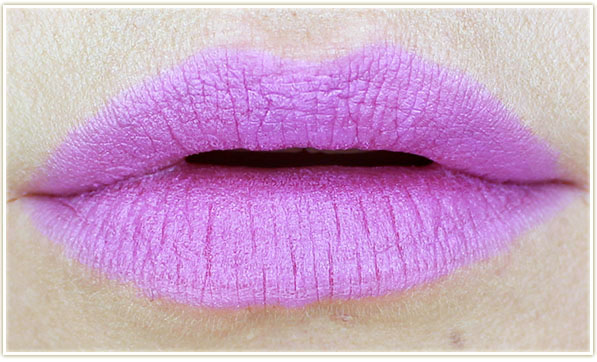
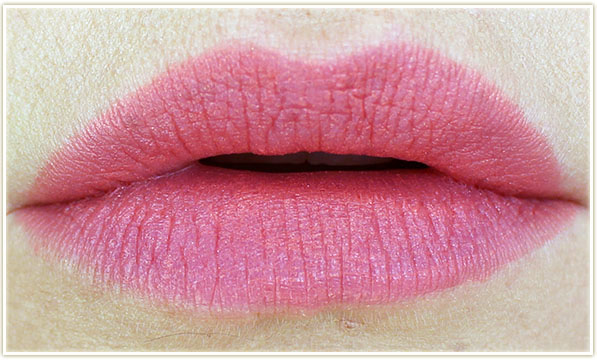
In the shot above I’m wearing Champagne – I find it adds a subtle hint of radiance without going totally overboard.

Final Thoughts

When used as a face primer under foundation, this is a very subtle highlight. As I mentioned above, I wouldn’t recommend wearing this alone on your face as I found it may look a touch greasy but it really does look excellent under foundation. It helps even out the texture of my skin and adds some luminosity to any matte foundations I own (which is especially nice during the winter). I wasn’t truly expecting this to increase the longevity of my makeup because I never really notice that with a face primer… but I’m quite happy to report that on the days that I wore these primers, I did notice my makeup looking particularly fresh by the time I got home from work.

You don’t normally find these kind of products at the drugstore, so I’m really happy that Joe Fresh is delivering something fresh and exciting and a much better price point than high end brands. Let me know if these illuminating primers are something you’re interested in!

The products featured in this post were sent to me for consideration.

What’s On My Face – Volume 45

As I was putting together this roundup of looks, I started to realize just how much I’ve been using my Makeup Geek shadows lately. I mean, I use them a lot on a regular basis, but three out of the five looks are solely Makeup Geek in here!


Viseart Editorial Brights makeup look

I did this for a YouTube video tutorial but had to repost it here because I know not everyone has the time for videos (I’ll continue to repost my video tutorial looks on the blog as time goes on).

Viseart Editorial Brights makeup look

Eyes
(using the Viseart 08 Editorial Brights palette) I first covered my lid with NYX‘s Jumbo Eyeshadow Pencil in Milk and then:

  1. MAC‘s Cork in the crease.
  2. The yellow shade from the palette on the inner third of the lid.
  3. The orange on the middle of the lid.
  4. The red on the outer half of the lid.
  5. The lime green on the inner corner of the lid.
  6. (also listed as 5) MAC‘s Blanc Type to highlighter the brow bone.

I applied the light blue to the middle of my lower lash line and the purple to the outer section of the lower lash line. I created the wing with Kat Von D‘s Tattoo Liner in Trooper and tightlined my water lines with Marc Jacobs‘  Highliner Gel Crayon in Blacquer. I coated my lashes with Make Up For Ever Smoky Stretch mascara and applied House of Lashes Bombshell falsies.

Face

  • Primer: Make Up For Ever Step 1 Smoothing Primer
  • Foundation: Make Up For Ever UltraHD in Y225
  • Bronzer: Joe Fresh Sand
  • Blush: Hourglass Diffused Heat
  • Highlighter: Becca Champagne Pop
  • Lips: Too Faced Melted Chocolate Milkshake with Sephora‘s lipgloss in Good Fairy

KAt Von D Mi Vida Loca Remix look

Although I love the Kat Von D Mi Vida Loca Remix palette, I’ve not been using it because I was trying to work through a bunch of other palettes. I said enough was enough, and went back to it for it this look!

KAt Von D Mi Vida Loca Remix look

Eyes
(Using the Kat Von D Mi Vida Loca Remix palette) I first applied NYX‘s Jumbo Eyeshadow Pencil in Milk to my lid, then:

  1. Misfit on the inner third of the lid.
  2. Synth on the middle of the lid.
  3. Dark Wave on the outer corner.
  4. (numbers are screwed up, sorry) Vinyl on the inner corner (to the right of 1).
  5. Ignore this one… I haven’t a clue if I put anything on my brow bone.

Echo is lining the outer half of my lower lash line. I coated my lashes with Make Up For Ever‘s Smoky Stretch mascara.

Face

  • Bronzer: Joe Fresh Sand
  • Blush: MAC Warm Soul
  • Lips: MAC Sweet Tooth

Makeup Geek look

Playing around with my new Makeup Geek duochromes!

Makeup Geek look

Eyes
(all Makeup Geek)

  1. Cupcake through the crease.
  2. Kaleidoscope on the lid.
  3. Pop Culture on the outer third of the lid.
  4. Duchess on the outer corner.
  5. Prism on the inner corner
  6. Vanilla Bean on my brow bone.

I used Blacklight on the lower lash line and created the wing with MAC‘s Blacktrack fluidline. I covered my lashes with Make Up For Ever Smoky Stretch mascara.

Face

  • Foundation: Revlon Colorstay in 200 Nude
  • Bronzer: Joe Fresh Sand
  • Blush: MAC Life’s A Picnic
  • Lips: Sephora Good Fairy

Makeup Geek look

Before anyone says anything – I know the lips look weird. I was playing around with different shades and I *thought* this went together. It wasn’t till I saw the photos that I was like “ohhh….”. haha

Makeup Geek look

Eyes
(all Makeup Geek)

  1. Prism all over the lid.
  2. Typhoon through the crease.
  3. Dirty Martini on the outer third of the lid.
  4. Vanilla Bean on the brow bone.

I created the wing with Kat Von D‘s Tattoo Liner in Trooper and coated my lashes with Clarins’ Aquatic Green mascara.

Face

  • Foundation: Revlon Colorstay in 200 Nude
  • Bronzer: Joe Fresh Sand
  • Blush: Tarte Blissful
  • Lips: Colour Pop Donut

Makeup Geek look

More Makeup Geek goodness!

Makeup Geek look

Eyes
(all Makeup Geek)

  1. Peach Smoothie through the top of the crease.
  2. Poppy through the crease.
  3. Fortune Teller on the lid.
  4. Morocco on the outer third of the lid.
  5. Voltage on the inner corner.
  6. Vanilla Bean on the brow bone.

I created the wing with MAC’s Blacktrack fluidline and coated my lashes with Make Up For Ever‘s Smoky Stretch.

Face

  • Bronzer: Joe Fresh Sand
  • Blush: Hourglass Incandescent Electra
  • Lips: Benefit Coralista gloss

Wet n Wild Velvet Matte Lip Color (Review + Swatches of the Full Collection)

Wet n Wild Velvet Matte Lip Colors

Let me start off by saying this product actually confuses me a bit. I believe the Wet n Wild Velvet Matte Lip Colors launched as part of the Fergie Wet n Wild line in the USA (and were branded with her logo on it), but I got these here in Canada at a Wet n Wild launch party a few weeks ago. They’re missing the Fergie logo, and they seem to have totally different names when I compare them to the Fergie linup. I wonder if the rights to her line were only for the USS? I’m fairly confident that despite the shade names being different, they are in fact the same shades!

Wet n Wild Velvet Matte Lip Colors

Regardless of their names, this is an entirely new set of products to me. Being the matte lip lover that I am, I was more than happy to try these out! The Velvet Matte Lip Colors come encased in a soft rubberized tube (similar to NARS packaging) and twist up from the bottom and can, thankfully, can be twisted back down. Although five of the nine shades look to be near identical in colour, I found that the colour of the packaging was SERIOUSLY misleading. If you can believe it, there’s actually a pinky-purple and a straight up magenta in there!

These have a soft matte feeling which is starting to become pretty standard for matte lip products. I did feel like some of the shades required a bit more pressure to be applied (almost as if I had to break through some kind of sheer coating to get through to the colour), but once I got there, the colour was fairly solid. Some of the shades were a bit more sheer (namely Lie Lack and Turnt Orange) and you’ll definitely be able to see that in the arm swatches. Overall, I’m impressed with the consistency of these especially given that the price point is around $3-4 USD/CAD.

Wet n Wild Velvet Matte Lip Color Swatches

Wet n Wild Velvet Matte Lip Color in A360 Nude Streak
Wet n Wild Velvet Matte Lip Color in A361 Toffee Frappe
Wet n Wild Velvet Matte Lip Color in A362 Looking For Truffle
Wet n Wild Velvet Matte Lip Color in A363 Hickory Smoked
Wet n Wild Velvet Matte Lip Color in A364 Charred Cherry
Wet n Wild Velvet Matte Lip Color in A365 Lie Lack
Wet n Wild Velvet Matte Lip Color in A366 Berry Tales
Wet n Wild Velvet Matte Lip Color in A367 Shelly Shocked
Wet n Wild Velvet Matte Lip Color in A368 Turnt Orange

Final Thoughts

You cannot go wrong with this kind of price point, especially if you want to try out a new lip colour! The texture is wonderful and if you like any of the colours above, I’d recommend checking them out! My personal favourite shades are Hickory Smoked, Turnt Orange (although it looks drastically different on my lips compared to the swatch) and Toffee Frappe.

The products featured in this post were sent to me for consideration.

Skincare Saturday: Bioderma’s Micelle Solutions (Sensibio, Hydrabio & Sebium)

Bioderma's micelle solutions in Sensibio H2O, Hydrabio H2O and Sebium H2O

Bioderma‘s micelle solution (often mis-said as “micellar” in English, which is really just an attempt to anglicize the French “solution micellaire”) is a product that I begrudgingly jumped on the bandwagon for several years ago. (I say begrudgingly because it was a little on the expensive side and basically only readily available in France – which is where I first picked it up!)

Crealine/Sensibio H2O in my bathroom....
Crealine/Sensibio H2O in my bathroom….

And now… it’s everywhere in my apartment and I’m loathed to be without it! It’s in my bathroom to help clean up and refresh my skin after I’ve removed my makeup. My husband even uses it when he’s feeling a bit greasy in the face after workday and wants a refresher.

Crealine/Sensibio H2O in my bedroom...
Crealine/Sensibio H2O in my bedroom…

I also have it sitting on top of my makeup table to help me fix any makeup mistakes and clean up under my eyes when I experience fall out from my eyeshadows.

Bioderma micelle solution in Sensibio H2O

I was, however, slightly unaware that Bioderma actually made a few varities of their micelle solution. The one that’s most easily recognizable is the Sensibio H2O (called Crealine H2O exclusively in France) which has a pink top. For those unfamiliar with the product, Sensibio H2O has the consistency of water and is considered perfect for sensitive to intolerant skin. It is fragance, alcohol and paraben-free, as well as hypoallergenic.

Some people use it to remove their makeup entirely, however I don’t find the formula is heavy duty enough for that on my face because I often wear waterproof and/or longlasting products. I prefer to use this after I’ve removed the bulk of my makeup with an oil-based remover/cleanser and then go in with the micelle solution on a cotton pad and clean up the excess that I missed by washing my face (and trust me, no matter how much you wash your face, you will still have excess makeup somewhere!). It’s odourless, but not tasteless, so if you use this to remove your lipstick, it will be a touch bitter.

I also use this to clean up any makeup mistakes while I’m doing my face and to clean up the inevitable eyeshadow fallout on my under eyes during application.

Bioderma micelle solution in Hydrabio H2O

The Hydrabio H2O formula is entirely new to me. I don’t notice any difference in my skin when I use this (as in, it performs just as well as the Sensibio H2O), however this is formulated for dehydrated sensitive skin. One thing that I thought was interesting about this one is that it smells really, really nice. Bioderma‘s web site indicates that it’s an allergen-free fragrance, as it would have to be since this is intended for sensitive skin. I’ve actually grown quite fond of the scent of the Hydrabio one and if it comes in the larger 500 ml bottles like the Sensibio, I’ll be switching to this one once I’ve finished all my bottles up!

Bioderma micelle solution in Sebium H2O

The final micelle solution is the Sebium H2O which was created for combination, oily or blemished skin. I’m none of these things, so I can’t tell you how it does, or does not help the skin in those respects. (I mean, I’m potentially combination skin, but it’s February here in the northern hemisphere so I’m basically just a dry bastard right now.) This one is also scented (although interestingly not marked as allergen-free), hypoallergenic, paraben-free and has no colouring agents. I assume the colouring agent comment is indicated on their site because unlike the others, this liquid is actually blue!

Final Thoughts

I cannot live without the Bioderma micelle solution in any of its formats. It’s a gentle, easy to use product that works wonders to help clean up my skin, or refresh it if it’s feeling tired and dirty. It’s rinse-free, which means you can splash it all over your face and not have to worry about reaching for a towel. If there’s one skincare product out there that I can recommend to you, it’s this one.

The products featured in this post were sent to me for consideration, although I did already own the two larger bottles of Sensibio H2O.