Halloween 2015: The Joker

2015halloween_thejoker4

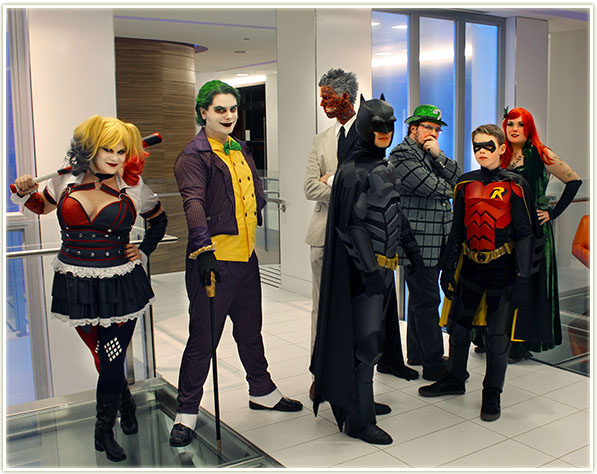
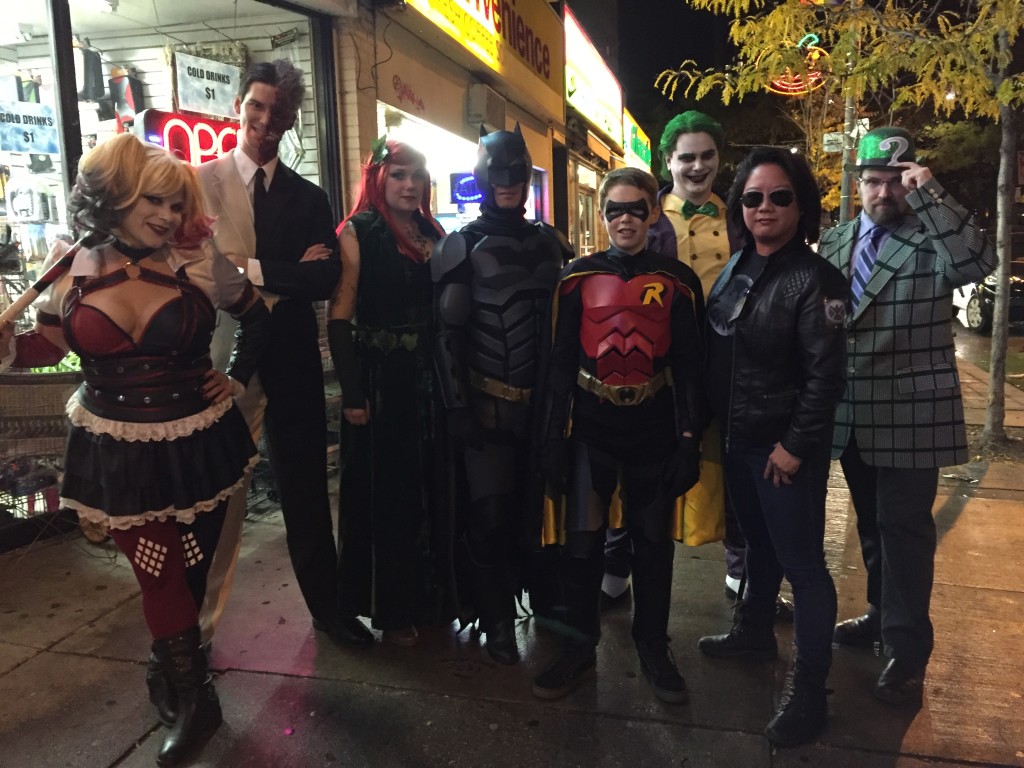
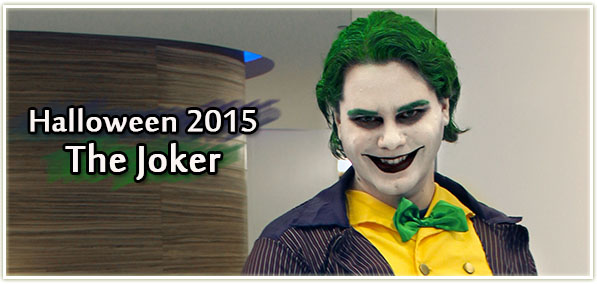
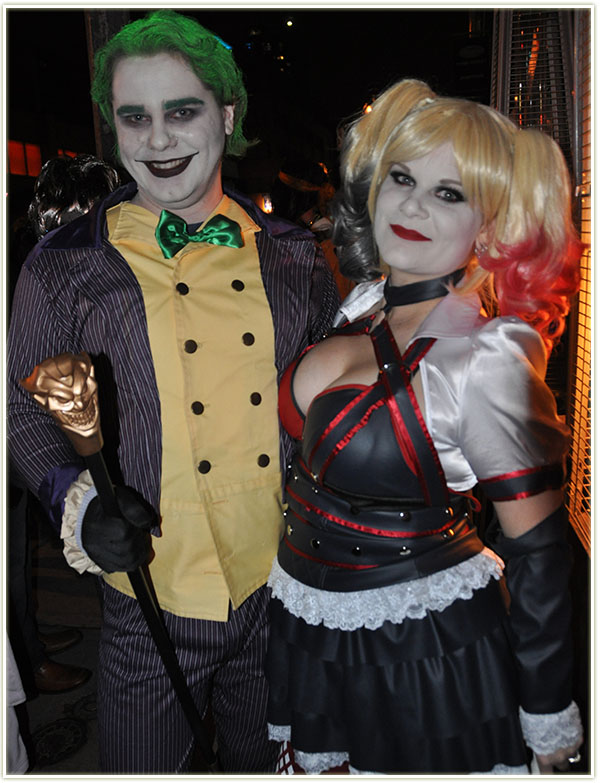
Continuing the Halloween theme, today’s post is on the makeup I did on my husband David to transform him into The Joker!

Halloween 2015 Squad: Batman & Robin + Villains

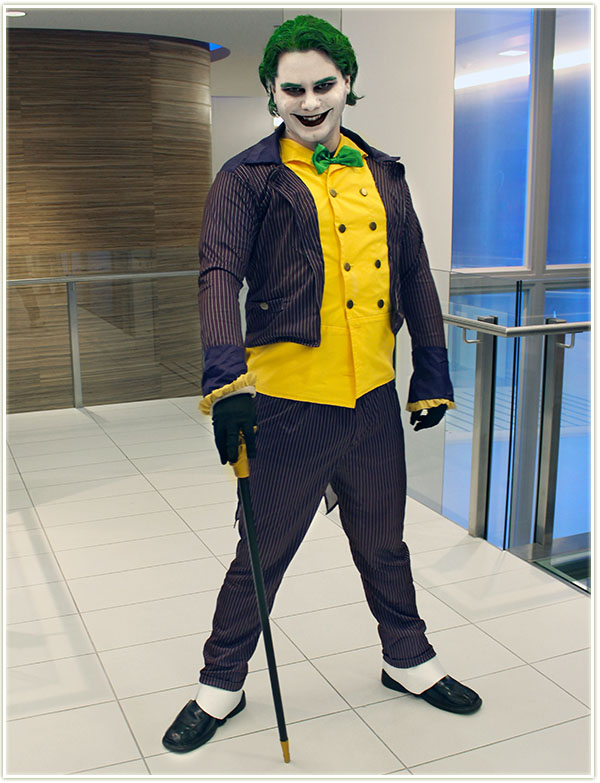
A little bit about his costume: he picked up the outfit on Ebay from a relatively well known brand (Rubies) in a medium. It came with a fairly horrible mask that we didn’t end up using and the full suit. The suit was constructed of a rather thin material and the yellow-gold vest it came with was really bad. David went to a second hand store and bought a women’s yellow jacket and transformed it into a vest-type thing that he then attached the jacket to. I was impressed with how much he changed that yellow jacket to look just like the Joker’s vest! The cane was bought individually from the same company, but the stick of it was spray painted black by him (the whole thing was originally gold). He also created the spats on the shoes out of white vinyl.
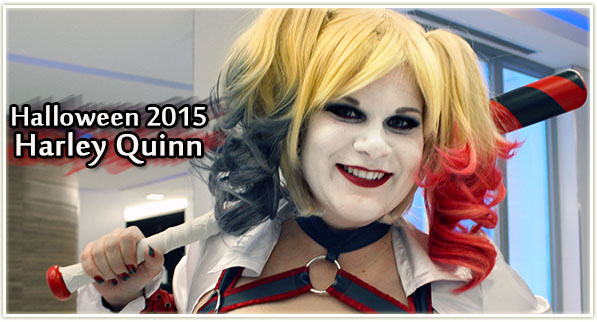
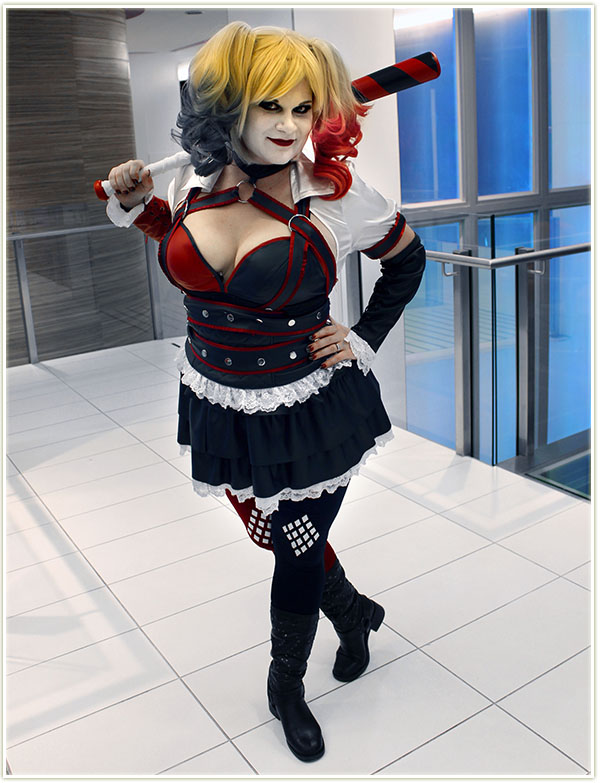
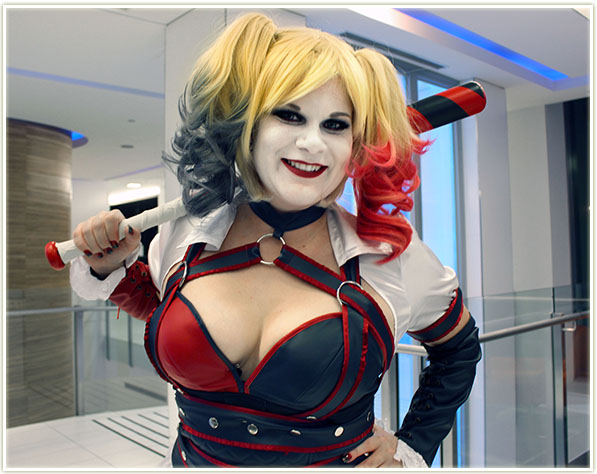
The Joker

Halloween 2015: The Joker

Halloween 2015: The Joker

Halloween 2015: The Joker

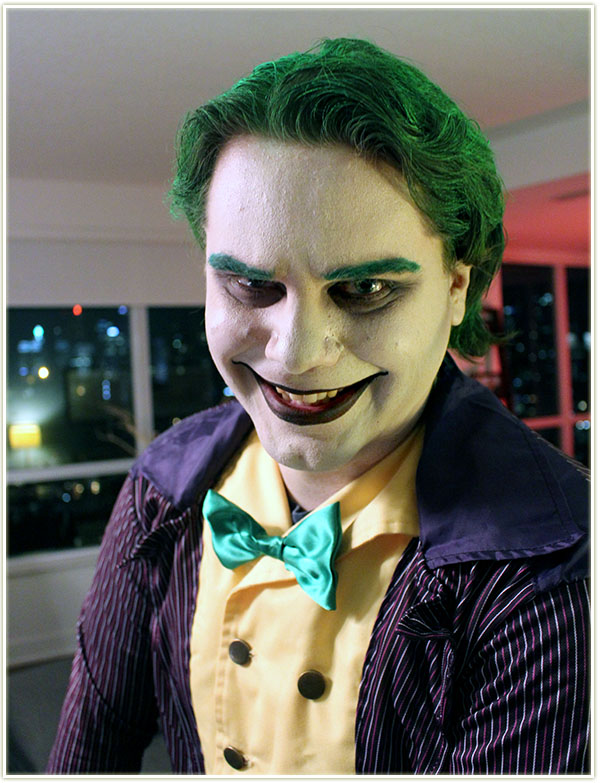
Honestly, the makeup wasn’t all that different from my own as Harley Quinn. This was my first time doing full face makeup on a male and I didn’t really know what to expect. He usually has facial hair, but shaved it all off for this (which was hilarious because I’d never seen him without facial hair and he hadn’t either since his teens!).

Halloween 2015: The Joker

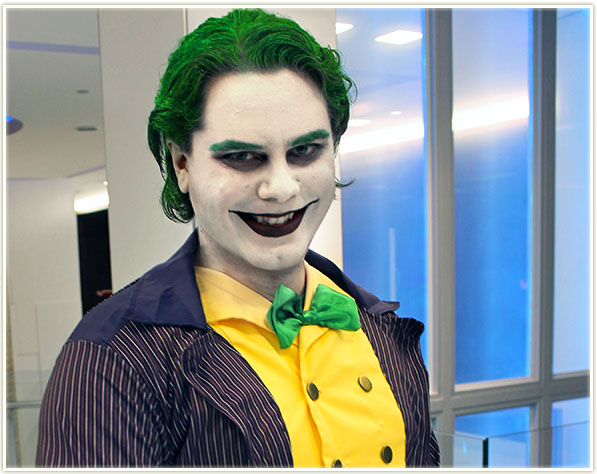
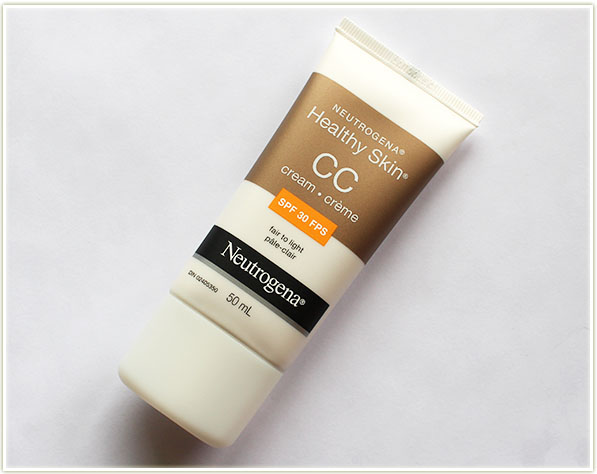
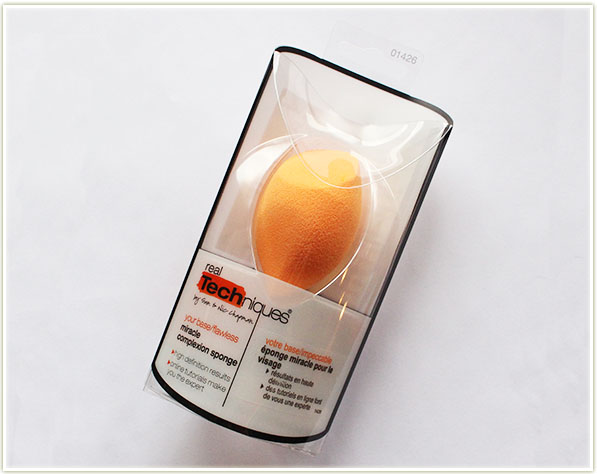
I prepped his skin with Make Up For Ever‘s Step 1 Smoother Primer because… man pores. Then I mixed a bit of Revlon‘s Colorstay foundation in Buff with a lot of Inglot‘s white concealer and sponged it onto his face using a Real Techniques Miracle Complexion Sponge. I actually had to do three layers, which kind of surprised me. It felt like his skin was very, very resistant to makeup… like it just kept absorbing it! So bizarre. I set the layers of makeup with Hourglass‘ Ambient Lighting Powder in Ethereal Light and did a little bit of contouring with MAC‘s Print and Handwritten eyeshadows. In hindsight, Print wasn’t the right colour to use, and David asked for more brown to be added in.

Halloween 2015: The Joker

The eyes were intentionally sloppy and messy – I layered a bunch of Laura Mercier purple shadows (Plum Smoke and Violet Ink) to make them look sunken. I tried to line his eyes with Maybelline‘s black pencil gel liner, but he was so twitchy that I had to give up and just smudged the terrible lines out with a pencil brush. I filled in his brows with Sleek‘s Dragonfly eyeshadow – that went really easily. His eyebrows are bushy enough that they just held the colour like nobody’s business!

The lips were my main concern but they came out okay. We hadn’t done any kind of trial run of the makeup so it was basically do or die. I lined them with Kat Von D‘s Tattoo Liner in Trooper, curling out the edges to give him an elongated smile. I filled them in a bit with the liner and then applied NARS Matte lip pencil in Cruella on his lips and tried to make them blend into the black liner. In the end, I think the red lipstick either wore off his lips too quickly or I didn’t apply enough because I don’t think you can really see the red as much in the photos.

While I was busy getting ready, Alison styled (seriously, awesome job woman, you killed that hair style!) and sprayed his hair with Graftobian‘s green hair colour.

The Joker and Harley Quinn
Chillin’ like villains

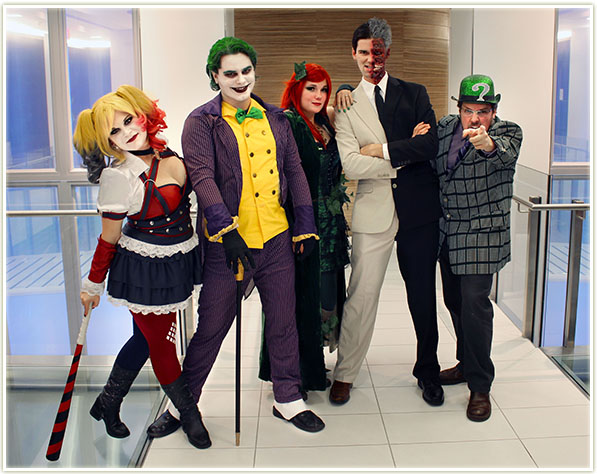
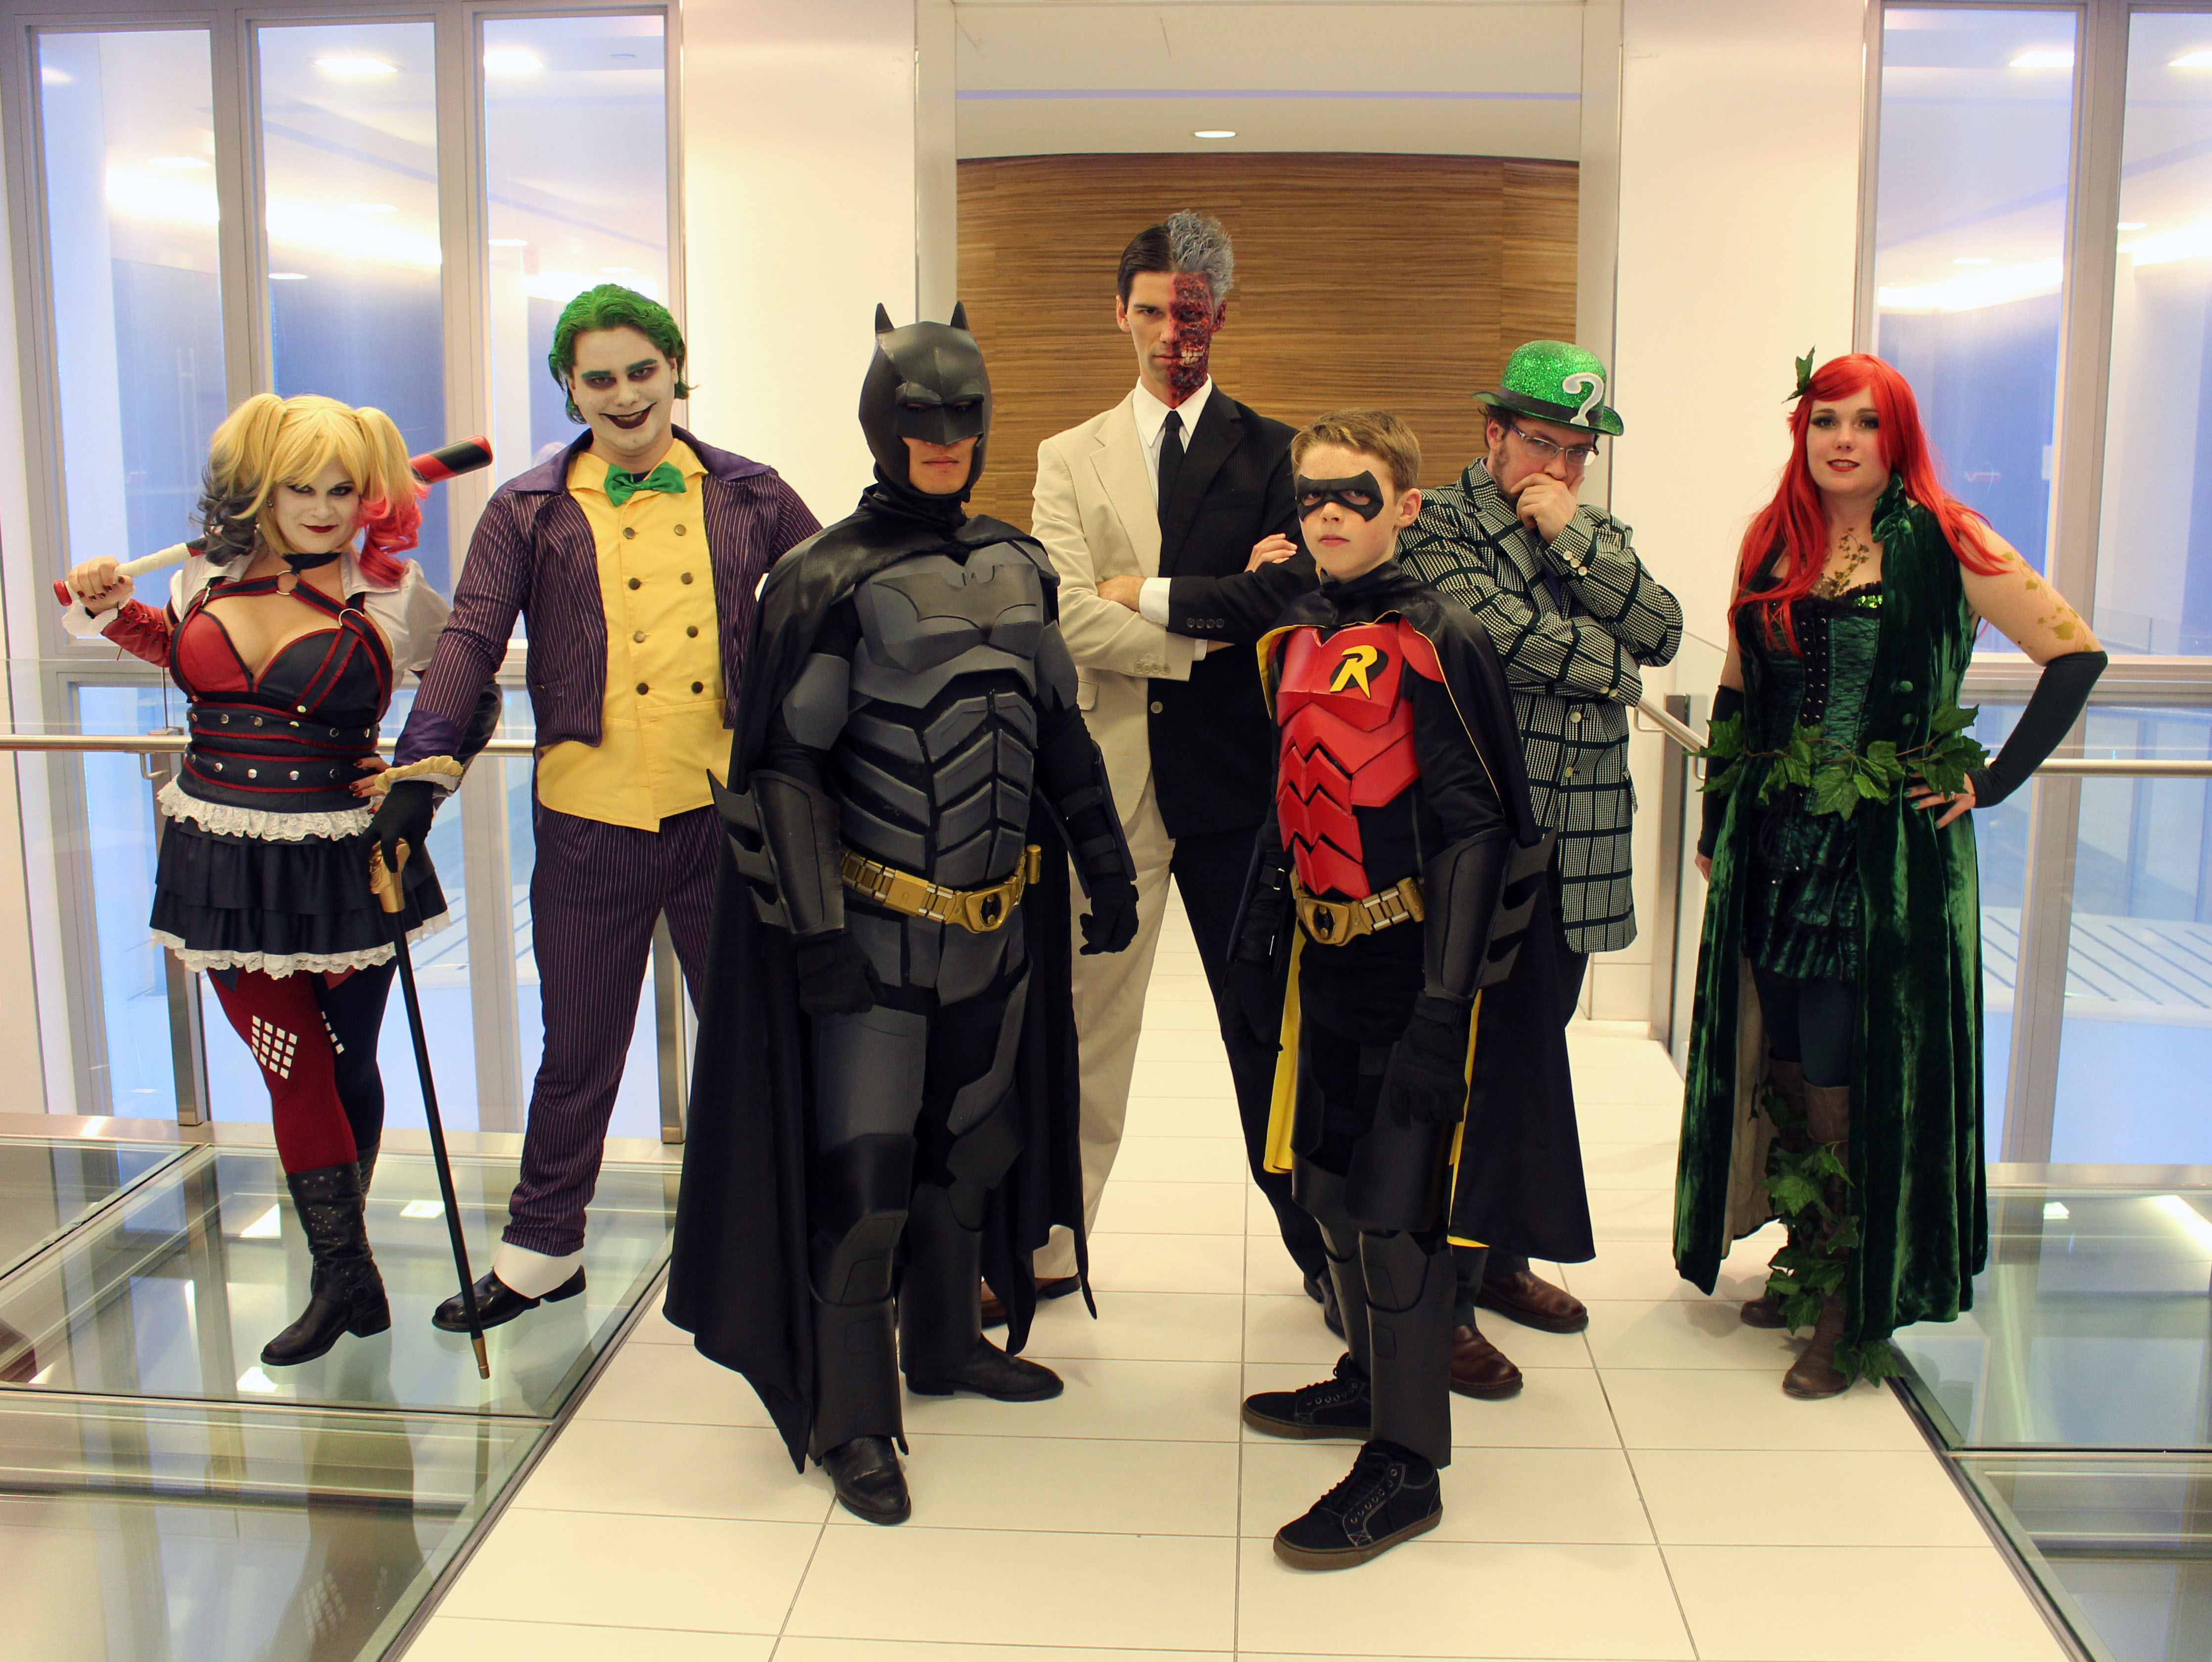
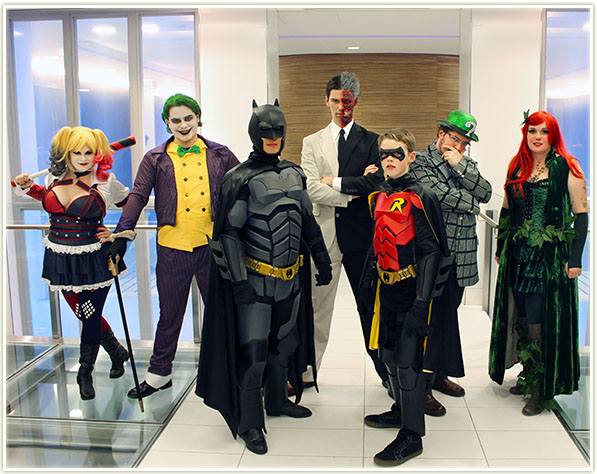
That’s it for this round! Click through to see some of the other costumes: | Harley Quinn | Poison Ivy | Two Face |

Halloween 2015: Harley Quinn

2015halloween_harleyquinn7

I’m a little overexcited about Halloween this past year: I got to be Harley Quinn! Being Harley Quinn had been an idea I’d had a years back after watching Julia Graf’s Harley Quinn makeup tutorial. Although I didn’t actually know anything much about the character, but I loved the look of her!

Let’s go back though – when our costume planning started in September, our group thought we were going to be characters from Star Wars, but after a few (shameful) people hadn’t seen the movies and didn’t immediately fall in love with it after we made them watch A New Hope, we went back to the drawing board. We decided on Batman villains, but it quickly evolved into Batman & Robin, plus assorted villains. Since last year’s Guardians of the Galaxy costumes had been so incredibly arduous and time consuming, we thought this would be a bit simpler to do and also a lot more individual. (Building Groot’s costume last year was almost a full time job for three people throughout the month of October.)

Halloween 2015 Squad: Batman & Robin + Villains

I was also really happy to incorporate my husband (The Joker) this year and longtime friend Alison whom I had known since I was in high school in Ottawa. (She has an awesome DIY/cooking/everything blog that you can check out here: Ali Does It.) Alison just happened to be in Toronto that entire weekend and was able to construct her costume on her own in Ottawa!

I’ll be recapping a few of the costumes that I had a part in making/creating over the next week or so. Today we’re starting out with mine:

Harley Quinn

Halloween 2015 - Harley Quinn
Halloween 2015 – Harley Quinn

I based my version of Harley Quinn on the Arkham Knight video game because that was the one that appealed to me the most and it didn’t require me to expose my midriff to the world.

Harley Quinn from Arkham Knight
Halloween 2015 - Harley Quinn
Halloween 2015 – Harley Quinn

Although most of the outfits in the group were homemade, I was one of the “lucky” few that got to buy their outfit. Well, at first I thought I was lucky, then I realized I was going to end up shelling out an arm and a leg for everything altogether but there was no way I could’ve made that outfit on my own. I purchased my outfit from Cosplay Sky and it was $149 USD. (And then there was an additional $30 USD shipping charge…) I ordered it mid-September and it arrived well before October from China. I was surprised at how quickly I received it, but really, really pleased.

Halloween 2015 - Harley Quinn
Halloween 2015 – Harley Quinn

I was also concerned about fit, but it worked out in the end. I ordered a medium and most of the costume fit just fine. The only piece that didn’t was the back shoulder strap grid thing which comes over the shoulders and across the chest. I ended up not wearing it and it didn’t really change the appearance of my costume.

Halloween 2015 - Harley Quinn - face close up
Halloween 2015 – Harley Quinn – face close up

My makeup was really, REALLY simple for this one. I first primed my face with Make Up For Ever‘s Step 1 Smoothing Primer to even everything out. I used a little bit of Revlon‘s ColorStay foundation in 180 Buff with a lot of Inglot‘s white concealer mixed in. I sponged the concoction onto my face using a Real Techniques Miracle Complexion Sponge and set it with Hourglass‘ Ambient Lighting Powder in Ethereal Light.

After priming my eyes with Milani‘s eyeshadow primer, I covered them with MAC‘s Blacktrack fluidline. I let that dry a bit then covered the fluidline with Urban Decay‘s Blackout shadow. I basically covered my entire lid with it, blended it up through the crease and lined my lower lash line with it – smoking it out as much as possible (I think I used a bit of MAC Cork to help out). I tightlined both water lines with my Marc Jacobs Highliner Gel Crayon in Blacquer, applied essence‘s get big! lashes (waterproof) mascara and then popped on some House of Lashes Bombshell falsies. I used a little bit of Lit CosmeticsHeartbreaker glitter on my lower lash line, but it didn’t really show up in pictures. I filled in my brows with Anastasia‘s Dipbrow Pomade in Taupe.

The only thing remaining was my lip colour – I ended up going with NARS matte lip pencil in Cruella.

Halloween 2015 - Harley Quinn
Halloween 2015 – Harley Quinn
Halloween 2015 - Harley Quinn with matching nails!
Halloween 2015 – Harley Quinn with matching nails!

One of the things that pleased me the most were my matching nails. I had some KISS fake nails in RIP which were PERFECT for this costume. Not only were they a red and black gradient, but they even had a little bit of glitter on them! I cut and filed them down to a more decent length for my hands, making them a lot easier to wear. (I saw that tip on someone else’s blog by the way – super useful!)

Dying my plastic wig with Sharpies

Dyeing the wig I got off Ebay was one of the more concerning things for me – especially since it was plastic and not something that would take colour well. Thankfully, Zubie of Living The Grey pointed me towards this YouTube tutorial that did the trick.  The gist of it is that you drain the ink out of Sharpies into an alcohol base and then paint it onto the wig.

Dying my plastic wig with Sharpies - first coat
Dying my plastic wig with Sharpies – first coat

Since my wig was so bright, I had to do about three coats before I got it looking decent enough to wear. At first the red came out quite pink and the black was honestly quite purple. Multiple coats of ink worked though!

The only other thing remaining was the baseball bat. I picked up the cheapest wooden bat I could get from Canadian Tire and spray painted the whole thing solid red. Once it had dried, I taped off a swirl pattern and resprayed it black. After the tape was pulled off, I let the whole thing dry and then tapped up the base like a hockey stick and tada! DONE!

Halloween 2015: Harley Quinn, The Joker, Two Face, Batman, The Riddler, Robin and Poison Ivy
We spent our evening out on Church Street in Toronto for the block party (thanks for the photo Paulyne!)

All in all, this was my absolute favourite costume to wear for Halloween and I was SO FREAKING SAD when I had to take it off! I not only thought I looked adorably spunky but I also felt like a badass. I’m totally up for wearing this to a con or something because I just want to get right back into that outfit!

Chillin' like villains
Chillin’ like villains

Click through to see some of the other costumes: | The Joker | Poison Ivy | Two Face |

What’s On My Face – Volume 43

With Halloween over, I can finally catch up on my backlog of posts to get through. I had hoped to have my Kat Von D Mi Vida Loca Remix Challenge Week up this week, but it seems that isn’t happening, so that’ll be up next week! Till then, here’s a collection of looks that I wore at some point throughout October with a couple guest posts chucked in for good measure. Enjoy!


201509_womf43_look1.1

I wore this to a preview of the H&M Beauty Department and got a lot of compliments on it. It’s one of my favourite colour combos so I was really happy that others seemed to like it as well!

201509_womf43_look1.2

Eyes

  1. MAC Illusionary Burning Ambition Duo –  used the white gold shade all over the lid.
  2. Inglot Matte 317 and Matte 338 mixed together on the outer half of the lid with a little bit of Urban Decay Blackout in the very outer corner.
  3. Wet n Wild Brule on the brow bone.

I created the winged liner with MAC‘s Blacktrack fludline and applied Urban Decay‘s Perversion mascara to my lashes.

Face

  • Bronzer: Hard Candy Hula Hula
  • Blush: essence pinky flow
  • Highlighter: Becca Champagne Pop
  • Lips: Bite Beauty Agave Lip Mask in Maple

201509_womf43_look2.1

The Soul Sister glitter I picked up from Lit Cosmetics at IMATS is quite possibly the most beautiful glitter I’ve ever encountered. My shots don’t do it justice, but it’s primarily green with gold and copper flecks. It’s absolutely incredible.

201509_womf43_look2.2

Eyes

  1. MAC Club all over the lid.
  2. Inglot Pearl 418 on the outer half of the lid.
  3. Lit Cosmetics Soul Sister glitter applied on top of Club.
  4. Wet n Wild Brulee on the brow bone.

Urban Decay Perversion mascara is on my lashes.

Face

  • Bronzer: SST Cosmetics Radiant Finish Bronzer
  • Blush: Hourglass Incandescent Electra
  • Highlighter: MAC Whisper of Gilt
  • Lips: NYX Spongecake gloss

201509_womf43_look3.1

I was headed out to Halloween Haunt at Canada’s Wonderland and had to wear something festive. Because even though it may not be seen by anyone due to how dark it was, *I* still knew I was wearing something fun! And by the way? Canada’s Wonderland Halloween Haunt? TOTALLY worth it. I had so much fun!

201509_womf43_look3.2

Eyes

  1. Too Faced Millenial at the top of the crease.
  2. Viseart matte orange from the Editorial Brights palette.
  3. Too Faced Girl’s Night on the outer half of the lid.
  4. Too Faced Chandelier on the brow bone.
  5. Lit Cosmetics California Soul all over the lid on top of the orange.

I created the wing with Kat Von D‘s Tattoo Liner in Trooper and applied Urban Decay Perversion mascara to my lashes.

Face

  • Blush: MAC Gingerly
  • Lips: Revlon Papaya

justmizzj_makeupyourmind_chelle1

I did this look for a guest post over on JustJ last month while she was away getting married!

justmizzj_makeupyourmind_chelle6

justmizzj_makeupyourmind_chelle8

Eyes

  1. Makeup Geek Frappe through the top of the crease.
  2. Makeup Geek Burlesque through the crease.
  3. Makeup Geek Bitten on the outer half of the lid and a bit through the crease. I also used this shade to line the lower lash line.
  4. Makeup Geek Corrupt in the outer corner to deepen up the look.
  5. Makeup Geek pigment in Utopia all over the lid. I used Too Faced’s Glitter Glue to make sure it stayed on my lid!
  6. Makeup Geek Bleached Blonde on the inner tearduct.
  7. Makeup Geek Vanilla Bean on the brow bone.
I created the winged liner with essence‘s easy 2 use jumbo eyeliner pen and tightlined both of my water lines with Maybelline‘s Lasting Drama Waterproof Gel Eye Pencil in Sleek Onyx. I applied a few coats of Urban Decay‘s Perversion mascara to my lashes and popped on some Ardell false lashes in the style 102 Black. I filled in my brows with Anastasia‘s Dipbrow in Taupe.
Rest of the Face
  • Foundation: IT cosmetics Your Skin But Better CC Cream with SPF 50+ in Fair and Light mixed together
  • Bronzer: Make Up For Ever Pro Bronze Fusion in 30M
  • Blush: Clinique Cheek Pop in Cola Pop
  • Highlighter: MAC Mineralize Skinfinish in Soft & Gentle
  • Lips: Too Faced Melted Berry

201909_forzoe1

And another guest post, this time for Zoe! I was going for unicorn inspired and this is what I came up with!

201909_forzoe3

201909_forzoe5

201909_forzoe7

Eyes

  1. Inglot Matte 334 through the top of the crease.
  2. Naked Cosmetics Ivory stack (white shade) on the inner tearduct.
  3. MAC Crystal Avalanche on the lid.
  4. Inglot Matte 325 on the outer half of the lid.
  5. Urban Decay Blackout on the very outer corner to deepen it up.
  6. Wet n Wild Brulee to highlight the brow.
  7. Inglot Matte 317 on the outer edge of the lower lash line.
  8. Inglot Matte 343 right beside it to the halfway line of the lower lash line.
  9. Inglot Matte 370 beside it as well.
  10. Inglot Matte 383 as the very last colour on the lower lash line.

I used the Kat Von D Ink Liner in Neruda to create the wing and applied Urban Decay’s Perversion mascara to my lashes. I filled in my brows with NYX’s MicroBrow in Taupe.

Rest of the Face

  • Foundation: Revlon ColorStay in 220 Natural Beige
  • Bronzer: Make Up For Ever Pro Bronze Fusion in 30M
  • Blush: Hourglass Ambient Lighting Blush in Diffused Heat
  • Highlighter: MAC Iridescent Powder in Silver Dusk
  • Lips: Inglot AMC Lipgloss in 544

What I Bought This Month – October 2015 Haul

There’s some exciting things in this haul! I got a bunch of stuff from overseas and that’s always enough to make me start squealing!

Neutrogena Healthy Skin CC Cream in Fair to Light (free)

This Neutrogena CC Cream was such a surprise to me – it was in my Scotiabank Toronto Waterfront Marathon goodie bag! At first I thought it was just sunscreen, but nope – it’s definitely a tinted cc cream. SO COOL! I’m excited to try this one out.

Real Techniques Miracle Complexion Sponge ($7.99 CAD)

Time for my yearly repurchase of the Real Techniques Miracle Complexion Sponge! I’ve started picking them up whenever IMATS happens, but they were only taking cash at the Farley Co and I hadn’t brought any this year. So anyway, I picked this one up at FTB Beauty and I’ve already started using it. As a note, if you take care of your sponges, they do last a really long time. There was nothing inherently wrong with my old Complexion Sponge as I clean it frequently enough, but after a full year of use, I just wanted a fresh one.

Bourjois Healthy Mix Serum foundation - 52 Vanilla (£10.99)
Bourjois Healthy Mix Serum foundation – 52 Vanilla (£10.99)

The next few items are via Natalie of Ivory Avenue! She was in England for a little while and she managed to snag me every single item on my wishlist. What a champ!

So the first item of my list was the Bourjois Healthy Mix Serum foundation in shade 52 Vanilla. I LOVE THIS STUFF. I ran through an entire bottle this year and when I finished it I was so so sad. This stuff is freaking magic on the skin (full review over here) and I am so happy to have it back in my collection. I still have a few other foundations I want to finish before I get to use this one but YES – SO HAPPY! Also, the reason I asked her to pick it up for me in the UK is because even with our Canadian dollar being pretty shitty right now, it’s still cheaper to buy it in the UK than it is to get it in Canada. How frustrating is that??

Bourjois Delice de Poudre (£7.99)

The other item I wanted to try was the Bourjois Delice de Poudre. I’m a bronzer fiend so every time I see something new or unique, I want it. Not that this powder is especially new on the market, but since I hadn’t picked it up before, it’s new to me! The powder is supposed to smell like cocoa or chocolate, but honestly? I smell coconut. Lots and lots of coconut. It also comes with a whopping 14g of product (a bronzer normally has 9-10g) and looks like chocolate. Adorable.

Soap & Glory - Glow All Out (£11)
Soap & Glory – Glow All Out (£11)

Soap & Glory‘s Glow All Out is kind of weird to me. When you open the compact you’ll notice the powder is full on PINK. So I was a liiiitle bit skeptical this would work as a highlighter and not a blush. As it turns out, the pigmentation of the actual colour is fairly weak (which is good!) and it instead packs a bunch of shine. It’s pretty, but more of a subtle highlight.

Soap & Glory - Solar Powder (£11)
Soap & Glory – Solar Powder (£11)

Annnnd another bronzer. Soap & Glory‘s Solar Powder bronzer has a dark side and a light, but really… I’m just going to end up swirling my brush through both of them.

Soap & Glory - Sexy Motherpucker in Nudist (free)
Soap & Glory – Sexy Motherpucker in Nudist (free)

I had asked Natalie to find me Soap & Glory‘s Sexy Motherpucker in Nudist since I loved my Raplumzel so much. She wasn’t able to, but she gave me HERS instead! I wasn’t expecting that at all and yet I’m so pleased because this colour is stunning on me. It’s a gorgeous translucent nude that adds just a little bit of colours but a whole lot of shine. Plus the scent is to die for. By the way, I don’t know if these are discontinued now, but they’re no longer on Soap & Glory’s UK site and Natalie was saying they were sold out almost everywhere. :s

No7 Foundations: £18.75 for both (buy one, get one 50% off!)

If you made me pick a favourite foundation I’d be tempted to say the Bourjois Healthy Mix Serum…. but this is sliiightly better since it provides a touch more coverage. Boots No7 Instant Radiance foundation is freaking BOMB and you can’t find it in Canada anywhere or at Target in the US (they don’t have the Instant Radiance line). This is the foundation that I always notice makes my skin flawless in photos. I ended up getting Cool Vanilla and Warm Ivory because sometimes I feel Cool Vanilla is too pink. I’m so, SO happy to have these back in my arsenal!

Wet n Wild Color Icon trio in Sunset Junction (free)

And lastly, a cast off from another blogger’s collection: Wet n Wild‘s Sunset Junction. Not sure what I think about it yet, but hey, I love trying new things.

That’s it for this month! Have you picked up anything exciting recently?