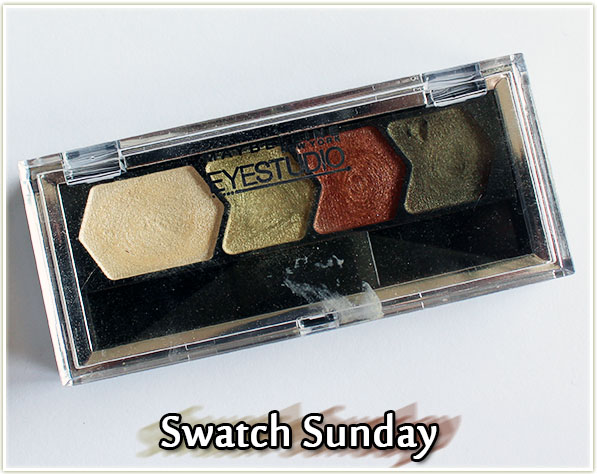
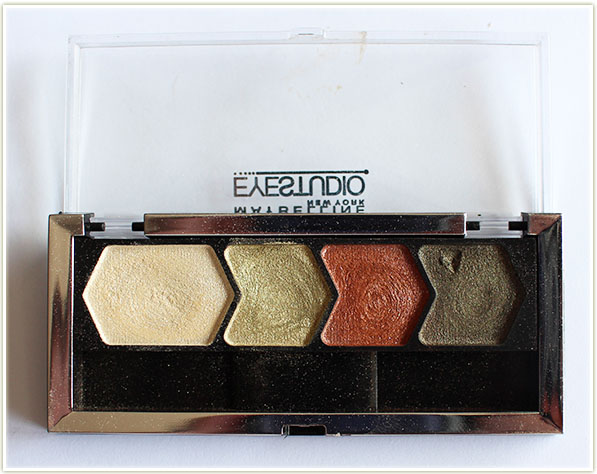
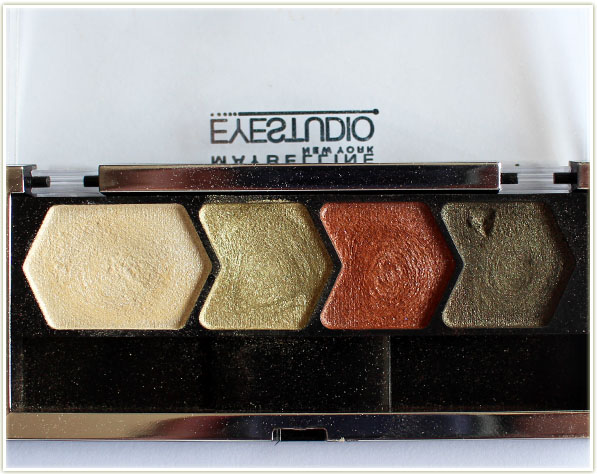
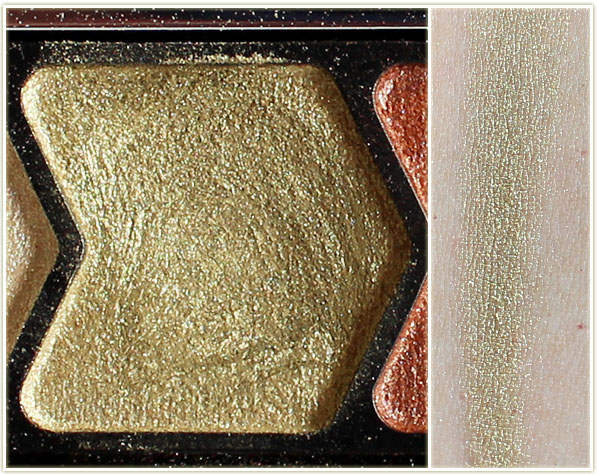
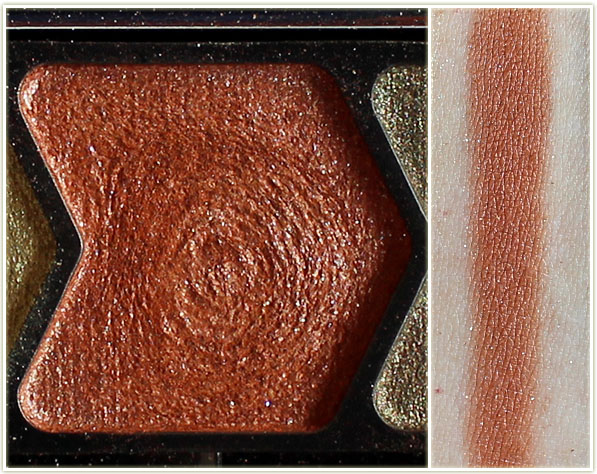
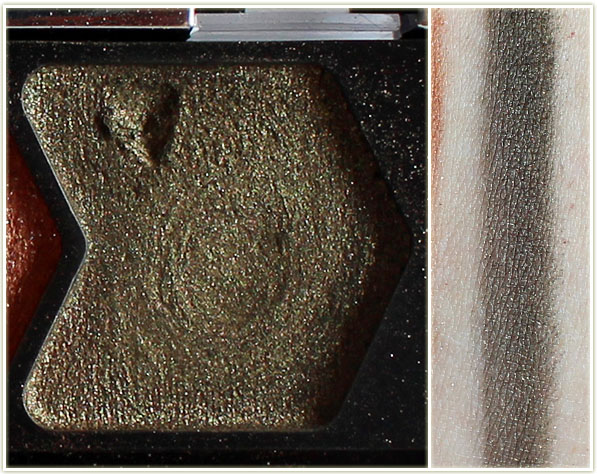
Limited edition for fall a few years back, this is Maybelline‘s Smokey Cinnamon quad. I remember this collection of quads being in short supply in Canada and having to hunt them down amongst the drugstores accessible to me. The formula in the Smokey Cinnamon quad is just as good as the first one I bought and the colours are gorgeous!
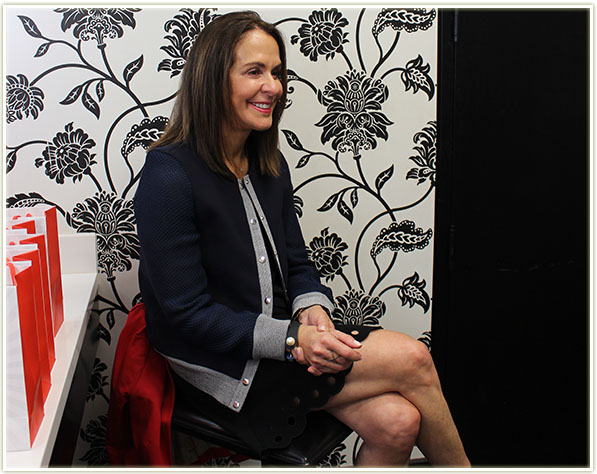
First Aid Beauty is one of those brands that I kept meaning to try but just never got around to it. Imagine my delight when I was invited to an event at Sephora’s Toronto Eaton Centre location where the actual creator of the brand, Lilli Gordon, was going to be present! An introduction to First Aid Beauty by the creator herself? Heck yeah, I’m in!
Lilli Gordon – creator of First Aid Beauty
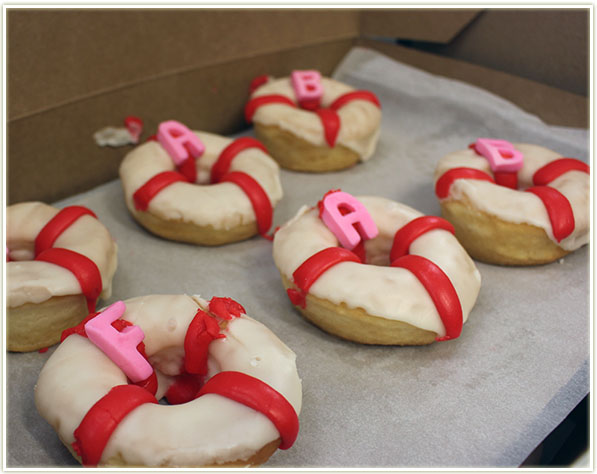
The blogger event was for whoever was able to make it during the weekday at midday. I’m lucky that I work in Toronto’s downtown core, so I have easy access to the Eaton Centre at all times! About ten of us got to meet and greet with Lilli Gordon (and fawn over the cute dougnuts) in Sephora’s back room.
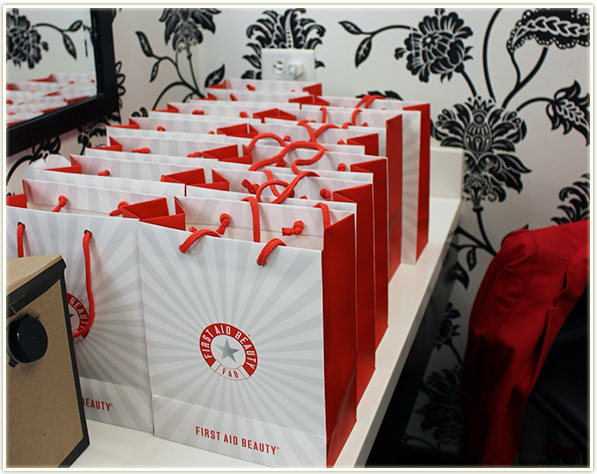
First Aid Beauty doughnutsFirst Aid Beauty blogger bags
As per their web site: In 2009, Lilli Gordon launched First Aid Beauty (AKA FAB). Lilli, a beauty industry veteran, found herself surrounded by products that worked but felt like medicine, felt great but were not effective, or smelled wonderful but made her sensitive skin red and irritated. Lilli created First Aid Beauty to provide highly effective yet luxurious products that treat everyday beauty and skincare challenges.
First Aid Beauty products are free of harsh chemicals and known allergens, including parabens, phthalates, alcohol, fragrances and artificial dyes.
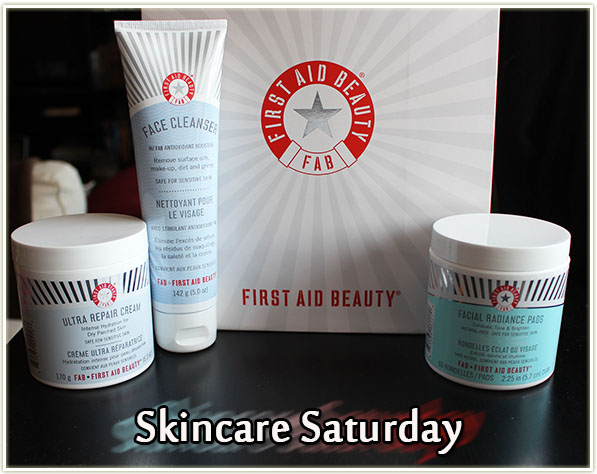
We were gifted their top three best sellers which was not only generous, but also really exciting. What better way to try out a brand than by using their number one sellers?
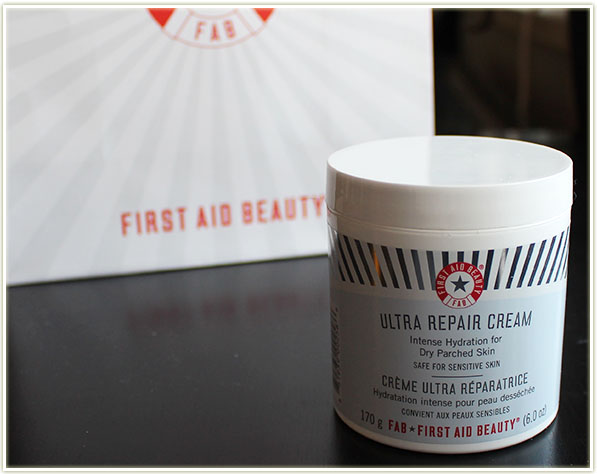
First Aid Beauty – Ultra Repair Cream
Let’s start with the one I haven’t used yet (I’ve got a backlog of moisturizers to get through). This dense Ultra Repair Cream has no scent and provides intense hydration for dry parched skin. As with all First Aid Beauty products, this is safe for sensitive skin. While I’ve not had the opportunity to try it out yet, I will absolutely be putting this tub to work in the winter months when my skin starts to dry out.
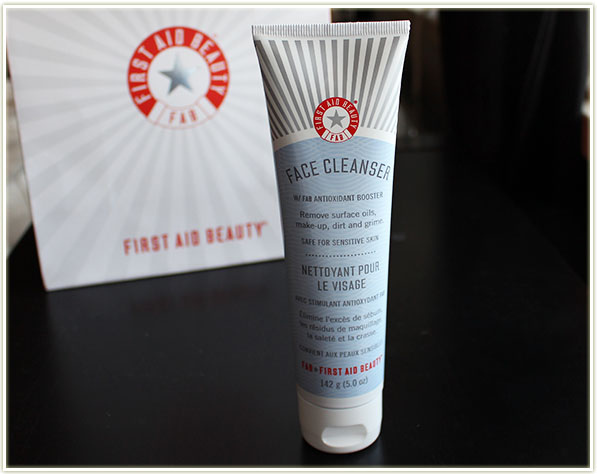
First Aid Beauty – Face Cleanser
The Face Cleanser is what it says it is – a facial cleanser. It feels very, very gentle when I use it and it doesn’t dry out my skin. I’ve been using it religiously for about two weeks or so now and I’ve not noticed a difference in my face (that’s a good thing – I don’t have bad skin) which is always a plus. It is unscented, however I will say it has one of those weird “unscented” scents. It’s a bit on the sour side which is unappealing to me, but I think I’m just a bit sensitive to stuff like that. It’s not a foul “gone off” smell, just an unscented scent, if you know what I mean.
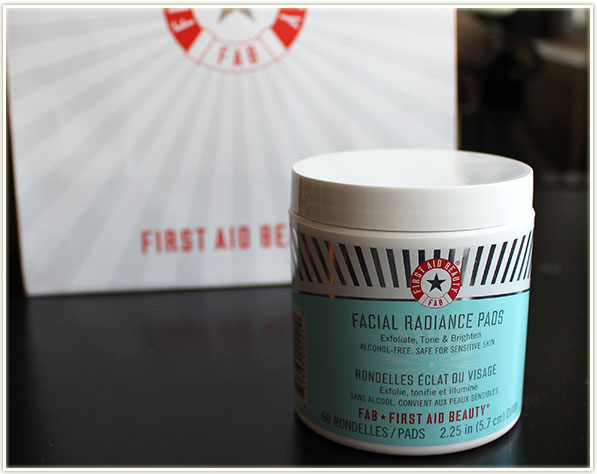
First Aid Beauty – Radiance Pads
The Facial Radiance Pads are the ones I’ve been using the most. They’re intended to exfoliate, tone and brighten your skin. I use them primarily after I’ve removed my makeup with oil and need to still clean up my face. These pads work wonders to remove any remaining bits of makeup and leave my skin feeling fresh. There’s even a scrubby side on one side of the pad which helps really dig into my pores to remove every last inch of makeup (I was actually surprised just how much more makeup came off my face when I started using these – I thought the oil I was using had obliterated everything!). I also don’t feel the need to use a moisturizer after using these, which probably has something to do with the fact that they don’t contain any alcohol.
So that’s my first look at First Aid Beauty products! Have you tried any of their products? Is there anything in particular you really love that you’d like to recommend to me?
This post features press samples provided for consideration.
This post is all kinds of stupid exciting for me. Makeup may be my true love now, but hair is the one thing I really HAD growing up. I’ve got great hair (in my not so humble opinion) – it’s naturally blonde, it’s medium bodied, it can hold a curl like nobody’s business and it can grow fairly long but it pretty much conks out around chest length.
Because it just doesn’t seem to grow past my chest, I’ve often dreamed of having princess long hair. I’ve watched more hair extension tutorials than I can even begin to tell you about. I just loved the way they gave you so many more options with your hair!
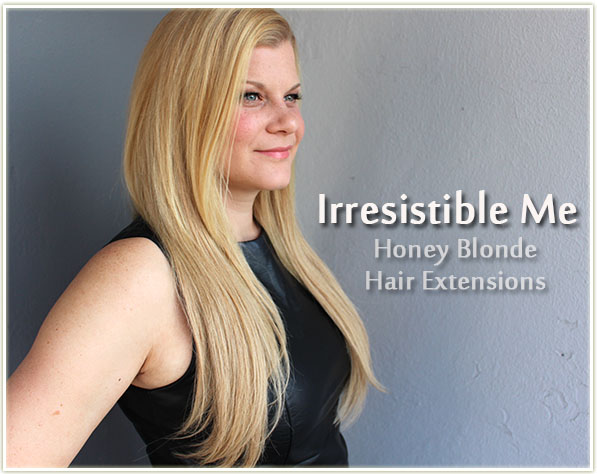
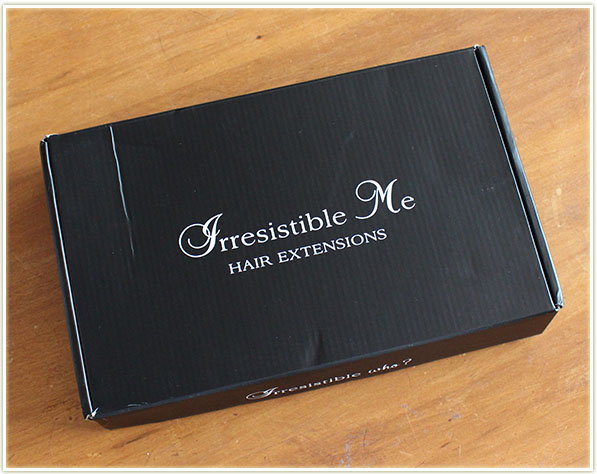
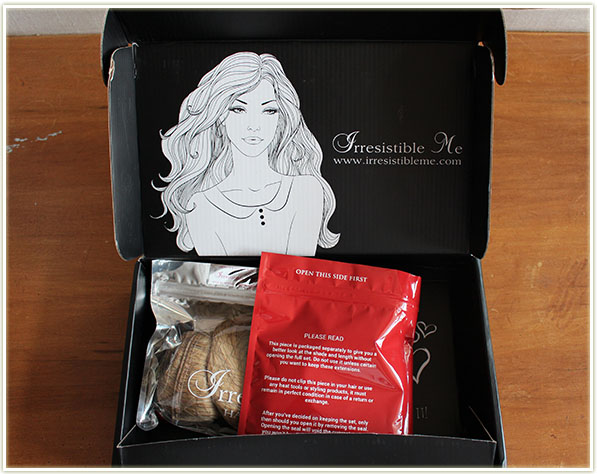
Irresistible Me Hair Extensions
Along came Irresistible Me and their gorgeous hair extensions offering to give me that perfect princess length hair! I opted for the Royal Remy hair extensions which are part of their deluxe lineup. Remy hair is essentially human hair where the cuticle layer is still intact and the hairs are aligned so that all the cuticles face the same way (like your own hair lies on your head).
Irresistible Me Hair Extensions in Honey Blonde
I hemmed and hawed over the colour to get for a long time. My hair is blonde, but I’m not BLONDE like some people are. Platinum was an option but I had seen just how white the blonde came off on Stephanie of Beauty Infinitum (who is whiter-blonde than me) so I didn’t think I could carry off platinum. Additionally, Irresistible Me‘s video tutorial on which colour to use was of no help when trying to see the difference between Golden Blonde and Honey Blonde. Go look at the video – they look EXACTLY the same (also, it’s instructed by an all time favourite YouTuber of mine, I was so surprised and pleased to see her!). I took a chance and opted for Honey Blonde.
Irresistible Me Hair Extensions in Honey Blonde
They showed up at work (I have everything delivered here) and it was a glorious, GLORIOUS colour match. I even freaked a coworker out by grabbing a loose weft of hair and held it out to her demanding that she tell me if it matched my own hair or not.
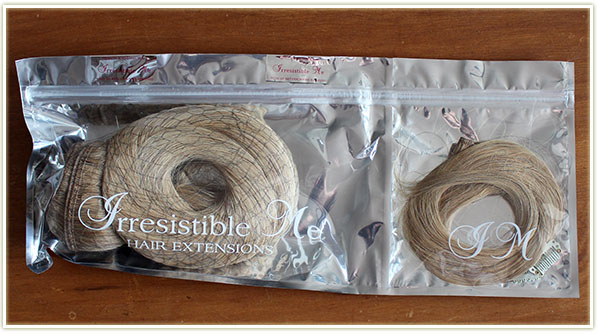
So the genius thing with Irresistible Me is they provide a Ziploc bag that has two compartments. The left side contains all your extensions. and the right side contains a weft of hair that you can take out and make sure that it matches to your hair colour. If it doesn’t match, send the whole thing back (left side untouched) and they’ll send you the correct colour. This saves a lot of heartache because you’ll be able to get your own colour without too much hassle (or wasting 200 bucks or so).
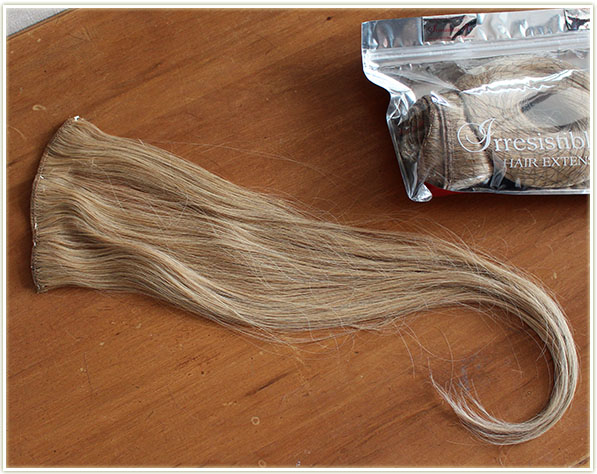
Irresistible Me Hair Extensions in Honey Blonde – one weft
Above is the weft of hair I took out first to make sure it matched the colour of my own hair. The hair is predominantly blonde but there are a few layers of colours in there to ensure it looks natural. There are some black hairs thrown in there though. It was a bid odd to me (as I’ve never spotted a black hair on my own head), but they don’t change the appearance of the extensions whatsoever.
In reality, my hair is slightly more yellow than the hair extensions I got. You may notice a slight colour discrepancy in the photos if you’re super observant, however I could not have asked for a better match.
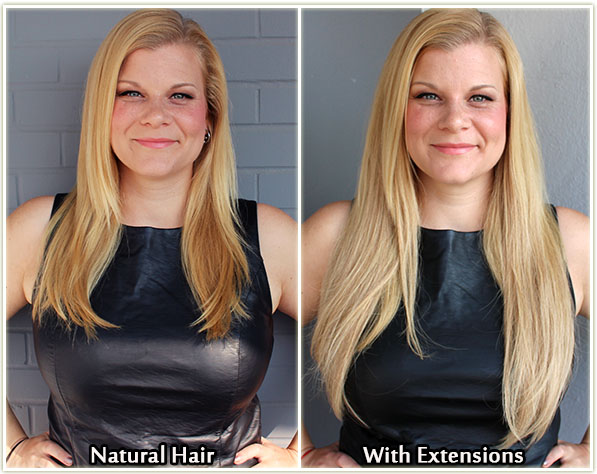
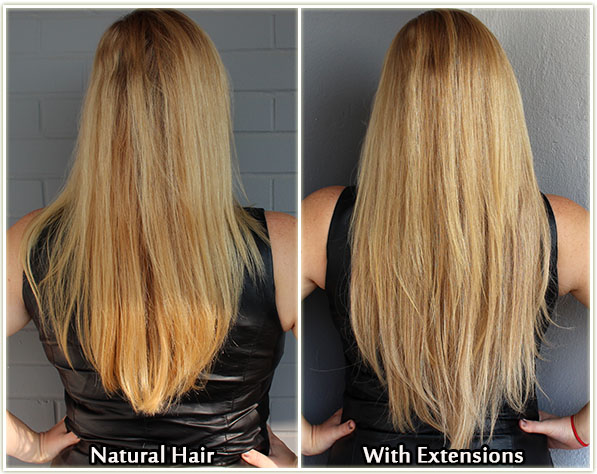
Natural Hair compared to Irresistible Me extensions – front view
I ordered the 20 inch Irresistible Me Royal Remy Hair Extensions in Honey Blonde. My hair is fairly long to begin with so it’s not like I had to worry TOO much about blending it in lengthwise with my own hair. I do feel like it’s a lot harder to blend in extremely long extensions with short hair unless you’re doing a half up/half down hair style – then you can get away with pretty much anything.
The extensions definitely kill any natural highlights/lowlights I have in my hair. In the shot above, my natural hair it looks kind of like I have low lights. In reality, that’s just my hair curving over the top of my chest and it displays a different colour than the rest of my mane. In the shot with extensions though, literally everything looks uniform because it removes some of that natural colouring.
Natural Hair compared to Irresistible Me extensions – back view
The extensions gave me about 2-3 inches (maybe even 4, but I didn’t measure) of length on top of my natural length and a RIDICULOUS amount of volume. The 20 inches only come in the 200g volume and let me tell you… that is a LOT of hair. In the shots where I’ve got my hair down, I’m only wearing maybe 75% of all of the extensions and it was HEAVY.
Wearing Irresistible Royal Remy Hair Extensions in Honey Blonde (20 inch)
When I wore my extensions to work, I wore the huge 4 clip weft (the base one), a three clip weft across the middle at the back of my head and two single clip wefts on either side of my head to help blend in the layers. Even then, I felt like I was wearing a cape (which, let’s be honest, feels pretty fucking awesome) – It’s a LOT of hair. More than I was expecting really. I’m not complaining, but DAMN, think twice about getting super long hair and about going for the heavier weight. For comparison, at 18 inches, you can order the 140g weight hair instead of 200g. If you have especially thin hair, I would recommend going for a lower weight since your roots won’t be able to sustain the heavier extensions.
At work, I wore my hair two different ways to test the extensions out. From insertion to removal, my days were roughly ten hours in length. With my hair down and wearing only four wefts I definitely felt like my hair was luxurious, but there was a definite weight to it. However, something about the clips made my hair feel very “secure”. It was an odd sensation, not something I’ve ever felt in my hair before. So, while heavy, it felt like my hair was “tucked in for bed”. I KNOW THAT’S A WEIRD DESCRIPTION OKAY. But honestly it was quite comforting.
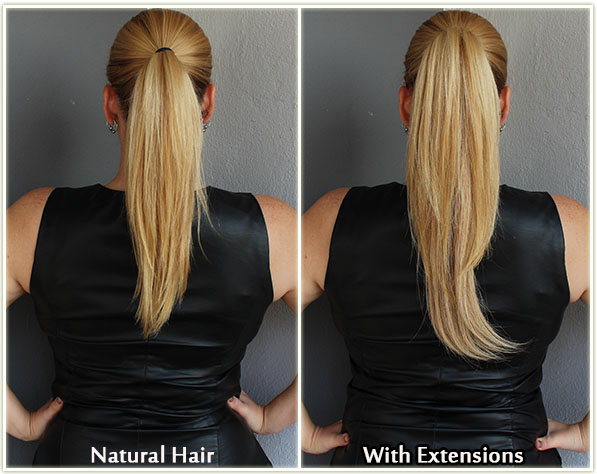
Natural Hair compared to Irresistible Me extensions – ponytail
When I wore it up in a ponytail it was exceptionally gorgeous. In fact, I kept playing with my hair like it was a horse’s tail (yeah… I freaked a few people out). I did experience “ponytail exhaustion” pretty quickly though. You know that feeling… The one where your hair just feels a bit too bent out of shape. Like you desperately want a shower so you can “reset” your hair. For the ponytail, I’m wearing two three-clip wefts, two two-clip wefts and two single-clip wefts so it was definitely weightier than when I wore my hair down.
Final Thoughts
Is this worth your money? YES. A million times YES.
Should you spend more money on getting Remy hair instead of artificial plastic hair? YES. Especially if you want to be heat styling your hair. Remy hair can be used just like your own hair! I didn’t do it, but at some point I will definitely be curling my extensions to see how much volume I can get in a curled hair look!
Is this quality hair? YES! It’s thick, voluminous and seriously glorious. It actually feels similar in texture to my own hair which is really reassuring.
Honestly, I couldn’t recommend these hair extensions more if I tried. They make me feel like a princess. Yes, I was sent these for consideration, but had I known how much I would love them I would’ve dropped the money on them much sooner in my life. I was always, ALWAYS hesitant because I knew it was a lot of money (I think this length starts around $200 USD) but had I known how incredible they would feel I would have flat out purchased them a long time ago. Irresistible Me has free international shipping over $150 and they do free exchanges and returns.
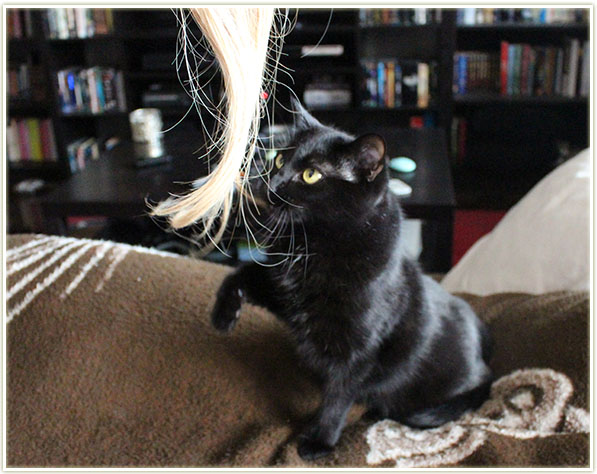
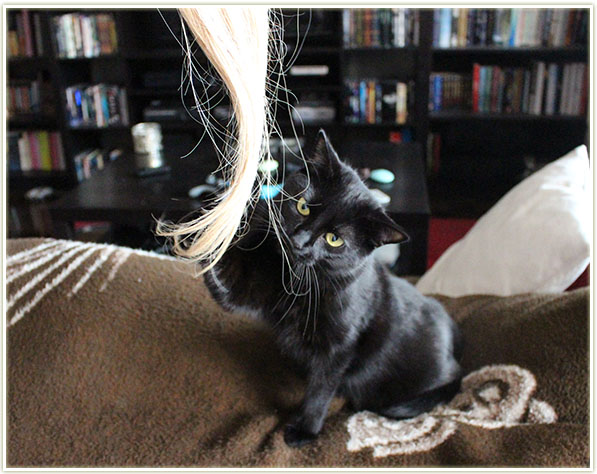
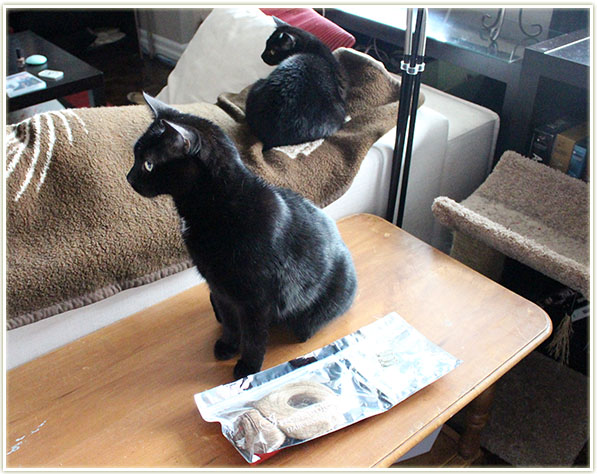
And of course, I used the first weft I took out as a cat toy….Get it, Kolme! GET IT!And now they’re both not so into it…
This post features a press sample sent for review.
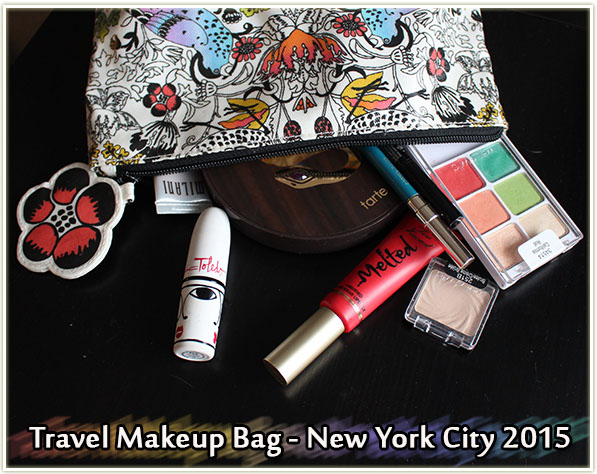
I’m heading to New York City tomorrow to visit some friends and while I’m not bringing too much makeup (in my book anyway), I love planning out what to pack and doing so in advance even lets me post about it! (Bonus that I then figure out what the heck I’m missing from makeup bag while writing up the post too…)
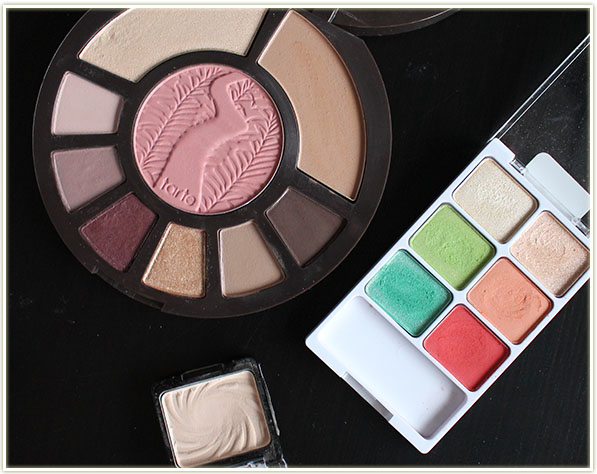
Tarte Rainforest After Dark, Wet n Wild California Roll, Wet n Wild Brulee
Alright, we’ve got some new travellers on the block here! The TarteRainforest After Dark palette does NOT get enough love in my collection so I’m packing it so I’ll be forced to use it. It also saves me on bringing a bronzer and a highlighter, plus it comes with a blush. Perfect every day essentials in that compact disk right there.
But… of course I need some colour in my life. Wet n Wild’s California Roll has colours that I would reach for most (red) so I’m chucking that one in my bag.
And since neither of two palettes actually comes with a matte cream brow bone shade (the one in the Tarte palette veers far too pink for my tastes), I’ve got my ever so perfect Wet n Wild single shadow in Brulee thrown in for good measure. I can’t tell you how handy it is having a single shadow that’s perfect for highlighting your brows. I don’t care what brand it is, so handy!
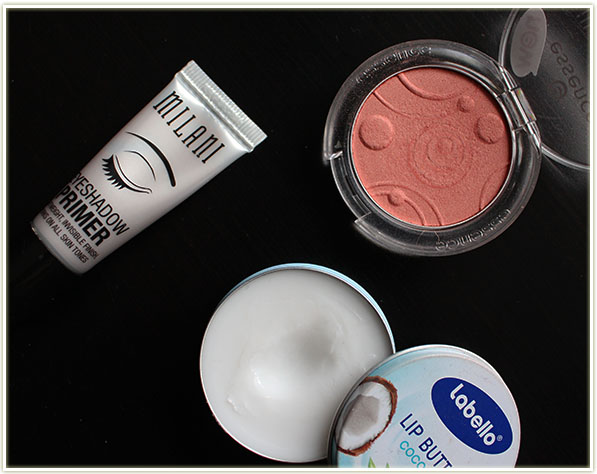
Milani Eyeshadow Primer, essence blush in Autumn Peach, Labello Lip Butter in Coconut
Various necessities here. My Milani eyeshadow primer is the only thing keeping my eyeshadows from overly creasing lately. (It does conk out around the 12 hour mark OR slightly before that if it’s hot as hell outside.)
And, of course, I couldn’t just travel with ONE blush, so I grabbed for essence‘s Autumn Peach because it’s more orange toned than the pink shade in the Tarte palette. Stunning, STUNNING shade too.
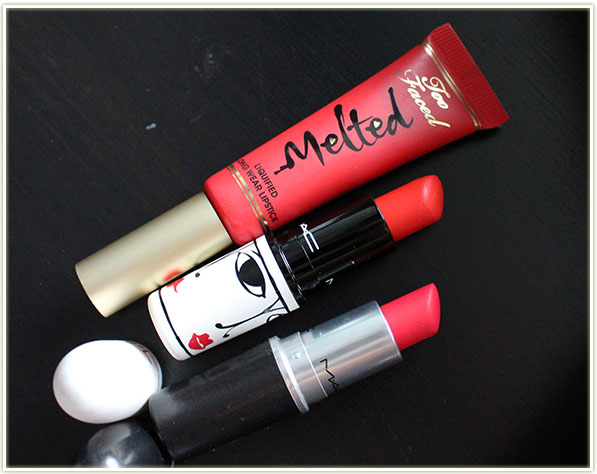
Too Faced Melted Strawberry, MAC Barbecue and MAC Relentlessly Red
Both of those MAC lipsticks are becoming frequent travellers. Relentlessly Red is what I consider “my shade” (that’s the pinkier one) and Barbecue is that perfect orangey-red (but more orange than red) that seems to suit a lot of occasions. I brought both of these lipsticks with me to Florida back in April too.
Too FacedMelted Strawberry is in there because not only do I love the formula, but it’s also a fun red to wear. I may need, I may not – but I sure do love having options.
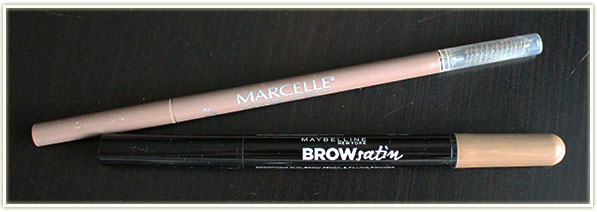
Marcelle Nano in Fair Ash Blonde and Maybelline Define + Fill Duo (BROWsatin) in Blonde
My NYXMicro Brow Pencil is far too close to being finished so I didn’t trust it to last the length of my five day trip. Instead, I opted for the MarcelleNano and the MaybellineDefine + Fill Duo pencils. Not super exciting I suppose, but I didn’t want to be fussing around with my potted eyebrow products while on vacation so pencils were a definite must have for me.
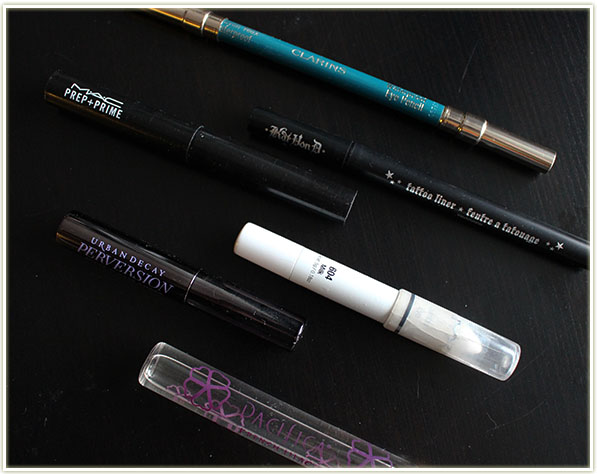
Clarins Aquatic Green eyeliner, Kat Von D Tattoo Liner in Trooper, MAC Prep + Prime for lips, NYX Jumbo Eyeshadow Pencil in Milk, Urban Decay Perversion mascara and Pacifica Lilac Blossom perfume
More necessities here.
The ClarinsAquatic Green waterproof eyeliner is if I want to play around with some colour amongst that neutral Tarte palette. This liner is no joke either – it stays put like nobody’s business.
The Kat Von DTattoo Liner is there because I’m pretty sure I can’t go five days straight without doing winged liner (plus this is the absolute BEST pen for doing quick lines without fussing around).
I also can’t wear lipstick without MAC‘s Prep + Prime for lips (I get bleed out no matter what I do, but this stuff saves me!).
NYX‘s Milk because those Wet n Wild shadows need a solid base to make them pop.
Urban Decay‘s Perversion mascara because not only is it amazing, but I also have an itty bitty sample size perfect for travel!
And lastly, my rollerball perfume – Pacifica‘s Lilac Blossom. We’re at the tail end of summer so I doubt I’ll be wearing this perfume much longer, but it’s my only rollerball and fit perfectly in my makeup bag.
And that’s it! I leave Thursday and I come back midday Monday. I don’t tend to do the touristy things in New York anymore because I’ve been visiting one friend there for… well probably a decade now, but I’m excited to just hang out, eat, drink and be merry. Plus you know… visit the Bite Beauty Lip Lab! 😉
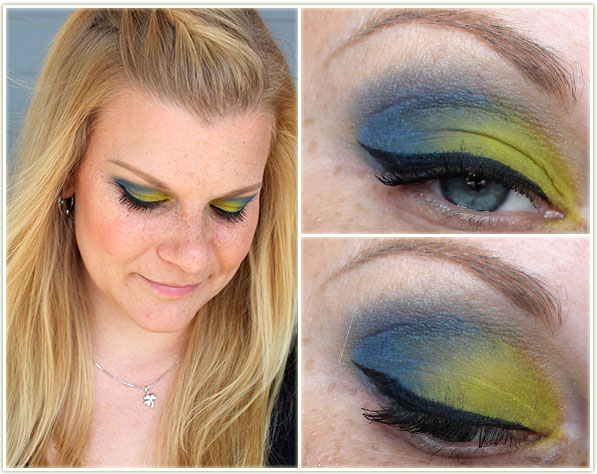
Another roundup! You’ll notice these sets of look go from bright and vibrant eye makeup to darker plums and red pretty quickly. It wasn’t done intentionally, but you can definitely see fall creeping into my looks slowly!
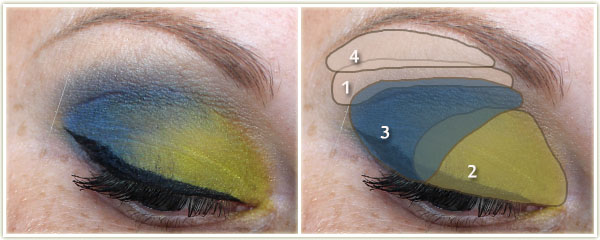
I had received the NARSRated R duo in a swap a while ago and wanted to try it out. So I wore it out to brunch!
Eyes
MACCork through the crease.
NARSRated R – green side all over the lid.
NARSRated R – blue side on the outer half of the lid.
Too FacedWhite Chocolate on the brow bone.
I created the wing with MAC‘s Blacktrack fluidline and applied Urban Decay‘s Perversion mascara to my lashes.
Rest of the Face
Foundation: Garnier BB Cream in Light to Medium
Bronzer: RevlonBronzed & Chic
Blush: Milani Luminoso
Highlighter: BeccaChampage Pop
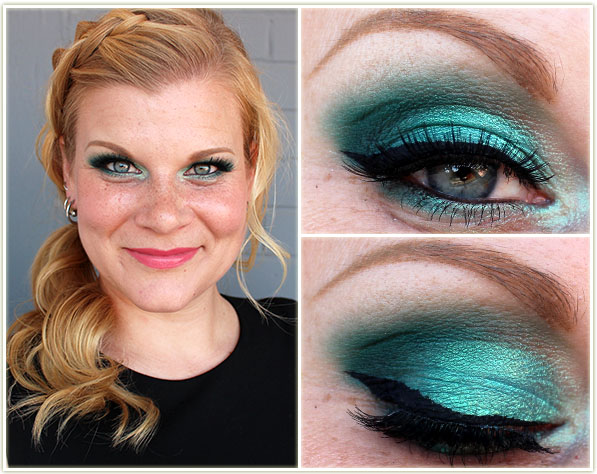
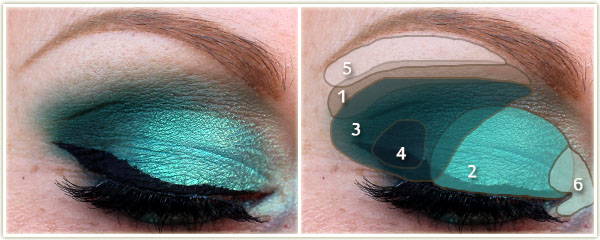
I *loved* this one. I wore it to my cousin’s engagement party and fell in love with the final look so much that I’ve now used it everywhere for my social media profile shot. LOVE, LOVE, LOVE!
Eyes
MACCork through the top of the crease.
InglotAMC Shine 33 all over the lid.
Inglot Matte 338 on the half of the lid and through the crease.
MACPrint to deepen the outer corner.
MACBlanc Type on the brow bone.
Naked Cosmetics IV05 (green reflect) on the inner corner of the eye.
I used Catrice‘s Dating Joe Black to create the wing and tightlined my upper and lower water lines with Marc Jacobs‘ Blacquer. I also popped on a pair of House of LashesBombshell falsies.
Rest of the Face
Foundation: Boots No7 Instant Radiance in Cool Vanilla
Bronzer: Hard CandyHula Hula
Blush: HourglassDiffused Heat
Highlighter: BeccaChampagne Pop
Lips: BiteBeautyFig
I did this to match my JORD watch a few weeks ago and it reminded me just how much I love that L’Oreal eyeshadow.
Eyes
Eyeshadow: L’Oreal Infallible shadow in Golden Mahogany (seriously, that’s the only thing I’m wearing on my lids).
Mascara: Urban DecayPerversion
Rest of the Face
Foundation: Make Up For Ever UltraHD stick foundation in Y225
Bronzer: Hard CandyHula Hula
Blush: Laura GellerPink Grapefruit
Highlighter: MACSoft & Gentle
Lips: ClarinsNude Beige lip liner
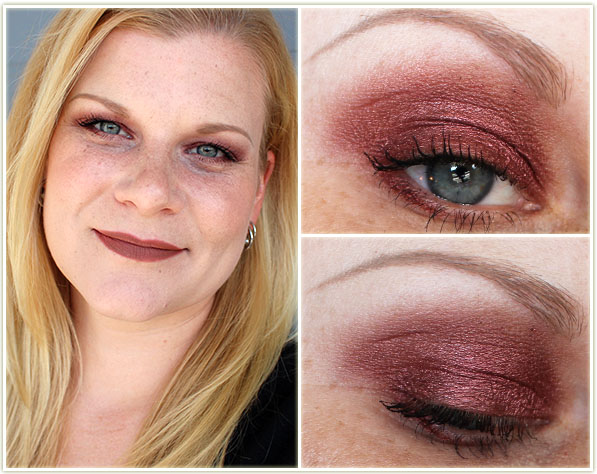
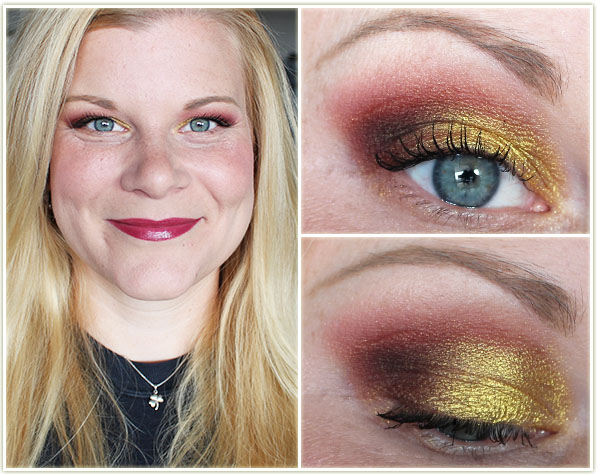
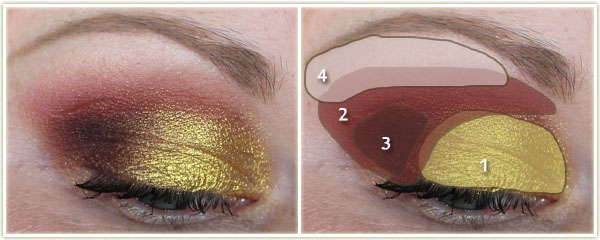
Ohhh yes. So much yes to this one. I was playing around with my Makeup Geek shadows and loved how this gold worked out with that darker rusty red. You can ever go wrong with MUG‘s Bitten!
Eyes
Makeup GeekFortune Teller all over the lid.
Makeup GeekBitten on the outer corner and through the crease. Apparently I blended it out with Peach Smoothie, but forgot to identify that on the chart above.
Makeup GeekCorrupt on the outer corner to deepen it up.
Makeup GeekVanilla Bean on the brow bone.
I coated my lashes with Urban Decay‘s Perversion mascara.
Rest of the Face
Foundation: Boots No7 Instant Radiance in Cool Vanilla
Bronzer: Make Up For Ever Pro Bronze Fusion in 30M
Blush: KryolanGlossy Rosewood
Highlighter: MAC Soft & Gentle
Lips: Clarins Joli Rouge in Soft Plum
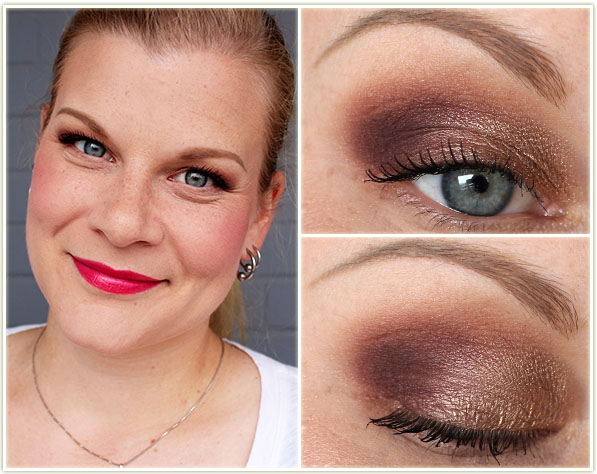
I can tell the outdoor natural lighting is starting to get fucked up in my pictures – definitely going to be investing in some studio lighting this fall and winter that’s for sure. I wanted to play more with my Too FacedChocolate Bar palettes – I love them, but I feel like I’m always reaching for the newest thing that’s been released. However, I still very, very much love these palettes.
Eyes
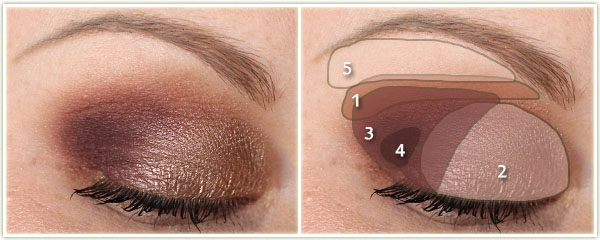
(all Too FacedChocolate Bar palette)
Salted Caramel through the top of the crease.
Creme Brulee all over the lid.
Cherry Cordial on the outer half of the lid.
Triple Fudge in the outer corner to deepen it up.
White Chocolate on the brow bone.
On my lashes is Urban Decay‘s Perversion mascara.
Rest of the Face
Foundation: Revlon Colorstay in 200 Nude and 220 Sand Beige mixed together
Concealer: Collection Lasting Perfection in Light 2