The Body Shop – Honey Bronze Collection (Review, Swatches & Look)

201507_thebodyshop_honeybronzecollection1

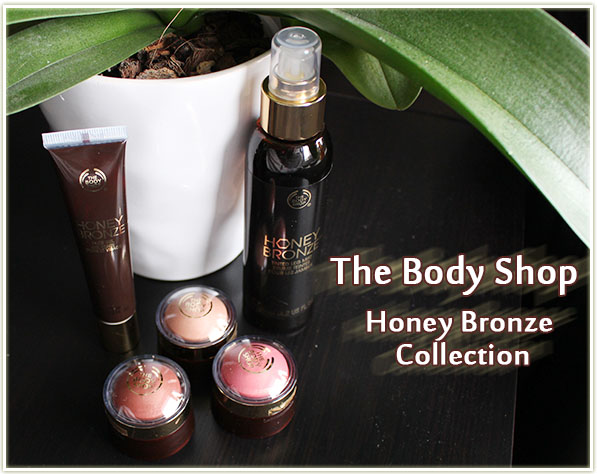
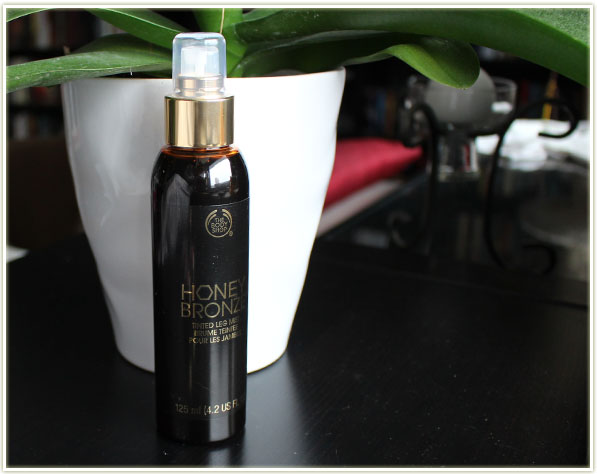
The Body Shop launched (somewhat) recently several additions to their already popular Honey Bronze lineup (made famous by their Honey Bronzer I believe). With these new additions they’re staying true to the golden goddess look that I’m looking for when when it gets sunny outside. Except, you know, without the added sun damage that comes along with looking tanned!

The Body Shop - Honey Bronze Highlighting Domes
The Body Shop – Honey Bronze Highlighting Domes

These were the absolute highlight (GET IT?!) of the collection to me. They’re labelled as the Honey Bronze Highlighting Domes, but they come in three colours that are very clearly suited towards traditional bronzer, blush and highlighter shades.

The Body Shop - Honey Bronze Highlighting Domes
The Body Shop – Honey Bronze Highlighting Domes
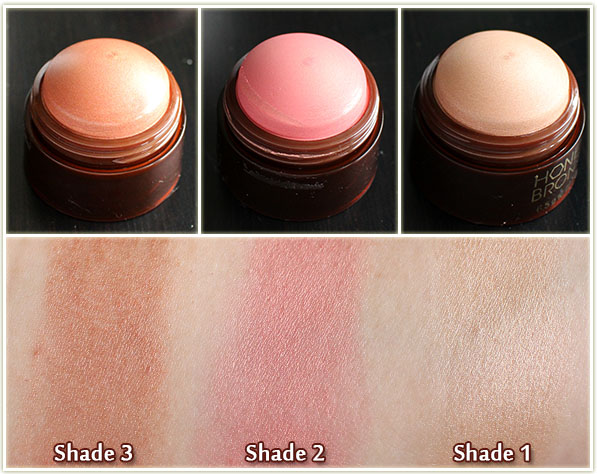
  • Shade 3 is the bronzer of the group. It has a red tint on top of the usual golden shade of a bronzer. I appreciate this because I like that edge of “I got slightly burned” without actually being in pain. (I realize that sounds like an odd description, but a bit of red in a bronzing shade is far more believable that outright orange.)
  • Shade 3 is a pink blush shade with a hint of golden sheen. This is STUNNING on the cheeks. I could wear this shade every day and be perfectly happy.
  • Shade 1 is a traditional champagne highlight shade.
And then Nemo wanted cuddles!

As I was shooting my photos, Nemo wanted a cuddle. And I wasn’t going to say no to that face!

All three highlighting domes on my face

Annnnd back to the Highlighting Domes. Although the packaging is quite bulky, it makes them look absolutely adorable. The product inside each of them is just incredible. Each dome has the same consistency: they’re a hard cream-like formula with a faint sheen. Since they do have that harder consistency, I use a firm brush to pick up the product and blend them into the skin.

All three highlighting domes on my face

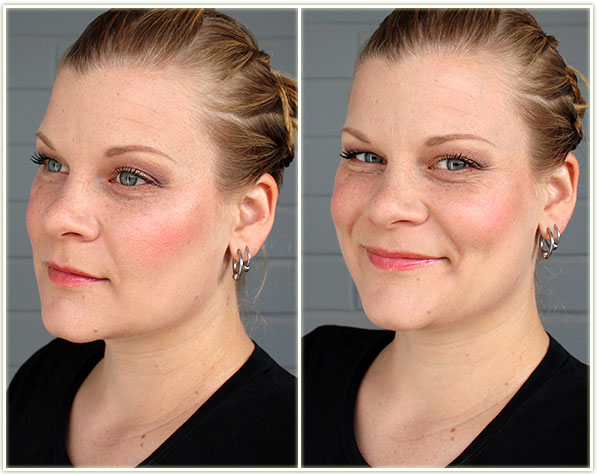
I really can’t rave about Highlighting Domes enough. I love the finished look on my skin. The bronzer looks natural, the highlighter is doing its shiny thang and the blush… oh my god the blush. I can’t get over that blush shade. I love, love, LOVE how that looks on my face and I swear it’ll match any eye look I come up with too. LOVE!

The Body Shop Tinted Face Gel

Also part of the collection is the Tinted Face Gel. I was excited, but a little bit nervous, to try this one out. I’ve never really done any kind of self tanning before (aside from actually laying out IN the sun) so this was a whole new world to me.

The Body Shop Tinted Face Gel

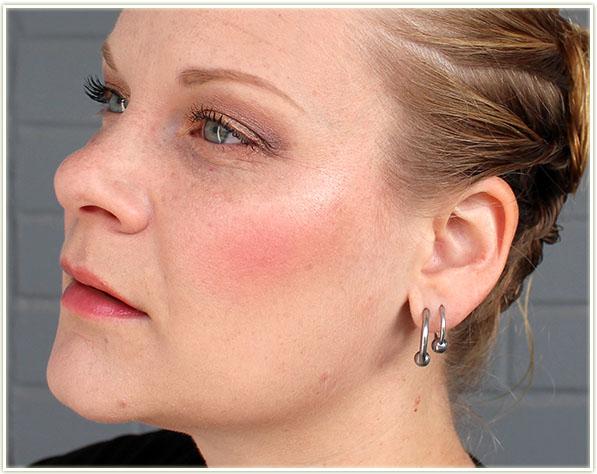
The gel is really, really dark when you first squeeze it out of the tube. Frighteningly so. Thankfully it spreads out to be a far more subtle shade once it’s blended into the skin.

The Body Shop Tinted Face Gel - Before and After
The Body Shop Tinted Face Gel – Before and After

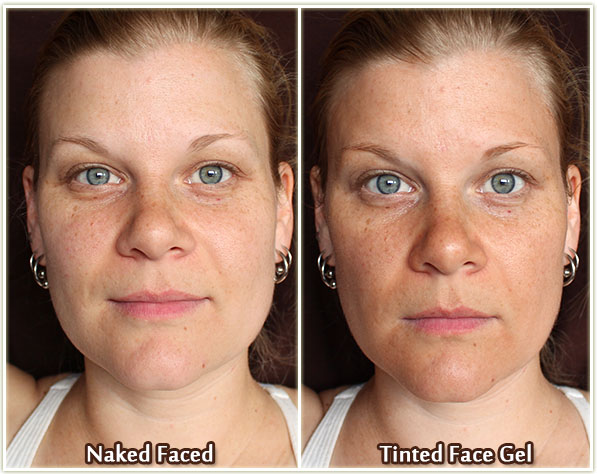
But… I’m not sold on it. In the above shot, I applied it directly to my face and rubbed it in like a moisturizer. It applied evenly and didn’t streak. However, now that I’m sitting here writing about it, I’m feeling kind of stupid – maybe I should’ve mixed it with my foundation and applied it to my face that way? Perhaps that’d give me a more natural look? I’m too distracted by the fact that my face looks like a completely different colour from my neck. Alright people, how do YOU wear tinted face gels? Give me your advice!

The Body Shop Tinted Leg Mist

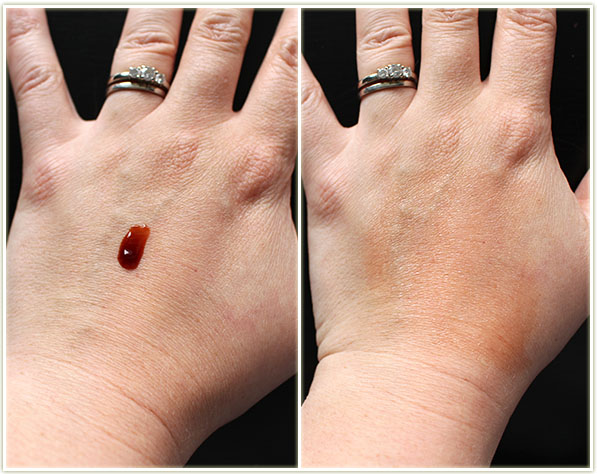
During the summer I often end up with a fairly annoying sock and shin pad tan lines from running and soccer, and they look pretty darn stupid when I’m wearing a dress and have bright white feet or shins. While my tan lines haven’t been extreme this year, I’d still really like to be able to add some colour to my legs while also covering up my usual mishmash of tan lines. The Tinted Leg Mist could be a possible solution to this.

The Body Shop Tinted Leg Mist

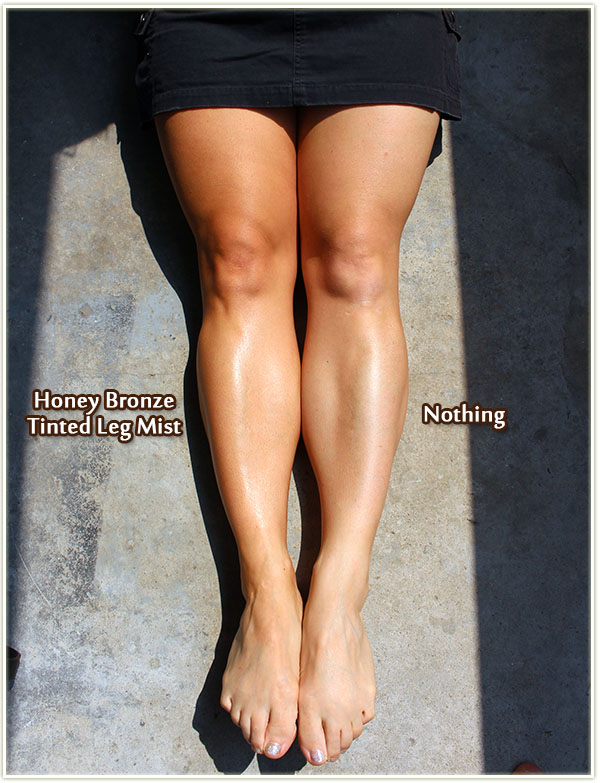
On the left side, I’ve applied several coats of the Tinted Leg Mist. On the right, nothing at all. The difference is subtle, but it is definitely there. I like how natural it is – it really does look like I’d gotten a tan and not like I’d covered myself in self tanner. I will say though, I’m not sure how well this will hold up if you’re sitting down. I would recommend this on nights when you know you’re going to be standing up a lot – at bars, dancing, or an event with a lot of mingling. I don’t feel like this would sweat off, but it does feel like you could rub it off on furniture, etc.

and more Nemo!
and more Nemo!

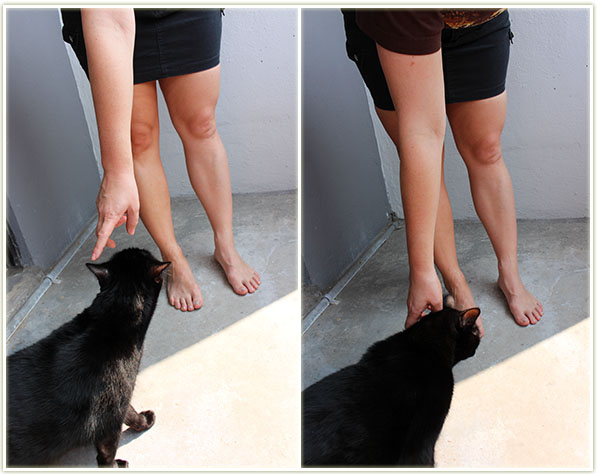
Nemo was all up in these products!

Final Thoughts

The Highlighting Domes knocked it completely out of the park for me! I love how they applied to my skin – all three shades worked well together to create beautiful glowing face makeup. I’m curious to see if The Body Shop will release more shades in this formula – I think it’d be a win for a lot of people.

The Tinted Face Gel was too far off the beaten path for me – although I am going to try mixing it with a foundation the next time I try it to see if I get better results.

The Tinted Leg Mist is very cool, but it’s kind of a take it or leave it product. If you’re in the market for a leg mist, this might be your jam. Unfortunately I can’t compare the longevity of it to anything else on the market as I’ve not tried anything else. But, I do love the natural looking colour it added to my legs.

If nothing else, you need to check out those Highlighting Domes. Serious winners in my book.

This review features press samples sent for consideration.

Swatch Sunday: The Balm – Meet Matt(e) Nude

201507_thebalm_meetmattenude1

My first The Balm palette! This was a surprise gift this past Christmas from my aunt. I was so surprised that she picked out a brand I’d been wanting to try(without me even mentioning it! As the title would suggest, all the shades in this palette are matte.

The Balm - Meet Matt(e) Nude
The Balm – Meet Matt(e) Nude
The Balm - Matt Johnson
The Balm – Matt Johnson
The Balm - Matt Garcia
The Balm – Matt Garcia
The Balm - Matt Malloy
The Balm – Matt Malloy
The Balm - Matt Rosen
The Balm – Matt Rosen
The Balm - Matt Wood
The Balm – Matt Wood
The Balm - Matt Singh
The Balm – Matt Singh
The Balm - Matt Abdul
The Balm – Matt Abdul
The Balm - Matt Lombardi
The Balm – Matt Lombardi
The Balm - Matt Hung
The Balm – Matt Hung

Maybelline Baby Lips Moisturizing Lip Gloss (Review + Swatches)

201507_maybelline_babylipsmoisturizinglipgloss1

One of the most interesting things I saw on Swatch and Review‘s event recap of Maybelline‘s 100th birthday was the brand new Baby Lips Moisturizing Lip Glosses. Although I had never actually purchased a Baby Lips before (shock, horror!), it was hard to resist how tempting these Baby Lips Glosses look. They look downright juicy, fun and come in a multitude of colours.

There are three finishes – shimmers, creams and jellies – and feature a lightweight texture with a refreshing fruity scent that isn’t overpowering. They are non-sticky (yay!) and are predominantly translucent when applied to the lips.

Let’s take a look!

Maybelline Baby Lips Moisturizing Lip Gloss - Tickled Pink
Maybelline Baby Lips Moisturizing Lip Gloss – Tickled Pink

Tickled Pink is a soft pink with a cream finish.

Maybelline Baby Lips Moisturizing Lip Gloss - Tickled Pink
Maybelline Baby Lips Moisturizing Lip Gloss – Tickled Pink

Tickled Pink goes on the lips with a somewhat milky texture, but spreads out to be a sheer wash. It’s very easy to wear – slap it on your lips and you’re good to go. Not a lot of fuss with this one – it’s the perfect topper to any lipstick if you need just a hint more pink or really want that glossy feel.

Maybelline Baby Lips Moisturizing Lip Gloss - Fuchsia Flicker
Maybelline Baby Lips Moisturizing Lip Gloss – Fuchsia Flicker

Fuchsia Flicker is a shimmer gloss with flecks of hot pink sparkles.

Maybelline Baby Lips Moisturizing Lip Gloss - Fuchsia Flicker
Maybelline Baby Lips Moisturizing Lip Gloss – Fuchsia Flicker

Fuchsia Flicker is great to ramp up the sparkle and shine on your lips. Use it alone and you get a faint hint of sparkle on your lips, or use it over a lipstick to get some additional shimmer. It’s not opaque, so you’re mostly going to get the sparkle on your lips and not the colour from the tube. The sparkles are finely cut so that they don’t give your lips a gritty texture.

Maybelline Baby Lips Moisturizing Lip Gloss - Berry Chic
Maybelline Baby Lips Moisturizing Lip Gloss – Berry Chic

Berry Chic is a red-orange tinted jelly gloss.

Maybelline Baby Lips Moisturizing Lip Gloss - Berry Chic
Maybelline Baby Lips Moisturizing Lip Gloss – Berry Chic

Out of the three, Berry Chic is definitely the most pigmented. I’ve worn this one the most because it definitely puts more colour on my lips than the rest of them.

Final Thoughts

The Maybelline Baby Lips Moisturizing Lip Glosses have a wide range of colours with enough textures to keep everyone happy. They are a primarily translucent gloss that are intended to moisturize your lips, so you won’t find a ton of colour payoff in most of the shades (out of the ones I tried anyway!). From my perspective, I look for more colour in my lip products, so these aren’t something I will personally reach for very often.

Wear time is average for a gloss for me – I tend to reapply every 90 minutes or so just to keep the texture going on my lips. They are smooth feeling and easy to wear. Due to the nature of the translucency of the pigment, I experienced no bleed out of my lip line which is highly appreciated! They are completely comfortable on the lips and you definitely do not need a mirror to touch up!

Aside from their moisturizing properties (which heaven knows everyone needs!), one of the things I thought of while wearing these is how much they would appeal to teens who are just starting to get into makeup. The Baby Lips Glosses are a perfect transition item from chapstick to actual lipstick for younger generations. They’re a highly popular item right now so you get the feeling of being “on trend” without going over the top. Just some food for thought from my end of things. (Says the woman with no kids, granted!)

The glosses retail for roughly $6 CAD and are starting to show up in drugstores across Canada right now. I can see these being a huge hit and I anticipate limited edition releases later on!

This review features press samples sent for consideration.

Review: Marc Jacobs Highliner Gel Crayon

201507_marcjacobs_highlinergelcrayon_blacquer1

Black pencil liners aren’t really exciting to talk about. I mean, it’s black, and hopefully it does its job. What that job is though can really change from person to person though. For me, a black pencil liner is used to tightline my waterlines (that flap of skin on the inside of your lashes!) and it must. stay. put.

Marc Jacobs Highliner Gel Eye Crayong in Blacquer

I’ve used many a pencil liner over the years that just completely bled off my water line. They’d rub off, wear off, or just… melt off within about 30 minutes. How freaking frustrating is it to create the perfect eye look and then have it ruined within the hour when your eyeliner suddenly decides to gunk up and go to the inside corner of your eyeball? You might be grossed out right now, but you know it’s happened to you. It’s happened to all of us!

Marc Jacobs Highliner Gel Eye Crayong in Blacquer - swatch
Marc Jacobs Highliner Gel Eye Crayong in Blacquer – swatch

However, I have found a black pencil eyeliner that actually fights the powers of darkness attacking my makeup look, and that badass is the Marc Jacobs Highliner Gel Eye Crayon in Blacquer. It’s got quite the long superhero name but this little guy knows how to get the job done.

It’s super black and it FRIGGING STAYS PUT on my water lines! So much so that I can actually apply it to my upper water line and it will not transfer to my bottom. I have never experienced this kind of majestic power built into an eye liner before! Seriously! I’m at the point where I’m actively throwing out all my other black pencil liners because when you find the holy grail, why bother use anything else?

'Murica inspired look
‘Murica inspired look

Here it is in use on a few looks. Ugh. Look at that beauty. It’s not budging for no one.

Urban Decay Electric amazingess

Yassss yassssss!

I can get away with wearing this for roughly 13 hours without issue (I don’t think I’ve worn it longer than that). Around the 10 hour mark I will suffer some very minor outer corner fading, but that’s fairly impressive considering what I’ve had to put up with before. If you’re looking for something to wear like iron, I’d say give the Marc Jacobs Highliner Gel Eye Crayons a shot.

Side note: Thank you for all of the well wishes over the last week as I’ve rebuilt my site from scratch. I’ve got 75% of the content back online (thank you, THANK YOU Google Cache!) as of typing this and I should get the remainder done this weekend. With this blog post, I’ll be resuming my normal schedule of Monday, Wednesday, Friday and Sunday, with the occasional bonus entry thrown in every now and again. It was only a week, but damn it feels good to be back.

Quick Update!

Hey everyone! Just a quick update to say that I’ve so far managed to recover 40% of my posts from Google Cache. I’ve still got the remaining 60% to get through, but I’m really happy that at least a chunk of my work is back online (although not all of your lovely comments 🙁 ). I know some people may be wondering why bother rebuilding the old stuff instead of just moving forward with new content, but the reality is that not everyone who reads my site comes through the front page. My blog often shows up when searched for different things (like foundation swatches, palette roundups, etc.) and that drives a ton of my traffic. Anyway, I’m getting there! New content should be up by the end of this week. Thank you so much for all of your support via comments and messages – it’s really kept me going!

If you’re looking to keep more up to date with me while I get everything back online, you can find me on Facebook, Twitter or Instagram. 🙂