Challenge Week: Urban Decay Electric Palette

201506_urbandecayelectric_challengeweek

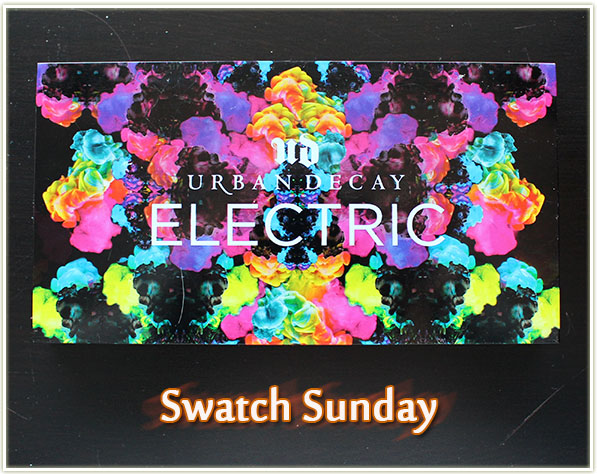
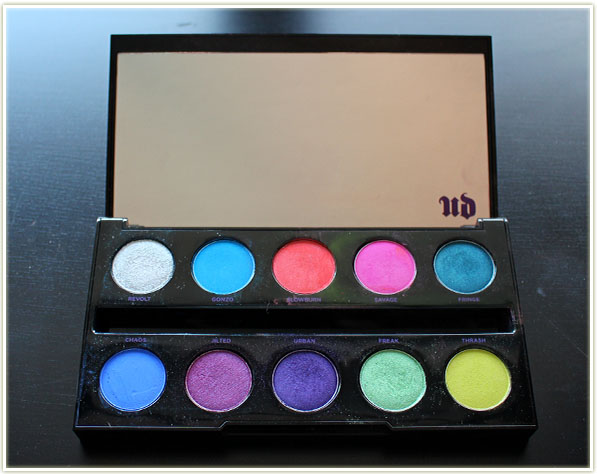
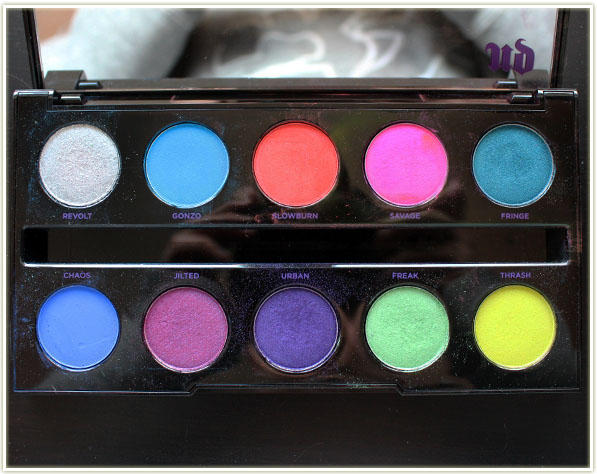
You’ve seen Swatch Sunday featuring the Urban Decay Electric palette. You know what this sucker is about. This is about pure unadulterated, pigmented, neon colour glory all packed into one palette. So, of course, I’m doing a Challenge Week on this beauty.

It’s also Pride Week here in Toronto! While a few cities have had their celebrations come and go already, this is my city’s week, so what better opportunity than now to share some insanely fun looks to wear out to Pride?

Note:
I sometimes used NYX’s Milk as a base, but I can’t remember for which looks.


201506_urbandecayelectric_look2-1

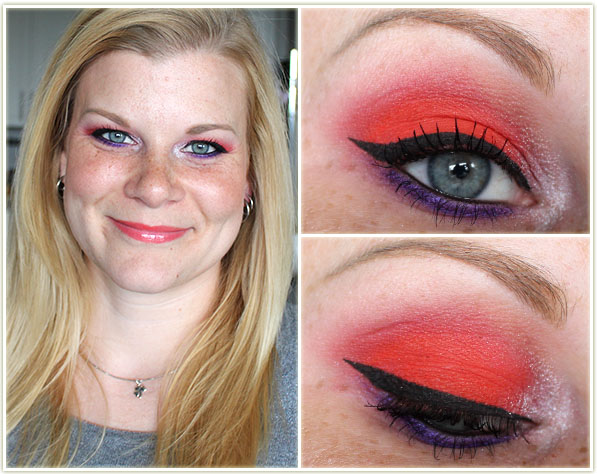
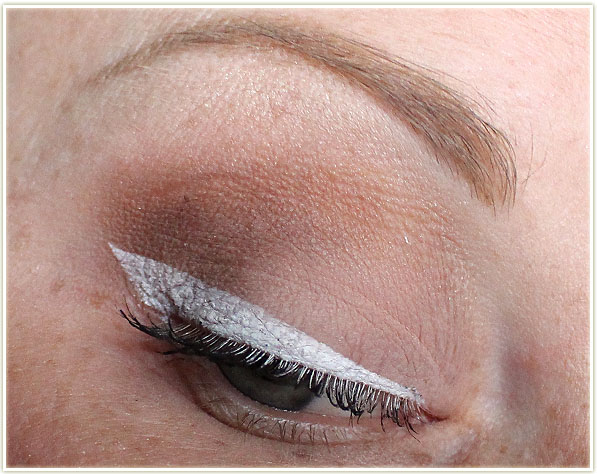
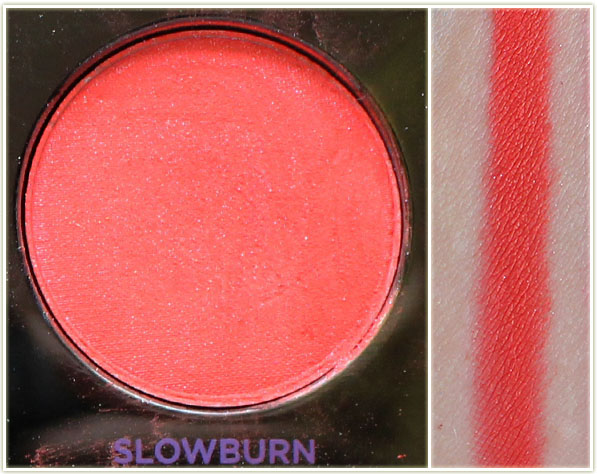
Let’s start this off with a bang! I cannot lay claim to creating this look at all, although I did do a more amped up version. I stole inspiration for this look from EmilyNoel83 and it came out even better than I had hoped. That reddish-orange? TO DIE FOR.

201506_urbandecayelectric_look2-2

Eyes

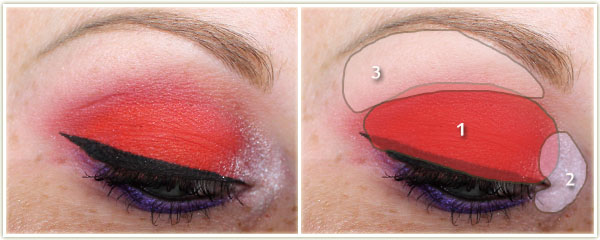
  1. Slowburn all over the entire lid.
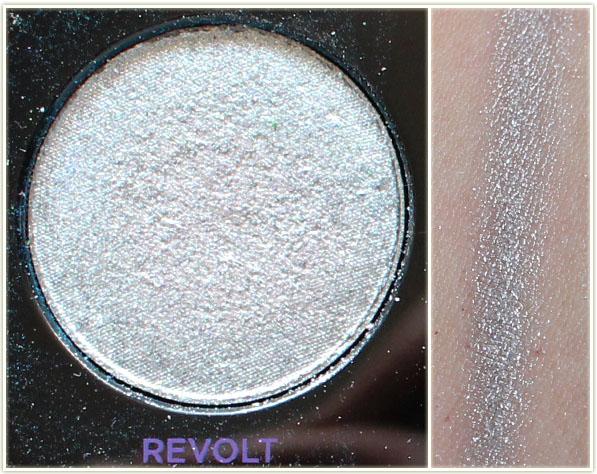
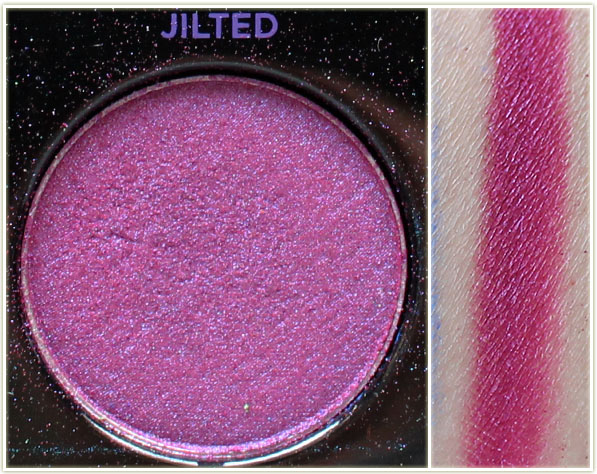
  2. Revolt on the inner corner.
  3. Wet n Wild Brulee on the brow bone.

I used Urban to line the lower lash line and tightlined both waterlines with my Marc Jacobs Highliner Gel Crayon in Blacquer. The wing was done with MAC‘s fluidline inBlacktrack and I’ve got Make Up For Ever‘s Smoky Stretch mascara on my lashes.

Rest of the Face

  • Bronzer: Hard Candy Hula Hula
  • Blush: Hard Candy Skinny Dipping
  • Highlighter: MAC Silver Dusk
  • Lips: Revlon Papaya

201506_urbandecayelectric_look1-1

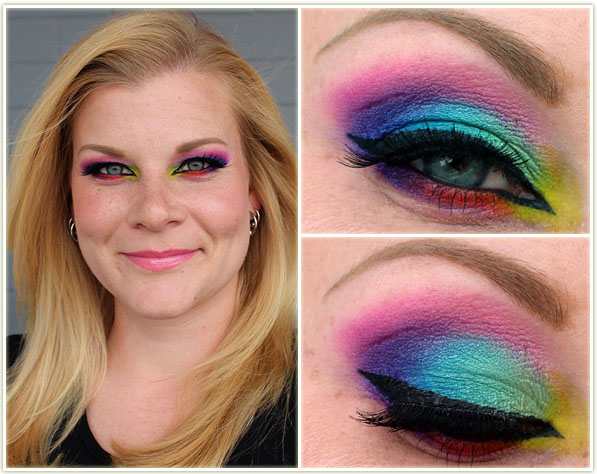
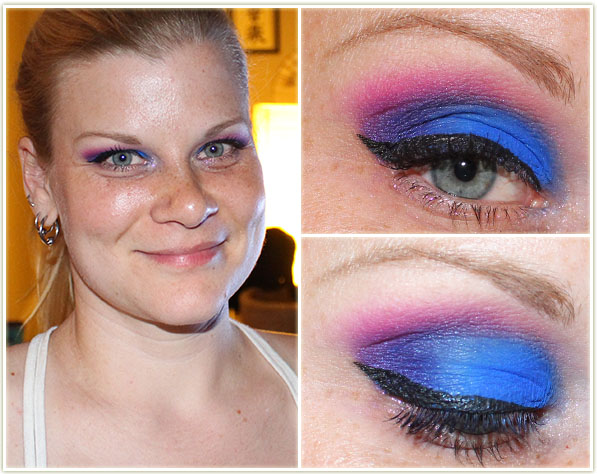
I guest posted over on Beauty Infinitum this past month and I LOVED how the look came out!
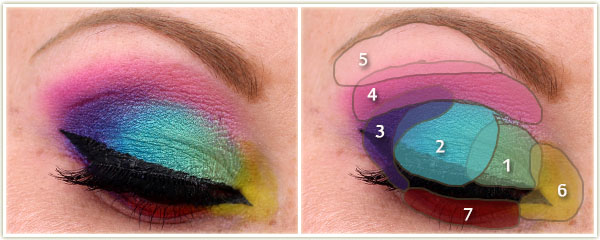
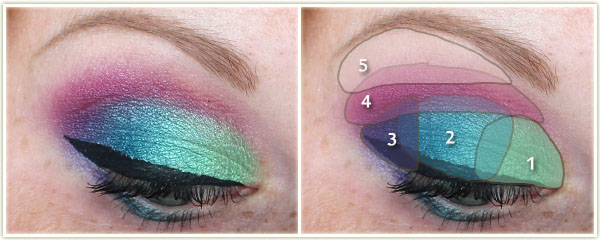
201506_chelle_electricpalette7

Eyes

I first applied NYX‘s Jumbo Eyeshadow Pencil in Milk all over the lid, blended it in with my finger, then proceeded with the following shadows (all Urban Decay unless otherwise specified):

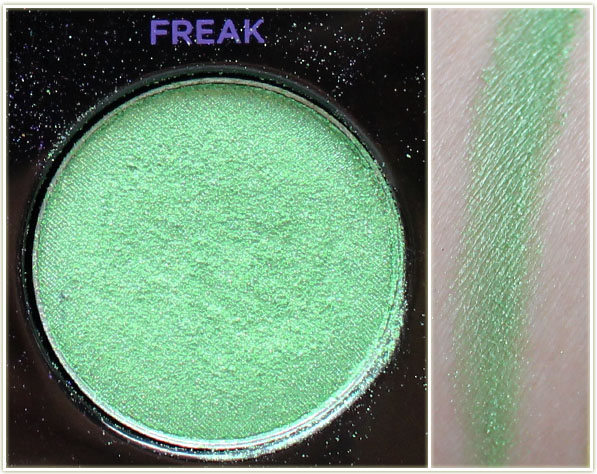
  1. Freak on the inner half of the lid.
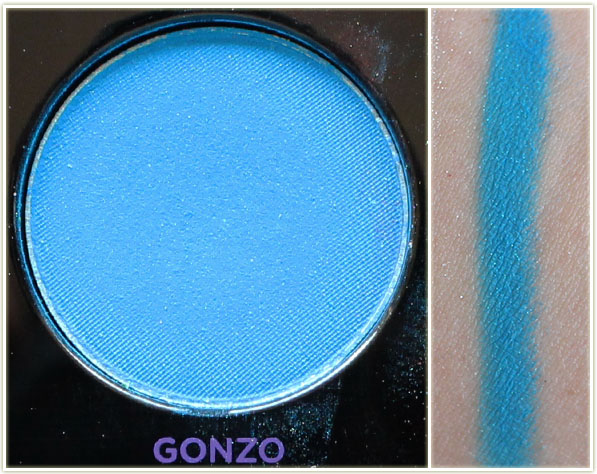
  2. Gonzo on the outer half of the lid.
  3. Urban on the outer corner and along the outside of the lower lash line.
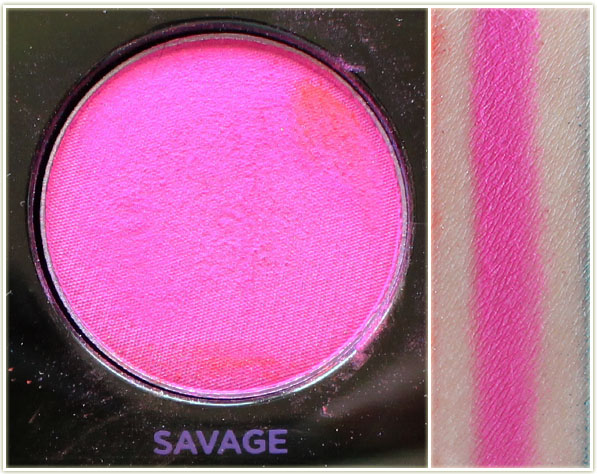
  4. Savage through the entire crease.
  5. Wet n Wild Brulee to highlight the brow bone.
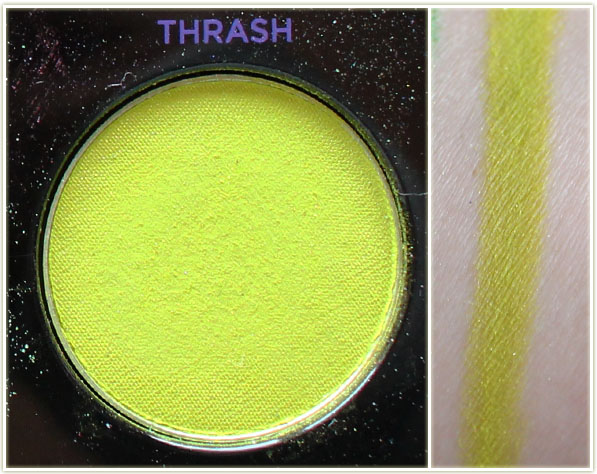
  6. Thrash on the inner tear duct.
  7. Slowburn on the middle of the lower lash line.

I drew the inner and outer winged liner with Make Up For Ever‘s Ink Liner and then tightlined both upper and lower lash lines with Marc Jacobs Highliner in Blacque. I applied a few coats of CoverGirl‘s Clump Crusher mascara to my lashes and popped on some House of Lashes Bombshell falsies.

Rest of the Face

  • Foundation: Boots No7 Instant Radiance in Cool Vanilla
  • Bronzer: Hard Candy Hula Hula
  • Blush: Hourglass Diffused Heat
  • Highlighter: MAC Soft and Gentle
  • Lips: I first applied Too Faced Melted Rainbow to see how it looked… but I wasn’t a huge fan. So I blotted most of it off and applied NYX‘s Butter Gloss in Creme Brulee which left me with a bit of a pink-tinged lip.


201506_urbandecayelectric_look5-1

Mmmmm I got a lot of compliments on this one, but I wasn’t totally pleased with how I looked in the mirror. That being said… the shots turned out pretty decent… so I guess the mirror lies? Wouldn’t wear that lip colour with this look again though.

201506_urbandecayelectric_look5-2

Eyes

  1. Thrash all over the lid.
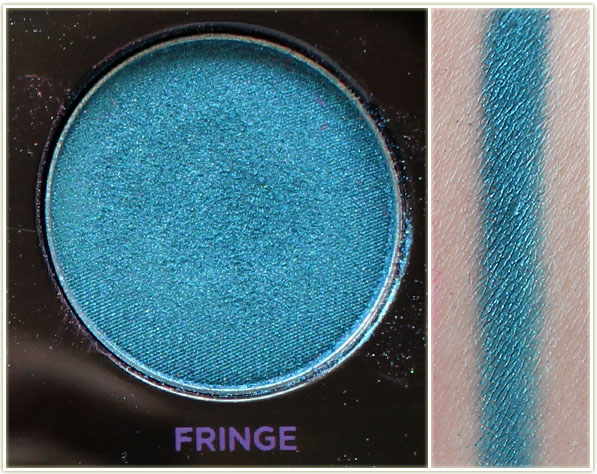
  2. Fringe on the outer half of the lid and through the crease.
  3. Wet n Wild Brulee on the brow bone.

I created the wing with MAC‘s Blacktrack fluidline and applied Make Up For Ever Smoky Stretch to my lashes.

Rest of the Face

  • Bronzer/Highlighter: Charlotte Tilbury Bronze & Glow
  • Blush: Milani Coral Cove
  • Lips: Maybelline Craving Coral

201506_urbandecayelectric_look3-1

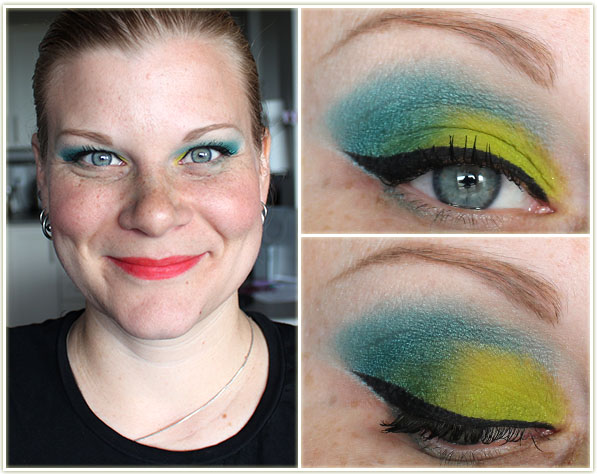
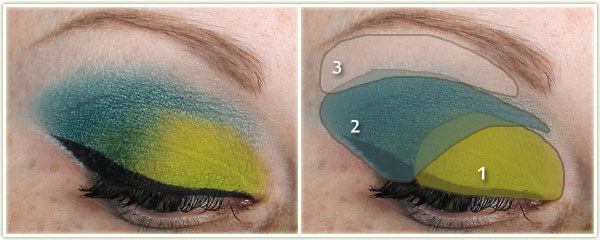
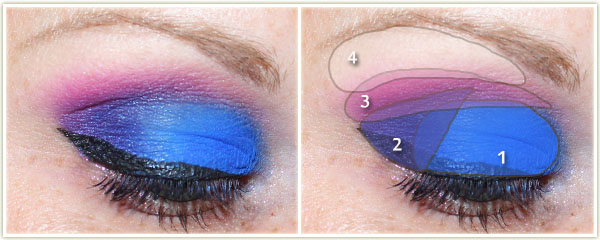
So, soooo pretty. Loved this one! I’m such a sucker for this kind of gradient.

201506_urbandecayelectric_look3-2

Eyes

  1. Freak on the inner third of the lid.
  2. Gonzo on the middle of the lid.
  3. Urban on the outer corner.
  4. Savage through the crease.
  5. Wet n Wild Brulee on the brow bone.

I created the wing with Catrice‘s liquid liner in Dating Joe Black and tightlined my upper lash line with Marc Jacobs‘ Highliner Gel Crayon in Blacquer. On my lashes is Make Up For Ever‘s Smoky Stretch.

Rest of the Face

  • Bronzer: Hard Candy Hula Hula
  • Blush: Illamasqua Hussy
  • Highlighter: MAC Soft and Gentle

201506_urbandecayelectric_look4-1

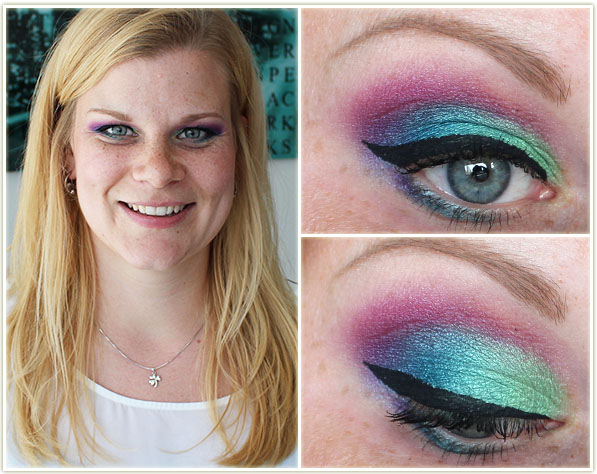
This was… what I ended up with. I tried doing a solid rainbow for the CBB meetup this past Sunday and I failed SO HARD. I could not get the colours to turn into a decent rainbow gradient, and I think it’s because there’s too much of a variety of finishes. Rainbow gradients seem to only work for me when I do either all matte, or all shimmer. ANYWAY. This got a rave review from the other bloggers so I was happy about that!

201506_urbandecayelectric_look4-2

Eyes

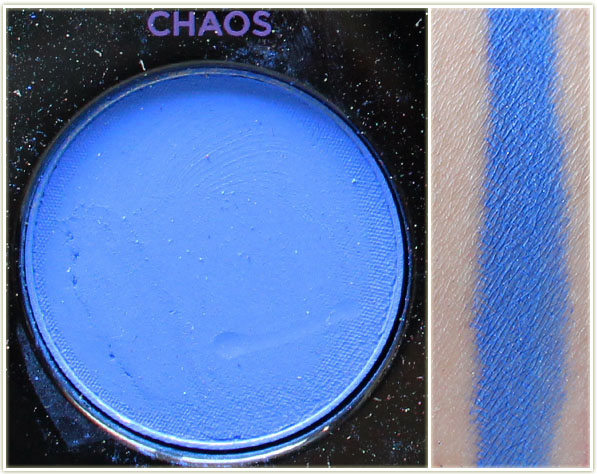
  1. Chaos all over the lid.
  2. Urban on the outer corner.
  3. Savage through the crease.
  4. Wet n Wild Brulee on the brow bone.

I created the wing with Kat Von D‘s Tattoo Liner in Trooper and applied Make Up For EverSmoky Stretch to my lashes. I also applied some MAC Transparent Red glitter to my lower lash line.

Rest of the Face

  • Bronzer/Highlighter: Charlotte Tilbury Bronze and Glow
  • Blush: Milani Coral Cove
Happy Pride everyone!

Review: Kat Von D Ink Liner

201506_katvond_inklinker_review1

Last month I picked up Kat Von D‘s Ink Liner in Neruda (white) as a last second “oh just add it to your cart” addition to my Sephora order last month. A liquid white eyeliner is an intriguing product and I wanted to see how this would work out for me.

Kat Von D Ink Liner in Neruda

The Ink Liners, unlike the Tattoo Liners, have a felt tip brush. However, unlike a lot of felt tip brushes I seem to have encountered over the years, this one has a flex to it that is near identical to the Tattoo Liner’s brush tip. I was really, REALLY happy about this because I much prefer using brush tips for their flexibility. They give me the ability to create a sweeping line when drawing on my eyeliner AND it fills in all the necessary folds in my (aging) eyelids. By comparison, a hard felt tip tends to leave me with a jagged, disjointed line.

Kat Von D Ink Liner in Neruda – single layer versus multiple layers

The formula is a wonderfully pigmented liquid. It doesn’t feel heavy, but the pigmentation is so intense that it doesn’t require much building up. This really surprised me because whites are notorious for being translucent and nowhere near opaque. Imagine my surprise when a single swipe delivered about 90% opacity (shot on the left). Incredible! I am also able to layer it without the colour lifting!

Kat Von D Ink Liner in Neruda – winged liner

On the eyes, Neruda is so much fun to use. It can create a very mod, stark look like the one above (which I LOVED wearing, it looked so different from my usual black winged liner) or you can use it to create small accents to your eyeliner. I’ve often seen it used in double winged looks (one black wing, with a small white line beside it to add some amazing contrast).

Kat Von D Ink Liner in Neruda – winged liner
Kolme checking out Neruda

Final Thoughts

I didn’t buy the Kat Von D Ink Liner expecting it to be waterproof, so I wasn’t disappointed in that respect. I love that the white colour is almost totally opaque, was easy to use and had a wonderful felt tip brush that mimicked my beloved brush tips.  I’m also incredibly pleased that the colour stayed true to itself through a typical 12 hour day. Love, love, love! Highly recommended. If white isn’t your thing, there are also the usual black and brown shades, but there’s also some gorgeous greens and blues you may want to check out too!

How To: Press Pigments

201506_howtopresspigments_shot1

Shawna over at Spill The Beauty was asking me about how I press my pigments one day and I thought I’d just go ahead and dedicate a whole post to the process. If you’re like me, you find that pigments are a freaking disaster to deal with.  They’re unnecessarily messy – I often end up with more pigment on my furniture, than I do on my lids! To solve this problem, I press all of my pigments.

What you’ll need to press your pigments

The key ingredients to pressing any pigment are plain old rubbing alcohol (I bought that enormous bottle for something like $3), an empty shadow pan (this is from an old MACeyeshadow I had finished), a couple of quarters, a few heavy books to press the actual shadow, and a clean dish towel. And of course, whatever pigment you’d like to press! In general, I find that shimmers are the easiest pigments to press. Mattes can go a bit dusty (although it’s still feasible) and glitters are a total no no.

Today I’ll be pressing MAC’s Vanilla pigment

Alright, let’s get to it! Take your empty shadow pan and clean of any remaining dusty shadow particles.

Firstly, get your pigment into that eyeshadow pan!

Pile your pigment high into the pan. The more you can get in there, the better. We’ll be adding alcohol to this and it’ll soak down the pigment. The shot above shows you how much I put in initially, but that’s barely enough for half the pan. You need far more pigment than you think you do to press one into such a tiny pan.

You want a paste-like consistency after you’ve added your alcohol into the mix

I then add rubbing alcohol via a dropper directly to the pigment in the pan. There’s no rhyme or reason to this and unfortunately I don’t have an exact measurement. I will say that you want your pigment to end up slightly chunky. In the shot on the right, you can see the texture is quite thick and the powder has dropped down in size. At this point I’ll start adding more pigment or more alcohol to get the right consistency. Do not let your pigment get “thin” or super runny – it means you’ve got way too much alcohol in it. If that happens, add more pigment until it gets thick again.

Stir up the pigment and alcohol thoroughly

I typically take a cotton bud, snap off the end, and use that to mix up the pigment with the alcohol. Since the alcohol is the binding agent, you want to make sure the entire pigment is thoroughly mixed with the alcohol. The shot on the right (above) shows the best consistency: It’s a bit thick, can hold some form, but is still somewhat liquid.

Drop the pan a few times to level out the pigment

From there, I pick up the pigment pan and drop it lightly a few times. This levels off the pigment so that you get a flat surface.

Almost there!
Almost there!

Tada! A level surface! At this point, your pigment is too wet to press, so you have to let some of the alcohol evaporate. I’ll generally leave it alone for an hour or so then come back to press it.

Pressing the pigment

We’re almost there! Once your pigment is soft to the touch, but not sopping wet, take a tea towel, place it over pan, then slot in two quarters on top.

Heavy books will press the pigment while it dries

Add a heavy book or two on top of the quarters and let it dry completely overnight.

Voila! Your pressed pigment is now done!

And there you have it, a freshly pressed pigment that won’t cause you so much grief! Keep in mind that whatever tea towel you use, that’s the imprint you’ll end up with on the pigment.

I hope this helped! Let me know if this works out for you. 🙂

Swatch Sunday: Urban Decay – Electric

201506_urbandecay_electric1

It’s Pride Week in Toronto everyone! In light of Pride Week, I thought I’d bust out one of my most vibrant palettes – the Urban Decay Electric palette. Today you’ll get the swatches and sometime this week there’ll be a Challenge Week as well. (Check that out here!) Enjoy!

Urban Decay Electric palette
Urban Decay - Revolt
Urban Decay – Revolt
Urban Decay – Gonzo
Urban Decay – Gonzo
Urban Decay – Slowburn
Urban Decay – Savage
Urban Decay – Fringe
Urban Decay – Chaos
Urban Decay – Chaos
Urban Decay – Jilted
Urban Decay – Urban
Urban Decay – Urban
Urban Decay – Freak
Urban Decay – Freak
Urban Decay – Thrash

Fitness Friday: 2015 Scotiabank Rat Race

This was my second consecutive year running the Scotiabank Rat Race for United Way.Last year I busted out a personal best time with a 26:10 for a 5k. So I was excited, and nervous, to see what I would do this year. I was really, REALLY hoping to get into the 25 minute mark this time around!

The Rat Race takes place on a Thursday in June and it’s after work hours. So even though I finished my job at 4:30, we had to hang around until 7:30 for the race. Like last year, I created a team of people on my floor, only this time I chose the team name “The Grumpy Cats”, which I found hilarious. Not sure everyone else was loving it though! 😉 We did manage to raise over $1500 for Toronto’s United Way, so that was fairly awesome!

I felt decent the day of the race, which is always a good sign. But I was getting progressively more and more nervous as the day went on. I just wanted to be better than before, you know?

Eventually the time came and we all congregated at the Start/Finish line on University just west of Toronto City Hall. The course was modified a bit this year, and it was a full loop around this time. I wasn’t looking forward to that because it meant a bit of an uphill ending. Gross.

We took off and it was more crowded than I remembered it being last year (looking back, it actually seems that were about 500 more people in the race compared to last year). And my legs felt like LEAD. I couldn’t believe it, what the hell was going on? It was such a struggle to get up Unviersity to Bloor (which is a slightly uphill), but at least it leveled off there and there was a water station right before we turned down Bay. I was also exceptionally parched when I hit the water station, so I had to grab two glasses of water, stop to walk to drink them, then push on. I’ve never stopped like that during a 5k so I knew that wasn’t a good thing.

Thankfully, as soon as we turned onto Bay it was downhill all the way to Queen Street. I think I made up for a lot of time there because it’s fairly smooth sailing at that point. Plus, there’s the added bonus that there was far less people in this area so I was able to weave a bit better.

I didn’t feel great in general. I kept trying to push pace but I keep getting that lightheaded/have to barf feeling that I usually get when I’m pushing hard during a race and it makes for a really uncomfortable race. The absolute worst part was hitting Queen Street and having to finish up that straight line and then turn back up onto University. I felt exhausted and I found myself slowing down as I got stuck behind a woman that was going almost the same pace, but a little slower. Worst thing ever in a race is getting stuck behind someone doing a comfortable pace because it brings down your speed. Ugh.

2015 Scotiabank Rat Race 5K Map

As I turned back up onto University some guy started to pull ahead of me which drives me absolutely crazy. I hate when there’s a super close runner to you and you can SEE the finish line, so they start pushing to beat you. Yeah, well, that spurred ME on so I started a mild sprint to the finish line. I was so determined to not let this dude beat me and I felt so awful that I wasn’t even able to look at the crowd where I knew my husband was cheering me on. He confirmed afterwards that “yeah, you’ve looked better”, and I knew it too – I felt like a sack of wobbly bones crossing that finish line.

In the end, I came in at 26:30 which I’m okay with. Considering how shite I felt throughout the whole run, I’m surprised I wasn’t into the 27 minute mark. It’s 20 seconds slower than my best, but it’s not miles off, so I’m okay with that. My teammates trickled in after me and I was really happy to see them all finish. It gives me such a happy boost to see my friends and coworkers finishing a race that it inspires me to do more.

Next up? Pride Run 5K in a week!

Race Summary

  • Finish Time: 26:30
  • Pace: 5:18 per kilometer
  • Overall placement: 382/1997
  • Gender placement (F): unknown/838