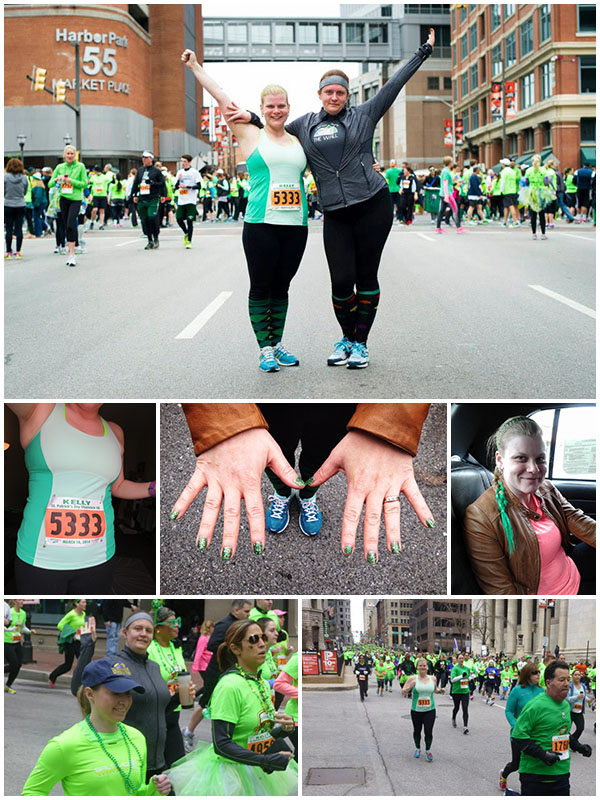
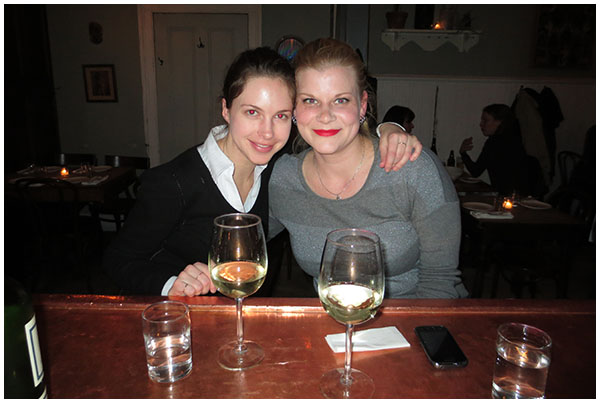
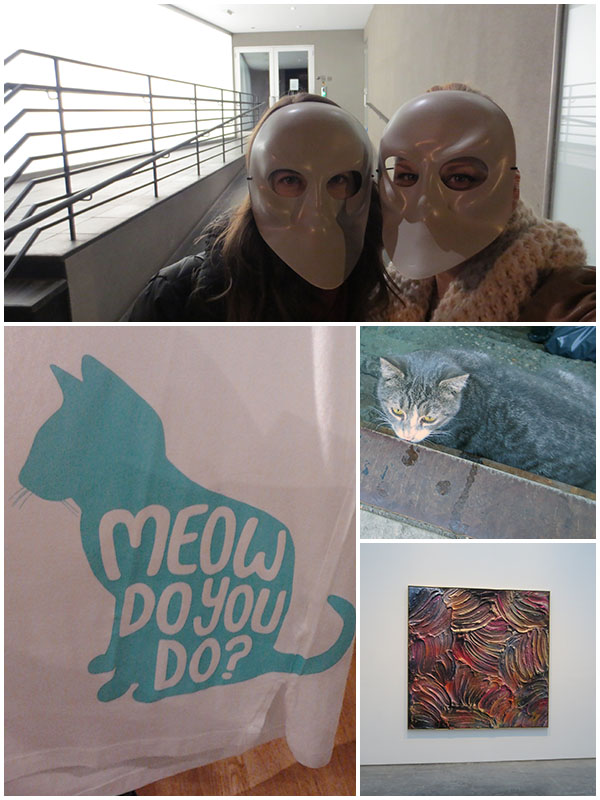
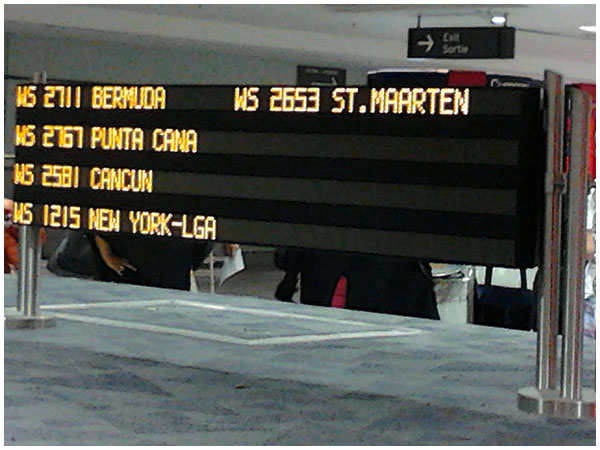
I went on vacation to Baltimore and New York City to visit some very good friends. Here’s my vacation in pictures. Enjoy. 🙂


I went on vacation to Baltimore and New York City to visit some very good friends. Here’s my vacation in pictures. Enjoy. 🙂
I had this idea that is neither unique, nor ingenious, but I liked the idea of it. Every now and again I get the idea to use a single eyeshadow palette for a week. It gets me out of a rut of always using that palette in the exact same way every time I pull it out.
Since Urban Decay‘s Naked 3 palette is relatively new, I thought I’d start with that one. Not going to lie, I looked up a few tutorials to give myself some extra inspiration (and/or flat out copied some of them!). It was a fun week of getting to know the Naked 3 palette a little bit better. I’m far more in love with this palette now, especially the darker, taupier shades in the palette that I hadn’t been so sure about (I mean, at one point, they were all starting to look like Mushroom to me).
So anyway, on with the looks. I used Naked 3 exclusively on my eyes for a week. There are only six looks because I didn’t wear any makeup on the Sunday of the week I was doing this.
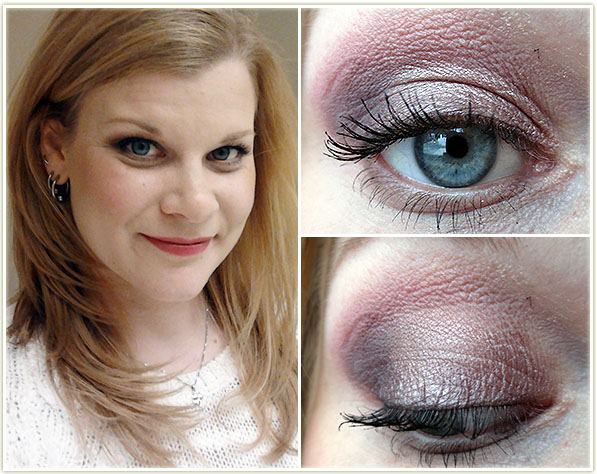
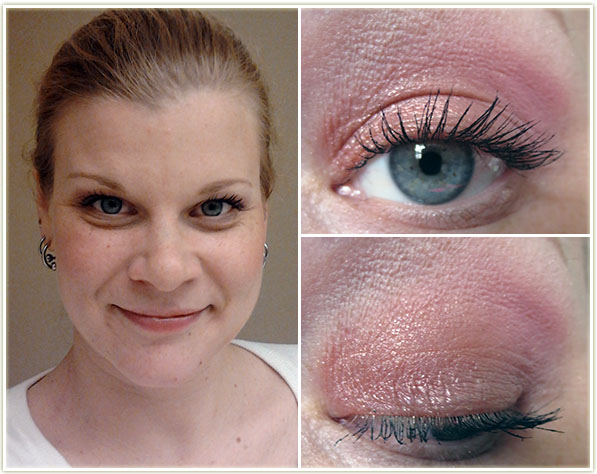
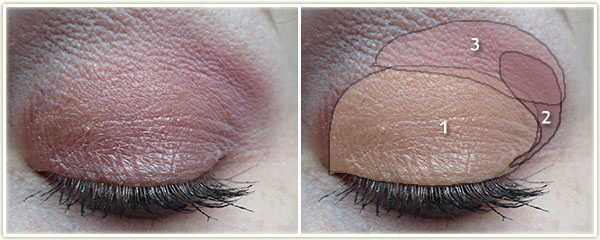
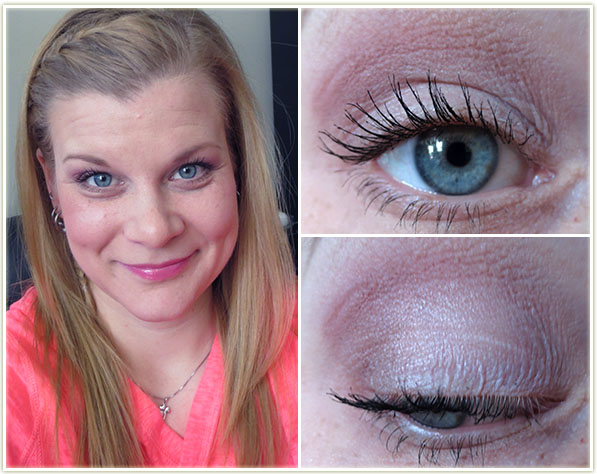
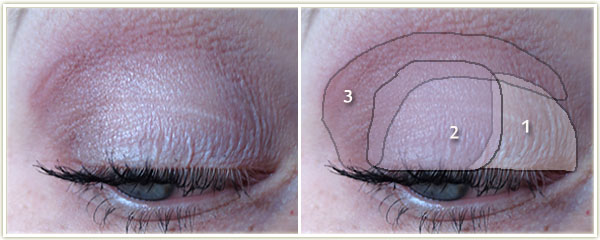
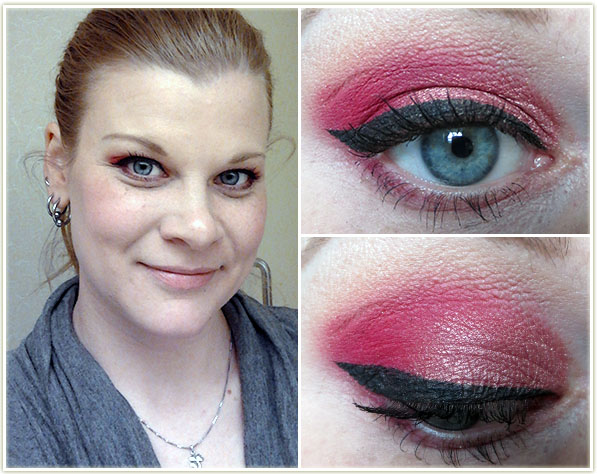
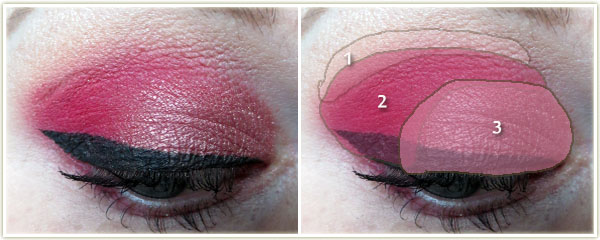
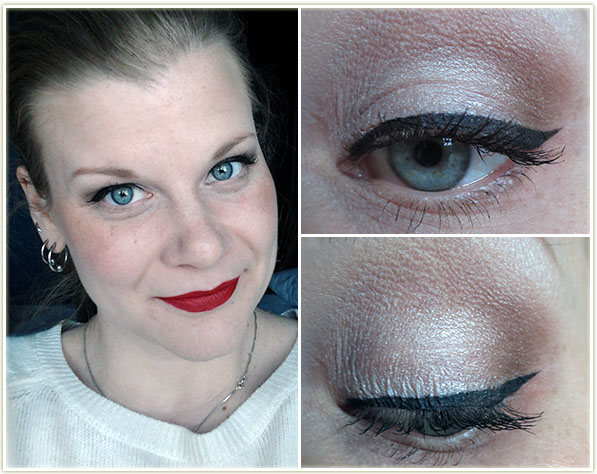
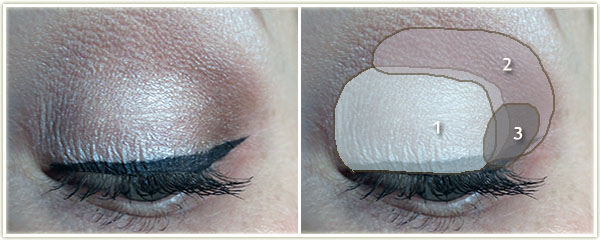
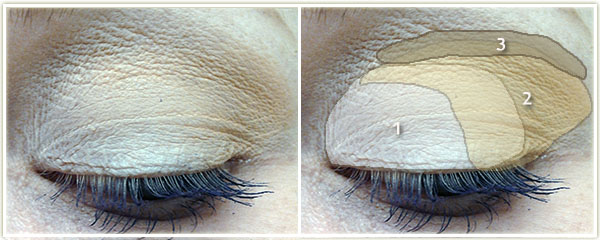
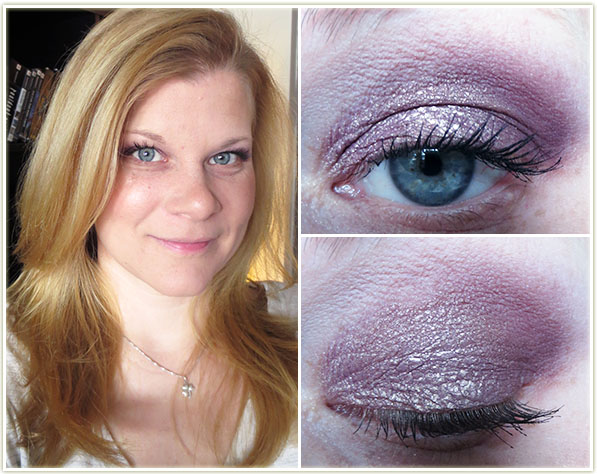
This look is courtesy of Cora‘s Naked Cranberry tutorial. I would never have thought to put the colours together like this so I’m glad she did! Although this is not my own original look, this is definitely my favourite look out of all of them.
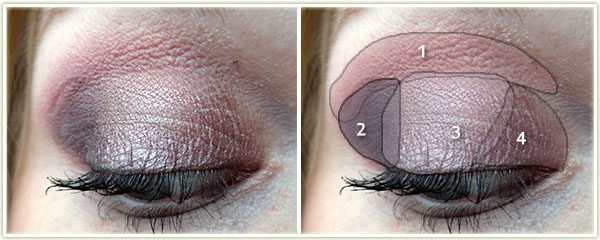
Eyes:
Strange on the browbone and apply Blackheart as a very thin liner right along the lashline. L’Oreal Voluminous Carbon Black on my lashes.
Rest of the Face
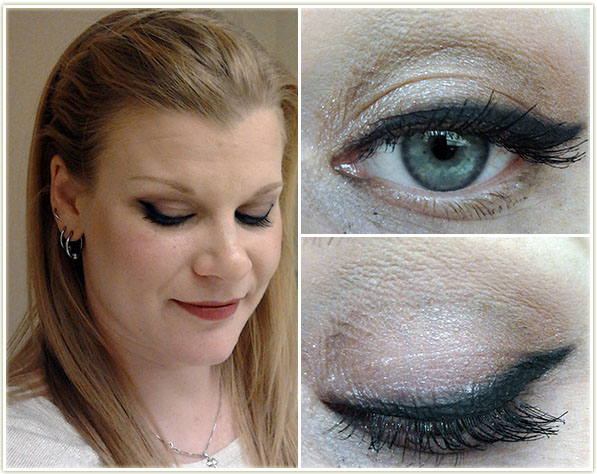
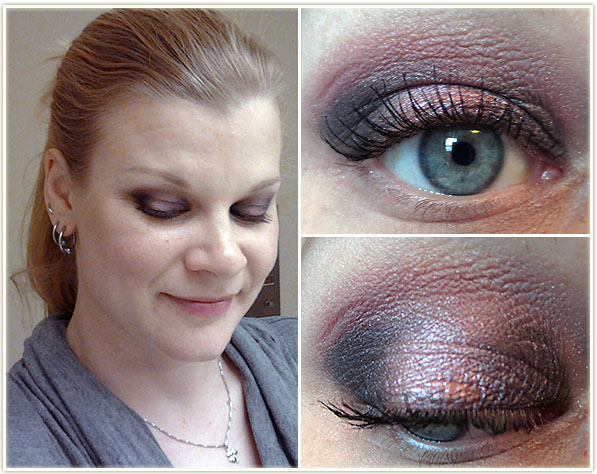
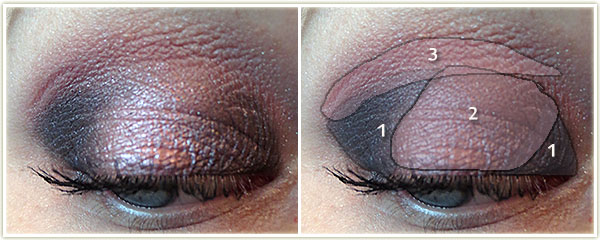
I looove how the winged liner turned out on this one. Slight side effect of it though; it transfers to your upper lid pretty quickly.
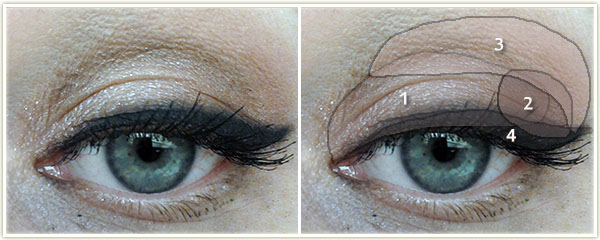
Eyes:
Strange to highlight the brow bone. L’Oreal Voluminous Carbon Black on my lashes.
Rest of the Face
This look uses my favourite colour out of the entire palette: Trick – the one true rose-gold shade out of all 12 of them. I’ve heard that you can apply it wet to punch up the colour a little bit and I’ll have to try that the next time as I used it dry here.
Eyes:
Strange on the browbone, L’Oreal Voluminous Carbon Black on my lashes.
Rest of the Face
Not gonna lie, the looks seriously start to meld together after a while. This one’s okay… not especially breathtaking in my eyes.
Eyes:
Strange on the browbone, L’Oreal Voluminous Carbon Black on my lashes.
Rest of the Face
Quick, easy one for Saturday brunch!
Eyes:
Strange on the browbone, L’Oreal Voluminous Carbon Black on my lashes.
Rest of the Face
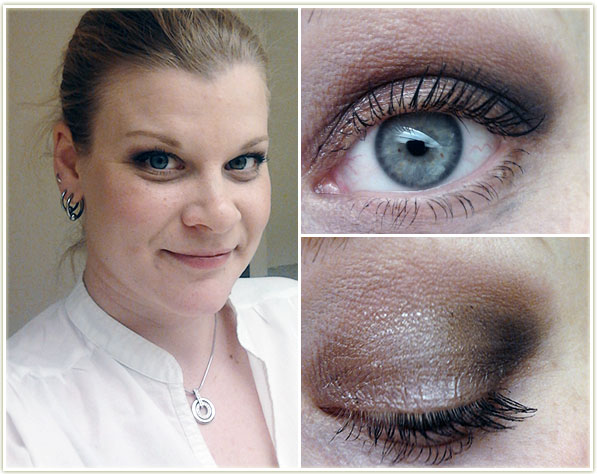
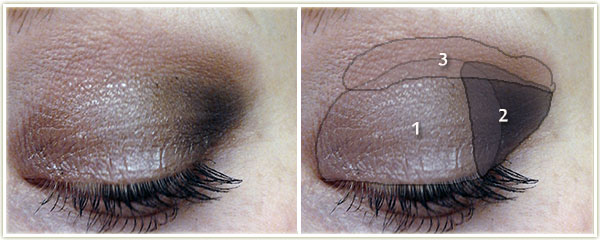
Bit of a darker one!
Eyes:
Strange on the browbone, L’Oreal Voluminous Carbon Black on my lashes.
Rest of the Face
Foundation: MUA Matte Foundation in Shade 1 Soft Sand
Bronzer: Physicians Formula Bronze Booster in Light/Medium
Blush: Illamasqua Hussy
Lips: MAC Tinted Lip Conditioner in Petting Pink
And that’s it for the week! I hope you found some inspiration or ideas for your own Naked 3 eyeshadow combinations. Now to dig through my collection and see what palette I’ll use next for another challenge week…
Ah, the makeup collection and storage posts (or videos). I love them so. Since I love reading about everyone else’s collections, I thought I’d share my own!
The area for my makeup is pretty small. The desk is shoved into a corner of the bedroom where it fits snuggly against the wall between the window and the closet door. The desk is from IKEA (go figure) and I’m really unsure what the model is. It’s similar to this one, but that’s not exactly it. It has a glass top and a single shelf that spans the length of the table (which, as you can see, I stuff just about everything under this table).
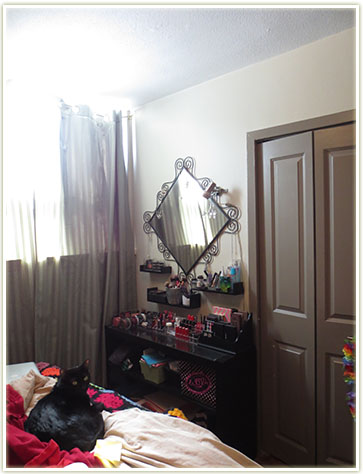
Obligatory zoomed out shot with Nemo product placement. Complementary unmade bed courtesy of the cat.
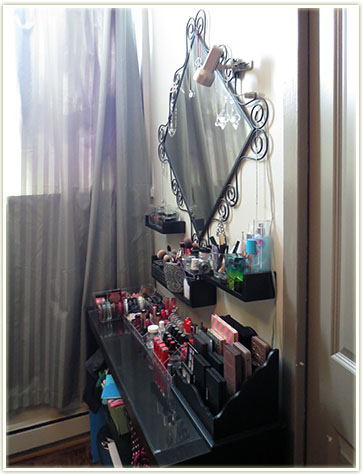
So as you can see, the space is small and narrow, but I manage to fit everything in quite nicely. One of the most important things to me is being able to see ALL of my makeup at a glance. I don’t want anything packed away in drawers where they’ll inevitably become forgotten. For that very reason, I don’t want my collection to get too big.
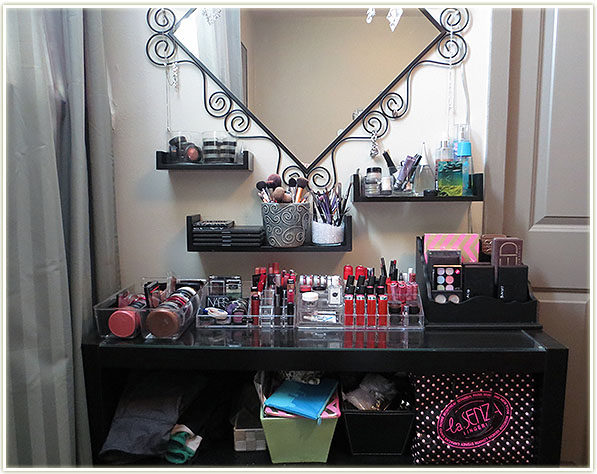
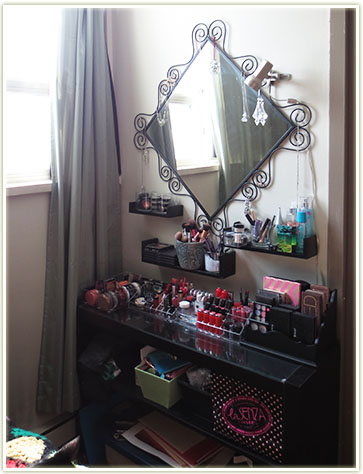
So here is a closeup of the entire set up. I keep a bag of empty products on the shelf below. There are a few makeup bags stored there as well. And a pile of yoga pants that no longer fit me but I refuse to throw out because they’re Lululemon and I paid a pretty penny for those!
The mirror is also from IKEA annnnd yet again I can’t find it on their web site. What the heck is going on here?! Kind of wonder if IKEA did a total stock overhaul… Anyway, I love it because I love the look of wrought iron and the shape and curve of bent wrought iron reminds me of my tattoo (tribal design). I like to hang my jewelry off the curves – everything from watches, necklaces, bracelets and rings. Since I’m not much of a jewelry person, I don’t need a lot of storage space for my accessories and dangling them works out rather nicely. I also have a small clippy lamp stuck to the top of the mirror. It’s not the best lighting, but it works well enough for those winter mornings when the sun still isn’t up when I need to get ready for work.
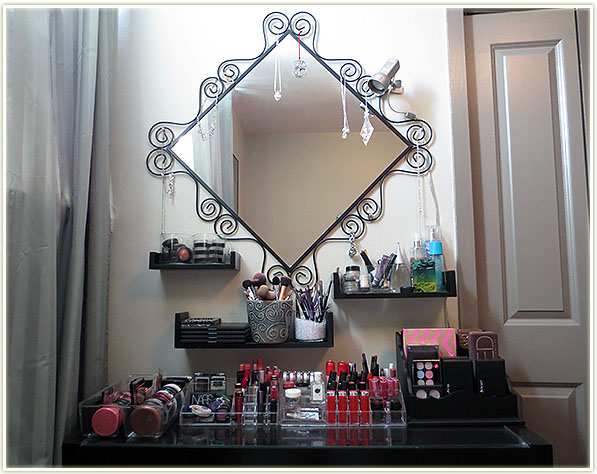
So let’s zoom in a bit closer and start on the top of my makeup table.
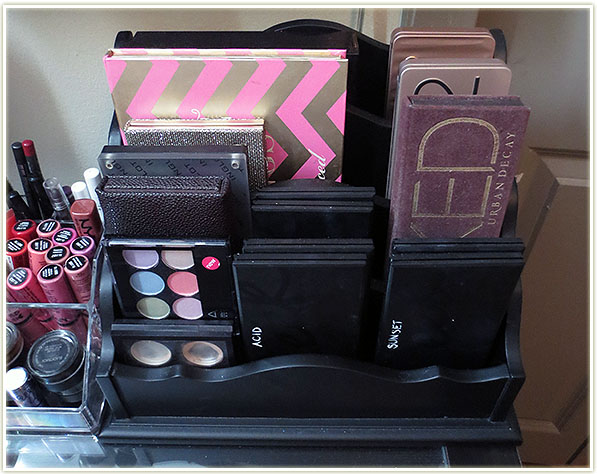
I bought this letter/mail divider from Bed, Bath and Beyond for about $20 CAD and it houses most of my palettes. It’s not height-staggered inside, so I arranged my palettes as best I could from shortest to tallest. You can see I labelled my Sleek palettes since they’re impossible to differentiate just by looking at the packaging. I’ve only recently become a palette person (Urban Decay‘s Naked set me off) and I have six Sleek palettes, one MUA, a MAC eyeshadow quad of shades I’m trying to finish up, all three UD Naked iterations, Laura Mercier‘s Artist (2013), a customized Inglot palette, Tar
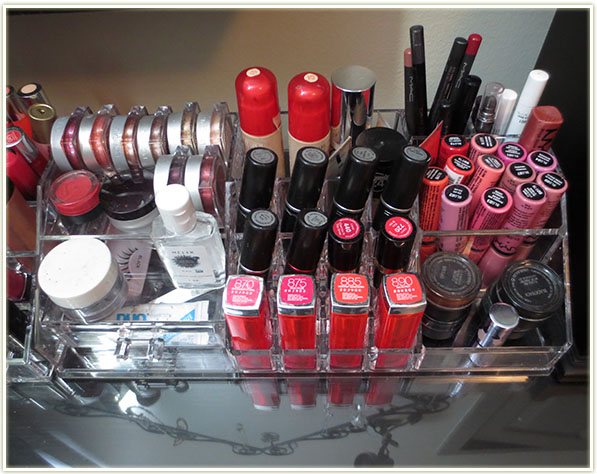
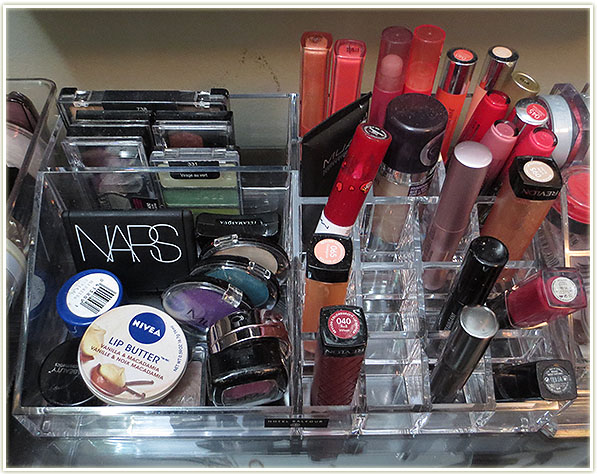
To the left of my palette divider is an acrylic makeup organizer I also picked up from Bed, Bath and Beyond (brand is Hotel Balfour, approximately ~$16). This is truly organized chaos. Starting at the back left, I have all of my L’Oreal Infallible eyeshadows stacked up along with a few random items (a depotted MAC Hibiscus lipstick when the bullet broke, a sample of a Laura Mercier powder, a tub of crystals and some hand sanitizer).
The back middle section contains my favourite foundations (Bourjois Healthy Mix Serum, No7 Instant Radiance, yaby, Revlon Colorstay). Just in front of the foundations are my lipsticks – primarily MAC but also some Revlon and Maybelline.
To the right at the back are my pencil-like products, primarily eye and lip liners and any jumbo eyeshadow pencils I happen to have. In front of the liners is my entire collection of NYX butter glosses (I had the whole lot of them until they just recently released more shades) and a few other assorted glosses. In front of the glosses are my MAC fluidlines which are my preferred liners, along with a tiny baby sample of Benefit‘s Watts Up.
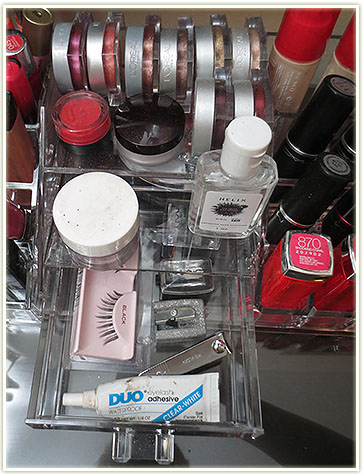
That unit also has a pull out drawer which has my false lashes, my gungy Duo eyelash glue that clearly needs replacing, some sharpeners and…. the nail clippers for my kitty’s claws.
The next acrylic unit to the left of the previous one was also purchased from Bed, Bath and Beyond (~$14 CAD). Starting at the back left: This has my smaller eyeshadow palettes – two Wet n Wild and three Maybelline quads. In front of the palettes is kind of a mishmash – I have my eyeshadow singles/duos (NARS, MUA, Illamasqua, Urban Decay, NYX, Wet n Wild) and my lip balms (Nivea, Blistex).
The section on the right is a bit of a mess. At the back are a few glosses and lipstains along with my beloved Rimmel Apocalips and some jumbo lip pencils I’m not a huge fan of. I also have two foundations I’m trying to use up (CoverGirl CC cream and MUA matte foundation). The lipstick holder area has products I’m trying to use up (left side) and some sample size mascaras that I haven’t opened yet. To the right are a few small sizes of a lipstick and lipgloss and a Revlon lip butter in Creme Brulee.
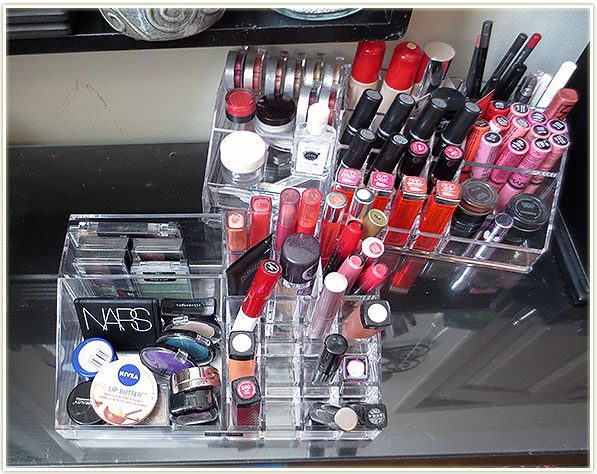
Both units separated so you can see their size when compared to each other.
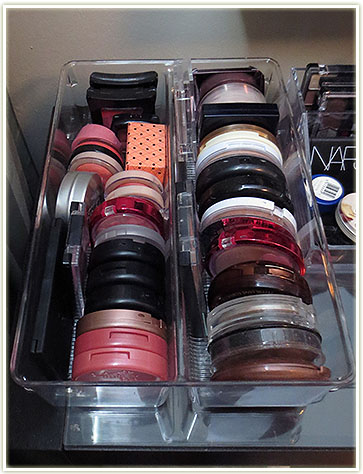
This is an eyesore to me, but it’s my only solution at the moment for my blushes, bronzers and highlighters. I bought this utensil divider from Kitchen Stuff Plus (~$20 CAD) and it really isn’t the best divider for these items – too much of my stuff rattles around. The left side contains all of my blushes (Tarte, MAC, Joe Fresh, Physicians Formula, Maybelline, Cargo, Sleek, Wet n Wild, Hard Candy, Revlon, Illamasqua, NYX, Bourjois).
The right side has my bronzer in front (NYC, Joe Fresh, Physicians Formula, Revlon) and my highlighters behind (MAC, Hard Candy, Too Faced, Dior, Hourglass).
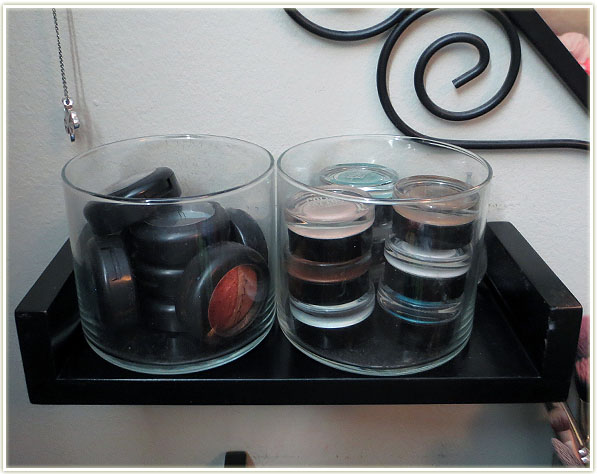
Moving up from the table, I have three shelves (Debbie Travis shelves from Canadian Tire, $~28 CAD) that I absolutely love. They’re three different sizes and I think they look quite unique.
The smallest shelf houses two upcycled Bath and Body Works 3-wick candle holders. The left one has all of my mineralize eyeshadows from MAC, the right one has my Maybelline Color Tattoos.
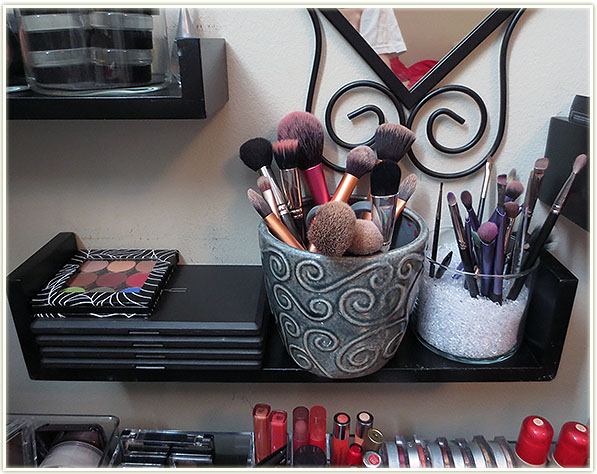
The largest shelf has my four MAC palettes (check them out here: Neutrals, Blacks & Whites, Greens & Blues, Pinks & Purples) along with a 9-pan Z Palette with my Makeup Geek eyeshadows. To the right of the palettes is a potting planter that I picked up from a gardening center – this one contains my larger face brushes. To the right is another upcycle candle container filled with eye brushes.
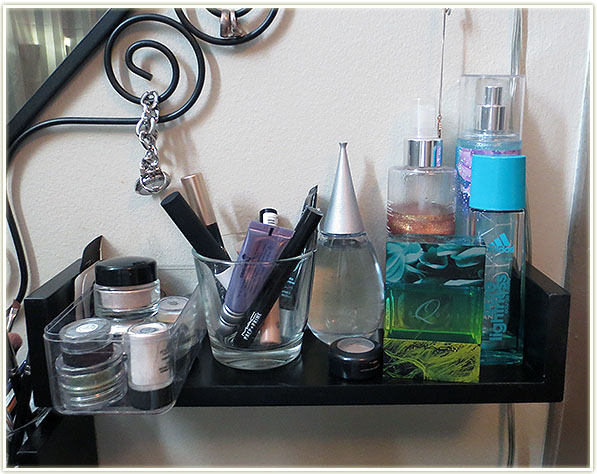
The last remaining shelf is the medium sized one. The left side (container is from an emptied out Ferrero Rocher chocolate box) has my pigments and glitters. Another small candle holder (this one was from IKEA) has my currently in use mascara, concealers, lip primer, eye primers and glitter glue. There’s a potted MAC Omega shadow remaining on the shelf along with my perfumes and sprays (Alfred Sung Shi, Bath and Body Works Warm Vanilla Sugar, Bath and Body Works Sky, Adidas Pure Lightness and MAC Turquatic).
There you have my entire collection! I love having everything in plain sight which makes it easy for me to pick out what to wear. I especially like that the small shelving units give me a lot more visible vertical space. If you have a collection post or video, I’d love to see it!
More recent makeup looks! A few neutrals mixed in with the bright ones.
I got this idea from Jaclyn Hill (her tutorial). She used some beautiful Makeup Geek shadows and while I had most of them, I had to improvise the lid colour. Her looks came out a lot more pink, whereas mine leans more towards red. I know red shadow isn’t something anyone really gravitates towards, but red and orange are my favourite colours to play with on the eyes – probably because they’re rather unconventional.
Eyes
MAC Shroom to highlight the brow, MAC Blacktrack fluidline for the winged liner and L’Oreal Voluminous Carbon Black on my lashes.
Rest of the Face
This the look I do when I need to be a bit more dressed up, but have no idea what to wear on my face. There isn’t an outfit in the world that this eyeshadow won’t match!
Eyes
Virgin to highlight the brow, MAC Blacktrack fluidline for the winged liner and Too Faced Better Than Sex mascara on my lashes.
Rest of the Face
I don’t usually do a cut crease because I honestly don’ really know what I’m doing. This ended up a bit more smoothed out through the crease than it should be, but I really love the colour combination for this one.

Eyes
I first applied NYX‘s Jumbo Eyeshadow Pencil in Milk all over the lid and smoothed it out. Then:
Too Faced Cream Colored Ponies to highlight the brow, Make Up For Ever Aqualiner in 13 Black for the wing and L’Oreal Voluminous Carbon Black on my lashes.
Rest of the Face
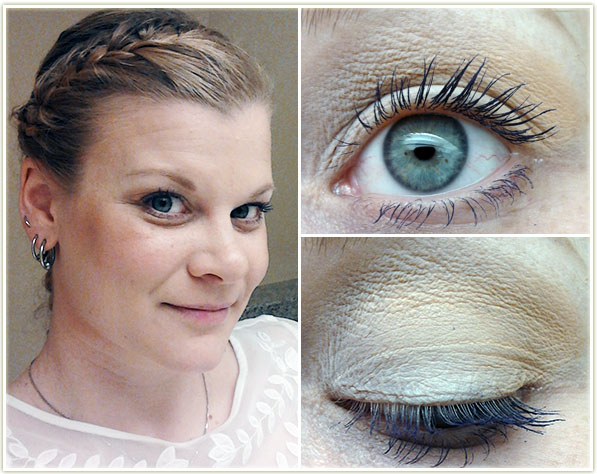
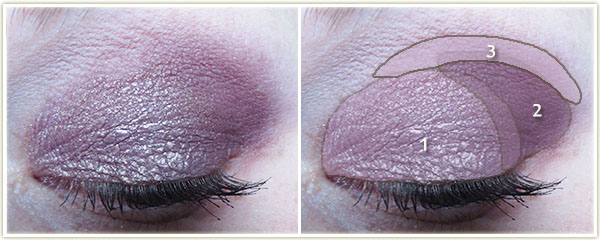
This was out of my comfort zone because it required toning down my eye makeup so that I could make the purple mascara pop more.
Eyes
Blanc Type to highlight the brow and Sephora Full Action Extreme Effect Mascara in Purple on my lashes.
Rest of the Face
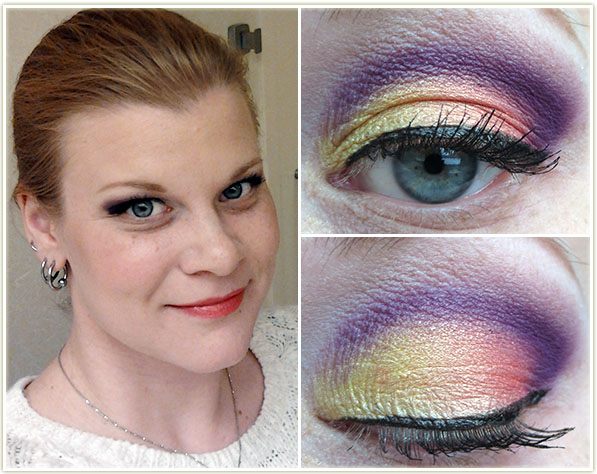
I used a gold base for this one because the previous time I’d done this look, I didn’t feel like the purple-gold (African Violet) had enough punch to it. I much prefer this with the base because it gives the shade a lot more of the gold dimension that’s already there but slightly hidden.
Eyes
First I applied Maybelline‘s Color Tattoo in Bold Gold all over the lid. Then:
Vanilla Nuts to highlight the brow and L’Oreal Voluminous Carbon Black on my lashes.
Rest of the Face
Thanks for reading. I hope something inspired you. 🙂
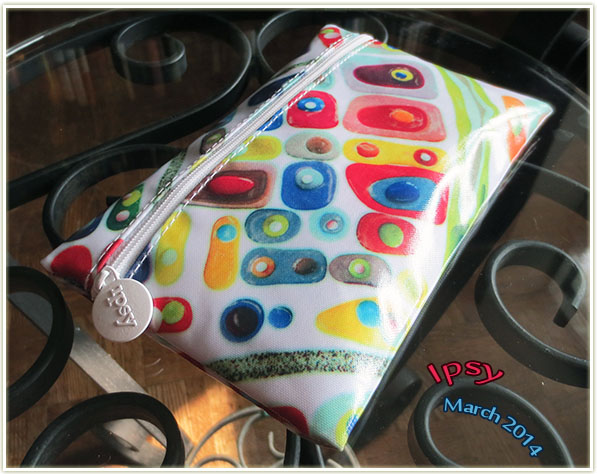
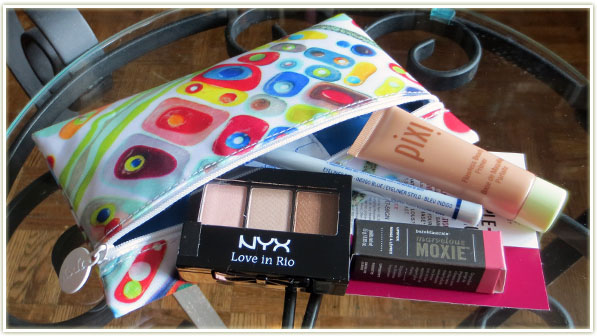
Ipsy‘s March bag was an absolute slam dunk. There is nothing in here I didn’t like! At first I was disappointed because there were only four products but they really outdid themselves on this one.
Let’s take a look at what came for me this month.
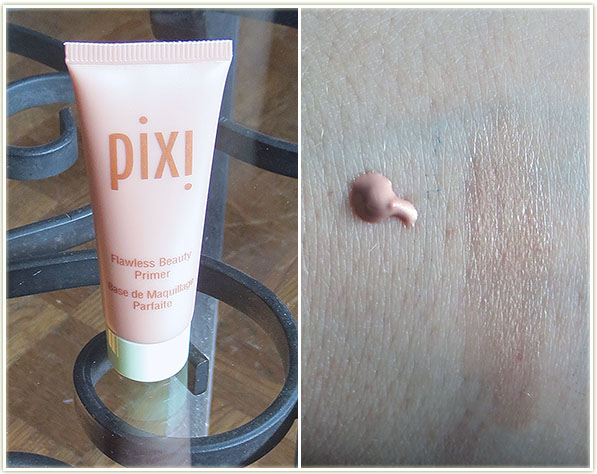
I’m not really sold on primers to be honest. I’ve gone through a few sample sizes of various brands and none of them really did anything for me (positive or negative). That being said, Pixi‘s Flawless Beauty Primer actually *did* do something.
When I first squeezed a drop out of the tube I was a little skeptical. The product isn’t clear, it’s actually quite pink with a sheen to it. So I’m thinking “well this is going to end in tears…” as I was blending it into my skin. It definitely tinted my skin and I looked like I had a bit of a pinky tan. I blended some foundation over top of it and it seemed to add a healthy glow even through the matte foundation (MUA matte). As a note, less is more with this product. I used too much and it balled up a little in certain areas – user error though, I don’t think it was the fault of the product.
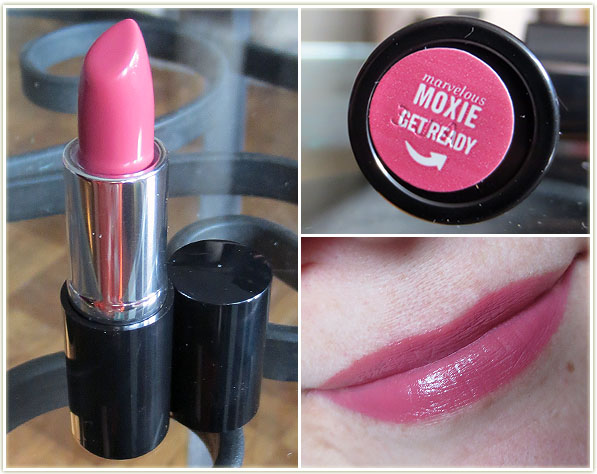
I don’t own anything from bareMinerals so I was really happy to get this lipstick. It’s a really tiny tube, maybe 1/4 the size of a full size of lipstick and the colour is beautiful.Get Ready is a pretty generic medium pink – which makes it easy to market to a lot of people. It has quite a bit of slip to it on the lips, so you may find it slides around a lot. I wore it with a lip primer and found it wore off within two hours or so, but it’s such an easy shade to wear and re-apply that you won’t find yourself with really awkward fade marks as the product wears away from your lips.
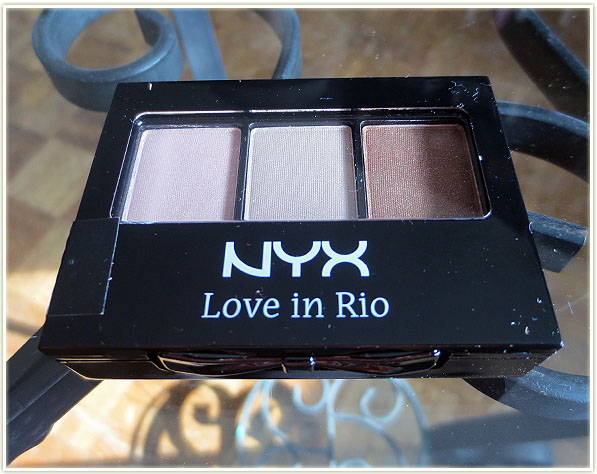
NYX changed up their eyeshadow trios relatively recently (I’ve seen them being phased out of Rexall over the last year or so) but I’ve never gotten around to trying out the old ones or the new ones. This trio, Segredos de Giselle, is a pretty failsafe colour combination (reminds me of Wet n Wild‘s Walking On Eggshells).
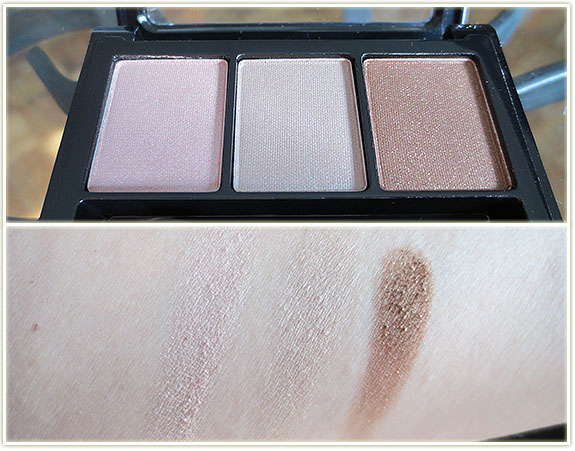
The swatches look rather sheer, but they apply really nicely on the lids. NYX having quality products is shocking to no one as they’ve proven themselves multiple times over the years with their products. One things that especially pleased me is how similar the beige shade is to Urban Decay‘s Virgin (closer than MAC‘s Shroom, in my opinion) and the brown is pretty close to Urban Decay‘s Smog.
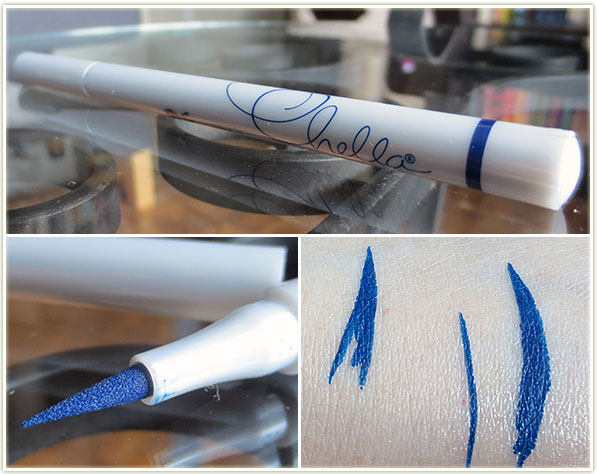
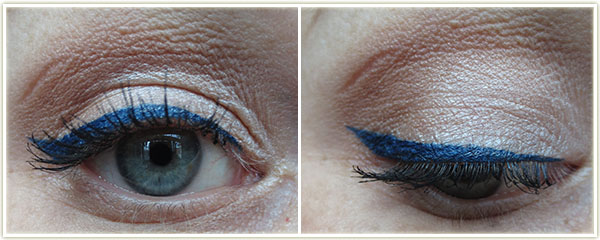
The final item in my bag was this Indigo liner from Chella. I was expecting this to be a pencil liner (boo) so I was extremely pleased when I found out it was actually a liquid liner (yay!). The colour is absolutely beautiful and incredibly vibrant. It doesn’t apply quite as easily to the eyelid as it does to the hand – getting the product to flow right out of the very tip can be a bit annoying. Although it can be a bit of a nuisance with application, it does stay on all day and didn’t smudge or move around at all. I also really love that this liner is completely matte. Definite winner.
Ipsy March 2014 Breakdown
BAG TOTAL: $~43.30 USD
My Thoughts
I said it right at the top of this post – I loved this month! I’ll use every item and that’s really exciting! The colours are on the safe side (pinks, beige, brown, etc.) because I think that for the most part people who subscribe to Ipsy are looking for something that’s pretty generic… which is why the indigo liner was such a surprise. It’s beautifully vibrant and while it’s not an easy safe colour like black or brown, it’s still useable by loads of people.
Two definite thumbs up.