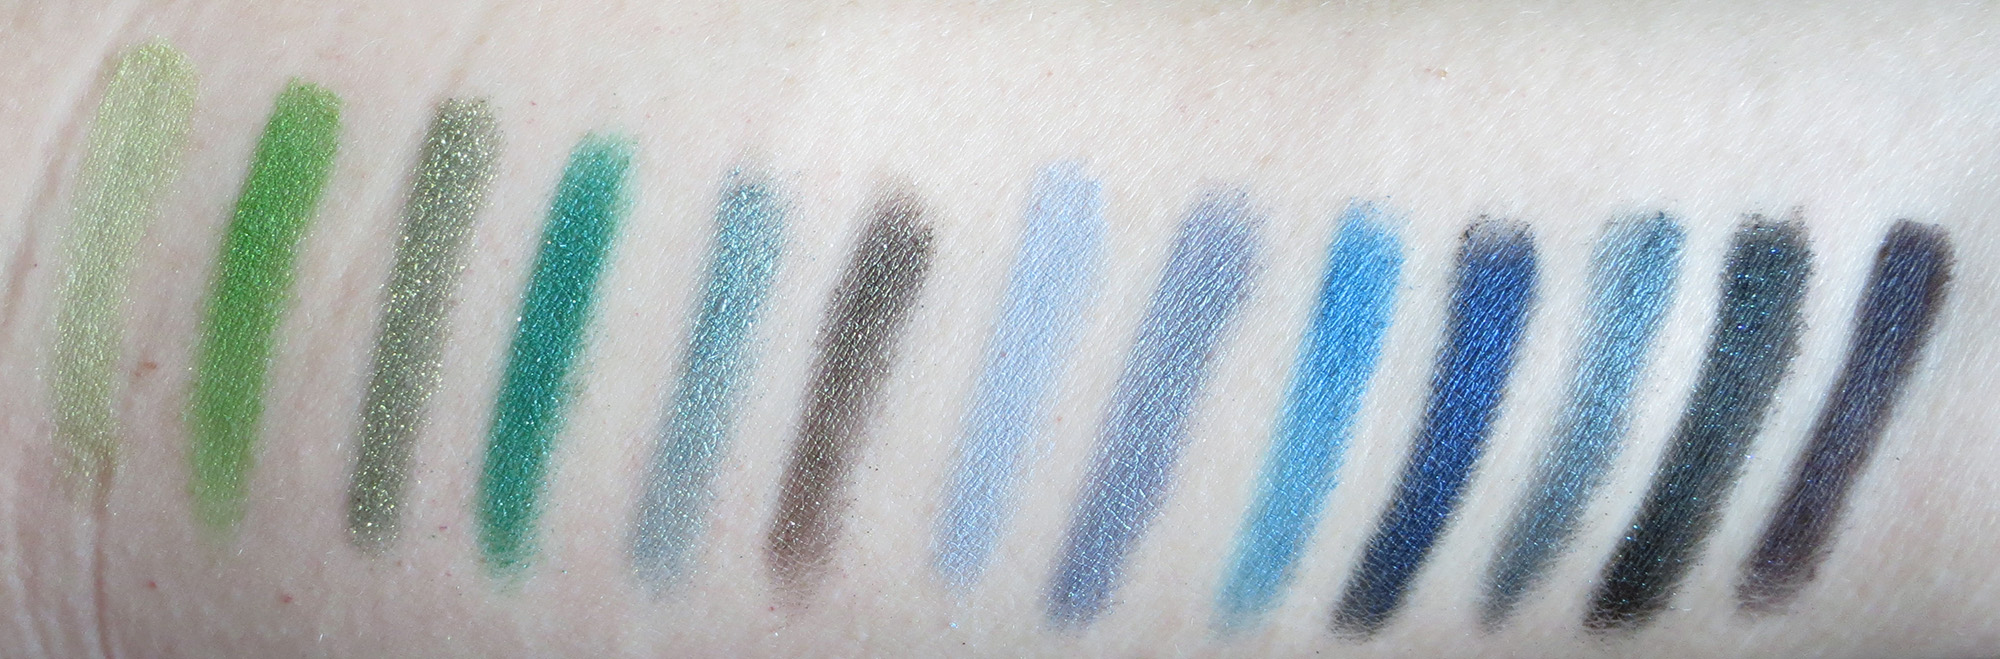
Green is my absolute favourite colour, so I love working with it. I also have a high affinity for teal colours just because they’re so darn pretty.
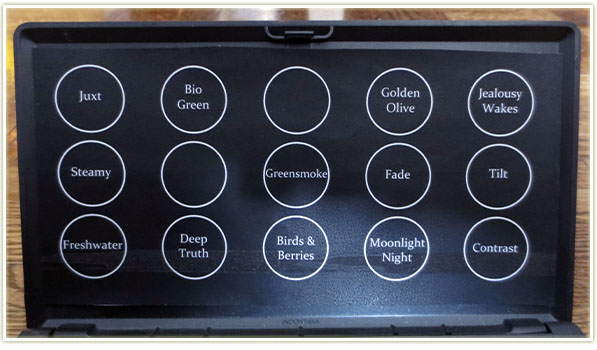
LabelsGreens & Blues
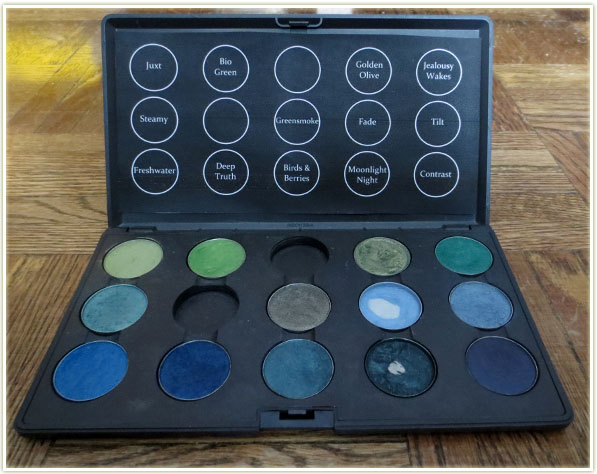
I’m a bit sad I didn’t photograph this palette earlier. I had a very old shadow called Sprout in there that MAC doesn’t make anymore (discontinued somewhere in and around 2007!). Sprout was sheer, but I remember using it on a friend of mine for a Halloween dance party in high school when she wanted to be Britney Spears from the Crazy music video (I’m dating myself here), so I had a lot of warm and fuzzy feelings towards that shadow. Humid is the other empty slot which I haven’t replaced yet (loved it, but I’m trying out an Inglot shade that’s almost an identical dupe). I Humid predominantly with Juxt and it was those two shades together that sparked a deeper interest in makeup several years ago.
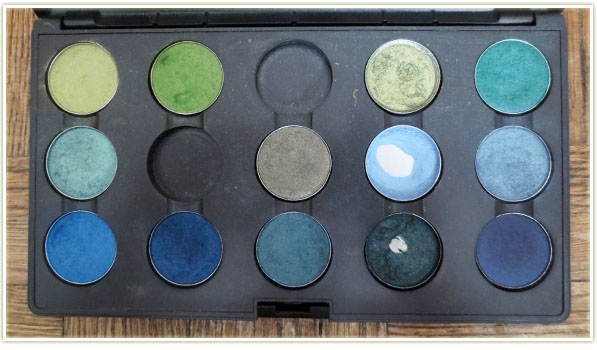
Here’s a closer look at the individual shades that make up this palette.
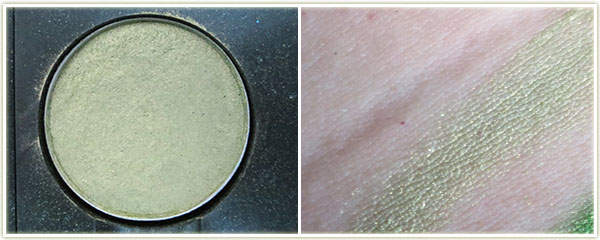
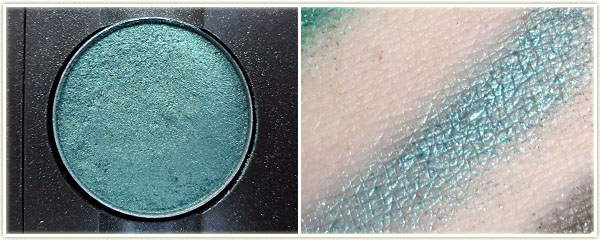
MAC – Juxt
Name:Juxt Finish: Satin Notes: Discontinued by MAC in 2011. This is my second pan of this shade – beautiful light green with subtle gold highlights. I’m surprised it’s a satin as this can actually get quite shimmery/reflective. Some people say it’s sheer, but I really just feel like it’s a light shade – heck, it’s almost pastel!
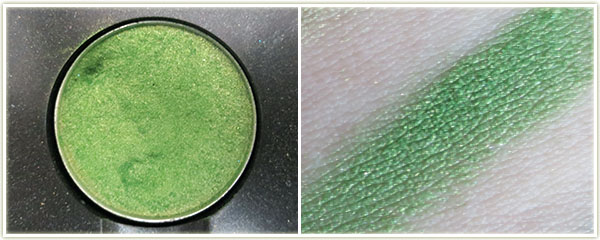
MAC – Bio Green
Name:Bio Green Finish: Frost Notes: I bought this over a decade ago when I think it was released in a special collection. I’m pretty sure it’s a PRO only colour now. Beautiful vibrant green.
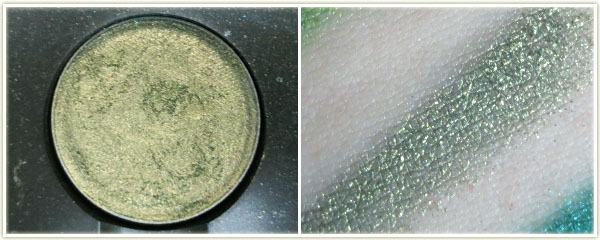
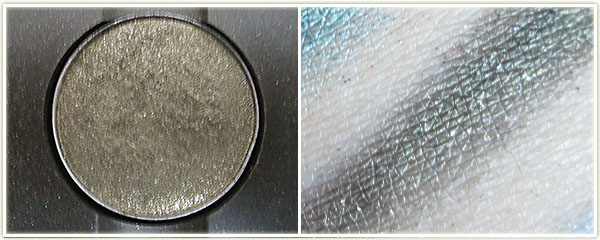
MAC – Golden Olive
Name:Golden Olive Finish: Pigment Notes: Pressed pigment. I don’t wear this often enough (which is not good news since I’ve got a LOT of it) but it’s absolutely beautiful. As the name suggests, this is a very golden olive shade.
MAC – Jealousy Wakes
Name:Jealousy Wakes Finish: Veluxe Pearl Notes: I bought this because as soon as I found out that Christine over at Temptalia had developed a shade for MAC, I knew it had to be good! I tend to wear this a lot with Vex. I wish I’d bought a backup because I doubt they’ll ever bring the shade back.
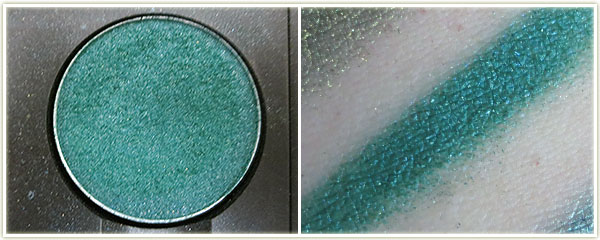
MAC – Steamy
Name:Steamy Finish: Frost Notes: A bluey-green shade that can be kind of patchy if you don’t apply it thickly.
MAC – Greensmoke
Name:Greensmoke Finish: Lustre Notes: Lustres are not my favourite finish as they can be really patchy, flakey and holy hell does it ever take some work getting this out of the pan. You really need to pack this colour on to get decent payoff.
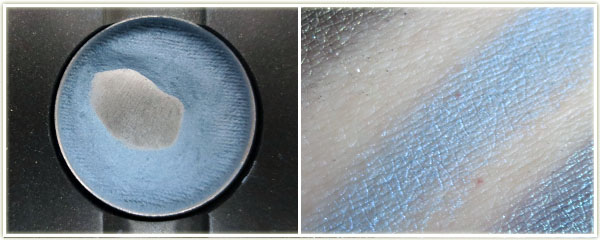
MAC – Fade
Name:Fade Finish: Satin Notes: This shade has been re-pressed after being completely broken. I bought this ages and ages and ages ago. My older (wiser?) self has no idea how to wear a powder blue shade anymore!
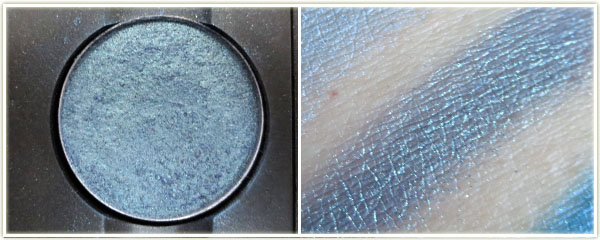
MAC – Tilt
Name:Tilt Finish: Frost Notes: Another one of the shades I’ve repurchased, this is my second pan of Tilt. It has a beautiful duochrome (light blue/violet) that reflects beautifully on the lids. This was one of my go to shades throughout my teen years.
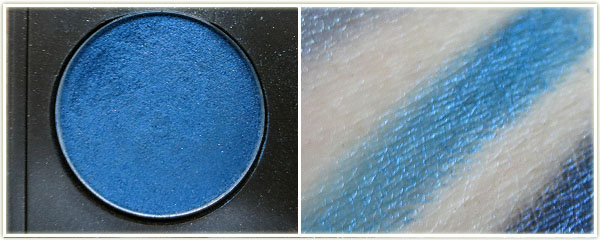
MAC – Freshwater
Name:Freshwater Finish: Veluxe Pearl Notes: Beautiful… but underused. Honestly, I really have no complaints about this shade… I wonder why I don’t use it more.
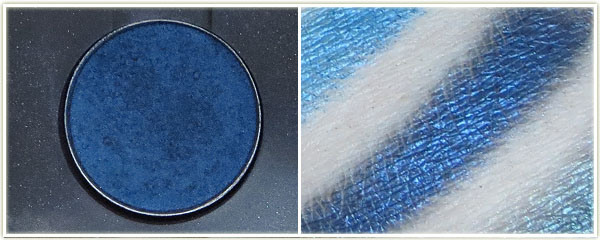
MAC – Deep Truth
Name:Deep Truth Finish: Frost Notes: Argh this one… I love the colour, it swatches beautiful, but I feel like it never looks this beautiful on my eyes. When I apply the shadow, it retains the dark blueyness of the shade, but the reflective properties seem to dissipate. Could just be user error… maybe I need to try a different brush.
MAC – Birds & Berries
Name:Birds & Berries Finish: Veluxe Pearl Notes: I’ve read that people consider this a dupe for Tilt, but I don’t see it at all. This one is darker, and doesn’t have the same duochrome that Tilt has. I picked this up with the Liberty of London collection.
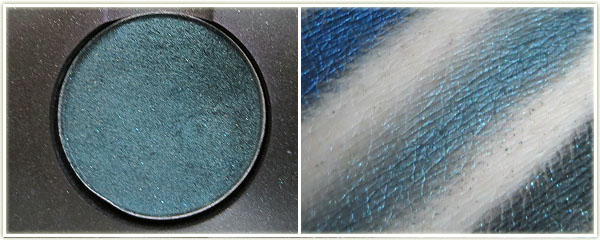
MAC – Moonlight Night
Name:Moonlight Night Finish: Pigment Notes: Another pressed pigment and I use this one often. It’s a deep, dark teal (almost black really), shot through with teal glitter. This one was limited edition with the Tartan Tale holiday collection in 2010.
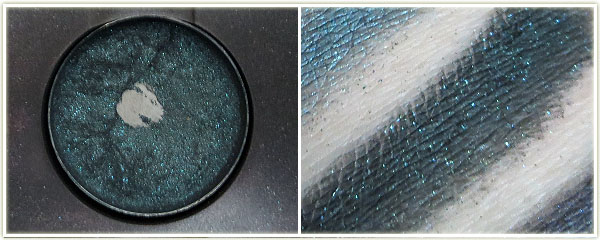
MAC – Contrast
Name:Contrast Finish: Velvet Notes: Beautiful in the pan but looks mostly black on my lids.
My MAC Greens & Blues Palette – Swatches – Click to enlarge
New year, new looks! And I’ve got plenty of new goodies to play with that I’ve accumulated over the holiday season!
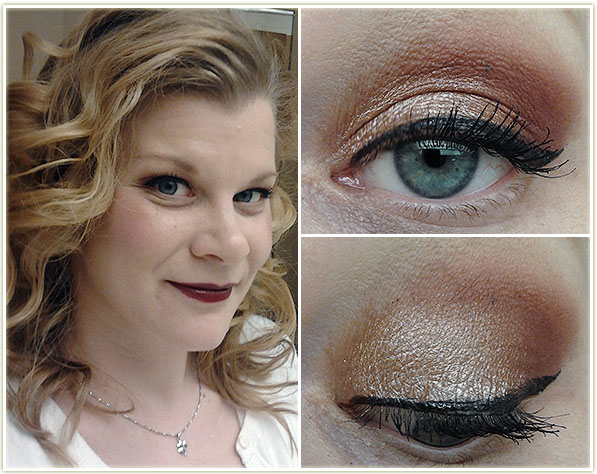
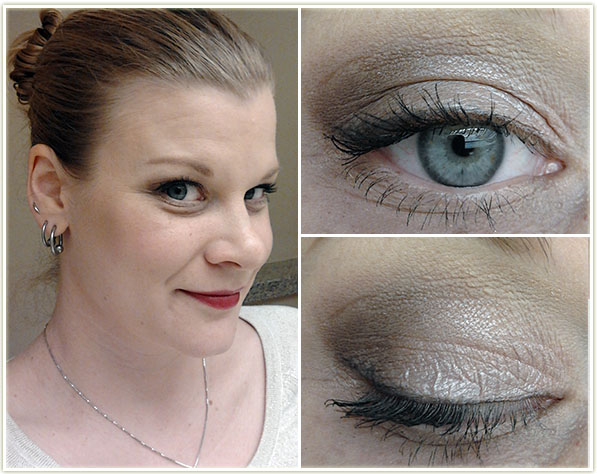
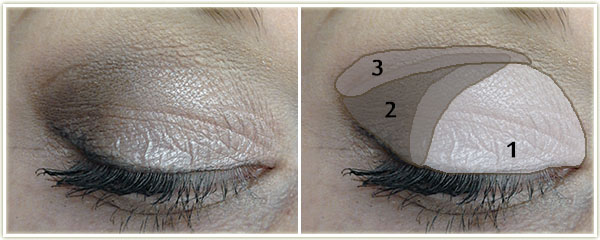
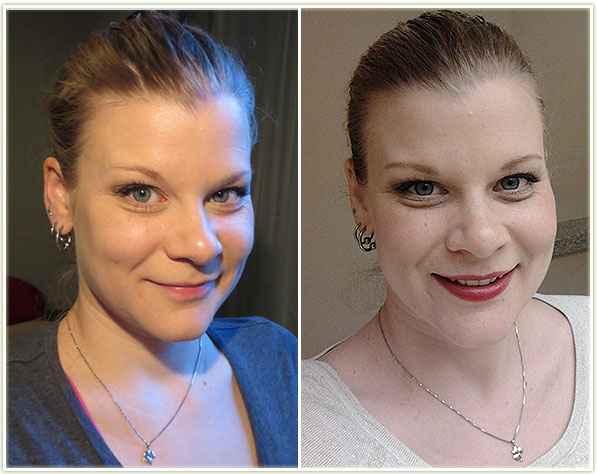
I love this one so much. Everyone has gone insane over rose-gold everything and I think I’m starting to see why. This was a makeup combination that just made me feel like I looked especially pretty. I’m also having a love affair with Makeup Geek’s Bitten and I’m more than happy to use it constantly on my eyes!
Eyes:
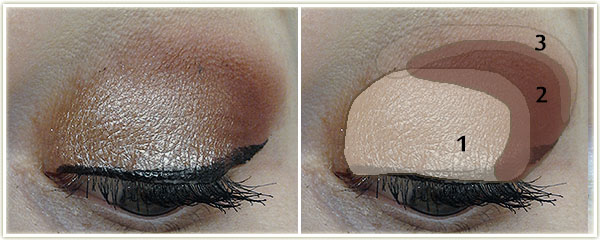
L’Oreal Amber Rush all over the lid.
Makeup Geek Bitten in the outer corner and crease.
Makeup GeekCreme Brulee at the top of the crease to blend the two lid shades together.
MACBrule was used to highlight my brow. I used Make Up For Ever Aqua Liner in 13 Black to create the wing and applied L’Oreal VoluminousCarbon Black mascara to my top lashes. For brows, I used MACOmega.
Rest of the Face
Foundation: Bourjois Healthy Mix Serum foundation in 51 Light Vanilla
Bronzer:Physicians Formula Bronzer Booster in Light/Medium
Blush: Cargo Mendocino
Highlighter: DiorAmber Diamond
Lips: MACDark Side
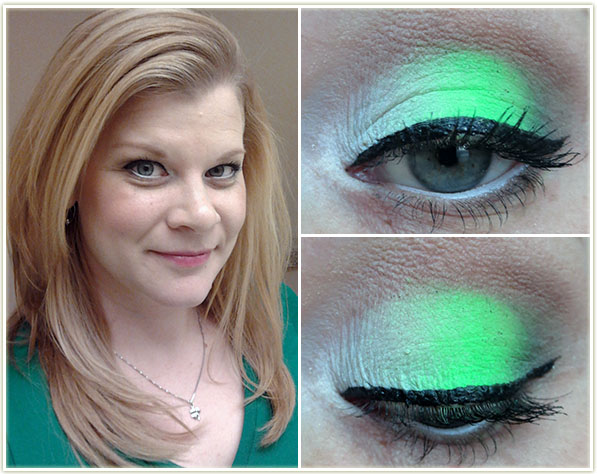
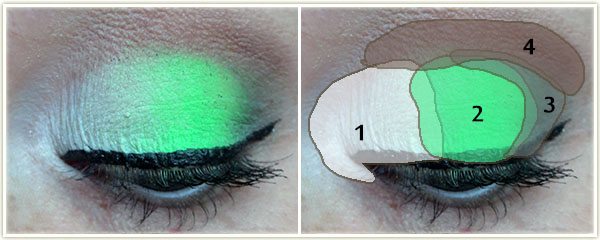
Good grief do I ever love this one too! I can’t claim ownership though, I relied on Shaanxo’s video for inspiration. Anything with neon (not to mention neon AND green) and I’m a total sucker for it.
Eyes: I first applied NYX‘s Jumbo Eyeshadow Pencil in Milk all over the lid and blended it out with my finger. I also brought it down below the inner tearduct as well.
Using the white from Sleek‘s Acid palette, I applied that all over the inner third of the eyelid, bringing it down around my inner tearduct.
With the same Sleek palette, I used the neon green shade and patted that on the center of my lid. (This took a lot of layers in order to get it to be so vibrant!)
Using MAC‘s Greensmoke, I placed it in the outer corner of my lid and tried to blend it as best as I could with the neon shade (wasn’t that easy and I don’t think I was overly successful).
I then used MAC‘s Cork through the crease.
Brule was used to highlight the brow and MACOmega was used on my brows. I used Make Up For Ever‘s Aqua Liner in 13 Black to do my winged liner and applied L’OrealVoluminous Carbon Black mascara to my upper and lower lashes. For the lower lash line, I used a bit of Greensmoke on the outer corner, then lined my inner waterline with NYX‘s Milk(which actually had decent longevity!).
Rest of the Face
Foundation:Bourjois Healthy Mix Serum in shade 51 Light Vanilla
Bronzer:Physicians Formula Bronze Booster in Light/Medium
Blush:Joe Fresh cream blush in Apricot
Highlighter:Hard CandyTiki
Lips:NYX‘s Butter Gloss in Vanilla Cream Pie
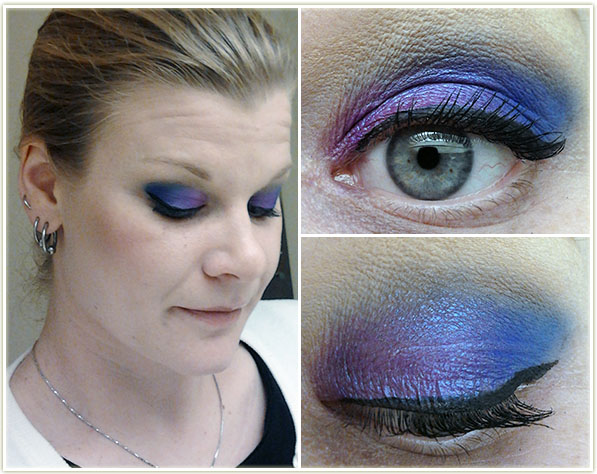
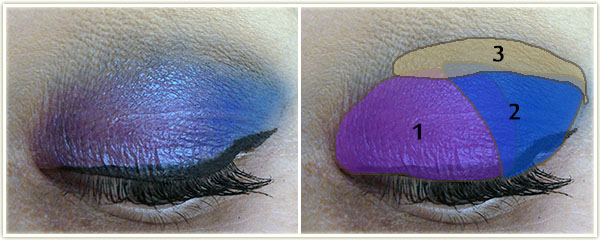
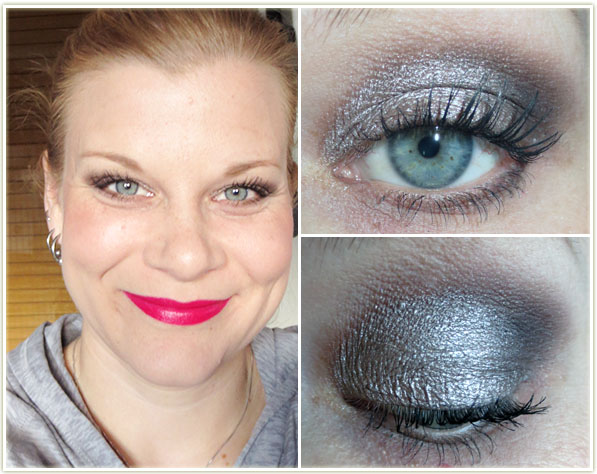
This look came about as I was trying to use products that I had bought, but hadn’t used yet. The primary inspiration came from MUA‘s Shade 9 which is one of the most beautiful duochromes I’ve ever owned. Unfortunately, I’m not keen on how the blue turned out, as it applied rather chalkily.
Eyes: I used Urban Decay‘s Eden primer this time as opposed to my usual Original one. In retrospect, that was a stupid idea considering I was using a very shimmery shadow and Eden is a very flat, very matte primer.
MUAShade 9 Pearl on the inner half of the lid.
Makeup GeekNeptune on the outer half of the lid.
Makeup GeekCreme Brulee in the crease.
MACBrule was used to highlight my brow with MACOmega through my brows. L’Oreal Voluminous Carbon Black on my upper lashes with MAC‘s Blacktrackfluidline to create the winged liner.
Rest of the Face
Foundation: MUA BB Cream in Light
Bronzer: Physicians Formula Bronze Booster in Light/Medium
Blush: TarteExposed
Highlighter/Powder: HourglassAmbient Lightning Powder in Ethereal
Lips: Revlon Lip Butter in Creme Brulee
Heh, I’m not even sure what to say about this one. *I* think it’s rather bland, but looks like this tend to be when I get the most compliments. I wanted to use the Naked 3 palette and dip into a few products on to my “To Use Up” list. I don’t find the end result very inspirational, so when I use the Naked 3 again, I’ll definitely try out different combinations.
Eyes: Urban Decay Primer Potion in Eden all over the lid. All shadows are from the Urban DecayNaked 3 palette:
Burnout on the inner two-thirds of the lid.
Factory on the outer third of the lid.
Limit through the crease
I used Strange as a brow highlight and applied Blackheart as a very thin line along my upper lash line with a faint flick at the outer edge. L’Oreal Voluminous Carbon Black mascara on my upper and lower lashes.
Rest of the Face
Foundation: Yaby Foundation in Buff
Bronzer: Physicians Formula Bronze Booster in Light/Medium
Blush: Tarte – Dollface and Dazzledmixed together
Highlighter: Hard CandyTiki
Lips: Revlon Lip Butter in Red Velvet with Creamsicle layered on top.
I had to laugh at this one… I didn’t intend for this to come out nearly as dark as it did, or nearly as ridiculously bright on the lips… for a weekend brunch. While I was also wearing workout clothes. Hah. Ah well.
Eyes:Maybelline‘s Color Tattoo in Bad to the Bronze was applied all over the lid, keeping it below the crease. On top of that I layered:
Inglot152 Shine over the entire eyelid.
Laura MercierBamboo on the outer corner of the lid.
Laura MercierEspresso was used to blend out the crease and pull the shadows out at the corner of my eye into a slight V shape.
MACBrule to highlight the brow with MAC Omega through the brows. Bamboo and Espressowere mixed together to line the lower lashline. L’Oreal VoluminousCarbon Black mascara were applied to upper and lower lashes.
Rest of the Face
Foundation: CoverGirl CC Cream in 110 Classic Ivory
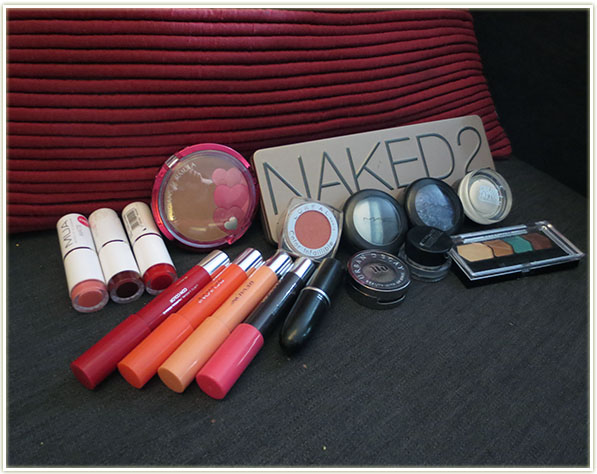
Today I’m sharing the items in my collection that I really regret buying. These, in general, are the items I reach for the least in my collection. Looking over the items I’ve pulled out, most of them are cheaper products which is a bit of a relief. I think this is because I tend to research more expensive products before purchasing them. Anyway, let’s see which items I’ve had a buyer’s remorse over!
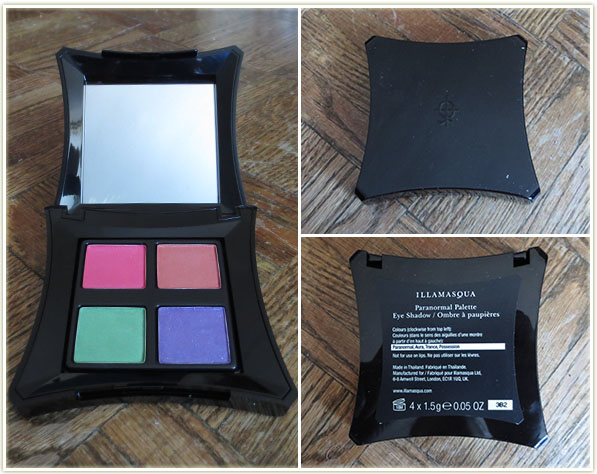
One of my most recent purchases was such an immediate regret that I ended up taking it right back! It’s Illamasqua‘s Paranormalpalette.
Illamasqua – Paranormal Palette
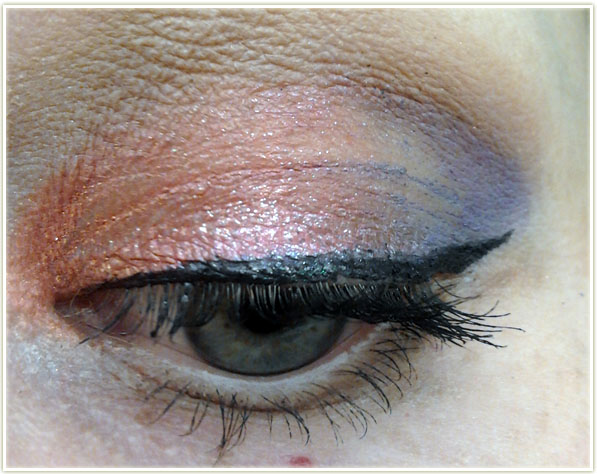
I’m reposting the exact same image from my haul just a few weeks ago because I used it twice, noticed the EXCESSIVE creasing, then hightailed my butt back to the Illamasqua counter and returned it. I had called them day before I returned it and had gotten some spiel about how my Urban Decay eyeshadow primer wasn’t good enough because these were cream to powder eyeshadows and I need to be using a creamy primer. I wasn’t buying it. Urban Decay‘s primer has NEVER lead me astray and I can’t remember the last time I had anything crease on my eyelids because of that primer! When I returned it, the woman was very lovely about it and didn’t give me any hassle. It takes a lot for me to return a product but this one was so expensive ($45 CAD) that there was no way I was going to keep it. I mean, just LOOK at the creasing:
Ridiculous!
At the end of the day, I do love the Illamasqua products I’ve tried, primarily their blushes and pigments, but I’m going to be avoiding these “cream to powder” products in the future.
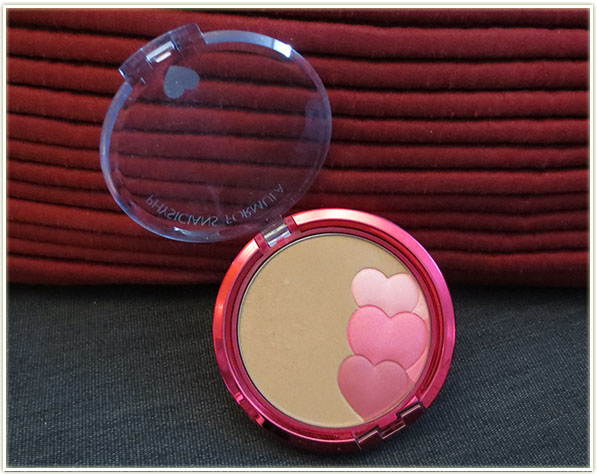
Sigh. I bought this Physicians Formula product thinking since it was a bronzer and a blush in one, it’d be perfect for travelling. The truth is I’ve not travelled even once with this item in the year or so I’ve owned it. I love the shade of the bronzer, but I’ve not even touched the blush. And let’s be realistic… without a proper division between the two products, it’s pretty hard to get JUST the blush when you dip into the product.
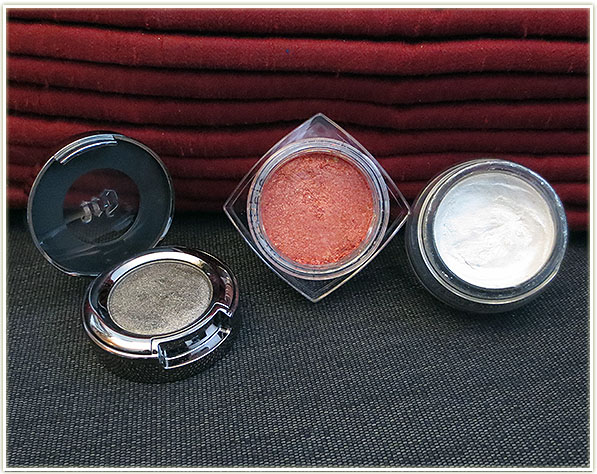
Urban Decay – Mushroom, L’Oreal Infallible – Pepsy Coral, Maybelline Color Tattoo – Too Cool
These were just poor choices all around.
Buying an Urban Decay single eyeshadow (Mushroom) is just a bad idea when so many of their shades come in palettes at a much better value. Not to mention that I don’t need yet another taupey, silver-grey shade – I think there’s even an exact dupe in my Naked 2 palette. Plus, this just isn’t the kind of colour I reach for much anyway.
L’Oreal‘s Pepsy Coral was an impulse buy at a warehouse sale I was at in October last year. It’s now three months later and I’ve still not used this shade. Plus it looks identical to MAC’s Paradisco which I already own.
Maybelline‘s Color Tattoo in Too Cool is a shimmery white cream shadow. It goes on patchy and the shade is very similar (if not identical) to MAC‘s Crystal Avalanche. Boo.
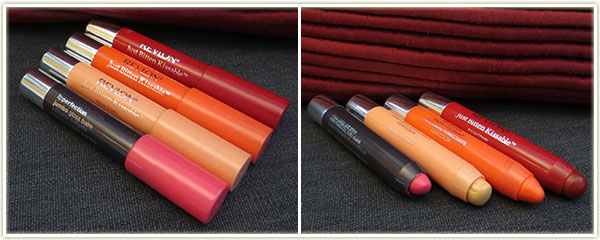
I am so over these chubby lipstick crayons. SO OVER IT. First of all, the CoverGirl one (Watermelon Twist) broke apart the first time I used it (the bullet fell right out of the tube). It also tastes awful. How does a drugstore product still taste terrible like this? Most of the other brands have grown out of the artificial, chemical smell of makeup from decades long past. The colour is okay, but I can’t get over the smell/taste. Although I do have to say… hot pink is not the colour I think of when the word “watermelon” is in the shade name.
As for the Revlon ones… also over it. They don’t actually stain that much. The lighter, peachier one (Charm) ends up staining my lips slightly pink (?!?). The red one tends to bleed outside my lip line quite a bit and reapplication only makes it look worse. On the bright side, they do have a nice minty smell, quite akin to dental floss actually, but I do like it! However, I’ve been avoiding any other crayon type lipstick once I realized how disappointed I was in these.
Urban Decay – Naked 2
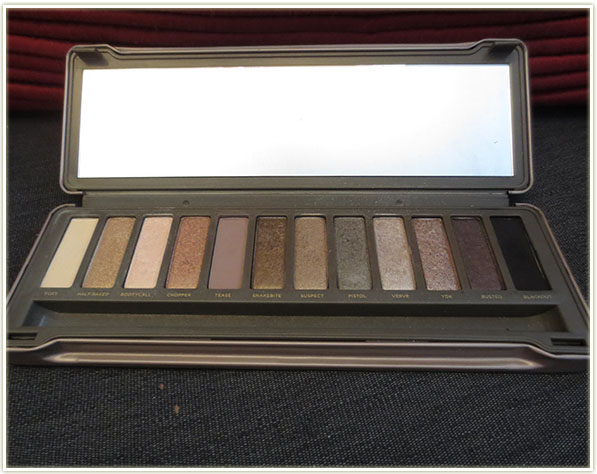
Oh man, I’ve seen people so divided over Urban Decay‘s Naked 2 palette.
Urban Decay – Naked 2Urban Decay – Naked 2
There are some colours in here that I love – specifically Tease, Verve and Blackout (but really, that’s just a black). But there are a lot of shades in here that just seem to blend together into nothingness when I try to put a look together. Maybe I’m using the wrong colour combinations or something, but my looks with this palette have been pretty dismal.
It’s hard to regret something when you only paid £1 for it, but these matte lipsticks from MUA do frustrate me. These have decent pigmentation when swatched and they *are* lovely colours, but they feel terrible on the lips. They ball up, go tacky and they seem to fade awkwardly, which is especially weird for a matte lipstick. Plus, check out the bottom right-hand picture above: You have to apply the lipsticks so hard on your lips to get the colour you need that it causes huge indentation marks in the side of the bullet. When that happens, the bullet starts to ooze a clear substance which is just icky. As soon as I finish this post, they’re going straight into the garbage bin.
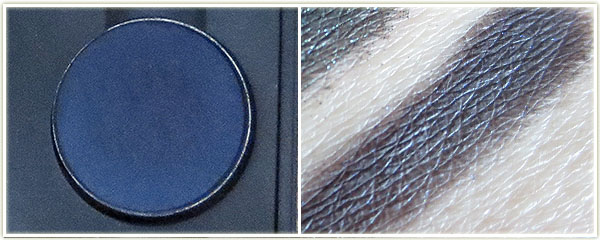
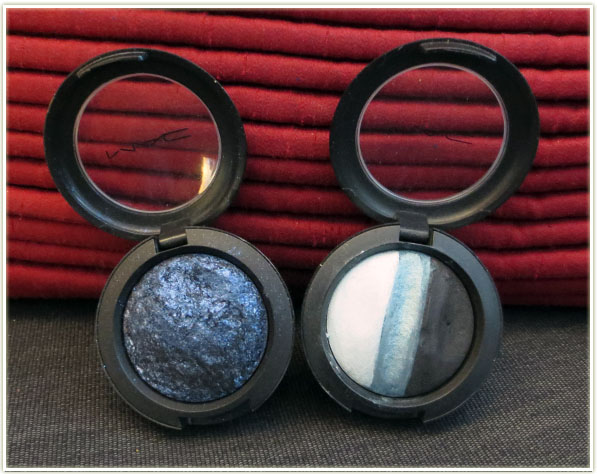
MAC Mineralize Eyeshadows – Blue Flame & Blue My Mind
I didn’t notice till I sat down to write this post that both of my MAC mineralize eyeshadow regrets are both blue. Blue Flame is beautiful, but I rarely use it. Blue My Mind is… meh. The light side is a pale, powdery blue that can be kind of awkward to wear. The middle section is nice, but it needs to be applied damp to get a good colour payoff. Plus the middle strip is so small that you need a rather small brush in there. The last section is black and it’s okay… but it’s a bit underpigmented.
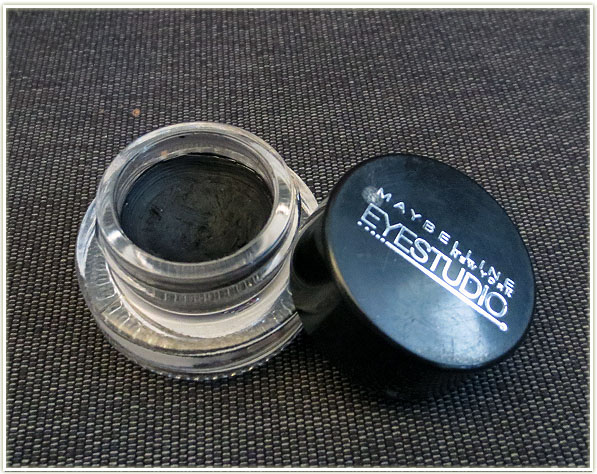
Maybelline Gel Liner in Blackest Black
I bought Maybelline‘s gel liner in Blackest Black after hearing many raves reviews from people saying that this was better than MAC‘s Blacktrack. Unfortunately, for me, this wasn’t the case. This just didn’t feel as fluid or creamy as MAC’s gel liner does and I sometimes end up with skipping problems along my lash line despite using the same brush for both gels. Because it’s just not as nice to use as MAC’s product, I’ve since gone back to MAC‘s fluidline and emptied out the jar so I could put something else in it.
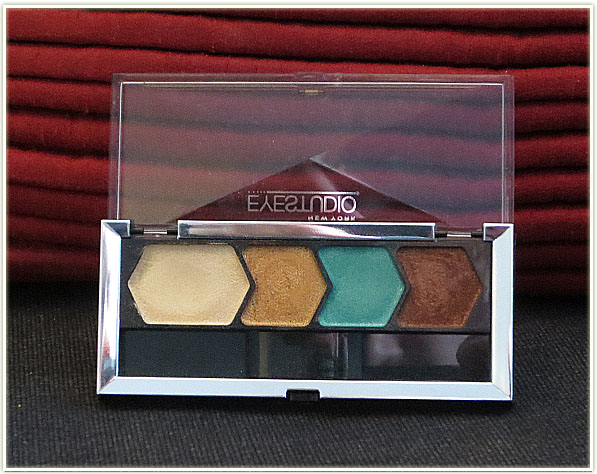
Maybelline Irresistibly Ivy Eyeshadow Quad
While I like the colours and they’re quite well pigmented, I just don’t reach for this palette that much. I was sucked in by the pretty green shade and the fact that this was on clearance since they were discontinuing this particular quad.
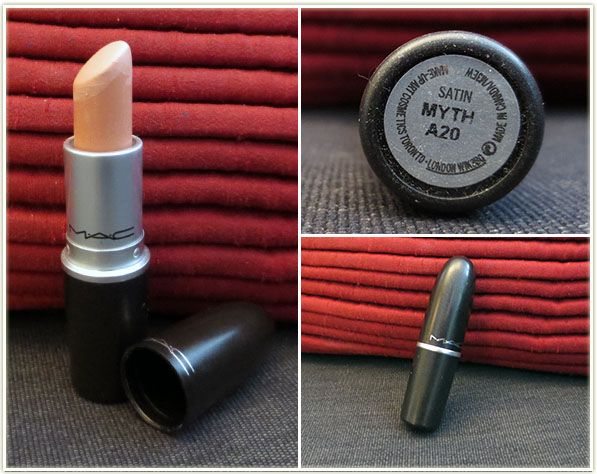
MAC lipstick in Myth
I regret this for no reason other than that this shade (Myth) looks like death warmed over on me. I love nude lipsticks, but this is not a shade I can pull off despite trying to make it work several times.
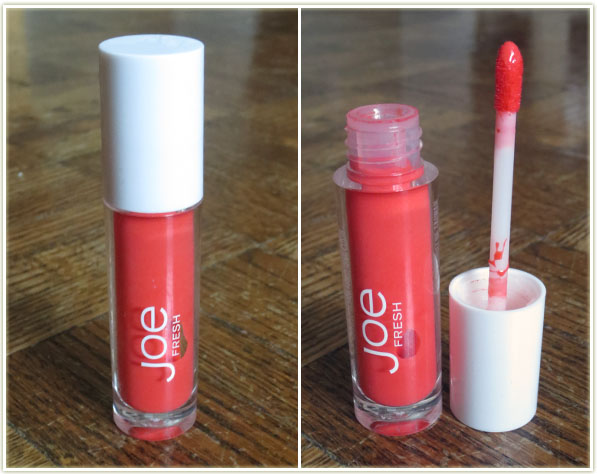
Joe Fresh Lip Tint in Mango
I forgot to photograph this with the rest of the group, but this is one downright awful product. It doesn’t ever dry down on the lips. If you talk, the product will magically disappear from your lips. If you lick your lips, the product completely disappears. But you definitely DON’T want to lick it off because the product tastes absolutely awful. This is another one going straight into the garbage bin as I can’t make this work even if I wanted to!
That’s it for me! Any products you’ve picked up that you regret buying?
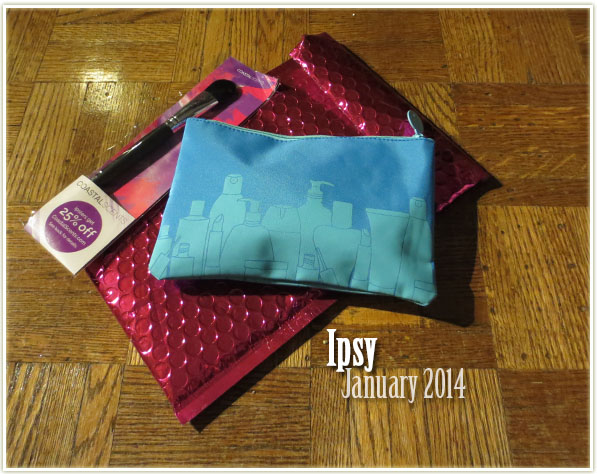
This is my first month as an Ipsy subscriber. Being in Canada, I wasn’t sure if I wanted to pay the additional $4.95 USD just for shipping (the bag itself is $10 USD which includes the cost of shipping if you’re in the USA). However, after seeing years worth of Ipsy haul videos on YouTube filled with so many good things, I finally decided it was worth it.
When I originally looked at spoilers for my bag, I was little “meh” about it all, but I have to say I’m pretty happy with what I got in my first bag! I had the opportunity to test out all the products before I made this post, so you’ll not only see what I received this month, but you’ll also get an idea as to whether the products are actually any good.
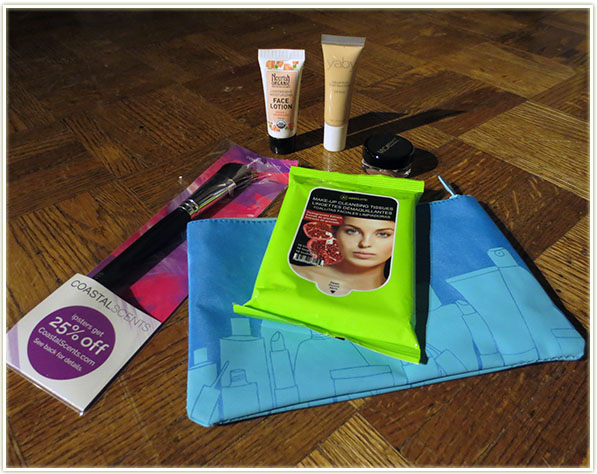
Enough talking, on with the goods!
The first item didn’t fit in the blue makeup bag, but was just sitting inside the foil packet.
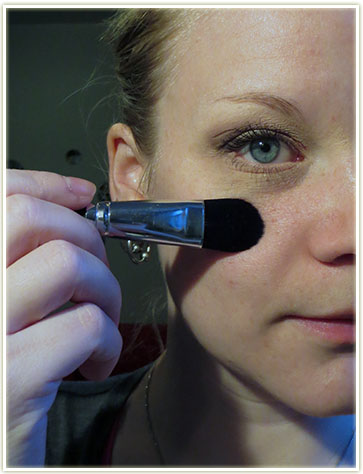
Coastal Scents Small Foundation Brush ($4.95 USD, full size)
In spite of the fact that I absolutely love makeup, I’m really not one to purchase many makeup brushes. Reason being that I dislike spending my money on tools. I’d rather spend my cash on actual products! So because of this, while I have enough brushes to bust out a look, the reality is that I just don’t have a wide variety of them. All this to say… I was really pleased to see a brush in this bag (especially since my bag also came with foundation). The photo above makes it looks smaller than it actually is (it actually looks like a MAC 232 above, hah), although this IS a smaller face brush. Coastal Scents‘ Small Foundation Brush is a synthetic brush and this is full size, which thankfully means no shortened handle. It’s also pretty densely packed, which is not something I expected for a $5 brush.
As you can see in the shot above, it definitely is sized for the face. I do like how it applied my foundation, but I’m not a fan of flat brushes to apply my foundation. I tend to prefer larger buffing brushes if only because it takes me less time in the morning when I’m trying to get my butt out the door to work. That being said, I’ve only used it once so I’ll give it a few more tries and see if I can adapt to using flat brushes. If it doesn’t work out for me for foundation, I’m sure I’ll find another use for it.
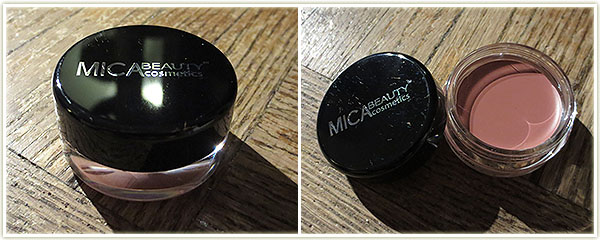
MICA Beauty Cosmetics in Natural ($30 USD, full size)
I’m completely unfamiliar with MICA Beauty so this is an all new experience for me. The first thing I did was look up this tinted lip balm to find out how much this retails for and my eyebrows just about shot off my face. This little 4g pot sells for $30 USD. Now, I don’t know who is actually paying $30 for this because that is an extremely high end price for something being touted as a tinted lip balm.
But is this really a lip balm? Not so much. This is more like a potted lipstick. The sensation of this is unlike anything I’ve ever felt before. It’s smooth and… well, it’s not slick, but it’s not creamy either. It’s not uncomfortable… it’s just totally different than anything I’ve ever worn on the lips.
MICA Beauty Cosmetics in Natural
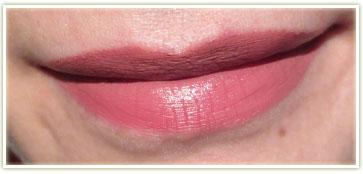
I received the colour Natural and it looks pretty brown in the pot but goes on the lips rather rosy. It’s rather shiny when first applied, but it dries down to a satin finish. This does not feel remotely like a lip balm to me. When it dries down, it tends to make your lips feel like they’re shrunk a bit and yet it’s not utterly uncomfortable to wear. The dry down will actually help increase the longevity of the product. You’ll be able to touch your lips without transferring any colour – it isn’t until you actually rub your lips where you’ll notice a colour transfer. I don’t feel it’s particularly moisturizing, but it didn’t dry out my lips either.
I didn’t wear this for a great deal of time (only about an hour or so), but I do really like the shade. If I can get used to the sensation of the product, I’m sure I’ll end up keeping this in my desk at work for the days when I forget to bring in a lip product.
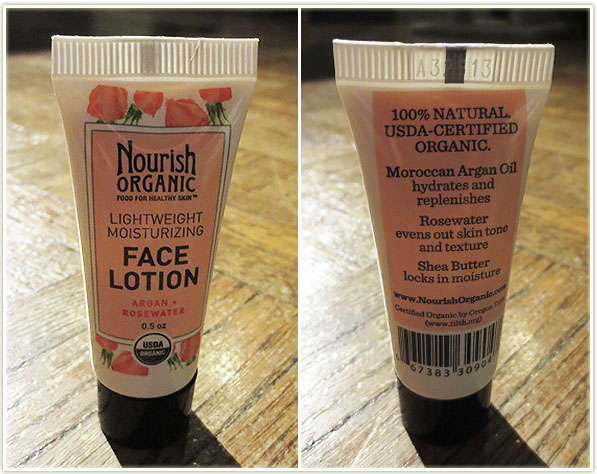
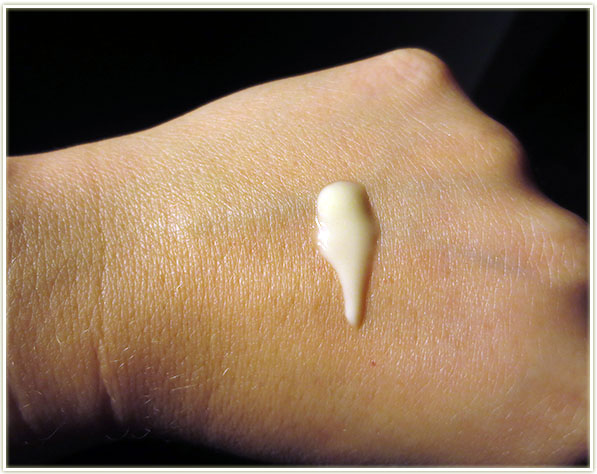
Nourish Organic Lightweight Moisturizing Face Lotion Argan + Rosewater (0.5 oz for $6.47, full size is 1.7 oz for $21.99)
Nourish Organic‘s Lightweight Moisturizing Face Lotion with Argan + Rosewater is indeed a pretty thin moisturizer. It feels incredibly liquidy, which doesn’t give me the feeling it’ll be moisturizing enough. It took a bit of rubbing to get the product into my skin, but it did sink in eventually. However, once it dried, it made my skin feel slightly tight, almost as if it had formed a shell over my skin and it needed to be cracked. I realize that sounds incredibly dramatic, and it’s not like it formed an entire plaster over my face, but it didn’t feel great. I’ll finish up the deluxe sample, but I wouldn’t ever purchase this product. Also… this smells like apricots even though the product says it’s the argan and rosewater variety. Odd.
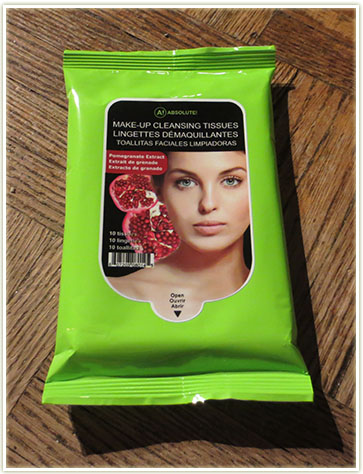
Thin moisturizerAbsolute! Make-Up Cleansing Tissues in Pomegranate Extract ($2.49 for 10 wipes, full size)
I received the Pomegranate Extract scent/flavour of the Absolute! Make-up Cleansing Tissues in my bag. They claim to remove all makeup, including waterproof mascara. Since I wear waterproof mascara daily, I was more than happy to try these out after a day at work.
So I came home yesterday and swiped off my makeup. And rubbed at it. My foundation came off without a hitch, but I did have to rub a decent amount at my lashes, including a lot of wiggling of the tissue *on* my lashes. It’s not something unusual for a makeup removing wipe, but it’s not something I particularly enjoy doing. In the end, they did work, but not as good as some other wipes I’ve used (Neutrogena springs to mind).
The other thing about these is that they smell kind of off. I don’t know if it’s just relegated to the pomegranate scent, but they initially smelled like an alcoholic froufy drink… and then the more I rubbed it on my skin the more nauseating the scent became. I’m glad there’s only ten in this pack because the smell of them would do me in if I used many more than that. I wouldn’t re-purchase these with my own money, but I was happy to try them out and I’ll finish up the package.
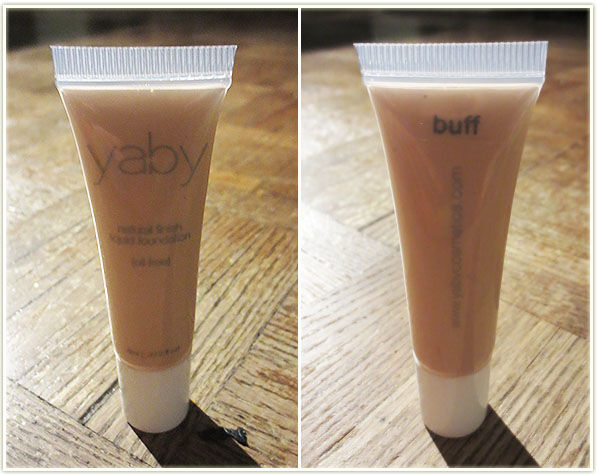
Yaby Liquid Foundation Natural Finish in Buff ($13.55 USD, full size)
This was incredible! I’ve heard about Yaby before, but didn’t own anything by them and don’t ever recall seeing them in stores. I was a bit skeptical about receiving a foundation because blind colour matches can be almost impossible. But this shade in Buff is a PERFECT match for my skin right now. It also looked and felt incredible on my skin. It was one of those moments where you step back from your mirror and go “whoa”. It was THAT good. I also like that the foundation is so small (although this is a full size tube) and has a nozzle end. This makes this the absolute perfect foundation for travelling with and I intend to save it for those occasions.
Keep in mind that ounce for ounce, this is a very expensive foundation. Since the full size tube is only 8 ml (versus the normal 30 ml in most foundations), if you were to buy a full ounce of product, as most foundations come, this would set you back about $50 which is on parr with high end foundations.
Yaby foundation in Buff under two different sets of lighting
To me, this foundation actually feels pretty similar to Revlon‘s Colorstay. It seems to have the same long lasting effect and it does make my skin feel a bit tight (not an issue for me now that I’m a bit more used to wearing foundation, but it is a bit annoying around the 12 hour mark). I love this and I would definitely repurchase this when I run out. As a side note, I was pleased to find out that Yaby is actually a Canadian-brand, developed in Toronto!
Ipsy January 2014 Breakdown
Coastal Scents Small Foundation Brush – $4.95 USD (full size)
I do have to say box’s overall monetary total is greatly inflated because of the tinted lip balm – I really don’t know who would pay $30 for that, it seems totally out of line. Regardless, I am really quite pleased with this bag. I enjoyed getting a new brush and I was SO HAPPY with that foundation that those two right there made the whole bag for me. The moisturizer wasn’t to my liking, nor were the wipes, but that’s really just a personal preference. The lip tint was interesting to play with although not a complete winner for me.
I’ll definitely be staying subscribed to Ipsy in the coming months. It really is a steal at $14.95 USD (for Canadians, $10 for Americans). If you’d like to sign up and would like to give someone a referral credit (I receive points I believe, not compensation of any kind), you can use my referral link.
If you received something different in your bag, let me know what you got and whether or not you like it!
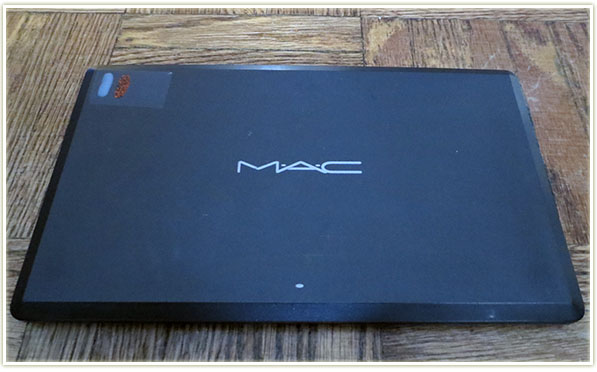
I thought I’d show you all a look into my MAC Neutrals palette. I also tend to think of this palette as the one with the “metals” because the middle row inspired me to think that way (gold, bronze, copper).
In order to identify my palettes since I do have the old style and won’t be converting to the new ones (I don’t see the point really, kind of a waste of money purely for aesthetics – says the person who loves makeup… lol) I put a piece of tape on the top left hand corner and then paint a nailpolish colour or two that best describes the shades in the palette. For my neutrals palette, there’s a stripe of nude polish and one of a sparkly orange because that was the closest I could get to neutral shades out of what I had!
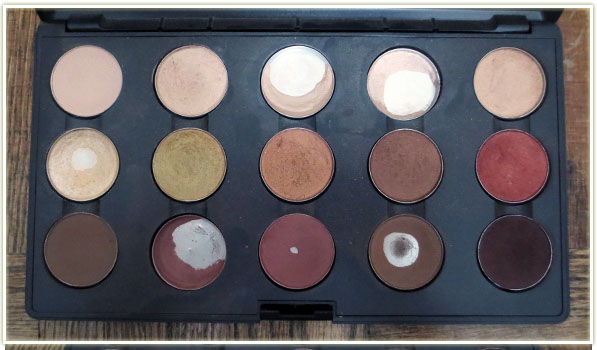
MAC Neutrals Palette
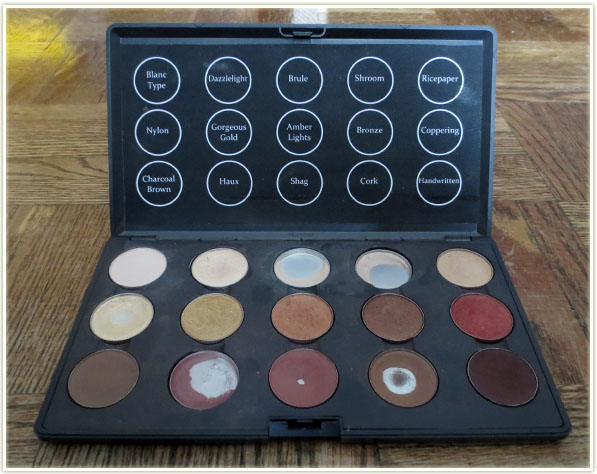
Although the highlight shades are used quite often, this is probably my least used MAC palette. Some of the browns are showing a lot of pan, but that’s because those are my oldest shades that date back to when I had less makeup so they got used a lot more often. Since I tend to prefer coloured eyeshadow, I don’t reach for this palette as often.
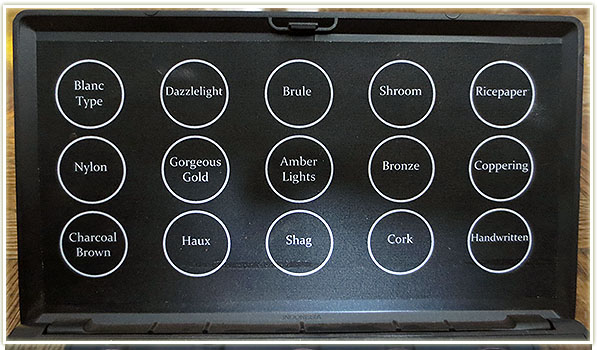
MAC Neutrals Palette Labels
These fantastic labels were completely stolen from Zabrena. You can find her video tutorial for creating these templates here. They are fantastic and much nicer looking than the ghetto Post-It notes I had stuck to the top of the palette before!
MAC Neutrals Palette Shadows
Let’s take a look at the individual shades I’ve plunked in. All swatches will be a diagonal stripe through the middle of graphic – I point this out because some of the swatches were a bit too close together on my arm so you may see more than one colour in some pictures.
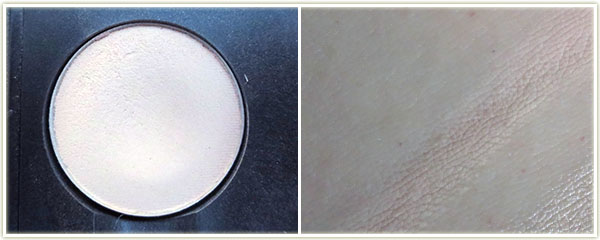
MAC – Blanc Type
Name: Blanc Type Finish: Matte2 Notes: Blanc Type is one of MAC’s buttery, soft Matte2 formula. On my my skin it looks slightly pink in the swatch, but it does wonders to brighten up any look and I tend to think of it as whiter than my other highlight shades. The texture is very, very smooth.
MAC – Dazzlelight
Name:Dazzlelight Finish: Veluxe Pearl Notes: This shade is slightly underused in my palette, but to me it’s a paler, whiter Shroom and definitely more shimmery.
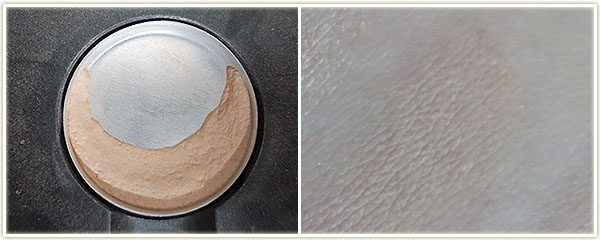
MAC – Brule
Name:Brule Finish: Satin Notes: Brule is an off-white that seems to completely melt into my skin. I’ve been trying to bust through this shade but it feels like the pan is never ending! This makes a great brow highlight on me and honestly, that’s the only thing I ever use it for. When I’m done with this, I’ll end up using Blanc Type as my usual brow highlight as I prefer the brightening effect that Blanc Typeprovides.
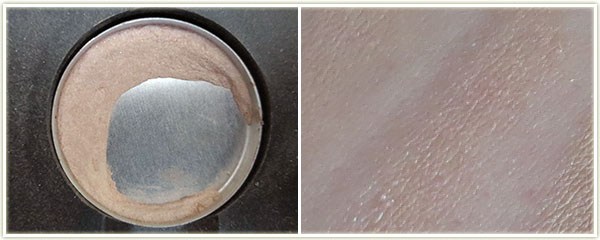
MAC – Shroom
Name:Shroom Finish: Satin Notes: I like to think of Shroom as a shimmery Brule. I’m confused as to why this shadow is a satin finish because it definitely has shimmer to it that you don’t often see in satins. A great deal of people compare Shroom to Urban Decay‘s Virgin, but I personally do not feel they are the same.
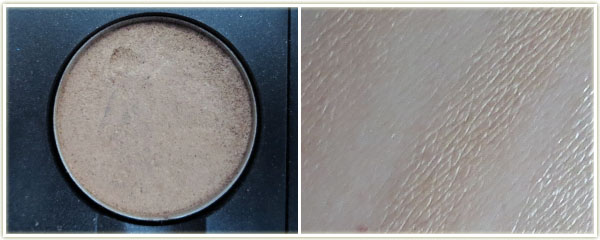
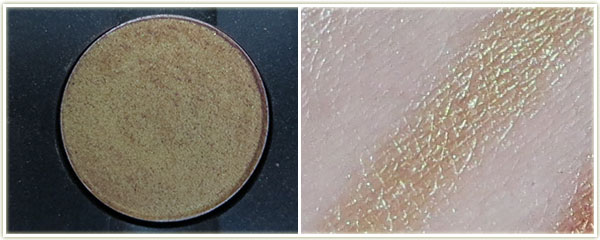
MAC – Ricepaper
Name:Ricepaper Finish: Frost Notes:Ricepaper is a yellow tinted, shimmery beige. It has a frost finish, but it doesn’t reflect the same amount of frost that some of the frost finishes do… such as the next one:
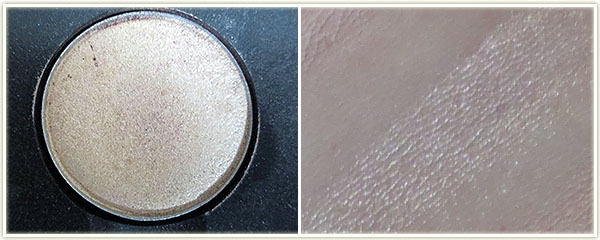
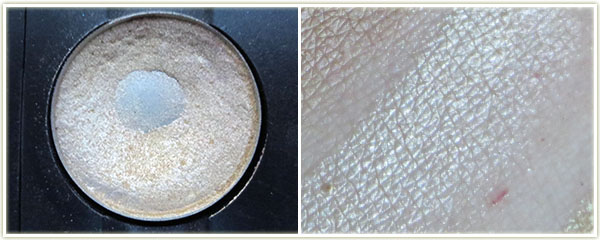
MAC – Nylon
Name:Nylon Finish: Frost Notes:Nylon is phenomenal. In the pan, it looks like a white-gold, but on the skin it definitely seems to just embody the term “frost”. It definitely has a frost finish and looks slightly yellow. This is my second pot of this shadow and one of the first ones I ever owned from MAC.
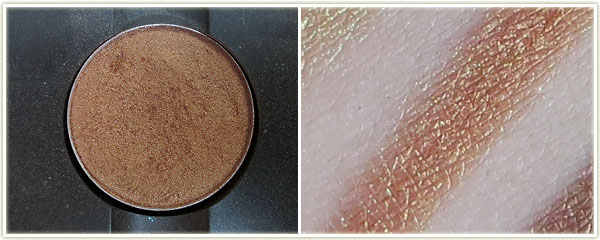
MAC – Gorgeous Gold
Name:Gorgeous Gold Finish: Veluxe Pearl Notes: This was was a nightmare to photograph in the pot, but as you can see from the swatch, it’s a beautiful reflective gold with hints of green.
MAC – Amber Lights
Name:Amber Lights Finish: Frost Notes: I know this is supposed to be phenomenal for blue eyes, but I must be mixing this with the wrong shades because it never looks that good on me. It’s very frosted and very orange. The pigmentation is fantastic and it smoothes on the lid beautifully.
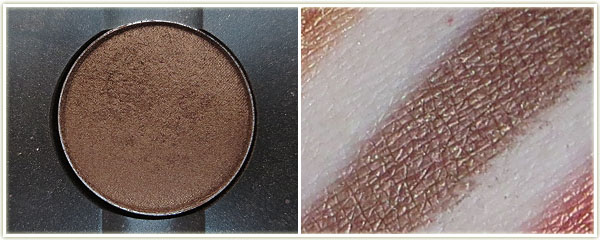
MAC – Bronze
Name:Bronze Finish: Frost Notes: Beautifully pigmented, although not one I use often.
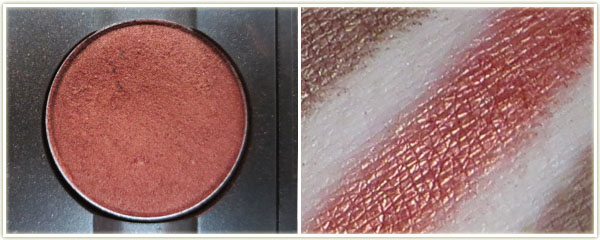
MAC – Coppering
Name:Coppering Finish: Veluxe Pearl Notes: This is an absolutely outstanding colour, easily my number one favourite by MAC. This is a bright copper that has wonderful pigmentation.
MAC – Charcoal Brown
Name:Charcoal Brown Finish: Matte Notes: Another shade I’ve not used often. Seems to apply quite well, but it’s not as smooth as their Matte2 formula.
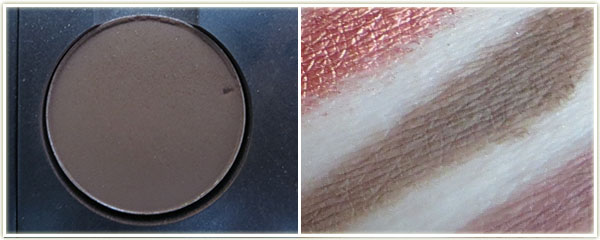
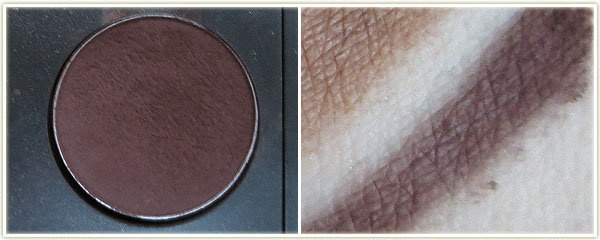
MAC – Haux
Name:Haux Finish: Satin Notes: This pan is my first ever MAC eyeshadow, bought in 1995. Yes, this shadow is that old! It’s a rosy-tinted brown and does wonders to make my eyes look awake. I use it in my crease with some kind of light shimmery shade on the lid.
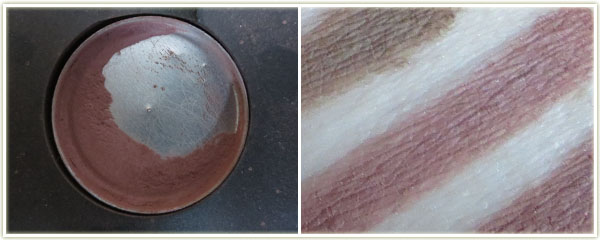
MAC – Shag
Name:Shag Finish: Unknown, likely a satin Notes: This is another incredibly old shade. MAC doesn’t seem to make this shade anymore and a quick Google search didn’t indicate to me when they discontinued it. That being said, it’s very similar to Haux. Maybe slightly deeper, but not by much. I usually pair this with Nylon.
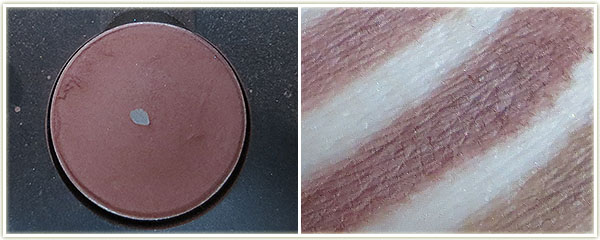
MAC – Cork
Name:Cork Finish: Satin Notes: I used to use this shade a lot, but I don’t even remember touching it in the last year.
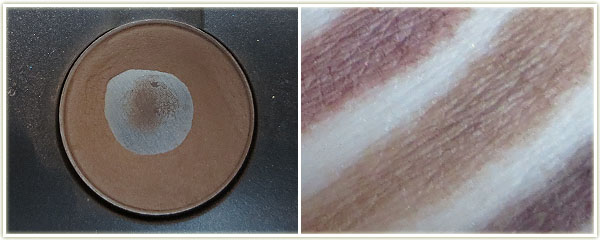
MAC – Handwritten
Name:Handwritten Finish: Matte2 Notes: If you buy this shade, one of the first things you need to do is touch it with your fingertip. The texture is so incredibly soft that it actually feels pillowy. I’ve never felt a shadow like that before! The pigmentation on this is insane – to the point where it can actually be too soft so be careful when you stick your brush into the eyeshadow!
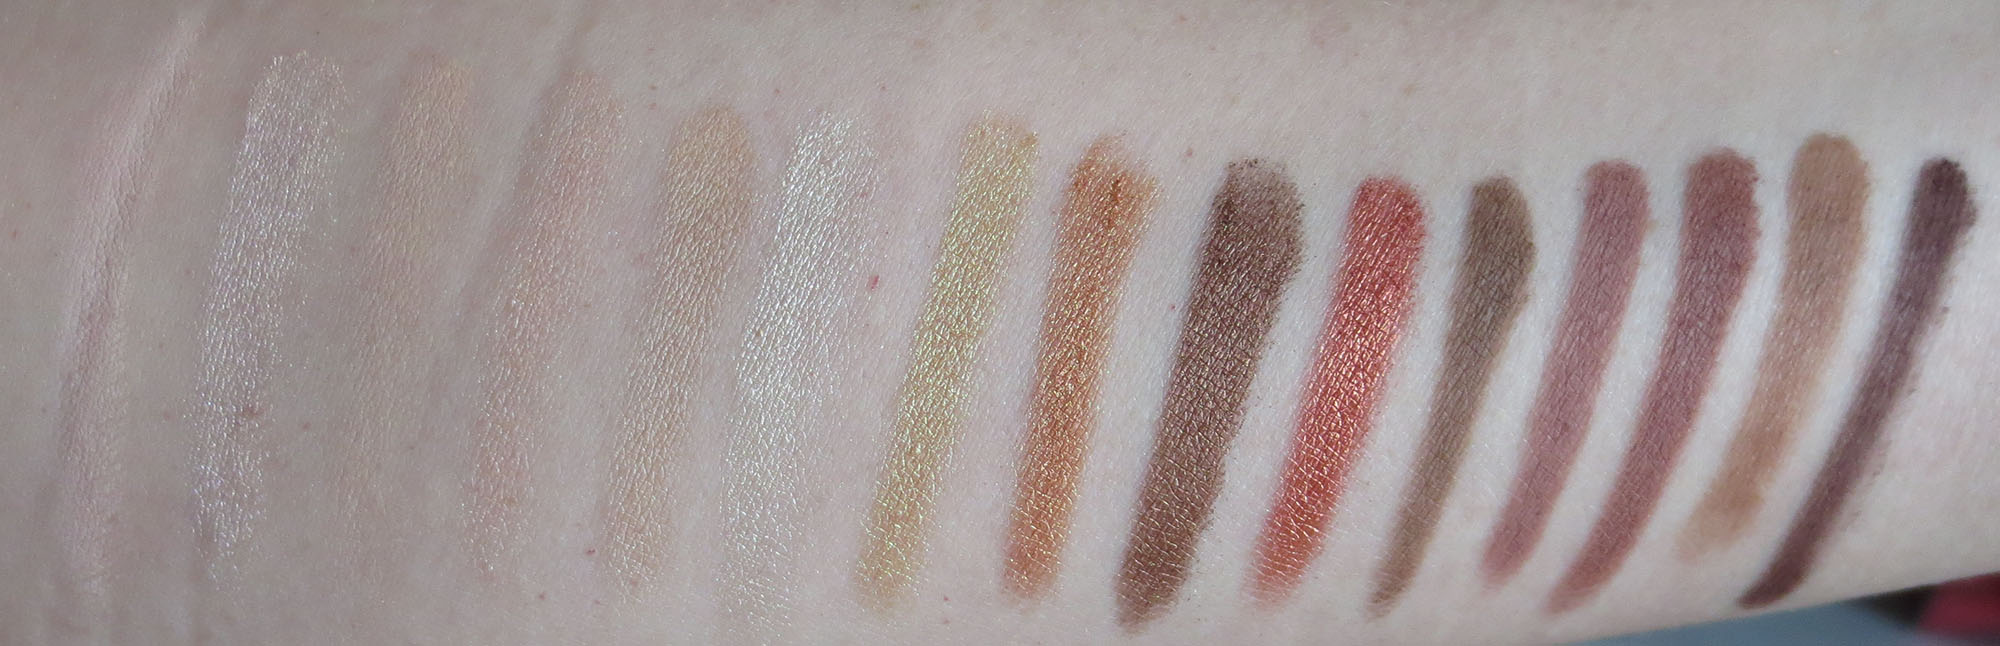
MAC Neutral Palette – Swatches – Click to enlarge
Blanc Type
Dazzlelight
Brule
Shroom
Ricepaper
Nylon
Gorgeous Gold
Amber Lights
Bronze
Coppering
Charcoal Brown
Haux
Shag
Cork
Handwritten
So that was my neutrals palette! I’ll have three more MAC palettes to show you in the upcoming weeks.