Tag Archives: CoverGirl

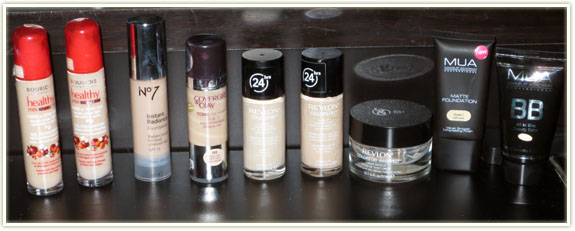
Drugstore Foundation Roundup

20131118_foundation_roundup

I’ll start this off by saying I still feel like I’m an extreme rookie when it comes to foundation. I often feel I have no concept as to what colour actually matches my  skin tone. A lot of what I say is going to be based on what professionals at MAC, Sephora or Boots have said to me. At MAC, depending on who I speak to, I’ve been told I’m either NC20 or NW20 (I do get pointed towards NW20 more often though). My veins appear blue, which means I have a cool undertone. One of the most important thing to note in the following swatches are that these are all done on the underside of my arm which is pretty darn pale. The underside of my arm does not match my face, nor does it even match tops of my arms, so keep that in mind as you’re comparing the colours to my skin. I tried swatching on my jaw line but it just made for incredibly awkward pictures.

Things to note about my skin:

  • At MAC I’m in the NW20/NC20 colour range.
  • My skin is not overly oily, however I do get occasional shiny patches. If I do get oily patches, I don’t generally try to powder it down as I don’t find them particularly blinding!
  • My veins appear blue, which means I have a cool undertone.
  • I don’t wear foundation every day as I don’t have anything to really cover up. A few occasional red patches where I pick at my skin, but I don’t need to cover acne or anything of the like. For me, foundation evens out skin tone.

On with the swatches! Prices are marked with the appropriate currency to the country in which I bought the foundation.
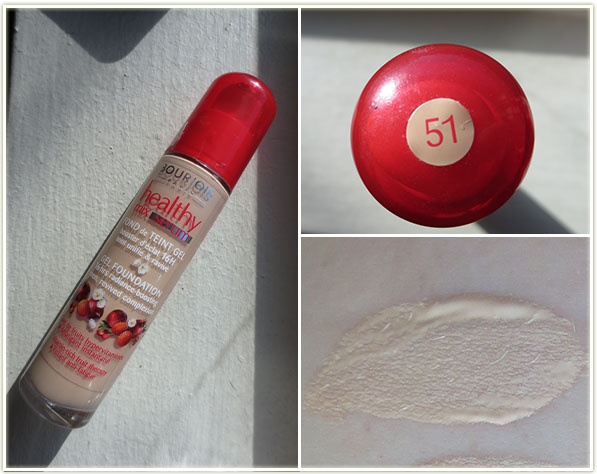
Bourjois Healthy Mix Serum in 51 Light Vanilla (~€14)

While in Ireland in May, I picked up the Bourjois Healthy Mix + Serum foundation in shades51 (Light Vanilla) and 52 (Vanilla). I’d heard many a good thing about this foundation and wanted to give it a try. The first thing that has to be said about this foundation is that it smells amazing. Putting this on your face is an absolute pleasure – it smells refreshingly like berries! The consistency is rather thin, although it does have somewhat of a gel-like texture which I suppose is the “serum” effect they refer to in the name. Shade 51 is too light for my complexion at the moment (even though in the swatch above it looks damn near perfect), so I’m hoping my skin pales out enough throughout the winter to be able to use it pure. If not, I’ll mix it with a darker foundation to get a better colour match.

Also worth noting is that this comes with a pump. I can’t tell you how invaluable pumps are for foundation. Nothing is worse than a bottle with an open end (I’m looking at youRevlon Colorstay!). I do find this gets patchy/wears away pretty quickly so the lasting power isn’t amazing.
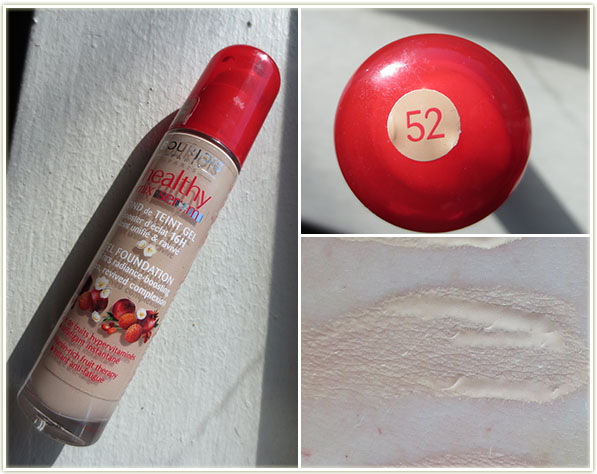
Bourjois Healthy Mix Serum in 52 Vanilla (~€14)

Right now this shade (52 Vanilla) seems perfect for my skin. It blends in smoothly and evenly. As with the shade I mentioned above, this is a really liquid consistency that feels really refreshing on the skin despite not having a very long wear time. It’s perfect for those who don’t like the feeling of overly thick foundations.
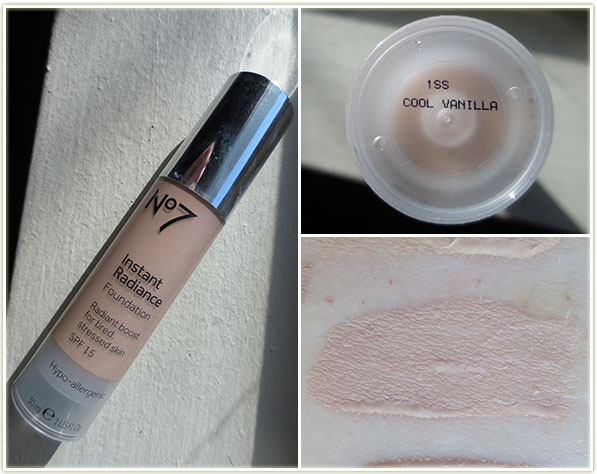
No7 instant Radiance Foundation in Cool Vanilla (~€16)
No7 Instant Radiance Foundation in Cool Vanilla (~€16)

No7 Instant Radiance foundation in Cool Vanilla is the foundation I feel the most comfortable wearing, which probably has to do with it being the foundation shade I was colour matched to in Boots. I’m never QUITE sure if a foundation matches me, so having a laser gun tell me my perfect shade eases a lot of my worry. I was colour matched in Ireland in May, so I had a partial tan at the time as it had already been quite warm in Canada by that point. This is the ONLY foundation I’ve worn where someone has commented on how amazing my skin looked. I will admit that it looks dark in the bottle, but it certainly doesn’t appear that intense on my face.

This also comes with a pump – therefore I love it. There is a faint “cosmetic” scent to the product, but it’s not offensive. Lasting power is quite good as it will endure an entire work day without issue.
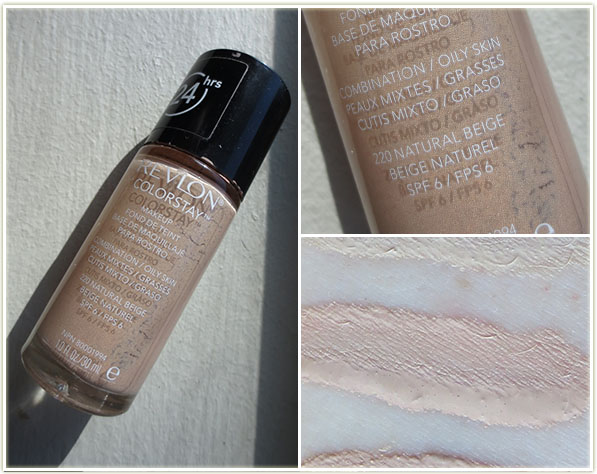
Revlon Colorstay Foundation in 220 Natural Beige (Combination/Oily) (~$20 CAD)

I had a bit of a love hate relationship with this foundation. Revlon Colorstay was the first liquid foundation I ever bought after hearing it recommended over and over again for being one of the best drugstore foundations ever. I took a leap of faith with the shade (220 Natural Beige) and it worked out decently well, though I do find this shade tends to run quite pink. This isn’t a shade I can wear during the dead of winter – it’s more an early summer and early fall shade (as my tan is both coming in and going out).

The first time I wore it I wasn’t loving it – it has a rather offensive paint-like scent (although you cannot smell it once it’s on your skin) and it dried down incredibly quickly, which wasn’t something I was used to. I gave up  on this foundation for a while then went back to it to force myself to finish the bottle… only to find that I suddenly LOVED the stuff. The coverage is intense – it will block out almost anything on your face and give you a flawless surface. It can appear quite artificial if you pack it on, so go lightly and build up a second layer if you really need it (I didn’t). It can feel rather tight if you’re not used to wearing foundation. Since the coverage is so heavy, it can look slightly artificial at times, which is why I tend to prefer how it looks after an hour or two of wear time once it’s had a chance to settle into your skin

I only wish this had a pump. I’ve read that some countries do have Colorstay in a pump, but I have yet to see that here in Canada!
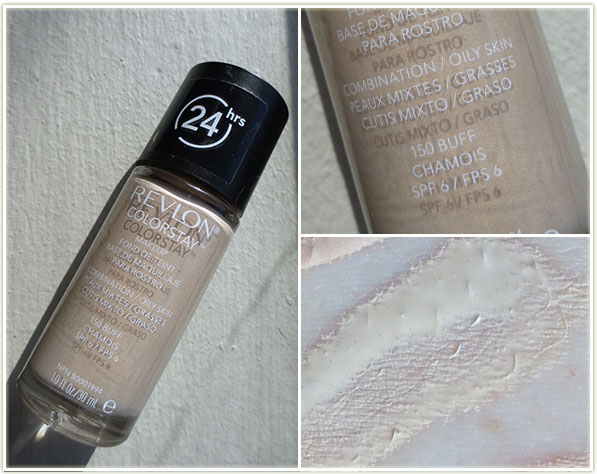
Revlon Colorstay Foundation in 150 Buff (Combination/Oily) (~$20 CAD)

Just a paler shade of Revlon Colorstay that I anticipate wearing in the winter. This shade (150 Buff) shade leans more yellow than 220 Natural Beige and is also significantly lighter.
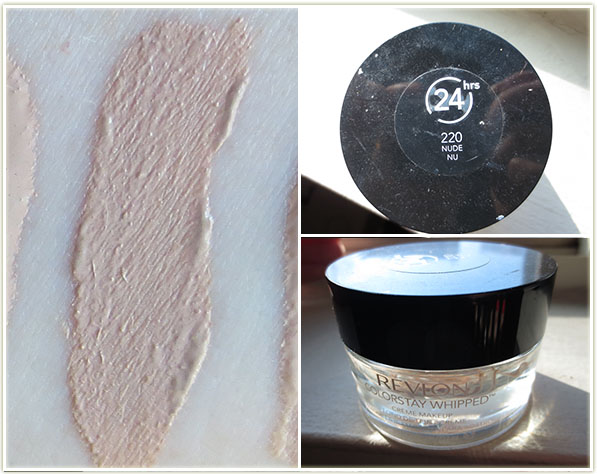
Revlon Colorstay Whipped Creme Foundation in 220 Nude (~$11 USD)

Ugh. This Revlon Colorstay Whipped Creme foundation (in 220 Nude) vexes me. First off, the number is the same as the Natural Beige shade in the normal liquid version and yet the shades have completely different names and are not similar at all. I bought this hoping it would be slightly paler than the liquid 220 Natural Beige shade – it’s definitely not, it’s darker!

I wore this throughout the summer as it was the darkest foundation I had and while it matched well enough, it was just never, ever comfortable to wear. Maybe it’s just because it was a cream foundation in the middle of a warm summer, but it just never felt like it completely settled into my skin. It really just felt like it sat on top of my skin. I forced myself to finish it, but I won’t purchase this one again. (And honestly, it has turned me off all cream foundations altogether now.) Also annoying is that despite it being in a rather cute tub, it was frustrating getting the product out. I resorted to using a cotton bud to remove the foundation, placed it one the back of my hand, and then dabbed my brush onto the back of my hand to pick up product.
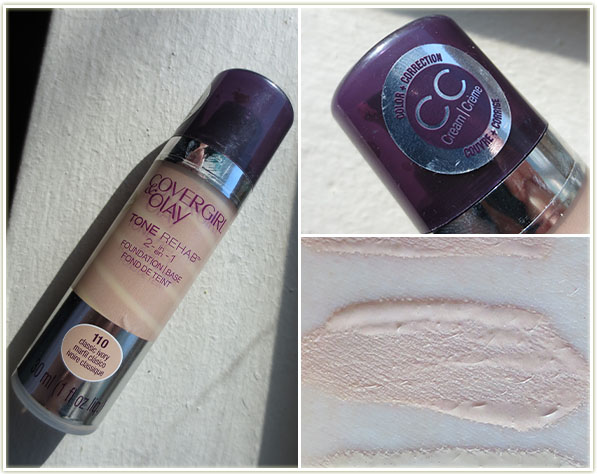
Covergirl & Olay Tone Rehab 2 in 1 Foundation – CC Cream in 110 Classic Ivory (~$20 CAD)

Covergirl‘s attempt at a CC Cream is a bit of a laugh. The actual tube doesn’t say anywhere on it that it’s a CC Cream… except for the sticker at the top which looks like it was added as an afterthought once the CC Cream craze started up in the beauty world. As far as I can see, it doesn’t actually have any CC Cream properties: there’s no colour correction properties to it and there’s no SPF. So let’s just forget it’s even labeled a CC Cream and move on. I’ve been wearing 110 Classic Ivory more lately to get a feel for it and I will say that it is an incredibly matte foundation. The colour match is quite good for me as we’re headed into the winter, but it does tend to feel a bit drying as I progressed throughout the day. I would recommend wearing a decent moisturizer underneath this foundation. And thumbs up for the pump!
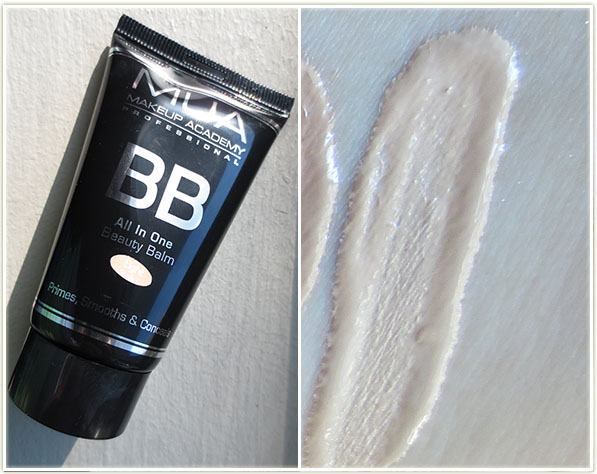
MUA BB Cream in Light (~£4 GBP)

MUA‘s BB Cream was cheap as chips and it doesn’t disappoint. It does feel rather thick, so go easy when you squeeze it out. The first time I applied it I definitely used too much and with the shade being too pale for me at the moment (man, I feel like I keep saying that!) it made me look rather ghostly. The dry down on this product is nice – you’ve got plenty of time to blend it into your skin and it just looks *nice*. To the touch it’s even rather soft. Love the squeezy tube and the nozzle end.
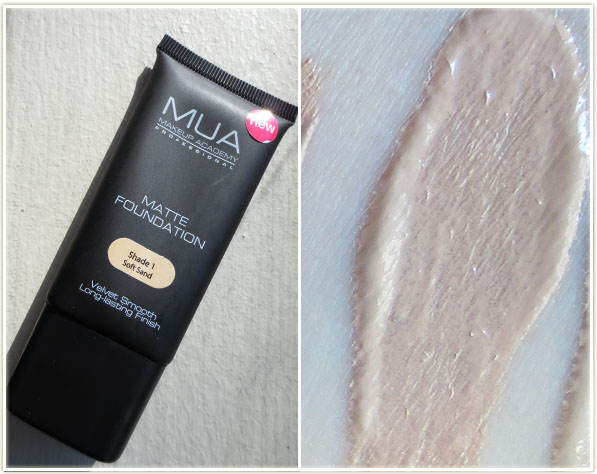
MUA Matte Foundation in Shade 1 Soft Sand (~£2 GBP)

MUA‘s Matte foundation is actually rather impressive. Not only is it incredibly cheap but it also has a nozzle end – a feature which I find to be an incredibly smart alternative to a pump. As a whole, the packaging on this one is rather awesome: It contains an ounce of foundation (typical for foundations) but it’s a flexible, soft tube with a nozzle. It’s compact and perfect for travelling, which makes it pretty ideal. I don’t find it holds up throughout the day as well as Revlon Colorstay, for example, but the cost of this foundation offsets just about every downside to that.

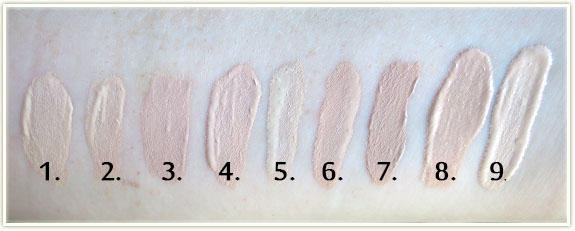
Here are all the foundations swatched side by side on the underside of my arm in indirect sunlight. As mentioned at the top of this post, my face has been colour matched to NW20 at MAC which is darker than my arm.
20131118_foundation_swatches_numbered

  1. Bourjois Healthy Mix Serum in 51 Light Vanilla
  2. Bourjois Healthy Mix Serum in 52 Vanilla
  3. No7 instant Radiance Foundation in Cool Vanilla
  4. Revlon Colorstay Foundation in 220 Natural Beige (Combination/Oily)
  5. Revlon Colorstay Foundation in 150 Buff (Combination/Oily)
  6. Revlon Colorstay Whipped Creme Foundation in 220 Nude
  7. Covergirl & Olay Tone Rehab 2 in 1 Foundation – CC Cream in 110 Classic Ivory
  8. MUA Matte Foundation in Shade 1 Soft Sand
  9. MUA BB Cream in Light

Those are all my foundations! I hoped the colours and swatches help you out if you were looking information and comparisons. Is there a foundation out there that you think I’d like? I’ll admit to never having owned a high end foundation so I’m sure that’s something I’ll be looking into at some point!
October 2013 Favourites

october2013favourites

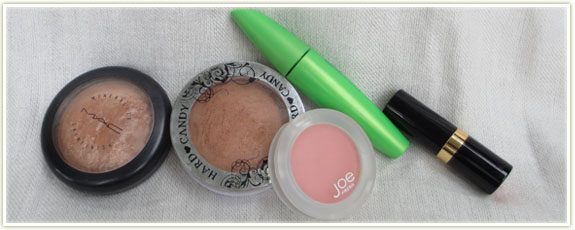
Here’s a look at the beauty products I reached for the most throughout the month of October.

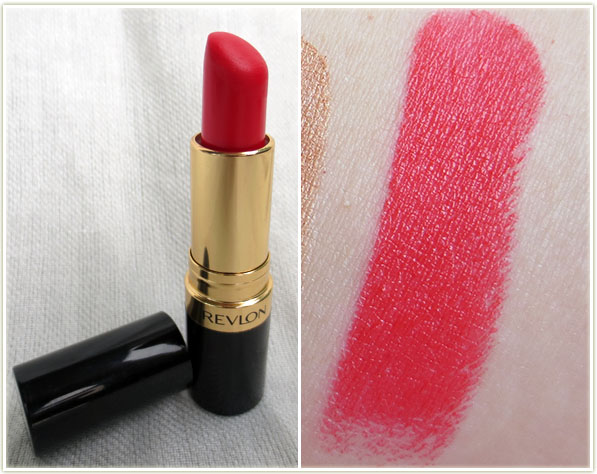
Revlon’s Super Lustrous lipstick in Fire and Ice

Fire and Ice is the first shade of Revlon lipstick I ever bought. It’s the kind of shade that makes me think I need to own every single colour from their Super Lustrous range, although realistically I have to acknowledge that no other colour is going to compare to this shade. The first time I wore it to work I got instantaneous positive reactions from a few coworkers. To me, it looks like an electric red with a hint of orange to it. The formula is comfortable on the lips and since it’s not matte (it’s a creme), it’s also not drying. Absolutely stunning product.

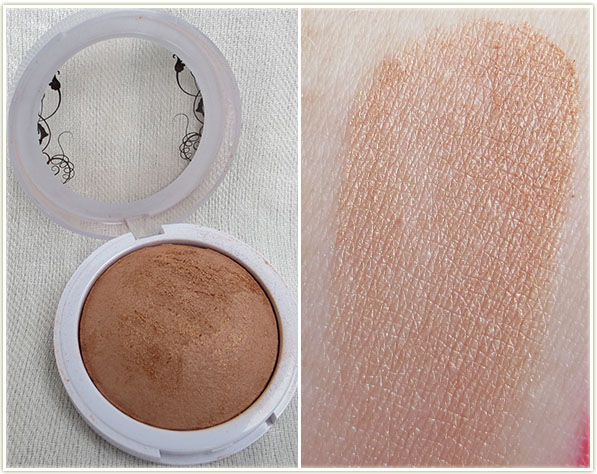
Hard Candy So Baked Bronzer in Hula Hula

Hard Candy‘s bronzer in Hula Hula had become a favourite of mine throughout the summer. I wasn’t expecting to continue wearing it throughout the fall months as I thought it would be too dark and shimmery on my rapidly fading tan. However, this didn’t turn out to be the case! It is still a rather dark bronzer on my skin tone (even more so on the underside of my arm as you can see in the swatch) but when applied with a light hand, this gives a wonderful glow to the face. I don’t use bronzers to contour, so I end up sweeping this across the highpoints of my face. The bonus with this one is that because of the shimmery gold specs in the product, it can also double as a bronzey-blush with built in cheek highlight!

As a note: I don’t tend to wear this bronzer if I have a very shimmery eye look on as it can be a bit overpowering.

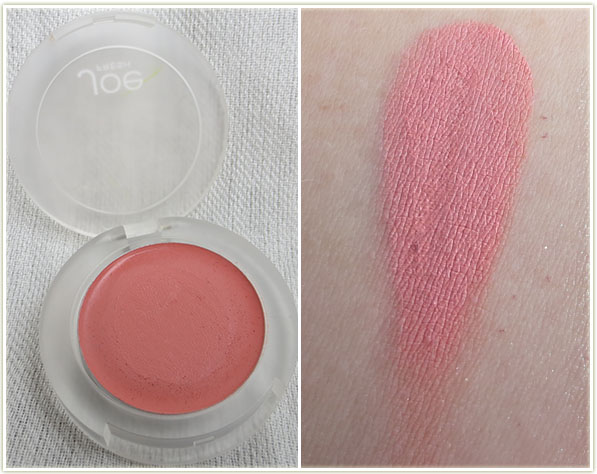
Joe Fresh Cream Blush in Apricot

Joe Fresh is a new company to me. I reviewed a few of their products very recently and this particular one stayed in constant rotation in my morning makeup routine. I don’t have a lot of experience with cream blushes and was a bit worried about how good the staying power would be. Imagine my surprise when the Apricot (a peach shade that tends to learn slightly pink on my skin) stayed safely on my cheeks throughout an entire work day (applied around 7 am, removed around 5 pm) and was actually VISIBLE on the cotton pad I used at night to remove my makeup. I hope all of the blushes in their cream line is as good as this one because I am definitely interested in picking up a few more!

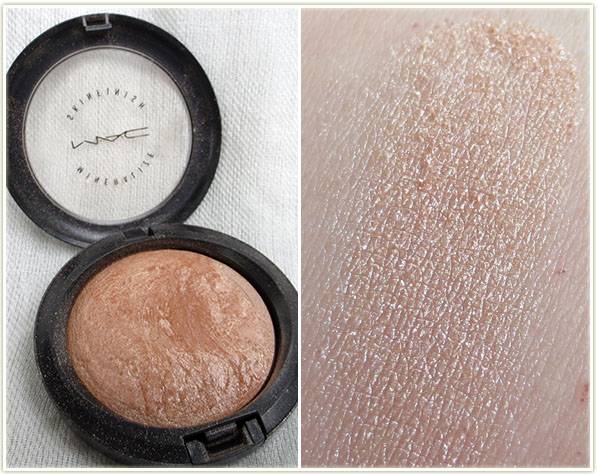
MAC’s Mineralize Skinfinish in Soft and Gentle

This is probably a staple in quite a lot of people’s makeup collections, and it has been in mine for several years as well. Lately I’ve found myself reaching for it more and more.MAC‘s Mineralize Skinfinish in Soft and Gentle is a lovely champagne highlighter that I used quite often throughout October to highlight my cheeks. In the past I’ve also used it as an eyeshadow,  however this month it was solely applied to my cheeks.

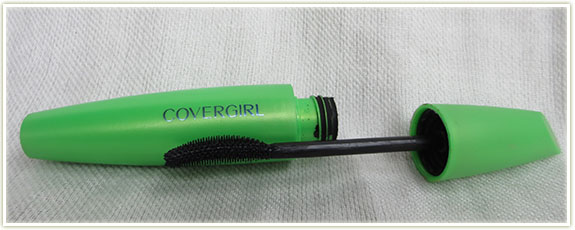
CoverGirl Clump Crusher in Very Black (water resistant)

I’m only going to mention this product in this monthly favourites, but rest assured that this is a “forever favourite”. I, like many others, was swayed by the utterly insane hype over CoverGirl‘s Clump Crusher mascara on YouTube about a year ago. While I love my L’Oreal Voluminous Carbon Black in waterproof, the reality is that sometimes you just want to try something new. This mascara does not disappoint! The oddly-shaped brush helps me get from the roots of my lashes to the tip multiple times over without, you guessed it, any clumps. I personally don’t apply multiple layers of mascara, but just for giggles one time I decided to do it just to see I could get the mascara to clump. No such climps. This stuff is beyond fantastic.

My only gripe with it? And this is one I’m willing to overlook because the brush and formula are so amazing… But there is no true waterproof formula for this mascara. I regularly buy the water resistant formula of this mascara and I have to say it just does not hold up to water at all. If anything remotely damp gets near your eye, this mascara WILL smudge. However, as I’ve already said, this is a detail I’m willing to overlook considering how amazing the results can be.

Let me know if you had any particular beauty favourites throughout October!

Eyeshadow Combinations

Another random assortment of looks I wore to work over the past week or so.


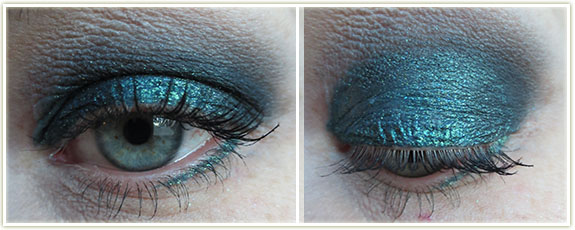
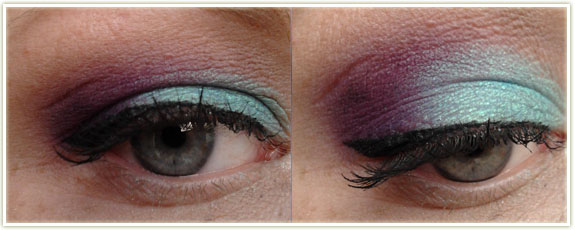
20131023

This one is a long time favourite of mine, but I can’t take credit for “inventing” it. I got the eyeshadow combination from Jangsara‘s Teal Tartan tutorial.

Base: Urban Decay Primer Potion (Original)

Eyeshadows: (All MAC products) Undercurrent pearlglide eyeliner was used as a replacement for eyeshadow  to cover the entire lid. Moonlight Night pigment was then used in the outer corner and swept into the crease. Brule was used to highlight the browbone.

Liner: Undercurrent was use to line the lower lashline from the outer corner to the middle of the lid.

Mascara: L’Oreal Voluminous Carbon Black (waterproof)


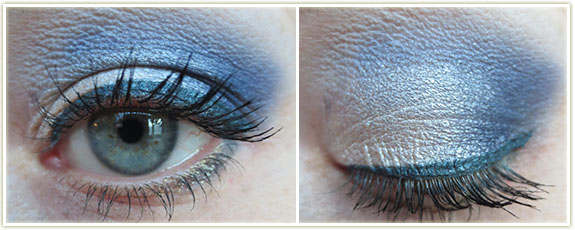
20131016

Base: Urban Decay Primer Potion (Original)

Eyeshadows: MAC’s Nylon was swept over the inner two-thirds of the lid with Sleek’s Ink (Matte darks palette) blended into the outer third of the lid and into the crease. I also angled it slightly so it came to a bit of a point instead of a rounded edge in the outer corner towards the brow.  MAC’s Brule was used to highlight the browbone.

Liner: MAC’s Midnight Blues was used on the upper lashline and flicked out slightly. Maybelline’s Color Tattoo in Bold Gold was used as a liner on the lower lashline with Sleek’s Ink very lightly applied to the outer edge.

Mascara:  CoverGirl Clump Crusher in Very Black (water resistant)


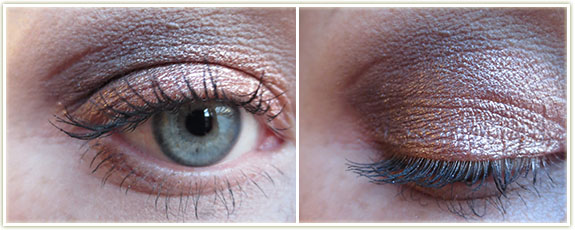
20131020

One of those “oh man, I have five minutes, throw something on quick” looks.

Base: Urban Decay Primer Potion (Original)

Eyeshadows: L’Oreal Infallible in Amber Rush applied all over the lid with MAC’s Midnight Madness (mineralize shadow from their Christmas collection several years ago) applied onto the outer third and into the crease. MAC’s Brule was used to highlight the browbone.

Mascara: CoverGirl Clump Crusher in Very Black (water resistant)

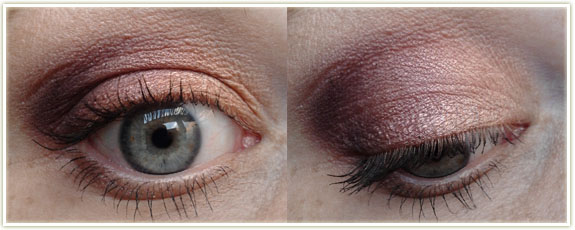
Oct. 2013 – Recent Looks I’ve Loved

eyes

This turned out near identical to another look I normally do using MAC’s Mineralize eyeshadow duo in Heat: Element that I got a few years back.

Base: Urban Decay Primer Potion (Original) with Maybelline’s Color Tattoo in Bold Gold layered over the inner two-thirds of the eye.

Eyeshadows: Sleek’s Sunset palette – the gold shade was used on the inner half of the eye, with the vivid  cranberry shade on the outer half of the eye. Urban Decay’s Buck was blended at the top of the crease. MAC’s Brule was used as a brow highlight.

Liner: MAC’s fluidline in Dipdown

Mascara: CoverGirl Clump Crusher in Very Black (in the water resistant variety, but I need to point out that is very NOT water resistant despite it being a fantastic mascara)


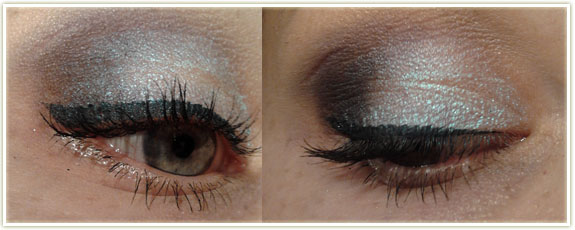
20131005

Looking at this now, I can see some creasing on the lid and these shots were taken right after application I believe. Regardless, I love that Color Tattoo (Waves of White) so in general I was pretty pleased with the outcome.

Base:  Urban Decay Primer Potion (Original)

Eyeshadows: Maybelline’s Color Tattoo in Waves of White on the inner two-thirds of the lid. MAC’s Contrast blended into the outer half of the lid, with Parfait Amour in the upper crease (very lightly since colour payoff with this shadow is not amazing). MAC’s Brule was used as a brow highlight. I then sprayed an angled liner brush with MAC’s Fix+ and dipped it in MAC’s Iridescent Powder in Silver Dusk and used it as a liner across the outer half of the lower lid.

Liner: MAC’s Midnight Blues was used to create the upper winged liner.

Mascara: CoverGirl’s Clump Crusher in Very Black (water resistant)


20131001

Someone at work called this a full on peacock look – I’ll take that compliment!

Base: Urban Decay Primer Potion (Original)

Eyeshadows: Inglot’s AMC Shine 33 on the inner two-thirds of the lid. Sleek’s Sugarlite (Matte Brights palette) on the outer third. Urban Decay’s Buck blended into the crease, with MAC’s Brule as a brow highlight.

Liner: Maybelline’s Eyestudio Lasting Drama Gel Eyeliner in Blackest Black (not a fan of this product), I’m just trying to use it up)

Mascara: CoverGirl’s Clump Crusher in Very Black (water resistant)


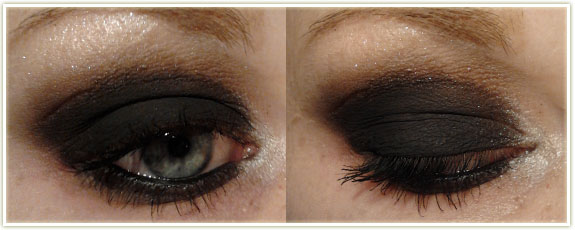
201309261

I was mucking around at home trying to do a “wearable to the office” type black eye. I quite like how this turned out and will probably end up wearing it to work one day. Also slightly Tron-esque which just makes it even more awesome.

Base: Urban Decay Primer Potion (Original)

Eyeshadows: Urban Decay’s Blackout all over the lid, into the crease and the smudged along the lower lashline. Buck was blended into upper crease. MAC’s Silver Dusk was used as a brow highlight and on the inner tearduct.

Liner: MAC’s Kohl Power in Feline on the inner waterline.

Mascara: CoverGirl’s Clump Crusher in Very Black (water resistant)


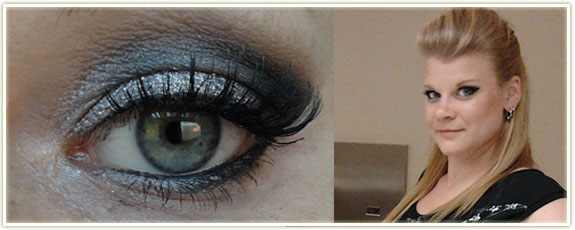
201309262

This was a fun one. We had a Rock N Roll-themed event at work and I took full advantage of being able to wear false lashes and glitter to work without thinking twice about it! While the end result ended up looking less rocker on my face than I’d intended, I still loved it.

Base: Urban Decay Primer Potion (Original)

Eyeshadows: I used a piece of sticky tape to create a sharp outer edge and then removed it once my makeup was completed.  MAC’s Electra all over the lid. Urban Decay’s Blackout in the outer corner and then blended slightly into the crease. Urban Decay’s Buck was use to blend out the harsh line of the black in the upper crease and MAC’s Blanc Type was used to highlight the brow bone. Electra was also used to line the inner half of the lower eyelid and Blackout on the outer half.

After all the blending was done, I used Too Faced’s Glitter Glue and applied that all over Electra on the lid. I then stuck my finger into Tony & Tina’s Cosmic Lights Glitter in Gateway (this product is probably about ten years old and unfortunately the company has since gone under. Any silver glitter will do.) and applied that over the glitter glue.

Liner: MAC’s Kohl Power in Feline on the lower waterline and Physicians Formula Eye Booster on the upper lashline (mostly to hide the false lashes).

Lashes: Ardell 102 Demis

Mascara: CoverGirl’s Clump Crusher in Very Black (water resistant)

Face: Revlon Colorstay (Combination/Oily) in 220 Natural Beige. Physicans Formula Happy Booster Bronzer in Light was used for contouring and as a blush. MAC’s Silver Dusk was used as a cheek highlight as well. MAC Omega through the brows.


20130720

This one is a “go to” for me when I want something I know that is easy and tends to go with most things I wear. I find that Sketch is quite flattering on me and I never seem to go wrong when I use that shade.

Base: Urban Decay Primer Potion (Original)

Eyeshadows: MAC’s All That Glitters on the inner third of the lid, Star Violet on the middle third and Sketch on the outer third of the eye. Naked Lunch used to highlight the brow bone and blend out Sketch. For the lower lid, I used All That Glitters on the inner half and Star Violet on the outer half.

Liner: None (although I will often use some kind of black liner for an extra punch)

Mascara: CoverGirl’s Clump Crusher in Very Black (water resistant)