Tag Archives: Illamasqua

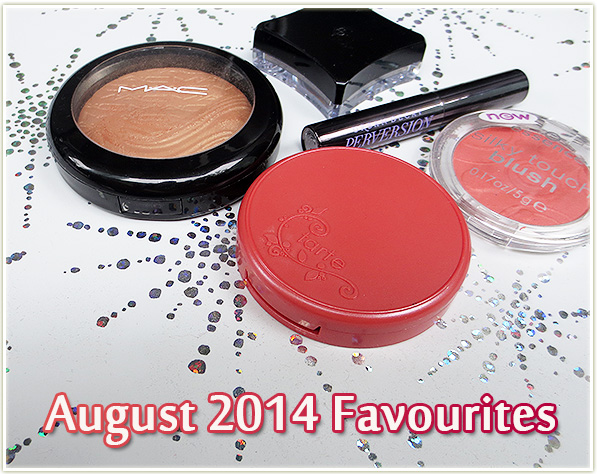
August 2014 Favourites

201408_favourites

I had to laugh when I looked at my favourites this month. The blushes I used this month are near identical! This month was a 50/50 mix of discovering new products and loving some old ones for me. I definitely favoured colours that were more on the sunset spectrum of things, which I think was partially inspired by having heavily used Sleek’s Sunset palette near the start of the month.
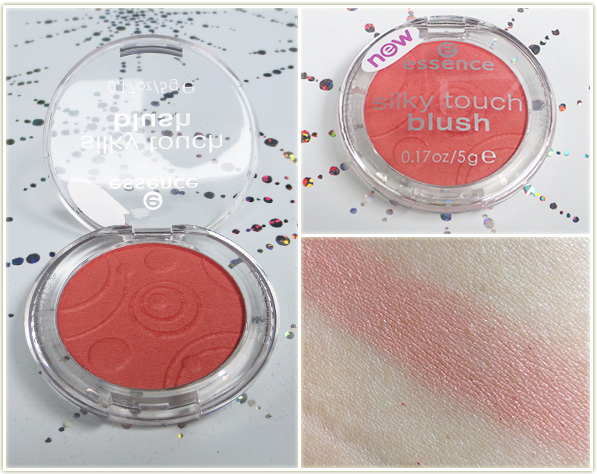
essence – Autumn Peach

I received essence‘s Autumn Peach blush from a promotional package I was sent by PR, and this blush was by far the best thing in there. I love absolutely everything about it: The packaging, the colour, the embossed graphics, the wear time. There is not a single thing about this blush that I dislike. It goes on my cheeks as a subdued bright apricot that I can build up to be quite intense. I defaulted to this blush so much because it’s just so easy to wear and seemed to match an awful lot of my eye looks in the last month.
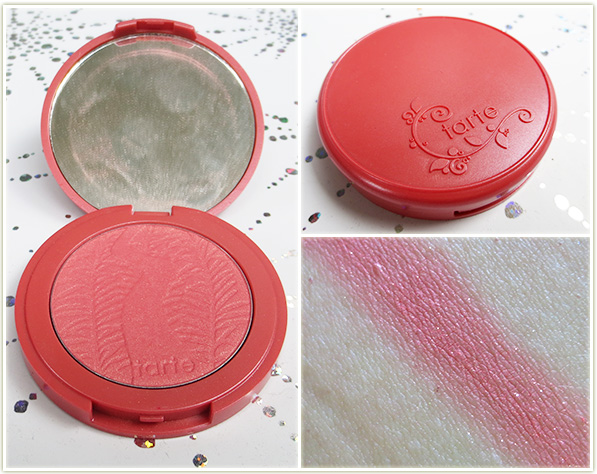
Tarte - Charisma
Tarte – Charisma

And this might as well be essence’s Autumn Peach blush’s slightly pinker sister! Tarte‘s Charisma is another shade I defaulted to a lot this month. Considering it’s so close to Autumn Peach, you can see that I was heavily favouring pinky-oranges in August. Charisma has a hint of gold sparkle to it, so I don’t generally use a highlighter when I opt to wear this one. Beautiful shade.
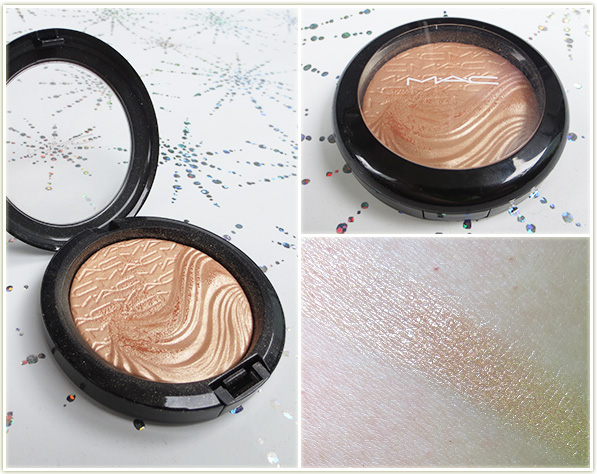
MAC - Whisper of Gilt
MAC – Whisper of Gilt

Keeping with the sunset theme is MAC‘s Whisper of Gilt Extra Dimension highlighter. The consistency of the Extra Dimension products has always felt very strange on my fingers (like a chalky styrofoam???) but it doesn’t feel like that when applied to the face. I wore a lot of oranges, bronzes and golds on my eyes in August so I tended to reach for my more golden highlighter to complement the looks.
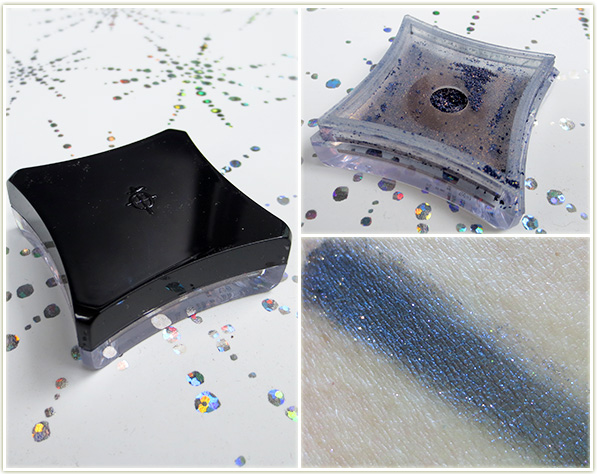
Illamasqua – Alluvium

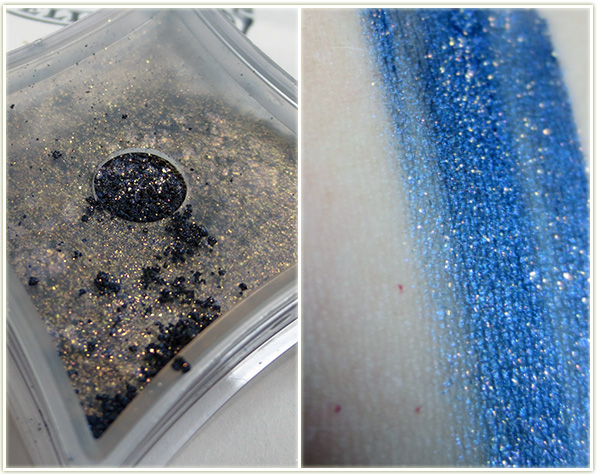
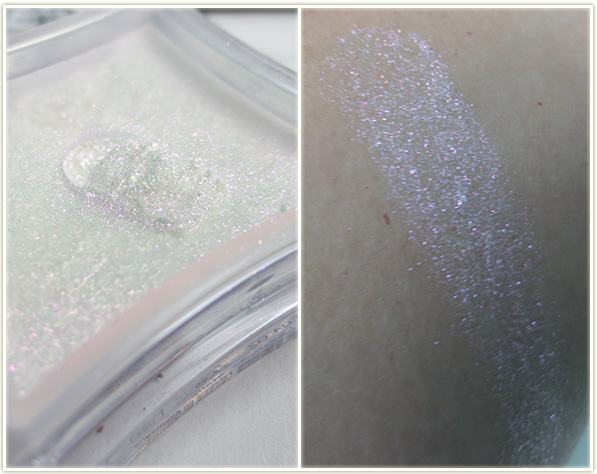
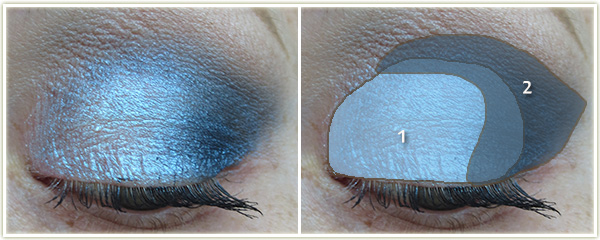
Alluvium is Illamasqua‘s most confusing pigment ever. Looks purply-bronze in the pot, swatches blue. In an effort to understand this pigment (what am I, the Eyeshadow Whisperer?), I used it a LOT after I bought it this month. Unfortunately, there didn’t seem to be a way to pull out the copper sparkles as this defaulted to a bright blue pigment no matter how I used it. If you’re looking for a vibrant blue pigment however, this is absolutely stunning.
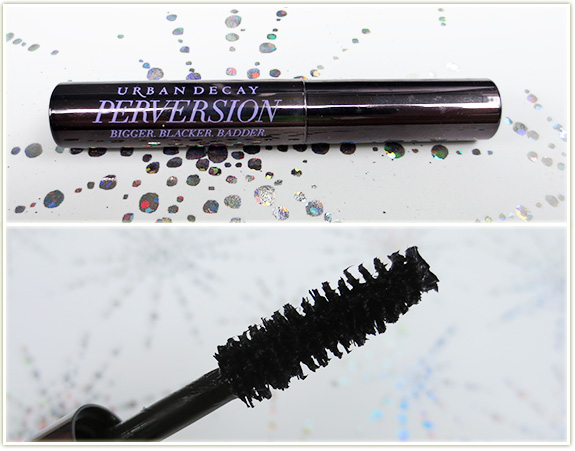
Urban Decay Perversion mascara

My last favourite of the month is Urban Decay‘s Perversion mascara. I received this little baby sized sample in my August Ipsy bag and fell in love immediately. Black, thick and wet (yep, I’m still talking about mascara) – this product is WONDERFUL. I have an unfortunate number of mascaras open at the moment (which is not a particular habit of mine), but I reached for this product over the six others I’ve bought/received lately. The one day I used another mascara instead of this one, I instantly regretted it. Love, love, LOVE!


What colours did you steer towards throughout August?
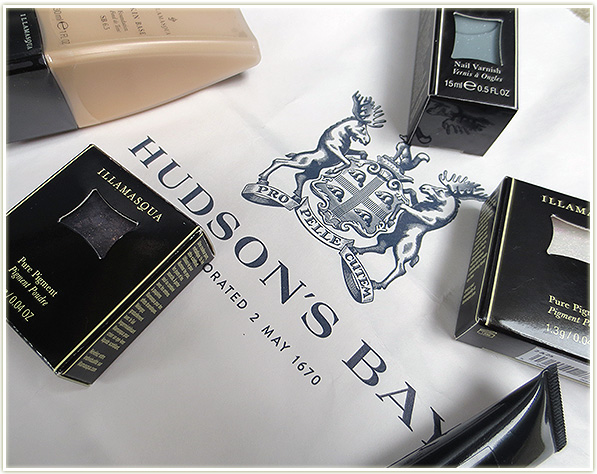
Sad Illamasqua News & Haul

201408_illamasqua1

I don’t normally post mid-month hauls as I generally try to save all of my goodies for a big long post at the end of the month, but I had a slight panic attack today when I read Julie from Swatch and Review’s recent Illamasqua haul. She pointed out that Illamasqua was pulling out of the North American market and that all of their products were on sale at The Bay. If I had waited till the end of the month to haul this stuff, you guys would’ve been screwed!

So, I don’t know where the heck I’ve been, but when I started researching this on Google, I discovered this isn’t apparently news and the information has been out there since February. Colour me totally blind because I had NO idea. I only got into Illamasqua‘s products within the last year or so, and I’ve been a huge fan of their blushes (in particular Tweak and Hussy). Feeling somewhat panicked by the news, I stormed over to the Illamasqua counter at The Bay yesterday during my lunch break (a mere hour after I read Julie’s post) and snapped up a few products. ALL Illamasqua products are 25% while supplies last, which means you’ll be saving a pretty penny since they’re not cheap products to begin with. The woman I spoke to at the counter indicated that they were expected to pack up shop by the end of August. YIKES!

It’s worth noting that as far as I can see, Illamasqua is completely gone from Sephora as well. That being said, The Bay always carried Illamasqua at significantly cheaper prices than Sephora did, so you’ve still got a few weeks to pick up some nicely discounted products!

Here’s the loot I snagged. I may go back for more before the end of the month, but this will do for now!

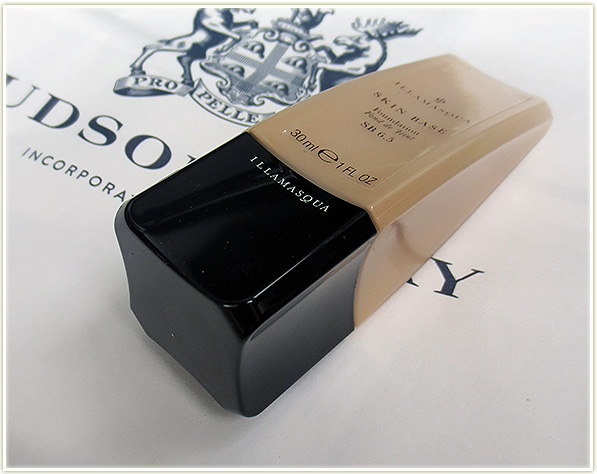
Illamasqua Skin Base in shade 6.5 (on sale for $31.50 CAD, regular price is $42)


Skin Base. If there’s one thing that Illamasqua fanatics always talk about, it’s Skin Base. I first heard about their foundation through Pixiwoo, and kind of ignored it over the years because it’s expensive and I’m a cheapo when it comes to foundation. It’s not a product I wear every day, so it’s not really essential like eyeshadow is to me. But goddamn if I wasn’t going to get this at 25% off! (And even on sale, it’s still pretty pricey at ~$32!)

The makeup artist at the counter helped me pick out the Shade 6.5 which kind of surprised me. Despite having a decent summer tan right now, I wasn’t expecting to be so high up the line of foundations (this is good news for the super pale folk out there!). According to Illamasqua’s siteShade 6.5 is similar to MAC NC25, so it’s not nearly as dark as I thought.

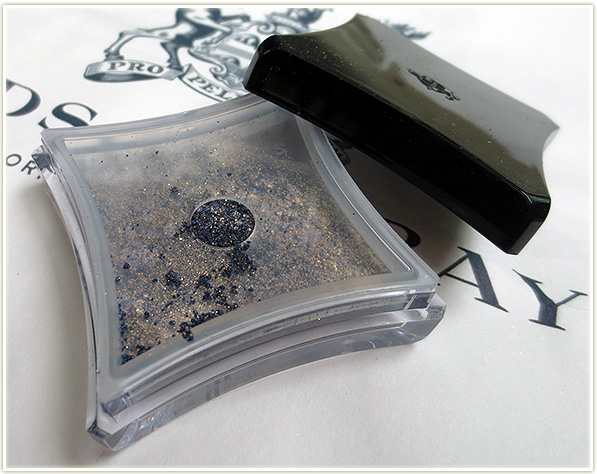
Illamasqua Pure Pigment in Alluvium (on sale for $19.12 CAD, regular price is $25.50)

Um hello there pretty! The Alluvium Pure Pigment is stunning in the pot (although the pots themselves are an absolute disaster packaging-wise. What a mess they make.). It looks like an incredibly dark navy blue with flecks of copper and gold sparkle. However…

Illamasqua Pure Pigment in Alluvium

What sorcery is this?!?! The swatch compared to the pigment in the pot is completely baffling to me. Honestly, I prefer the shade in the pot, and I’m going to see if I can try to pull more of the darker copper sparkles out of this shade by using a brown base. It’s still beautiful though. Despite the rather unexpected blue shade, you gotta admit that is one *stunning* shade of blue.

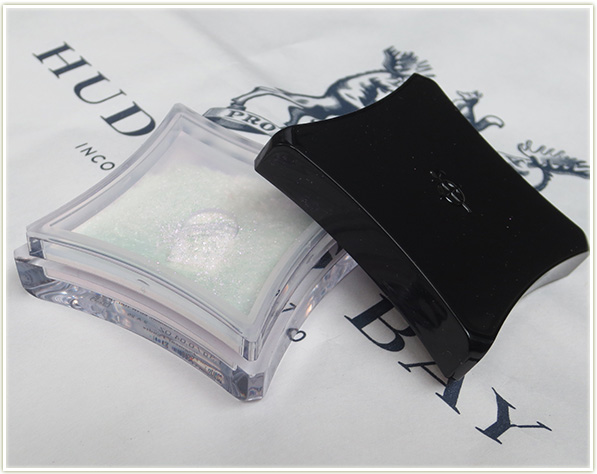
Illamasqua Pure Pigment in Static (on sale for $19.12 CAD, regular price is $25.50)

The Static Pure Pigment looks an awful lot like Beguile (a Pure Pigment shade I already own), but it has far more of a pink flash to it (whereas Beguile ends up looking like snow although it has multi-coloured shimmer in it). I bought this because I don’t have anything quite like it. It reminds me of MAC‘s Transparent Glitters (teal being my favourite).

Illamasqua Pure Pigment in Static

Out of focus shot to the right so you can see the pink flash to the pigment. It’s obvious in person, but man oh man is it hard to photograph straight on.

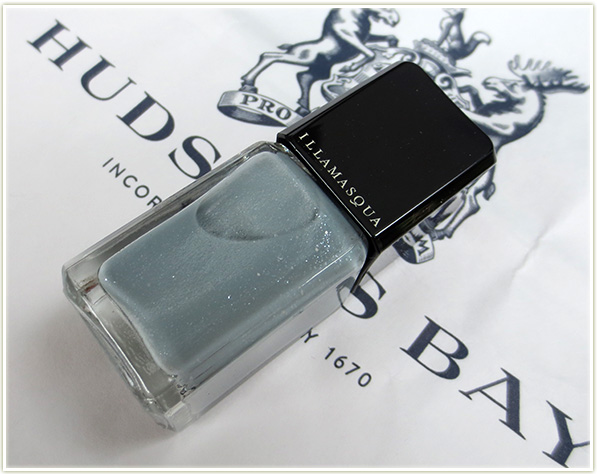
Illamasqua Nail Varnish in Raindrops (on sale for $12.75 CAD, regular price is $17)

I wasn’t sure what else to pick up from Illamasqua, so I did a bit of research before heading over. One of the things that Christine fromTemptalia recommended highly was their Raindrops nail varnish. It’s a muted grey polish with flecks of silver throughout. It looks like a polish I could wear week after week. I haven’t tried it yet, but I’m excited to try it out!

Nemo helping out
Nemo helping out

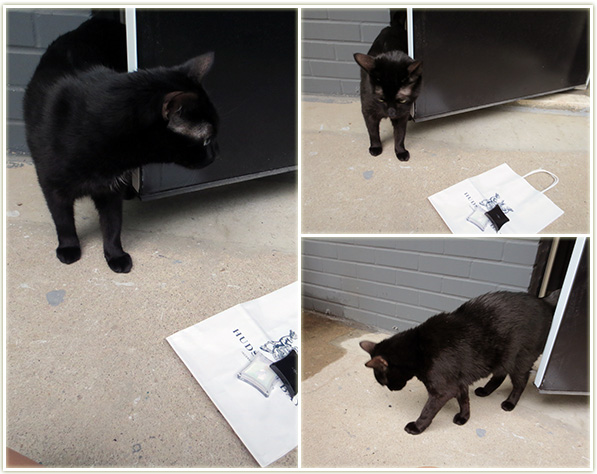
And what’s a product photographing session without Nemo checking out what’s going on? 🙂
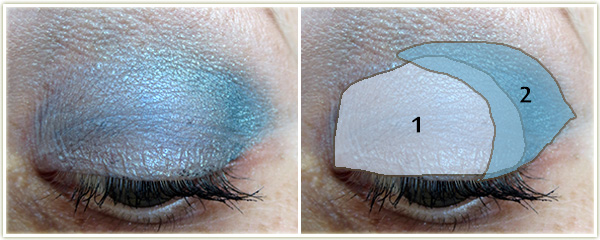
That’s it for this haul – if you’re interested in Illamasqua, you’ve got until the end of the month to pick up some lovely products at some very nice prices. Good luck, and let me know if you got anything!

What’s On My Face – Volume 20

20140721_look3-1

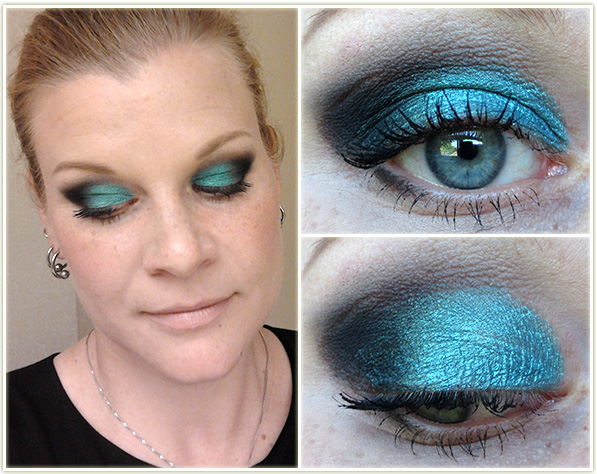
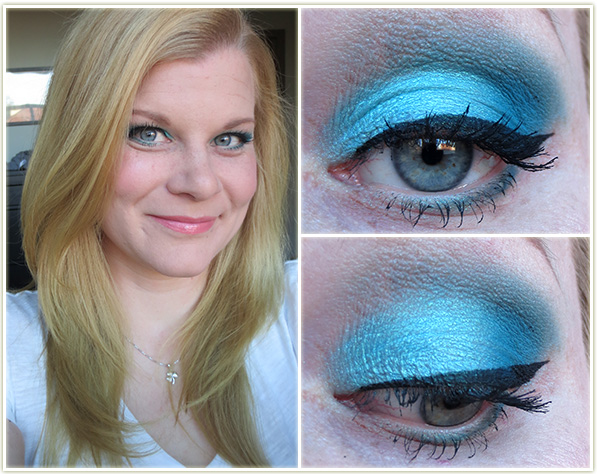
My dark but bright eyes look coupled with dead nude lips. Always a bit of an odd one to wear in the middle of the summer, but still a staple look I go to when I want to make an impact with my makeup.

20140721_look3-2

Eyes

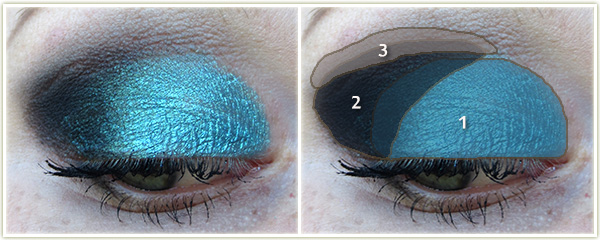
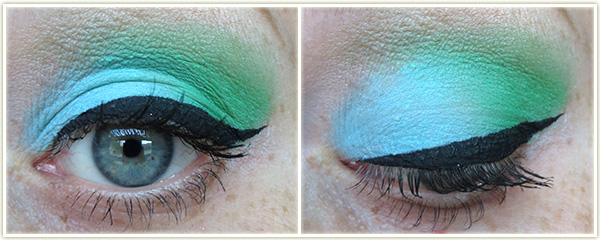
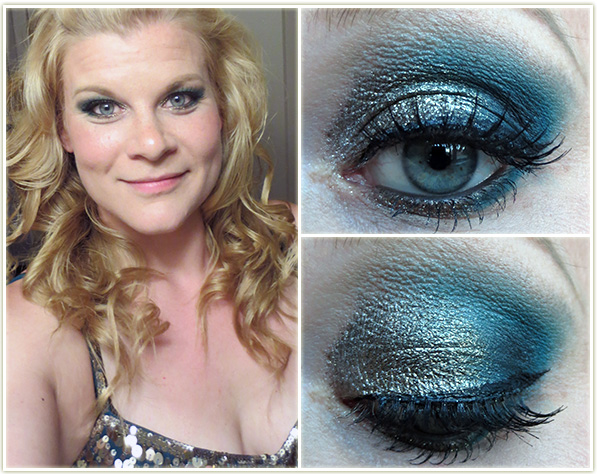
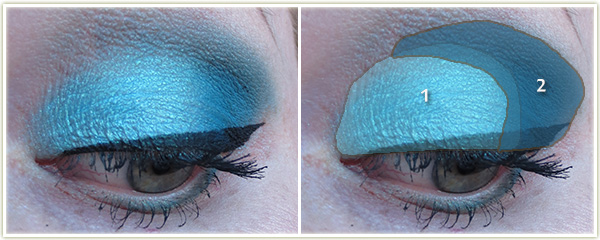
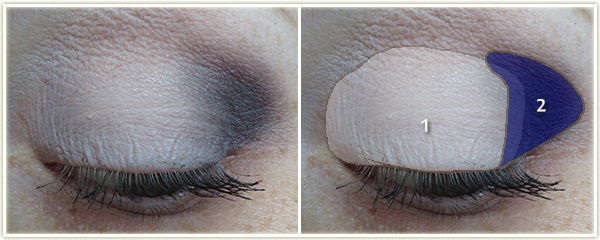
  1. MAC Blue Sorcery all over the lid. (I apply this with a damp brush to bring out the brightness of the shade.)
  2. Urban Decay Blackout in the outer third of the lid and pulled through the crease. I also lined my lower lash line at the outer edge with this shade.
  3. Makeup Geek Creme Brule at the top of the crease to blend everything out.

MAC Blanc Type on the browbone and Benefit‘s They’re Real mascara on my lashes.

Rest of the Face

  • Foundation: Boots No7 Instant Radiance in Cool Vanilla
  • Bronzer: Joe Fresh Sand Bronzer
  • Blush: Wet n Wild Mellow Wine
  • Highlighter: MAC Silver Dusk
  • Lips: Rimmel Apocalips in Nude Eclipse

20140721_look1-1

Quick weekend look!

20140721_look1-2

Eyes

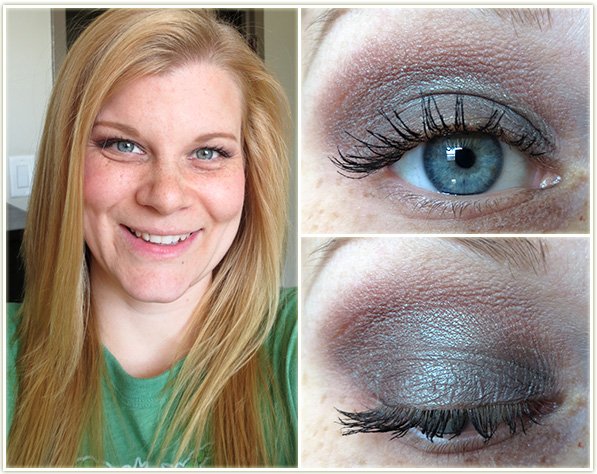
  1. MAC Greensmoke all over the lid.
  2. MAC Club in the outer corner and through the crease.

MAC Blanc Type on the browbone and Benefit They’re Real on my lashes.

Rest of the Face

  • Bronzer: Physicians Formula Bronze Booster in Light/Medium
  • Blush: Illamasqua Tweak

20140721_look5-1

Love how this came out – especially the lip combination.

20140721_look5-2

Eyes

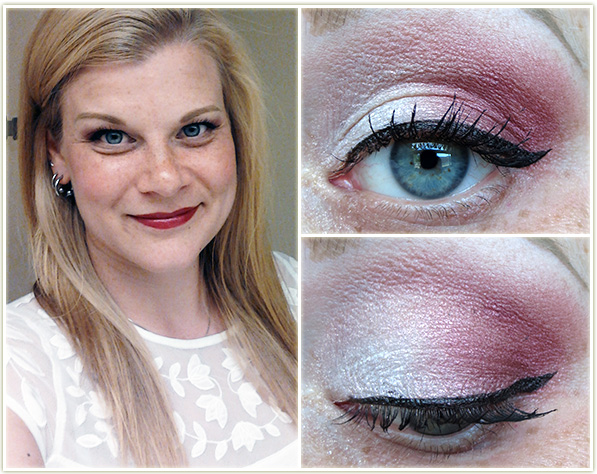
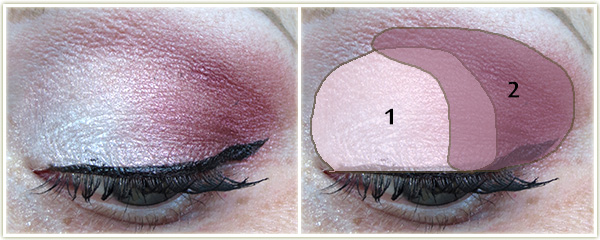
  1. MAC Vanilla pigment all over the lid.
  2. MAC Cranberry on the outer half of the lid and blended up really high.

MAC Blanc Type on the browbone, Kat Von D Tattoo Liner in Trooper to create the wing (significantly less thick than I normally make my wings) with Pür Minerals Big Look Waterproof mascara on my lashes.

Rest of the Face

  • Bronzer: NYC Fire Island Tan
  • Blush: MAC Sea Me, Hear Me
  • Highlighter: MAC Vanilla pigment
  • Lips: Revlon‘s Red Velvet lip butter with Creamsicle lip butter on top

20140721_look4-1

I never get tired of Sleek‘s Bright Mattes palette. That and winged liner. So combine the two and you’ve got a very happy Chelle!

20140721_look4-2

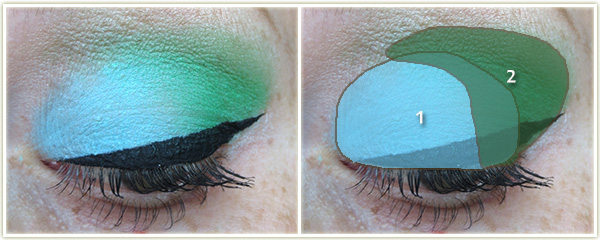
  1. Sleek‘s Chill on the inner half.
  2. Sleek‘s Dragonfly on the outer half.

MAC‘s Shroom on the browbone, Tarte‘s black gel liner to create the wing and Make Up For Ever‘s Smoky Lash Extravagant on my lashes.

20140721_look2-1

This was an odd combination to throw together (in my book) but it came out okay-ish.

20140721_look2-2

Eyes

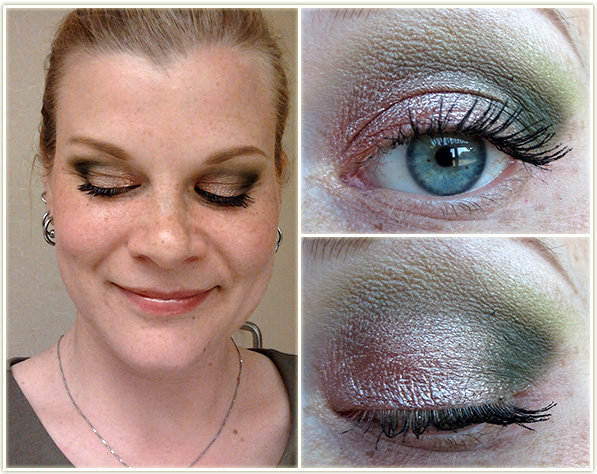
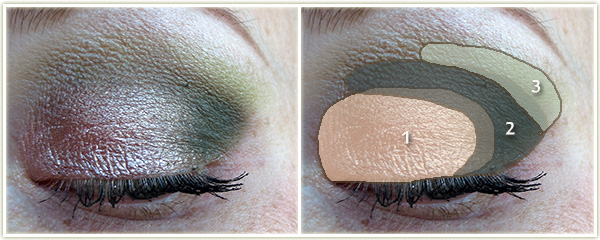
  1. L’Oreal Amber Rush all over the lid.
  2. Makeup Geek Dirty Martini in the outer corner and through the crease.
  3. Makeup Geek Fuji at the top of the crease to fade out the darker green.

MAC Shroom on the brow bone and Benefit They’re Real mascara on my lashes.

Rest of the Face

  • Bronzer: NYC Fire Island Tan
  • Blush: Bobbi Brown Apricot
  • Lips: Revlon Sunset Peach lipgloss


What’s On My Face – Volume 19

Time for round 19 of makeup gunk I’ve splashed on my face!

201407_look2.1

I wore this one during Toronto’s Pride Week and really liked how this came out. You can really never go wrong with Makeup Geek‘s Utopia, such a beautiful blackened gold that seems to work with every colour imaginable.

201407_look2.2

Eyes

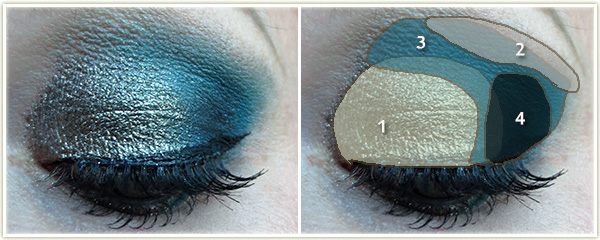
  1. Inglot‘s Shine 132 (silver) all over the lid. Then apply Too Faced‘s Glitter Glue on top of the silver and tap on Makeup Geek‘s Utopia pigment on top. Utopia is also applied on the inner half of the lower lash line.
  2. Makeup Geek Creme Brulee through the top of the crease.
  3. Inglot‘s Matte 338 (turquoise) in outer corner and through the crease and blend it in to Utopia338 is also applied on the outer half of the lower lash line.
  4. Urban Decay‘s Blackout in the very corner to darker up the turquoise.

MAC Shroom to highlight the browbone, Tarte‘s gel liner in Black to create the wing with Urban Decay‘s Black Velvet pencil liner on my inner rim. Make Up For Ever Smoky Lash Extravagant on both sets of lashes with a pair of J. Cat false lashes in EL13 glued on. Instead of my usual MAC Omega on my brows, I’ve switched to Anastasia‘s Dipbrow Pomade inBlonde.

Rest of the Face

  • Foundation: Revlon Colorstay (Dry/Normal) in 220 Natural Beige
  • Bronze: NYC Fire Island Tan
  • Highlighter: MAC Whisper of Gilt with MAC Silver Dusk on top
  • Blush: Illamasqua Hussy
  • Lipstick: (not pictured) Too Faced Coral Fire

201407_look3.1

Quick and easy, no-fuss look for a weekend brunch.

201407_look3.2

Eyes

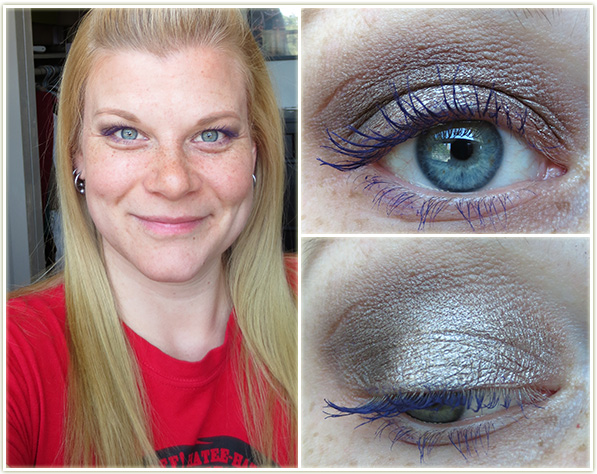
  1. Maybelline Bad to Bronze all over the lid.
  2. Sleek Bark on the outer half of the lid.

MAC Shroom to highlight the brow bone and Sephora‘s Full Action Extreme Effect mascara in Purple on my lashes. Anastasia‘s Dipbrow Pomade in Blonde through my brows.

Rest of the Face

  • Bronzer: (also used as a blush) NYC Fire Island Tan

201407_look1.1

One of Nikki Tutorials’ recent recreations was a look that was inspired by Cheryl Cole. I took Nikki’s tutorial and tried to replicate it as much as possible which was, thankfully, relatively easy given that I had almost all of the exact same products she used. So here’s my take on her tutorial!

201407_look1.2

Eyes

  1. MAC Coppering all over the lid as a base layer. Then apply Too Faced Glitter Glue on top of Coppering, and tap on Makeup Geek‘s Vegas Lights pigment.
  2. Combine Makeup Geek Cocoa BearToo Faced Semi-Sweet and Too Faced Cherry Cordial and blend that in the outer corner and through the crease. I also ran this combination all along the lower lash line.
  3. Makeup Geek Creme Brulee through the top of the crease.

MAC Shroom on my brow bone, Tarte‘s gel liner in Black to create the wing and Urban Decay‘s Black Velvet liner on my inner lower rim. Make Up For Ever Smoky Lash Extravagant on my lashes with Ardell 102 Demi false lashes. Anastasia Dipbrow Pomade in Blonde through my brows.

Rest of the Face

  • Foundation: Revlon Colorstay (Dry/Normal) in 220 Natural Beige
  • Bronzer: NYC Fire Island Tan
  • Blush: Tarte Dollface
  • Highlighter: Hard Candy Tiki
  • Lips: Starlooks Naked lip liner with NYX Butter Gloss in Maple Blondie on top

201407_look4.1

This look came about as I was doing my “Four or More: Eyes Edition” post and remembered just how much I love the sheen/duochromeness of the Color Tattoo in Waves of White.

201407_look4.2

Eyes

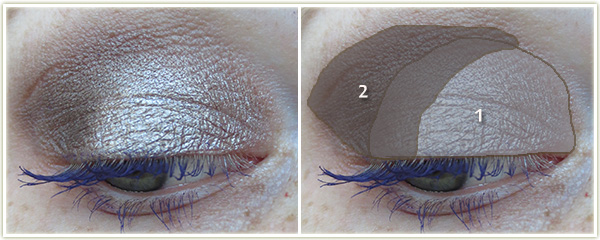
  1. Maybelline Color Tattoo in Waves of White all over the lid.
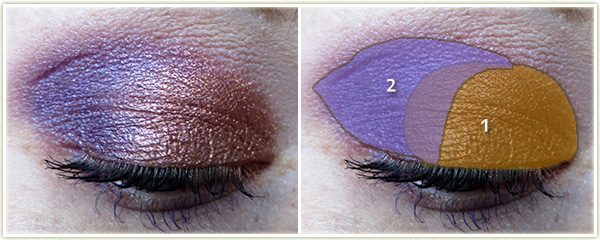
  2. From Sleek‘s Acid palette, use the darker blue shade in the outer corner and through the crease.

Makeup Geek Creme Brulee blended through the top of my crease with MAC Shroom on the browbone. Make Up For Ever‘s Smoky Lash Extravagant on my lashes.

201407_look5.1

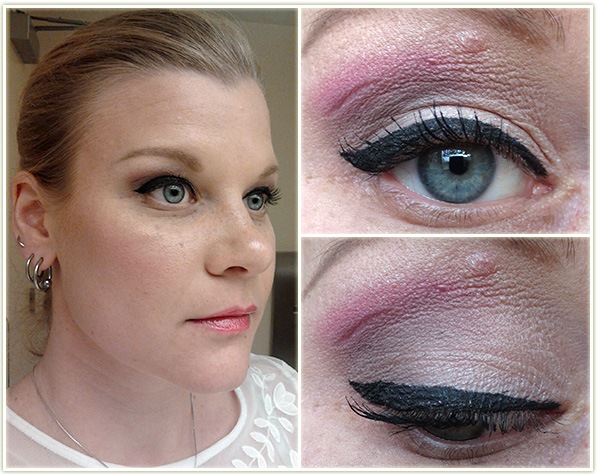
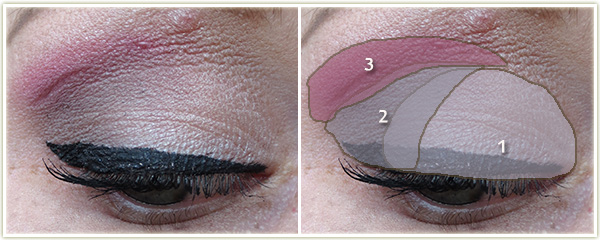
Judging by what foundation I used, I think this look is from a month or more ago. I was going through a pink crease phase and this was one of the looks I came up with.

201407_look5.2

Eyes

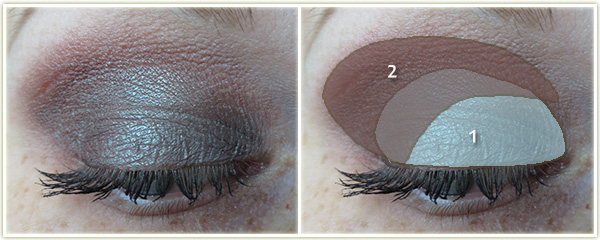
  1. MAC Shroom all over the lid.
  2. MAC Copperplate on the outer half of the lid.
  3. Makeup Geek Simply Marlena through the crease.

MAC Shroom to highlight my brow bone. Tarte‘s gel liner in Black to create the wing and L’Oreal Voluminous Carbon Black mascara on my lashes.

Rest of the Face

  • Foundation: CoverGirl CC Cream in 110 Classic Ivory mixed with Bourjois Healthy Mix Serum in 51 Light Vanilla
  • Bronzer: Joe Fresh Sand Bronzer
  • Blush: Joe Fresh Apricot cream blush with Be A Bombshell‘s Beach Please powder blush on top
  • Highlighter: Too Faced Candlelight
  • Lips: Inglot Lipgloss in AMC 544

What’s On My Face – Volume 16

You know… I never really noticed just how much white I wear until I started taking pictures of my face for this blog. It seems that nine times out of ten I’m wearing a white shirt!

This entry ended up being highly blue-centric. Enjoy!


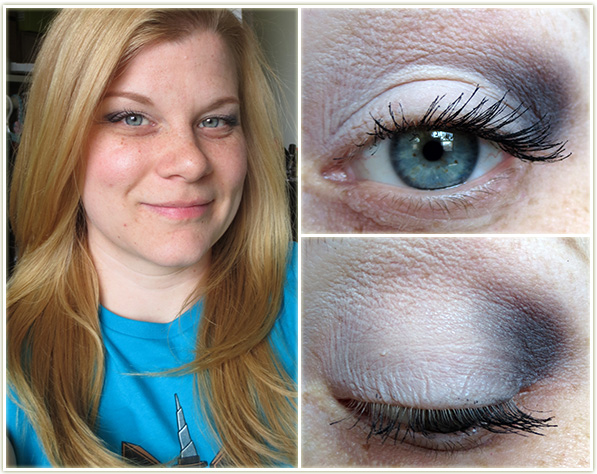
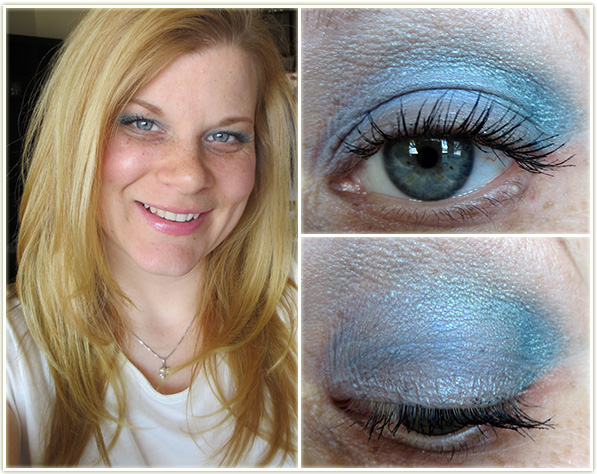
20140517_look4.1

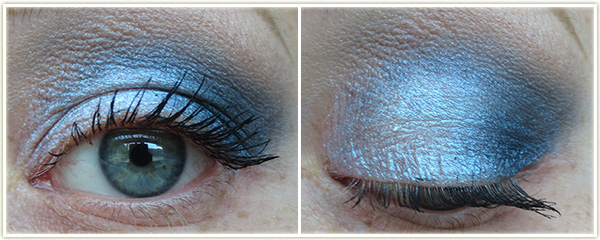
I can’t get over Inglot and their colour range. I wish I had easier access to the brand (they’re nowhere in Toronto) but good grief are their colours ever amazing.

20140517_look4.2

Eyes

  1. Inglot AMC Shine 33 all over the lid and on the middle of the lower lash line.
  2. Inglot Matte 338 heavily in the outer corner, blended into the crease. Also in the outer corner on the lower lash line.
  3. Makeup Geek Creme Brulee slightly through the crease (not pictured).

MAC Shroom to highlight the brow, Tarte‘s Black gel liner to create the wing and BenefitThey’re Real on my lashes.

Rest of the Face

  • Foundation: Covergirl CC Cream in 110 Classic Ivory and Bourjois Healthy Mix Serum in Shade 51 Light Vanilla mixed together
  • Bronzer: Joe Fresh Sand Bronzer
  • Blush: Joe Fresh Apricot
  • Highlighter: MAC Silver Dusk
  • Lips: Wet n Wild 903C with NYX‘s Tiramisu Butter Gloss over top


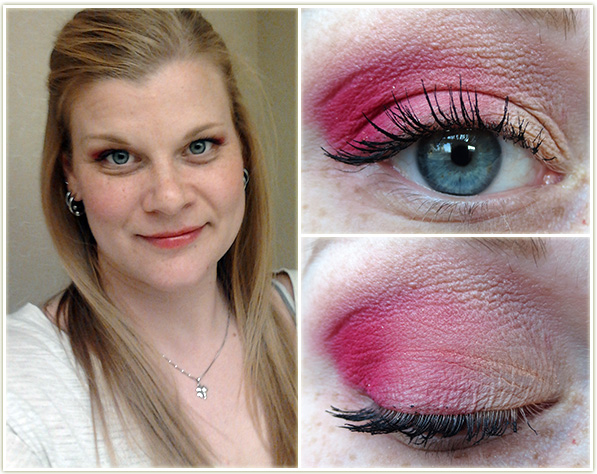
20140517_look3.1

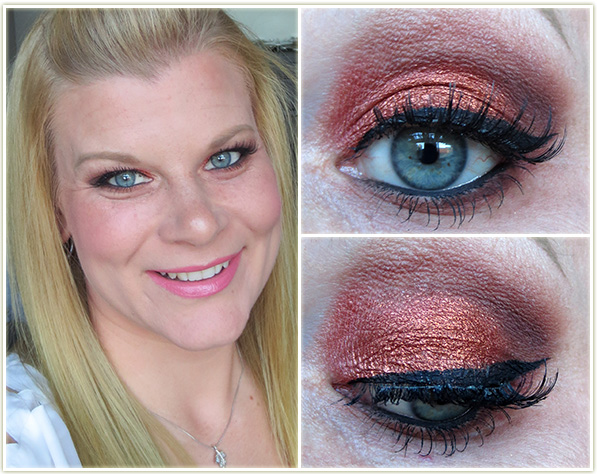
Seriously love red eyeshadow. My only gripe is that Makeup Geek‘s Peach Smoothiealways does that really annoying creasing thing on my lid every time I wear it on the lid (even with double primers).

20140517_look3.2

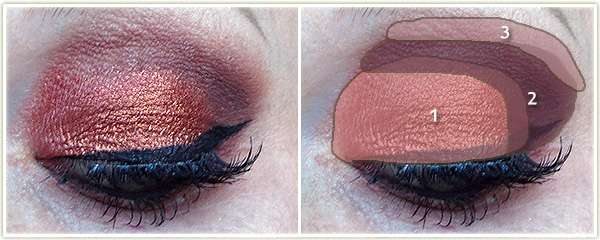
Eyes

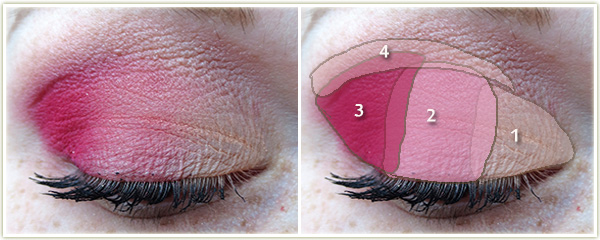
  1. Makeup Geek Peach Smoothie on the inner third of the lid.
  2. Makeup Geek Mango Tango on the middle of the lid.
  3. Makeup Geek Razzleberry on the outer third.
  4. Makeup Geek Creme Brulee through the crease to blend everything out.

MAC Shroom to highlight the brow and Benefit They’re Real mascara on my lashes.

Rest of the Face

  • Blush: Hourglass Diffused Heat
  • Highlighter: MAC Soft & Gentle
  • Lips: Revlon Colorburst Lipgloass in Papaya


20140517_look2.1

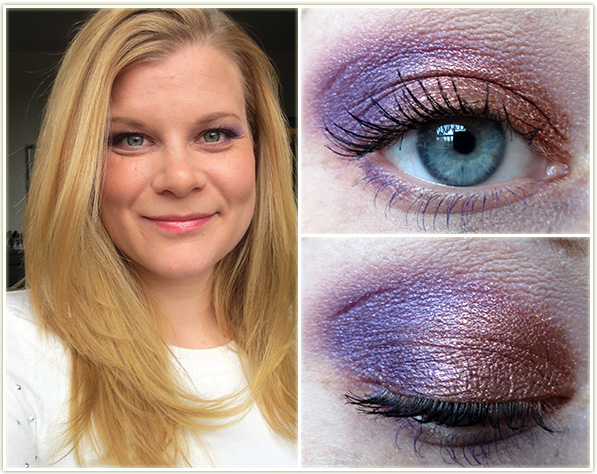
I haven’t used my Original Sleek palette very much so I pulled it out for this look.

20140517_look2.2

Eyes

  1. The copper shade from the Original Sleek palette all over the lid.
  2. The purple shade from the Original Sleek palette in the outer corner and on the outer corner of my lower lash line.

MAC Shroom to highlight the brow and L’Oreal Voluminous Carbon Black mascara on my top lashes with Sephora‘s Purple mascara on my bottom lashes.

Rest of the Face

  • Foundation: MUA Matte Foundation in Shade 1 Soft Sand
  • Bronzer: Joe Fresh Sand Bronzer
  • Blush: MAC Gingerly
  • Highlighter: Hard Candy Tiki
  • Lips: Revlon Colorburst Gloss in Sunset Peach


20140517_look5.1

If I look half asleep it’s because I was – this was some early morning IKEA run. I had no idea people actually line up outside IKEA before it even opened for the day. o.O

20140517_look5.2

Eyes

  1. MAC Blanc Type all over the lid and all the way up to the brow bone.
  2. MAC Contrast in the very outer corner.

Benefit They’re Real mascara on my lashes.

Rest of the Face

  • Blush: Illamasqua Hussy


20140517_look1.1

Mehhhh not sold on this look – wouldn’t repeat it.

20140517_look1.2

Eyes

  1. MAC Fade all over the lid (this is so patchy – the name is apt, it fades poorly!)
  2. MAC Steamy in the outer corner.

MAC Shroom to highlight the brow and L’Oreal Voluminous Carbon Black mascara on my lashes.

Rest of the Face

  • Blush: Bourjois Rose Gold
  • Lips: NiveaA Kiss of Berry Swirl