Tag Archives: Make Up For Ever

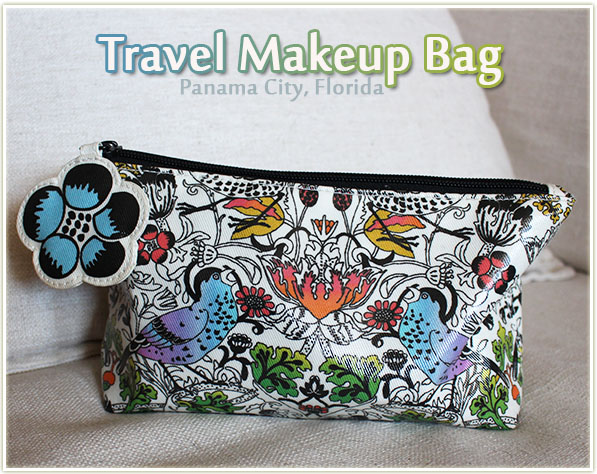
Travel Makeup Bag – Panama City, Florida

201504_travelmakeupbag_panamacityflorida1

I’m heading down to Panama City, Florida for spring break today and despite this being a week-long beach vacation, I still feel the need to pack some makeup. While I definitely won’t be wearing makeup on the beach (cuz, ew gross), I’m sure there will be plenty of opportunities to check out some bars or go shopping and I’ll definitely want to play around with my face then!

I’ve packed everything into my usual makeup bag from MAC. This was a limited edition bag that came out with the Give Me Liberty of London collection in 2010. Because the outside of the bag is a plastic-type substance, this thing really never gets dirty (although inside is a completely different story). The bag’s not enormous, but it’ll fit enough products to satisfy me for a week.
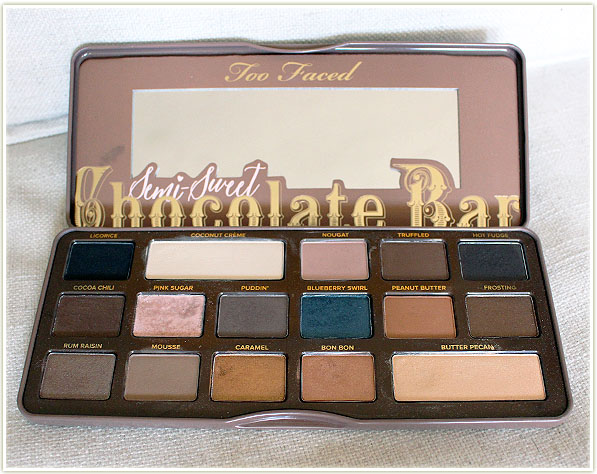
Too Faced Semi-Sweet Chocolate Bar palette

Despite loving the Too Faced Semi-Sweet Chocolate Bar palette to pieces (even moreso than the original), I never get the chance to use it as much as I would like to because I feel like I’m eternally reaching for something either more vibrant, or something to use up, or something new that I just bought. The good thing with a vacation is that if you commit to bringing one palette, you are definitely not going to have the choice to try something different out. And really, I love this thing!
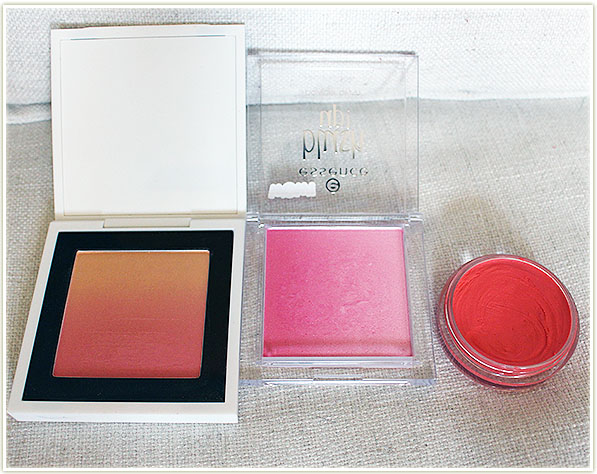
Three blushes for eight days… makes sense, right?

This is so overkill. Who needs three blushes for an eight day vacation?
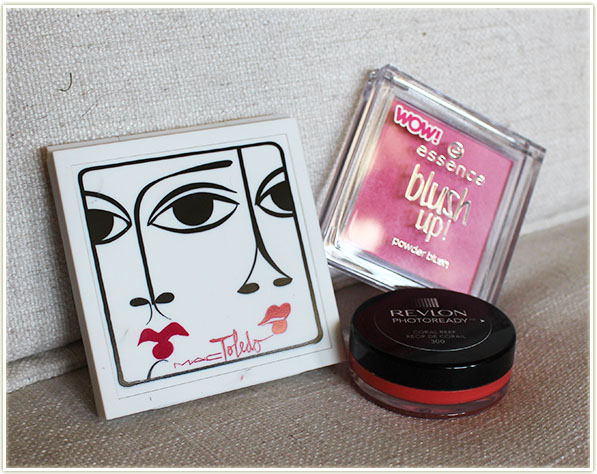
MAC Ripe Peach, essence Pinky Flow, Revlon Coral Reef

But I mean… how could I not bring two ombre blushes with me? MAC‘s Ripe Peach is the colour of eternal summer to me, essence‘s Pinky Flow ombre will more than likely actually be the most flattering shade on my face and I still felt the need to bring along Revlon‘s Coral Reef cream blush just to have some extra variety. I’m sure that, in the end, I’ll maybe use ONE of these. But… options man, options.
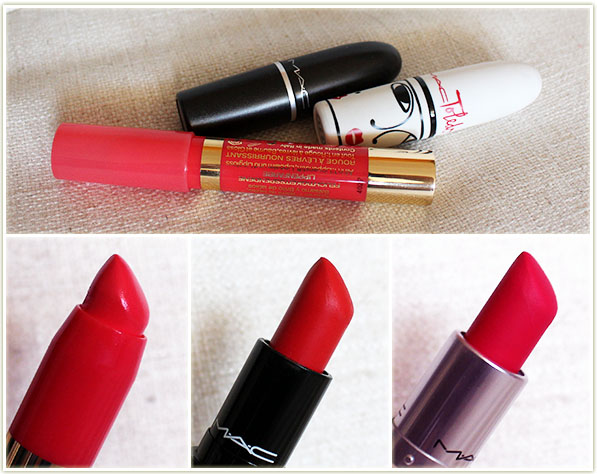
Astor Feeling Feline, MAC Barbecue, MAC Relentlessly Red

They’re all different! I swear!

First up is Catrice‘s Feeling Feline which is a lovely coral shade with a balm-like texture. I’ll likely end up wearing this one the most since it’s an easy one to wear on the go. MAC‘s Barbecue is for some added variety since it’s more orange-toned. And MAC‘s Relentlessly Red is because I refuse to be separated from “MY SHADE”. I am also bringing MAC‘s Prep + Prime for lips, but I completely forgot to photograph it.
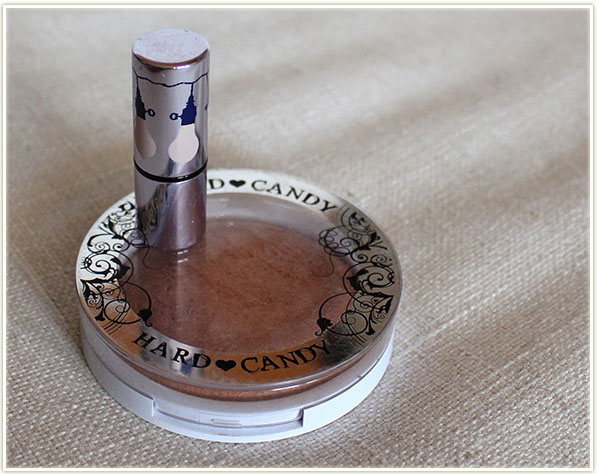
Hard Candy Hula Hula, Benefit Watts Up

Benefit Watts Up is actually my favourite highlighter, but I only ever think to use it when I go on vacation because of the small sample size I have. This product gives me the most incredible sheen (and, if you read Vibrant, Vivacious, Veracious Beauty Blog, I almost always gasp in awe when Jen uses this on her cheeks).

The bronzer is a deep dive into my darker bronzers for the season. Since I’ll be (hopefully) getting some sun through all the sunscreen I’ll be applying, I pulled out Hard Candy‘s Hula Hula bronzer because it’s one of my darker, more reflective bronzers. It’s shot through with gold shimmer, so in my eyes that makes it perfect for the beach.
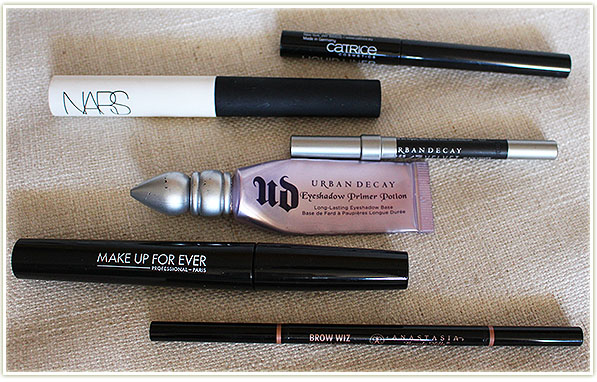
Top to bottom: Catrice liquid liner in Dating Joe Black, NARS Primer, Urban Decay Black Velvet liner, Urban Decay primer, Make Up For Ever Smoky Stretch mascara, Anastasia Brow Whiz

The usual suspects here. The Catrice liner because it’s pen style and matte black (although not waterproof), two primers (Urban Decay, NARS) because my eyelids are creasy little fuckers, a black pencil liner for the waterline/tightlining, my now beloved Make Up For Ever Smoky Stretch mascara and finally, the Anastasia Brow Whiz. I opted for the Brow Whiz instead of my usual Dipbrow because I don’t want to fuss with a pot on vacation and I figured less strong brows would probably suit me a bit more in the sun.

Things I decided to skip:

  • Foundation. I have no idea how much sun I’ll get so colour matching would be a nightmare. And really… I just don’t need it. It’s fun to play with, but it’s a step that I don’t feel is totally required.
  • False lashes. Primarily because I ran out of lash glue…

Posts will continue throughout the week I’m gone as I have them pre-written and post-dated so I hope you enjoy those! If you’re curious to see vacation photos while I’m gone, feel free to take a gander at me over on Instagram (@mu_your_mind)
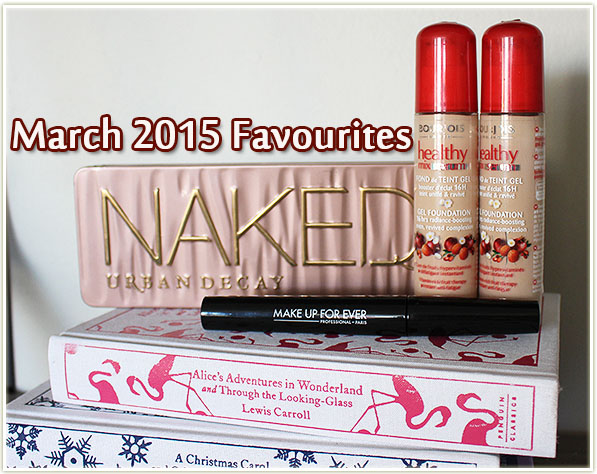
March 2015 Favourites

201503_march2015favourites1

March was a total blur. I had fun celebrating St. Patrick’s Dayran a pretty decent 5K raceattended a blogger event and hung out with some awesome people. It was a whirlwind month, but a lot of fun!

Urban Decay Naked 3
Urban Decay Naked 3

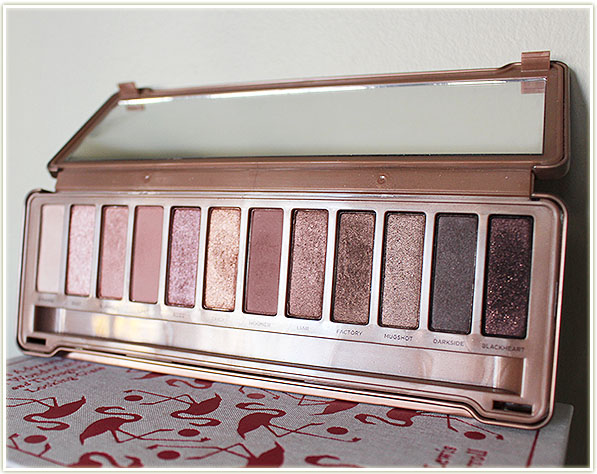
It’s funny how a month can pass in which you totally forgot what you did or wore. I completely forgot I used this palette so much in the early half of the month until I checked my notes (which I have to keep for favourites posts, or I won’t remember anything) and realized that I had used this palette constantly. Urban Decay‘s Naked 3 is one of those items where I really don’t know why I bought it. I’m not a pink person, I don’t salivate over rose-gold everything and yet… I bought it anyway. I probably got caught up in the hype of it when it first launched.  But in reality, this is such an easy palette to wear that really doesn’t require outside help – even moreso than the original Naked (which doesn’t have a matte or satin highlight shade) or the Naked 2 (which has shades that blend together into the same shade), this palette offers you the opportunity to stick with pinks and taupes, but without demanding that you WEAR PINK.

And those pink-tinged mattes? Do a wonder of good for the crease and blending out shades.

Make Up For Ever Smoky Stretch mascara

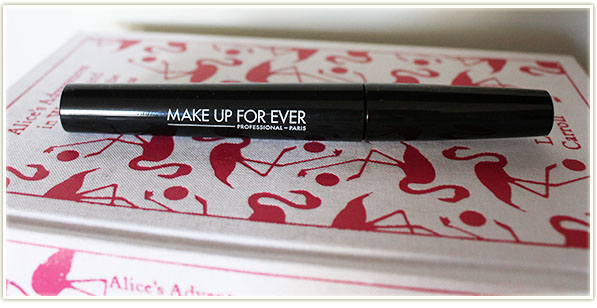
Well this one isn’t any secret – I love this sucker. Make Up For Ever‘s Smoky Stretch mascara came out of left field when I was gifted it at a blogger event this past month and slapped me right across the face. Despite having purchased my beloved Clump Crusher this past month, I’ve barely touched it because I keep opting for the MUFE one. This mascara is incredible – volume, length, true black… and the wand pulls through my lashes in the most satisfying way. You can see my full review on the Smoky Stretch mascara here.

Bourjois Healthy Mix Serum foundation in Shade 51 Light Vanilla & Shade 52 Vanilla

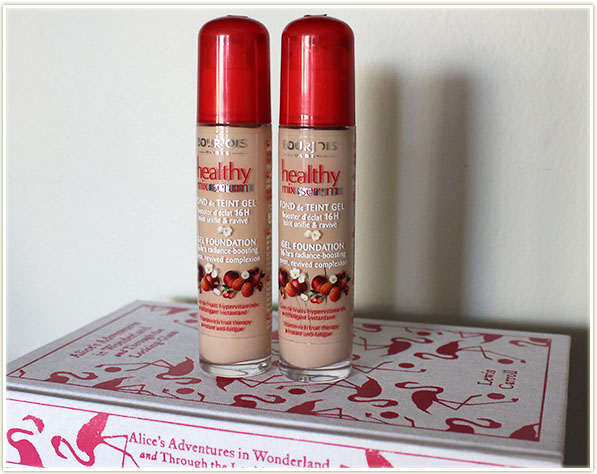
I feel like makeup lovers go through this eternal cycle of wanting to try new products, then they go back to old products they loved, and wonder why they ever stopped using them. (And yet, you know the next time something shiny and new comes along, you’ll drop that beloved product again!) Such is the case with the Bourjois Healthy Mix Serumfoundations I own. I added these foundations to my Use Up 2015 pile because I’ve had them for about two years and it was time to cycle them out… but since I’ve started to use them again, I’m wondering why I ever stopped. Healthy Mix Serum is a lightweight medium coverage foundation that smells incredible (seriously, like fruit). I picked mine up at Boots in Ireland a few years ago, but you can buy the brand at Shoppers Drug Mart here in Canada.

My favourite look from the month of March

My favourite look from the month of March

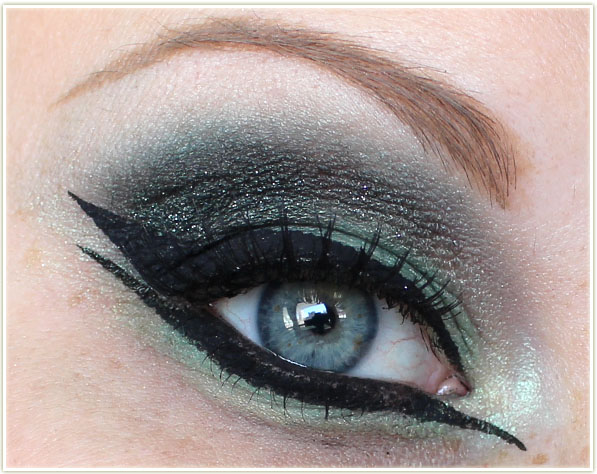
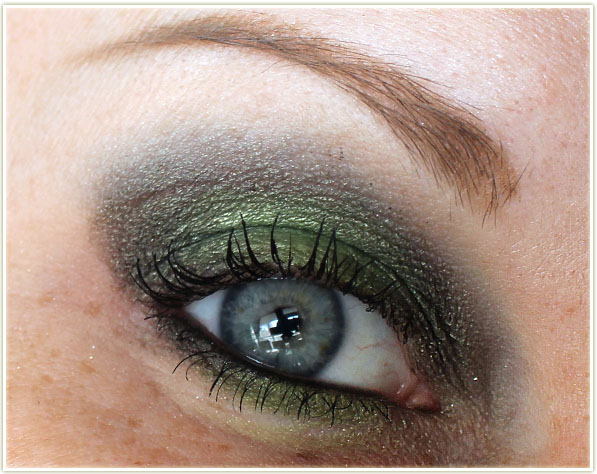
And to finish up the month, my favourite look was this one that I created for Prairie Beauty Love.  It may be outside of most peoples’ comfort zone, but I love how well this turned out. I don’t normally get the opportunity to get this creative with my makeup, but I decided to just go balls out for this post and was super proud on how well this translated onto my eyes.

Onward into April we go!

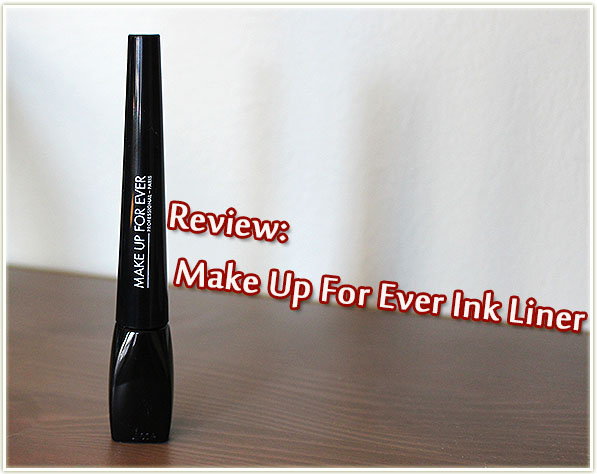
Review: Make Up For Ever Ink Liner

201504_makeupforever_inkliner1

Make Up For Ever‘s Ink Liner ($27 CAD) is a relatively new release for the brand. I was anxious to try this one out due to the claims, the primary one which claimed this was a truly matte formula.

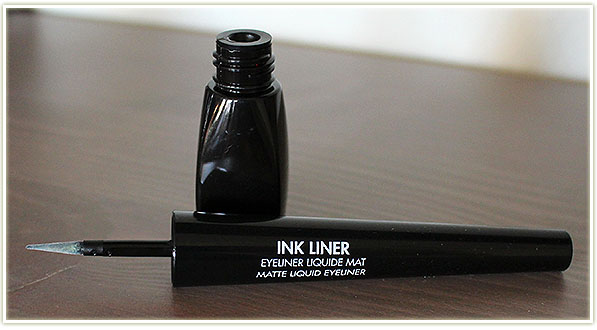
Ink liner with the brush wiped off so you can see the shape of the liner

Released just this past January, the Ink Liner promises  to be a truly matte black liquid eyeliner, and quick drying while providing flawless wear and hold. I have been after a liquid liner that actually delivers a matte black formula without the hint of a sheen so I was super excited to try this out.

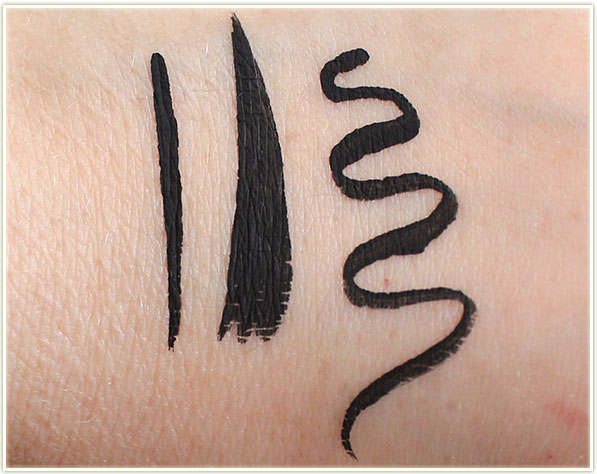
Make Up For Ever Ink Liner swatches

And the Ink Liner definitely delivers on the matte black formula! This stuff is as dark as an abyss. It is completely, without a shadow of a doubt, matte. It has no sheen, no hint of a gleam – it is UTTERLY matte. It also remains matte throughout the entire day – I had zero transfer from my eyeshadows to the liner, which is a problem I still have with my matte gel liners.

One thing worth noting, is that this liner is not waterproof. A lot of people assume that liquid liners are always waterproof, and that is not necessarily the case. This one is not waterproof (nor did they ever claim it was), so if you have watery eyes you may want to stay away from this one.

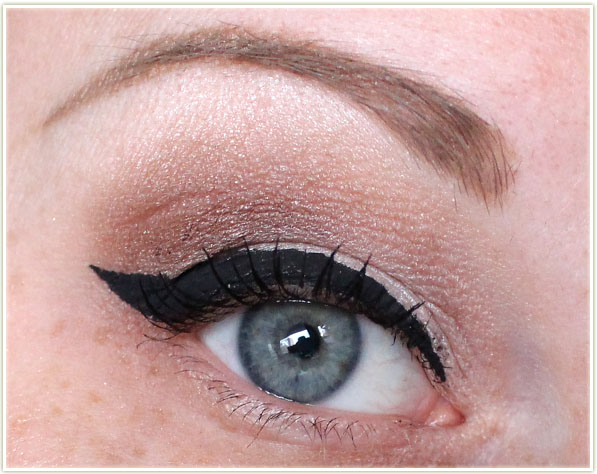
Freshly applied
Freshly applied

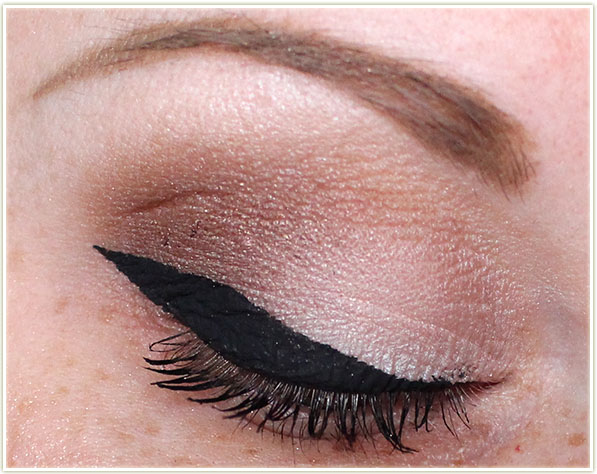
The shot above is the Ink Liner freshly applied. I put it on before work that morning (roughly 7:30 a.m.). My first attempt with the liner produced quite a thick line. As with any new applicator, you need a little bit of time to get used to the shape. The applicator is a small rubberized cone with a fairly rounded end. It has some flex to it, but not as much as a brush tip.

Freshly applied
Freshly applied

But what a line it produces! With my eye closed, you can see just how solid this product is. I got a sharp point on the end of my wing while freehanding the line.

Ink Liner at the end of the day

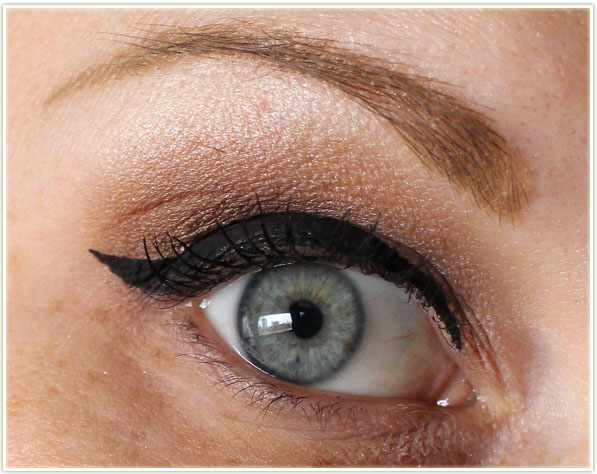
And this is what the Ink Liner looked like at the end of my work day (roughly 5 p.m.). It’s just as matte black as when I started the day out! It didn’t transfer to my upper lid once it had dried down and it didn’t pick up any of the shimmery shadows from my lid (and I purposely did a look that’s given me problems in the past with eyeshadow transfer). These are enormous pluses in my book since I’m all about that ultra matte life with zero transfer.

I really love that the Ink Liner managed to deliver what other liners have not for me (the true matte-ness), but I can’t help but wish it was waterproof. Maybe it’s just impossible to make a completely matte formula while having waterproof properties? Hmmm.

Do you have a favourite matte liquid liner? I’d love to hear about your experiences with liners!

The product featured in this review was provided by PR.

What’s On My Face – Volume 34

Another makeup looks roundup!


womf_vol33_look1-1

I was playing around with some matte shades… then decided I needed some glitter.

womf_vol33_look1-2

Well WHOOPS. I totally messed up the colour map…

Eyes

  • The Balm Matt Abdul all over the lid.
  • The Balm Matt Johnson in the crease.
  • The Balm Matt Malloy on the brow bone.
  • Illamasqua Static pigment was applied all over the lid directly on top of the lid shade.

I used Kat Von D‘s Tattoo Liner in Trooper to create the wing, then applied Too FacedBetter Than Sex mascara to my lashes.

Rest of the Face

  • Bronzer: Joe Fresh Sand
  • Blush: Cargo Mendocino

womf_vol33_look5-1

This was a straight rip from a recent Jaclyn Hill YouTube tutorial that I just loved. I had almost all the same products (always a blessing when you watch a tutorial) and loved how it looked on her so I decided to replicate it as best I could. This ended up being near identical to the look I wore on Valentine’s Day.

womf_vol33_look5-2

Eyes

  1. Makeup Geek Peach Smoothie and Creme Brulee mixed together at the top of the crease.
  2. Makeup Geek Cocoa Bear heavily through the crease.
  3. Too Faced Dark Chocolate (from the A few of my Favorite Things palette) in the inner and outer third of the eye.
  4. Makeup Geek Houdini on the center of the lid.
  5. Makeup Geek Vanilla Bean on the brow bone.
  6. (not marked) MAC Nylon on the inner tearduct and lightly on the brow.

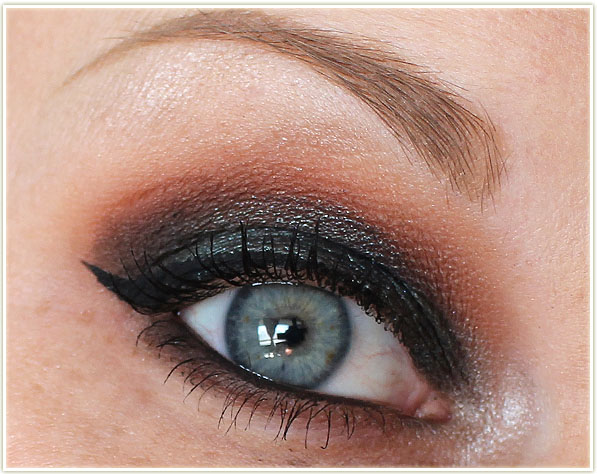
I used Make Up For Ever‘s Ink Liner to create the wing, then tightlined my upper and lower lash line with Urban Decay‘s Black Velvet liner. Blended along my lower lash line is Cocoa Bear and Dark Chocolate. On my lashes is Make Up For Ever Smoky Stretch mascara.

Rest of the Face

  • Foundation: Bourjois Healthy Mix Serum in shades 51 Light Vanilla and 52 Vanilla mixed together
  • Bronzer & Highlighter: Make Up For Ever Pro Sculpting Duo #1
  • Blush: Hourglass Diffused Heat

womf_vol33_look4-1

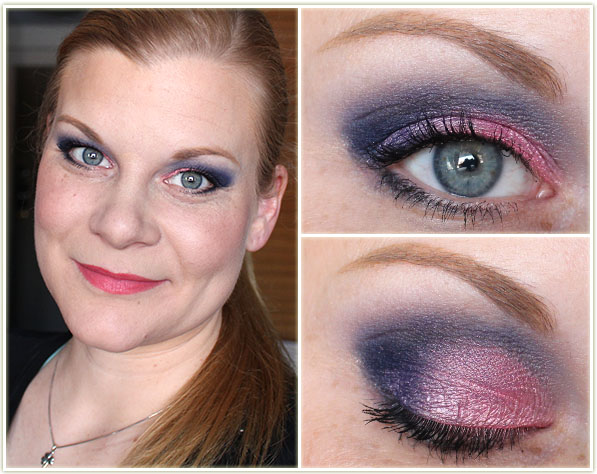
I hadn’t touched my Naked Cosmetics pigments much since I picked them up in November, so I decided to just pick a colour at random (the pink) and work with it.

womf_vol33_look4-2

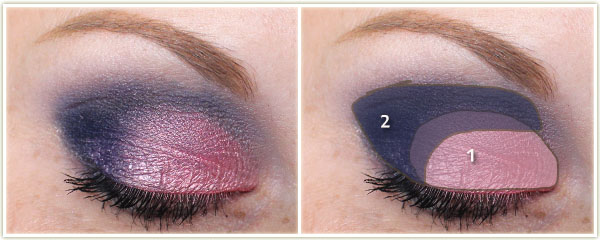
Eyes

  1. Naked Cosmetics Tropical Indulgence pigment stack, peachy pink colour applied wet all over the lid.
  2. Sleek Ink on the outer corner and through the crease.

Too Faced Better Than Sex mascara is on my lashes.

Rest of the Face

  • Foundation: Bourjois Healthy Mix Serum in shades 51 Light Vanilla and 52 Vanillamixed together
  • Bronzer: Joe Fresh Sand
  • Blush: Can’t remember! 🙁
  • Lips: Too Faced Coral Fire


womf_vol33_look3-1

This one disappointed me. I applied some black glitter to the lower lash line, but you can’t even really tell – it just looks like I HEAVILY outlined my lower lash line with black eyeliner. Boo.  🙁

womf_vol33_look3-2

Eyes

  1. Sleek Chill all over the lid.
  2. Sleek Bolt on the outer half of the lid and through the crease.
  3. Wet n Wild Brulee on the brow bone.

I used Tarte‘s black gel liner to create the wing. I then lined my lower lash line with MAC‘sPhone Number eye kohl, applied some Too Faced Glitter Glue on top and then patted onLit CosmeticsBack in Black glitter on top. I lined my lower rim with CoverGirl‘s Liquidline Blast in Black Fire and applied Too Faced Better Than Sex mascara to my lashes

Rest of the Face

  • Bronzer: Joe Fresh Sand
  • Blush: MAC Ripe Peach
  • Lips: Too Faced Melted Nude with NYX Butter Gloss in Peaches and Cream on top

womf_vol33_look2-1

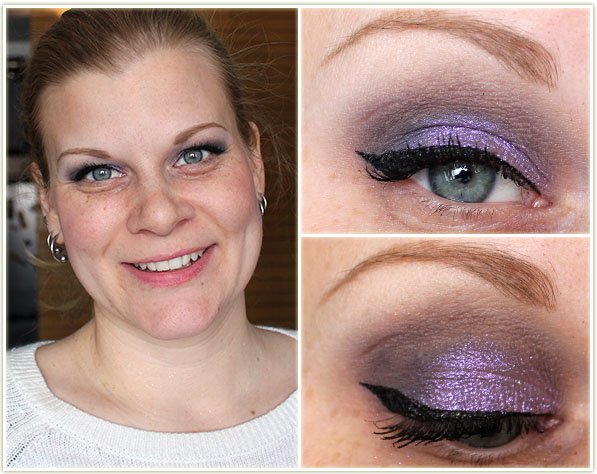
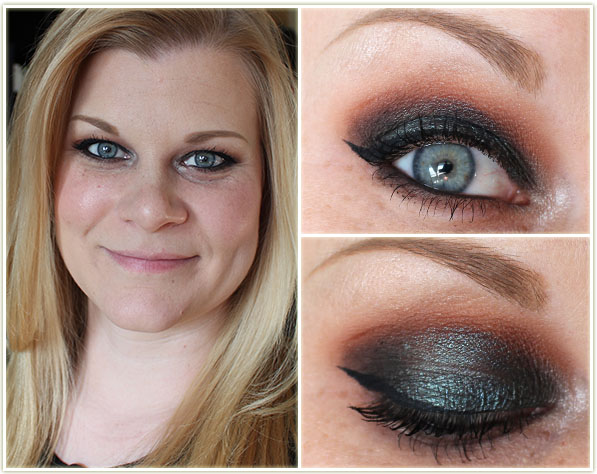
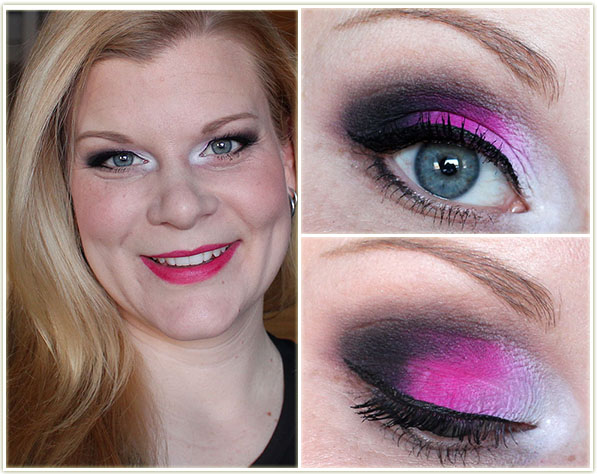
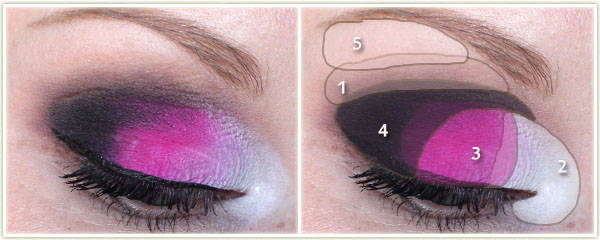
This look was created as a guest post on Jodi’s blog; Up The Rollercoaster. The theme was red, white and pink. So I opted for a more neon shade of pink to suit my fancy. Most of the colours used are from my Morphe palette, but since they have no true names, I just used colour names to describe them.

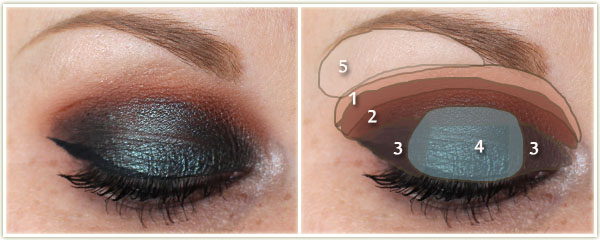
womf_vol33_look2-2

Eyes

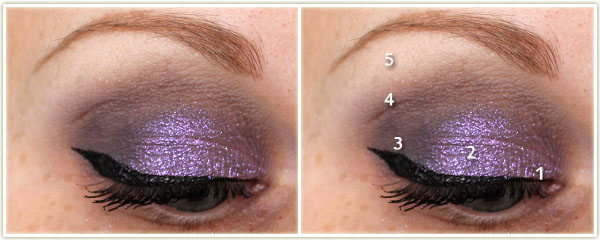
First off, I applied an eyeshadow primer, then layered NYX‘s Jumbo Eyeshadow Pencil in Milk all over the lid. Pat that in, then proceed:

  1. Makeup Geek Creme Brulee through the crease.
  2. White on the inner third of the eye, brought heavily around the inner tearduct.
  3. Neon Pink on the middle of the lid.
  4. Black on the outer half of the eye and lightly through the crease to tie it all together.
  5. Pale beige on the brow bone.

I used Kat Von D‘s Tattoo Liner in Trooper to create the wing on the upper lash line, then used MAC‘s Phone Number pencil lightly on the outer corner of the lower lash line. On my lashes is Too Faced‘s Better Than Sex mascara.

Rest of the Face

  • Foundation: Bourjois Healthy Mix Serum in shades 51 Light Vanilla and 52 Vanillamixed together
  • Bronzer: Joe Fresh Sand
  • Blush: Hourglass Ambient Lighting Blush in Diffused Heat
  • Highlighter: Hard Candy Tiki
  • Lips: Too Faced Melted Ruby (this was applied lightly, rubbed onto the lips with my finger and then blotted off with a tissue – I wanted it to be more of a stain than a flat out lipstick)

Review: Make Up For Ever Smoky Stretch Mascara

201503_makeupforever_smokystretchmascara1

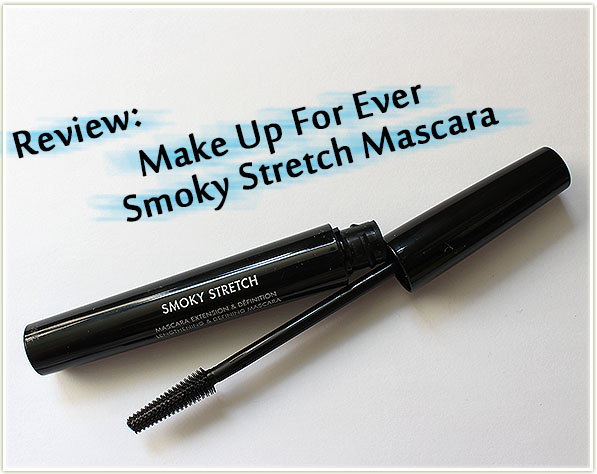
After attending the Make Up For Ever Spring 2015 Preview event, we were gifted a generous bag of products that were launching soon. The first product in the bag I reached to try was the Smoky Stretch mascara. Having been a fan of their Smoky Extravagantmascara, I was interested to see what this one would have to offer.

Make Up For Ever Smoky Stretch – Lengthening & Defining Mascara

Make Up For Ever says: “Thanks to its exclusive Flex Control Complex, Smoky Stretch’s smooth formula glides on lashes for incredibly length and perfect definition. Its molded multi-bristle brush grips lashes starting from the root, covering every single lash for optimal separation without clumping. Shorter bristles on the tip work magic on tiny lashes.”

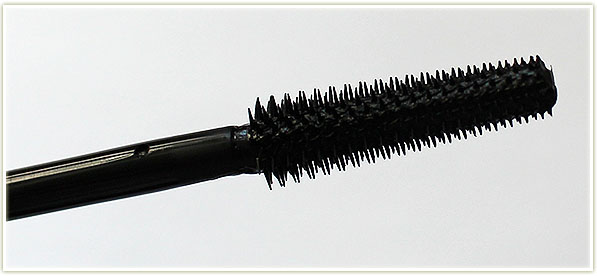
Make Up For Ever Smoky Stretch brush

The wand on the Smoky Stretch mascara has rubberized bristles in a slight conical shape. It’s a small taper, but it’s also a small brush, which works a lot better on my own lashes. I struggle with enormous brushes because it feels like I can’t get to the root of my lashes so I was especially pleased with the size of this one!

And they’re not kidding about the small bristles gripping your tiny lashes. This wand grasps the lashes and tugs them through the wand in order to coat them with mascara. I suppose that sounds painful, but it’s not. If anything, it’s an incredibly satisfying feeling.

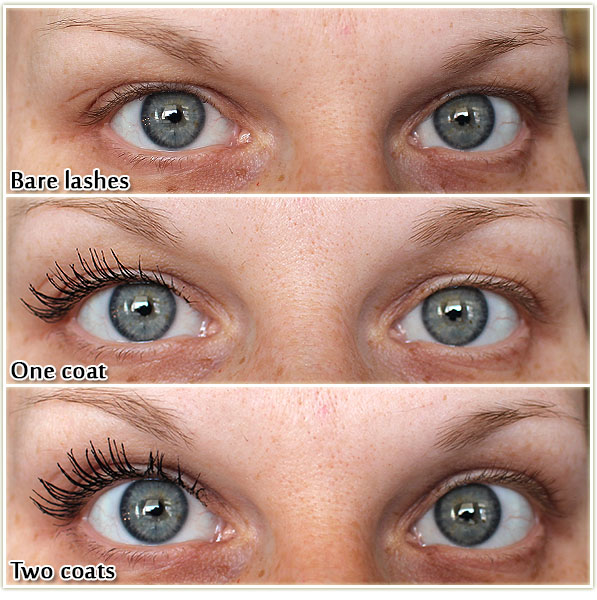
Let’s see how it did on my own lashes:

Left side: Mascara application at varying stages. Right side: No mascara at all.

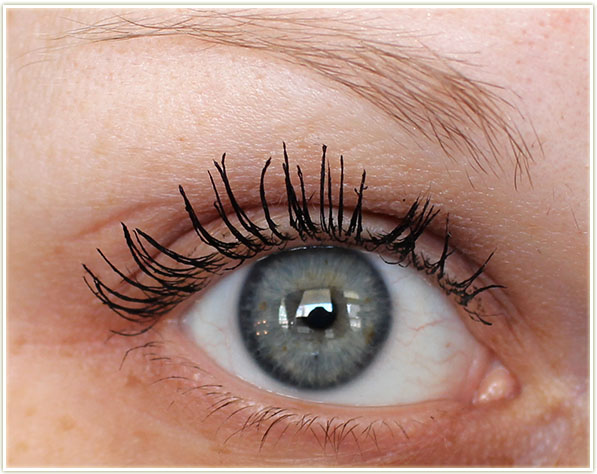
As you can see, I have blonde lashes that are almost non-existent when there’s no mascara on them. I personally only tend to wear one coat of mascara, but I applied a second one after the first coat had dried to see if it would cause any major clumping (which I don’t feel it did).

Visually the application looks impressive – I like how separated it makes my lashes, but how much bulk it adds as well. The brush grips the lashes and applies an even application of mascara. The smaller bristles are excellent for working on the inner and outer corner to build up the product in areas that need it. It also has a wet consistency, which is a personal preference of mine.

Make Up For Ever Smoky Stretch Mascara

So how did it wear you ask?

UNBELIEVABLY WELL. I am prone to constant and consistent flaking with every single mascara I have ever worn. It drives me crazy, but I’ve tried dozens and none of them have ever not flaked. Until now! Smoky Stretch gripped onto my lashes and held on for dear life. On my longest day, I wore this for 16 hours straight and the only complaint I can make is that I had maybe one flake fall onto my upper cheek by the end of the day. It also doesn’t make my lashes feel brittle or crunchy either – huge plus!

I’ll be curious to see how the formula holds up as the months go on (I really hope it doesn’t dry up after a month like my Benefit They’re Real did), but after the two weeks I’ve been using this product, I can safely say I am totally on the bandwagon with this one.

Wearing Smoky Stretch Mascara

My press sheet says that the Make Up For Ever Smoky Stretch mascara is available at MUFE Boutiques, but I can also see it up on the Sephora web site which will make it readily accessible for everyone. It retails for $28 CAD which definitely makes this a higher end mascara, but based on my experiences, I will for sure be buying this one when I run out!

Have you tried any MUFE mascaras before? Do you think you’ll give this one a shot?

The product featured in this post was given to me for consideration.