Tag Archives: NYX

Halloween 2014 – Part 2 Guardians of the Galaxy

20141112_halloween_guardiansofthegalaxy2

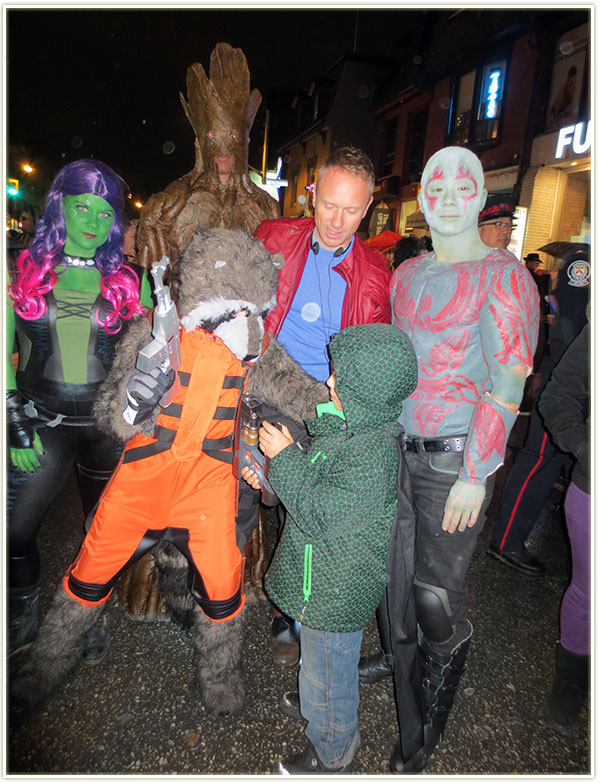
Halloween was QUITE the event this year! A group of friends and I saw the movie the Guardians of the Galaxy in August and walked out of the theatre with the realization that we had the exact perfect combination of people to go as the Guardians for Halloween. We knew it was going to be a lot of work, but holy cow did I ever not realize just how much! We got started at the beginning of October and it feels like it consumed the entire month!
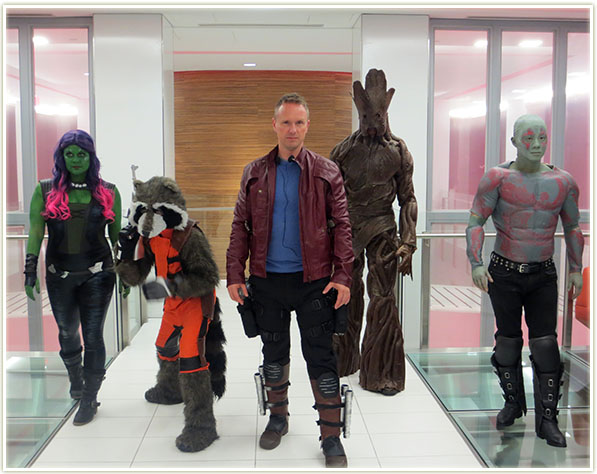
Our group as the Guardians of the Galaxy!

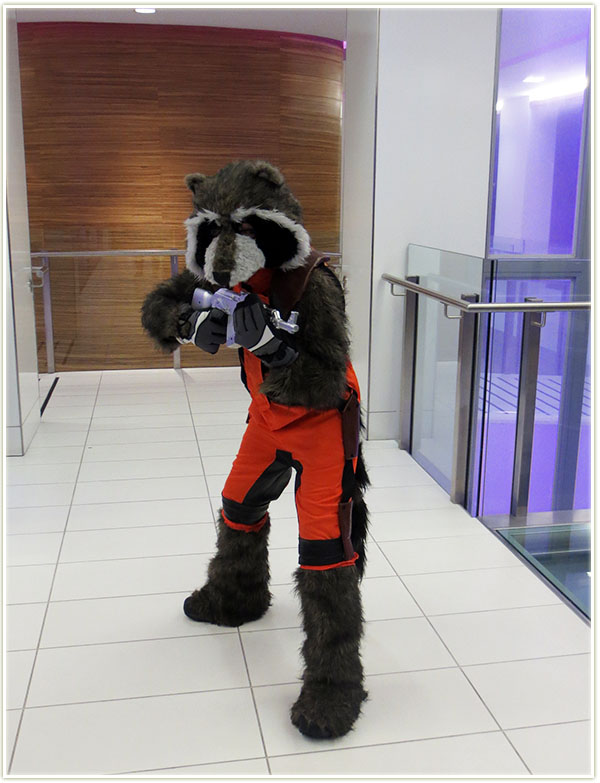
The bulk of the work was spent working on the Groot costume since that was not only massive, but super involved. I think it came out especially well – and we have our costume designer mastermind behind it all – Steve did an amazing job pre-planning and executing the Groot outfit, his own Drax costume (amazing muscle suit!) and then did Rocket Raccoon’s entire costume by himself! It’s worth pointing out that all of those costumes were made from scratch! I got off pretty easy – all of my parts (wig, costume) were all purchased online.

I have a few details on some of our makeup below, if you’re only interested in photos, be sure to scroll down to see some amazing shots of our group in action!
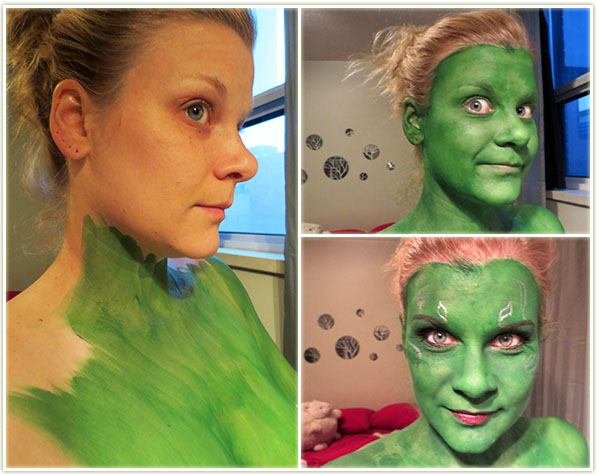
 

Going green
Going green

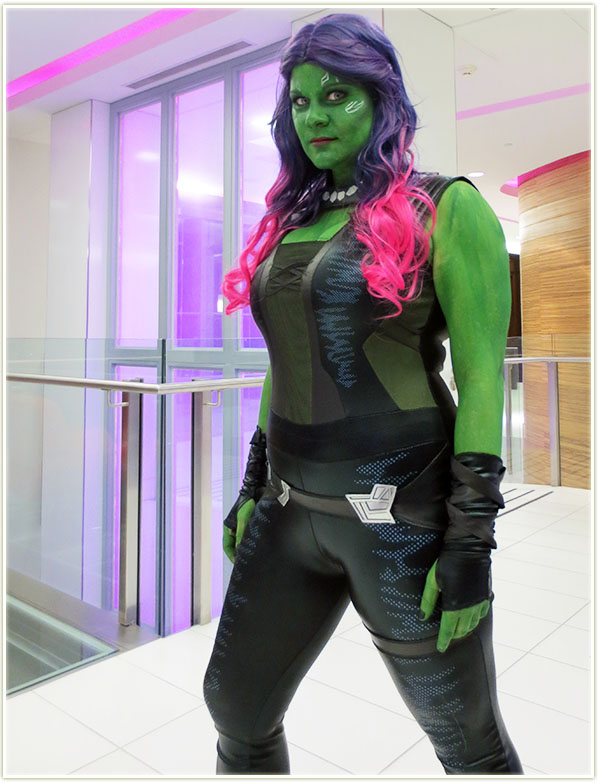
My makeup took longer than I expected – about two hours to get me completely done. I used MAC‘s Chromacake in Landscape Green to change the colour of my skin. It took about two layers but I’m still not pleased with how it turned out as I feel it’s too patchy. The texture seemed to be more even on my face, but the body was especially bad. I think using an airbrush system would’ve been a better idea.
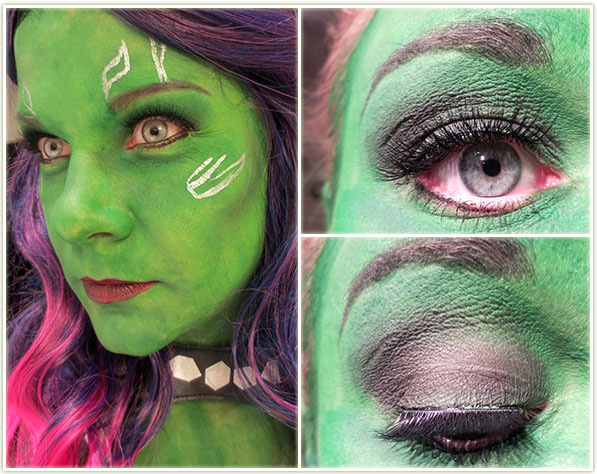
Close up of face detail

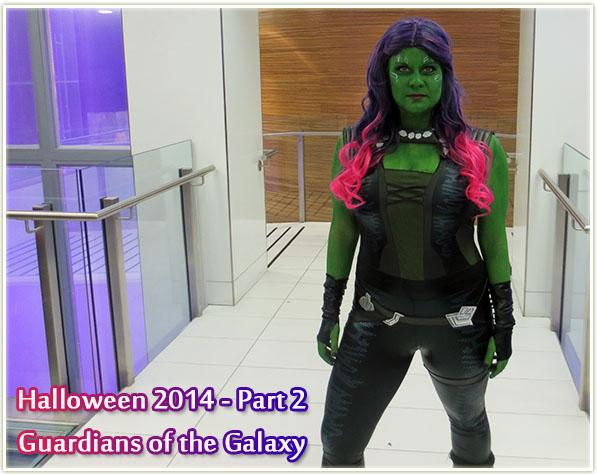
My face was pretty straightforward once I had the green base on. I kept it simpler than the trial I had done before and stuck with a single colour on my eye for shadow (MAC Print). I used the same shade through my eyebrows and to contour my face. The contour helped a lot to give me some depth and bring out my cheekbones since I looked especially flat before doing so. I popped on a pair of Femme Fatale lashes in their Catwalk style since I felt my eyes were getting lose amongst all the green. Any liner touchups were done with Urban Decay‘s Black Velvet pencil. On my lips is Revlon‘s Black Cherry because I couldn’t find a decent darker green and I was running out of time to mix shades. Gamora has a few silver lines on her face so I sketched out some rough shapes with a silver liquid liner from NYX.
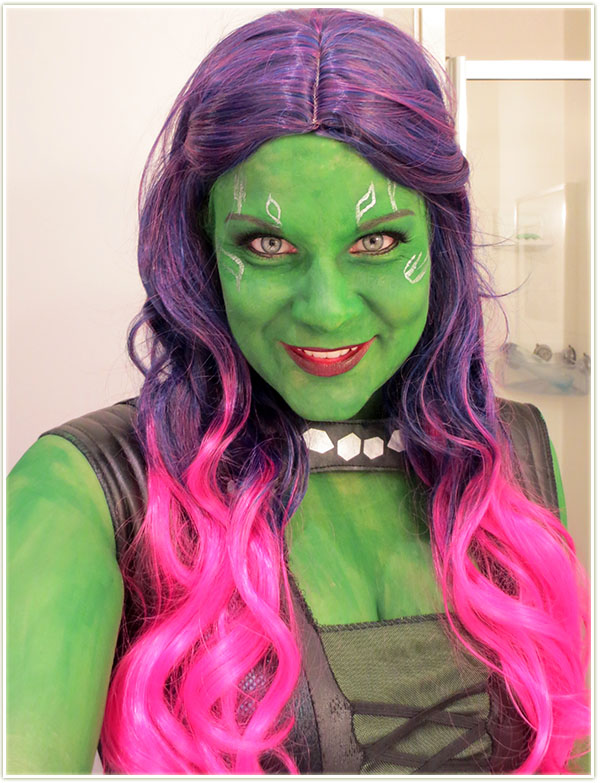
Finished Gamora makeup with outfit and wig

I think the end result is decent. Not movie quality, certainly, but definitely good enough for Halloween! The wig was a $20  I got from Ebay and it worked out far better than I ever expected from a relatively cheap wig (plus I’d never even worn a wig before). I had to pin some of the pieces into the wig cap because they kept dangling in my face, but I think the overall look is relatively realistic. Let me know what you think!
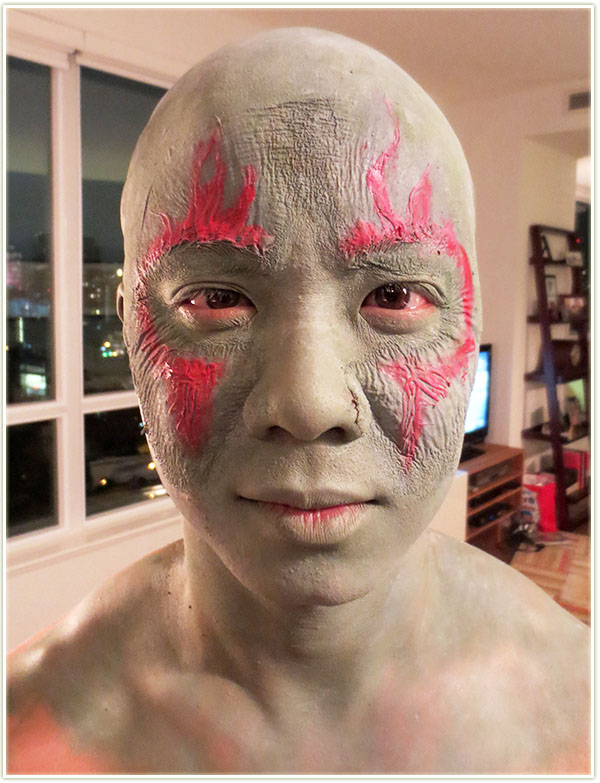
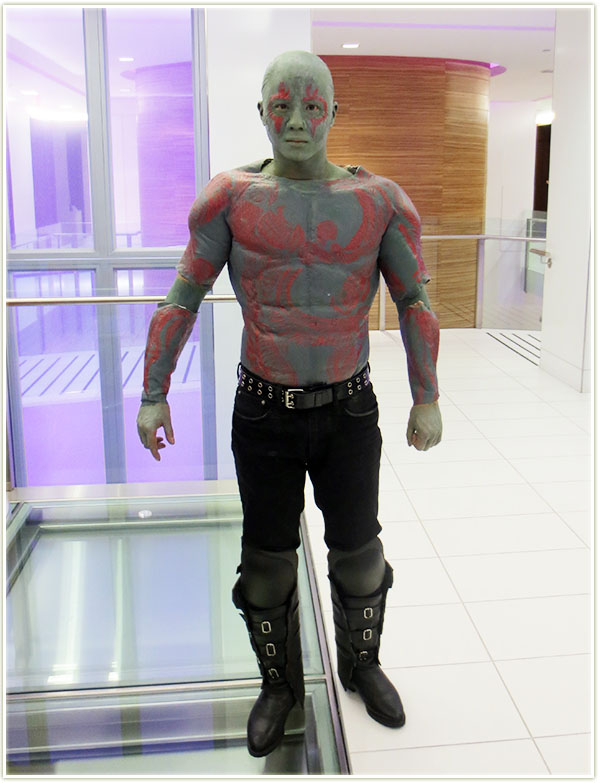
Steve as Drax
Steve as Drax

My friend Steve did his own makeup for Drax and he was kind enough to share how his turned out. Here’s his summary of what he did on his face:

Creating the Drax make-up required a fair amount of thought, and I wasn’t altogether sure about what supplies to use, or if I would be able to create it properly. For the movie, the tattoos were created using foam latex pieces that were made by taking a cast of Dave Bautista’s face, sculpting the tattoos on the cast, then taking a mould of the sculpt, and then creating the foam latex out of that. I do not have the kind of skills to do that, nor the materials, so I needed a work around that would allow me to have a base coat of greyish green, with raised red tattoos over top. I was comfortable working with latex, but could not get latex that was the greyish green I needed, nor could I make the latex thick enough to hold the shape of the tattoos.

I chose to use acrylic paint mixed with latex. What I found was that acrylic alone would flake off of the latex once it dried, as the latex did not give enough to adhere to. When I mixed the paint with liquid latex, I found that the paint now stuck and kept its thickness. I started by putting on the bald cap (which was an ordeal unto itself) trimming to size first, and then applying to my head using spirit gum. I then sponged “ruddy flesh tone” liquid latex to blend it into my skin so there was no seam.

I would need a base on which to apply the acrylic, so I used the ruddy coloured latex above my eyes and below them (I applied olive oil to my eyebrows so that I would hopefully not lose them all when I pulled off the latex). I then applied a green acrylic/liquid latex blend (I used a 3:2 ratio of liquid latex to acrylic paint) and then some grey to lighten the green, blow-drying between applications to set the latex.

I then applied the red acrylic and liquid latex mix (for this I needed it thicker so chose to use a 1:1 ratio of acrylic to latex). I lacked dexterity when applying to my face, so just used the side of the brush to make lines that criss-crossed and carefully applied tails and sharp ends using a toothpick. I added a coat of grey-green over top to lighten the tattoos.

Unfortunately, as I attempted to blend everything together using Ben Nye‘s Creme Make-up in Army Green mixed with some grey made from white and black Ben NyeCreme make-up, the latex sopped-up all of the colour, and a few minor mishaps ruined the red of the tattoos. As a result, I completely blended using the make-up and then used some leftover red creme make-up to bring the tattoos out.

You’ll notice in the close-up that there is a lot of wrinkling happening with the latex. I realized after the fact that this was probably because of the acrylic. It wasn’t sticking to my face as well because the acrylic didn’t want to stretch as much as the latex. In the end the make-up worked fine, but I wish I had done things slightly differently. I wish that I had just used acrylic and latex for the tattoos to make them raised, but then just used make-up to create colour and blend everything in. In the end the latex took the make-up so well that I would have been fine to paint the raised tattoos using red make-up after the fact.

In the end, I was satisfied with the look, and of course the best news is that my eyebrows escaped intact.

And now for some amazing shots we got before heading out onto the street!
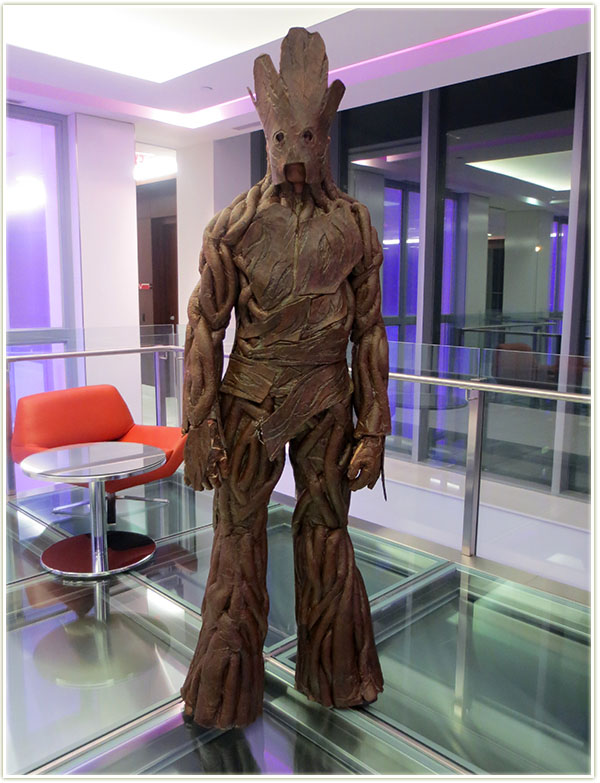
Groot
Groot
Rocket Raccoon
Rocket Raccoon
Drax
Drax
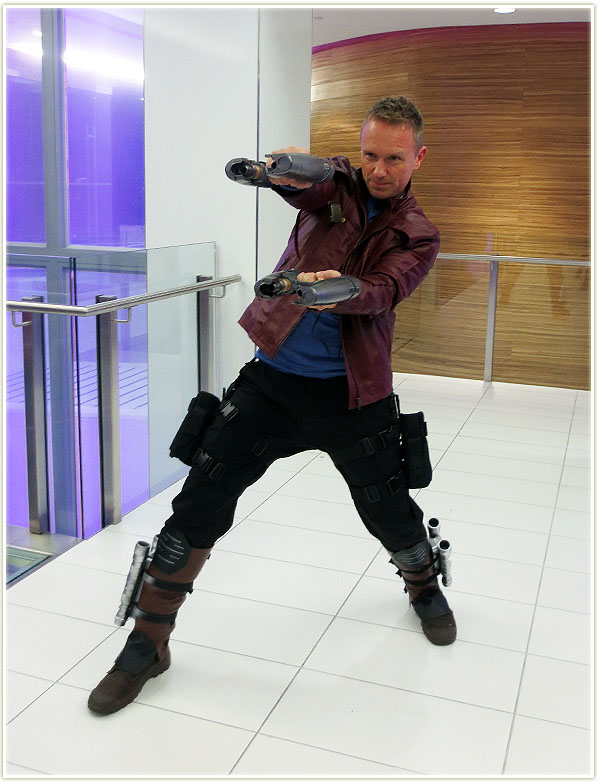
Starlord
Starlord
Gamora
Gamora

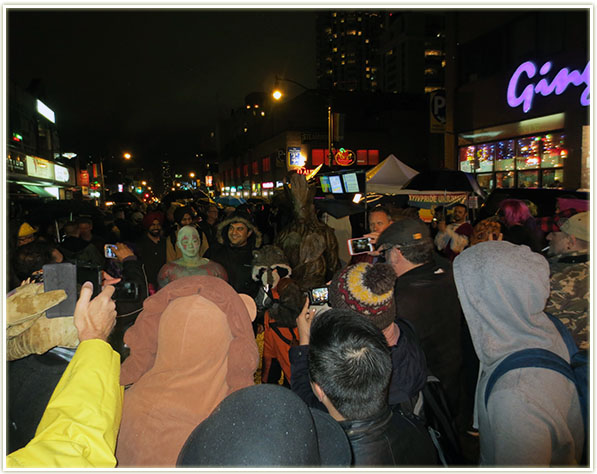
After our brief “photoshoot”, we hit up Church Street which is shut down to traffic on Halloween for the entire evening for a street party. It was seriously cold (about 2 degrees), but it stopped raining for the hour we were out there which was a HUGE blessing since most of the paint would’ve melted off us!
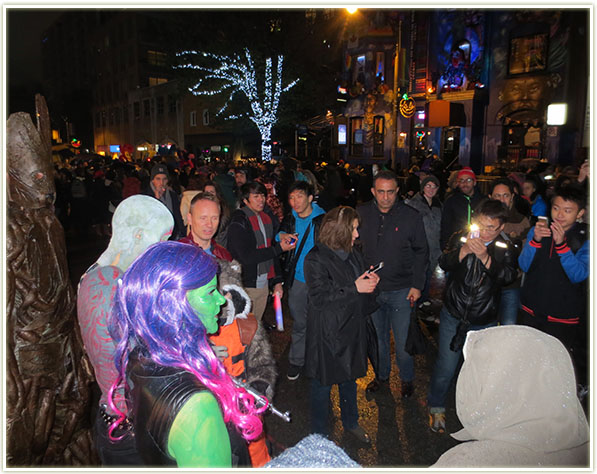
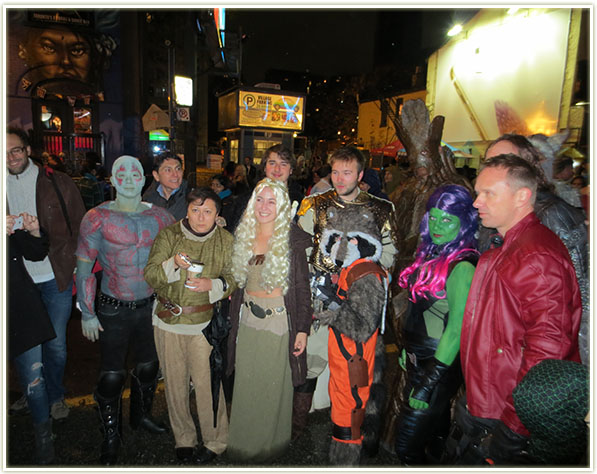
The first group to stop us for pictures
Posing with some characters from Game of Thrones!
This was cute… a lot of kids came up to us and Rocket was always trying to get them involved!
We were stopped so often and so frequently for pictures that we ended up with crowds and crowds of people around us!
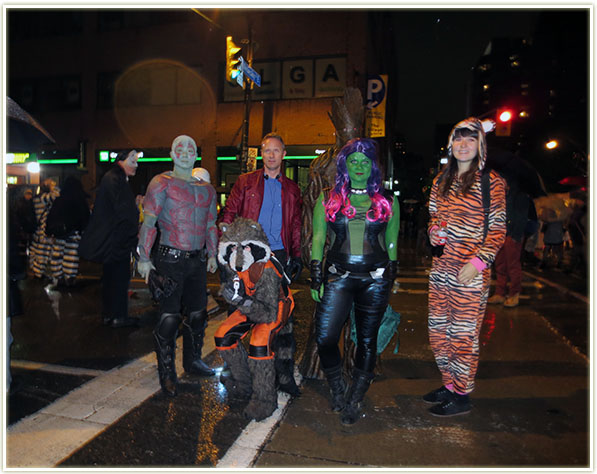
More posing
More posing

As always, Halloween was an amazing experience on Church Street in Toronto. If you live in the city and don’t know what to do on Halloween, it’s worth it to come down to the area and check out all the costumes. Even if you’re not dressed up yourself, it’s still worth it to see what others put together. And if you DO dress up, you’ll end up feeling like a celebrity for the evening.

Happy Halloween everyone. 🙂
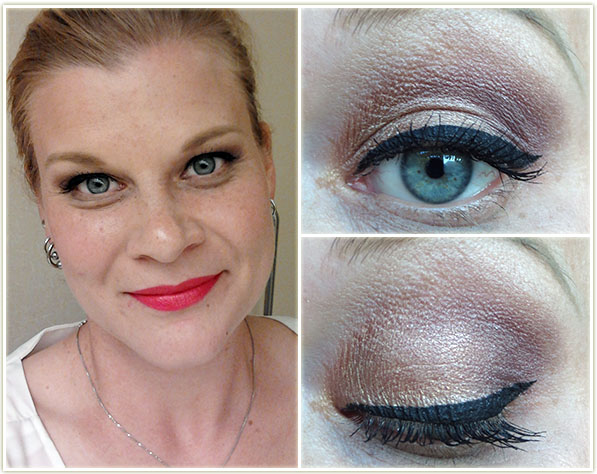
What’s On My Face – Volume 27

There’s an insanely cool look (to me) in this set amongst the usual ones. Read on!

20141114_look1-1

Standard neutral lid with bright lip combo.

20141114_look1-2

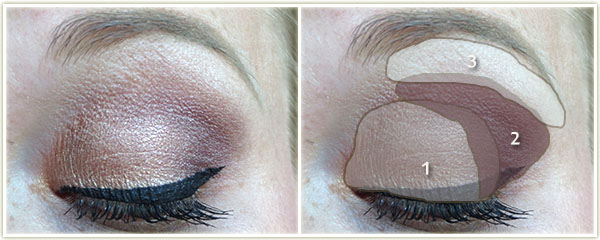
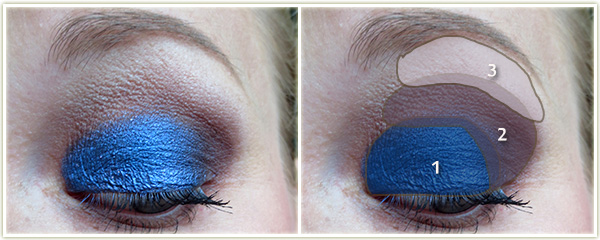
Eyes

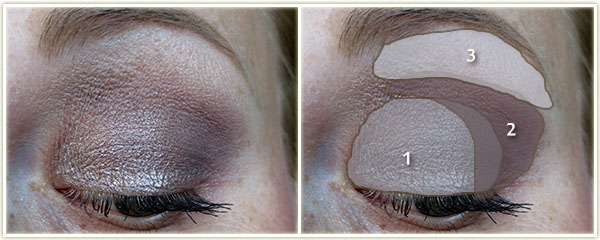
  1. e.l.f. Coral Reef gold shade all over the lid.
  2. e.l.f. Coral Reef purple shade on the outer corner and lightly through the crease.
  3. MAC Shroom on the browbone.

Tarte‘s black gel liner to create the wing with Urban Decay Perversion mascara on my lashes.

Rest of the Face

  • Foundation: Boots No7 Stay Perfect in Deeply Ivory
  • Bronzer: e.l.f. Surf’s Up
  • Blush: essence Pinky Flow
  • Lips: Too Faced Melted Candy

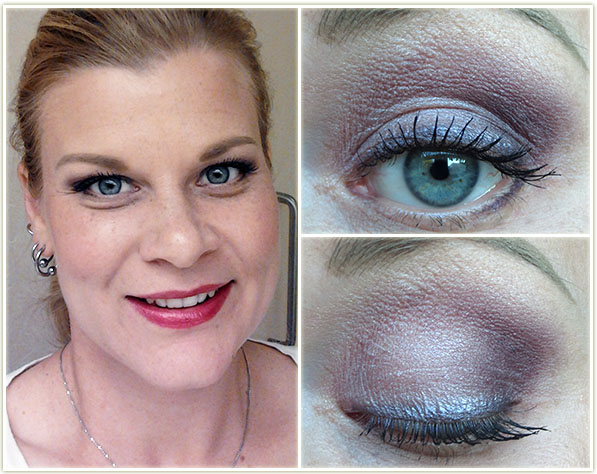
20141114_look2-1

I had a bunch of freebie items from No7 (well, FREE if I spent enough money on the brand… which I had) that I wanted to try out and this was the look I got out of them.

20141114_look2-2

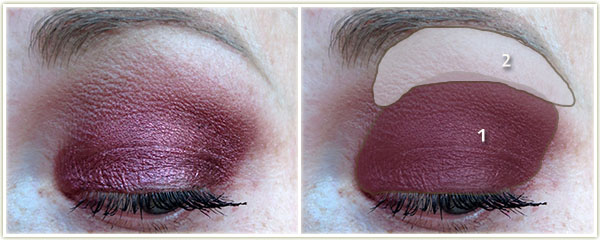
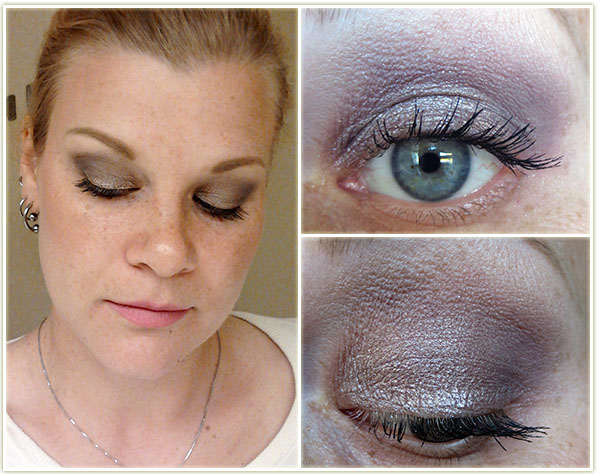
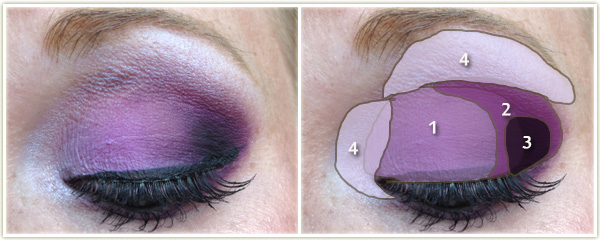
Eyes

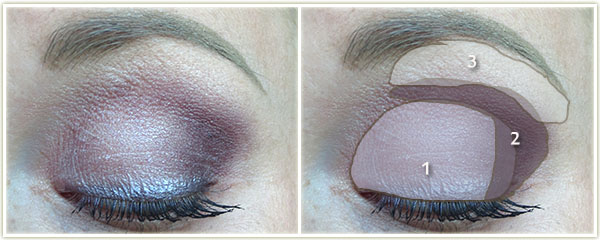
I first lined my upper lash line and outer corner of my lower lash line with Boots No7 Metallic Eyes Pencil in Purple, then I applied:

  1. Boots No7 eye shadow in Violet Shine all over the lid and over the liner.
  2. MAC Sketch on the outer corner and through the crease.
  3. MAC Shroom on the brow bone.

Urban Decay Perversion mascara is on my lashes.

Rest of the Face

  • Foundation: Boots No7 Stay Perfect in Deeply Ivory
  • Bronzer: Hard Candy Hula Hula
  • Blush: Can’t remember!
  • Highlighter: MAC Soft & Gentle
  • Lips: Soap & Glory Raplumzel

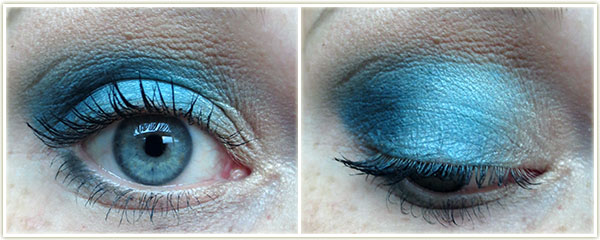
20141114_look3-1

Playing around with e.l.f.’s Little Mermaid collection.

20141114_look3-2

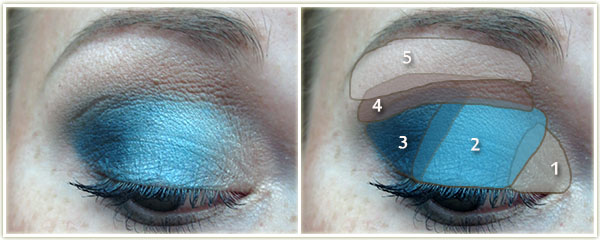
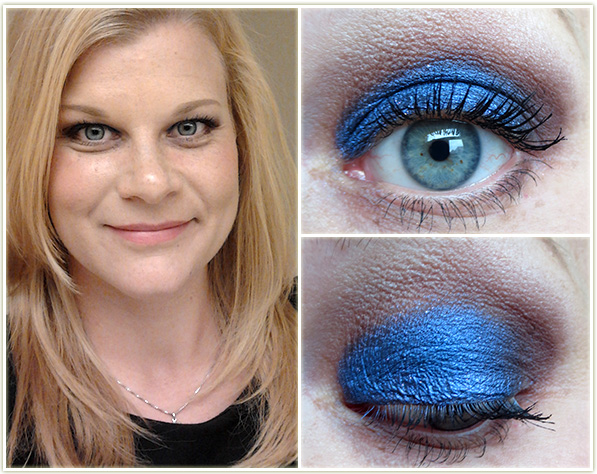
Eyes

  1. e.l.f. High Tide gold shade on the inner third of the eye.
  2. e.l.f. High Tide blue shade on the middle of the lid.
  3. Inglot Matte 338 on the outer corner.
  4. Too Faced Chocolate Milk through the crease.
  5. MAC Shroom on the brow bone.

To line the outer corner of the lower lash line, I used MAC Phone Number pencil and then layered Inglot Matte 338 on top lightly. Urban Decay Perversion mascara is on my lashes.

20141114_look4-1

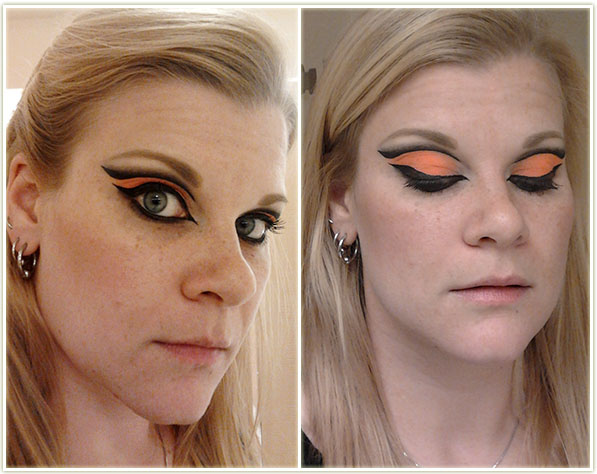
I love how this look came out from a visual perspective. It’s in no way flattering on its own (even though I’ve given you somewhat decent photos above) but it was a lot of fun to create. I was looking for orange cut creases online for Halloween and I found this as a source of inspiration/outright copying.

20141114_look4-2

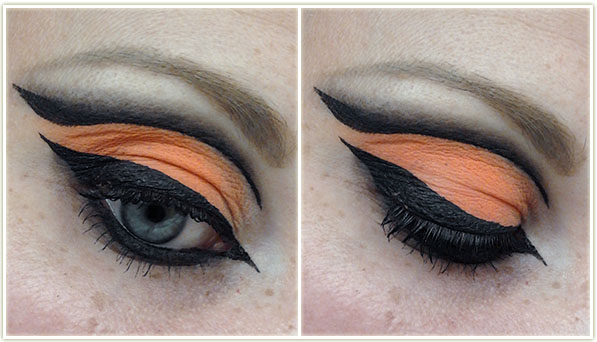
Taken at the right angle, this look is BEAUTIFUL in photographs. I love the sharp edges and the vivid colour. I wore this to work the day before Halloween (hey, any excuse right?) and it sure did net me some reactions alright! lol

20141114_look4-3

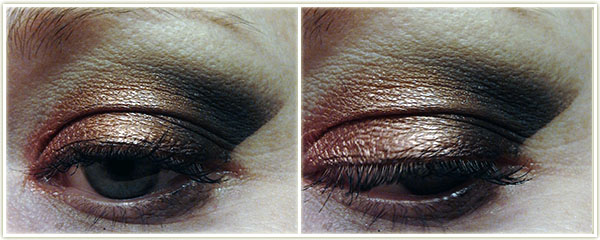
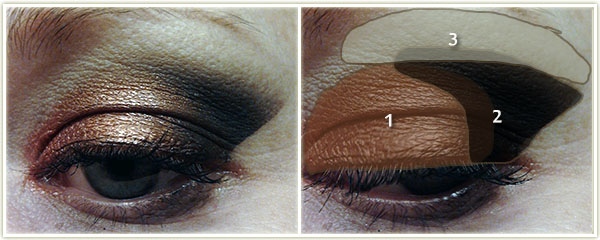
Eyes

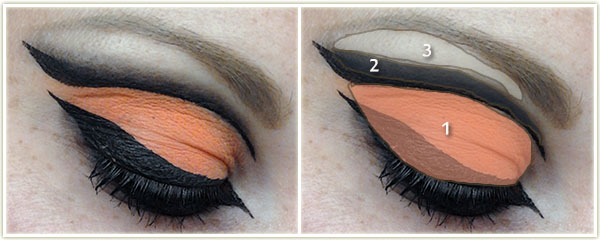
I first applied NYX‘s Jumbo Eye Shadow Pencil in Milk all over the lid and blended it out with my finger. I then applied:

  1. Sleek‘s neon orange from the Acid palette all over the entire lid, right up and over my crease.I then used Kat Von D‘s Tattoo Liner in Trooper and carved out the top of the crease (keep your eye open for this), and;
  2. used Urban Decay‘s Blackout to blend out the edge of the liner upwards.
  3. Urban Decay Foxy is on my brow bone.

I used Kat Von D‘s Tattoo Liner to create the enormous wing and dragged it into a tiny point on the inner corner of my eye. I lined my lower lash line and water line with Urban Decay‘sBlack Velvet pencil. Estee Lauder Sumptuous Infinite Daring Length + Volume Mascara is on my lashes.

Rest of the Face

  • Bronzer: NYC Fire Island Tan
  • Blush: Hard Candy Skinny Dipping
  • Lips: Benefit Ultra Plush Lip Gloss in Coralista

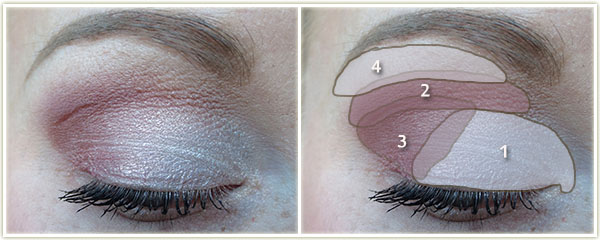
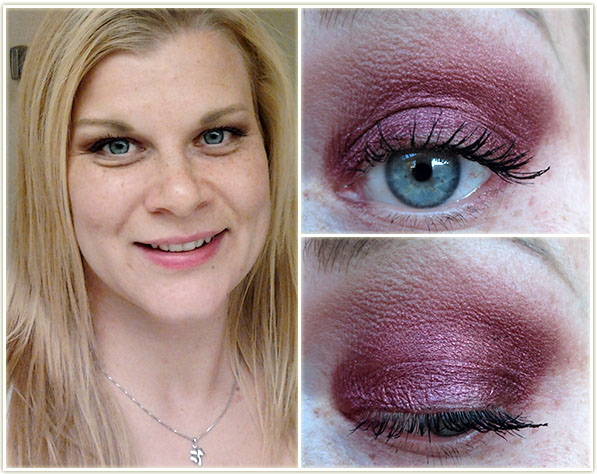
20141114_look5-1

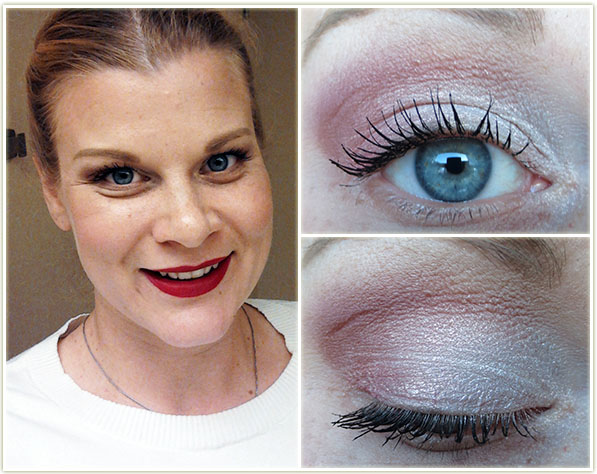
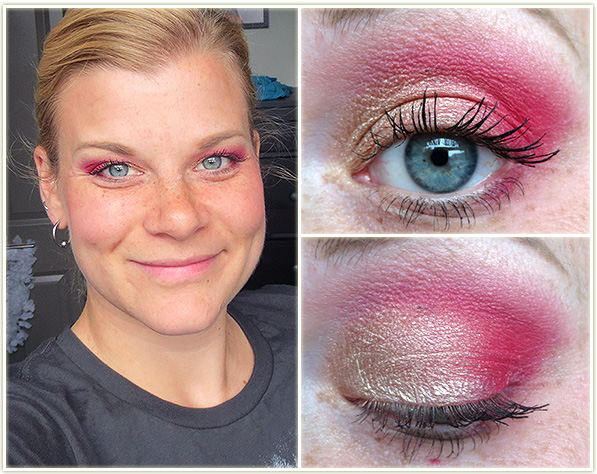
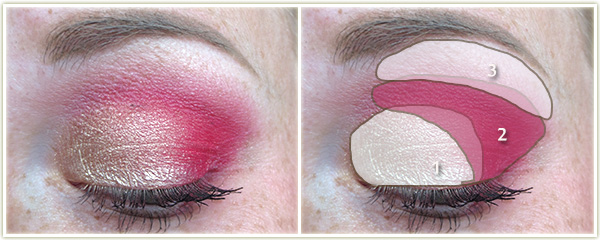
Totally falling in love with this lip colour! Too Faced Melted Berry is absolutely beautiful and goes with a whole variety of looks (+obvious observation that it’s fall and it’s a dark lip shade, yadda yadda).

20141114_look5-2

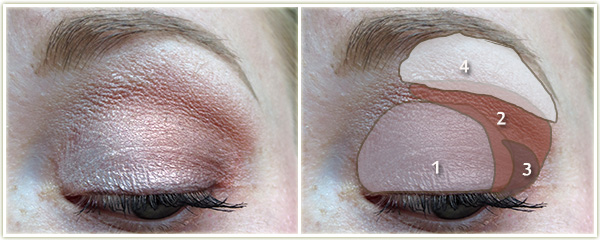
Eyes

  1. MAC Vanilla pigment all over the lid.
  2. MAC Shag through the crease.
  3. MAC Expensive Pink on the outer corner.
  4. Wet n Wild Brulee on the brow bone.

Estee Lauder Sumptuous Infinite Daring Length + Volume Mascara is on my lashes.

Rest of the Face

  • Foundation: CoverGirl CC Cream in 110 Classic Ivory
  • Bronzer: NYC Fire Island Tan
  • Blush: Hourglass Luminous Flush
  • Highlighter: MAC Vanilla pigment

What’s On My Face – Volume 26

I’ve been having “blah” kind of makeup days lately. A lot of neutrals, with brighter lip shades (tis the season?) but it’s actually starting to make me feel a bit depressed. With the darkness in the morning, I have far less desire to get out of bed. And because of that, I spend a lot less time on my makeup, which means not only boring looks (to me), but it also means sometimes I don’t even have enough time to take pictures of my makeup before I dart out the door to work. Sigh. Beauty blogger problems? I don’t know. I’m looking forward to DST ending so I can get an extra hour of that sun in the mornings (uhhh that is how that works right? I think I mess this up every year…), because right now, the only relatively suitable light I have to take pictures is at 7:55-8:05 a.m., which is when I’m supposed to be out the door!

So I tried to spice it up and do some interesting things every now and then. This is a mix of “meh” and “oooo”. I hope you find something you like!

20141027_look2-1

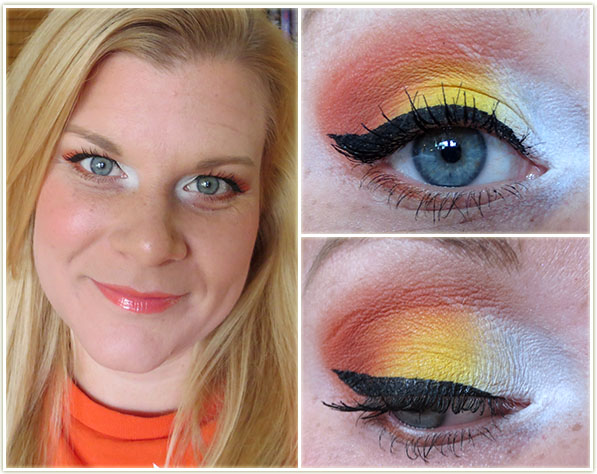
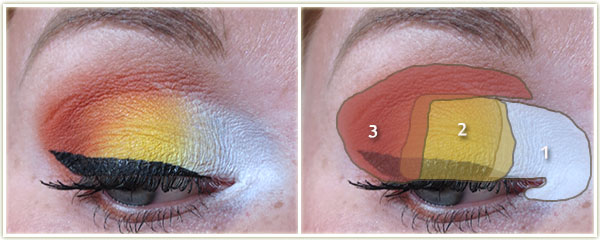
Let’s start out with my favourite! Themed after one of my favourite candies of the Halloween season: candy corn!

20141027_look2-2

Eyes

I first applied NYX‘s Jumbo Eyeshadow Pencil in Milk all over the lid, blended it out, then:

  1. Makeup Geek White Lies on the inner third of the lid and pulled around the tearduct.
  2. Inglot Matte 370 on the middle third of the lid.
  3. Inglot Matte 383 on the outer third of the lid and on the outer corner of the lower lash line.

Tarte‘s black gel liner to create the wing with Urban Decay Perversion mascara on my lashes.

Rest of the Face

  • Foundation: Boots No7 Instant Radiance in Cool Vanilla
  • Bronzer: NYC Fire Island Tan
  • Blush: Hard Candy Skinny Dipping
  • Lips: NYX Butter Gloss in Cherry Cheesecake

20141027_look5-1

While I love this shadow, this is what I mean when I say I’m too damn lazy to get out of bed in the morning. This is basically a one eyeshadow look with no liner. Not something I’m fond of, but this colour certainly gets the job done!

20141027_look5-2

Eyes

  1. L’Oreal Infallible in Golden Mahogany all over the lid and blended up through the crease.
  2. MAC Blanc Type to highlight the brow.

On my lashes is Estee Lauder‘s Sumptuous Infinite Daring Length + Volume Mascara.

Rest of the Face

  • Bronzer: NYC Fire Island Tan
  • Blush: MAC Gingerly
  • Highlighter: Too Faced Candlelight
  • Lips: Sephora Color Reveal Balm in Unique Pink

20141027_look1-1

I actually did this in 2012, but never got around to posting it. I believe I wore it to work on Halloween that year.

20141027_look1-2

  1.  MAC Coppering all over the lid.
  2. I then used a piece of tape to create the sharp outer edge, and then blended appliedUrban Decay Blackout to the outer corner.
  3. MAC Brule was used to highlight the brow.

L’Oreal Voluminous Carbon Black mascara is on my lashes.

20141027_look3-1

These are the kinds of looks I just don’t gravitate towards, but they’re a heck of a lot simpler to put together in the morning!

20141027_look3-2

Eyes

  1. L’Oreal Infallible in Tender Caramel all over the lid.
  2. MAC Copperplate on the outer corner and through the crease.
  3. MAC Shroom on my brow bone.

On my lashes is Urban Decay‘s Perversion mascara.

Rest of the Face

  • Bronzer: Hard Candy Hula Hula
  • Cheeks: Hourglass Mood Exposure
  • Lips: NYX  Soft Matte Lip Cream in Istanbul 

20141027_look4-1

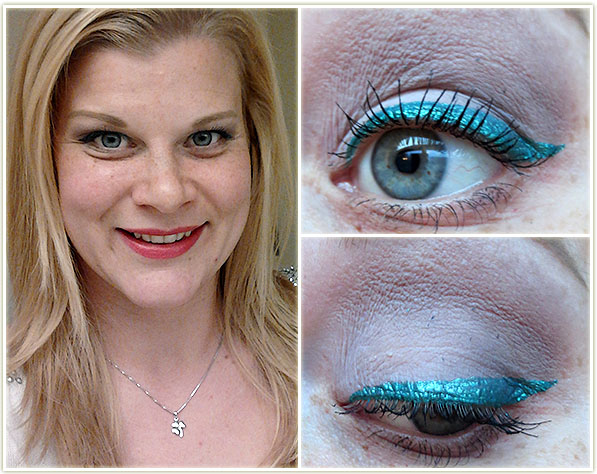
Another easy one. Whack on boring eyeshadows, a super bright liner and tada!

20141027_look4-2

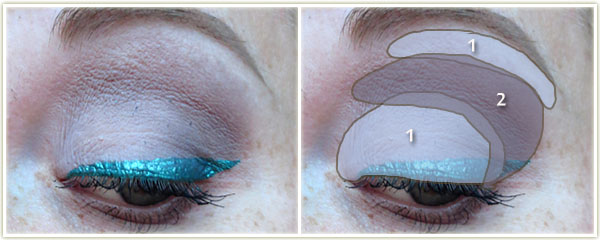
Eyes

  1. MAC Blanc Type on the lid and on the brow bone.
  2. MAC Copperplate in the outer corner and crease.

Nicka K Shimmer Eyeliner in Green to create the wing with Dermacol Party Time mascara on my lashes.

Rest of the Face

  • Bronzer: NYC Fire Island Tan
  • Blush: essence Pinky Flow
  • Lips: Revlon Pink Velvet

What I Bought This Month – September 2014 Haul

Settle in folks, this is another doozy of a haul. I spent almost two weeks in September travelling in Europe and this meant getting to dabble in makeup brands that I don’t have access to in Canada. I picked up a lot of different brands and products overseas, as well as a few new releases here in Canada/US.

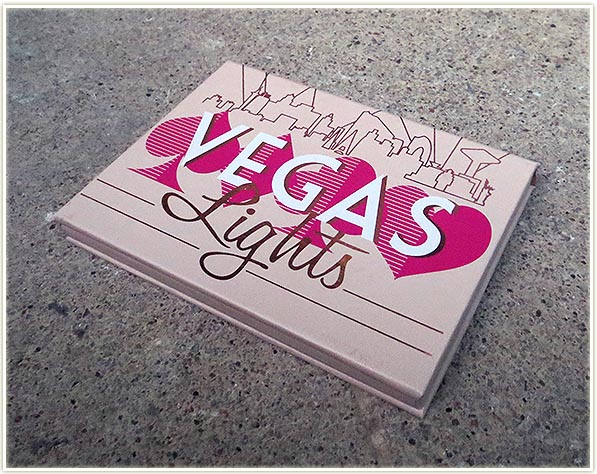
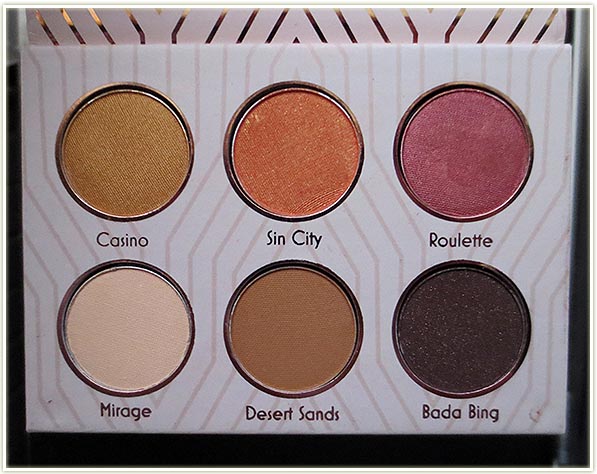
Makeup Geek Vegas Lights palette ($37.99 USD)

The most exciting thing I picked up was the brand new Makeup Geek Vegas Lights palette. I hemmed and hawed over this sucker for a little while, but in the end splashed out for it. I love Marlena of Makeup Geek, and I *love* her eyeshadows.

Vegas Lights: Casino, Sin City, Roulette, Mirage, Desert Sands, Bada Bing

The colours in this palette are right up my alley – specifically Sin City and Roulette. The bottom row really helps ground any look you can come up with this palette. I’m impressed thatMakeup Geek managed to put out a palette that actually has serviceable neutrals along with some beautifully coloured shadows. I think this palette is limited edition, in which case, consider picking this up before it’s completely gone!

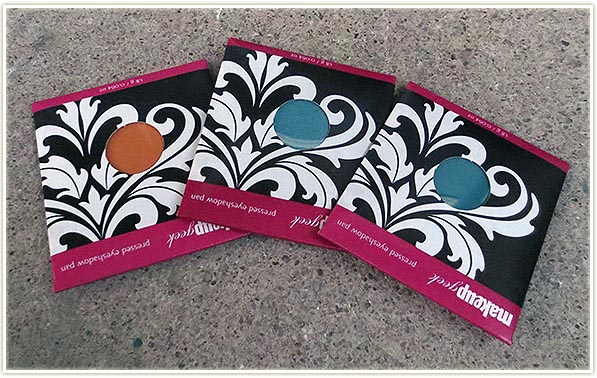
Makeup Geek shadows: Chickadee, Glass Slipper, Shark Bait ($5.99 USD each)

When I put in the order for the Vegas Lights palette, I also put a few shadows in the order. I have this (completely useless) idea of collecting all the Makeup Geek shadows so had to plug in a few more for this order.

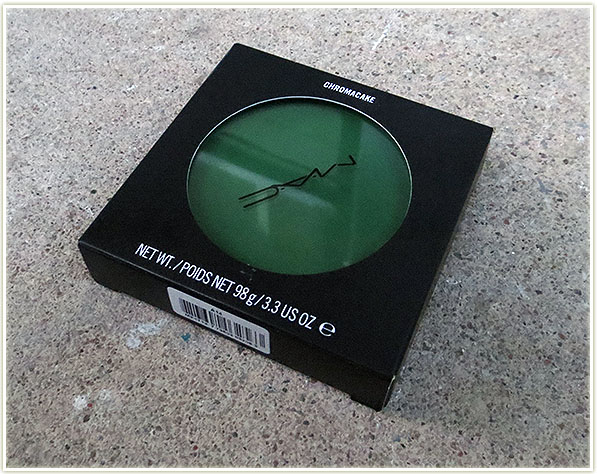
MAC Chromacake in Landscape Green ($31 CAD)

For this year’s Halloween costume, I’m going as Gamora from the Guardians of the Galaxy. Because of Gamora’s green skin, I’m going to need a heck of a lot of coverage so I hopped on over to the MAC Pro store and picked up a Chromacake in Landscape Green. I’ve never used a Chromacake before, or any kind of body paint before, but I’m hopeful that this will turn out well.

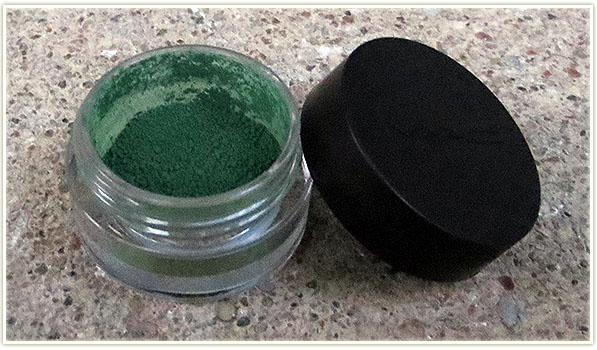
MAC pigment in Landscape Green (free)

The lady at the MAC Pro store was kind enough to give me an insanely generous sample of Landscape Green pigment to match my Chromacake. In fact, she gave me so much pigment I was actually able to mix it with alcohol and press it into an eyeshadow pan. Very handy!

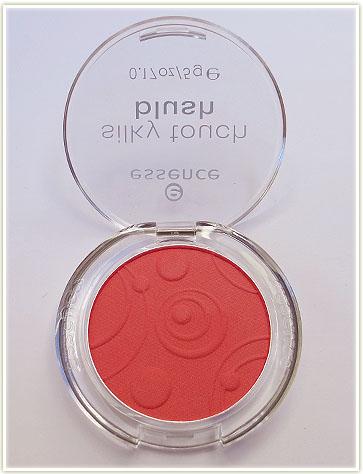
essence – Life’s a Cherry ($3.99 CAD)

I’ve been loving the Autumn Peach blush by essence that I was previously sent, that I wanted to check out the other shades. Life’s a Cherry is a lovely pink veering on red shade. I think the lighting on the shot above really doesn’t make it across right, but so far I am loving this other essence blush as well.

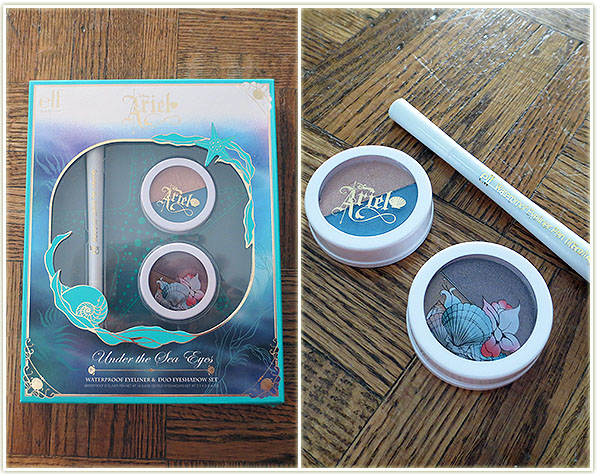
e.l.f. Disney Ariel Eye Collection ($5 USD)

The Disney Ariel collection was never released in Canada as far as I could see, so a friend in the US shipped a bunch of the products up to me. The eyeshadows aren’t bad, but that eyeliner is absolute crap.

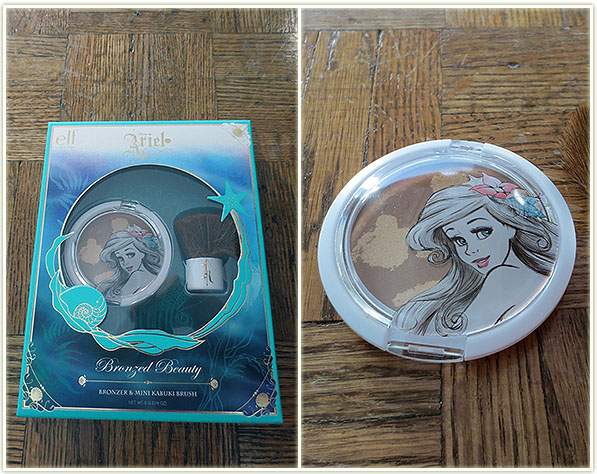
e.l.f. Disney Ariel Bronzer & Mini Kabuki Brush ($5 USD)

The brush on this one is far too scratchy, but the bronzer is fairly nice. Pretty glittery, but still useable.

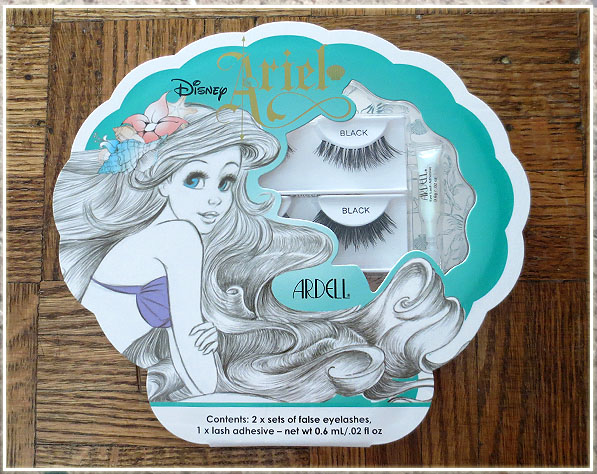
Ardell Disney Ariel Lash Kit ($8 USD)

And lastly from the Ariel collection, a couple pairs of false lashes. They’re regular Ardell lashes but specially packaged up for this Little Mermaid collection.

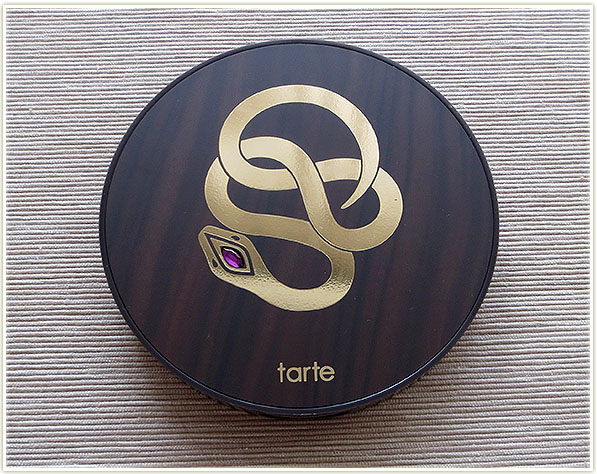
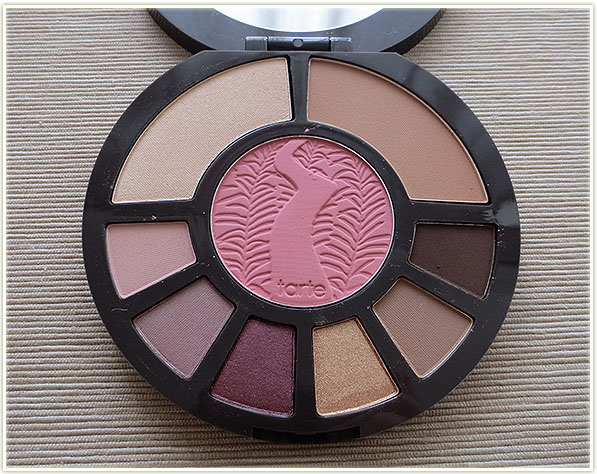
Tarte – Rainforest After Dark ($26 USD)

My wonderful friend Sara whom I was vacationing with in Prague managed to snag me a few goodies in the US that she very kindly brought over for me. She managed to get an awesome deal on the Tarte Rainforest After Dark palette.

Rainforest After Dark

Having only ever tried Tarte’s blushes and bronzer, I was curious how their eyeshadows would perform. There are some lovely shades in here, but the palette on its own needs help. There’s no matte brow shade that works for me (the light pink is too dusty of a pink colour) and the pale lavender-grey is actually quite sheer and requires a lot of packing on. That being said, this sucker is super handy. The browns on the right side are wonderfully pigmented, the bronzer and the highlighter are wonderful and the blush is like all of Tarte’s blushes – easy to blend and looks great on my cheeks. This palette is wonderful for a full face – something quite rare in a palette of this size.

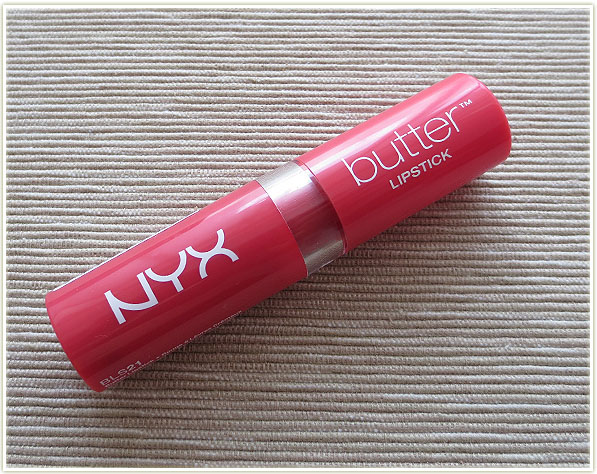
NYX – Fizzies ($5.99 USD)

I had bought NYX‘s Butter Lipstick in Fizzies back in March but had managed to mangle it when I took it out to a club one night with me. The bullet broke in half and no matter what I did, I couldn’t put it back together. Since NYX‘s Butter Lipsticks still aren’t available in Canada, once again Sara managed to pull through and picked me up a tube in the US. Here’s hoping I don’t break this one as well.

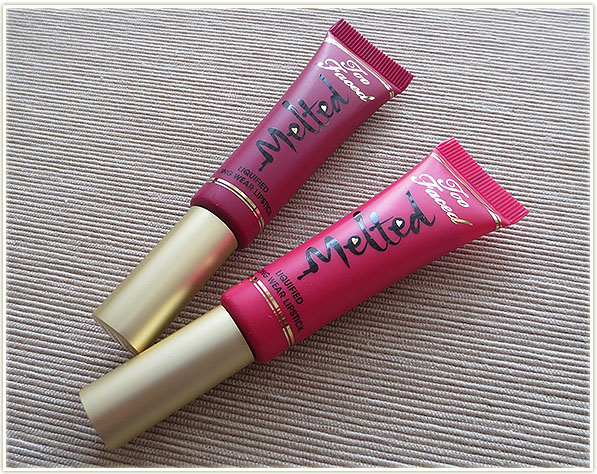
Too Faced Melted Lipsticks in Melt Berry and Melted Candy ($21 USD, each)

She also snagged me two of the newer shades of the Too Faced Melted lipsticks. I haven’t actually tried any yet, but I’d been lusting over them for several months. As they’re cheaper in the US, I broke down and had her buy me two – Melted Berry and Melted CandyMelted Candy is AMAZING. It’s almost fluorescent and shows up amazingly in pictures.

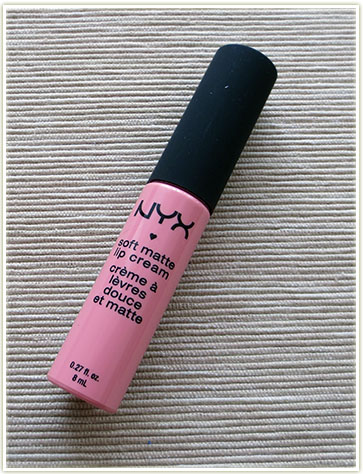
NYX Soft Matte Lip Cream in Istanbul (free)

And finally, she also kindly gave me a few products that hadn’t worked out for her. NYX‘s Soft Matte Lip Cream is a product I’ve heard about constantly over the years, but had never picked one up. The colour above is Istanbul and I’m excited to try it out.

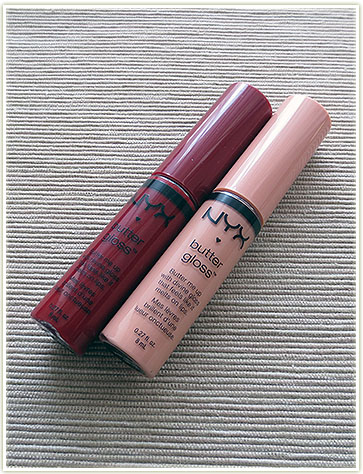
NYX Butter Gloss in Red Velvet and Fortune Cookie (free)

And lastly, Sara handed over two NYX Butter Lip Glosses that hadn’t worked for her. (Shock, horror!) I’ll always happily add more of these to my collection!

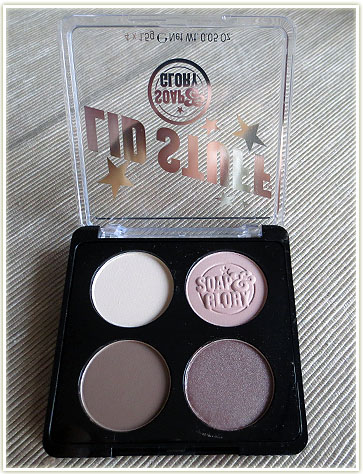
Soap & Glory Lid Stuff in What’s Nude (£10 GBP)

I had a layover at Heathrow on my way to Prague and made a mad dash for the Boots they had in one of the terminals. Thankfully, this particular Boots had Soap & Glory makeup products and I was able to pick up their Lid Stuff eyeshadow quad in What’s Nude.This is a handy quad to bring along with a super bright palette, quite similar to one of the Urban Decay Naked Basics.

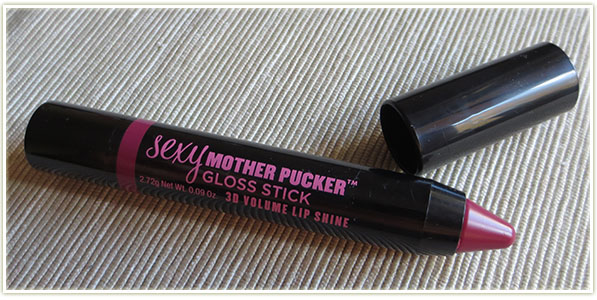
Soap & Glory Sexy Mother Pucker in Raplumzel (£8 GBP)

Also from Soap & Glory is their Sexy Mother Pucker Gloss Stick in Raplumzel. This is completely unlike any other balm sticks I own. It’s way more buttery and soft, very reminiscent of a Revlon Lip Butter except that this smells like caramel or something. Delicious!

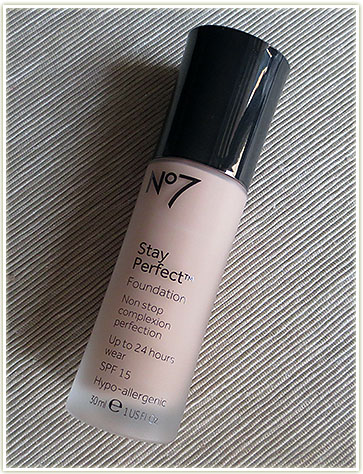
Boots No7 Stay Perfect Foundation in Deeply Ivory (£14.50 GBP)

Boots’ own brand No7 was having a deal on where if you spent enough money, you’d get a free goodie bag. I was interested in picking up more foundation from No7 as I already use their Instant Radiance foundation quite often. I got re-colour matched with their fancy handheld device and they paired me up with Deeply Ivory, two shades darker than what I had been previously using. I really love just how well the colour match seems to work with this brand, I’ve never been disappointed! I have zero idea if the technology is the same, but I’ve found that the Boots one gives me accurate results whereas the one from Sephora is seriously dodgy.

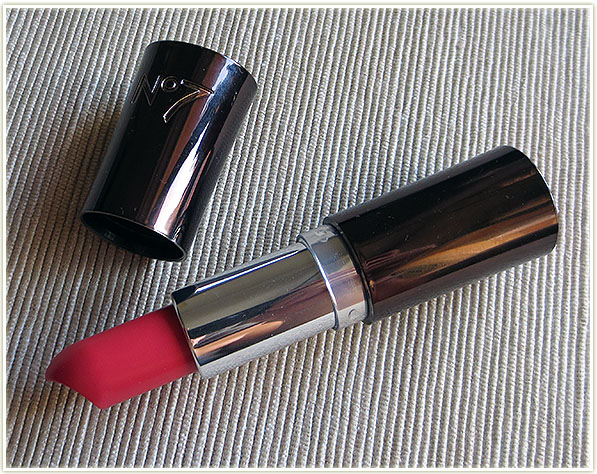
Boots No7 Lipstick in Sweet Copper (£9.95 GBP)

The lady at the Boots counter was doing colour matching to “find your perfect shade of lipstick”. I’m sure this suckers some women in, but it was really just about colour matching your skin and then finding a few shades that seem to match it based on some card they had. I thought it was basically a bunch of garbage, but I picked out a colour I didn’t think I had (yeah right) and it turned out to be Sweet Copper. Beautiful shade and I really love the consistency.

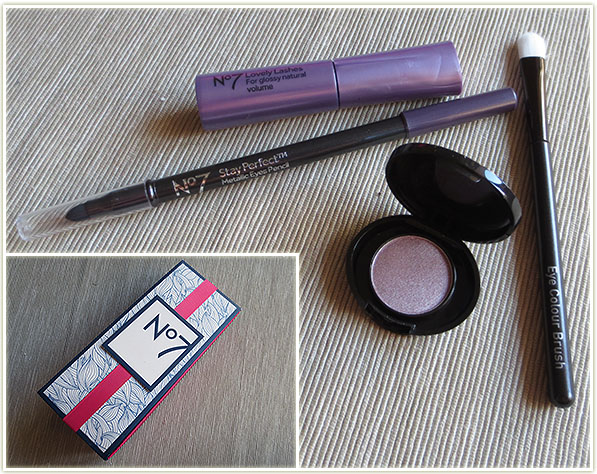
Boots No7 Exquisite Eyes Gift with Purchase (free)

And because I’d spent enough money on their No7 line, they gave me this set. It includes a mascara, an eye pencil, a brush and a shadow.

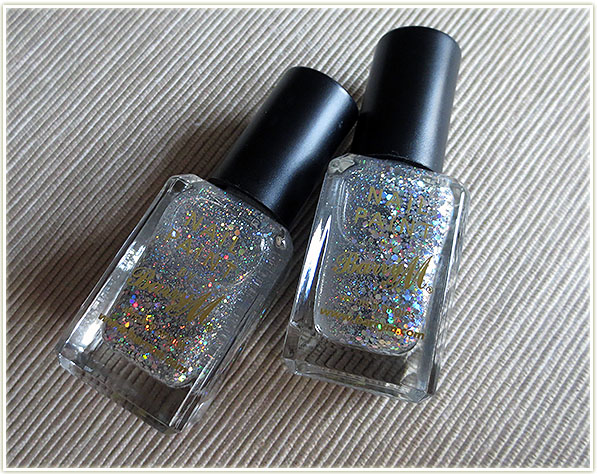
Barry M Nail Paint in Diamond Glitter (£2.99, each)

I spotted the Barry M display and snagged the last two Diamond Glitters left on the display. I had previously gone through an entire bottle of it and I knew I loved it. I was happy to re-stock this in my collection because I can’t get Barry M in Canada.

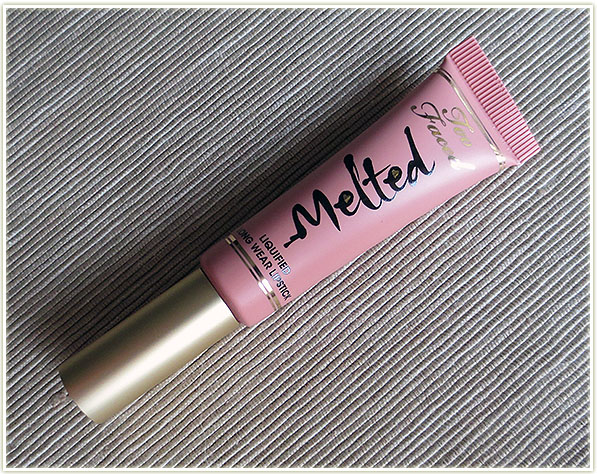
Too Faced – Melted Nude (456 Kč)

Because I had loved the Too Faced Melted lipsticks that Sara had brought me up from the US, that I ran out at bought Melted Nude in Prague. Bonus being that it was on sale (price above is the non-discounted price) and it was cheaper than I could even get it in Canada. Sold!

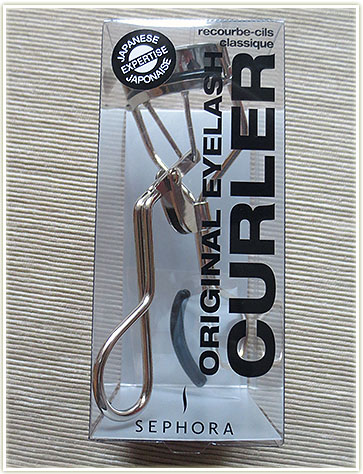
Sephora Eye Lash Curler (315 Kč)

This one was a necessity. I had forgotten my eyelash curlers at home and had to pick up a pair while on vacation. I’ve been using Tweezerman ones for years and I guess I just assumed eyelash curlers are supposed to pinch your eyes? Wrong, so wrong. I was happy to discover that Sephora‘s eyelash curlers are wonderful! No pinching of my lids at all! Think I’ll be throwing out my Tweezerman ones immediately.

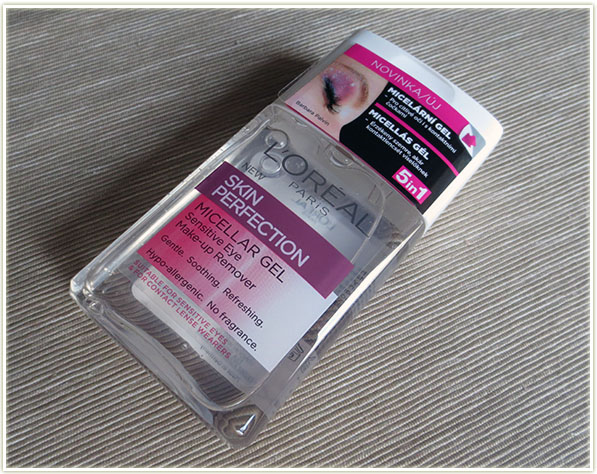
L’Oreal Micellar Gel (119 Kč)

Now this was interesting! I picked this up at Rossman, one of the drugstores in the Czech Republic, because I had read that L’Oreal regular liquid version was similar to Bioderma‘s micellar liquid. This is the gel format and I’m curious to see how this works in comparison with my other makeup removers.

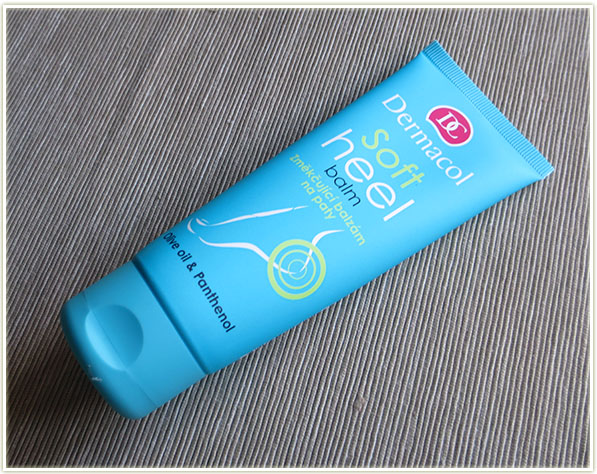
Dermacol Soft Heel Balm (72.90 Kč)

Picked up Dermacol‘s Soft Heel Balm solely because of the packaging. I have nasty heels and anything I can use to repair them is definitely right up my alley.

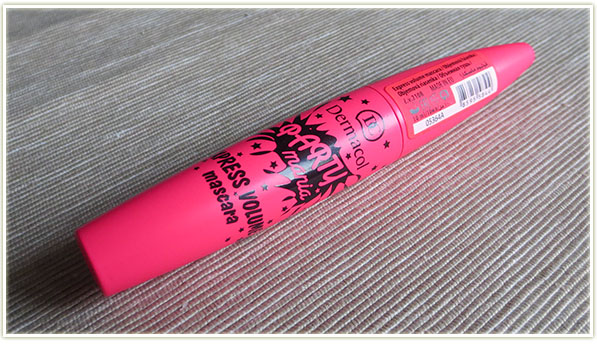
Dermacol Party Time mascara (179 Kč)

I wish I’d bought more Dermacol, but I didn’t actually realize that they were a Czech brand until very late into my trip. This was another item bought purely because the packaging screamed at me. Not opened yet because I have a bunch of other mascaras I need to finish up first.

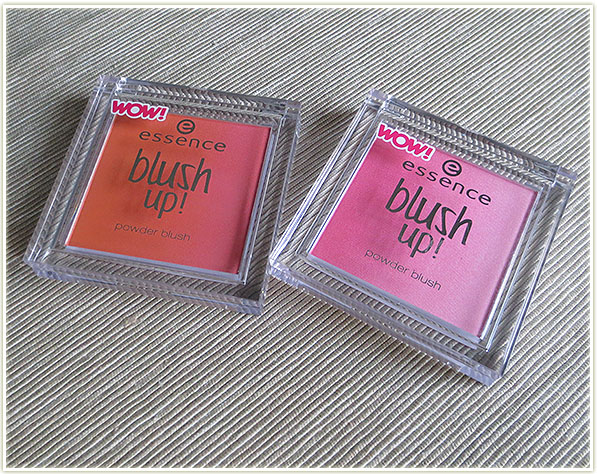
essence blush up! in Heat Wave and Pinky Flow (105 Kč, each)

Snagged these two up because I’ve never seen them in Canada! Bush ombres are just way too pretty to pass up and the one on the left looks like a dupe for MAC’s Ripe Peach, a blush I had never managed to get my hands on.

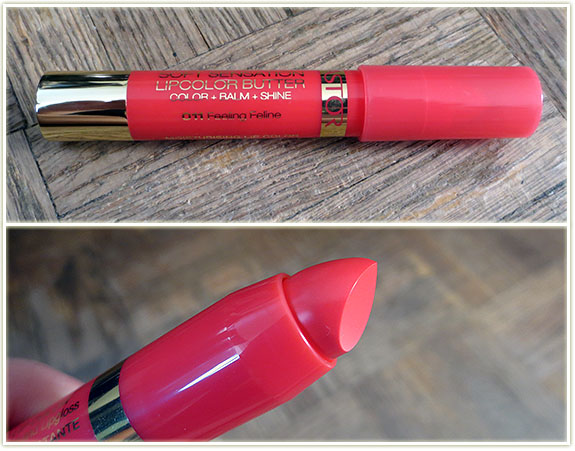
Astor Lipcolor Butter in Feeling Feline (169.90 Kč)

Hot pink, slightly sheer and called Feeling Feline! We had to go to three or four DM stores before we finally found one that hadn’t already been used. I also like how it’s not cut at the top like all the other chubby stick lip products.

Catrice Liquid Liner in Dating Joe Black (94.90 Kč)

Nikkie of NikkieTutorials claims this is better than Make Up For Ever’s liquid liner. Sold!

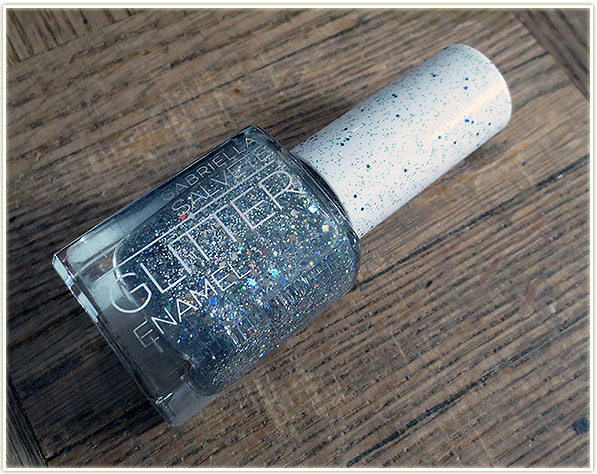
Gabriella Salvete Glitter Enamel (89.90 Kč)

Yet another 3D silver glitter polish to add to my  collection! I think this one is textured though.

Gabriella Salvete Liquid Eyeliner in Black (129.90 Kč)

I really don’t need more black liquid liner, but this one claims that it’s matte. I’ve yet to meet a liquid liner that’s actually matte, but hey, I’m willing to give it a shot!

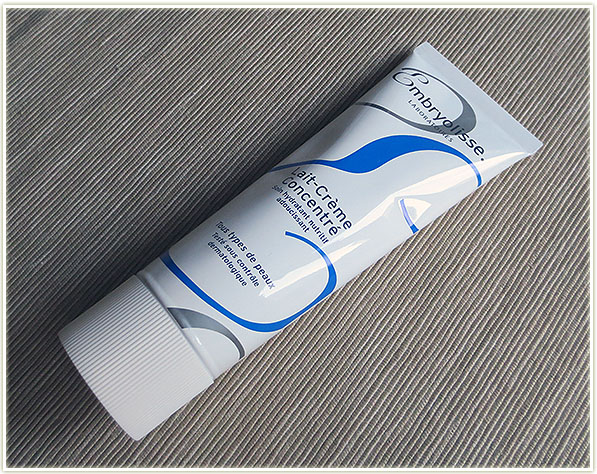
Embryolisse Lait-Creme Concentre (15 €)

My brother brought this over from France as I was getting low on the one I had back in Toronto. I had thought this was around 7 or 8 euros, but it turns out it’s a lot more expensive than that. I wonder if the price got jacked up recently?


That’s it for this post! There were a few things I picked up in Vienna that I don’t have on me now (forgot them in the car, my friend in Germany is going to mail them to me) so they’ll be in next month’s post.


What’s On My Face – Volume 24

So many vibrant  looks this week! Hooray!

20140917_look4-1

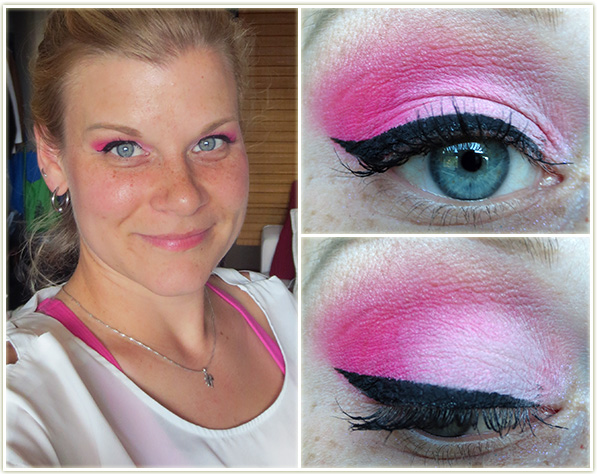
I don’t wear this look very often, but when I do, I definitely seem to startle people with how vibrant that pink colour is!

20140917_look4-2

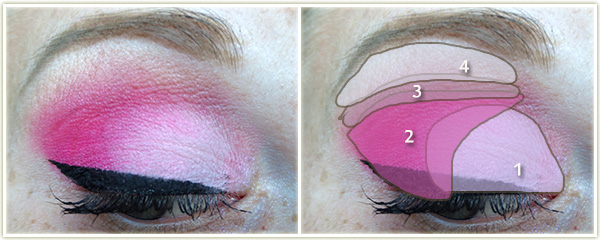
Eyes

  1. NYX Jumbo Eyeshadow Pencil in Milk all over the lid, with Sleek Floss on top.
  2. Sleek Pout on the outer half of the lid.
  3. A touch of Makeup Geek Creme Brulee through the crease.
  4. MAC Shroom to highlight the brow.

Winged liner with Tarte’Black gel liner and Covergirl Clump Crusher mascara on my lashes.

Rest of the Face

  • Bronzer: Hard Candy Hula Hula
  • Blush: Hourglass Diffused Heat
  • Lips: Softlips CUBE in Vanilla Bean

20140917_look5-1

I created this look for my guest blog post on Nicole’s site (Nicole About Town), but wanted to re-post it here to have in my own archives.

20140917_look5-2

Eyes

  1. Inglot Matte 334 all over the lid.
  2. Inglot Matte 325 on the outer third of the lid and used as lower lid liner.
  3. Urban Decay Blackout to darken up the outer edge.
  4. MAC Vellum  to highlight the brow, also used as an inner corner highlight.

I used Tarte‘s Black gel liner to create a wing, then used Urban Decay‘s Black Velvet pencil liner  to tightline and rim my inner lower lash line. I applied several coats of CoverGirl‘sClump Crusher mascara and then popped on a pair of J. Cat lashes in EL13 with some duo lash adhesive.

Rest of the Face

  • Foundation: Boots No7 Instant Radiance in Cool Vanilla
  • Bronzer: NYC – Fire Island Tan
  • Blush: Hourglass – Diffused Heat
  • Highlighter: MAC – Silver Dusk
  • Lips: essence – Wear Berries!

20140917_look3-1

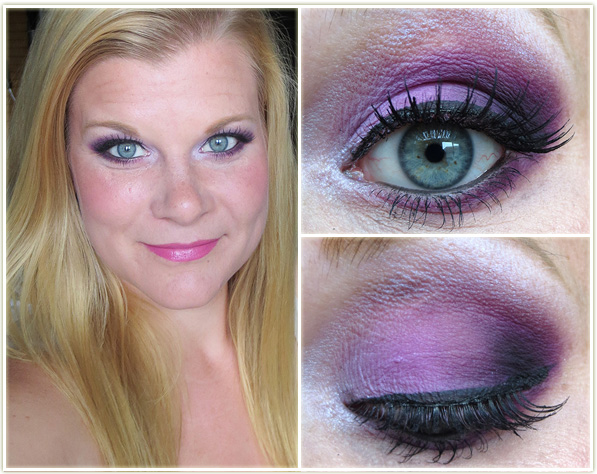
Oh Razzleberry… aren’t you BEAUTIFUL!

20140917_look3-2

Eyes

  1. Urban Decay Half Baked on the inner two-thirds of the lid.
  2. Makeup Geek Razzleberry on the outer corner and through the crease.
  3. MAC Ricepaper to highlight the brow.

Urban Decay Perversion mascara is on my lashes.

Rest of the Face

  • Bronzer: NYC Fire Island Tan
  • Blush: Hourglass Diffused Heat

20140917_look2-1

Playing around with Illamasqua‘s Alluvium pigment. Not my best attempt at blending!

20140917_look2-2

Eyes

  1. Illamasqua Alluvium pigment all over the lid.
  2. MAC Handwritten in the outer corner and through the crease.
  3. MAC Shroom to highlight the brow.

Urban Decay Perversion mascara is on my lashes.

Rest of the Face

  • Foundation: Illamasqua Skin Base in 6.5
  • Blush: Coastal Scents – some kind of peach blush, no idea name or number
  • Lips: Bite Beauty Fig

20140917_look1-1

Subdued, but rather pretty.

20140917_look1-2

  1. MAC Vanilla pigment all over the lid.
  2. The pinky-bronze shade from the Sleek Sunset palette in the outer corner.
  3. MAC Handwritten tapped lightly in the outer corner and used as a liner.
  4. MAC Shroom to highlight the brow.

Make Up For Ever Smoky Lash Extravagant is on my lashes.