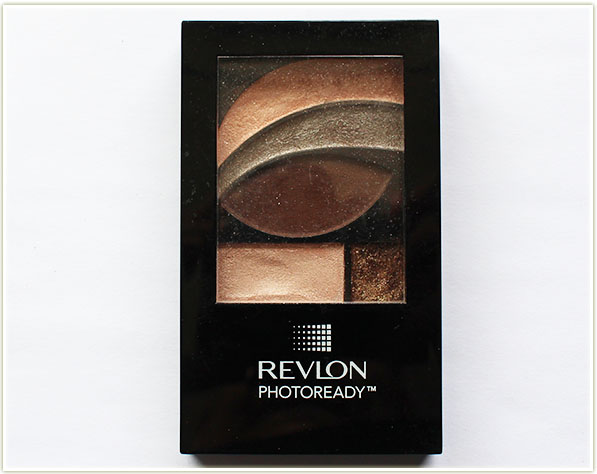
Today’s swatchfest is for Revlon‘s Photoready eyeshadow palette in Metropolitan. Enjoy!
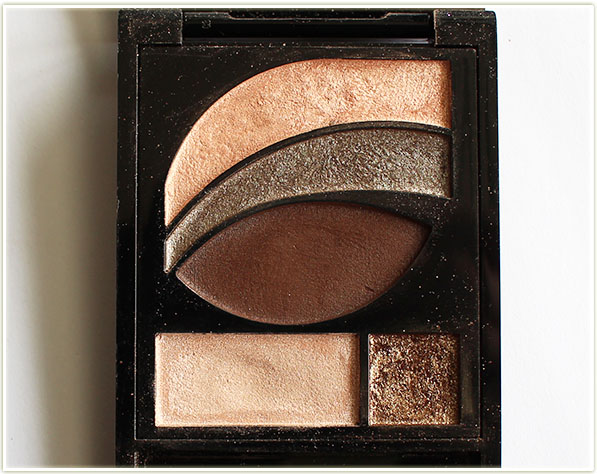
Revlon Metropolitan Swatches
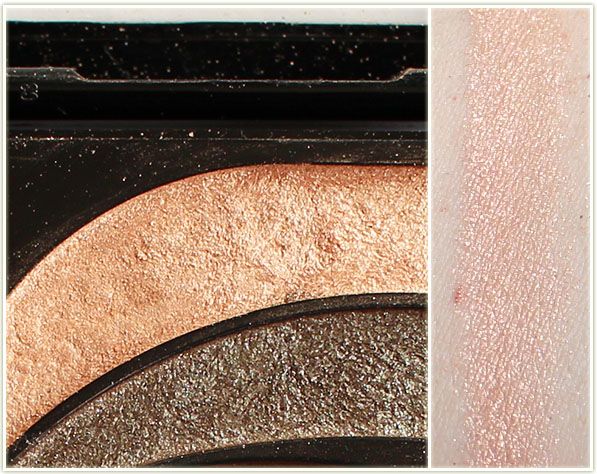
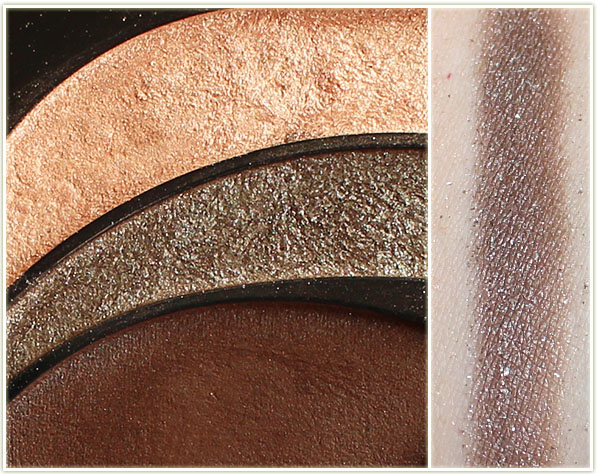
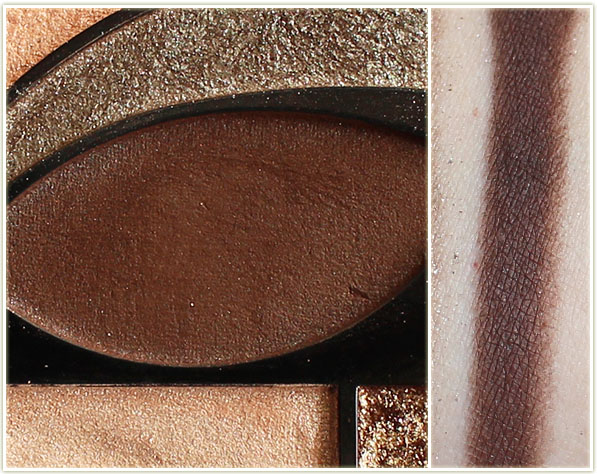
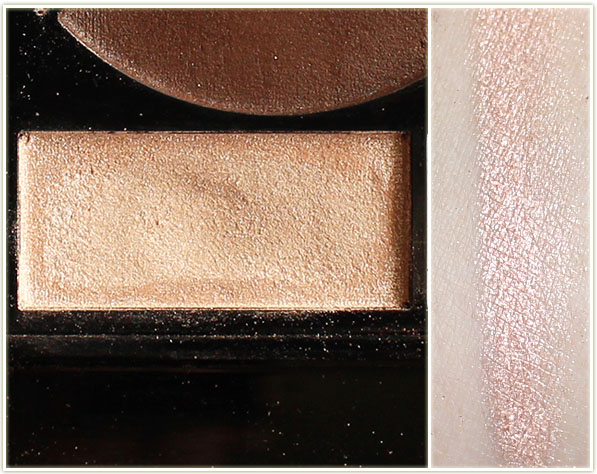
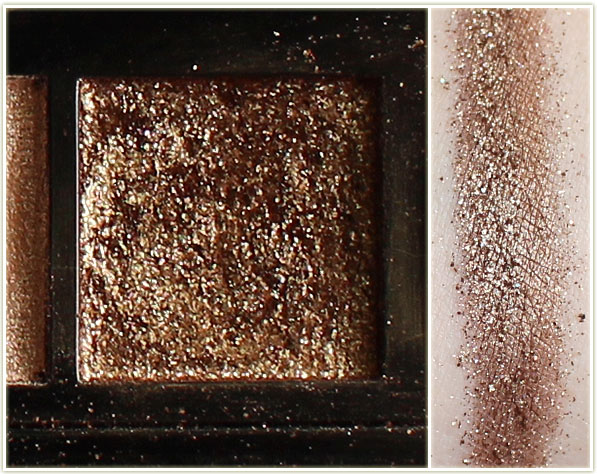

Today’s swatchfest is for Revlon‘s Photoready eyeshadow palette in Metropolitan. Enjoy!


As I was putting together this roundup of looks, I started to realize just how much I’ve been using my Makeup Geek shadows lately. I mean, I use them a lot on a regular basis, but three out of the five looks are solely Makeup Geek in here!
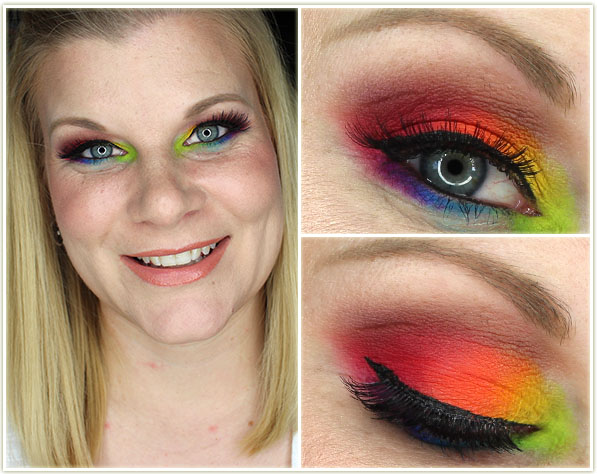
I did this for a YouTube video tutorial but had to repost it here because I know not everyone has the time for videos (I’ll continue to repost my video tutorial looks on the blog as time goes on).
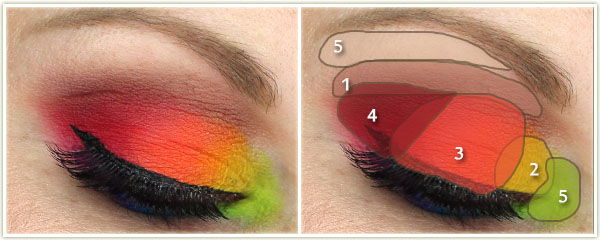
Eyes
(using the Viseart 08 Editorial Brights palette) I first covered my lid with NYX‘s Jumbo Eyeshadow Pencil in Milk and then:
I applied the light blue to the middle of my lower lash line and the purple to the outer section of the lower lash line. I created the wing with Kat Von D‘s Tattoo Liner in Trooper and tightlined my water lines with Marc Jacobs‘ Highliner Gel Crayon in Blacquer. I coated my lashes with Make Up For Ever Smoky Stretch mascara and applied House of Lashes Bombshell falsies.
Face
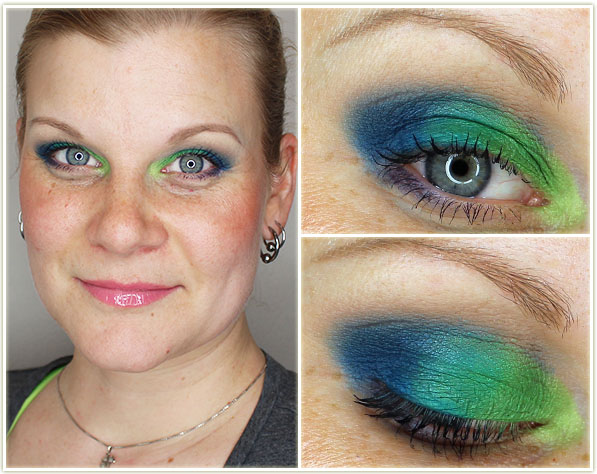
Although I love the Kat Von D Mi Vida Loca Remix palette, I’ve not been using it because I was trying to work through a bunch of other palettes. I said enough was enough, and went back to it for it this look!
Eyes
(Using the Kat Von D Mi Vida Loca Remix palette) I first applied NYX‘s Jumbo Eyeshadow Pencil in Milk to my lid, then:
Echo is lining the outer half of my lower lash line. I coated my lashes with Make Up For Ever‘s Smoky Stretch mascara.
Face
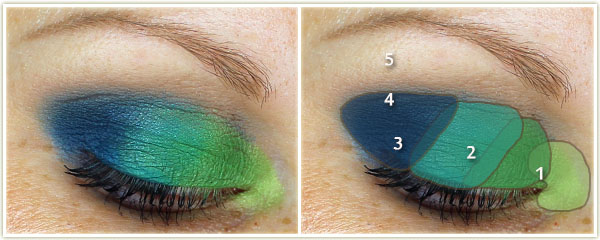
Playing around with my new Makeup Geek duochromes!
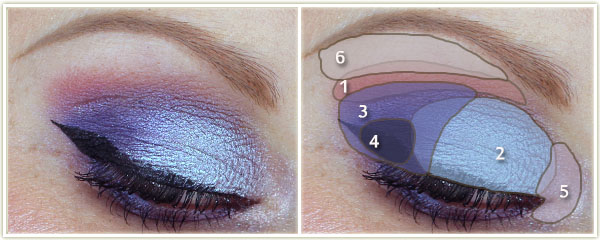
Eyes
(all Makeup Geek)
I used Blacklight on the lower lash line and created the wing with MAC‘s Blacktrack fluidline. I covered my lashes with Make Up For Ever Smoky Stretch mascara.
Face
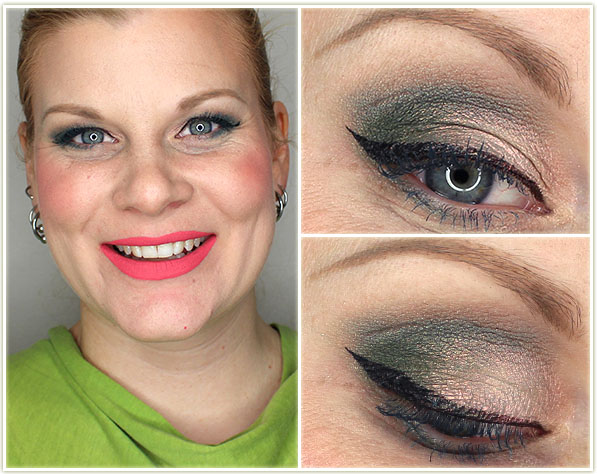
Before anyone says anything – I know the lips look weird. I was playing around with different shades and I *thought* this went together. It wasn’t till I saw the photos that I was like “ohhh….”. haha
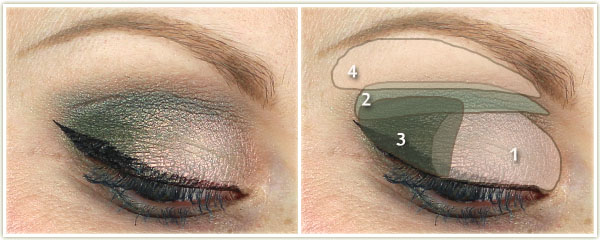
Eyes
(all Makeup Geek)
I created the wing with Kat Von D‘s Tattoo Liner in Trooper and coated my lashes with Clarins’ Aquatic Green mascara.
Face
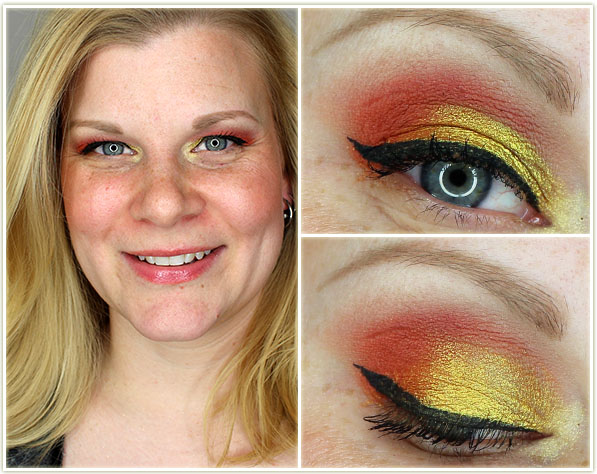
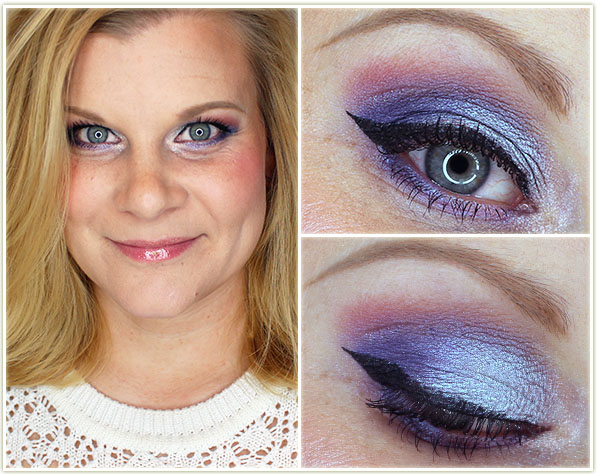
More Makeup Geek goodness!
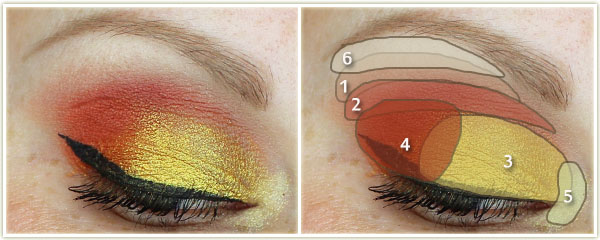
Eyes
(all Makeup Geek)
I created the wing with MAC’s Blacktrack fluidline and coated my lashes with Make Up For Ever‘s Smoky Stretch.
Face
Alright, it’s been a while since I’ve done a roundup of looks. Unfortunately, there wasn’t a lot of pizzazz in my looks throughout December as I felt like I was eternally rushing around, so this roundup is going to include my actual New Year’s look, some guest posts and a suuuuper old look from June I still hadn’t posted yet. Enjoy!
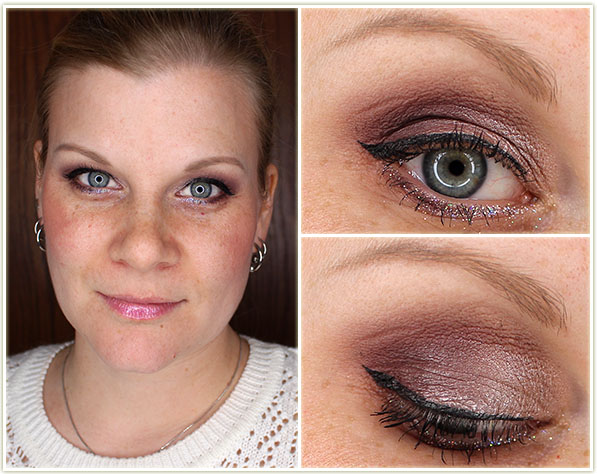
So here’s what I actually wore on New Year’s Eve. We didn’t have extravagant plans (we ended up going to an arcade), but I wanted to at least have a splash of glitter on! I ended up applying false lashes later on, but didn’t get around to reshooting the pictures, so what you’re looking at is sans falsies. This look does use the Too Faced Chocolate Bon Bons palette, but I promise there’s a full Challenge Week coming up focusing on that palette soon!
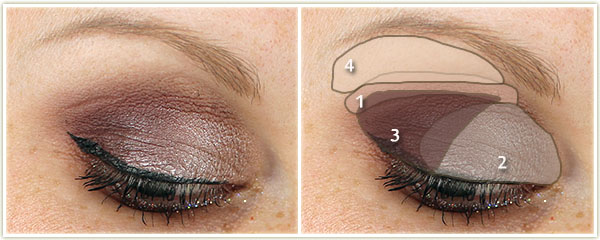
Eyes
(Too Faced Chocolate Bon Bons palette)
I applied Make Up For Ever Glitters in 13 to my lower lash line using some Too Faced Glitter Glue. I created the wing with Kat Von D‘s Tattoo Liner in Trooper and applied Make Up For Ever Smoky Stretch mascara to my lashes.
Face
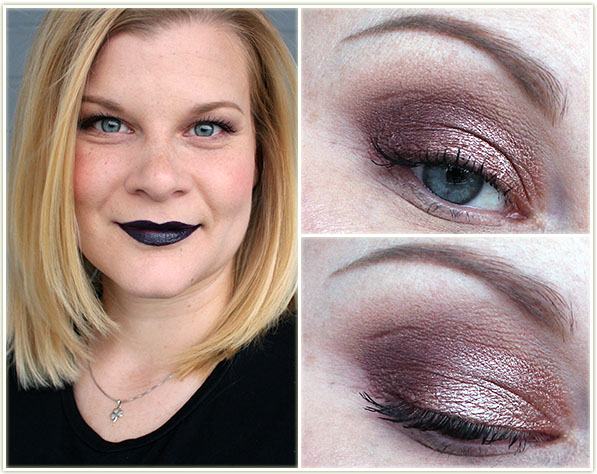
This look was completely focused on featuring Too Faced’s Melted Villain lipstick. Although it’s a dark purple, I have to admit that it mostly comes out looking black on me. that’s okay though! I love the colour and it’s NOT patchy! (And yes, I did wear this exact look to work that day!)
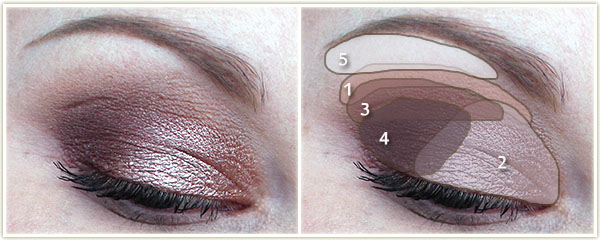
Eyes
(all Makeup Geek)
I applied Make Up For Ever‘s Smoky Stretch mascara to my lashes.
Face
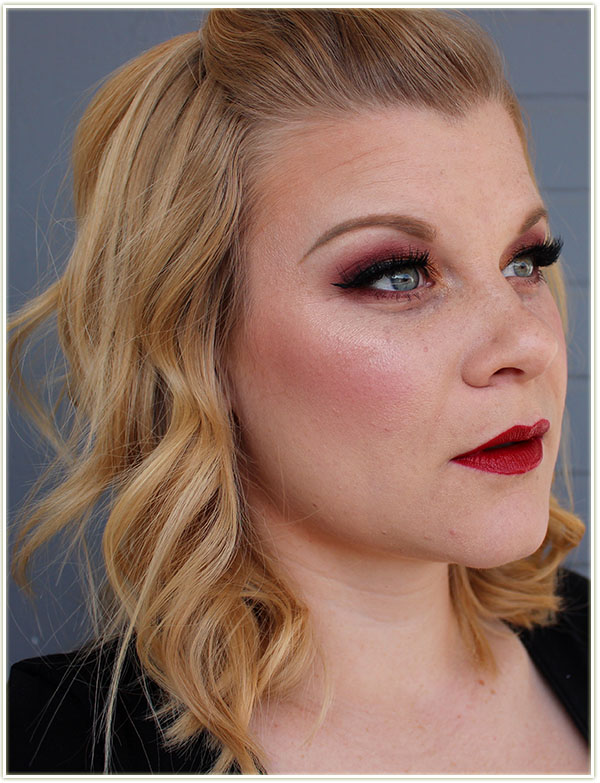
I looooved this look! I did this as a guest post for Up The Rollercoaster last month and just adored how the shots came out. I wasn’t sure how the cranberry tones in the shadows would work with a red lip and if I’m honest, I think it’s a LITTLE bit off, but the overall effect is WA-BAM!
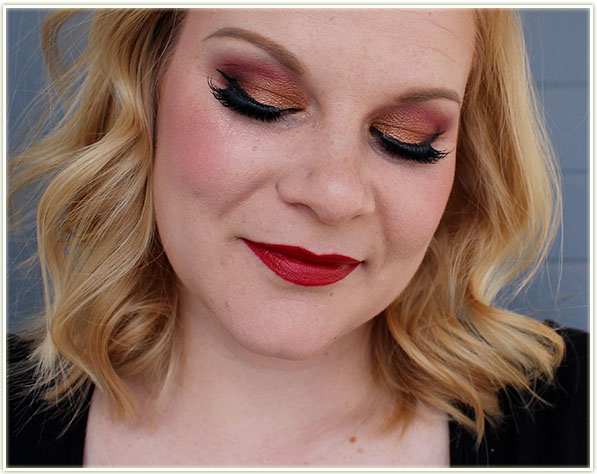
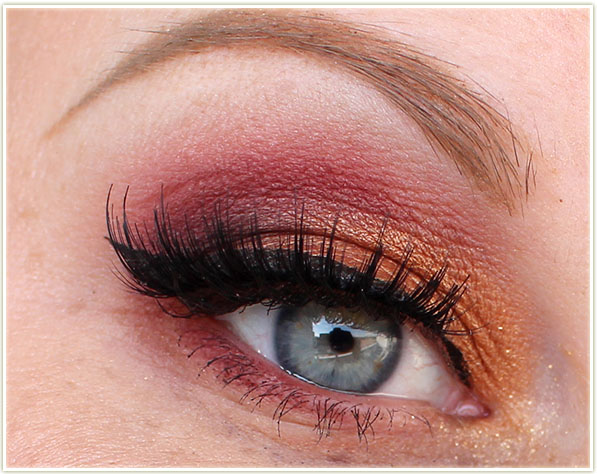
^^ That right there’s a money shot. I’m so pleased with it!
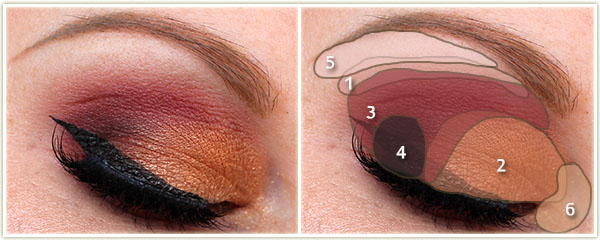
Eyes
I created the wing with Kat Von D‘s Tattoo Liner in Trooper and tightlined my upper water line with Marc Jacobs‘ Highliner Gel Crayon in Blacquer. I coated my lashes with essence‘s get BIG! lashes volume boost waterproof mascara and applied a pair of Noir Fairy false lashes by House of Lashes. My brows are filled in with Anastasia’s Dipbrow Pomade in Blonde.
Face
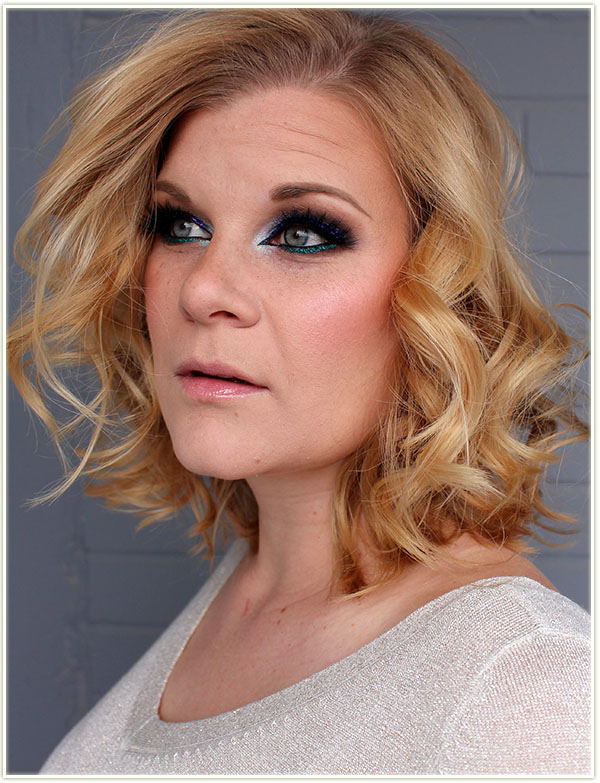
Another guest post! (This time for Writing Whimsy.) I really love doing guest posts because it gives me an opportunity to be totally creative. Usually I’ll take a Saturday afternoon and spend a couple hours working on one. This is very different from my usual makeup roundups which are done almost exclusively as my daily work makeup (which doesn’t always afford me the luxury of playing around with glitter since I’m usually in a rush!).
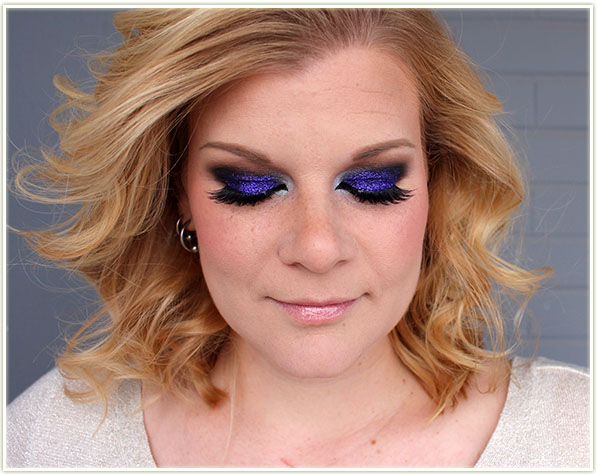
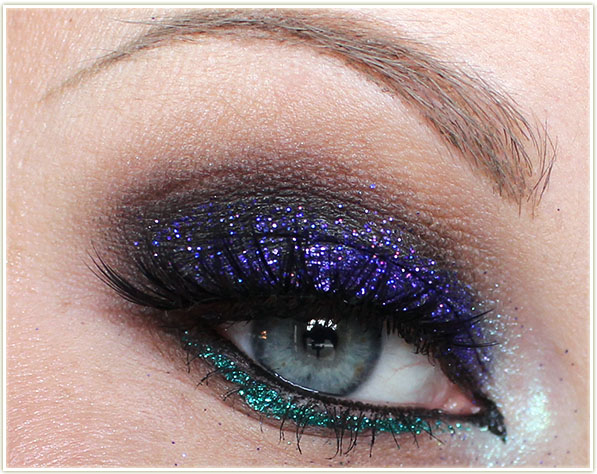
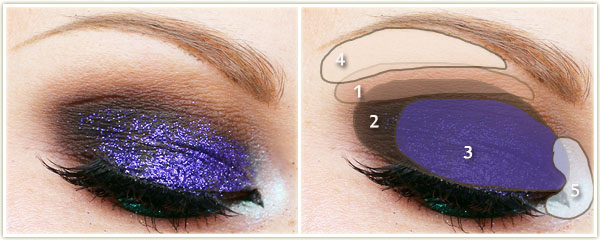
Eyes
After priming my eyelids, I applied NYX‘s Jumbo Eyeshadow Pencil in Black Bean all over the lid and blended out the edges. Then:
I created the inner corner point with Kat Von D‘s Tattoo Liner in Trooper, thinly lining my upper lash line with it as well. I tightlined my water lines with Marc Jacobs Highliner Gel Crayon in Blacquer and applied essence get big! lashes waterproof mascara to my lashes. I lined my lower lash line Lit Cosmetics Peacock glitter.
Face
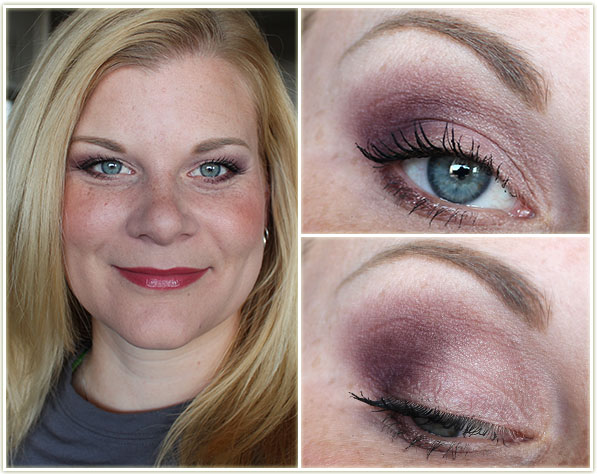
Alright this one’s just super old. I had toyed with doing a Challenge Week for Laura Mercier‘s Artist palette, but I never got around to finishing it (likely something new and exciting caught my eye!). I did this look sometime in June of 2015.
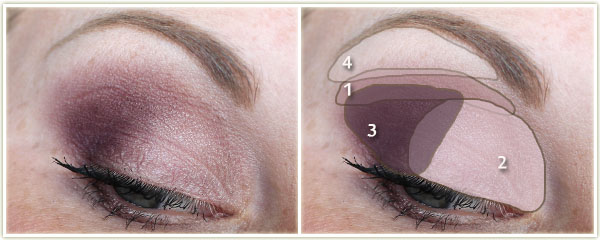
Eyes
(all Laura Mercier Artist palette)
I coated my lashes with essence‘s Lash Princess mascara.
Face
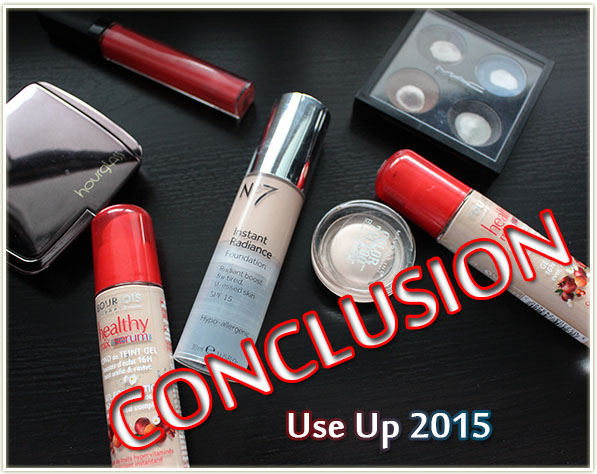
This past year, I chose ten products I wanted to finish up and get them circulated out of my collection. They weren’t necessarily products I disliked, just that they were old enough that I needed to finish them and move on.
Here’s how I did:
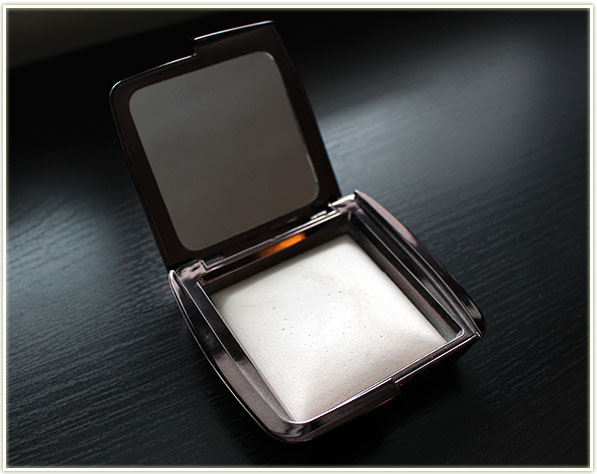
I started out with a relatively brand new Hourglass Ambient Lighting Powder in Ethereal Light. I had used it a bit, but not with any kind of regularity. (And no, I didn’t notice myself look ethereal at all!)
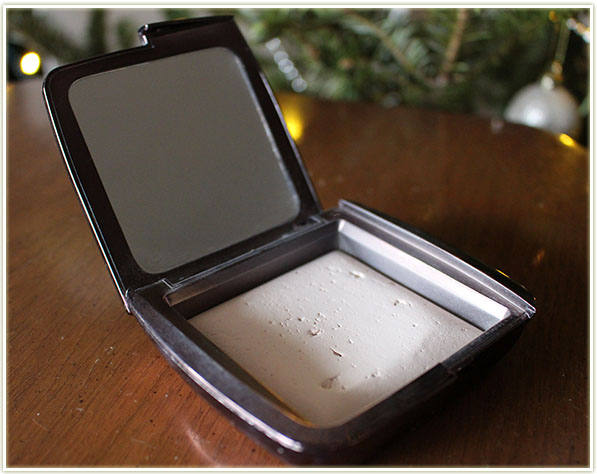
And here’s the usage after a year of dipping into this product.
Things I’ve learned:
Although I didn’t use this daily, I did apply it frequently enough throughout the year. I expected to be done with this product since I know people finish up powders relatively quickly, but nope! I’ll keep plugging along with this product, but since I noticed no difference in my skin with this ambient lighting powder, I’m unlikely to buy another one. I also don’t think I’ll be picking up ANY face powders at all since I just don’t need it on my face.
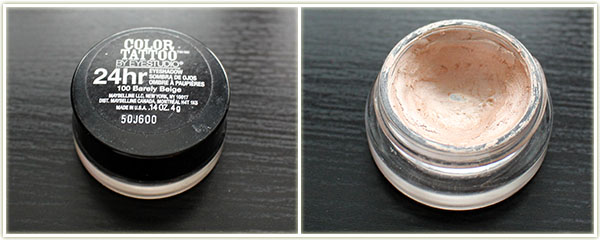
The Maybelline Color Tattoo in Barely Beige was a bit of an unfortunate choice for this project. I’ve grown to really dislike the Color Tattoos because they make my eyelids look kind of crepey. I had expected I could at least get through this tub though since it’s such a neutral colour that it could be used as a base.
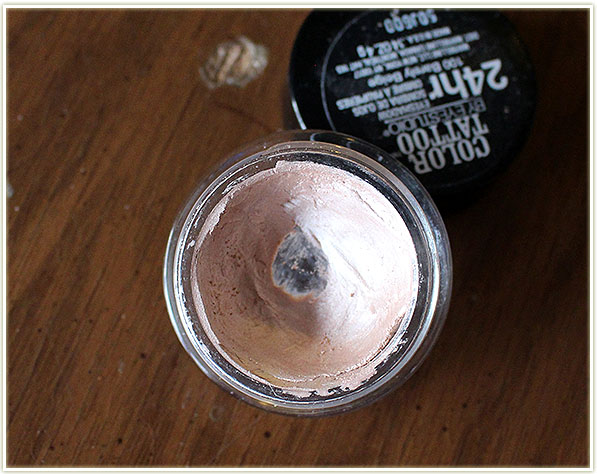
Alas, no. Although the Color Tattoos have EXCELLENT staying power (seriously, I went swimming in the ocean with them on before and they stayed put) I just don’t enjoy using them. This one got so stiff over the course of the year that I just gave up on it. It’s now gone straight into the garbage.
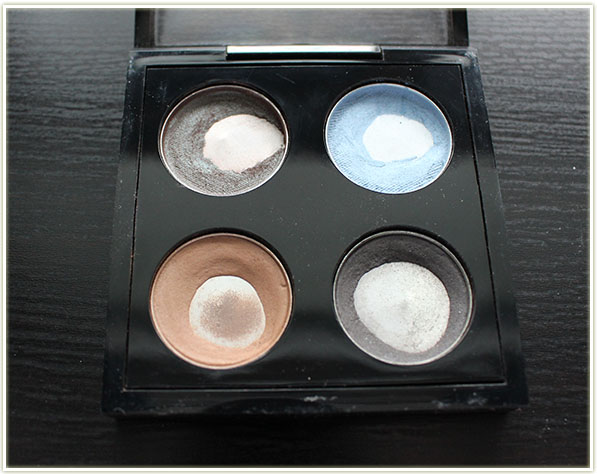
I have a few MAC shadows that are quite old, so I figured it was time to move them out of my collection.
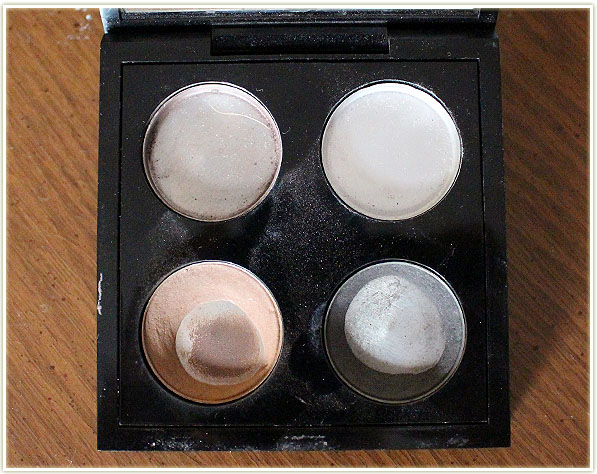
I managed to completely finish Club! Woohooo! Fade actually crumbled and fell apart on me, so I just pitched out the remains. Cork and Print however… while I used them a bit, it wasn’t enough to finish then. I’ve recently recommitted to wearing Cork more often through my crease now I’m hoping to kill that one over the next few months! Using Print again reminded me a lot of my early twenties since I wore it a lot back then.
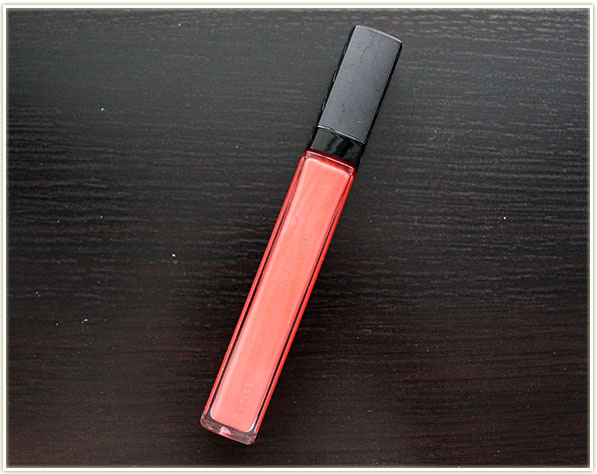
This Revlon Papaya lipgloss is such a beautiful colour – but I’ve had it for a few years now, so it was time to move on. They also don’t make this line of glosses anymore (which is a damn shame!) so it’s not like I can even encourage you to go buy it!
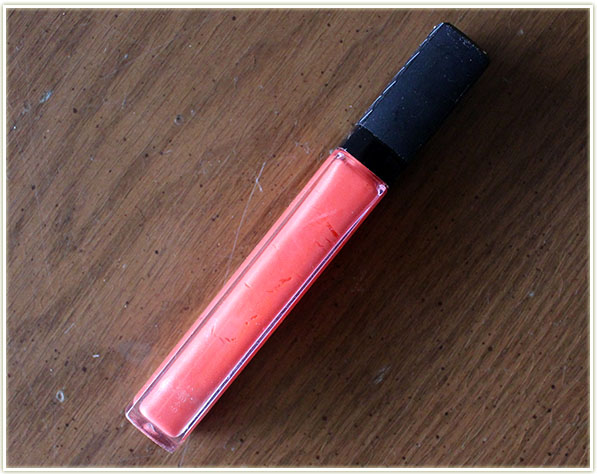
Unfortunately, despite using this guy consistently, he’s still kicking out product! It’s getting a bit sparse through the tube (you can see the cracks of the product separating from itself) so I at least know I got through a bit more of it. But the smell has gone a tiny bit off so I’m just straight out pitching it now.
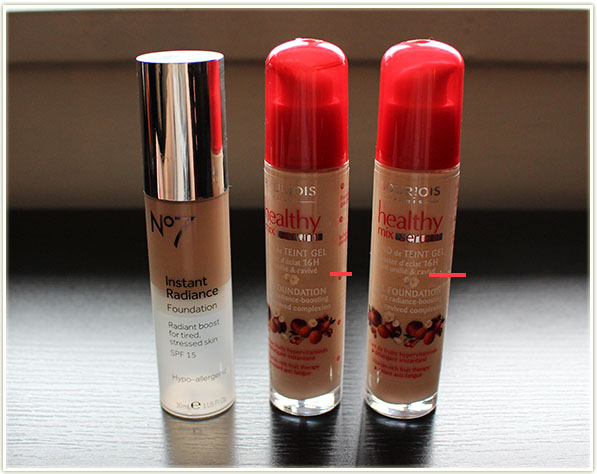
This was an ambitious move for me. I decided I wanted to get through three foundations this year (I only chose one last year!)
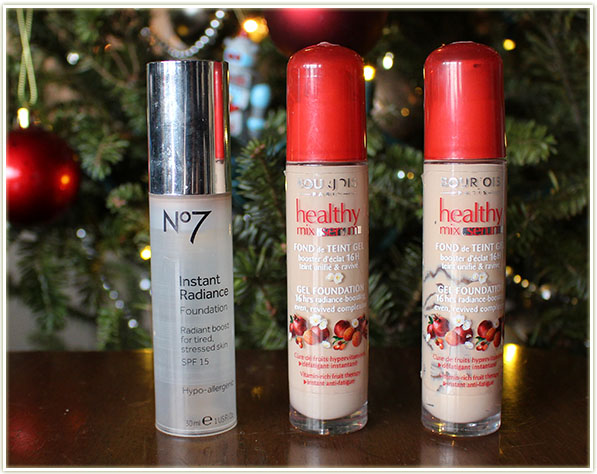
And finish all three I did! The Boots No7 Instant Radiance in Cool Vanilla was the first to go since it’s more of a summer shade for me. Once that was done, I started in on Bourjois Healthy Mix Serum in 52 Vanilla and once that was done I cleaned out the Bourjois Healthy Mix Serum in 51 Light Vanilla.
I was so surprised I got through all of these foundations because I’m not a daily foundation user. I loved these so much and I have actually repurchased them (sooooo what was the point of the Use Up? lol). You can see all three foundations mentioned in my recent Empties video.
So that was it for 2015! All in all, it wasn’t hugely successful. I got through about half of the products I wanted to get through, so that’s not amazing. Although I love watching “Use Up” projects, I don’t think it’s a viable thing for me anymore as a blogger. I try out so many products now (both a blessing and a curse) that it makes it near impossible to stick with even just ten products throughout a year. I hope you enjoyed my Use Up 2015 roundup, and since I do love reading about them, please tell me what products you’re trying to use up!
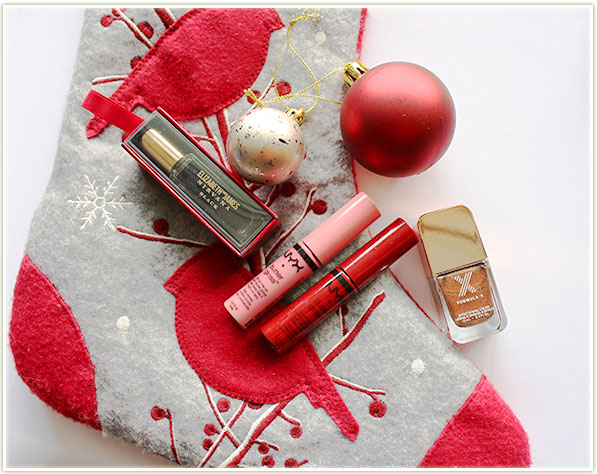
I don’t know about you, but I often struggle to think of reasonably priced, small items for stocking stuffers. Here are some items that stick to $25 CAD and under that I think most beauty lovers can appreciate on some level.
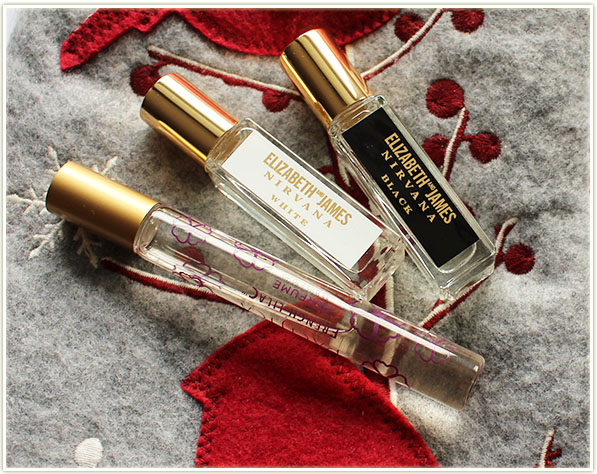
Since they’re small and compact, rollerball perfumes are one of the easier things to pick up. Almost every brand out there has a rollerball sized perfume, but it’ll be up to you to figure out the scent the person you’re gifting will most like to receive.
My suggestions:
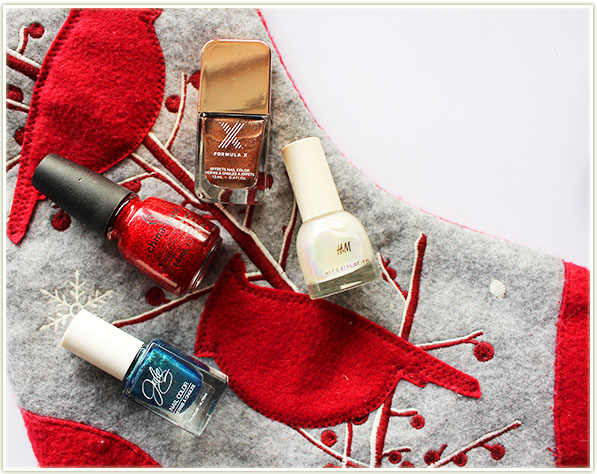
Another small item that’s perfect for stockings is nail polish! And the cheap stuff is almost always as good as the expensive ones. I’ve included some of my favourites and recent collection additions:
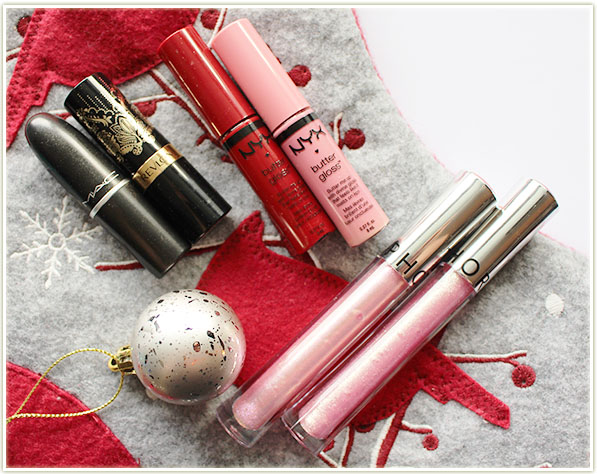
Another small item great for stockings are lipstick and lipglosses. The NYX butter glosses are great for any age, but are especially good for pre-teens since they’re not as strongly pigmented as a lipstick and the glossiness of the product keeps it quite fresh looking. If you’re giving a lip product to someone who loves lipsticks, you really can’t go wrong with a lipstick by MAC (more pricey) or one by Revlon (less pricey). Or, give them a sparkly lipgloss like the Sephora* ones and they can be used alone or as a topper to any lipstick.
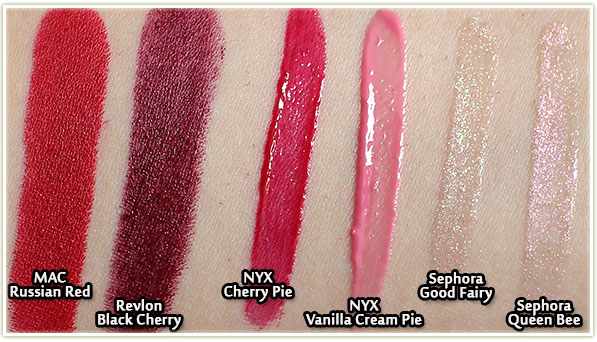
Look at the fine glitters in the Sephora glosses!
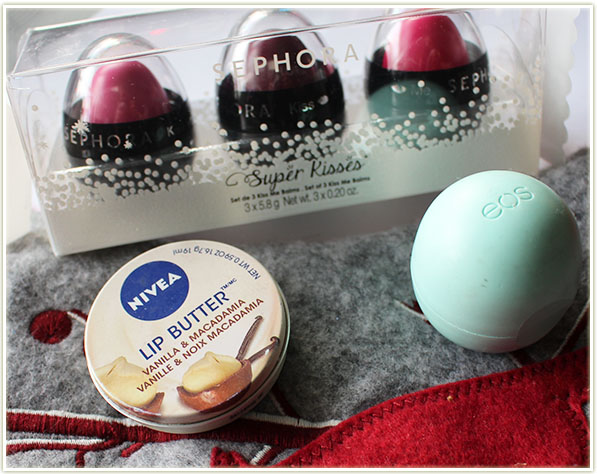
Lip balm is a reoccurring option for stockings in my family. My grandmother always gives me some Burt’s Bees lip balm and it usually ends up in one of my winter coats pockets for easy access when it’s blustery outside. Lately I’ve been ploughing through my Nivea lip butter in Vanilla & Macadamia (the smell is divine) and the EOS Sweet Mint has been in my bag for travelling. Sephora also has the Super Kisses* lipbalm trio that can be given as one gift, or broken apart for three separate people. These Sephora balms do pack some colour punch – just something to be aware of when you’re gifting them!
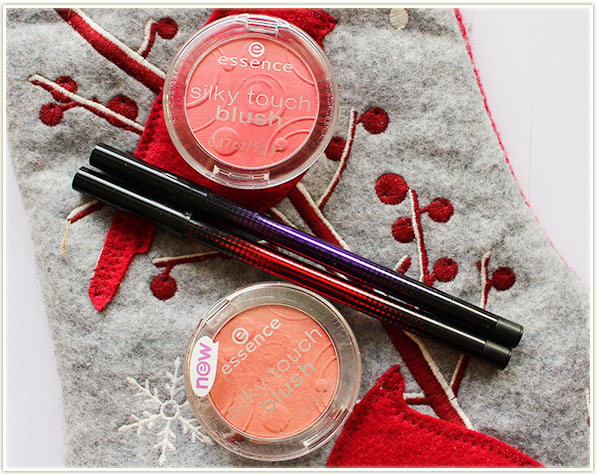
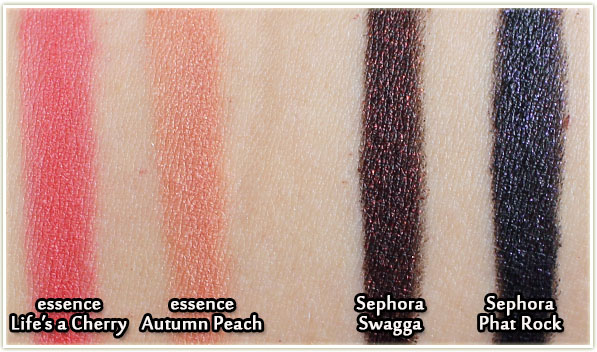
Don’t be fooled by the ridiculously low price tag (less than five bucks each!), essence makes some of the absolute best blushes on the market. They’re pigmented, easy to blend and the colours are gorgeous.
The Sephora Diamond eyeliners* are not just plain old eyeliners… instead, they’re shot through with small glitter particles! The black base brings out the colour and you’re left with a subtle shimmery red (Swagga – my personal favourite) or purple (Phat Rock). These liners will set you back $18 CAD, but they’re awfully unique and I think if this was received as a gift, the person would be awestruck by the colour (I know I sure was when I first swatched these).
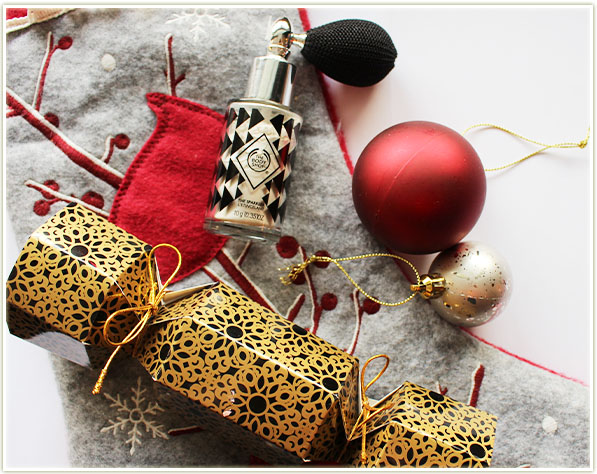
Last two items!
The Body Shop has released limited edition Sparklers ($22 CAD each – comes in gold or silver) for the holidays and these guys are pure magic in a bottle. They poof out clouds of shimmer and smell like vanilla! While this is far more elegant than those old 90s bottle of roll on jelly glitter I used to love in my teens, this still makes me squeal whenever I spray it. Perfect for the holidays. (I plan to douse myself in it on Christmas and New Year’s!)
Lastly, are these amazing holiday crackers* by Quo. They come in a set of four (perfect for breaking up and putting into stockings!) and contain one lip gloss and one eyeshadow. All the colours are fairly neutral so you won’t struggle with the decision on what colour to give each person in your life. I love how the packaging adds a bit of extra flare too.
That’s it for this gift guide – good luck with your shopping!
Items marked with an asterisk(*) were provided by PR for consideration.