Tag Archives: Tarte

Travel Makeup Bag – Off to Baltimore and New York City!

Tomorrow morning I’m off on a much needed vacation to visit some friends in the US. I’ll be headed to Baltimore for six days first and then back up to New York City for five.
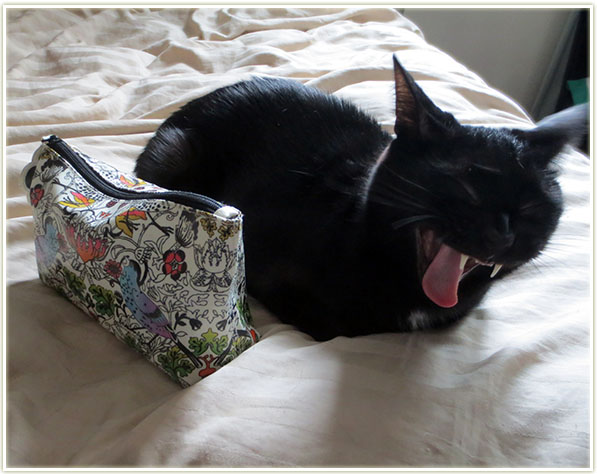
Nemo’s reaction to being left alone again…

In Baltimore I’ll be visiting a close friend that I’m eager to spend more time with. We’ve signed up for the Charm City Shamrock 5k run on Sunday and I’m excited to look as ridiculous as possible with the green hair extensions I’ve picked up and as much glitter as I can find. There’s a chance I’ll get to visit Washington D.C., but that isn’t set in stone yet.

In New York City I’ll be visiting my old university roommate (and it’s frightening to think that we lived together ten years ago…) and seeing another old friend from my teen years. For shits and giggles, I also signed up for a 10k run on Roosevelt island while I’m there. Until recently, I used to visit New York City every year so I’m anxious to go back!

And not to mention… I am *seriously* excited to pick up all the makeup I can get my hands on for the far cheaper prices that they have in the US!

So let’s take a peak into what I’m bringing on vacation this time.
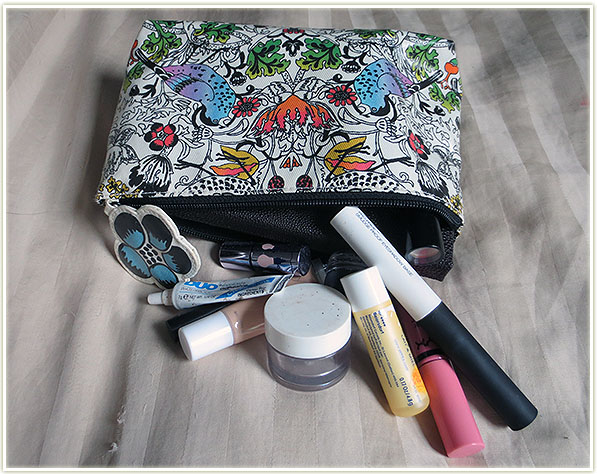
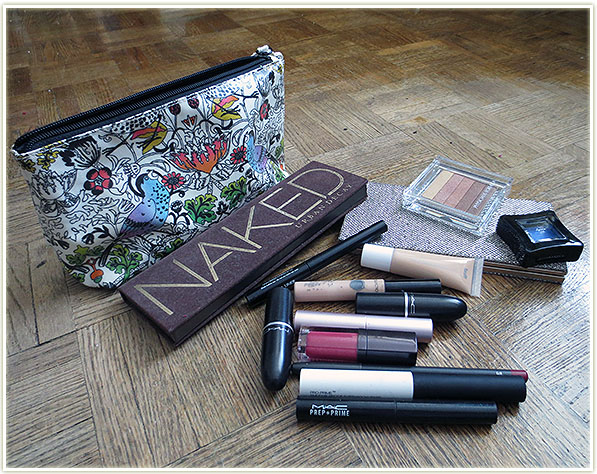
201403_travel_makeup_bag2

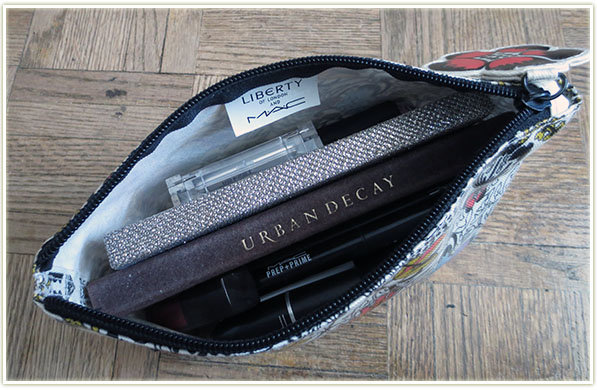
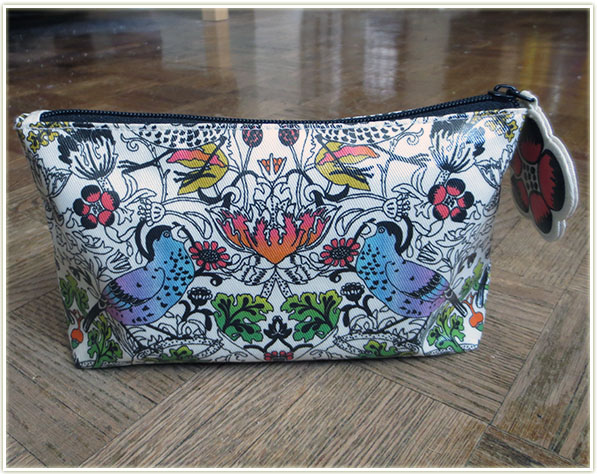
Once again, the bag I’m taking with me is from MAC‘s Liberty of London collection (2010). I love this bag, and until it frays and falls apart, I’ll be using it!
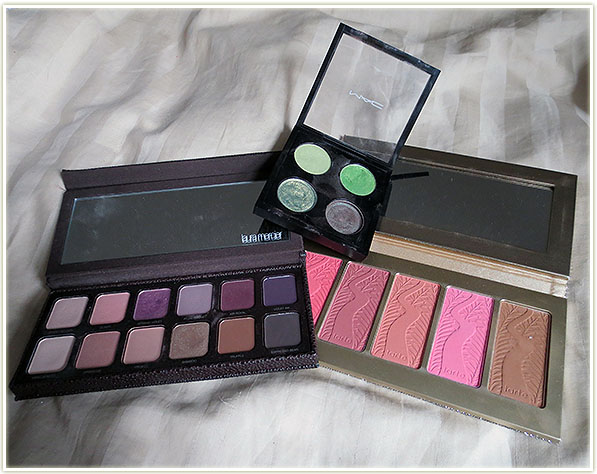
Palettes – Laura Mercier Artist (2013), customized MAC quad and Tarte Off The Cuff

I’m bringing along Laura Mercier‘s Artist palette (2013) instead of my usual Urban Decay Naked. I’m doing this primarily because my Naked palette gets enough travel mileage and I think the Artist palette has a bit more selection for looks since there’s far more matte shades.

Tarte‘s Off The Cuff palette is an easy one – four blushes and a bronzer without the need for bringing multiple bulky compacts.

The green MAC quad is for St. Patrick’s Day. I’ll definitely want to go all out with green everything so I plopped in a few shades (Juxt, Bio Green, Golden Olive pigment andClub) so I can be as festive as possible!
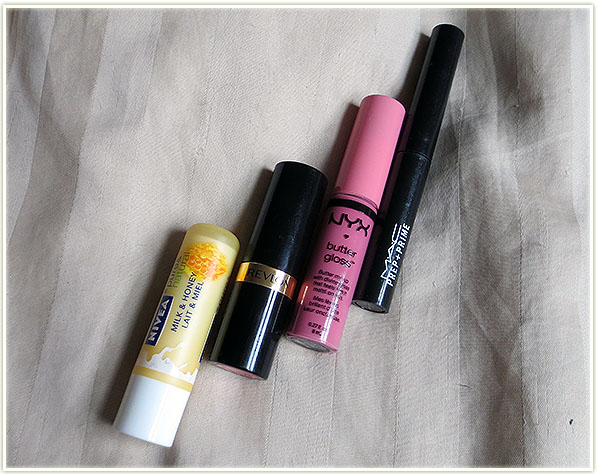
Lip Products
Lip Products

I kept the lip products fairly simple since re-applying lipstick on vacation is mostly just frustrating to me. One lipstick (Revlon‘s Fire and Ice) and MAC‘s Prep + Prime for lip to prevent feathering should I decide to actually wear the lipstick. The NYX Butter Gloss in Vanilla Cream Pie is for when I want something easy to wear. And finally, I picked up a Nivea lip balm in Milk & Honey specifically for this trip because I didn’t actually own another stick lip balm and I didn’t want to carry around a potted product as they don’t sit easily in my pockets. Lip balms are an absolute must for me when I travel.
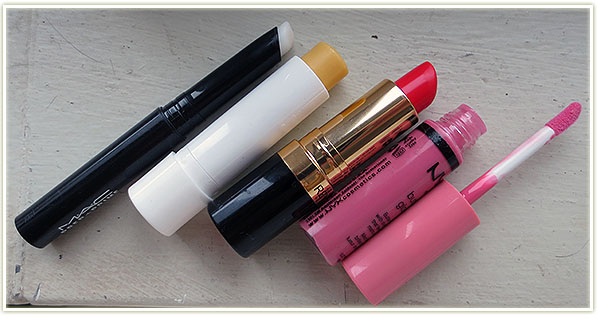
MAC Prep + Prime for Lip, Nivea Milk and Honey, Revlon Fire and Ice, NYX Vanilla Cream Pie

It doesn’t look like many lip products really… but I know I won’t wear much else even if I were to bring a few more.
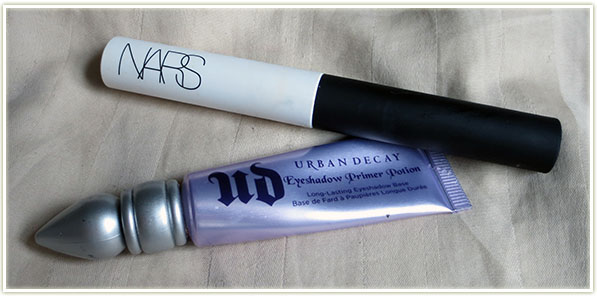
NARS Pro Prime Eye Primer and Urban Decay Primer Potion in Original

Double primers you ask? Yep. I swore by Urban Decay Primer Potion for years, but it recently started creasing on me (much to my horror). I tried the NARS one and it *also* creased on me. If I double up and use them both on my lids then the creasing stops, so… double primers from now on.
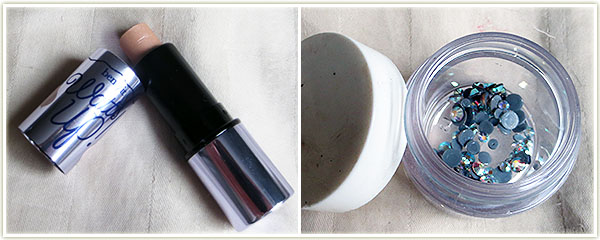
Benefit Watts Up and some craft gems

I haven’t used it much, but I packed Benefit‘s Watts Up highlighter simply because it’s a sample size product and fits easily in my bag. The sheen of this highlighter is quite similar to MAC‘s Soft and Gentle.

The craft gems are for the St. Patrick’s Day Shamrock 5k race a friend and I are doing in Baltimore. Although the gems aren’t green, they’re what I had available, and I’ll definitely be plastering my face in them for the run!
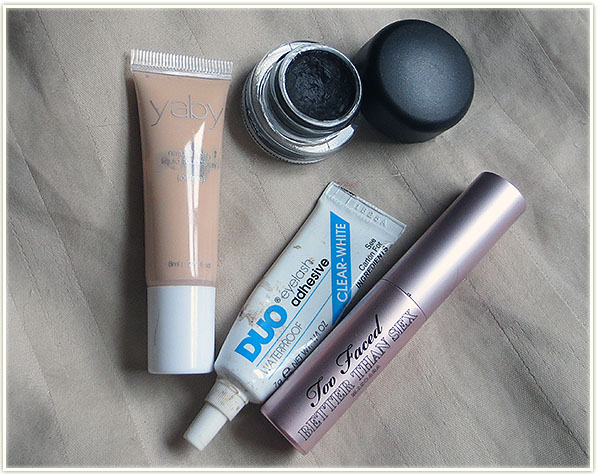
yaby foundation in Buff, MAC Blacktrack fluidline, duo lash adhesive and Too Faced Better Than Sex mascara

More tiny products! The yaby foundation in Buff is a good shade for me right now and the tube is tiny so that was an easy one to pop in. I don’t expect to be wearing much foundation, but it’s nice to have in case I decide I want to wear some. Too Faced‘s Better Than Sex mascara is a deluxe sample size and I’m hoping to finish this one up  on the trip. I’m slightly worried because it’s not waterproof and the weather forecast looks positively schizophrenic for the next few weeks. :s

The Duo lash adhesive is for the gems (and by looking at that package, it definitely needs replacing). And lastly, my beloved MAC Blacktrack fluidline.  My liquid liners just weren’t working out the way I wanted them to and even though it’s slightly more work (have to bring an extra brush and all), the end result is far better.

That’s everything I’ve stowed away in my makeup bag for my trip! Blog posts will continue while I’m gone as I have them sitting in queue ready to go live on the usual schedule (Mondays, Wednesdays, Fridays). Take care everyone. 🙂
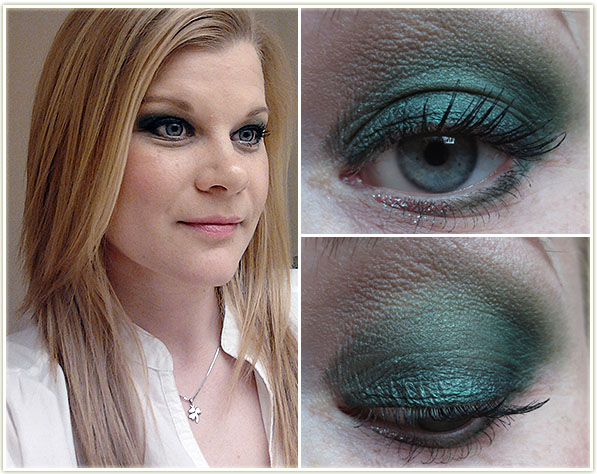
St. Patrick’s Day Makeup Ideas

Aside from Halloween, St. Patrick’s Day is my absolute favourite “holiday”. I tend to do a lot of green looks in general, but I thought I’d do a few more and compile them together for a post specifically dedicated to the holiday of all things green!

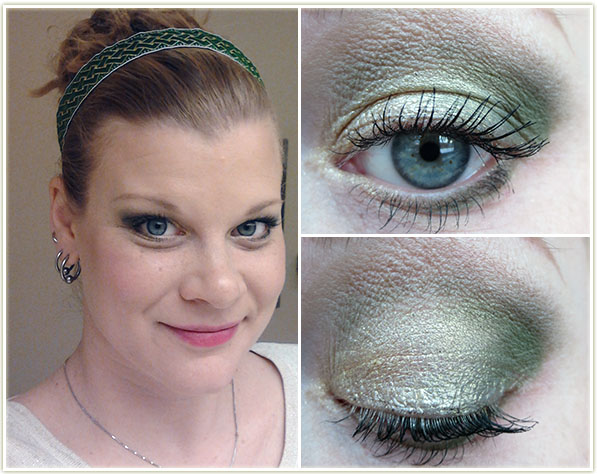
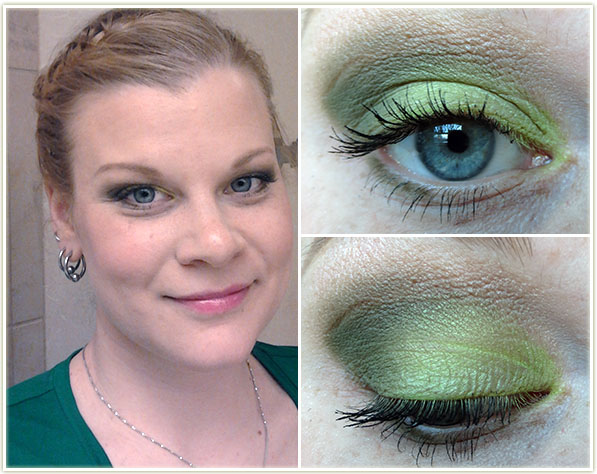
20140307_look4.1

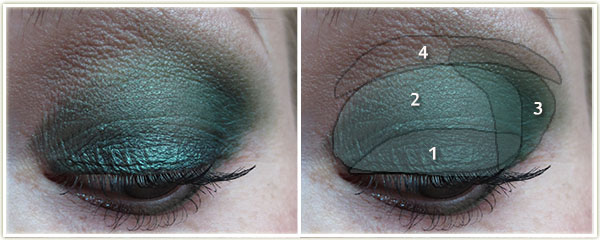
Dark forest green with a hint of glitter. One of the stronger looks in this post and heck… you really can’t go wrong with glitter!

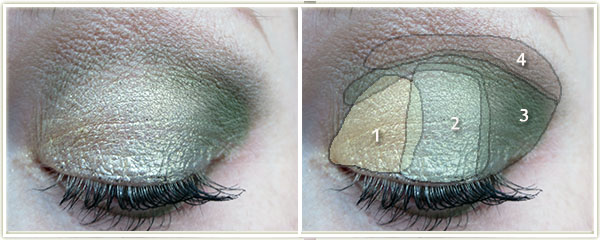
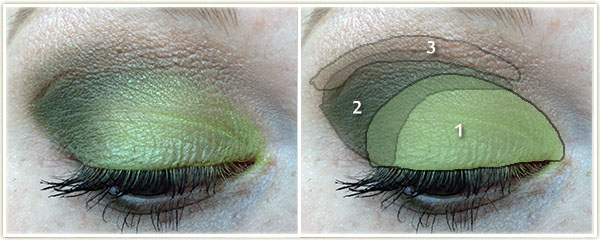
20140307_look4.2

Eyes:

  1. I first lined my lower lashline thickly with MAC Feline Kohl Power pencil and smudged it out into a really messy, thick line.
  2. Too Faced Evergreen was placed all over the lid, on top of the black liner.
  3. Sleek Fern in the outer corner.
  4. Makeup Geek Creme Brulee at the top of the crease.

MAC Shroom was used to highlight the browbone. On the lower lashline I smudged Evergreen on the outer half and then used some Too Faced Glitter Glue on the inner half and appliedToo Faced Glamour Dust in Glampire on top of the glue. L’Oreal Voluminous Carbon Black on my lashes.

Rest of the Face

  • Foundation: Covergirl CC Cream in 110 Classic Ivory and Bourjois Healthy Mix Serum in Shade 51 Light Vanilla mixed together
  • Bronzer: Physicians Formula Bronze Booster in Light/Medium
  • Blush: Tarte Blissful
  • Lips: NYX Butter Gloss in Maple Blondie

20140307_look1.1

I’m amazed and pleased with just how well this one turned out. Usually I would reverse the colours (gold on the inside, colour on the outside), but I decided I need to actually learn to play with my makeup a little bit more. And I’m happy I did because I think this is really beautiful.

20140307_look1.2

Eyes:

  1. MUA Shade 26 Pearl all over the lid.
  2. Urban Decay Half Baked in the outer corner and into the crease.
  3. Makeup Geek Creme Brulee through the crease.
  4. Makeup Geek Cocoa Bear barely tapped into the very outer corner to make it a touch bit deeper.

MAC Shroom on the browbone and L’Oreal Voluminous Carbon Black mascara on my lashes.

20140307_look2.1

This is a bit more “typical” St. Patrick’s Day look for me (gold on the inner lid, green on the outside).

20140307_look2.2

Eyes:

  1. L’Oreal Infallible in Goldmine on the inner third of the lid.
  2. MAC Golden Olive pigment on the center of the lid.
  3. Makeup Geek Dirty Martini on the outer third of the lid and dragged lightly through the entire crease.
  4. Makeup Geek Creme Brulee at the top of the crease.

MAC Rice Paper to highlight the browbone. On the lower lid, Goldmine on the inner half and Dirty Martini on the outer half. L’Oreal Voluminous Carbon Black mascara on my lashes.

Rest of the Face

Foundation: Covergirl CC Cream in 110 Classic Ivory and Bourjois Healthy Mix Serum in Shade 51 Light Vanilla mixed together
Bronzer: Physicians Formula Bronze Booster in Light/Medium
Blush: MAC Petal Power
Lips: Sephora Color Reveal Balm in Unique Pink

20140307_look5.1

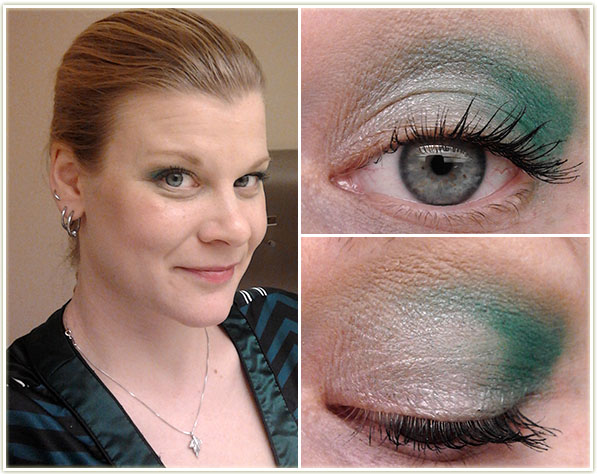
Even though this showed up pretty vibrantly on camera, I’d recommend using a white base (which I didn’t do) in order to brighten the colours up a bit more. I found the colours faded a bit throughout the day and the white base may help to keep the shadows intact.

20140307_look5.2

Eyes: (all Makeup Geek)

  1. Fuji all over the lid.
  2. Dirty Martini on the outer corner and through the crease.
  3. Creme Brulee to blend out the crease.

MAC Shroom on the browbone. Dirty Martini smudged very slightly on the outer corner of the lower lashline. Too Faced Better Than Sex mascara on my lashes.

Rest of the Face

Foundation: Covergirl CC Cream in 110 Classic Ivory and Bourjois Healthy Mix Serum in Shade 51 Light Vanilla mixed together
Bronzer: Physicians Formula Bronze Booster in Light/Medium
Highlighter: MAC Silver Dusk
Blush: Joe Fresh Apricot (cream)
Lips: NYX Butter Gloss in Vanilla Cream Pie

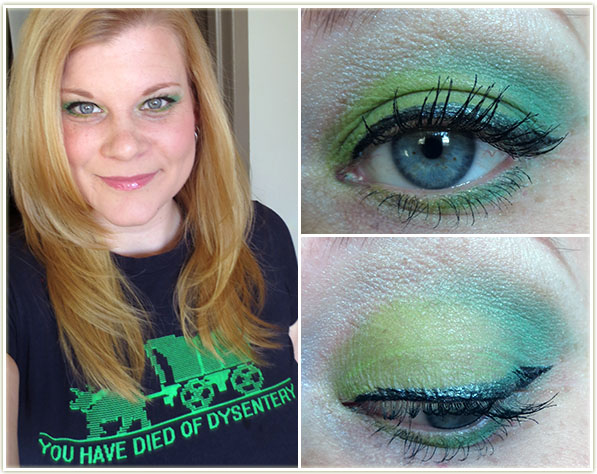
20140307_look3.1

I love this look, but damn does it ever look not great in close ups. You’ll also notice that the liner is completely covered in the eyeshadow… this seemingly can’t be helped whenever I wear shiny liquid liners as it just picks up the shadow from my lid when my eyes are open.

Also… tell me how much you love my shirt. 😉

Eyes: Using the Wet n Wild I Dream of Greenie trio, follow the instructions!

  1. Eyelid shade all over the lid and the inner half of the lower lid.
  2. Crease shade in the outer corner and through the crease and on the outer half of the lower lid.

And, obviously, the Browbone shade to highlight the brow. Make Up For Ever Aqualiner in 13 Black to create the wing (although honestly, I’m so irritated with this liner that I’d recommend using a matte black one that won’t cause so much eyeshadow transfer to the liner). L’Oreal Voluminous Carbon Black mascara on my lashes.

Rest of the Face

Foundation: Covergirl CC Cream in 110 Classic Ivory and Bourjois Healthy Mix Serum in Shade 51 Light Vanilla mixed together
Blush: Illamasqua Hussy
Lips: NYX Butter Gloss in Tiramisu

What’s On My Face – Volume 11

20140224_look1.1

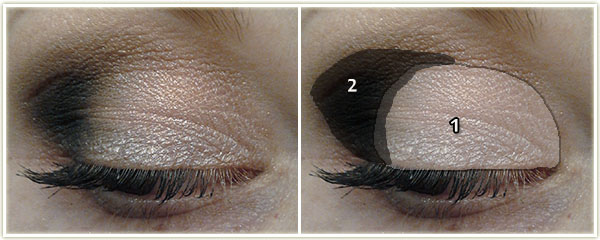
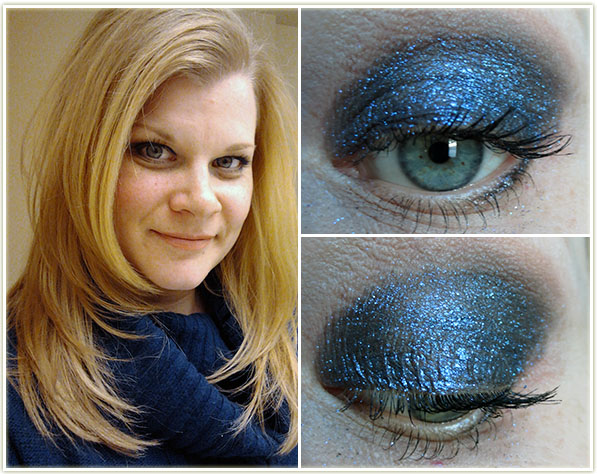
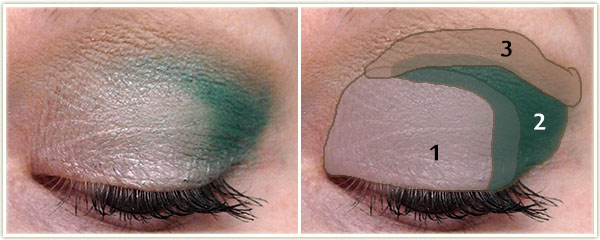
I hadn’t used MAC‘s Club in a really long time, and when I do, I tend to use it just in the crease which honestly doesn’t really show off just how awesome the shade is. So I decided to try something different and use it all over the lid.

20140224_look1.2

Eyes: Primed with Urban Decay Primer Potion in Original (this is the day when this primer suddenly stopped working on me and this entire eye look ended up a creased mess by the end of the day!), then:

  1. MAC Club all over the entire lid right up and over the crease.
  2. Makeup Geek Creme Brulee at the top of the crease to blend out the edges of Club.

MAC Brule was used to highlight the brow with L’Oreal Voluminous Carbon Black on my lashes.

Rest of the Face

  • Foundation: MUA Matte in Shade 1 Soft Sand
  • Concealer: MAC Select Cover-up in NW20
  • Bronzer: Physicians Formula Bronze Booster in Light/Medium
  • Blush: Cargo Medocino
  • Lips: Revlon Just Bitten Balm + Stain in Twilight

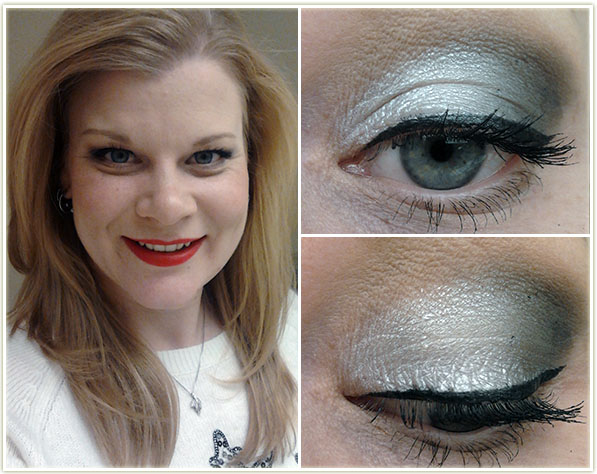
20140224_look3.1

My eye makeup matched my shirt. That’s pretty much the only logic I applied here!

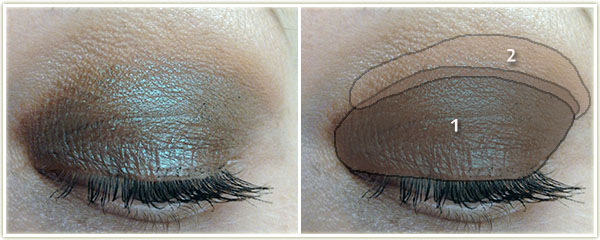
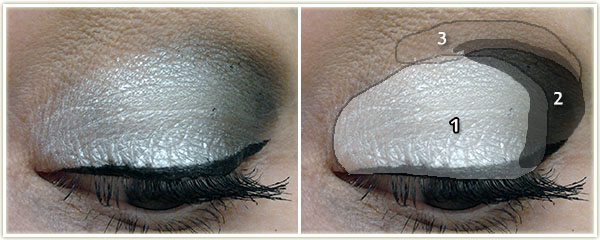
20140224_look3.2

Eyes: NARS Pro Primer eye primer, then:

  1. MAC Crystal Avalanche all over the lid.
  2. MAC Print in the outer corner.
  3. Makeup Geek Creme Brulee to blend out the upper crease.

MAC Brule to highlight the brow and L’Oreal Voluminous Carbon Black on my upper and lower lashes. Make Up For Ever Aqualiner in 13 Black to create the wing.

Rest of the Face

  • Foundation: Revlon Colorstay (Combination/Oily) in Buff
  • Bronzer: Revlon Photoready in Bronzed & Chic
  • Concealer: MAC Select Cover-up in NW20
  • Blush: MAC Warm Soul
  • Lips: Revlon Fire and Ice

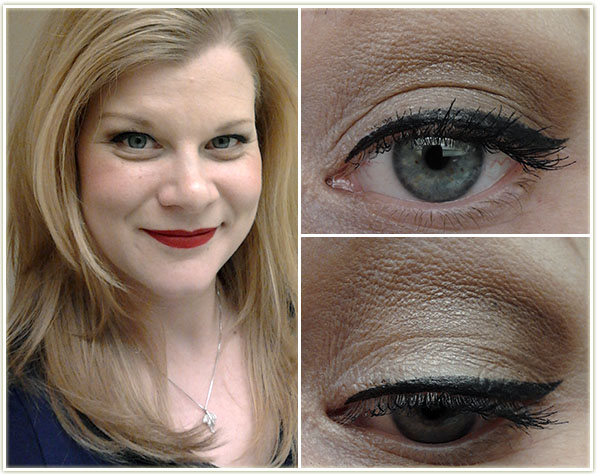
20140224_look4.1

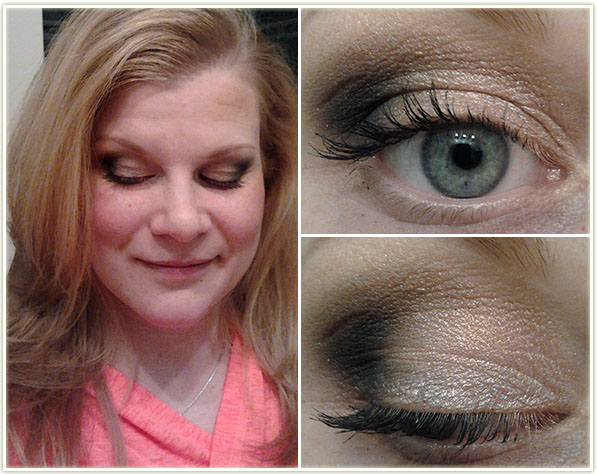
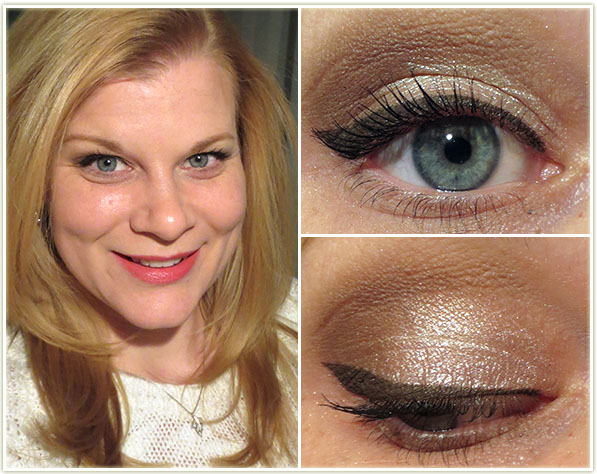
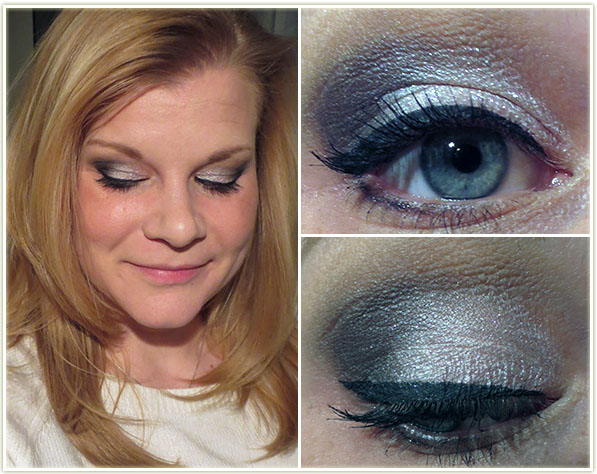
Although I tend to think of the Laura Mercier Artist 2 palette as predominantly purple, there are a lot of neutral shades in there that need recognition too!

20140224_look4.2

Eyes: Urban Decay Primer Potion in Eden all over the lid, then:

  1.  (all Laura MercierSparkling Dew all over the lid.
  2. Bamboo through the crease.
  3. Truffle to darker up the outer corner.

MAC Brule on the browbone, Make Up For Ever Aqualiner in 13 Black for the winged linger and L’Oreal Voluminous Carbon Black mascara on my upper lashes.

Rest of the Face

  • Foundation: Bourjois Healthy Mix Serum in Shade 51 Light Vanilla
  • Bronzer: Physicians Formula Bronze Booster in Light/Medium
  • Blush: Illamasqua Hussy
  • Lips: MAC Russian Red lipstick with Brick lip pencil

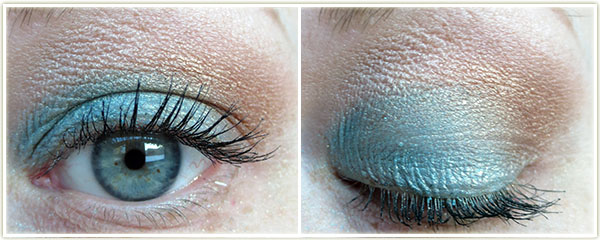
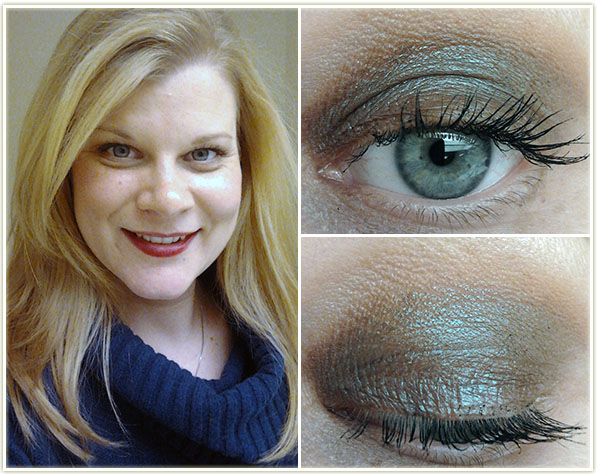
20140224_look2.1

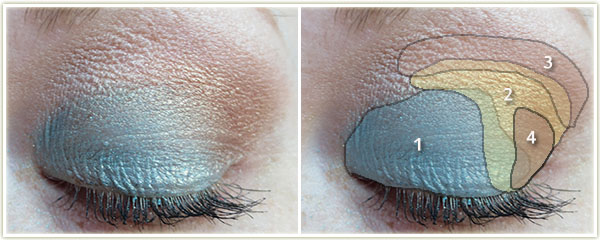
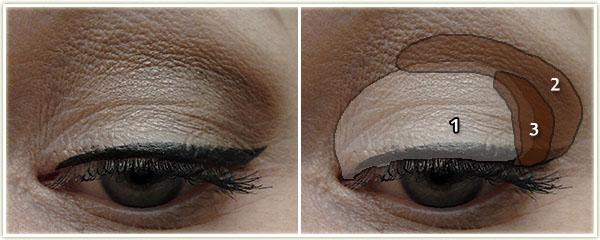
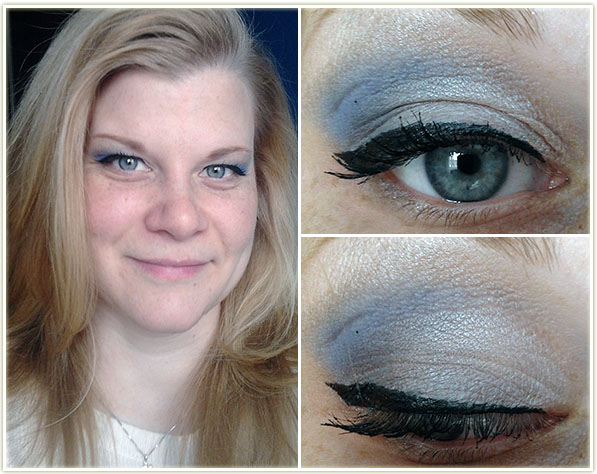
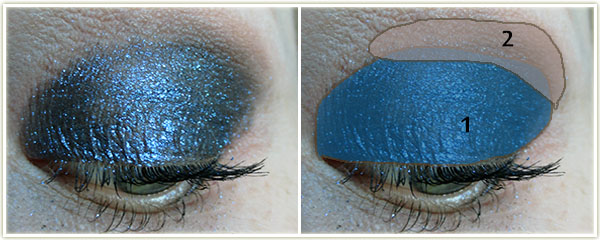
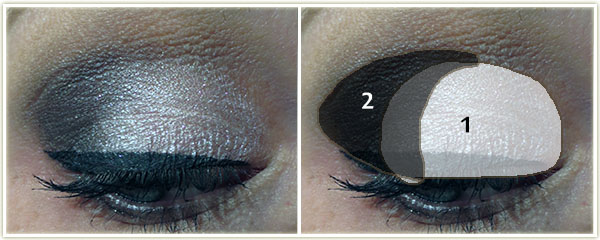
This one showed up decently in pictures, but I can’t say I really liked the end result. The blue shade (Illamasqua‘s Imagine) was sheer, powdery, patchy and just flat out miserable to apply. It needed a insane amount of layers AND it faded throughout the day.

20140224_look2.2

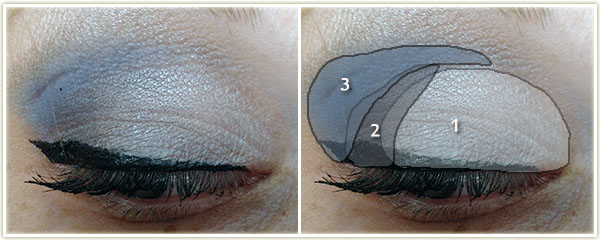
Eyes: NARS Pro Prime all over the lids, then:

  1. Urban Decay Virgin on the inner two-thirds of the lid.
  2. Urban Decay Gunmetal in sort of an angular stripe at the outer corner.
  3. Illamasqua Imagine at the outer corner and blended into the crease.

Urban Decay Virgin to highlight the brow, Make Up Forever Aqua Liner in 13 Black for the wing and Too Faced Better Than Sex mascara on my upper lashes.

Rest of the Face

  • Foundation: none
  • Bronzer: Tarte Park Ave. Princess
  • Blush: Tarte Crave
  • Lips: nothing

20140224_look5.1

Super quick one while I was on vacation.

20140224_look5.2

 Eyes: NARS Pro Prime all over the lid, then:

  1. (all Urban DecaySin all over the lid.
  2. Creep in the outer corner.

Virgin to highlight the brow and Too Faced Better Than Sex mascara on my lashes.

Rest of the Face

  • Foundation: nothing
  • Bronzer: Tarte Park Ave. Princess
  • Blush: Tarte Crave
  • Lips: nothing

Travel Makeup Bag – February 2014

201402_travel_makeup_bag3

I’m taking an extended vacation over the Family Day long weekend here in Ontario, so I’ll be heading back up to my parents house in Ottawa right after work on Wednesday (same date as this blog post if you’re reading it then). After having been ridiculously sick over Christmas vacation and not getting to hit any of the hills with my snowboard, I’ve been itching to get back up there. Toronto really doesn’t have any decent hills in the area (don’t even get me started on Blue Mountain… it’s not a mountain, it’s a sad, sad slope) so I really do need to get up to Ottawa and into Quebec to see some proper runs.

ANYWAY. All that to say I’m heading to Ottawa for about 5 days and thought I’d show you what makeup I’m bringing with me this time.

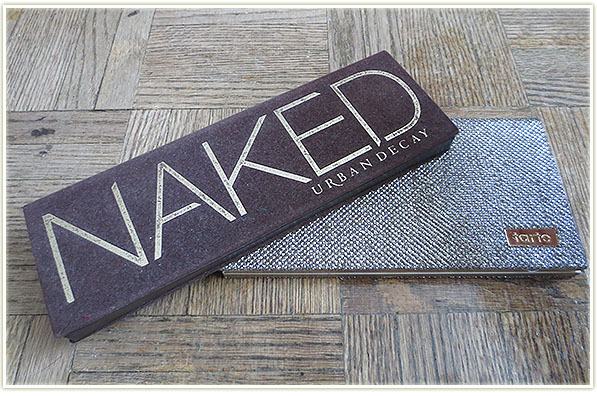
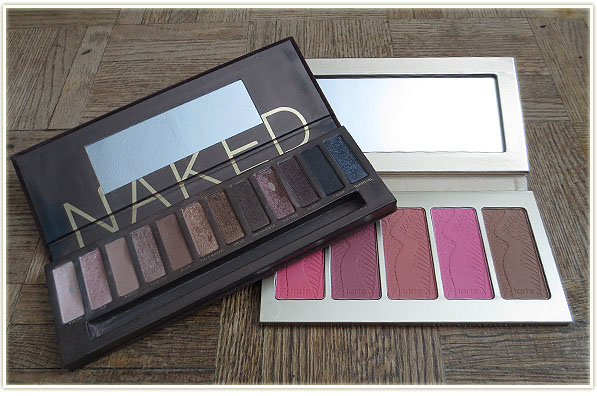
Urban Decay Naked & Tarte Off The Cuff palettes

First up are the palettes. Usually I pack my Naked palette and pop in a few loose blushes, but this time I decided to take advantage of the fact that the Tarte palette actually comes with four blushes and a bronzer. The Naked is a must have, but the Tarte palette is kind of a no-brainer.

Urban Decay Naked & Tarte Off The Cuff palettes

Also, sad to say, but I’ve barely used the Tarte palette since I bought it in late last year, so I really want to get some proper use out of it. Not to mention the amount of space it saves.

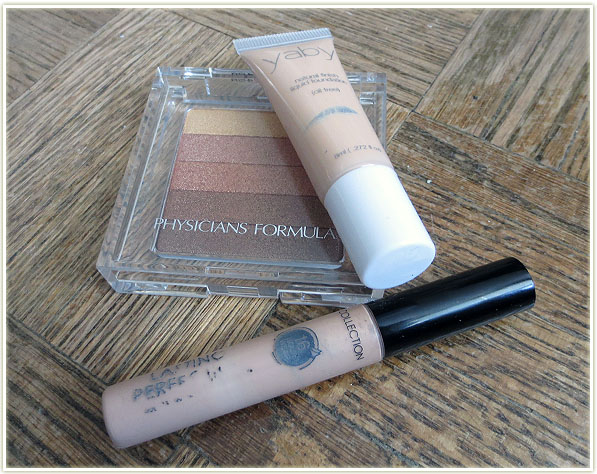
Physicians Formula Shimmer Strip, Yaby foundation, Collection Concealer

For face products, I’m bringing the Physicians Formula Shimmer Strip in Sunset Strip (also because it’s underused), the Yaby foundation in Buff because it’s a great match for my skin and it comes in an incredibly small tube. Last up is the Collection Lasting Perfection Concealer in Shade 2 Light which I don’t really find to be a necessity on a daily basis, but I may want to use it so I threw it in there anyway.

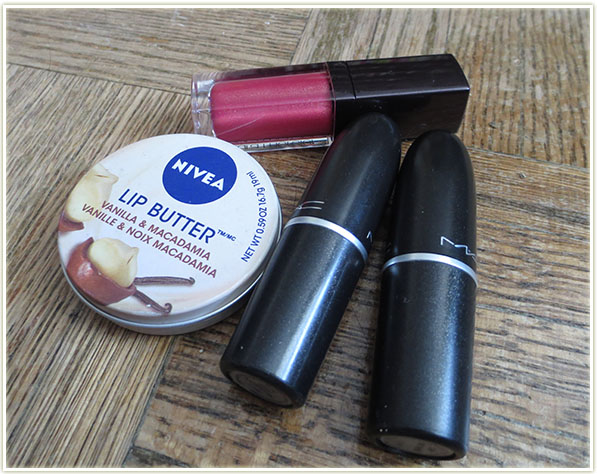
Nivea Lip Butter, Laura Mercier Lip Glacé, MAC lipsticks

My Nivea lip butter in Vanilla & Macadamia tastes delicious (and reminds me of Ireland, since that’s where I bought it) and will be needed for hitting the slopes even though the packaging is kind of inconvenient. The mini Laura Mercier Lip Glace in Rose is in there in case I want to use a gloss (plus it also smells amazing). The two MAC lipsticks are Russian Red and Darkside, although I stupidly forgot to show you the actual colours. Whoops. I doubt I’ll even need this many lip products for a five day vacation, but the variety is nice for those “just in case” moments.

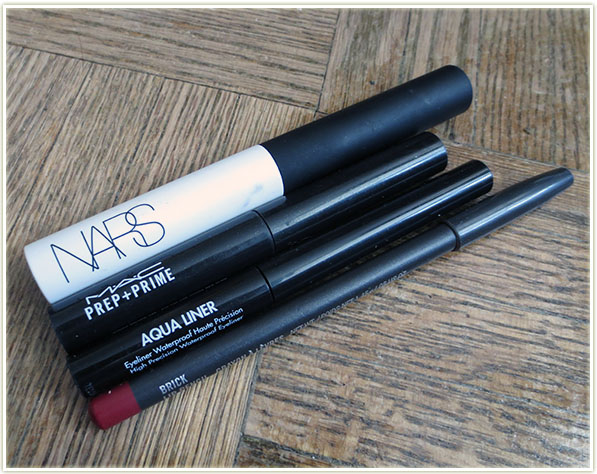
NARS Pro Prime, MAC Prep + Prime, MUFE Aqua Liner, MAC Lip Liner

And these are my necessities: NARS eyeshadow primer, MAC Prep + Prime for lips, Make Up For Ever Aqua Liner in 13 Black and a MAC lip pencil in Brick for if I decide to wear Russian Red.

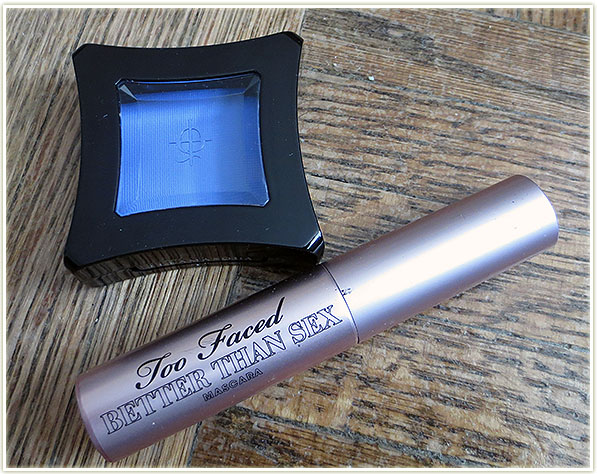
Illamasqua shadow, Too Faced mascara

Last up are Illamasqua‘s Imagine eyeshadow because I’ve never used it and I figured I needed to bring some kind of coloured shadow since the Naked palette is so very neutral. Too Faced‘s Better Than Sex mascara is also coming along for the ride since it’s in a tiny tube and easy to transport. Since I won’t be wearing any makeup while actually on the slopes, I don’t need a waterproof formula at all.

And all of it fits!
And all of it fits!

All of that fits into this relatively small makeup bag. For once I had a lot of small deluxe sample sized products which made it a lot easier to get everything crammed in there.

Travel Makeup Bag
Travel Makeup Bag

The makeup bag itself was part of the Liberty of London MAC collection from 2010. I’ve used this bag religiously to travel with over the years and love how it’s held up. I also love the colours and the pattern itself. If you’re wondering where my brushes are, I’ll probably end up chucking them in a Ziploc bag and stuff them between soft things somewhere between my clothing.

That’s it for this travel makeup bag. I’m extremely excited to get back out there snowboarding since it’s been far too many years!

What’s On My Face – Volume 10

More makeup looks I’ve done over the past few weeks ranging from stuff I wore to work, out to a bar or was just headed over to a friend’s place! I was really happy with this set of looks and I hope you enjoy them.

As a note, I’ve switched to NARS‘ Pro Prime eyeshadow primer, so that’s what I use in all of my looks now unless otherwise stated.

20140205_look1.1

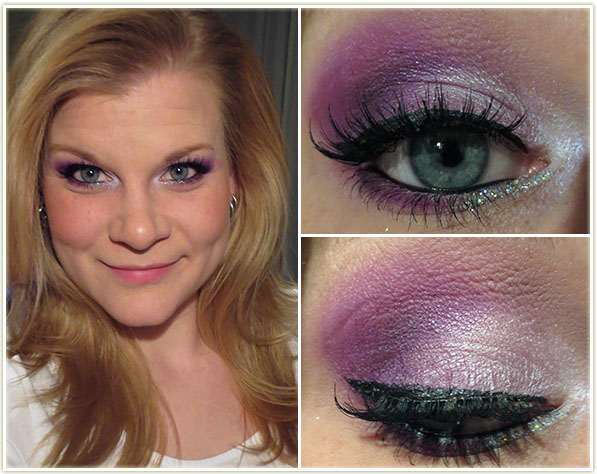
I loooove this one! It took me a lot more time to put this one together because I don’t normally get this creative and use so many shadows. (Seriously, if you haven’t noticed, I tend to stick to about two lid colours!) I don’t typically wear this much shadow/liner under my eyes on a regular basis because holy hell is that area ever sensitive on me and I usually end up with very watery eyes. This frustrates me because I realize just how much a makeup look comes together when you shade under your eyes!

Anyway, moving on.

With this, I had one goal: I wanted to use the MUFE rainbow glitter that I had picked up last month. I also hadn’t done purple look in quite a while so I figured this was as good a time as any.

20140205_look1.2

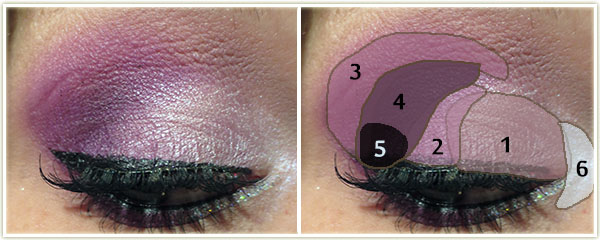
Eyes: I first applied NYX‘s Jumbo Eye Shadow Pencil in Milk all over the lid as a base.

  1. The first colour from a ginormous Sephora eyeshadow palette I have that unfortunately does not have shade names, however, the colour is very similar to MAC‘s Crystal. Essentially, the colour is a very pale lilac shade with a bit of a sheen to it. This shade was placed on the inner half of the lid.
  2. I then used MAC Dame’s Desire right beside the previous shadow, but not all the way out to the corner.
  3. Sleek Sugarlite was blended heavily into the upper crease.
  4. Sleek Highness filled in the outer corner, with;
  5. Sleek Noir at the very edge of the outer lashline to darken up that area.
  6. I then used MAC Vellum to highlight the inner corner of the eye and blended it into the pale purple.

MAC Blanc Type  to highlight the browbone with MAC Omega on my brows. On the lower lashline, I used Sugarlite to line the outer half of the lid, then applied some Too Faced Glitter Glue to the inner half of the lid and tapped on Make Up For Ever‘s Glitters 13 (silver rainbow glitter) on top of the glue. I lined the upper lashline with MUFE‘s Aqua Liner in 13 Blackand used MAC‘s Feline Kohl Power pencil on the lower waterline. And finally, I finished up the eyes with some Ardell‘s 102 Demis and applied  L’Oreal Voluminous Carbon Black on my lashes.

Rest of the Face

  • Foundation: Bourjois Healthy Mix Serum in 51 Light Vanilla
  • Bronzer: Revlon Photoready Bronzer in Bronzed & Chic
  • Blush: Tarte Exposed with Illamasqua Hussy layered on top
  • Highlighter: MAC Silver Dusk
  • Lips: I’m not wearing it in the picture, but I wore Rimmel Apocalips in Celestial out that night.
  • Extra: I used MAC‘s Select Coverup in NW20 under my eyes and set it with Laura Mercier

20140205_look2.1

It was just one of those mornings when I had no idea what to wear and just happened to look into the tub that contains all of my mineralize eyeshadows. Although it’s beautiful, I rarely use this shadow. A word to the wise though, this can apply really patchy and can flake off at a moment’s notice. Beautiful end result, however.

20140205_look2.2

Eyes:

  1. With a dampened, flat, stiff makeup brush, I packed (and I do mean packed) on MAC Blue Flame all over my entire lid. You may will likely need to layer this.
  2. I then blended Makeup Geek Creme Brulee into the crease.

I also lined the outer third of my bottom lashline with the Blue Flame as well. Too Faced‘s Cream Colored Ponies on my browbone and L’Oreal Voluminous Carbon Black on my lashes.

Rest of the Face

  • No foundation, bronzer or highlighter.
  • Blush: Illamasqua – Hussy
  • Lips: MAC – Shy Girl

20140205_look5.1

Obligatory neutral eye look, using the Too Faced A Few of my Favorite Things palette.

20140205_look5.2

Eyes: (Urban Decay Primer Potion as a primer for this one!)

  1. Too Faced Snowflakes all over the lid.
  2. Too Faced Buche de Noel slightly into the outer corner.
  3. Too Faced Woolen Mittens on the outer corner and blended into the crease.

I did the winged liner with MAC‘s Dipdown fluidline. Too Faced Cream Colored Ponies to highlight the brow with  L’Oreal Voluminous Carbon Black on the lashes.

Rest of the Face

  • Foundation: MUA Matte foundation in Shade 1 Soft Sand
  • Bronzer: Physicians Formula Bronze Booster in Light/Medium
  • Blush: Errr no idea. Maybe nothing?
  • Lips: MAC Boldly Bare lipliner with MAC Viva Glam Cyndi on top

20140205_look4.1

This look features Jealousy Wakes, the eyeshadow created by Christine (Temptalia) for MAC. Unfortunately it was limited edition (boy, was it EVER) and it sold out almost instantly back when it was released. It’s a beautiful shade and this is my default look when I want to wear that shadow.

20140205_look4.2

Eyes: (Again with UDPP)

  1. MAC Vex, inner two thirds.
  2. MAC Jealousy Wakes, outer corner and into the crease.
  3. Makeup Geek Creme Brulee throughout the crease.

MAC Brule to highlight the brow and  L’Oreal Voluminous Carbon Black on my lashes.

Rest of the Face

  • Foundation: MUA Matte foundation in Shade 1 Soft Sand
  • Bronzer: Physicians Formula Bronze Booster in Light/Medium
  • Blush: Physicians Formula – Natural
  • Highlighter: Dior Amber Diamond
  • Lips: MAC Petting Pink Lip Conditioner

20140205_look3.1

A shame the sparkles don’t show up more – I was going for a wintry snowfall at night look.

20140205_look3.2

Eyes:

  1. MAC Crystal Avalanche on the inner two-thirds of the lid.
  2. MAC Print on the outer third.

Although it is incredibly difficult to see in the photograph (which is very frustrating to me), I did layer Illamasqua‘s Beguile pigment on top of Crystal Avalanche. Rest assured that it showed up much better in person.

I used KIKO‘s Twinkle Eye Pencil in 06 (I really need to use this more, it’s fantastic) on the lower lashline. The upper winged lined was created with MAC Blacktrack fluidline. I appliedToo Faced Better Than Sex mascara to both sets of lashes and ran some MAC Omega through my brows. (The brows really never change, I’ll probably stop repeating this…)

Rest of the Face

  • Foundation: MUA BB Cream in Light mixed with some moisturizer
  • Bronzer: Physicians Formula Bronze Booster in Light/Medium
  • Blush: MAC Warm Soul
  • Highlighter: MAC Silver Dusk
  • Lips: Nothing – was heading out to eat so I didn’t see the point!

I’m pretty pleased in the makeup department lately… most of my looks have been suitable enough to post on here and I had about 15 or so looks to choose from for this post! Pretty happy with that because sometimes I can get a nasty streak where I don’t like anything I applied at all for several days. (That’ll make for an interesting post some day.