Tag Archives: Urban Decay

Ipsy – April 2014 Glam Bag

201404_ipsy1

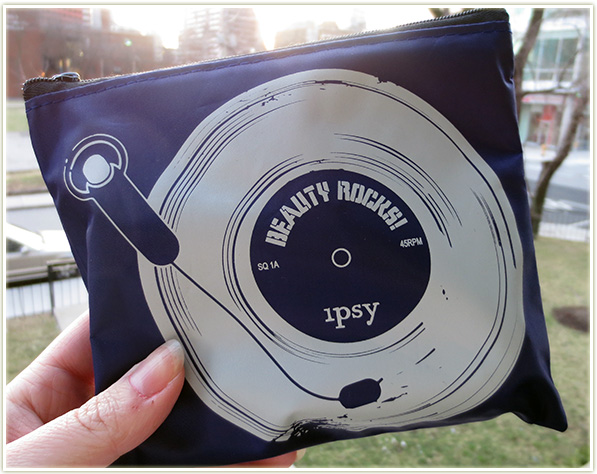
Another month, another bag of Ipsy goodies. This month’s theme was “Beauty Rocks” or something to that extent. Aside from the record on the front of the bag (an object I’m not sure the generation after me has even had physical contact with) the theme is slightly debatable.
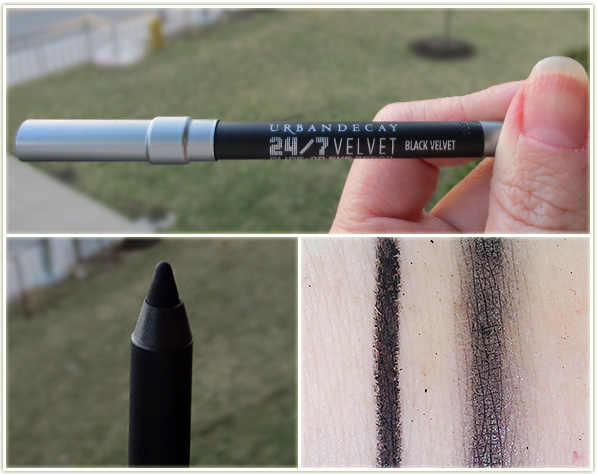
Urban Decay 24/7 Velvet Glide-on eye pencil in Black Velvet (travel size)

First up, and the item everyone got in their bag, is Urban Decay‘s new 24/7 eye liner pencil in Black Velvet. I’m one of few people who doesn’t actually own an UD liner so I was really happy to receive this. Urban Decay says this is “an ultra velvety, plush version” of their usual liners and this can create “perfectly blended-out or rich, precise lines that are blacker-than-black”.  This is a hefty size sample – in fact it’s only 0.01 oz smaller than a full size product!
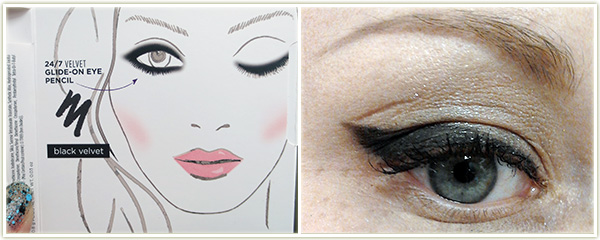
Testing out Black Velvet

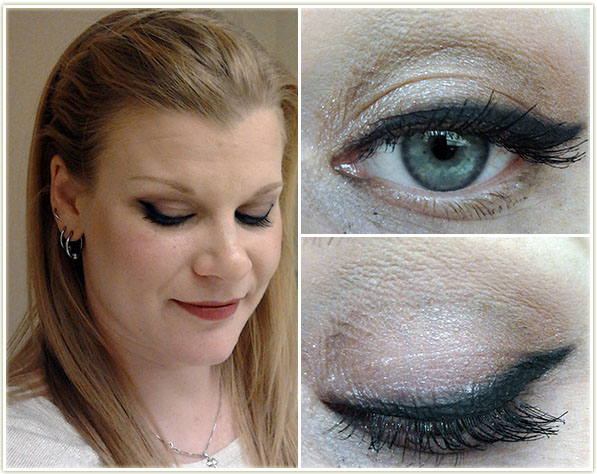
Judging by the picture on the diagram that came with the liner, I assumed I could blur this out to a really smudgy, smoky look. Well… that didn’t actually work out. The pencil is certainly very black, but blending this sucker out was difficult – too difficult. I ended up using UD‘s Blackout eyeshadow to blend out the pencil liner in an attempt to make it smudgy. As you can see, I didn’t really succeed, but I ran out of time that morning and finished it off as quickly as I could. Despite the pencil not actually smudging like I thought it would (or like they implied), I really do like this liner. It’s super black, and it’s wonderfully smudge resistant (hah). It sets really, REALLY quickly, hence why I had problems smudging it out.  The liner didn’t transfer to my upper lid throughout the work day. It also claims to be waterproof, but I didn’t test that bit out. Definitely love this one.
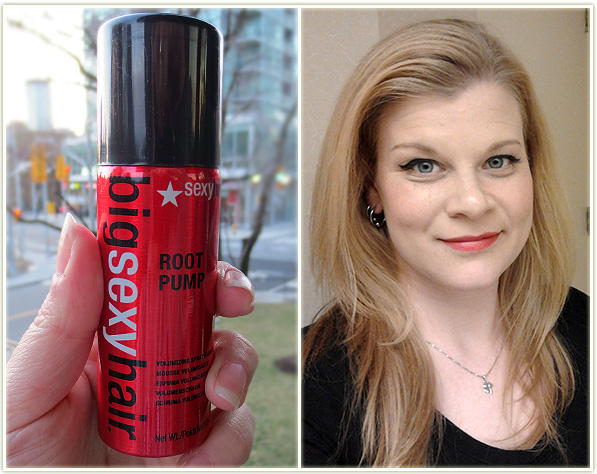
Big Sexy Hair – Root Pump (travel size)

I was excited to try this out as I definitely feel like I need some lift in the roots of my hair and this product looked interesting. Big Sexy Hair‘s Root Pump is a white mousse that dries clear. The instructions indicate to apply it to the roots of your hair while your hair is damp and blow dry your roots away from your scalp. Did that and I think it worked – I certainly seem to have more lift to my hair through the scalp… but now my hair feels like CHALK! Like chalk that’s been smashed into powder, had water added to it and then rubbed into the roots of my hair. I constantly run my fingers through my hair throughout the day and the texture this created in my hair to give it the extra OOMPH just totally freaked me out. (It feels similar to those powder-shaker root lifts, another product I can’t stand.) So while this product DOES work, the texture is so awful to me that there’s no way I’ll use it.
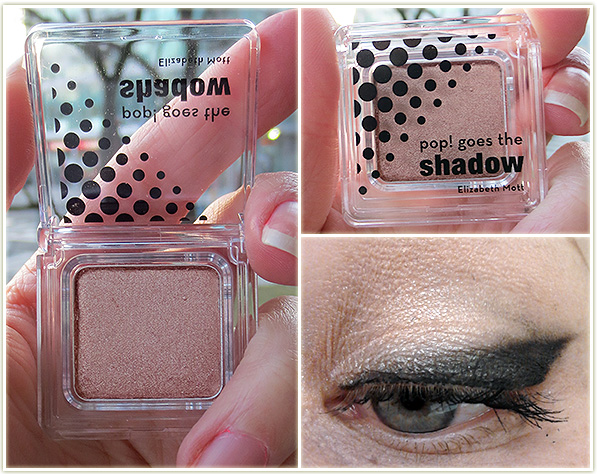
Elizabeth Mott – Pop! goes the shadow in Champagne (full size)

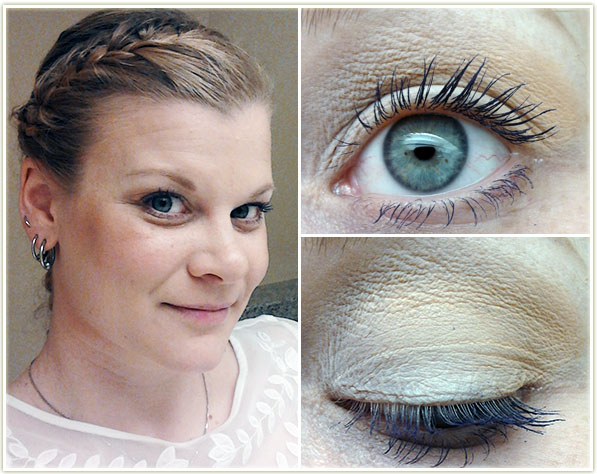
A lot of people are going to love this colour I’m sure, but I’m only so-so on it. Elizabeth Mott‘s Champagne eye shadow is a barely there shade that adds a little bit of shine on my lids, but not a whole lot of colour payoff. It swatches okay, but the end result on the lids isn’t spectacular even with a primer. ( In the shot above, the shadow was applied all over my lid right up to my brows.) I was happy to try it out though, and I’ll give it a shot as a cheek highlighter as well.
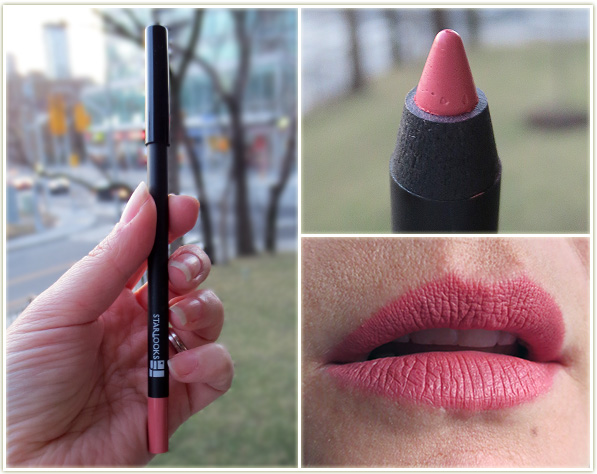
Starlooks Luscious Longwear Lip Pencil in Naked (full size)

Since I discovered MAC‘s Prep + Prime for lips I don’t have a massive need for lip liners (as a result, I only have two!). As a result, this item was actually pretty welcome in my bag as I didn’t have a colour like it for the times where I do want to add some extra wear time to my lip colour or even just to wear a liner under some gloss. Starlooks Naked lip liner is a peachy-pink colour that slid onto my lips without any tugging (which isn’t something I can say about MAC‘s pencils… those suckers tug at my lips!). It does have a bit of a plastic taste to it which is a bit meh, but not enough to prevent me from wearing it.
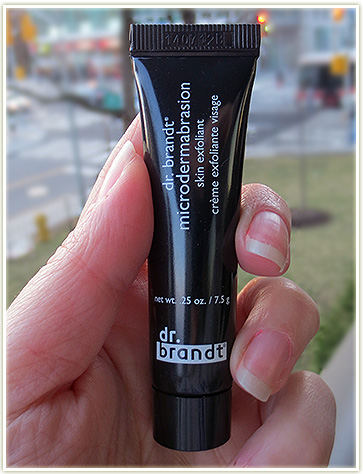
Dr. Brandt Microdermabrasion skin exfoliant (trial size)

I had to look up what the heck microdermabrasion was in comparison to a regular exfoliator and it turns out microdermabrasion utilizes smaller beads and is stronger than a regular exfoliator.Dr. Brandt‘s microdermabrasion feels really lovely on the skin and I can definitely feel the granular difference between this and the cheapo exfoliators I buy at the drug store. It also, incredibly, smells just like Sabon‘s Lemon Mint body scrub which makes this an absolute PLEASURE to use.

The full price of this product, however, is a whopping $78 USD. I love trying out this luxury brand, but let’s get real – this is a sample in a $10 a month beauty bag – most of us are not looking to spend nearly $80 on one skincare item. So it seems out of line with the clientele, but what do I know?

I used this once on my face and it felt wonderful, but I’m going to restrict the use of this to a pesky milia pearl I’ve got on one of my lower lids and see if this will work to get rid of it with prolonged use.


Ipsy April 2014 Breakdown
(all prices in USD)

  • Urban Decay 24/7 Velvet Glide-on eye pencil in Black Velvet (0.03 oz @ $15, full size is $20 for 0.04 oz)
  • Big Sexy Hair Root Pump Volumizing Spray Mousse (50 ml @ $3, full size is $17.95 for 300 ml)
  • Elizabeth Mott Pop! goes the shadow – Champagne ($12.99 USD, full size)
  • Starlooks Luscious Longwear Lip Pencil in Naked ($14, full size)
  • Dr. Brandt Microdermabrasion skin exfoliant (7.5 g @ $9.75, full size is $78 for 60 g)

BAG TOTAL = $54.74

My Thoughts

Yet another good bag put together by Ipsy! I loved trying everything out even if some of them didn’t work out for me (I’m looking at you specifically Root Pump). Double pencils (eye and lip) was a bit of a let down at first but once I used them I was really happy with them. The Urban Decay one definitely lived up to the brand’s reputation and I love the microdermabrasion product – I just wish the full size wasn’t so expensive because I could never bring myself to spend that much on an exfoliator. Definitely staying subbed!
The Unmentionables

201404_theunmentionables

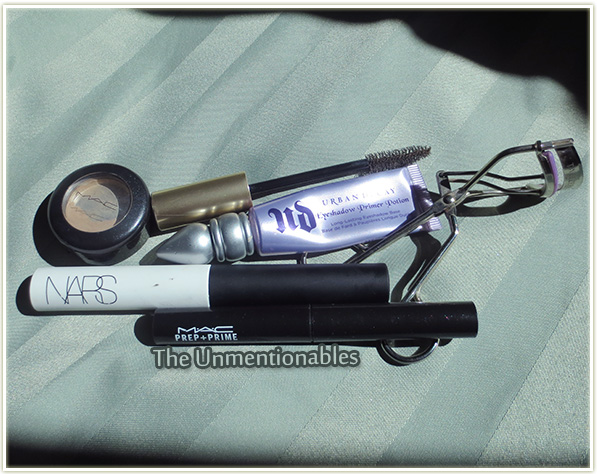
I absolutely adore these products. I use them every  single time I do my makeup. But it gets incredibly repetitive saying that I use them every time I do a makeup look because really… these products aren’t changing in my routine any time soon and it’s not like you need to hear what primer I used unless I actually change it up, right?

So here are my unmentionables… and they’re only unmentionables because they’re too well loved!

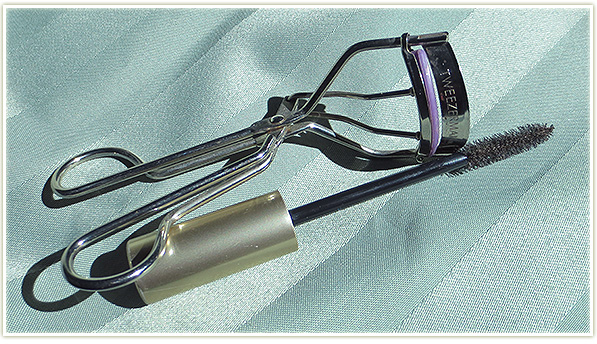
The Tools – Tweezerman eyelash curler and an old mascara wand

Nothing glamorous about these two but they’ve ingrained themselves into my daily makeup routine.

The eyelash curlers are self explanatory – They’re a pair of Tweezerman ones I picked up at Shoppers Drug Mart several years ago. I’ve run out of the rubbery things to replace on the band, but they’re still working just fine as far as I can tell. (Although… side note, where the heck do you actually get replacement rubber thingies?!)

The old mascara wand is from a tube of L’Oreal Voluminous that I cleaned up and use as a spoolie for running through my brows when I’ve applied too much powder through them. Works like a charm, so why bother paying for an actual spoolie?

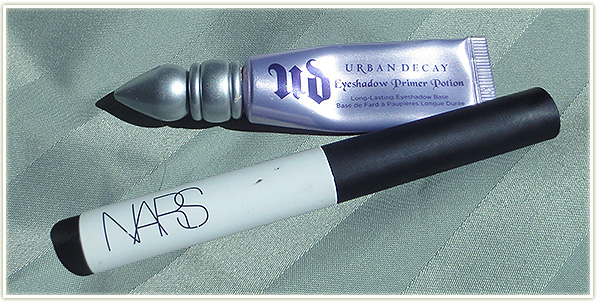
The Eye Primers – Urban Decay Primer Potion and NARS Pro Prime

Double primers because, for whatever reason, using only one of them no longer seems to work on me. I use the NARS one first, allow it to dry, then apply the Urban Decay one on top. These two together ensure that my eyeshadows don’t budge all day.

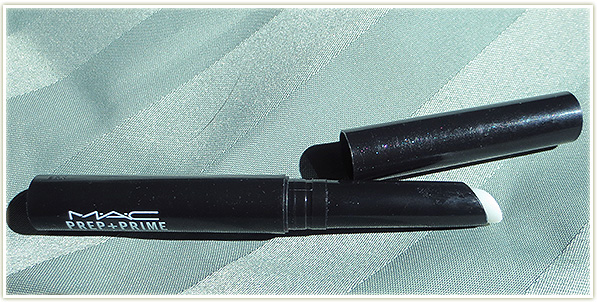
The Lip Primer – MAC Prep + Prime for lips

MAC‘s Prep + Prime for lips has been an absolute lipstick saviour for me. I was a really timid lipstick wearer until about three years ago. My major problem was that my lipstick, no matter what brand I used, would slide all over the place and bleed outside my lip lines. Lip liner never worked for me. Nor concealer. Someone at a MAC counter eventually suggested this primer and I was incredibly skeptical… how much better was this REALLY going to be? Well… it is. It just flat out is. My lipstick stays on my lips and doesn’t bleed outside my line. I won’t wear lipstick without this now!

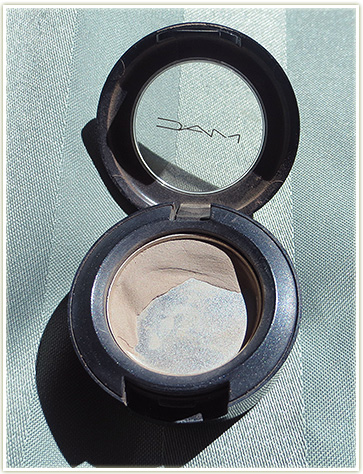
The Brow Filler-Iner – MAC eyeshadow in Omega

I’ve been using MAC‘s eyeshadow in Omega to fill in my brows for the last two years and I’m only just now getting to the bottom of the pan. The colour is a perfect match for my barely there blonde eyebrow hairs. I’ve been surprised at the longevity of this product too – it doesn’t wear off during the day and that’s a necessity for me since my brows are so blonde it looks like I’ve overplucked them to hell and back. (I haven’t, the hairs just don’t seem to grow where the tail of my brows are supposed to be.)

All of these products are part of my daily routine and won’t be changing any time soon. They’ve all attained holy grail status in my collection. Is there anything you use in your daily routine that you can’t be without? I’m at the point where I don’t even want to test out replacement products or tools because these are already so good as is!

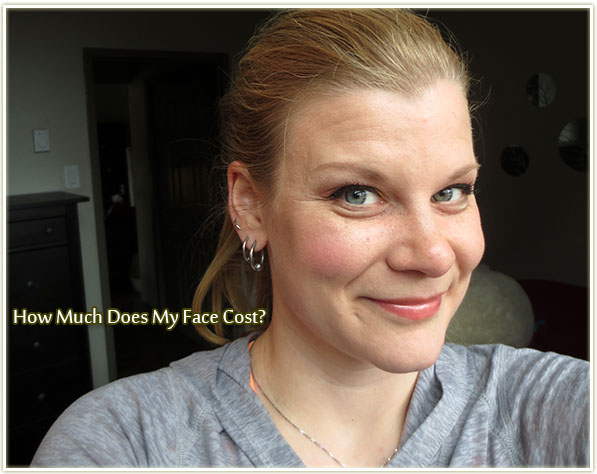
How Much Does My Face Cost?

201404_howmuchdoesmyfacecost1

I saw this kind of topic years ago and always thought it was hilarious. If we really added up how much crap we put on our face, would we be shocked? More than likely. It’s funny how much makeup adds up, and how many more products get added into our routine over time.

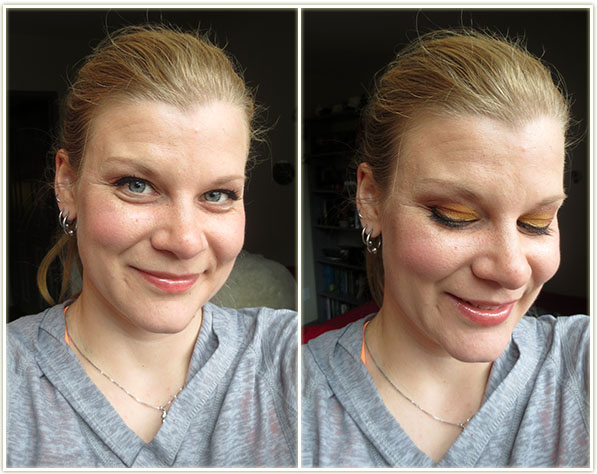
I took these pictures after I got home from work yesterday and thought I’d add everything up afterwards. This was a semi-typical day: I didn’t like the makeup look enough to photograph it for a “What’s On My Face” post, but it wasn’t a total bomb day in the sense that I didn’t wear more or less products than any average day.

201404_howmuchdoesmyfacecost2

Face Breakdown

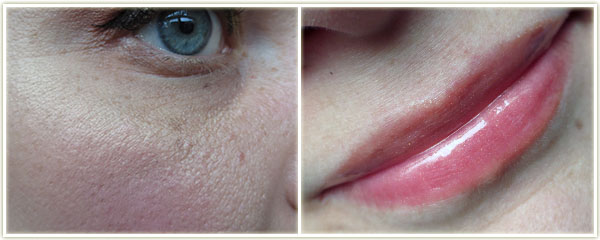
  • Foundation: Covergirl & Olay Tone Rehab 2 in 1 Foundation – CC Cream in 110 Classic Ivory ($22.49 CAD) mixed with Bourjois Healthy Mix Serum in 51 Light Vanilla (€14)
  • Blush: Cargo – Mendocino ($26 CAD)
  • Bronzer: Physicians Formula Bronze Booster in Light/Medium ($14.95 USD)
  • Highlighter: Too Faced Absolutely Invisible Candlelight Powder ($38 CAD)
  • Brows: MAC Omega eyeshadow ($18 CAD) + Chella Eyebrow Defining Gel in Clear ($18 USD)

201404_howmuchdoesmyfacecost3

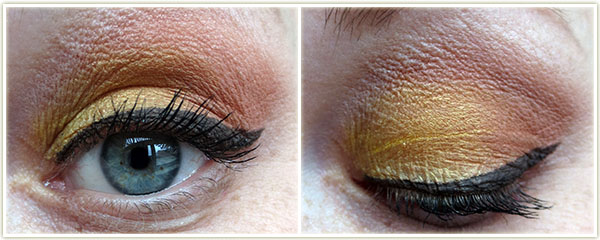
Eye Breakdown

Primers:

  • NARS Pro Prime Smudgeproof Eyeshadow Base ($29 CAD)
  • Urban Decay Primer Potion in Original ($24 CAD)

Eyeshadows:

  • Makeup Geek Lemon Drop ($5.99 USD)
  • Makeup Geek Goddess ($5.99 USD)
  • Makeup Geek Cocoa Bear ($5.99 USD)
  • Makeup Geek Brule ($5.99 USD)
  • MAC Shroom ($18 CAD)

Liner: MAC Dipdown Fluidline ($19 CAD)

Mascara: L’Oreal Voluminous Carbon Black mascara ($~10)

201404_howmuchdoesmyfacecost4

And finally, the only remaining thing…

Lips: Revlon ColorBurst Lipgloss in Sunset Peach ($10.99 CAD)

Converting all of the different currencies by today’s exchange rate, I get…

Grand Total: $299.38

WOW. That was actually way higher than I thought it was going to be. I didn’t think I was wearing anything especially expensive as the eyeshadows were pretty cheap and so was the lip products. And that’s not even including any brushes! Has anyone else added up how much product they whack on their faces every day?

Challenge Week: Naked 3

I had this idea that is neither unique, nor ingenious, but I liked the idea of it. Every now and again I get the idea to use a single eyeshadow palette for a week. It gets me out of a rut of always using that palette in the exact same way every time I pull it out.

Since Urban Decay‘s Naked 3 palette is relatively new, I thought I’d start with that one. Not going to lie, I looked up a few tutorials to give myself some extra inspiration (and/or flat out copied some of them!). It was a fun week of getting to know the Naked 3 palette a little bit better. I’m far more in love with this palette now, especially the darker, taupier shades in the palette that I hadn’t been so sure about (I mean, at one point, they were all starting to look like Mushroom to me).

So anyway, on with the looks. I used Naked 3 exclusively on my eyes for a week. There are only six looks because I didn’t wear any makeup on the Sunday of the week I was doing this.

20140324_look4.1

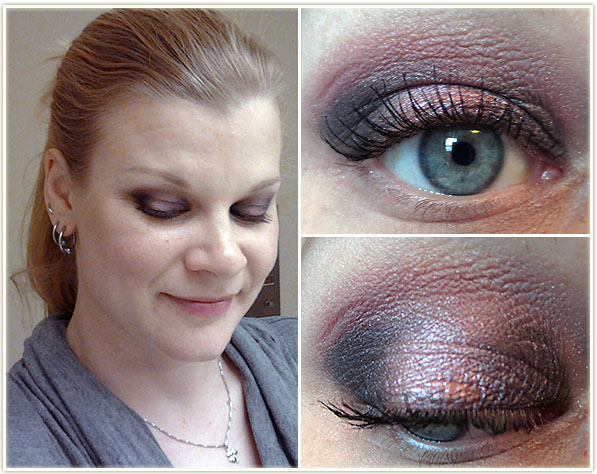
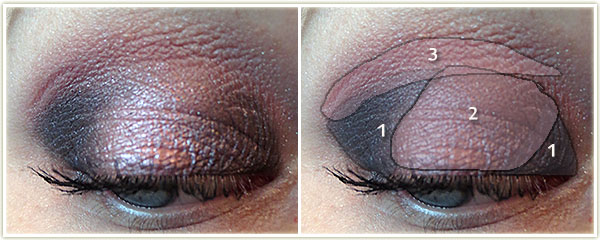
This look is courtesy of Cora‘s Naked Cranberry tutorial. I would never have thought to put the colours together like this so I’m glad she did! Although this is not my own original look, this is definitely my favourite look out of all of them.

20140324_look4.2

Eyes: 

  1. Limit through the entire socket, all the way to the nose.
  2. Darkside on the outer third of the eye, fade it out towards the center of the lid.
  3. Mugshot on the middle of the lid.
  4. Liar on the inner third of the lid.

Strange on the browbone and apply Blackheart as a very thin liner right along the lashline. L’Oreal Voluminous Carbon Black on my lashes.

Rest of the Face

  • Foundation: Revlon Colorstay (Combination/Oily) in Buff
  • Bronzer: Physicians Formula Bronze Booster in Light/Medium
  • Blush: Tarte Exposed
  • Lips: Rimmel Apocalips in Celestial

20140324_look2.1

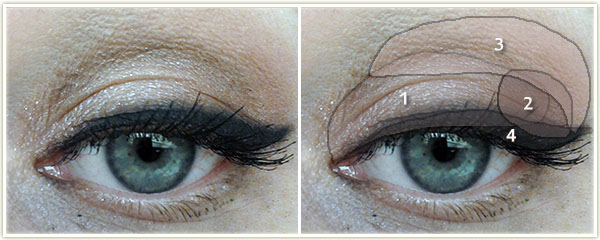
I looove how the winged liner turned out on this one. Slight side effect of it though; it transfers to your upper lid pretty quickly.

20140324_look2.2

Eyes:

  1. Dust all over the lid.
  2. Buzz in the outer corner.
  3. Limit to blend out the crease.
  4. Blackheart applied as a winged out liner with MAC Blacktrack on top (but not to the point where it overwrites the soft edge of Blackheart).

Strange to highlight the brow bone. L’Oreal Voluminous Carbon Black on my lashes.

Rest of the Face

  • Foundation: Bourjois Healthy Mix Serum in 51 Light Vanilla
  • Bronzer: Physicians Formula Bronze Booster in Light/Medium
  • Highlighter: MAC Silver Dusk
  • Blush: Wet n Wild Heather Silk
  • Lips: MAC Boldy Bare lip pencil with MAC Cyndi on top

20140324_look3.1

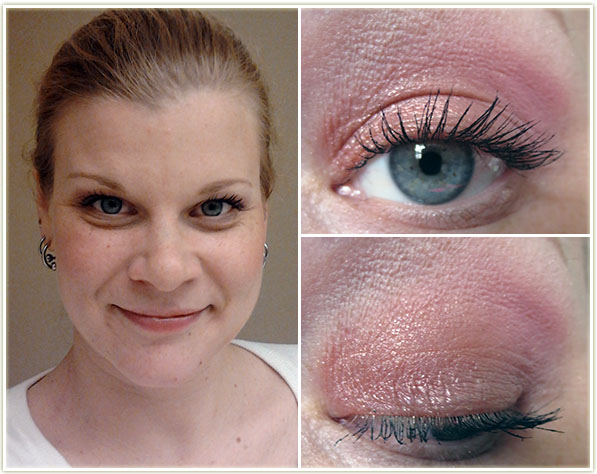
This look uses my favourite colour out of the entire palette: Trick – the one true rose-gold shade out of all 12 of them.  I’ve heard that you can apply it wet to punch up the colour a little bit and I’ll have to try that the next time as I used it dry here.

20140324_look3.2

Eyes:

  1. Trick all over the lid.
  2. Nooner in a “C” shape on the outer corner.
  3. Limit to blend out the crease.

Strange on the browbone, L’Oreal Voluminous Carbon Black on my lashes.

Rest of the Face

  • Foundation: None
  • Bronzer: Joe Fresh Sand Bronzer
  • Blush: MAC Warm Soul
  • Lips: Revlon ColorBurst Lipgloss in Sunset Peach

20140324_look1.1

Not gonna lie, the looks seriously start to meld together after a while. This one’s okay… not especially breathtaking in my eyes.

20140324_look1.2

Eyes:

  1. Mugshot all over the lid.
  2. Blackheart in the outer corner.
  3. Strange to blend out the crease.

Strange on the browbone, L’Oreal Voluminous Carbon Black on my lashes.

Rest of the Face

  • Foundation: MUA matte foundation in Shade 1 Soft Sand
  • Bronzer: Physicians Formula Bronze Booster in Light/Medium
  • Concealer: Collection Lasting Perfection in Shade 2 Light
  • Blush: Physicians Formula Happy Booster Bronzer in Natural
  • Lips: NYX Tiramisu

20140324_look6.1

Quick, easy one for Saturday brunch!

20140324_look6.2

Eyes:

  1. Strange on the inner half.
  2. Liar on the outer half.
  3. Limit in the outer corner and through the crease.

Strange on the browbone, L’Oreal Voluminous Carbon Black on my lashes.

Rest of the Face

  • Foundation: Bourjois Healthy Mix Serum in Shade 51 Light Vanilla
  • Bronzer: Physicians Formula Happy Booster 2 in 1 Bronze/Rose (Bronzer side used)
  • Blush: Physicians Formula Happy Booster 2 in 1 Bronze/Rose (Rose side used)
  • Lips: NYX Peaches and Cream

20140324_look5.1

Bit of a darker one!

20140324_look5.2

Eyes:

  1. Blackheart in the outer and inner third of the eye.
  2. Buzz on the middle of the lid, blend it into Blackheart on both sides.
  3. Limit through the crease to blend out all the edges.

Strange on the browbone, L’Oreal Voluminous Carbon Black on my lashes.

Rest of the Face

Foundation: MUA Matte Foundation in Shade 1 Soft Sand
Bronzer: Physicians Formula Bronze Booster in Light/Medium
Blush: Illamasqua Hussy
Lips: MAC Tinted Lip Conditioner in Petting Pink


And that’s it for the week! I hope you found some inspiration or ideas for your own Naked 3 eyeshadow combinations. Now to dig through my collection and see what palette I’ll use next for another challenge week…

What’s On My Face – Volume 12

More recent makeup looks! A few neutrals mixed in with the bright ones.

20140319_look4.1

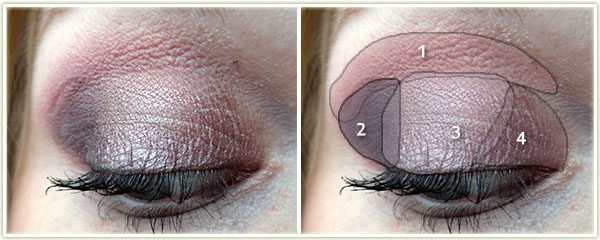
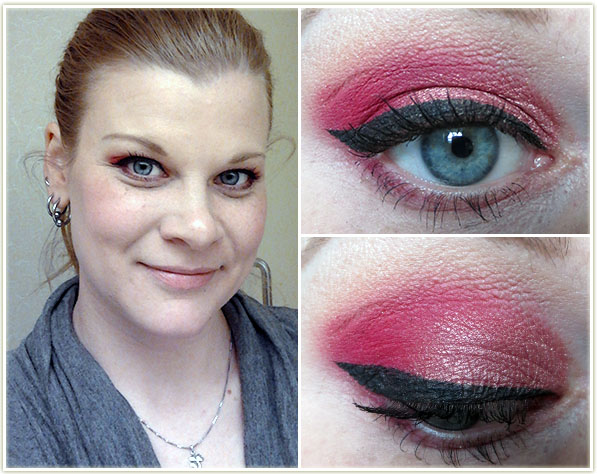
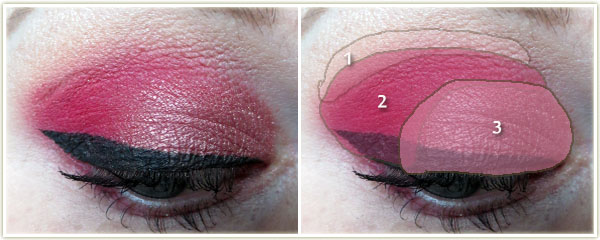
I got this idea from Jaclyn Hill (her tutorial). She used some beautiful Makeup Geek shadows and while I had most of them, I had to improvise the lid colour. Her looks came out a lot more pink, whereas mine leans more towards red. I know red shadow isn’t something anyone really gravitates towards, but red and orange are my favourite colours to play with on the eyes – probably because they’re rather unconventional.

20140319_look4.2

Eyes

  1. Makeup Geek Peach Smoothie at the top of crease.
  2. Makeup Geek Razzleberry heavily in the outer corner and through the crease (don’t blend above Peach Smoothie). Lightly line the lower outer corner of your bottom lashline as well.
  3. Taking the Sleek Sunset palette, mix together the third shade from the left (top row) with the first shade on the right (bottom row) and apply the mixed shadows to your entire lid, blending it into Razzleberry.

MAC Shroom to highlight the brow, MAC Blacktrack fluidline for the winged liner and L’Oreal Voluminous Carbon Black on my lashes.

 Rest of the Face

  • Foundation: none
  • Blush: Tarte Charisma
  • Bronzer: Physicians Formula Happy Booster in Light/Medium
  • Lips: MAC Shy Girl

20140319_look1.1

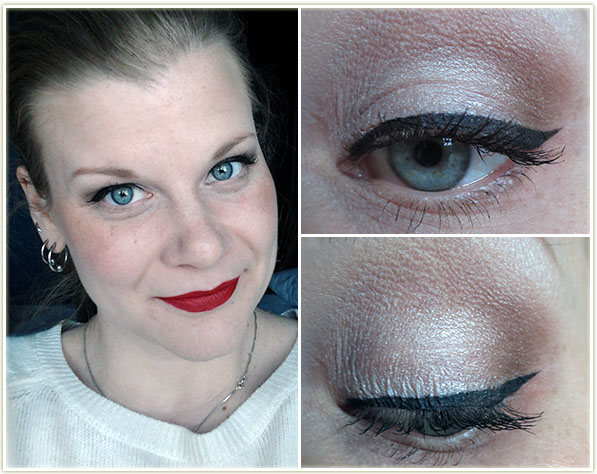
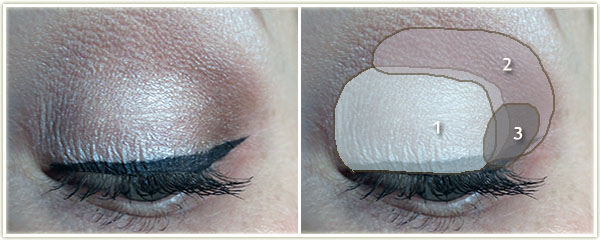
This the look I do when I need to be a bit more dressed up, but have no idea what to wear on my face. There isn’t an outfit in the world that this eyeshadow won’t match!

20140319_look1.2

Eyes 

  1. (all Urban DecayVirgin all over the lid.
  2. Buck in the outer corner and through the crease.
  3. Smog in the very outer corner.

Virgin to highlight the brow, MAC Blacktrack fluidline for the winged liner and Too Faced Better Than Sex mascara on my lashes.

Rest of the Face

  • Foundation: Yaby in Buff
  • Brows: Urban Decay Naked (only mentioning this since I usually use MAC Omega)
  • Concealer: Collection Lasting Perfection in Shade 2 Light
  • Bronzer: Tarte Park Avenue Princess
  • Blush: Tarte Darling
  • Highlighter: Hard Candy Tiki
  • Lips: MAC Brick lipliner with MAC Russian Red on top

20140319_look3.1

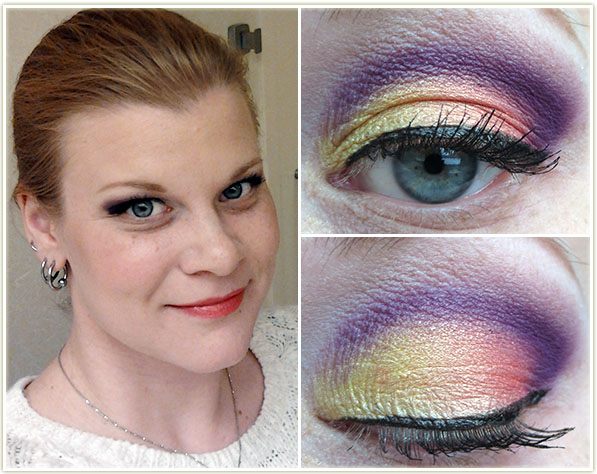
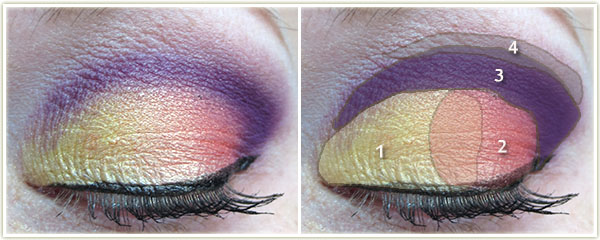
I don’t usually do a cut crease because I honestly don’ really know what I’m doing. This ended up a bit more smoothed out through the crease than it should be, but I really love the colour combination for this one.

20140319_look3.2

Eyes

I first applied NYX‘s Jumbo Eyeshadow Pencil in Milk all over the lid and smoothed it out. Then:

  1. Applied a mixture of a very yellow-gold from a Sephora palette I own (sorry, no name!) to the inner half of the lid.
  2. Inglot AMC Shine #15 on the outer half of the lid.
  3. Inglot Matte #325 at the very outer edge then pulled as sharply as you can through the crease.
  4. Makeup Geek Creme Brulee to blend out the very upper edge of the purple shadow.

Too Faced Cream Colored Ponies to highlight the brow, Make Up For Ever Aqualiner in 13 Black for the wing and L’Oreal Voluminous Carbon Black on my lashes.

Rest of the Face

  • Foundation: CoverGirl CC Cream in 110 Classic Ivory mixed with Bourjois Healthy Mix Serum in 51 Light Vanilla
  • Blush: Sleek Crochet
  • Highlighter: MAC Whisper of Gilt
  • Lips: NYX Cherry Cheesecake

20140319_look2.1

This was out of my comfort zone because it required toning down my eye makeup so that I could make the purple mascara pop more.

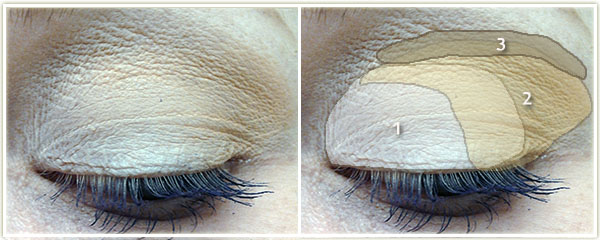
20140319_look2.2

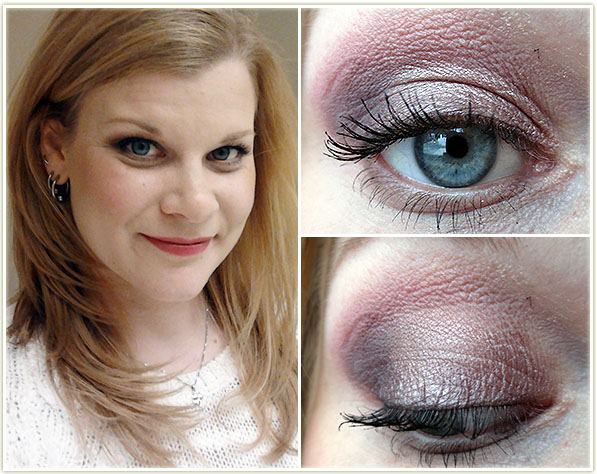
Eyes

  1. MAC Blanc Type all over the lid.
  2. Makeup Geek Peach Smoothie on the outer half of the lid.
  3. Makeup Geek Creme Brulee lightly through the crease.

Blanc Type to highlight the brow and Sephora Full Action Extreme Effect Mascara in Purple on my lashes.

Rest of the Face

  • Foundation: CoverGirl CC Cream in 110 Classic Ivory mixed with Bourjois Healthy Mix Serum in 51 Light Vanilla
  • Bronzer: Physicians Formula Bronze Booster in Light/Medium
  • Blush: MAC Gingerly
  • Highlighter: MAC Whisper of Gilt
  • Lips: Nothing

20140319_look5.1

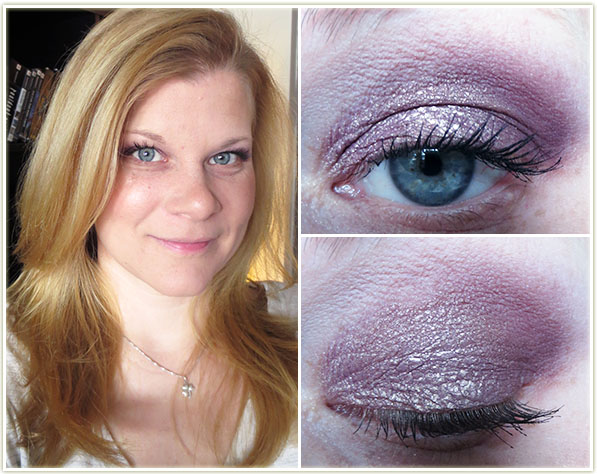
I used a gold base for this one because the previous time I’d done this look, I didn’t feel like the purple-gold (African Violet) had enough punch to it. I much prefer this with the base because it gives the shade a lot more of the gold dimension that’s already there but slightly hidden.

20140319_look5.2

Eyes

First I applied Maybelline‘s Color Tattoo in Bold Gold all over the lid. Then:

  1. (all Laura MercierAfrican Violet all over the lid.
  2. Kir Royal in the outer corner.
  3. Plum Smoke through the crease.

Vanilla Nuts to highlight the brow and L’Oreal Voluminous Carbon Black on my lashes.

Rest of the Face

  • Foundation: CoverGirl CC Cream in 110 Classic Ivory mixed with Bourjois Healthy Mix Serum in 51 Light Vanilla
  • Blush: I’m not positive, but it might be Tarte Exposed
  • Bronzer: Physicians Formula Bronze Booster in Light/Medium
  • Highlighter: MAC Whisper of Gilt
  • Lips: Nothing

Thanks for reading. I hope something inspired you. 🙂