What is it about “hitting pan” that makes us makeup freaks get all giggly and excited? I mean, are we THAT excited to finish the product up? Does seeing that silver pan really make us feel accomplished? (You know it does, don’t even kid yourself.) These are some of my favourite kinds of videos or blog posts, so I thought I’d share what products I’ve been diving deep into. Forewarning, a lot of it is MAC.
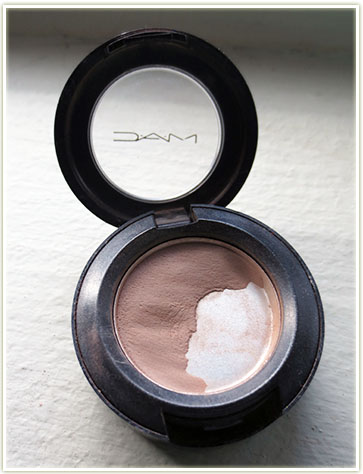
MAC – Omega
Omega is the only MAC eyeshadow I have still in a pot. I use it for my eyebrows every day, so having it in a pot makes it more convenient as opposed to pulling out a 15 pan eyeshadow palette every time I want to do my brows! I think the shadow is roughly a year old and as you can see it’s about halfway gone. I find this shade is perfect for my incredibly blonde eyebrows that are almost non-existent without some product on them.
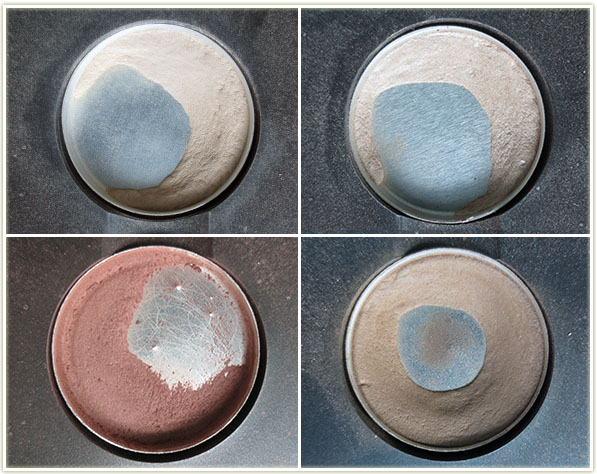
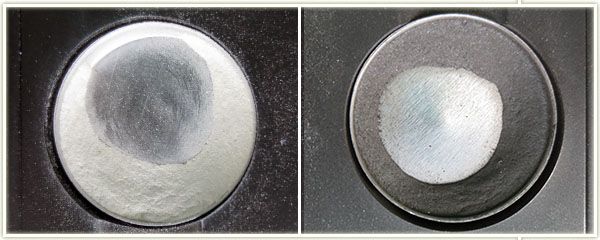
MAC – Brule, Shroom, Haux and Cork
Top left – If you’ve been reading any of my eyeshadow looks lately, you’ll know that I useBrule an awful lot. I’ve been trying to finish this one up so I can get on to the myriad of other off-white satin type shades I own. It’s a good shadow, but it’s so easily dupeable that I don’t find it particularly unique.
Top right – Shroom is a beautiful colour when I want to have a bit of sheen to highlight my brow. It’s also not particularly hard to duplicate.
Bottom left – I know a few of you are going to be cringing when I tell you just how old MACHaux is. It’s the very first MAC eyeshadow that I bought when I was 12 years old (which makes this shadow 18 years old!) I know what you’re thinking… hasn’t it expired yet? And I can guarantee you that it hasn’t. I did re-press the shadow recently with alcohol when it was starting to be difficult to access the shadow as it had run off to the edges of the pan and the alcohol not only disinfects it, but actually slightly softened up the powder. It’s a lovely, easy colour to wear, but since it’s going to take me more than 18 years to use up, I definitely won’t be repurchasing this one!
Bottom right – MAC‘s Cork is one of my lesser used shadows over the years, but I’ve clearly used it enough to hit the pan along the way! I tend to use it a lot with Ricepaper.
MAC – Parfait Amour, Swish, All That Glitters, Star Violet
Top left – Parfait Amour is one my most annoying shadows. It looks lovely in the pan with its purply-blue duochrome. It looks decent when swatched on my finger. And it looks TERRIBLE when I try to apply it to my eyelids with a brush. I don’t know if I just happened to get a dud, because everyone else seems to love the colour, but I have major problems making this one work (and clearly I’ve tried since I’ve hit pan!) To me it’s nothing but a chalky, unpigmented mess.
Top right – Swish is a colour that I look back on and wonder what the heck possessed me to buy a frosted, shimmery pink eyeshadow. I’m not even much of a pink person! The only way I’ve found to make this eyeshadow look suitable on me is to use it all over the lid withSketch on the outer corner and into the crease.
Bottom left – All That Glitters is a beautiful rose-gold shade that’s very, very easy to wear. My favourite shadows to match it with are Star Violet and Sketch. Definitely picking this one up again when I run out.
Bottom right – I bought Star Violet at the encouragement of an artist at MAC and I’ve loved it since. As I’ve mentioned just above, I love wearing Star Violet with All That Glitters and Sketch.
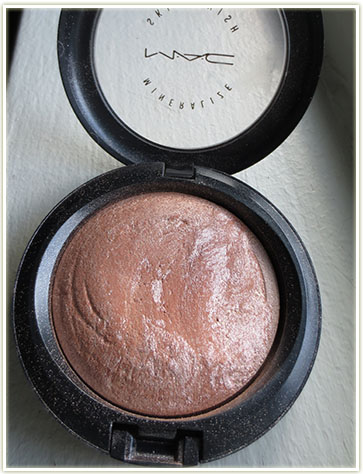
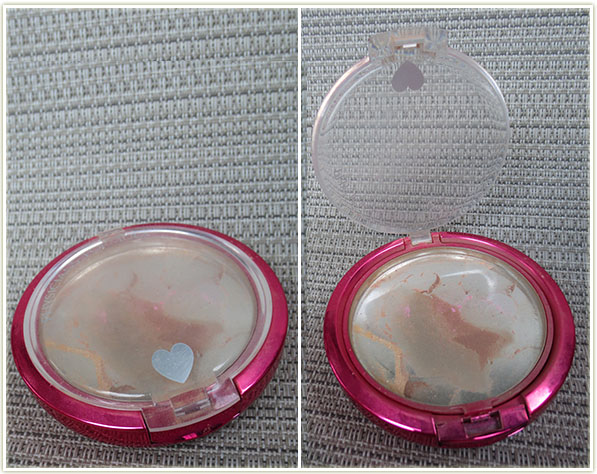
MAC – Soft and Gentle
This one is a bit less obvious, but you can see the very edge of the terracotta pan on the right side of the product. Soft and Gentle is a beautiful highlight that be layered on quite strong to create one hell of a sheen. Since I own about five other highlighters, I’ll be surprised if I ever actually get a chance to finish one of them!
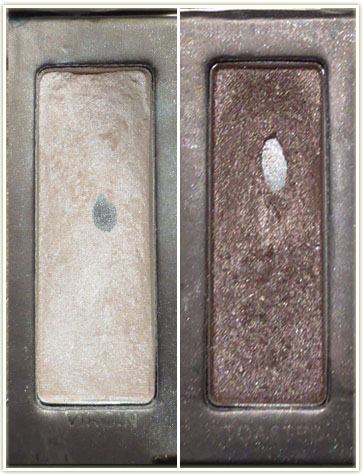
Urban Decay – Virgin, Hustle
I fee like hitting pan on your Naked palette is a rite of passage in the beauty community.Virgin and Hustle are clearly my most used shades from the palette (although I do feel likeNaked and Buck are neverending shadows because I swear I use them as much as these two!). I quite prefer the sheen of Virgin when I compare it to MACShroom, although I know a lot of people feel they are dupes for on another, I personally don’t agree. To me, Virginhas a much softer, creamy side to it. Shroom is lovely, don’t get me wrong, but overall I prefer Virgin.
MAC – Crystal Avalanche, Print
Getting really down there on these ones! Crystal Avalanche is a very shimmery, frosted white shadow that I tend to use a lot in conjunction with Print. (I’m not ashamed to admit that I’ve been trying to replicate LL’s look from Freak Friday for the past ten years or so with this combination!) Print is a charcoal grey that can be a lot easier to wear, and blend, than a straight black.
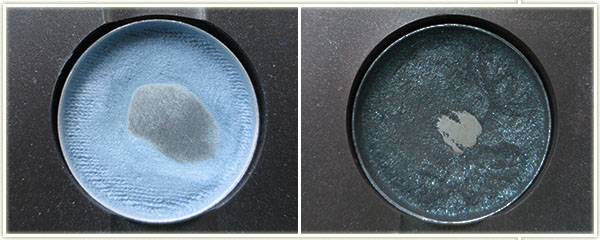
MAC – Fade, Moonlight Night
Fade is a pale baby blue that I picked up many moons ago. I’ve since dropped it and re-pressed the shattered remains (hence the odd crosshatching on the shadow). It’s a smooth colour, slightly sheer… but wearing baby blue these days is not really an easy thing to do!
Moonlight Night is a pigment I pressed from a MAC Christmas collection several years ago. The colour itself is a very dark, almost black, teal pigment with bright teal microshimmer. Beautiful colour, but the shimmer does have a tendency to fall out quite a bit. Of course, since this is a pigment, I have a lot more sitting in a jar.
So those are all the products I’ve currently hit pan on! Have you hit pan on anything recently?
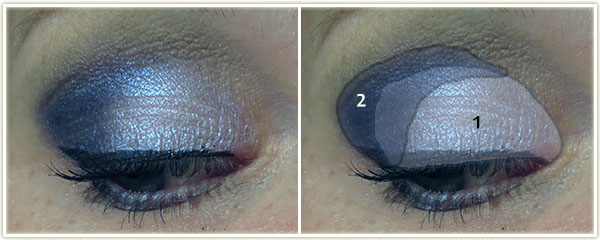
Hey everyone! I’m going to try something new and insert diagrams for the eyeshadow portion of my looks – let me know if you find them useful (or not!).
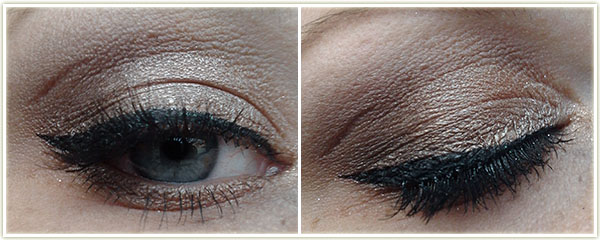
I did this look in an attempt to look Christmas-y themed for an event we were having mid-day at work without going too over the top. I did get a few looks regarding the crystals, but once people clocked on that it was for the event, it didn’t seem quite as odd to them! Having recently bought the Too Faced “A Few of my Favorite Things” palette, I wanted to make use of it right away!
Eyes: (All Too Faced)
Tinsel was applied to the inner two-thirds of the lid.
Evergreen was applied to outer third and swept slightly into the crease.
Chocolate Milk was blended into the crease.
Cream Colored Ponies was used to highlight the brow with MAC‘s Silver Dusk layered on top.
I then used MAC‘s Blacktrack fluidline to create a winged liner and applied L’OrealVoluminous Carbon Black to my lashes. The rhinestones were from a craft store and I usedDuo lash adhesive to get them to stick to my skin.
Lips: MACBrick lipliner with Russian Red lipstick on top.
Cheeks: Too FacedMelt Into Spring with DiorAmber Diamonds to highlight.
Face: Bourjois Healthy Mix Serum foundation in 52 Vanilla
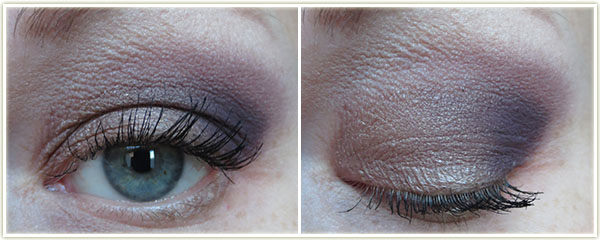
I loved this look! I wanted to wear something a bit more glitzy to go see Catching Fire (although really, I should’ve gone for an oranger/red theme@) and this is what I came up with.
Eyes:
InglotAMC Shine 28 over the lid and on the inner two-thirds of the lower lid.
Sleek Ink on the outer third of the lid and blended into the crease. I also applied it to the outer corner of my lower lid.
MACBrule was used to highlight the brow. I then used MAC‘s Blacktrack fluidline to create a winged liner and applied L’OrealVoluminous Carbon Black to my lashes.
Lips: NYXVanilla Cream Pie
Cheeks: TarteDollface with MACSilver Dusk to highlight.
Face: No foundation.
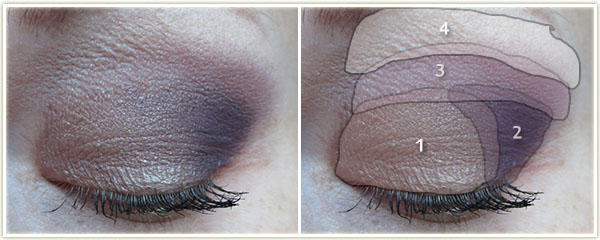
More messing about with Laura Mercier‘s Artist (2013 edition) palette.
(All Laura Mercier)
Bamboo all over the lid.
Violet Ink in the outer corner.
Plum Smoke throughout the entire crease.
Vanilla Nuts to highlight the brow.
As per usual, L’OrealVoluminous Carbon Black mascara on my lashes.
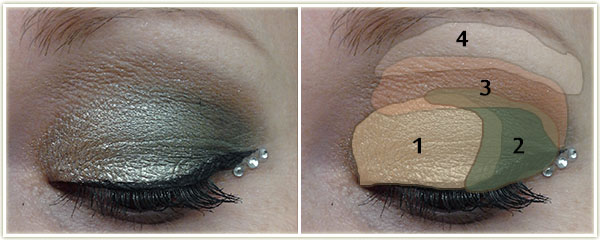
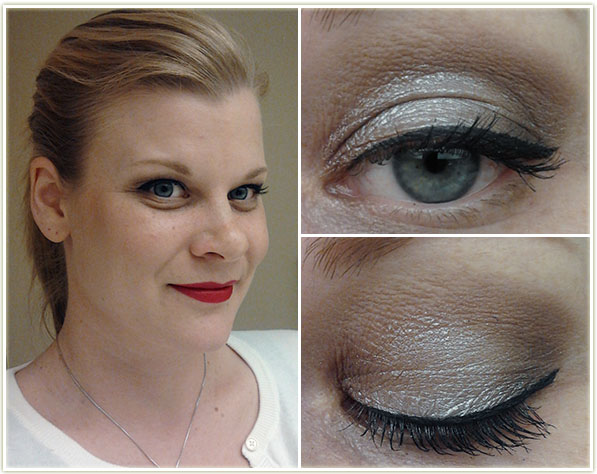
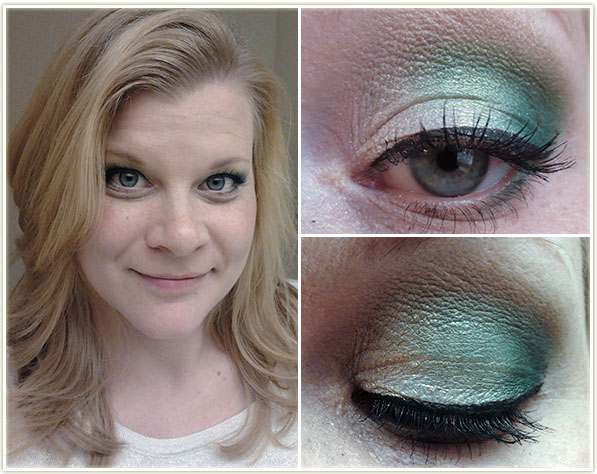
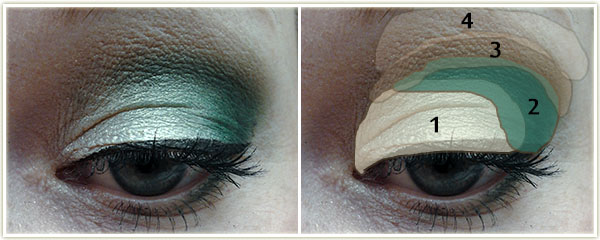
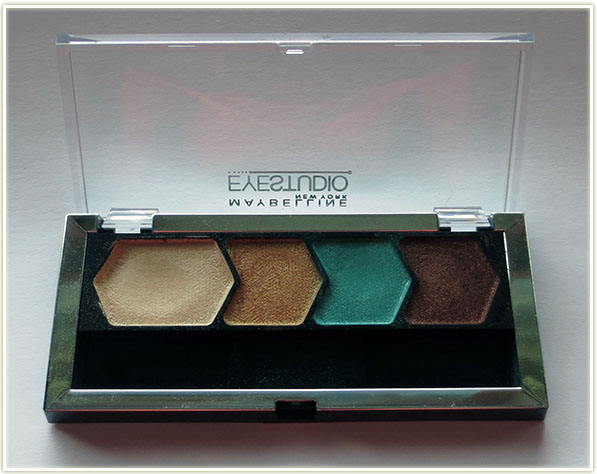
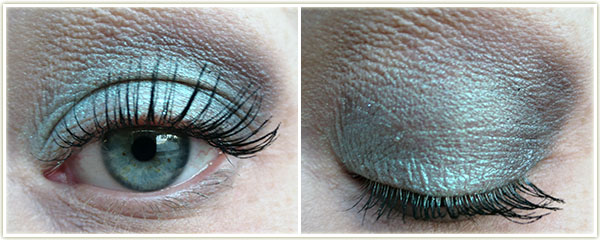
I love how the iridescence of the white-gold mineral eye shadow makes the matte green actually sparkle. Beautiful colours.
Eyes: I first applied NYX‘s Jumbo Eyeshadow Pencil in Milk all over the lid because I feel I really need a sticky white base for the mineral shadow I’m about to apply next.
Using the lighter, white-gold side of MAC‘s Burning: Illusionary Ambition duo, I applied that shade all over the lid.
SleekFern was applied into the outer corner and blended into the crease. Fern was used to line the outer half of the lower lash line.
I blended Urban DecayNaked into the upper crease to blend out the green shadow.
MAC Brule on the brow bone.
MAC‘s Blacktrack fluidline to create a winged liner and applied L’OrealVoluminous Carbon Black to my lashes.
Lips: Nothing
Cheeks: Physicians Formula Happy Booster Blush in Natural
Face: Bourjois Healthy Mix Serum in 52 Vanilla with Physicians Formula Bronze Booster in Light to Medium.
This is one of two staple looks that I have (‘ll post the other one at a later time). This is the more rushed, “need to get out the door” look. This look was predominantly created so I could finally finish up Haux, my oldest MAC shadow.
Maybelline Color Tattoo in Barely Beige all over the lid.
MACHaux in the outer corner and blended into the crease.
MACBrule to highlight the brow and blend out the crease
Topped it off with L’OrealVoluminous Carbon Black mascara.
The Perfect Palette Tag is one of my favourite tags going around YouTube and various blogs. So what makes my perfect palette? Let me tell you!
Best Packaging
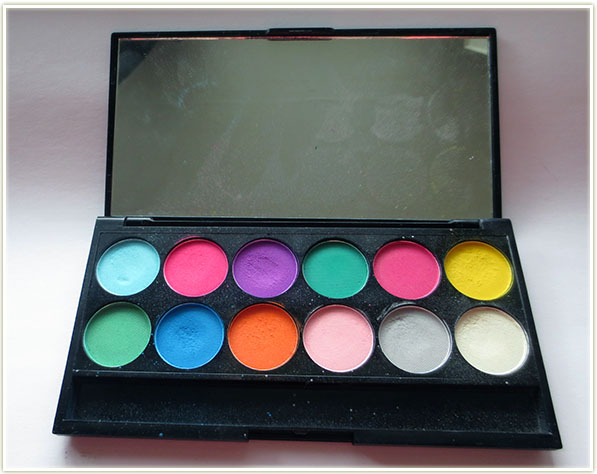
Hands down, the best packaged palette goes to Sleek and their 12 pan eyeshadow palettes. While I do have one of their brightest palettes pictured below (Mattes V1), there are also a myriad of other palettes to own that have different colour combinations in the exact same packaging.
So what makes this palette packaged so perfectly? For starters, there’s not a lot of wasted space (aside from the slot for the eyeshadow sponge that comes with the palette). The packaging as a whole is rather slim and compact. It clicks shut, so you know it’s definitely closed and won’t pop open if you happen to be carrying it around. There’s also an overall feeling of sturdiness to the case, which, given that it’s a drugstore palette is pretty outstanding. Not to mention the mirror is absolutely huge! To give you an idea of size, it’s about 60% the length of Urban Decay‘s Naked palette and half the height! It’s super thin and if you have multiples of these, they stack really nicely.
Best Colour Payoff
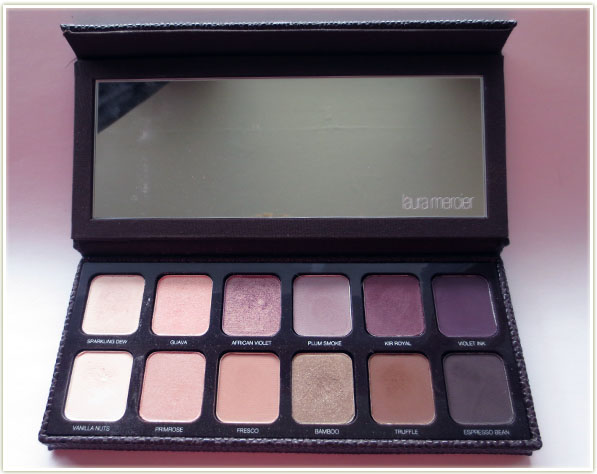
While this palette is new to me, it’s shown me just how good the quality of Laura Mercier‘s products can be. The Artist 2 palette has six matte and 6 shimmery shades, making it one of the easiest palettes to throw a look together quickly. The mattes are soft to the touch and blend smoothly (they remind of MAC’s Matte2 finish). The shimmery colours are intense – the dimension in the shade African Violet is especially impressive.
Most Versatile
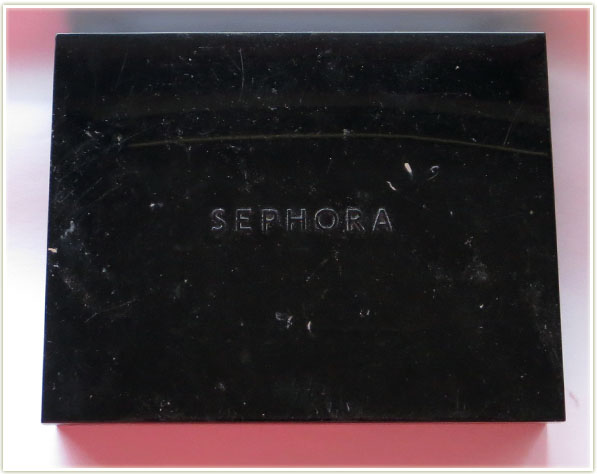
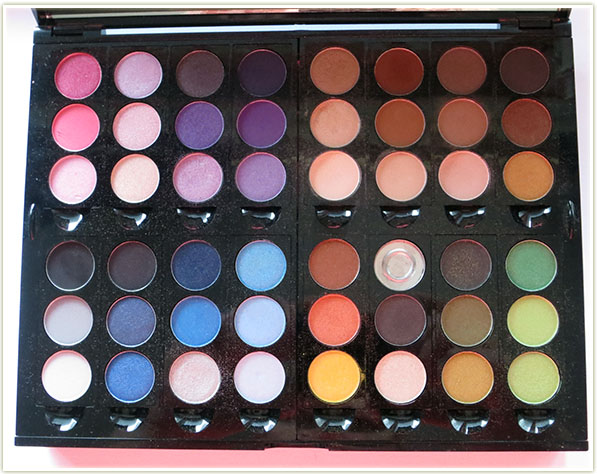
This one was kind of an obvious choice for my most versatile palette. Sephora‘s Smoky Studio 2 has the biggest colour range out of all the palettes I own. It even has a set of lip colours underneath the shadows. However, because the palette is so large, it doesn’t make it particularly easy to travel, despite how versatile it is.
(As a note, it does come with a pop-out packaging for travel where you can pick out sets of three sets of 3-eyeshadow columns and insert them into the package for travelling.)
Best for Travelling
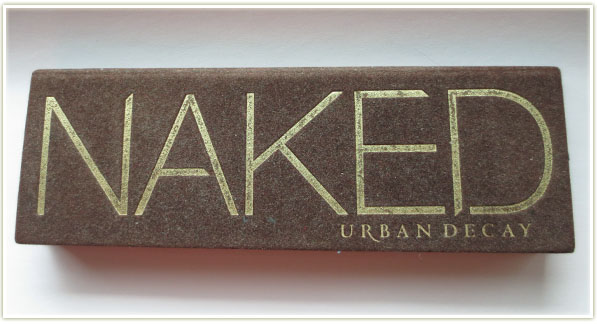
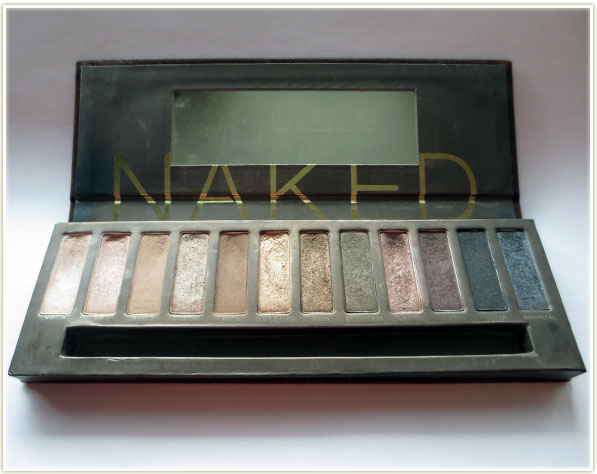
The original Urban DecayNaked palette has come with me on every vacation and every long weekend I have gone on since I got my hands on it. It’s been to France, Ireland, England and the US, to name a few. And not once has it failed me!
I’m finally starting to hit pan on some of the shadows and I will definitely repurchase this if I were ever to run out. I do usually need to bring a few colourful shades to balance out the complete neutrality of this palette but this is definitely my pick when it comes to travelling with a single palette.
Biggest Regret
Maybelline‘s quad eyeshadow (does this count as a palette?) is probably my biggest regret. Although that really isn’t saying much since this palette was only about $10. While the colours in the quad have lovely pigmentation, I was honestly suckered in by the name (Irresistible Ivy) and by the lovely green shade. Unfortunately, the reality is that I have a dupe for each of the shades in the palette. It’s not the end of the world really, but it’s kind of a bummer.
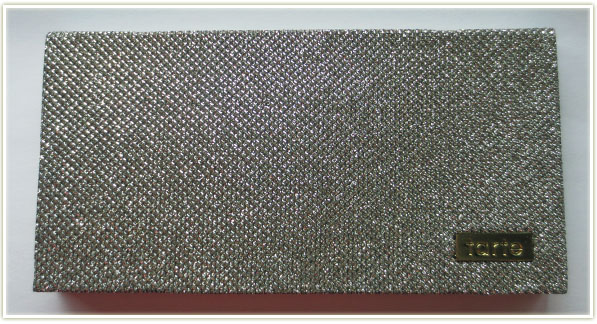
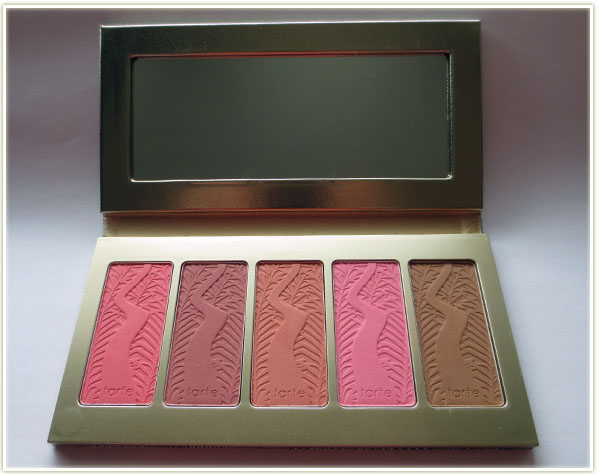
Best Colour Names
Tarte‘s Off The Cuff palette is a very recent purchase for me but I still adore the names. And truthfully, it goes for all of Tarte‘s blushes – I just love the simplicity.
The palette above has the shades Crave, Dazzled, Darling, Dollface and Park Avenue Princess. While you could say the shades are not all that ingenious, I just think they’re really sweet! In particular, the name of the bronzer, Park Avenue Princess, has held my fancy for quite a few years now. Plus the actual palette is called “Off The Cuff“, and it came with a cuff bracelet (not pictured). Come on now – that’s way too cute! (Or obvious, take your pick! 😉 )
(An honourable mention has to go to Too Faced‘s A Few Of My Favorite Things palette which I don’t actually own (yet), but with names like Whiskers on Kittens, how could you NOT love it?!)
Least Used
Right back to Maybelline‘s Irresistible Ivy quad for least used. Too easily dupable, and not something I reach for very often.
Most Used, Most Loved, “Desert Island” Palette
This almost feels too easy. Like Urban Decay‘s Naked palette should’ve had to work harder for this namesake.
Honestly, I feel like it’s a bit of a weird choice for me. In general, I prefer brightly coloured eyeshadow, but if I’m going by the namesake of the question, which is “most used, most loved”, then it has to be this one. This is the only palette I’ve actually hit pan on a few of the shades (Virgin, and Hustle has the faintest whisperings of pan) and the one I always bring on vacation. So just for that alone, this is definitely the one I reach for the most.
The Perfect Palette Tag was created by iluvfaces1042 on YouTube. Be sure to check out their video to see where this tag all started!
I’d love to hear about your favourite palettes! If you have a blog and did this tag, link it below so I can check it out. Or if you don’t have one, just let me know which palettes you own you feel best suit each category in your comment. Thanks for reading!
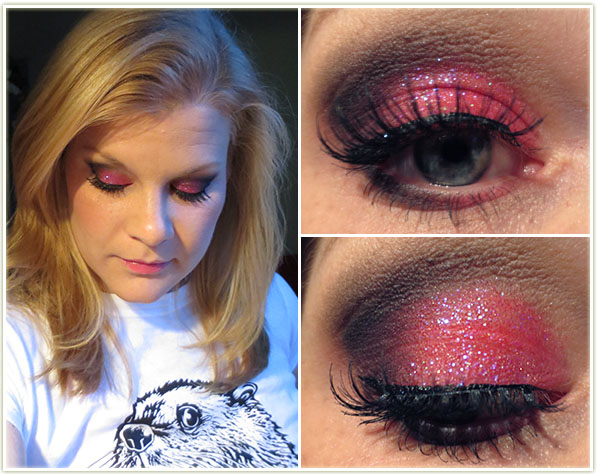
Wore this one out to a concert (Phildel was playing at the Drake Hotel in Toronto – check her out). I’ve been hoarding this pink cosmetic glitter for what feels like eons now (seriously, a friend gave me some of this about ten years ago) and never really thought to wear it because I didn’t used to wear a lot of pink (I still don’t really). For whatever reason, it sprung into my head as I was getting ready for the show so I decided to give it a shot.
Eyes: I used Urban Decay Primer Potion in Original to prime the lid. I then applied SleekPout all over the lid (take a while to pack this on) and then used Urban Decay Blackout in the outer corner and into the crease. To blend out the black, I used Urban DecayBuck at the top of the crease to help blend it into my brow highlight which was MACBrule. I also lined the lower lid with Pout (inner half) and Blackout (outer half).
To add the glitter, I first applied Too FacedGlitter Glue wherever the pink eyeshadow was, then dabbed the glitter over top. I wish I knew what the glitter was, but I don’t as it’s been decanted into an unlabeled bottle. It’s a very transparent pink glitter with a slight blue iridescence.
I then lined the upper lash line with Physicians FormulaUltra Black liquid liner and applied ArdellDemi lashes with some Duo adhesive. To finish off the look I appliedL’OrealVoluminous Carbon Black mascara (waterproof).
Face: Bourjois Healthy Mix Foundation in 52 Vanilla with RevlonBronzed & Chic as my bronzer.
Lips:NYX Butter Gloss in Strawberry Parfait
Cheeks: TarteBlissful
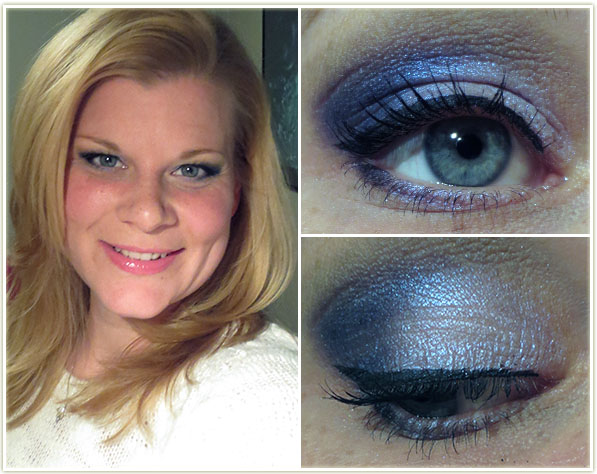
Just a very plain, neutral look.
Eyeshadows: Urban Decay Primer Potion in Original all over the lid and up to the brow. Maybelline Color Tattoo in Bad to the Bronze layered on top of the primer (all over the lid, barely into the crease). I then applied Urban DecaySidecar (be careful with this one, the glitter gets EVERYWHERE) to the inner two-thirds of the lid with Urban DecayHustle in the outer corner and slightly blended into the crease. MACBrule was used to highlight the brow and blend Hustle in slightly.
Liner:Maybelline Gel Liner in Blackest Black
Lashes: Well, according to my notes on this look, I have single lashes glued in, so they would be by Ardell. Good thing I wrote it down, because I wouldn’t have picked up on them from these shots. I used CoverGirl Clump Crusher in Very Black as my mascara.
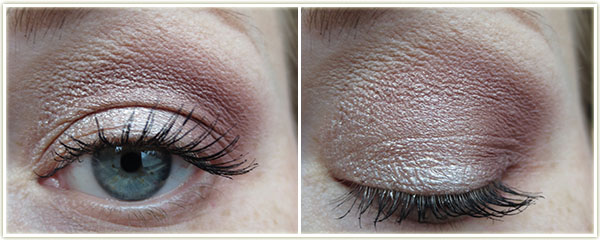
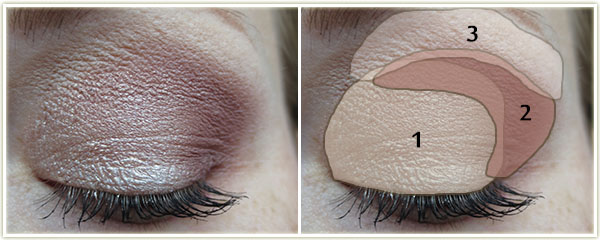
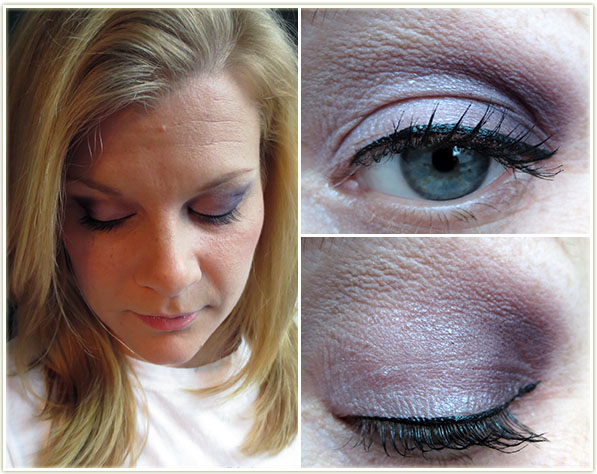
Playing around with my Laura Mercier Artist palette.
Primer: Urban Decay Primer Potion in Original
Eyeshadows: I used the light lavender shade from the MUAPretty Pastels palette all over the lid with Laura Mercier Ink on the outer third of the lid. Laura Mercier Vanilla Nuts was used to highlight the brow.
Liner: Physicians Formula Eye Booster in Ultra Black
Mascara: L’OrealVoluminous Carbon Black (waterproof)
Rest of the Face:
Cheeks – TarteDollface
Lips – NYX Butter Gloss in Maple Blondie
No foundation or bronzer
Just an easy one I did while getting ready for work in the morning.
Primer: Urban Decay Primer Potion in Original
Eyeshadows: Inglot AMC Shine 24 over the entire lid with Urban DecayGunmetal in the outer corner and blended into the crease. MAC Brule as my brow highlight.
Mascara: L’Oreal Voluminous Carbon Black (waterproof)
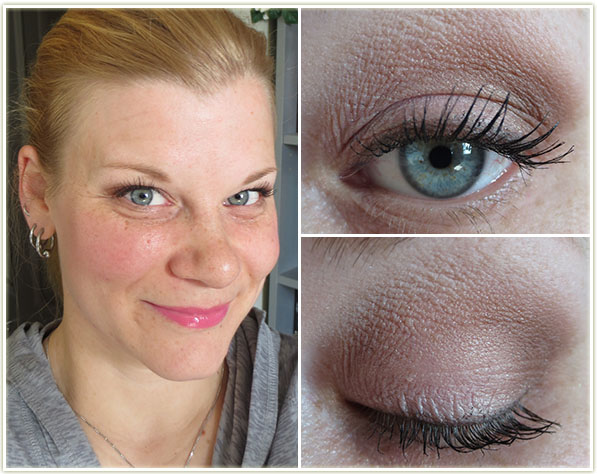
Jeez, this one just looks boring looking at in pictures! Although I’m sure there’s some neutral lovers out there that will prefer this to my more colourful looks.
Eyeshadows: UDPP in Original all over the lid. (All Laura Mercier) Guava all over the entire lid, Truffle blended into the outer corner and through the crease with Vanilla Nuts as a brow highlight. I then pressed Espresso into the lashline to create a soft liner.
Mascara:L’Oreal Voluminous Carbon Black (waterproof)
Come with me, will you, while we rummage through my trash!
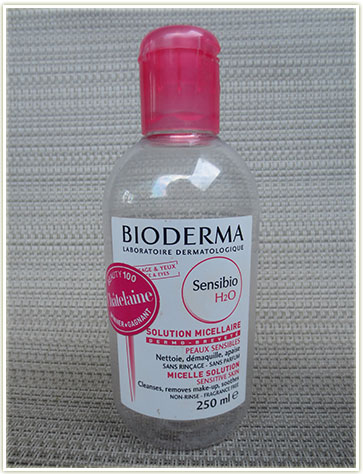
Bioderma Sensibio H20 – Solution Micellaire
Quite an amped up product in the beauty community. I bought this bottle of Bioderma last year and expected miracles out of it. What I got was basically an overhyped makeup remover that didn’t work on waterproof cosmetics as far as I could see. I ended up using this to clean up makeup mistakes and occasionally to remove oil residue from my face (read: after I’d used my other oil based makeup remover to actually remove my makeup). It does work very well for removing lip products, but the taste of this product is so bitter that it made me not want to use it to remove lipstick. For what it did for me, it wasn’t worth the cost. It’s definitely not a bad product, but it just didn’t work as efficiently as my usual makeup remover (Marcelle Eye Makeup Remover – oil based).
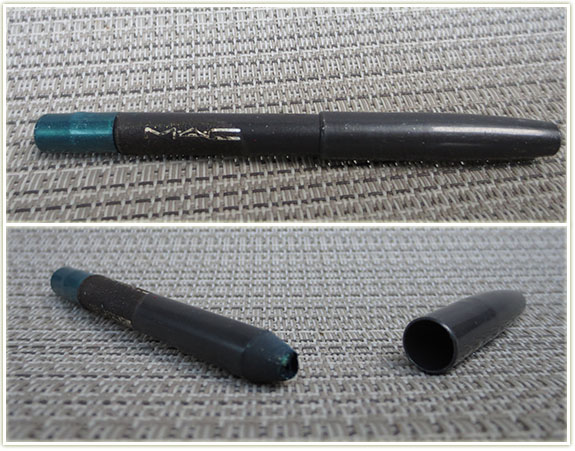
MAC Pearlglide Intense Eyeliner in Undercurrent
You might be asking why does this pencil look so jacked up, especially since it hasn’t been sharpened all the way down to the very nub. Well, the pencil itself is about two years old, and the last time I used it it was becoming harder and harder to apply to my eye. In my infinite wisdom I thought I’d McGyver the crap out of the pencil – melt it down into a little pot and then nuke it in the microwave to soften it up.
This is not what happened.
In the end I succeeded in burning my fingers and burning the product (the actual pencil caught on fire, I kid you not). By the time I got anything out of the pencil, after having smeared most of it on my hands, I had a very hard lump of burnt eyeliner sitting in a tub. By the time it had cooled, the product was so rock hard that I gave up hope and threw it out. Sigh.
That being said? MAC‘s Undercurrent eyeliner is the best eyeliner I have ever owned. It took 2 or more years to dry out, but it was a beautiful colour that almost melted onto the lids when applied. The teal colour of the pencil was shot through with glitter that didn’t flake off. I will definitely buy this particular liner again.
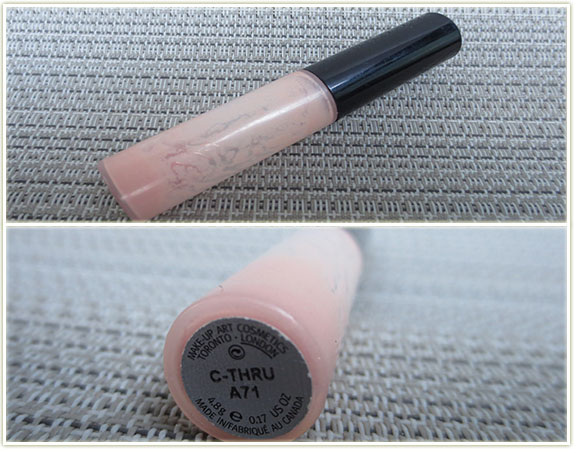
MAC C-Thru Lipglass
I love this lipglass. This is the second tube of C-Thru I’ve finished. There was a bit left, but the scent had started to go off and I didn’t want to risk wearing it any longer. On me, it gives a bit of a milky texture to the lips. It definitely sinks into my liplines and does a nice job of blanking out my lips – I’m aware this sounds utterly unappealing, but I really do like the pale look it gives my lips, particularly when I’m wearing a very intense dark eyeshadow look.
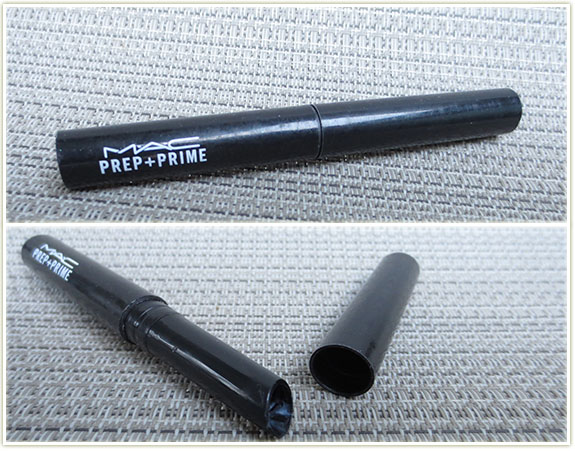
MAC Prep + Prime for Lips
This stuff is AMAZING. I was continually having problems with lipsticks bleeding outside my lip line no matter what I did. Liner, blotting, powder blotting, lip liner brush, edging my lip line with concealer… you name it, I tried it. Frustrated, I finally asked someone at MAC for help and they pointed me towards their Prep + Prime for Lips. I was very skeptical, but I used it with Russian Red the next day and it didn’t budge. I now use it every time I wear lipstick and will never be without it!
As a tip, when I apply this, I apply it not only to my lips, but also slightly outside my lipline so that I fill in any fine lines around my lips that I may have. I also make sure to wait until the product feels tacky on my lips (about 60 seconds after application) and then I apply my lip colour. I find this works a lot better than applying lipstick right after I’ve applied the primer as it hasn’t been given a chance to go tacky yet.
MAC Fix+
I’m trying to think what I actually feel about this product and I’m kind of stumped. MAC Fix+is okay, but it’s not amazing (I’m sure some people are shaking their heads sadly at me right now). I normally spritzed this on my face after I’d applied all my makeup to “soften things up”. Did it work? Maybe. But it also could make my skin look a little too dewy. I also used it to apply mineral eyeshadows or pigments and it will definitely intensify the colour of the shadows… but water does the exact same thing. A lot of people swear by this, but I personally haven’t repurchased it again.
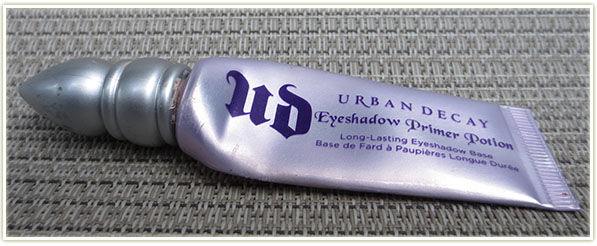
Urban Decay Eyeshadow Primer Potion in Original
Despite being into makeup as far back as I can remember, I had never used an eyeshadow primer until roughly 4 years ago. I couldn’t believe what I was missing out on! Suddenly my eyeshadow was no longer creasing by mid-day! Urban Decay’s Primer Potion was the first one I bought and still the only one I’ve used that I like. (I gave a MAC Paint Pot a shot, but that sucker creased on me pretty quickly.) I am curious to try out Too Faced‘s version, but I’ve been so happy with UD that I’ve been hesitant to even try. The tube above was probably my fourth tube and I already have another one already opened in my collection. For anyone interested, if I apply makeup 5-6 times a week, the tube will last me an entire year!
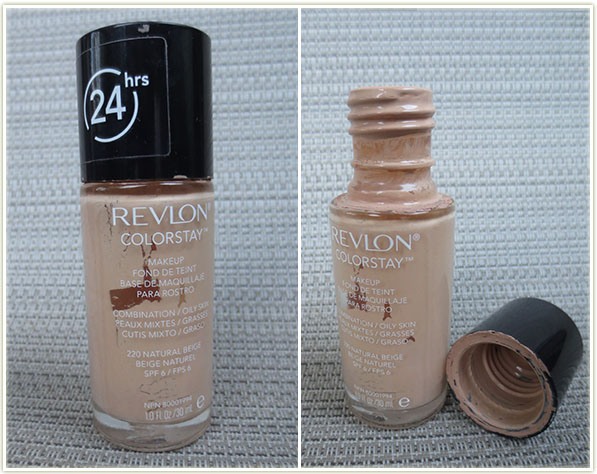
I had an odd relationship with this foundation. At first I hated Revlon Colorstay. It smelled like paint thinner, it felt awkward on my face (although it must be said that when I bought this, it was one of the first foundations I ever owned, so I was not accustomed to wearing foundation frequently) and I wasn’t really sure it was the right colour for my skin. And I’m still not sure it’s the right shade, but no one’s ever said to me it looked odd on my face. I eventually started to experiment with other foundations and stopped using this one… until I realized I still had a lot left in the bottle and I had better get to finishing it.
And suddenly, it was like the product was completely transformed. I suddenly LOVED Colorstay! The shade 220 Natural Beige was definitely not dark enough for the summer months on my tanned skin, but it was good for late spring and early fall as my tan started to fade. I loved the texture on my skin and I loved that it would hold up throughout an entire day. Compared to the other foundations I had started to experiment with, this was like pure gold!
I’ve since bought a lighter shade for the winter months but I’m not quite pale enough for it yet.
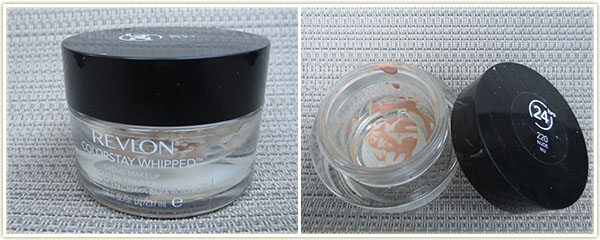
Revlon Colorstay Whipped Creme Foundation in 220 Nude
This Whipped Creme foundation on the other hand, vexed me. First of all, why is THIS foundation called “220 Nude” whereas the one I just finished above, the liquid version, is called 220 Natural Beige. WHY DOES THE SAME NUMBER HAVE A DIFFERENT SHADE NAME? And there *is* a Natural Beige in the Whipped Creme formula, but it’s number 240! It doesn’t make any sense and it’s just confusing for consumers.
I bought 220 Nude last year while visiting a friend (and attending her wedding!) in the US before the product was commercially available in Canada. After much internet research, I settled on this particular shade because I thought it was lighter than 220 – Natural Beige (in the normal liquid version of Colorstay). In the end, I think it’s actually a tad darker and I ended up wearing it throughout the summer. I’m not even sure why I bothered to finish the product, as I didn’t particularly enjoy it although it did have good lasting power. It just didn’t compared to the liquid version I loved so much I suppose. I’m glad I tried it, but I won’t be getting it again.
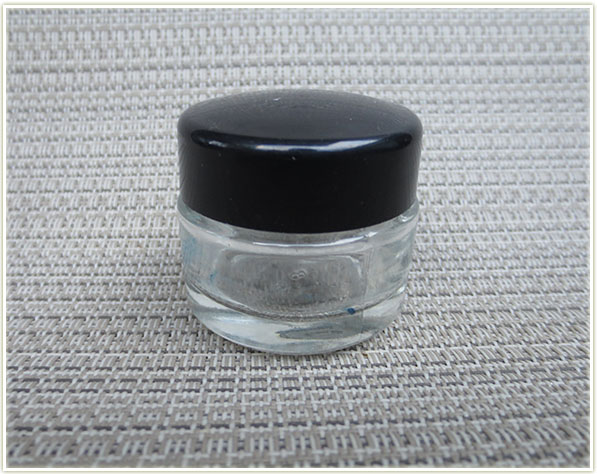
L’Oreal Studio Secrets Professional Magic Perfecting Base
The sticker is gone from the product as I intended to reuse the jar for something else before I thought to throw it in my “Empties” bin, but this is L’Oreal‘s Magic Perfecting Base. It’s not exactly a primer, as it doesn’t actually say it is, but it is supposed to facilitating foundation application. This is one of those products where I really have to wonder if it actually helped with my application. Overall, I’d say no, BUT I did find that it seems to do a pretty good job of smoothing out my pores. I would apply it with my fingertips and smooth it over my skin and it really did feel nice to apply it. That being said, it’s an expensive product and it didn’t do enough to my skin to warrant repurchasing.
Physicians Formula Happy Booster Bronzer in Light
I *loved* this product. Physicians Formula Happy Booster Bronzer in Light was absolutely fantastic on my skin. It was a light tan shade with a slight (VERY slight) silver glow to it and it smelled of lavender. Since all of my other bronzers with shimmer in them are a decidedly golden shimmer, this felt very unique to me. I’m browsing Physicians Formula’s site right now and it doesn’t look like they carry this product anymore. 🙁
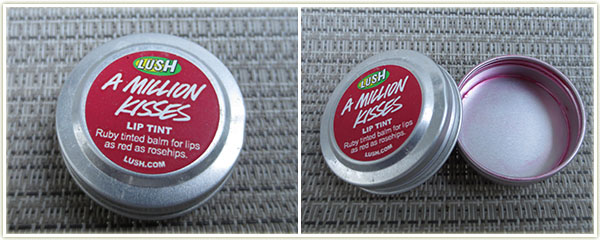
Lush A Million Kisses Lip Tint
I received this as freebie from my mother who didn’t like it that much. I tried it once, twice, and then emptied the thing out of the container so I can return it to Lush later (for a free face mask). A Million Kisses tastes absolutely awful to me. The colour it gives the lips is quite pretty and I wish I could get over the scent/taste, but I can’t, and there’s no way I was going to ever finish that little tub.
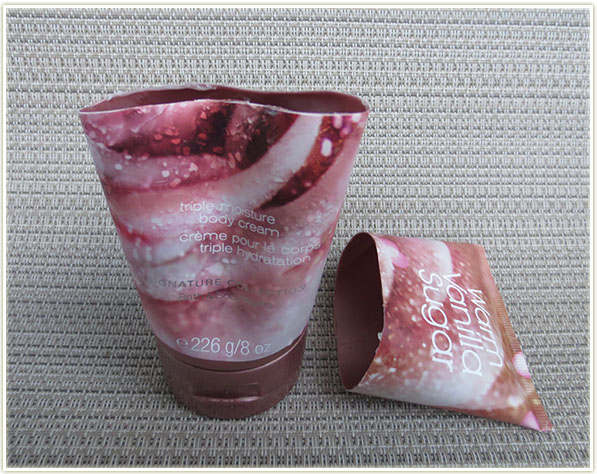
Bath & Body Works Warm Vanilla Sugar Triple Moisture Body Cream
This is my second tube of B&BW‘s Warm Vanilla Sugar in the Triple Moisture Body Cream version. I prefer this over the regular lotion that comes in a different bottle as that one feels too liquidy to me. This cream is thick and smooths into the skin nicely. The scent also has pretty good lasting power, so if you put clothes on right after you’ve applied this product, be aware that it will linger for quite a while – probably into the next day! Will definitely repurchase this at some point.
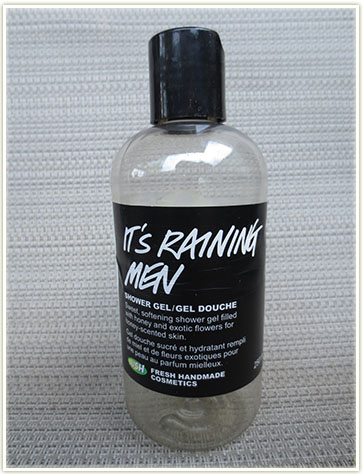
Lush It’s Raining Men Shower Gel
For me, this is a much better choice when compared to Lush‘s Honey I Washed The Kidssoap. It’s the exact same scent, but It’s Raining Men lasts a lot longer than that bar of soap does. I originally bought this smaller 250ml bottle so I could test it out and see how I feel about it. Well, the verdict is in, because the 500ml bottle is sitting in my shower caddy!
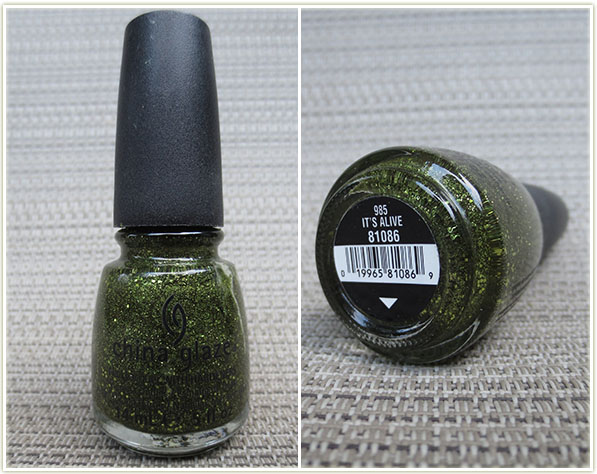
China Glaze It’s Alive Nail Lacquer
This bottle doesn’t look empty, but it has about a third of it left and it’s gone really clumpy and hard to apply. It’s Alive is a polish from China Glaze‘s Halloween 2011 collection and it was absolutely stunning. It would go on smoothly and the chunks of glitter were absolutely gorgeous. It’s a shame the product eventually clumped up, I would’ve like to have kept this another year!
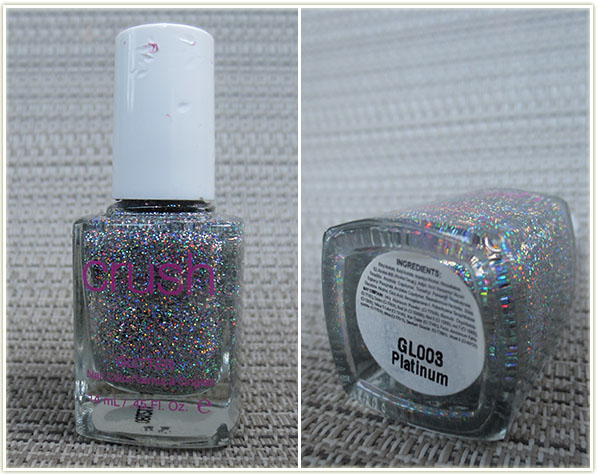
Crush Glitter Nail Color in Platinum
It’s no secret – I always wear glitter nail polish on my toes. I prefer silver, or rainbow/disco ball glitter, and have been doing so since my mid-teens. I don’t stick to a particular brand, but I did end up with three bottles of this Crush brand one (bought it at a Boathouse store, I’ve never seen the brand anywhere else) and this is the last of the bunch. The bottle is actually completely used up, even if it doesn’t appear that way. Since I have no brand loyalty for glitter polish, I probably wouldn’t repurchase again just so I could try something new.
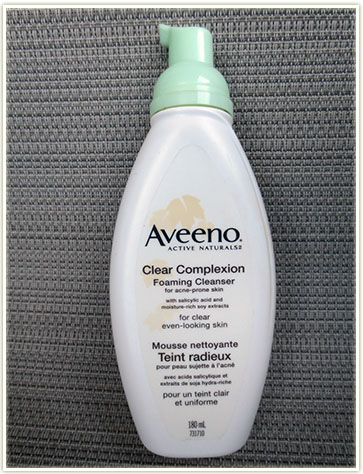
Aveeno Clear Complexion Foaming Cleanser
Not much to say about this other than that this is probably the 15th bottle I’ve owned. I buy Aveeno cleansers on a regular basis (any of them, they’re all excellent) and will continue to do so. They’re gentle on the skin and they smell nice. Winner.
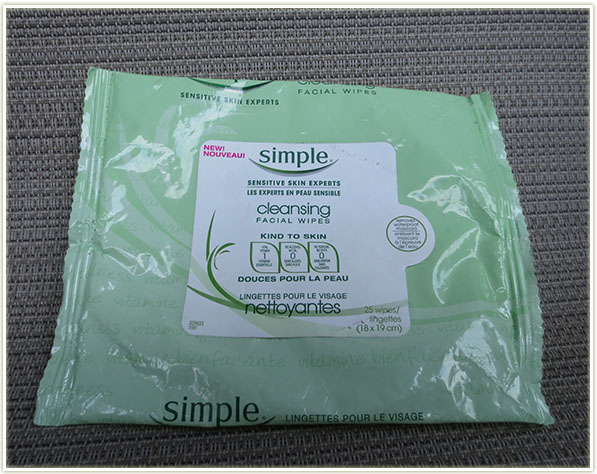
Simple Cleansing Facial Wipes
I’ve seen people go on and on about these Simple Cleansing Facial Wipes as if they were the second coming. My verdict? They work and they don’t smell offensive. Are they my favouritest ones ever?!?! No, but I would repurchase them if they were on sale.
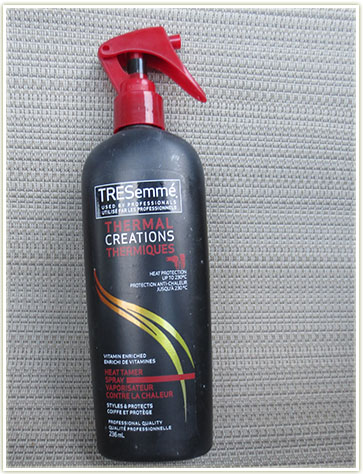
TRESemme Thermal Creations Heat Protectant
I actually have a bone to pick with this TRESemme heat protectant:
It weighs my hair down.
It doesn’t matter how much or how little I use, it ends up making my hair lay flat when I really didn’t want it to be doing that. It also definitely increased the greasiness of my hair which didn’t help my “lay flat” situation either. I’ll admit this is the first heat protectant I’ve ever used, but I’ve never had problems with dry, or damaged hair prior to using this, so I don’t even know what possessed me to buy this product in the first place. (Oh wait, I do know… everyone on YOUTUBE!) I know others seem to enjoy this product, so perhaps it really just wasn’t for me. But I have to ask… does anyone ACTUALLY notice a difference in their hair (in a positive manner) when they use a heat protectant spray? I sure didn’t notice my hair being any healthier than it was before. As a bonus though, it really does smell quite nice. But that’s not enough to make me repurchase this one.
Biore Deep Cleansing Pore Strips
Oh man, these are glorious. Is there anyone out there who doesn’t love Biore pore strips? I’ve been using these for about 15 years now and pulling these strips off my face never gets old. As a note, I use the ones made for the nose on my chin as well. I’ve found that the nose strips seem to have a stronger adhesive which makes the nose ones more successful at pulling out gunk from the pores on my chin as well as my nose. The strips made specifically for chins didn’t seem to have the same effect on me.
Phew! That was it! there was a lot more there than I had expected and I’m happy that I can finally actually throw out some of my trash!


