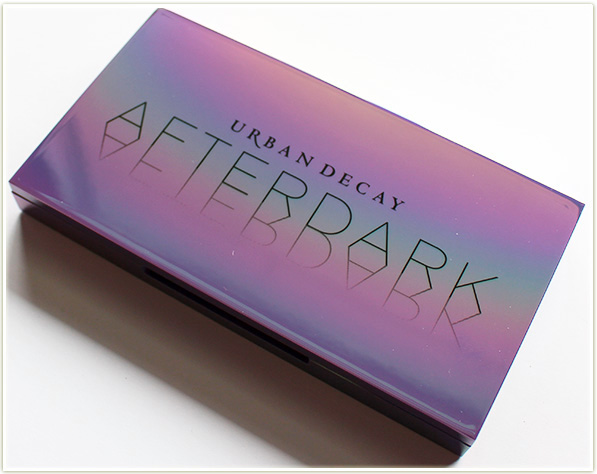
Finally! I’m finally getting my Urban Decay Afterdark Challenge Week up!
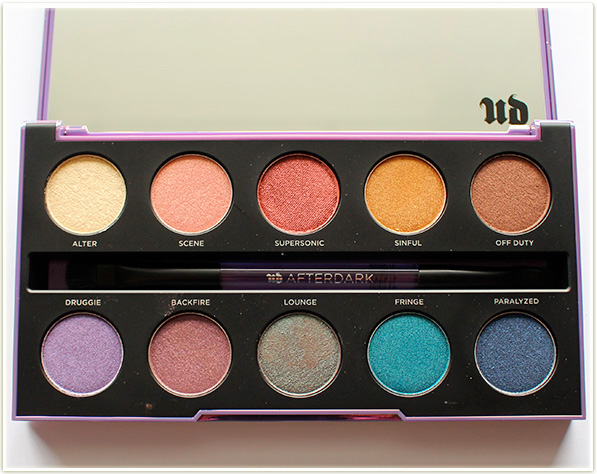
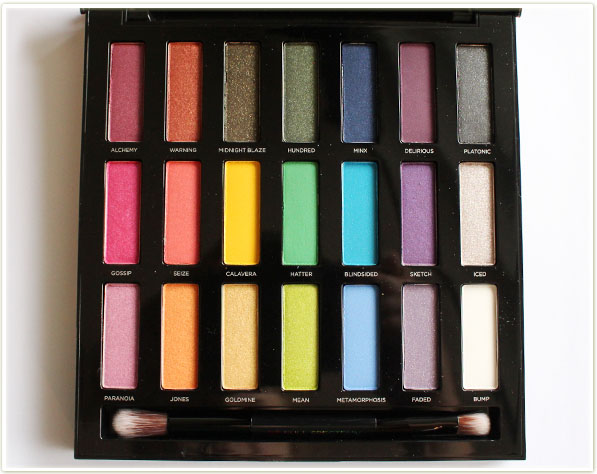
Let’s state the obvious: this is not a standalone palette. You’re going to have to bring in some other shades/palettes if you want to create a cohesive look. For these looks I did my best to stick to the palette without adding much else, but since there are no matte shades, I beg forgiveness from you guys because I had to pull in a crease shade and a matte brow bone highlight!
Urban Decay Afterdark Challenge Week Looks
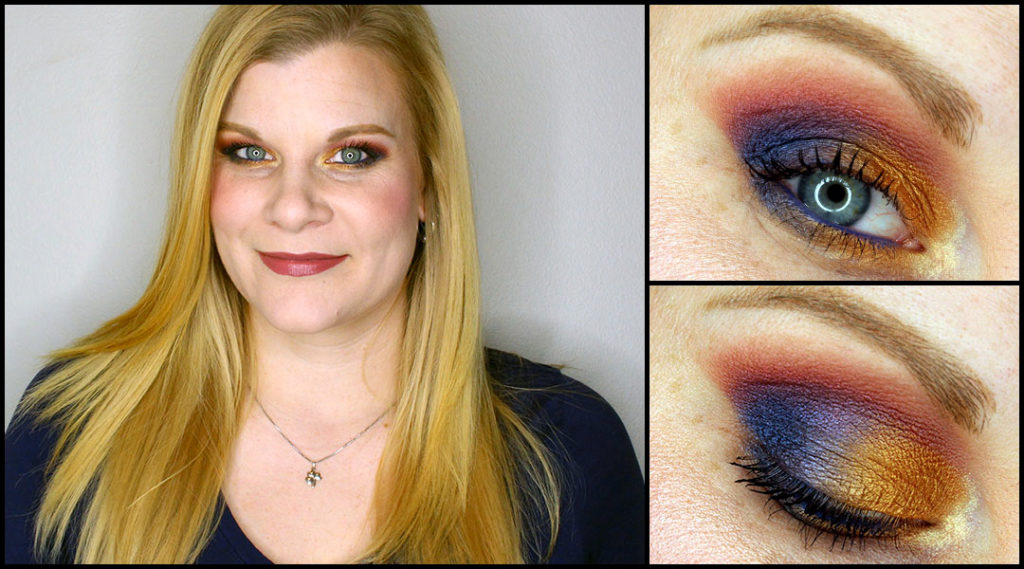
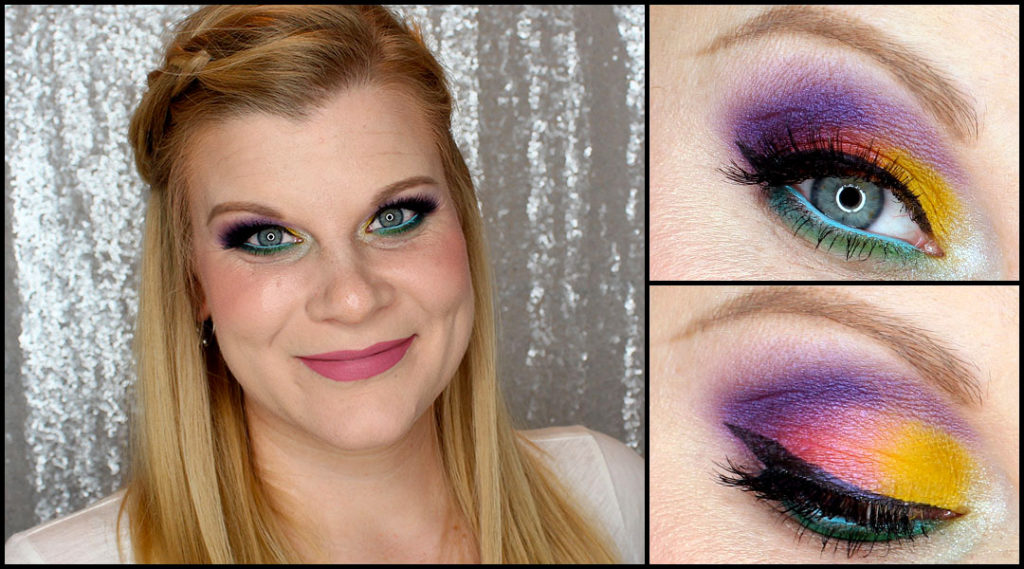
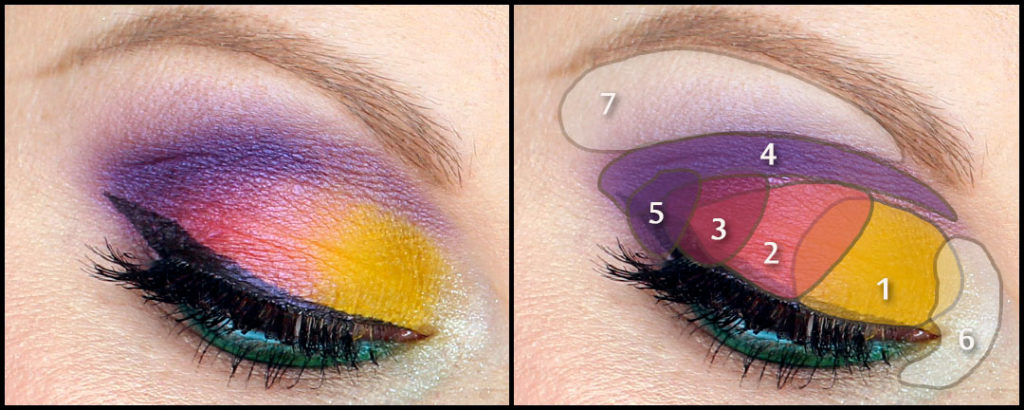
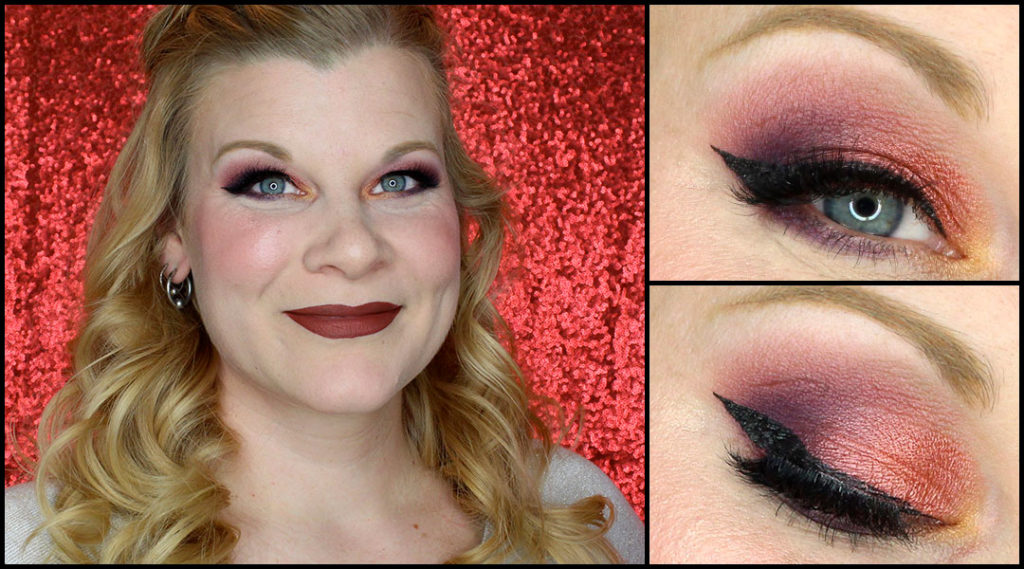
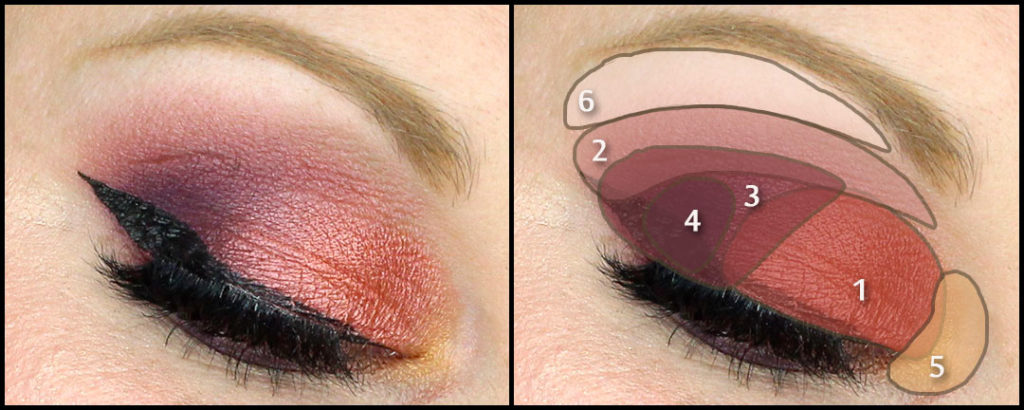
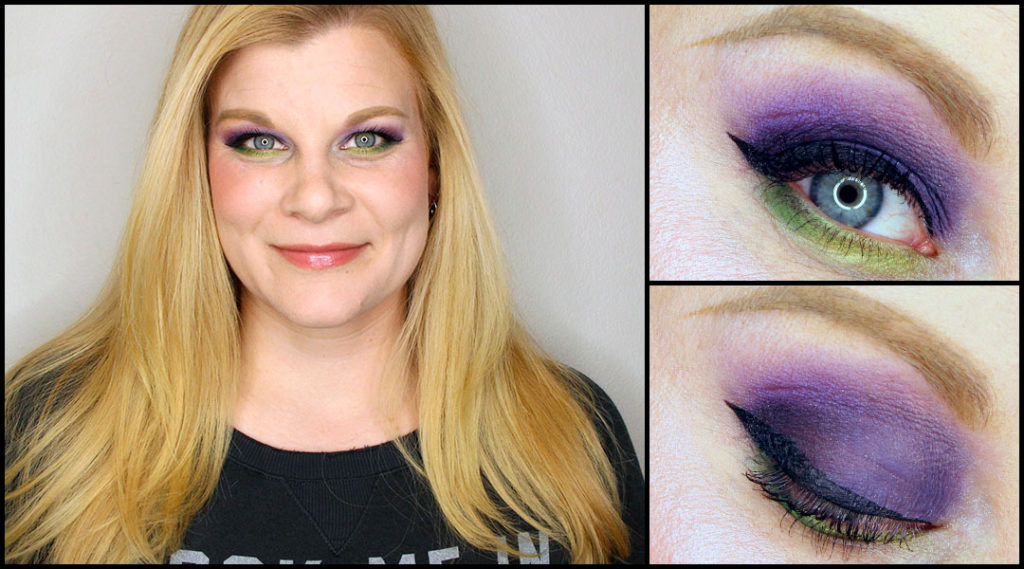
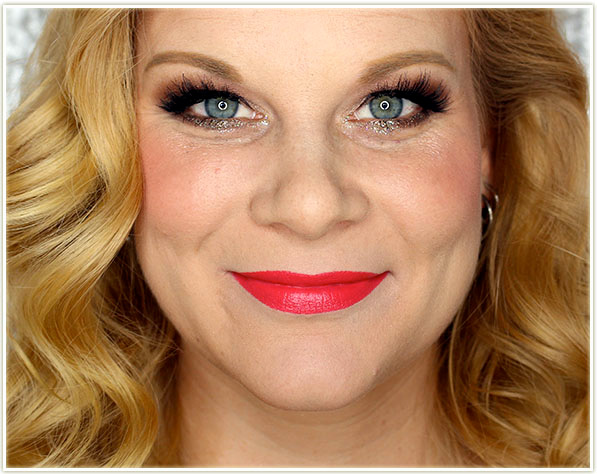
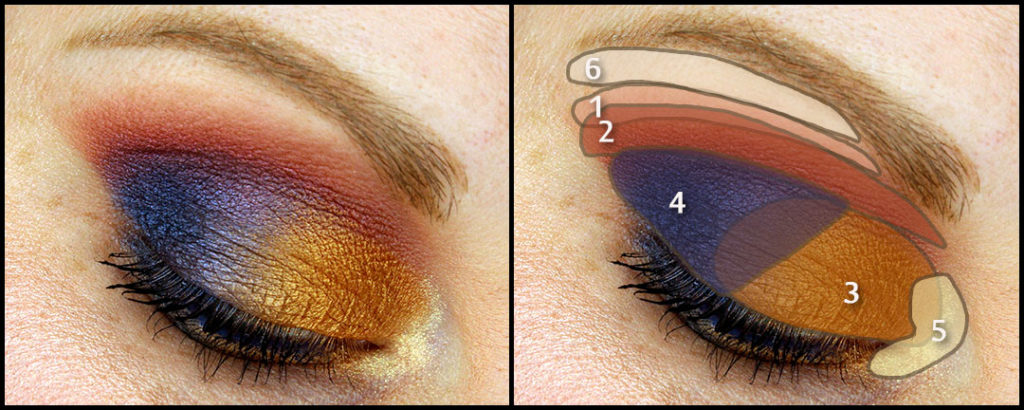
I wasn’t really sure where to start with this palette, so I opted to start with… a lot. It turned out very sunset inspired!
Eyes
- MAC Cork in the crease.
- Supersonic through the crease, layered pretty much on top of Cork.
- Sinful on the lid.
- Paralyzed on the outer corner.
- Alter on the inner corner.
- MAC Blanc type on the brow bone
On my lashes is Maybelline Lash Sensational Luscious Full Fan Effect mascara.
Face
- Foundation: THEFACESHOP Water Cushion in Apricot Beige
- Bronzer: Physicians Formula Butter Bronzer
- Blush: Cargo Mendocino
- Lips: Bite Pepper
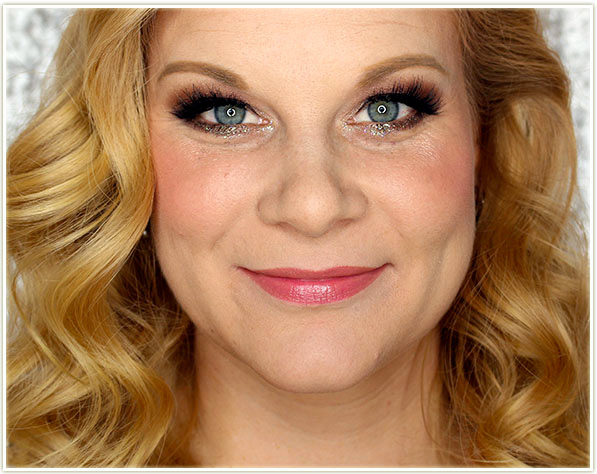
I really, REALLY like the mix of colours in this look. I put it together quickly because I was heading to work, so the look is a little unfinished in the end, but man do I ever love the way these colours look together!
Eyes
- MAC Cork through the crease.
- Backdrop through the crease.
- Lounge on the lid.
- Paralyzed on the outer half of the lid.
- MAC Blanc Type on the brow bone.
On my lashes is Maybelline Lash Sensational Luscious Full Fan Effect mascara.
Face
- Foundation: Maybelline Dream Velvet in 10 Porcelain Ivory
- Bronzer: Physicians Formula Butter Bronzer
- Blush: Urban Decay Bitter Sweet
- Highlighter: Anastasia Beverly Hills Blue Ice
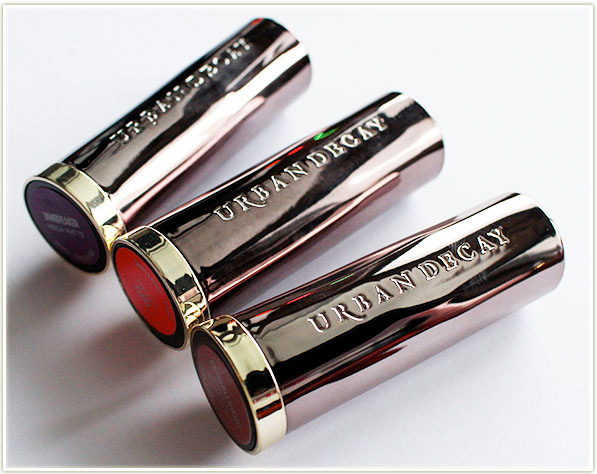
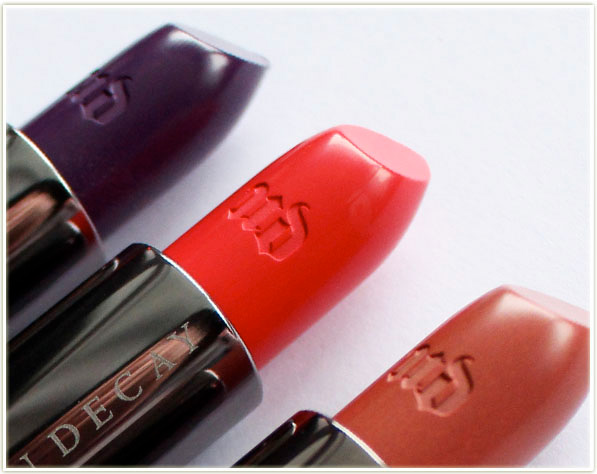
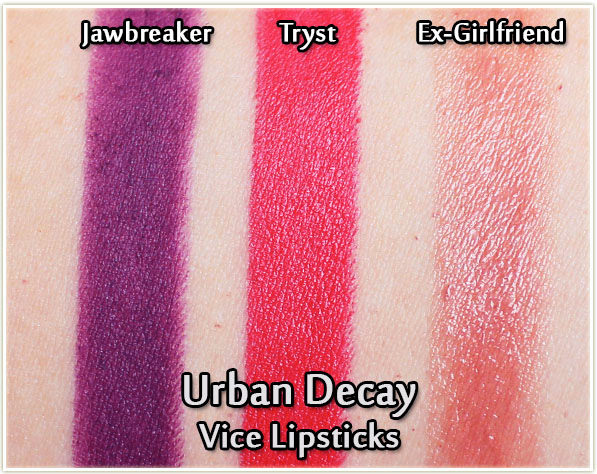
- Lips: Urban Decay Ex-Girlfriend
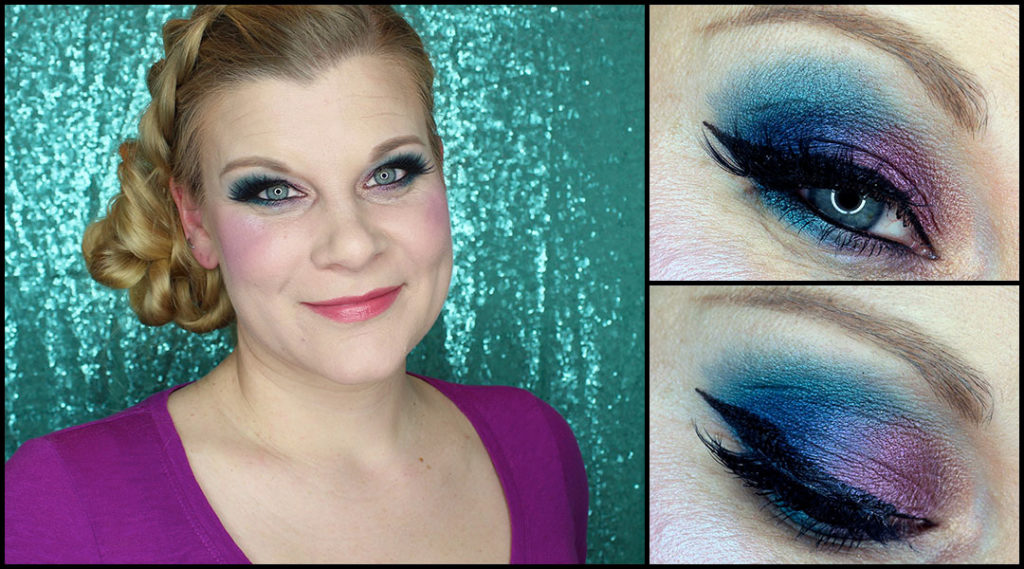
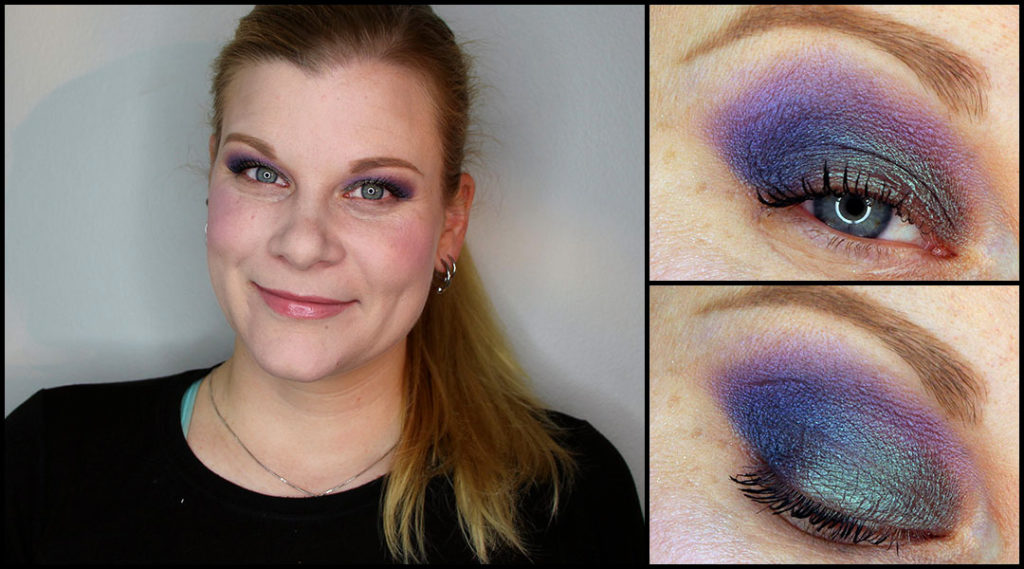
ANOTHER solid colour mix! I’m also totally matchy-matchy because my shirt AND backdrop match the eyeshadow!

Eyes
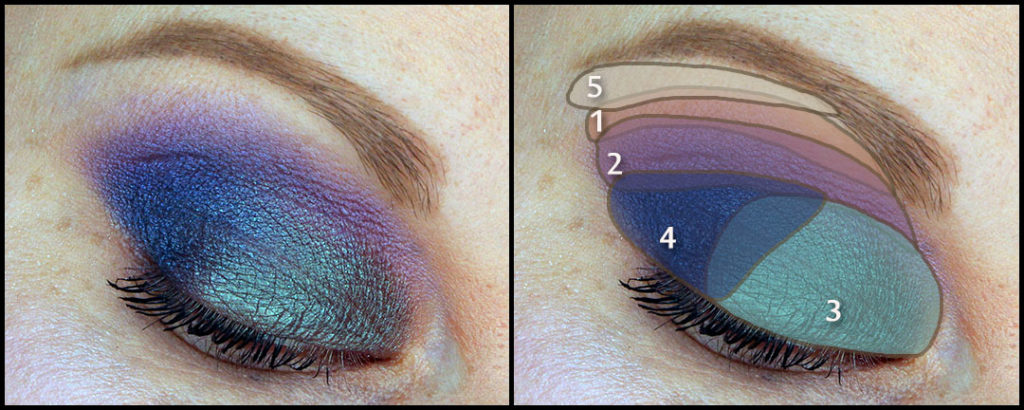
- MAC Cork through the crease.
- Fringe through the crease.
- Backfire on the lid.
- Paralyzed on the outer half of the lid.
- Scene on the inner corner of the eye.
- MAC Blanc Type on the brow bone.
I created the wing with Kat Von D’s Tattoo Liner in Trooper and tightlined my upper and lower waterlines with the Marc Jacobs Highliner Gel Crayon in Blacquer. I coated my lashes with Maybelline Lash Sensational Luscious Full Fan Effect mascara and popped on a pair of Esqido false lashes (probably Lashlorette, but I didn’t write it down so not positive).
Face
- Foundation: Too Faced Born This Way in Porcelain
- Bronzer: Physicians Formula Butter Bronzer
- Blush: Urban Decay Bittersweet
- Highlighter: Kat Von D Alchemist – Blue Saphyre
- Lips: Clinique Crayola Chubby Stick in Mauvelous
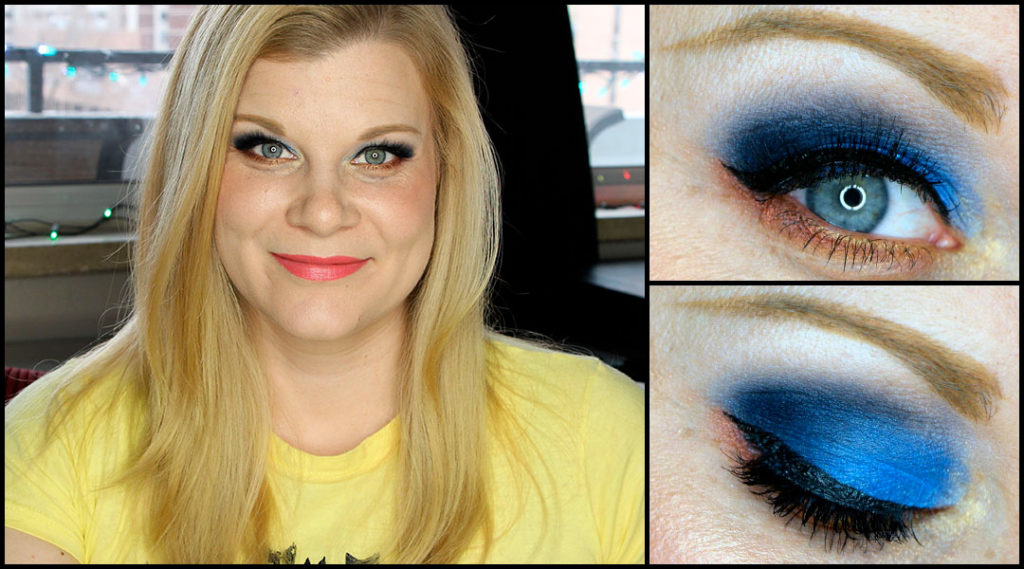
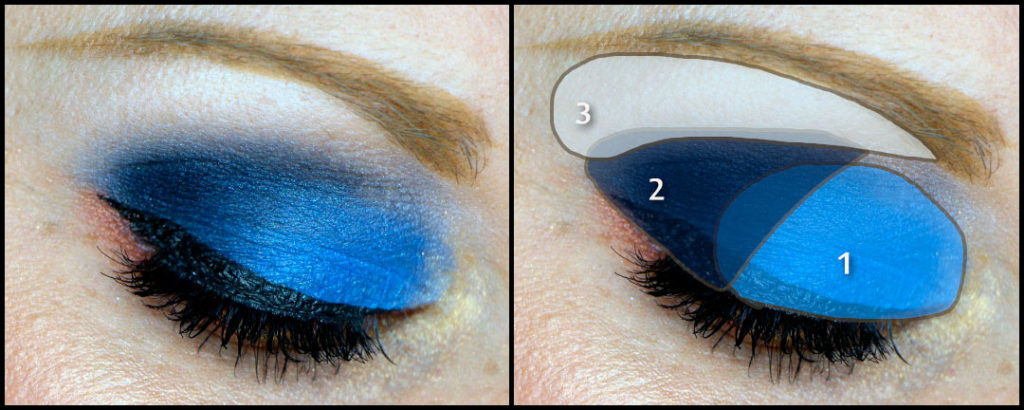
This one was a bit of an experiment. The palette does have some shades that can be used to make a neutral look… but I still wanted some colour in there so I threw the pinky-purple in the crease. The end result is still very neutral though!

Eyes
- Backfire through the crease.
- Scene on the lid.
- Off Duty on the outer corner of the lid.
- MAC Blanc Type on the brow bone.
I created the wing with MAC’s fluidline in Dipdown and coated my lashes with Maybelline’s Lash Sensational Luscious Full Fan Effect mascara.
Face
- Foundation: Maybellime Dream Velvet in 10 Porcelain Ivory
- Bronzer: The Body Shop Honey Bronzer in 01 Light Matte
- Cheeks: Too Faced Papa Don’t Peach
- Lips: Fresh lip balm in Rose

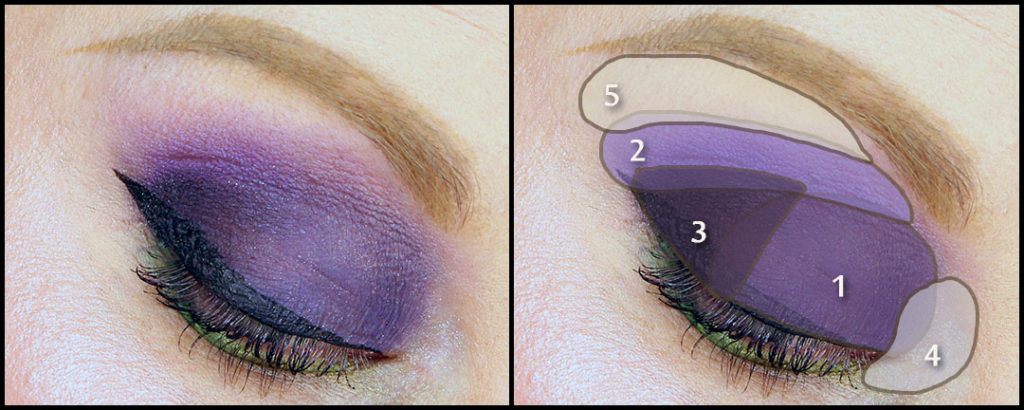
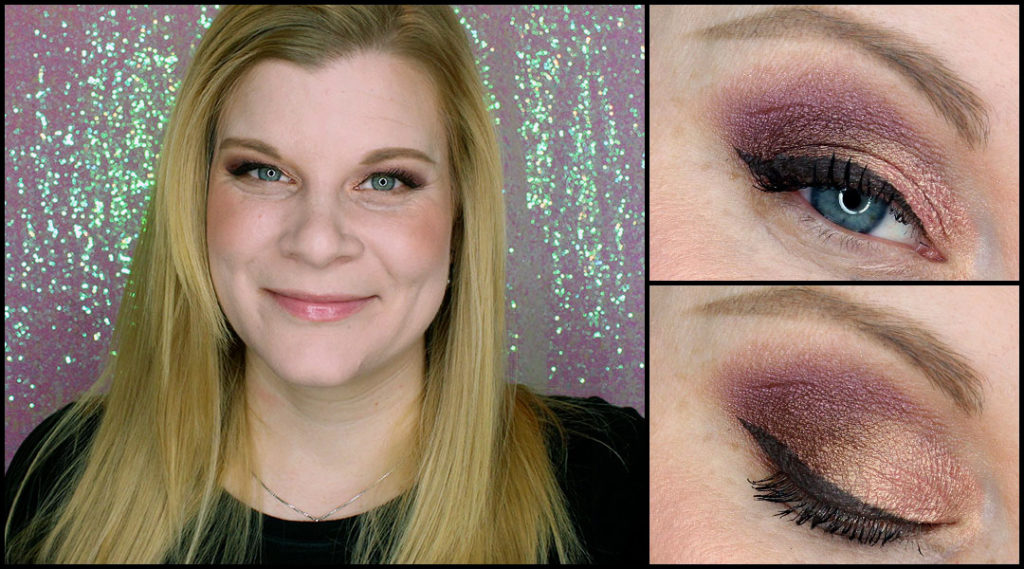
By the time I got to the fifth look in this Challenge Week I was seriously running out of ideas. So I tried to reverse the shades I would normally use in different areas and I think it turned out okay! (For example, I almost never put a red like that on the lid – I usually put in the crease. And vice versa for the purple!)
Eyes
- Druggie through the crease and used to line the lower lash line.
- Supersonic on the lid.
- Backfire in the outer corner.
- Scene on the inner corner.
- MAC Blanc Type on the brow bone.
I created the wing with Kat Von D’s Tattoo Liner in Trooper and applied Maybelline’s Lash Sensational Luscious Full Fan Effect mascara to my top and bottom lashes. I also lined my lower water line with MAKE UP FOR EVER’s Aqua XL Pencil Liner in M-92.
Face
- Foundation: MAKE UP FOR EVER Ultra HD liquid in Y225
- Bronzer: Physicians Formula Butter Bronzer
- Blush: Stila Convertible in Twilight Rose
- Highlighter: Kat Von D Alchemist Holographic Palette – Ultra-Violet Amethyst
- Lips: Tarte Color Drench in Happy
Let me know if you picked up this palette and what colour combinations you’ve come up with that you’ve loved!
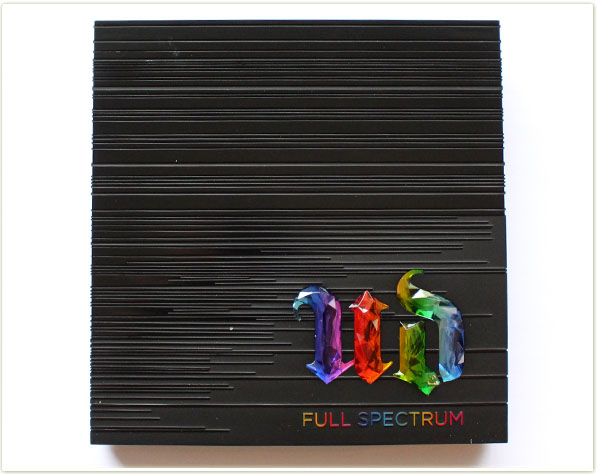
If you want to snag it, the Urban Decay Afterdark palette is $59 CAD on sephora.ca and $49 USD on sephora.com.
Post contains affiliate links.