Tag Archives: Wet n Wild

What I Bought This Month – March 2014 Haul

This is a massive haul. Epic even. I went to the U.S.  for two weeks and it was basically a “no holds barred” kind of deal. I mean… when everything is just naturally cheaper, even when you factor in the exchange rate, what the heck else are you supposed to do? Dive right in, throw money at things and have a damn good time doing it!

So buckle in. This is a big one.
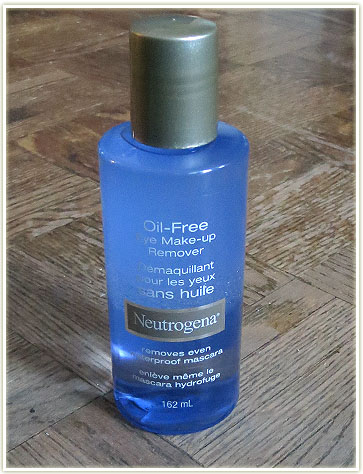
Neutrogena Oil-Free Eye Make-up Remover ($7.99 CAD)

And to start us off… the boring stuff. I haven’t seen my usual Marcelle makeup remover on sale in a while so I decided to pick up the Neutrogena Oil-Free Eye Make-up Remover since it was on sale instead. I’m a bit confused how this is oil free and yet there is two distinctly differently liquids inside that need to be shaken up.  I’ve not used it yet as I have a minuscule amount left in my Marcelle bottle.
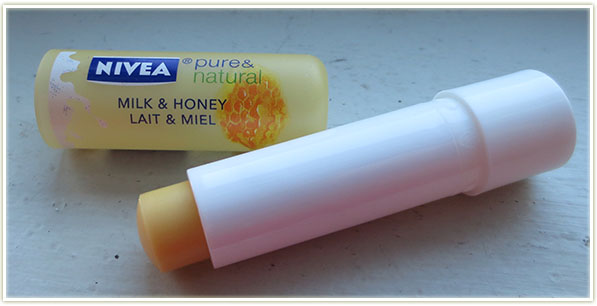
Nivea Milk & Honey ($2.99 CAD)

I bought Nivea‘s Milk & Honey balm specifically for my vacation in March as I didn’t have a lip balm in a tube anymore; they’re all in pots which are really just too messy for travel. It’s okay… nothing overly special though. I’m not over the moon about the scent like a lot of people are, but it’s a serviceable lip balm and that’s all I needed.
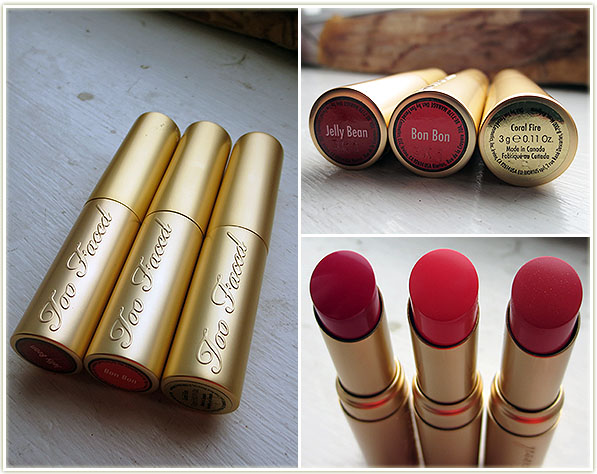
Too Faced La Creme Lipsticks – Jelly Bean, Bon Bon and Coral Fire ($22 USD each)

My first stop in the U.S. was to Sephora. And I dove right for the Too Faced display. I had heard many good things about their La Creme lipsticks but (like a lot of things in this post) the Canadian price tag had made me go “NOPE”. I picked up Coral Fire from their original line and from their spring collection I picked up Jelly Bean and Bon Bon. They are unbelievably creamy and they have a smell/taste unlike any other makeup product I have ever sniffed – it’s lemon-y! I love it! Totally unique and completely unexpected.
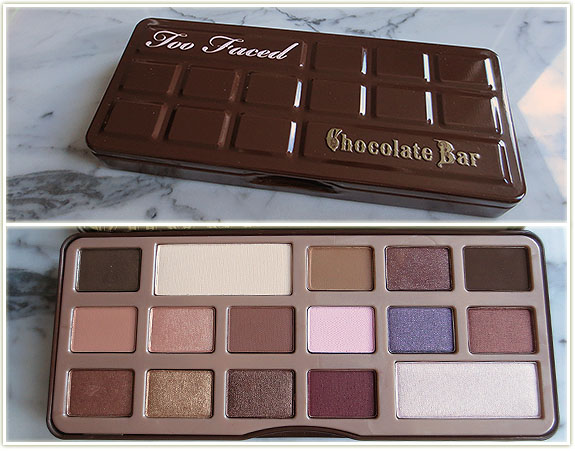
Too Faced – Chocolate Bar palette ($49 USD)

I hemmed and hawed over Too Faced‘s Chocolate Bar palette for a few months. For one, it’s yet another neutral palette and I prefer brights. For two, I have a lot of eyeshadows to begin with. And then the buts started. But it smells like chocolate. But it’s so pretty. But it’s cheaper in the US. But it’s got a matte brow bone shade. But it has more than just neutrals (*cough*notreally*cough*). In reality, I didn’t need it, but I wanted it. I tend to skip over palettes because they’re “expensive” and I could usually buy more items with that money (even if it is less bang for your buck). But I really do like palettes and I want to have more of them and less single eyeshadows. I’m really enjoying this palette so far and probably the most boring shade (Salted Caramel) has been really lovely.
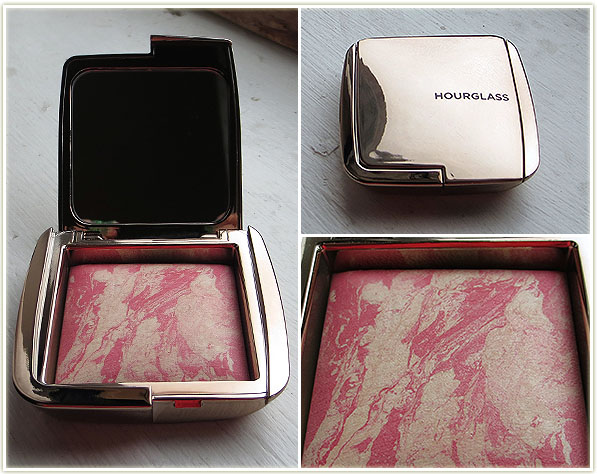
Hourglass Ambient Lighting Blush in Diffused Heat ($35 USD)

The Hourglass Ambient Lighting Blushes are just too pretty to pass up. I’ve heard nothing but good things so I picked up the one that suited my tastes the most – Diffused Heat.  On first swatch I was not impressed at all: The blush is way less coral than anticipated and actually looks mostly pink, a light pink in fact. I was a little incensed, even though I knew that this was supposed to be pretty paled-out considering it’s mixed with a face powder. In the end, the colour is beautiful on me and is an incredibly easy colour to wear. It must be because of the swirled in face powder, but I dare say this blush is idiot proof. I restrained myself to only one in this line… although I really would like more of them…
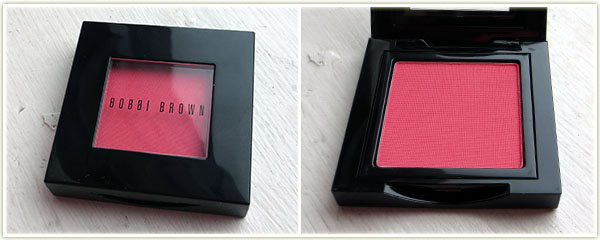
Bobbi Brown – Apricot blush ($25 USD)

Bobbi Brown‘s Apricot blush was what I was expecting Diffused Heat to look like on the skin. I picked this up as it’s been mentioned a few times in Essie Button‘s videos. This is my first Bobbi Brown product and so far I’m impressed. I thought this would be similar to my Illamasqua blushes, but it’s (thankfully) not the same. I *never* get compliments on my blush, but this one garnered instant compliments at work when I wore this.
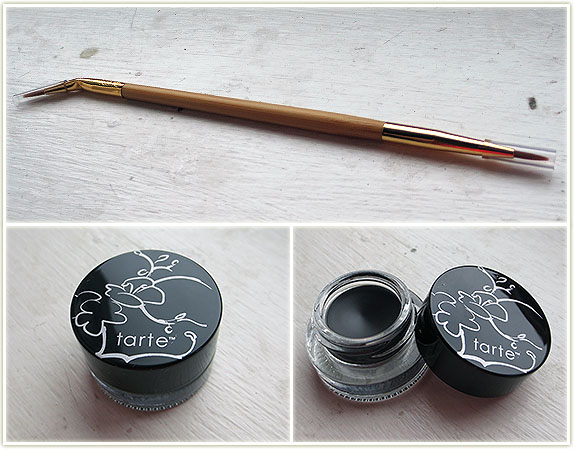
Tarte Amazonian Clay Waterproof Gel Liner in Black ($24 USD)

I picked up Tarte‘s Amazonian Clay Gel Liner in Black because they claim this is waterproof. MAC‘s Blacktrack is definitely not waterproof, and I wanted to give another gel liner a shot since I can’t seem to find a matte black pen style liner. I dare say this is darker than MAC‘s Blacktrack, but it is definitely not waterproof. At least not to the extent that MUFE‘s Aqualiner is (although that’s shiney and so disappointing in that area). I’m pretty pleased that the liner actually comes with a double ended brush that’s actually completely serviceable. Love that little extra.
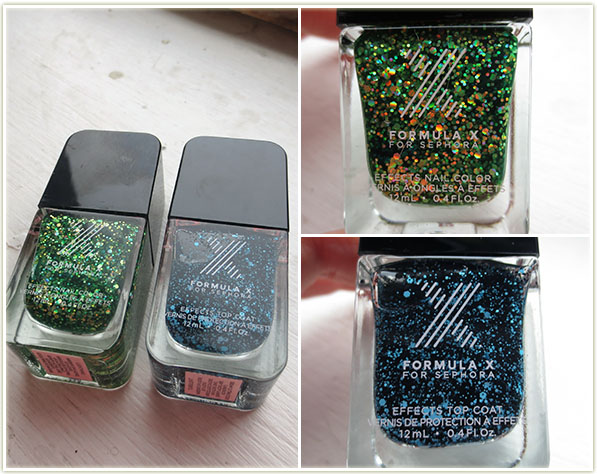
Formula X for Sephora nail polish – Lightning & Turbulent ($12.50 USD each)

I’d heard amazing things about Formula X for Sephora but since I’m not a massive nail polish junkie (I wear it frequently enough, but it doesn’t get me excited like face makeup does) I hadn’t ever really considered picking it up. And at $15 CAD a pop, you had better damn well LIKE it for it to be worth it. Well, I was finishing up my rounds at Sephora and just happened to spot these.

I knew the green (Lightning) was a winner as soon as I saw it, and bought it with St. Patrick’s Day specifically in mind. It’s chockful of glitter in a green jelly base – it. is. STUNNING. The black and blue one (Turbulent) is supposed to be a top coat, but I wear it as is and it’s also amazing. I’m so stunned by how awesome these polishes are that I really, *really* want more. The price tag is a bit over the top, but the ones that I picked out are totally unique to anything I own.
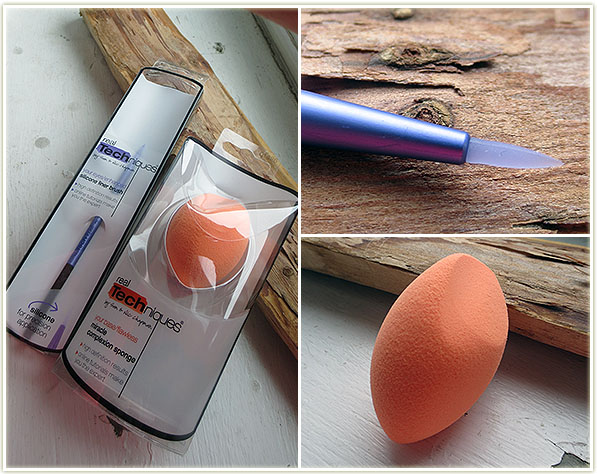
Real Techniques – Silicone Eye Liner and Miracle Complexion Sponge ($5.00 USD each – BOGO 50% off)

Next up, Ulta! They were having several deals so I made sure to take advantage. Real Techniques were buy one, get one half off. I really wanted the dual fiber brushes but couldn’t seem to find them (or they’d been totally wiped out by the sale). Instead I picked up the silicone liner brush (first impression… not great, although it’s a very unique idea) and the miracle complexion sponge (first impression… this is AWESOME).
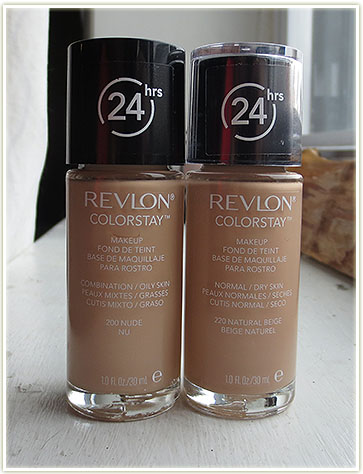
Revlon Colorstay foundation in 200 Nude and 220 Natural Beige ($11.99 USD each – BOGO 50% off)

I need to stop buying other brands of foundation because Revlon‘s Colorstay is by far my favourite. So for that reason, I picked up two shades for when I fluctuate skin colour throughout the spring. I snagged 200 Nude (Combination/Oily) and 220 Natural Beige (Dry Skin, because they were out of the Combination one). I’m curious to see what the actual difference is between the two types.
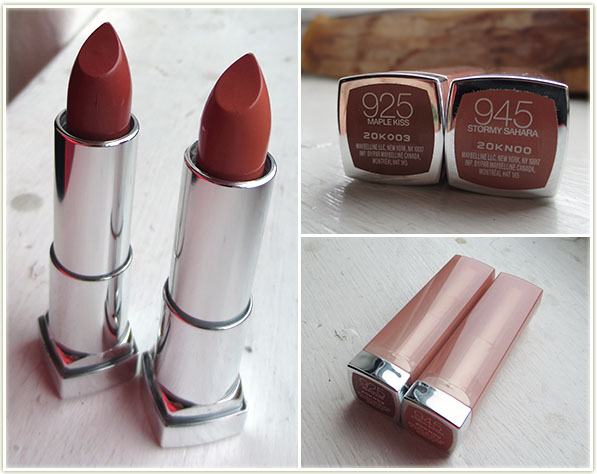
Maybelline lipsticks in Maple Kiss & Stormy Sahara ($7.49 each)

Maybelline‘s The Buffs have been out for a while now buttttttt since Ulta was also having BOGO 50% off at Ulta I waited to pick them up there. Unfortunately, all of the paler shades were sold out, so I only snatched up Maple Kiss and Stormy SaharaMaple Kiss is really brown. Browner than I had expected. But Stormy Sahara seems to be a good neutral on me, although I’ve only swatched it on my lips once.
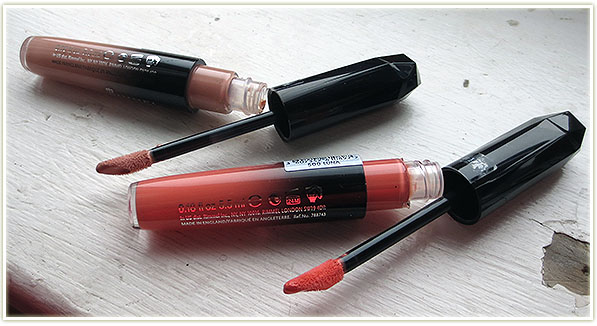
Rimmel Apocalips in Nude Eclipse and Luna ($5.89 each)

Next up are two Rimmel Apocalips (called Show Offs in the U.S.) shades that weren’t released in Canada – Nude Eclipse and Luna. I already love the formula of the three other shades I have, so I’m happy to add to my collection.
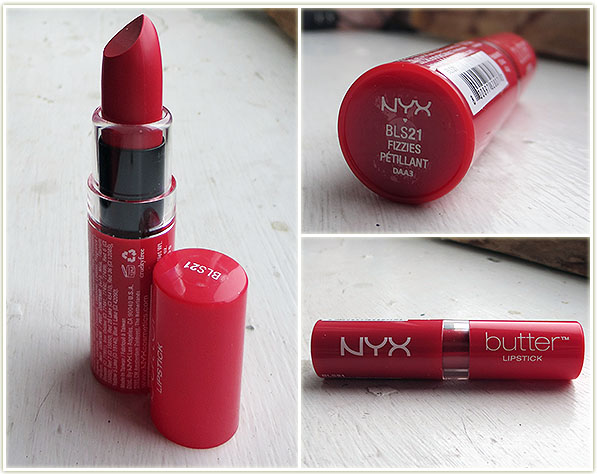
NYX Butter Lipstick in Fizzies ($5.99 USD)

NYX‘s Fizzies was the one Butter Lipstick I knew I wanted for sure from that line. Fizzies is gorgeous, although the texture is a lot less buttery and creamy than I had expected. It actually slides on a bit stiff! That being said, the lasting power is longer than I had anticipated and this particular shade is really, really pretty. I wish I had bought more shades but I tragically opted for more Milani lipsticks instead (further below).
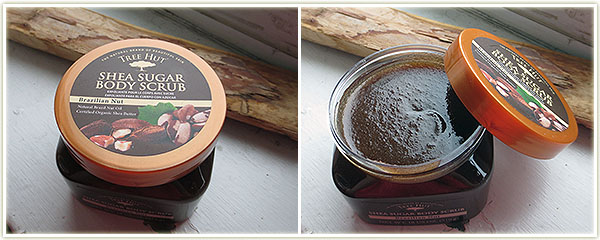
Tree Hut – Shea Sugar Body Scrub in Brazilian Nut ($7.49 USD)

I’ve heard of this brand, but never been able to find it in Canada. Tree Hut‘s Shea Sugar Body Scrub in Brazilian Nut smells so bloody good that I actually want to eat it (funnily enough, it does say “DO NOT EAT” on the tub).
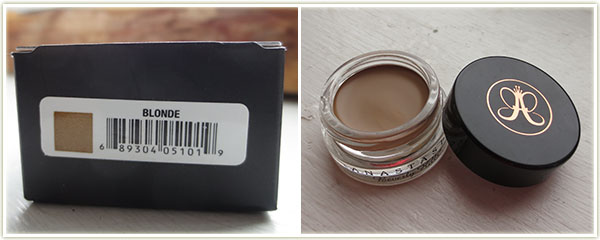
Anastasia’s Dipbrow Pomade in Blonde ($18 USD)

Anastasia‘s Dipbrow Pomade in Blonde was a challenge and a half to find. Sephora didn’t have it. Two Ultas didn’t have it (and one Ulta actually had a note on their Dipbrow display saying they were out of stock indefinitely because the product was in way too high of a demand!). As a last ditch effort, we stopped in yet another Ulta and I managed to get my greedy paws on the last Blonde Dipbrow sitting on the shelf. I’m not much of a brow person – the only brow product I have ever used is MAC‘s Omega eyeshadow to fill them in, so I’m excited to try something new out. I’ve used it once and the colour match seemed quite good.
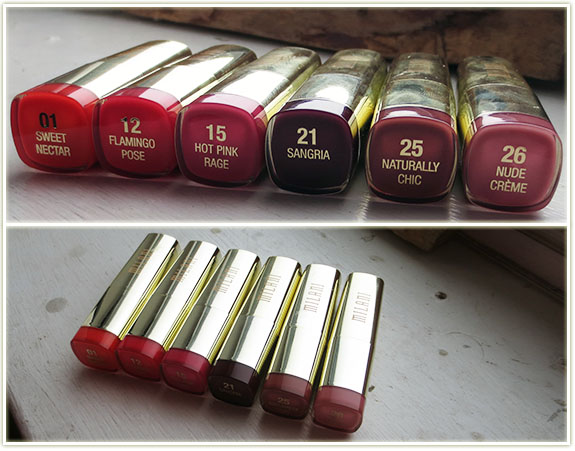
Milani lipsticks – Sweet Nectar, Flamingo Pose, Hot Pink Rage, Sangria, Naturally Chic, Nude Creme ($2.99 – $5.99 USD each – BOGO 50% off)

Well I bought into the hype of these Milani lipsticks – I just wish I hadn’t gotten so many of them.
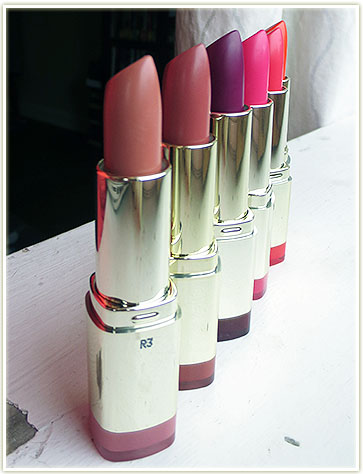
Milani Lipstick Line-up

They smell like fake watermelon and it doesn’t go away on the lips. The colours are beautiful, but they’re actually quite stiff to apply on the lips. They’re sealed in the store so I couldn’t even get a whiff of them before I bought all six of them. Kind of kicking myself now because I would’ve preferred more of the NYX Butter Lipsticks. Ah well.
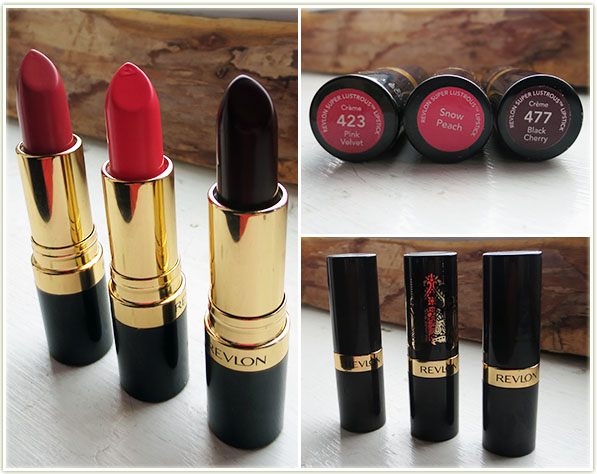
Revlon Super Lustrous lipsticks – Pink Velvet, Snow Peach and Black Cherry ($6.99 USD each)

Hands down my favourite brand/type of lipsticks. Revlon‘s Creme Super Lustrous lipsticks are better than anything I’ve ever tried, including MAC. I got the Black Cherry andPink Velvet at Ulta (again, BOGO 50%) and then had to HUNT for Snow Peach since it’s part of Revlon‘s re-released collection. (Honestly, took about 12 different drugstores before I finally found the display.)
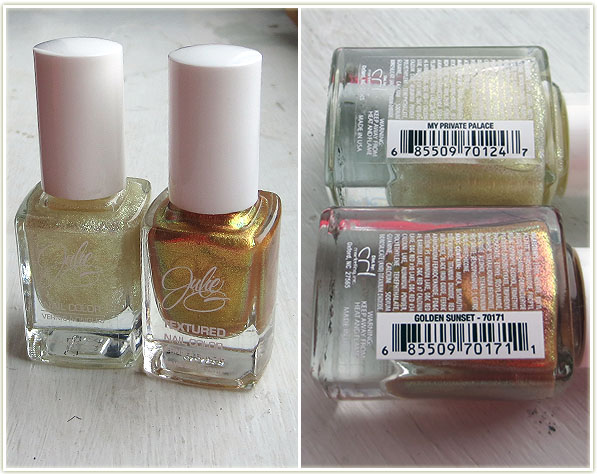
JulieG nailpolish in My Private Palace & Golden Sunset ($3.99 USD each)

I love Julie G‘s YouTube videos and wanted to support her nail polish at Rite Aid. I have another shade from a previous trip to the U.S. (Mermaid’s Tale) and the quality of the polish was excellent. The new shades I picked up are My Private Palace and Golden SunsetGolden Sunset is supposed to be textured but is definitely not (not a complaint really, I prefer smooth nail polish, but it struck me as odd that it would be advertised as textured when it’s decidedly not).
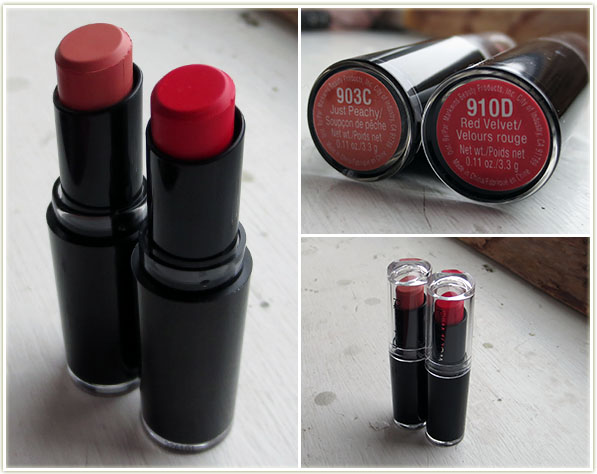
Wet n Wild Megalast Lipsticks in Just Peachy and Red Velvet ($1.99 & 0.99 USD – BOGO 50% off)

So you can actually get Wet n Wild products in Canada a lot more readily now, but I don’t tend to think about them when I’m in Rexall and I thought they’d be cheaper in the U.S.. They weren’t, but I picked some up anyway (because vacation money isn’t REAL money right?!). Just Peachy (903C) is much raved about by Tati of GlamLifeGuru so I thought I’d give it a shot, and Red Velvet (910D) is just a beautiful red all around. As a warning though, I wore the red while on my trip and it stained the everloving crap out of my lips. To the point where I woke up the next day and look like I’d been eating raspberries all night!
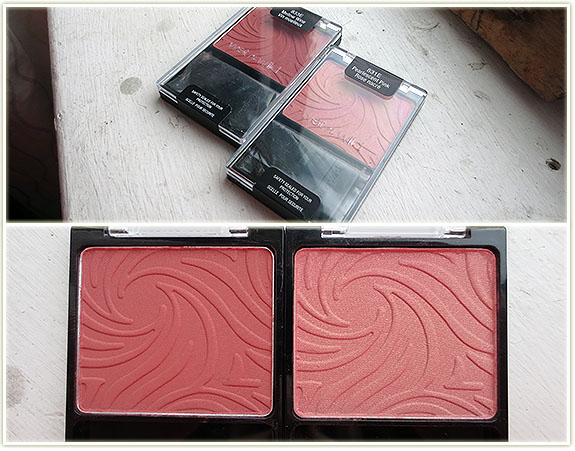
Wet n Wild Coloricon Blush in Mellow Wine and Pearlescent Pink ($2.99 and $1.49 USD – BOGO 50% off)

I own one of Wet n Wild‘s blushes, but wanted more, so I snatched up Mellow Wine and Pearlescent Pink. Out of all of Wet n Wild‘s products, these are the most awesome ones they have. Aside from the fact that they only have four blush colours, the pigmentation is wonderful. Highly recommended.
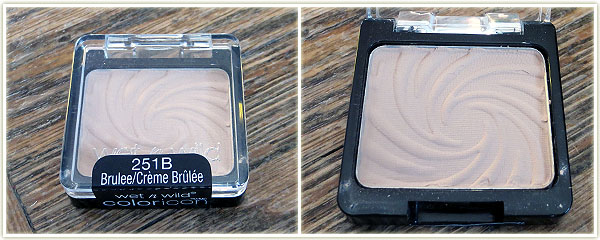
Wet n Wild eyeshadow in Brulee ($0.99 USD)

And lastly from Wet n Wild, I picked up single shadow in Brulee because I often just need a single eyeshadow to pack with me on vacations if the palette I’m bringing doesn’t have a matte brow highlight shade.
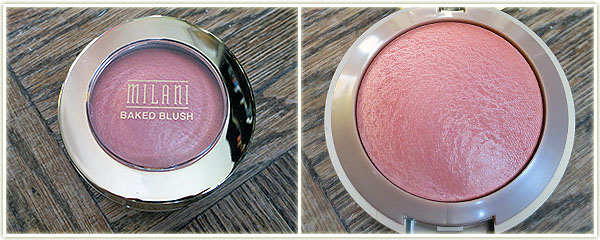
Milani blush in Luminoso ($8.49 USD)

I felt like the last person alive to own this blush. Milani‘s Luminoso blush seems to be the love child of every beauty blogger and YouTuber alike. This was another item that was hard to find. It was either sold out or broken at almost every drugstore I went to. I did finally find one intact and snatched it up immediately.
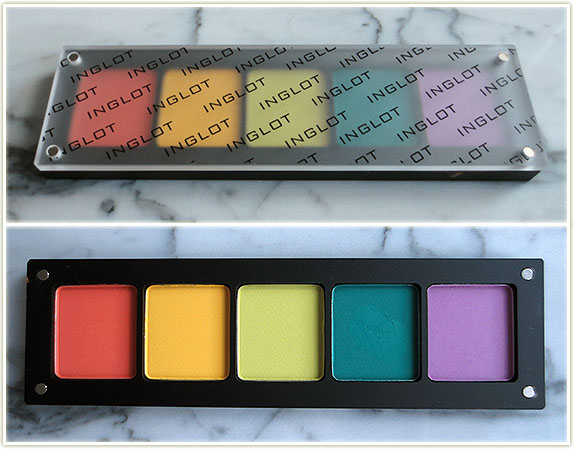
Inglot – Mattes: 383, 370, 343, 317, 334 ($7 USD each, $12 for the palette)

We ended up at the Inglot in Chelsea Market in Manhattan, which meant it was completely empty and we had the run of the entire store. It was in a 5th floor loft area and it was wonderful! I put together a five pan palette of completely matte vibrant shades. With the neutral overdose of palettes lately, I needed a bright combination to make me feel alive again. I didn’t have a list of things I wanted, so I just went for colours I didn’t think I had. The one in the middle looks quite similar to MAC‘s Bitter which is the primary reason I wanted that one.
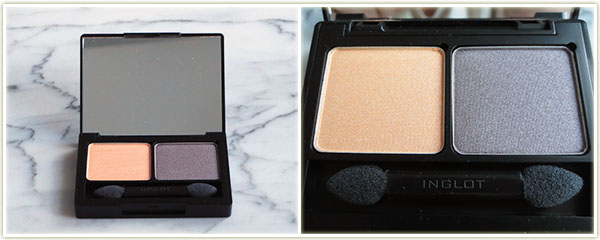
Inglot – Pearl: 393, 420 ($7 USD each, $7 for the palette)

This Inglot duo isn’t for me, but for my mom. The left shade turned out way peachier than I thought it was in the store, but ah well. She’ll love the sponge tip brush that comes with it too.
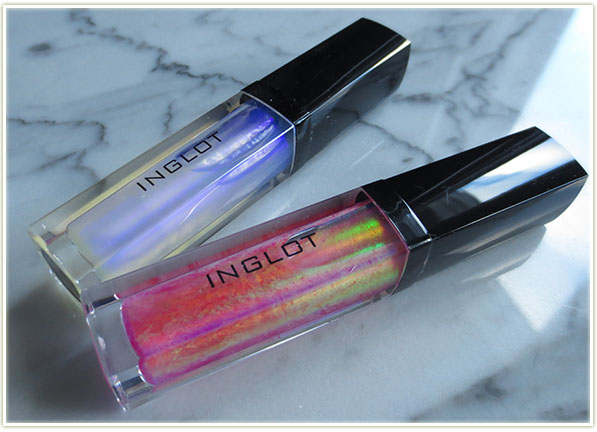
Inglot – AMC Lip Gloss 541, 544 ($8 USD each)

And these. How could I pass these up? These Inglot AMC glosses reflect crazy, crazy colours and I had to have them. The pink one is completely wearable, it’ll catch some orange reflections, but mostly it just looks pinky-red. The white/blue/purple one… I have noooo idea what I’m going to do with that one, but I’m sure I’ll figure something out!
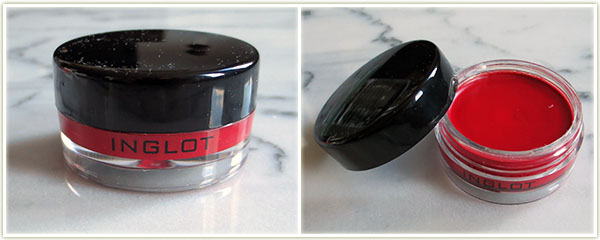
Inglot – Gel liner in 79 ($12 USD)

As the cashier was collecting all my items, I asked him what their best selling products were, or what Inglot was most known for. He took me straight to their gel liners which he said were so waterproof that he used them all the time for underwater photoshoots and they don’t come off the models’ eyes. I was pretty sure I’d heard mixed reviews, but thought I’d try one out anyway. Since I’d already picked up a black gel liner on this trip, I decided to go with the red so I could try out some new things. I’ve worn it once since then, and I have to say the gel texture is totally unlike any other gel liner I’ve ever used. It’s far more liquid in texture (not a problem, just odd) and if you don’t clean your brush off after you use it, all the hairs will fuse together. I love the colour and pigmentation, but I’m unclear on the waterproofness though.
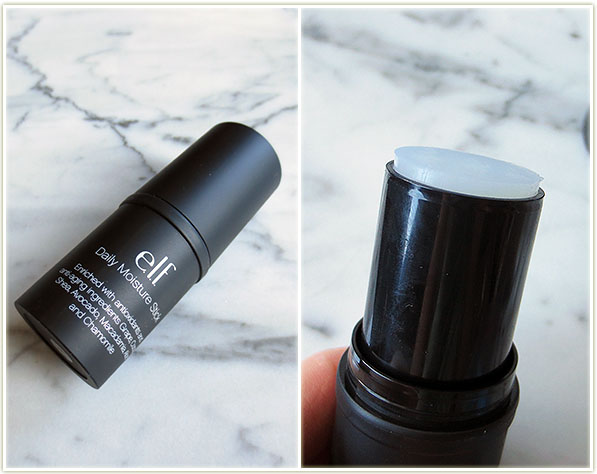
e.l.f. Daily Moisture Stick ($3 USD)

e.l.f.’Daily Moisture Stick is a weird one. It looks like a glue stick, it applies like a glue stick, it smells vaguely like a glue stick, but… it’s a moisturizing balm. I picked it up on Emilynoel83′s recommendation and so far it has definitely helped me out with some nasty dry patches around my mouth.
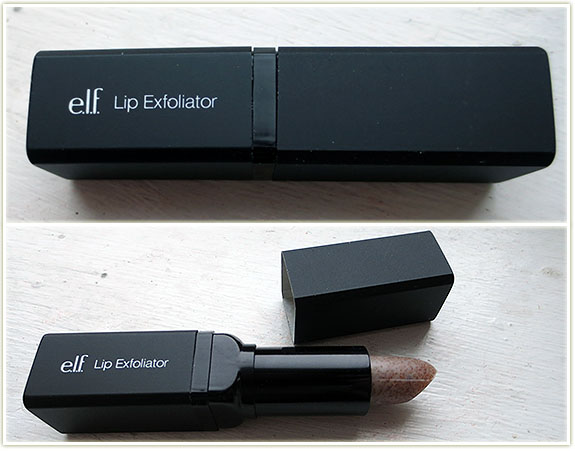
e.l.f. Lip Exfoliator ($3 USD)

My friend was picking up the e.l.f. Lip Exfoliator and I decided to be a copycat. It smells so good you’d want to eat it. The product was a bit rough on my lips as the sugar granules are quite large but I’m sure I’ll get used to it after a few uses.
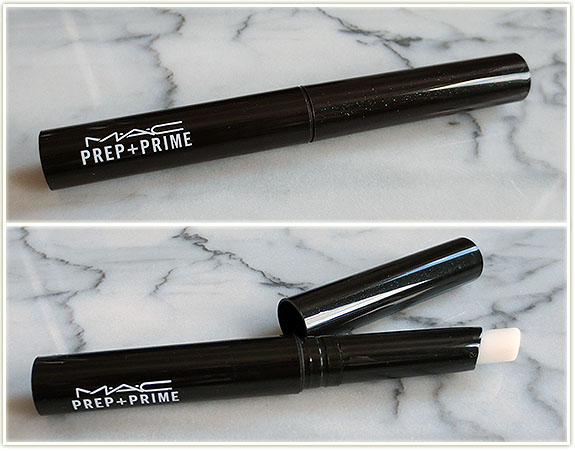
MAC Prep + Prime for lips ($16 USD)

My standard lip primer. I’m close to finished on my current MAC Prep + Prime for lips so I needed a backup.
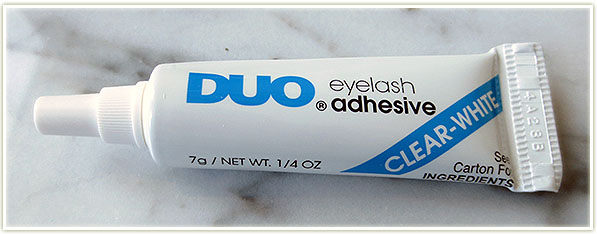
Duo eyelash adhesive in Clear-White ($4.49 USD)

Another replacement for a product I own. My current Duo eyelash glue is quite old and needed replacing. I prefer the white/clear version, so that’s what I bought.
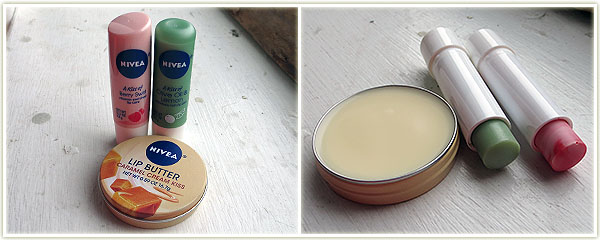
Nivea – Berry Swirl, Olive Oil and Lemon & Caramel Kiss ($2.99 USD each)

More Nivea chapsticks! None of these flavours are available in Canada so in my basket they went!
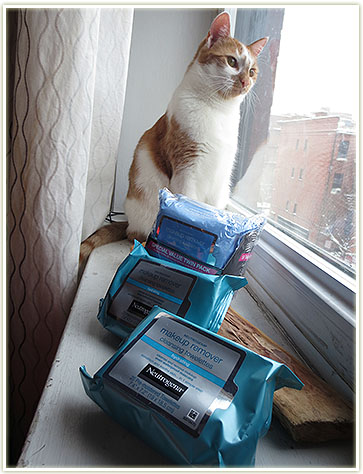
Neutrogena makeup removing wipes (~$6 each)

More makeup wipes (they’re about half the cost in the U.S.) for my stockpile.
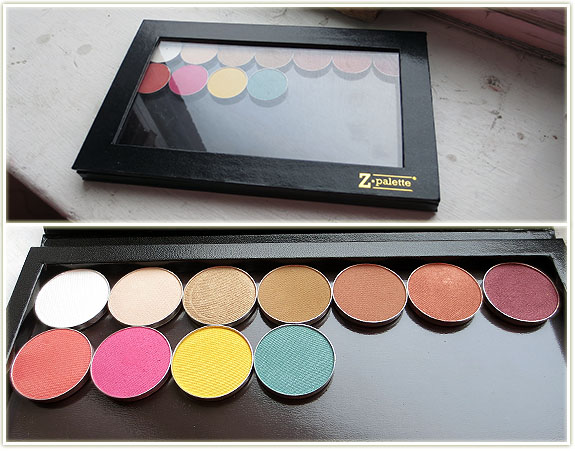
Makeup Geek eye shadows: White Lies, Vanilla Bean, Bleach Blonde, Preppy, Frappe, Goddess, Burlesque, Mango Tango, Simply Marlena, Lemon Drop, Sea Mist ($5.99 USD each)

Makeup Geek shadows! Yay! I already own nine from my haul back in December and I had to have more. These are quickly replacing my MAC eyeshadows, and at the price point, you really can’t argue. These are softer, more pigmented and just work better than MAC. Highly, highly recommended – to the point where I don’t actually think I’ll be purchasing many more MAC shadows unless they’re a truly unique shade. Also grabbed a larger Z-palette to fit all my shades.
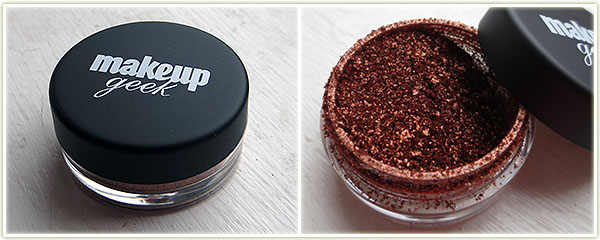
Makeup Geek pigment – Vegas Lights ($6.99 USD)

Along with the Makeup Geek eyeshadows, I ordered a pigment in Vegas Lights. On first glance, it looks very similar to MAC‘s Coppering which is a favourite shade of mine. Unfortunately I forgot to buy the new sifters for the pots, so this’ll be a bit messy whenever I use it.
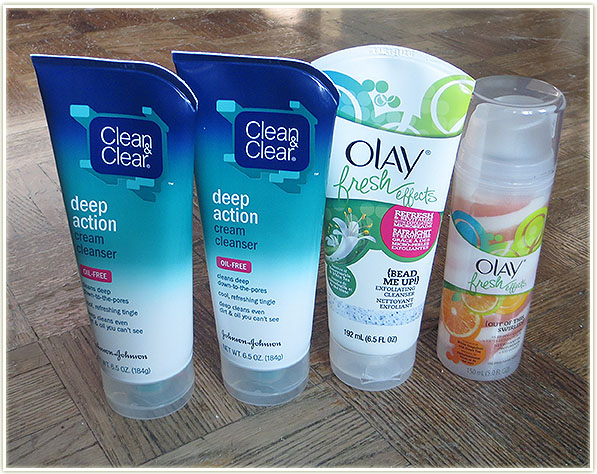
Clean & Clear Deep Action Cream Cleanser (x2), Olay Fresh Effects Bead Me Up! and Olay Fresh Effects Out of this Swirled (~$6 USD each)

Various facial cleansers that are (once again) cheaper in the U.S.. The Clean & Clear cleansers are ones I’ve used for many years. The Olay ones sold me with their pretty packaging.
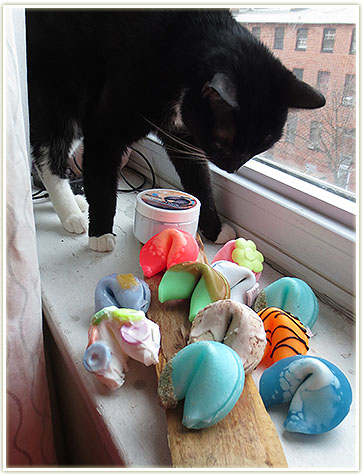
Rumbles is very interested….

Last up is a Fortune Cookie Soap order I put in to have shipped to my friend in Baltimore. As I’ve said before, the shipping cost to Canada for any kind of FCS order is so ridiculously high that there’s no way I’d place an order to myself in Toronto. So I took advantage of having a U.S. address for a short week and had a box full of items I wanted to try shipped to my friend.
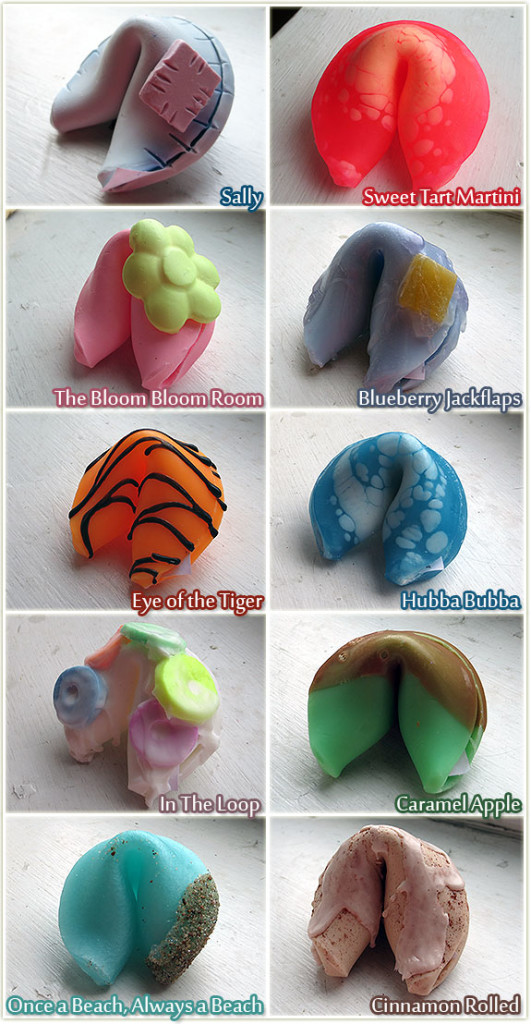
Fortune Cookie Soap (prices vary between $2.99 – $3.99 USD each)

Various Fortune Cookie Soaps I can’t wait to try out.
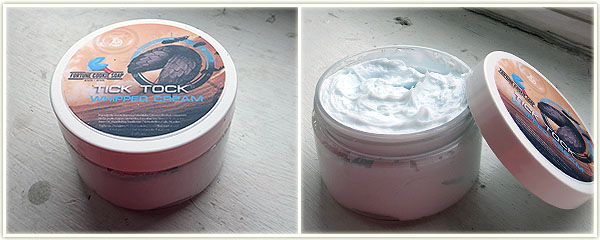
Fortune Cookie Soap – Tick Tock Whipped Cream, $10.99 USD

FCS’ Tick Tock Whipped Cream smells like clean laundry to me. I knew it was supposed to smell fresh, but other than that I didn’t really know how I’d like it. It’s okay, but not something I’d order again. I wish I had ordered the Make It Rain Whipped Cream (the one that came in the Spring Soap Box), but they were completely out of it when I placed my order.
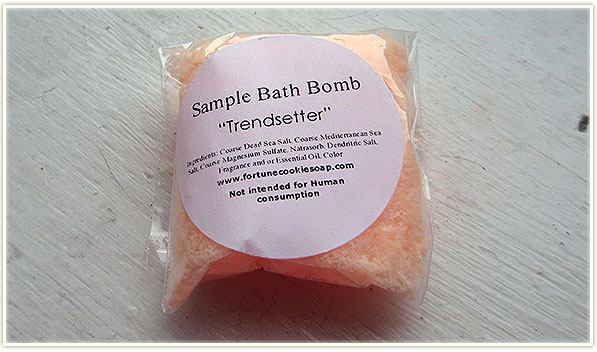
201403_fortunecookiesoap_bathbomb

FCS also sent a sample of their Trendsetter Bath Bomb with my order.


HOLY MOLY. And that’s it. That was my ginormous March haul. I’m slightly ashamed about how much I bought, but the scary thing is that’s actually my tailored down list of items I wanted to pick up (!!!!). The next few months will likely not be that interesting in terms of hauling as I’ve certainly picked up enough items to play with for a very long time!
 

St. Patrick’s Day Makeup Ideas

Aside from Halloween, St. Patrick’s Day is my absolute favourite “holiday”. I tend to do a lot of green looks in general, but I thought I’d do a few more and compile them together for a post specifically dedicated to the holiday of all things green!

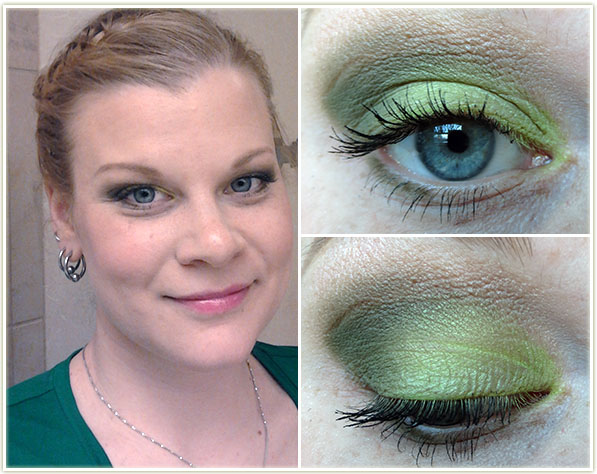
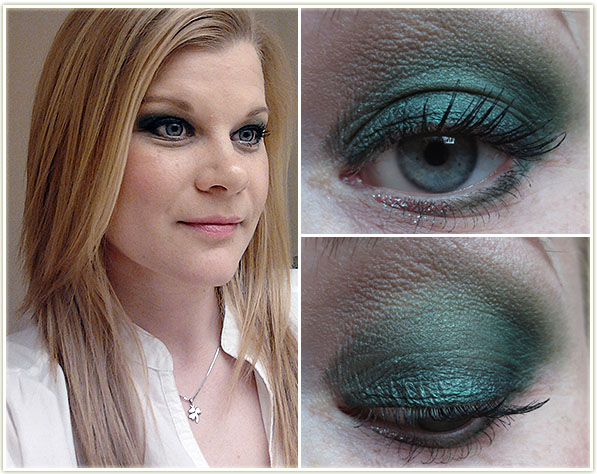
20140307_look4.1

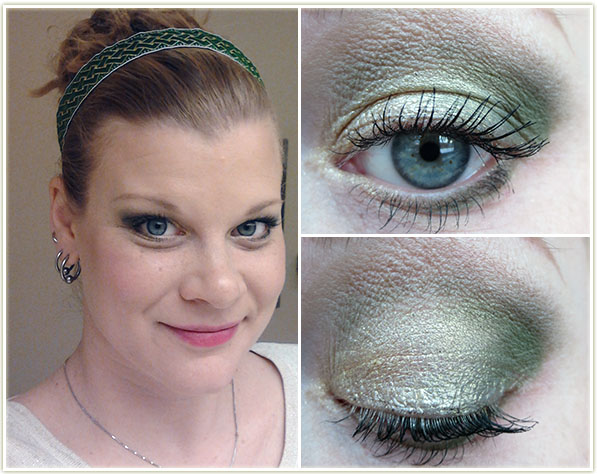
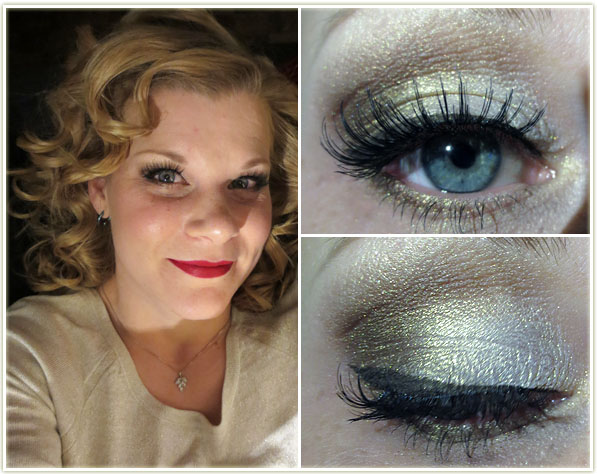
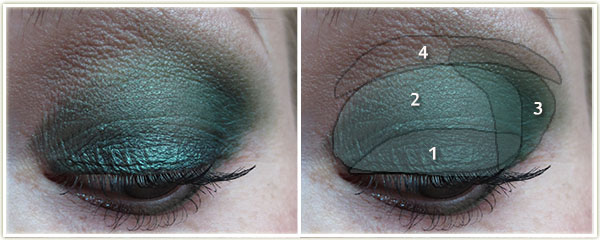
Dark forest green with a hint of glitter. One of the stronger looks in this post and heck… you really can’t go wrong with glitter!

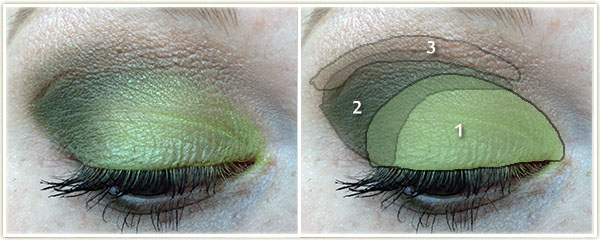
20140307_look4.2

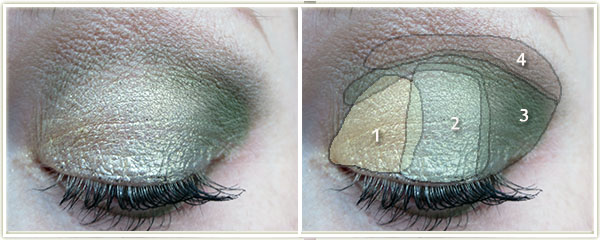
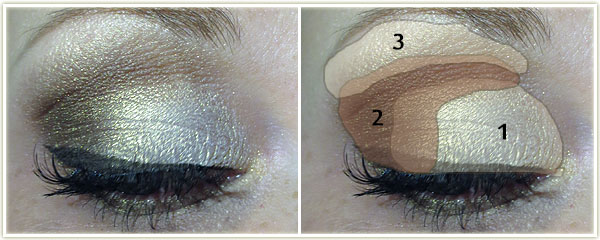
Eyes:

  1. I first lined my lower lashline thickly with MAC Feline Kohl Power pencil and smudged it out into a really messy, thick line.
  2. Too Faced Evergreen was placed all over the lid, on top of the black liner.
  3. Sleek Fern in the outer corner.
  4. Makeup Geek Creme Brulee at the top of the crease.

MAC Shroom was used to highlight the browbone. On the lower lashline I smudged Evergreen on the outer half and then used some Too Faced Glitter Glue on the inner half and appliedToo Faced Glamour Dust in Glampire on top of the glue. L’Oreal Voluminous Carbon Black on my lashes.

Rest of the Face

  • Foundation: Covergirl CC Cream in 110 Classic Ivory and Bourjois Healthy Mix Serum in Shade 51 Light Vanilla mixed together
  • Bronzer: Physicians Formula Bronze Booster in Light/Medium
  • Blush: Tarte Blissful
  • Lips: NYX Butter Gloss in Maple Blondie

20140307_look1.1

I’m amazed and pleased with just how well this one turned out. Usually I would reverse the colours (gold on the inside, colour on the outside), but I decided I need to actually learn to play with my makeup a little bit more. And I’m happy I did because I think this is really beautiful.

20140307_look1.2

Eyes:

  1. MUA Shade 26 Pearl all over the lid.
  2. Urban Decay Half Baked in the outer corner and into the crease.
  3. Makeup Geek Creme Brulee through the crease.
  4. Makeup Geek Cocoa Bear barely tapped into the very outer corner to make it a touch bit deeper.

MAC Shroom on the browbone and L’Oreal Voluminous Carbon Black mascara on my lashes.

20140307_look2.1

This is a bit more “typical” St. Patrick’s Day look for me (gold on the inner lid, green on the outside).

20140307_look2.2

Eyes:

  1. L’Oreal Infallible in Goldmine on the inner third of the lid.
  2. MAC Golden Olive pigment on the center of the lid.
  3. Makeup Geek Dirty Martini on the outer third of the lid and dragged lightly through the entire crease.
  4. Makeup Geek Creme Brulee at the top of the crease.

MAC Rice Paper to highlight the browbone. On the lower lid, Goldmine on the inner half and Dirty Martini on the outer half. L’Oreal Voluminous Carbon Black mascara on my lashes.

Rest of the Face

Foundation: Covergirl CC Cream in 110 Classic Ivory and Bourjois Healthy Mix Serum in Shade 51 Light Vanilla mixed together
Bronzer: Physicians Formula Bronze Booster in Light/Medium
Blush: MAC Petal Power
Lips: Sephora Color Reveal Balm in Unique Pink

20140307_look5.1

Even though this showed up pretty vibrantly on camera, I’d recommend using a white base (which I didn’t do) in order to brighten the colours up a bit more. I found the colours faded a bit throughout the day and the white base may help to keep the shadows intact.

20140307_look5.2

Eyes: (all Makeup Geek)

  1. Fuji all over the lid.
  2. Dirty Martini on the outer corner and through the crease.
  3. Creme Brulee to blend out the crease.

MAC Shroom on the browbone. Dirty Martini smudged very slightly on the outer corner of the lower lashline. Too Faced Better Than Sex mascara on my lashes.

Rest of the Face

Foundation: Covergirl CC Cream in 110 Classic Ivory and Bourjois Healthy Mix Serum in Shade 51 Light Vanilla mixed together
Bronzer: Physicians Formula Bronze Booster in Light/Medium
Highlighter: MAC Silver Dusk
Blush: Joe Fresh Apricot (cream)
Lips: NYX Butter Gloss in Vanilla Cream Pie

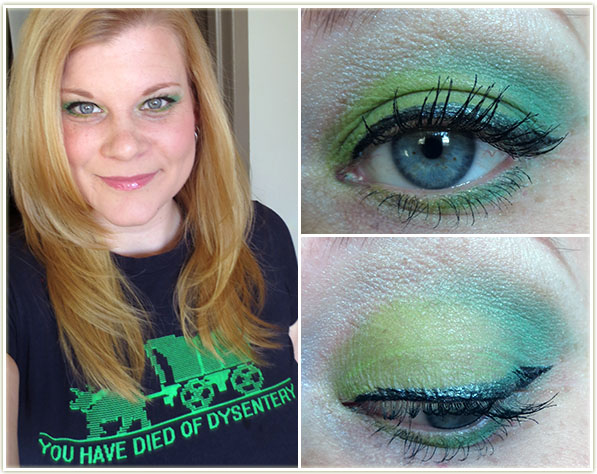
20140307_look3.1

I love this look, but damn does it ever look not great in close ups. You’ll also notice that the liner is completely covered in the eyeshadow… this seemingly can’t be helped whenever I wear shiny liquid liners as it just picks up the shadow from my lid when my eyes are open.

Also… tell me how much you love my shirt. 😉

Eyes: Using the Wet n Wild I Dream of Greenie trio, follow the instructions!

  1. Eyelid shade all over the lid and the inner half of the lower lid.
  2. Crease shade in the outer corner and through the crease and on the outer half of the lower lid.

And, obviously, the Browbone shade to highlight the brow. Make Up For Ever Aqualiner in 13 Black to create the wing (although honestly, I’m so irritated with this liner that I’d recommend using a matte black one that won’t cause so much eyeshadow transfer to the liner). L’Oreal Voluminous Carbon Black mascara on my lashes.

Rest of the Face

Foundation: Covergirl CC Cream in 110 Classic Ivory and Bourjois Healthy Mix Serum in Shade 51 Light Vanilla mixed together
Blush: Illamasqua Hussy
Lips: NYX Butter Gloss in Tiramisu

What’s On My Face – Volume 7

Lately I found I had been wearing far too many neutral looks and I was boring myself with my makeup in the morning. Neutral colours are so easy and safe to play with… but they just don’t get me excited. When I wear something more vibrant on my eyes, I actually feel better. I can’t explain it any better than that really. Colour makes me happy!


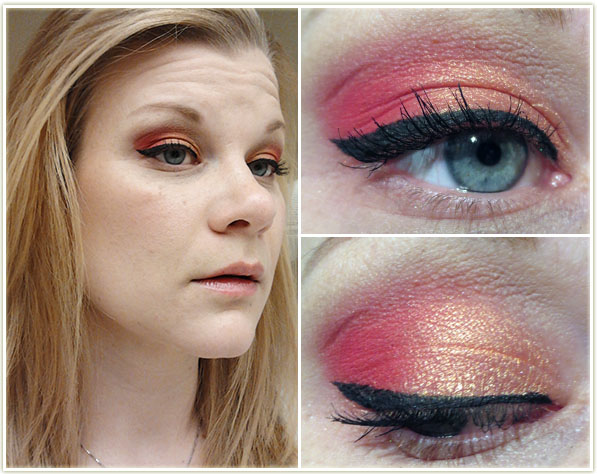
20131217_inglot1

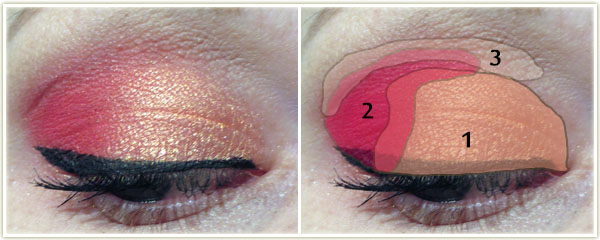
I *love* this one. It’s not particularly hard to achieve, I just think it’s the colour combination that I love so much. Excuse the derp face – I find if I smile in pictures, my eyes crinkle up too much to actually show what the shadows look like on a full face shot!

20131217_inglot2

Eyes:

  1. Inglot AMC Shine 15 (shimmery orange) all over the inner two-thirds of the lid.
  2. Inglot Matte 382 (matte red) on the outer third of the lid and blended slightly into the crease.
  3. Urban Decay Naked in the crease to blend all the colours together.

MAC Brule was used to highlight my brow. And, of course, I used MAC Blacktrack fluidline to create the wing and applied L’Oreal Voluminous Carbon Black mascara to my top lashes. For brows, I used MAC Omega.

Rest of the Face: Bourjois Healthy Mix Serum foundation in 52 Vanilla with Revlon‘sBronzed & Chic bronzer on the high points of my face. I used Tarte Charisma on my cheeks and since that blush has enough shimmer to it, I didn’t bother with a highlighter. On my lips is Benefit Ultra Plush Gloss in Coralista.


20131217_mac1

I wore this one out to a (friend of a) friend’s Christmas party. Red, gold, false lashes. All the staples of holiday season makeup!

20131217_mac2

Eyes: To make the white-gold eyeshadow show up better, I have to lay down a white base. For that I use NYX‘s Jumbo Eyeshadow Pencil in Milk. Make sure to keep the white base below the crease and also blend it out so you don’t have any harsh lines.

  1. On the inner two-thirds of the lid, pack on the white-gold shade in MAC‘s Illusionary: Burning Ambition duo (limited edition from several years ago). And when I say pack it on, I mean, PACK it on. This stuff is fallout city and gets everywhere, but it’s really way too pretty to ignore.
  2. Using the brown side of that same duo, apply it to the outer third of the lid and sweep it through the crease.
  3. Using the white-gold shade again, use it to highlight your brow and to blend out the brown shade in the crease. This is a LOT of shimmer and it may even be overkill for some people. You’ll notice that the brow ends up being more gold, while the lid colour is has more of a white-cast due to the base that we put down.

I used MAC Dipdown fluidline to create the wing and applied L’Oreal Voluminous Carbon Black mascara to my lashes. False eyelashes are Ardell Demis applied with Duo adhesive.

Lips: Since the eyes are so shimmery, I stuck with a matte red. I used MAC Brick lipliner to line and fill in my lips, then followed it up with MAC Russian Red lipstick.

Rest of the Face: Foundation is Bourjois Healthy Mix Serum in 52 Vanilla. I used Joe FreshSand bronzer to contour since it’s matte.  On my cheeks is Tarte Exposed.


20131217_sleek1

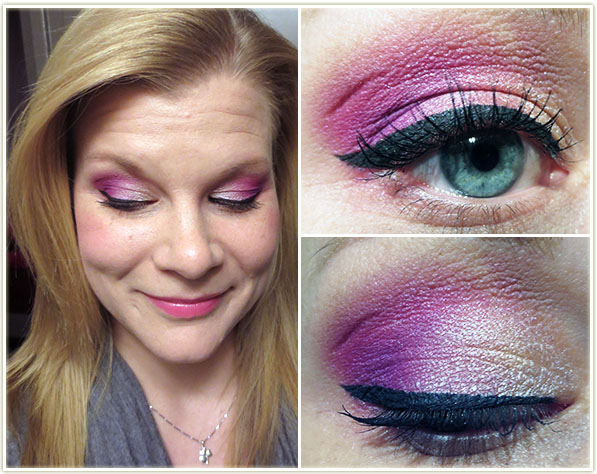
With this one I just knew I wanted it to be bright! I also tend to get stuck in ruts and keep re-using the same colour combinations because I generally know they’ll work. While trying to break out of that rut, I ended up going with a fail-safe colour palette anyway. Whoops!

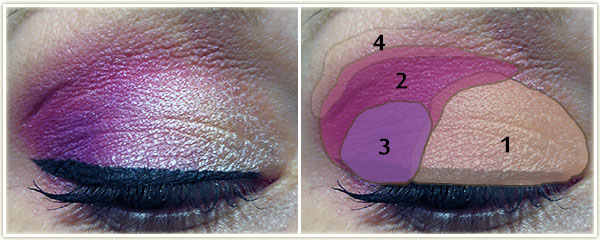
20131217_sleek2

Eyes:

  1. From the MUA Pretty Pastels palette, I applied the second shade from the left on the bottom row all on the inner half of my lid. The shade looks rather peach in the pan, but as you can see, it came out almost white.
  2. Using the Sleek Acid palette, I applied the first shade on the top row (a fuchsia pink) to the outer half of my lid and pulled it through the crease.  Then, using the same palette;
  3. I took the bright purple colour directly below the fuchsia and dabbed it right in the outer corner of my eye, on top of the fuchsia. You’ll need to blend some of the edges otherwise it’ll be pretty stark.
  4. I then used Urban Decay Naked to very lightly blend out the bright fuchsia.

As per usual, I used MAC Brule to highlight my brow. Followed it up with MAC Blacktrack as my liner and L’Oreal Voluminous Carbon Black mascara. MAC Omega was used to fill in my brows.

Lips: NYX Strawberry Parfait

Cheeks: Wet n Wild Heather Silk

Rest of the Face: My foundation is MUA‘s Matte Foundation in Shade 1 Soft Sand withRevlon‘s Photoready bronzer in Bronzed & Chic.


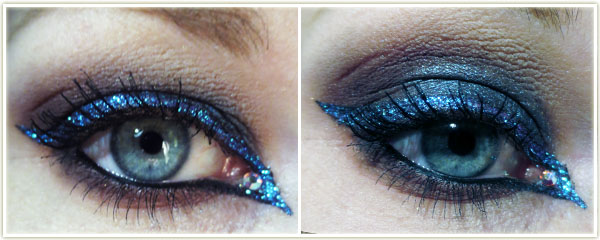
20131217_transparentteal1

No full face for this one because I was only messing around. I wanted to play around with my Too Faced A Few of my Favorite Things palette and then it kind of developed into this glitter bomb.

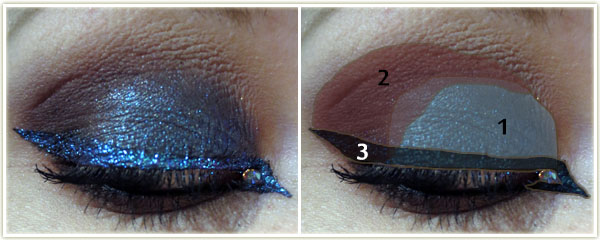
20131217_transparentteal2

I first used NYX‘s Jumbo Eyeshadow pencil in Black Bean and applied it all over the lid as a base. I then;

  1. applied Too Faced Party Time on the inner half of my lid (this really needs some kind of coloured based or it’ll apply very, very sheer). I really packed this one on.
  2. Too Faced Soiree was applied to the outer half of the lid and through the crease. I didn’t use a blending shade to fade this colour out, instead I very slowly blended it up through the crease. I also used this shade on my lower lashline.
  3. I don’t usually number my liner in my diagrams, but there were a few steps involved with this one. I first created an inner and outer wing with Maybelline‘s black gel liner. With the inner half of the wing, I made sure to do it far out enough so that I could leave a gap near my inner tearduct and drew the line right back to my lower waterline, creating a small triangle. After the gel liner had set, I use Too Faced Glitter Glue and went over top of the liner. Once that became tacky, I used MAC Reflects Glitter in Transparent Teal and placed it on top of the liner.

I used MAC Feline Kohl Power pencil to line my upper and lower waterlines. I appliedL’Oreal Voluminous Carbon Black mascara heavily to my upper and lower lashes. The small crystal was from some set that I got at Michael’s a few years ago and I stuck it to inner corner of my eye with some Duo clear lash adhesive.